This document provides instructions for encapsulating dynamic libraries (dylibs) within a framework in Xcode and ensuring the framework and any applications using the framework can locate the embedded dylibs. Key steps include copying dylibs into the framework, using install_name_tool to change library search paths, adding run scripts to apply changes on build, and configuring framework and application build settings to locate embedded libraries.
The notes covers the topic THE CLR AND THE .NET FRAMEWORK in C#.net
You will learn about creating assemblies and strong names for them
in CLR via C#. More specifically, you will learn about:
Defining Assemblies
Differentiate the Assembly Types
Creating Strong names
Creating an assembly cache
Working with Directories
Installing Assemblies
Signing into an Assembly
Configuring the assembly
Tamper resistant assemblies
Resolving an assembly reference
Explaining the process of locating and binding assembles
Using SPMetal for faster SharePoint developmentPranav Sharma
This session will cover the ins and outs of SPMetal, a tool which ships with SharePoint 2010. SPMetal allows developers compile-time access to SharePoint lists, content types and columns. This allows for type-safe access to columns/fields on a SharePoint site. Additionally, developers can write LINQ queries against these lists using SPMetal which speeds up query writing tremendously. We will cover adding support for complex column types (Managed Metadata, Publishing HTML, etc) which aren’t supported by SPMetal out of the box. Lastly we will also touch upon performance considerations and other best practices when coding with SPMetal.
Things released by Data Pump Export Application can be brought in into a data source using Details Push Transfer Application. The following explains how to use Details Pump Export Application to import objects
International Journal of Engineering and Science Invention (IJESI)inventionjournals
International Journal of Engineering and Science Invention (IJESI) is an international journal intended for professionals and researchers in all fields of computer science and electronics. IJESI publishes research articles and reviews within the whole field Engineering Science and Technology, new teaching methods, assessment, validation and the impact of new technologies and it will continue to provide information on the latest trends and developments in this ever-expanding subject. The publications of papers are selected through double peer reviewed to ensure originality, relevance, and readability. The articles published in our journal can be accessed online.
Intro to drupal module internals ashevillecgmonroe
Slides for the Introduction to Drupal Internals talk given at DrupalCamp Ashville in 2014. See the youTube video at https://www.youtube.com/watch?v=WWC7bhFZOEk
This talk is intended to help non-programmers or programmers just starting to understand some of the basic structures that make up Drupal. OpenSource is great but often the documentation lacks. Knowing how to look around inside the code (even if you don't know how to code) can let you determine things that aren't documented.
1 of 9 CSCE 3600 Systems Programming Major Assignm.docxShiraPrater50
1 of 9
CSCE 3600: Systems Programming
Major Assignment 2 – The Shell and System Calls
Due: 11:59 PM on Wednesday, November 6, 2019
COLLABORATION
You should complete this assignment as a group assignment with the other members of
your group as assigned on Canvas using our GitLab environment (i.e., the same group
you had for Major 1). If desired, you may submit only one program per group, but all
source code must be committed in GitLab. Also, make sure that you list the names of all
group members who participated in this assignment in order for each to get credit.
BACKGROUND
A shell provides a command-line interface for users. It interprets user commands and
executes them. Some shells provide simple scripting terms, such as if or while, and
allow users to make a program that facilitates their computing environment. Under the
hood, a shell is just another user program. The file /bin/bash is an executable file for
the bash shell. The only thing special about your login shell is that it is listed in your
login record so that /bin/login (i.e., the program that prompts you for your password)
knows what program to start when you log in. If you run "cat /etc/passwd", you will
see the login records of the machine.
PROGRAM DESCRIPTION
GROUP COLLABORATIVE PORTION
In this assignment, you will implement the shell “engine” as the “group” component,
where all members are responsible for the following functionality:
• A Command-Line Interpreter, or Shell
Your shell should read the line from standard input (i.e., interactive mode) or a
file (i.e., batch mode), parse the line with command and arguments, execute the
command with arguments, and then prompt for more input (i.e., the shell prompt)
when it has finished.
1. Interactive Mode
In interactive mode, you will display a prompt (any string of your choosing)
and the user of the shell will type in a command at the prompt.
2. Batch Mode
In batch mode, your shell is started by specifying a batch file on its command
line. The batch file contains the list of commands that should be executed. In
batch mode, you should not display a prompt, but you should echo each line
you read from the batch file back to the user before executing it.
You will need to use the fork() and exec() family of system calls. You may
2 of 9
not use the system() system call as it simply invokes the system’s /bin/bash
shell to do all of the work.
You may assume that arguments are separated by whitespace. You do not have
to deal with special characters such as ', ", \, etc. However, you will need to
handle the redirection operators (< and >) and the pipeline operator (|), which
will be specified in the “individual” portion of this assignment.
Each line (either in the batch file or typed at the prompt) may contain multiple
commands separate with the semicolon (;) character. Each command separated
by a ; should be run sequentially, but the shell should not print the next prompt ...
Welcome to the wonderful world of composer,
We will see what is composer, how we can use it.
Namespacing (What, How & Why)
& Autoloading your own code using composer
13th Sep - Drupal Global Training Day by TCS - Drupal core advanced overview
dylibencapsulation
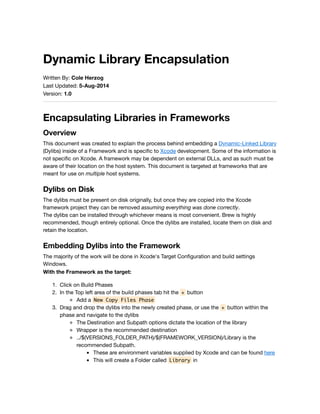
1. Dynamic Library Encapsulation
Written By: Cole Herzog
Last Updated: 5-Aug-2014
Version: 1.0
Encapsulating Libraries in Frameworks
Overview
This document was created to explain the process behind embedding a Dynamic-Linked Library
(Dylibs) inside of a Framework and is specific to Xcode development. Some of the information is
not specific on Xcode. A framework may be dependent on external DLLs, and as such must be
aware of their location on the host system. This document is targeted at frameworks that are
meant for use on multiple host systems.
Dylibs on Disk
The dylibs must be present on disk originally, but once they are copied into the Xcode
framework project they can be removed assuming everything was done correctly.
The dylibs can be installed through whichever means is most convenient. Brew is highly
recommended, though entirely optional. Once the dylibs are installed, locate them on disk and
retain the location.
Embedding Dylibs into the Framework
The majority of the work will be done in Xcode's Target Configuration and build settings
Windows.
With the Framework as the target:
1. Click on Build Phases
2. In the Top left area of the build phases tab hit the + button
Add a New Copy Files Phase
3. Drag and drop the dylibs into the newly created phase, or use the + button within the
phase and navigate to the dylibs
The Destination and Subpath options dictate the location of the library
Wrapper is the recommended destination
../$(VERSIONS_FOLDER_PATH)/$(FRAMEWORK_VERSION)/Library is the
recommended Subpath.
These are environment variables supplied by Xcode and can be found here
This will create a Folder called Library in
2. yourFrame.framework/Versions/Current
Current is a symlink likely pointing to A depending on the
framework
Note: You may place the dylibs wherever you would like inside of the framework, as long
as you can locate them using the Xcode environment variables. These variables allow the
framework to locate the libraries no matter what the current host system's file heirarchy
is.
Helping the Framework locate the Dylibs
While the Dylibs have now been added to the framework's file heirarchy, the unix executable
portion of the framework will not bother looking there unless explicitly told to. Achieving this
requires an understand of @rpath , @executable_path , possibly @loader_path , otool,
install_name_tool, and writing scripts.
@executable_path
executable_path is the most basic of the three paths. This is simply the location of the folder
MacOS within the calling application.
Example: yourApp.app/Contents/MacOS
@loader_path
loader_path is very close to executable_path, and in the overwhelming majority of cases points
to the exact same folder. The difference is @loader_path will point to the location of whatever
loaded the framework. This is useful in the case of an application requiring a framework, and
then said framework requiring another framework. The app's embedded framework would
reference its embedded framework through @loader_path, as @executable_path will always
point to the Application itself.
Note: This was added in 10.4
@rpath
rpath is the most recently added, and most useful of the three path variables. rpath can be
described as a localized PATH variable. In Xcode the contents of @rpath can be found under the
Build Settings for the framework Target and is called Runpath Search Paths .
Example: If /tmp/ , /Libraries/Frameworks , and /etc/ were added to @rpath the
@rpath/myDir would expand into /tmp/myDir , /Libraries/Frameworks/myDir , and
/etc/myDir .
Note: This was added in 10.5
3. otool -L
Running the command otool -L on a unix executable will list all of the dependent libraries for
the executable as well as where the executable has been instructed to search for them. Altering
this list is how a framework can be told to search itself for its dependent libraries.
Example: otool -L
/Library/Frameworks/iTunesLibrary.framework/Versions/A/iTunesLibrary
install_name_tool
This command line tool is used to modify the list that otool -L gives. The syntax for changing
one of the entries is
install_name_tool -change old new target
Old refers to the path currently listed for the executable.
New refers to the path that will replace the listed Old path.
Target refers to the executable being changed.
Example: install_name_tool -change /usr/local/lib/libssh2.1.dylib
@rpath/$VERSIONS_FOLDER_PATH/$FRAMEWORK_VERSION/Library/libssh2.1.dylib
$BUILT_PRODUCTS_DIR/$VERSIONS_FOLDER_PATH/$FRAMEWORK_VERSION/$PROJECT
Note: The dylibs a framework lists as dependencies may also have dependencies.
install_name_tool must be used on these dylibs as well to explicitly tell them where to
search for the other dylibs they themselves are dependent on.
Scripts
Unfortunately, even though an executable has been delicately changed using install_name_tool,
every time the folder is cleaned and the framework is built a new executable will be created
without the necessary changes. To fix this Xcode can be told to run a script after building.
In the Top left area of the build phases tab hit the + button
Add a New Run Script Phase [This should be the final build phase]
In the text field type or copy + paste the script [The code, not the file]
All required install_name_tool scripts should be here, as shown in the
above example. As every situation is different this script must be created
specifically for each framework. @rpath should likely be the beginning of
the New argument for install_name_tool, and a path to the framework's
executable should be created using Xcode's environment variables for the
Target argument.
4. Note: The framework's dependent libraries must also have their dependencies changed in
this script as referenced in the note above.
Helping the Dylibs locate their Dylibs
As the most recent notes have mentioned, dylibs the framework is dependent on may have
dependencies themselves (sub dependencies). These sub dependencies must be included in
the project, and their dylibs must be altered using install_name_tool (likely with the help of otool
-L). These install_name_tool commands should be added to the framework's script.
Build Settings
Under the build settings tab for the framework the Skip Install option should be set to Yes .
The framework is not being installed anywhere, as it will be embedded itself within the calling
application. All required linker flags under the Other Linker Flags option must be set for any
added dylibs (check specific dylib’s documentation for more information).
Example: -lssh2
Embedding Frameworks into applications
While the work on the individual framework has been completed, the framework now has to be
encapsulated within the application, and the application has to be told where to look for its
frameworks.
1. Go to the application's Build Phases tab
2. In the Top left area of the build phases tab hit the + button
Add a New Copy Files Phase
Change the Destination to Frameworks
Copy only when installing should be unchecked
Either add of drag and drop the framework into the build phase
Note: This automatically copies the framework into
@executable_path/../Frameworks@executable_path/../Frameworks
Helping the application locate the frameworks
The framework has been added to the application in the correct location, but the application has
not been instructed to search for said framework.
1. Go to the application's Build Settings tab
2. The Runpath Search Paths setting (@rpath) needs to include
@executable_path/../Frameworks
If this is a framework calling another framework,
5. @loader_path/../Frameworks should be used instead
3. The Frameworks Search Paths setting needs to include
$(TARGET_BUILD_DIR)/$(FRAMEWORKS_FOLDER_PATH)
These bash variables point to the yourApp.app/Contents/Frameworks
directory
Finishing
The product should now have:
1. embedded dylibs in the framework
2. dylibs that know the location of their individual dependencies
3. a Framework that knows where to look for its dependent libraries
4. an Application with an embedded framework
5. an Application that knows where to find its dependent frameworks
Note: The application should now be a completely standalone application. If it is not, a
mistake was made. The best way to test this is to either delete or alter the names of all
required dylibs and frameworks on disk.