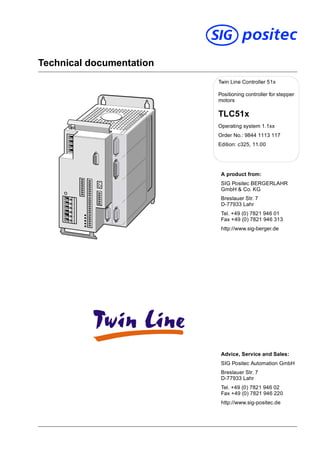
SlideShare a Scribd company logo
A product from:
SIG Positec BERGERLAHR
GmbH & Co. KG
Breslauer Str. 7
D-77933 Lahr
Tel. +49 (0) 7821 946 01
Fax +49 (0) 7821 946 313
http://www.sig-berger.de
Technical documentation
Advice, Service and Sales:
SIG Positec Automation GmbH
Breslauer Str. 7
D-77933 Lahr
Tel. +49 (0) 7821 946 02
Fax +49 (0) 7821 946 220
http://www.sig-positec.de
Twin Line Controller 51x
Positioning controller for stepper
motors
TLC51x
Operating system 1.1xx
Order No.: 9844 1113 117
Edition: c325, 11.00
-2 Twin Line Controller 51x
TLC51x
98441113117,c325,11.00
TLC51x Table of Content
Twin Line Controller 51x V-1
Table of Content
Glossaries . . . . . . . . . . . . . . . . . . . . . . . . . . . V-5
Abbreviations. . . . . . . . . . . . . . . . . . . . . . . . . . V-5
Product name . . . . . . . . . . . . . . . . . . . . . . . . . V-5
Technical Terms . . . . . . . . . . . . . . . . . . . . . . . . V-6
Written conventions and note symbols. . . . . . . . . . . . . V-8
1 The positioning controller . . . . . . . . . . . . . . . . . . . 1-1
1.1 Scope of supply . . . . . . . . . . . . . . . . . . . 1-1
1.2 Documentation and literature . . . . . . . . . . . . 1-5
1.3 Unit series . . . . . . . . . . . . . . . . . . . . . . 1-6
1.4 Unit overview . . . . . . . . . . . . . . . . . . . . 1-8
1.5 Modules of the positioning controller . . . . . . . 1-10
1.6 Module configuration, operating modes and
functions 1-11
1.7 Guidelines and standards . . . . . . . . . . . . . 1-13
1.7.1 Declaration of conformity and CE labelling . . 1-13
1.7.2 Regulations and standards . . . . . . . . . . 1-15
2 Safety . . . . . . . . . . . . . . . . . . . . . . . . . . . . . . 2-1
2.1 Danger categories . . . . . . . . . . . . . . . . . . 2-1
2.2 Safety instructions . . . . . . . . . . . . . . . . . . 2-1
2.3 Use for the purpose intended . . . . . . . . . . . . 2-2
2.3.1 Ambient conditions . . . . . . . . . . . . . . . . 2-2
2.3.2 Intended use . . . . . . . . . . . . . . . . . . . 2-2
2.4 Qualification of the personnel . . . . . . . . . . . . 2-3
2.5 Safety devices . . . . . . . . . . . . . . . . . . . . 2-3
3 Technical data. . . . . . . . . . . . . . . . . . . . . . . . . . 3-1
3.1 Mechanical data . . . . . . . . . . . . . . . . . . . 3-1
3.1.1 Positioning controller TLC51x . . . . . . . . . . 3-1
3.1.2 positioning controller TLC51xP . . . . . . . . . 3-2
3.1.3 Accessories for standard unit . . . . . . . . . . 3-3
3.2 Electronic data . . . . . . . . . . . . . . . . . . . . 3-4
3.2.1 Positioning controller . . . . . . . . . . . . . . . 3-4
3.2.2 Modules . . . . . . . . . . . . . . . . . . . . . 3-6
3.2.3 UL 508C certification . . . . . . . . . . . . . . . 3-8
3.2.4 Accessories for standard unit . . . . . . . . . . 3-8
V-2 Twin Line Controller 51x
Table of Content TLC51x
98441113117,c325,11.00
4 Installation . . . . . . . . . . . . . . . . . . . . . . . . . . . 4-1
4.1 Electromagnetic compatibility, EMC . . . . . . . . 4-1
4.2 System components . . . . . . . . . . . . . . . . 4-4
4.3 Mechanical installation . . . . . . . . . . . . . . . 4-5
4.3.1 Positioning controller TLC51x mounting . . . . . 4-6
4.3.2 Mounting the positioning controller TLC51xP . . . 4-7
4.3.3 Fitting the unit label . . . . . . . . . . . . . . . . 4-8
4.3.4 Installing accessories to the standard unit . . . . 4-9
4.3.5 Mounting version P accessories . . . . . . . . 4-10
4.4 Electrical installation . . . . . . . . . . . . . . . . 4-11
4.4.1 Electrical installation TLC51xP . . . . . . . . . 4-12
4.4.2 Mains connection . . . . . . . . . . . . . . . . 4-14
4.4.3 Motor connection TLC51x . . . . . . . . . . . 4-15
4.4.4 Motor connection with holding brake to
TLC51xP 4-17
4.4.5 Connecting the 24 V supply voltage . . . . . . 4-18
4.4.6 Connection to the signal interface . . . . . . . 4-19
4.4.7 Connection to the RS232 interface . . . . . . 4-26
4.4.8 Connection to the RS422-C module . . . . . . 4-27
4.4.9 Connection to the PULSE-C module . . . . . . 4-29
4.4.10 Connection to the RM-C module . . . . . . . . 4-32
4.4.11 Connection to the PBDP-C module . . . . . . . 4-34
4.4.12 Connection to the CAN-C module . . . . . . . 4-36
4.4.13 Connection to the RS485-C module . . . . . . 4-38
4.4.14 Connection to the IBS-C module . . . . . . . . 4-40
4.4.15 Connection of accessories to the standard unit 4-42
4.5 Wiring examples . . . . . . . . . . . . . . . . . . 4-44
4.5.1 Manual set-up and operation on the field bus . 4-44
4.5.2 Operation via field bus, configuration via TL HMI
or TL CT 4-47
4.5.3 Operation via field bus, field bus configuration
via inputs 4-49
4.6 Function test . . . . . . . . . . . . . . . . . . . . 4-51
4.7 Installation troubleshooting . . . . . . . . . . . . . 4-52
5 Commissioning . . . . . . . . . . . . . . . . . . . . . . . . 5-1
5.1 Commissioning procedure . . . . . . . . . . . . . 5-1
5.2 Safety instructions . . . . . . . . . . . . . . . . . 5-2
5.3 Commissioning tools . . . . . . . . . . . . . . . . 5-3
5.3.1 Overview . . . . . . . . . . . . . . . . . . . . . 5-3
5.3.2 The Twin Line HMI hand-held operating unit . . . 5-3
5.3.3 Operating software Twin Line Control Tool . . . . 5-5
5.4 Commissioning the positioning controller . . . . . 5-7
5.4.1 Commissioning stages . . . . . . . . . . . . . . 5-7
5.4.2 Setting phase current and device parameters . . 5-7
5.4.3 Starting the positioning controller . . . . . . . . . 5-8
5.4.4 Checking the limit switches . . . . . . . . . . . . 5-9
5.4.5 Checking the holding brake . . . . . . . . . . . . 5-9
5.4.6 Testing the motor under manual movement . . 5-10
5.4.7 Checking inputs and outputs . . . . . . . . . . 5-12
5.4.8 Optimizing the performance of the motor . . . . 5-15
98441113117,c325,11.00
TLC51x Table of Content
Twin Line Controller 51x V-3
6 Operating modes of the positioning controller . . . . . . . . 6-1
6.1 Changing the operating mode . . . . . . . . . . . 6-1
6.1.1 Access channels . . . . . . . . . . . . . . . . . 6-1
6.1.2 Access control for selecting operating mode
or function 6-3
6.1.3 Selecting the operating mode . . . . . . . . . . 6-4
6.1.4 Monitoring the set operating mode . . . . . . . . 6-5
6.1.5 Status monitoring in movement mode . . . . . . 6-7
6.2 Manual movement . . . . . . . . . . . . . . . . . . 6-9
6.3 Speed mode . . . . . . . . . . . . . . . . . . . . 6-14
6.4 Point-to-point mode . . . . . . . . . . . . . . . . 6-15
6.5 Electronic gear . . . . . . . . . . . . . . . . . . 6-17
6.5.1 Gear settings . . . . . . . . . . . . . . . . . . 6-19
6.5.2 Synchronisation with compensatory movement 6-22
6.5.3 Offset positioning . . . . . . . . . . . . . . . 6-23
6.6 Referencing . . . . . . . . . . . . . . . . . . . . 6-26
6.6.1 Reference movement . . . . . . . . . . . . . 6-26
6.6.2 Dimension setting . . . . . . . . . . . . . . . 6-30
7 Functions of the positioning controller . . . . . . . . . . . . 7-1
7.1 List control and list processing . . . . . . . . . . . 7-1
7.2 Teach-in processing . . . . . . . . . . . . . . . . 7-7
7.3 Normalisation . . . . . . . . . . . . . . . . . . . 7-10
7.3.1 User-defined units and normalisation factors . 7-10
7.3.2 Setting normalisation factors . . . . . . . . . . 7-11
7.3.3 Residual value in user-defined normalisation . 7-15
7.4 Ramp function . . . . . . . . . . . . . . . . . . . 7-16
7.5 Quick-Stop function . . . . . . . . . . . . . . . . 7-18
7.6 Reversal of direction of rotation . . . . . . . . . . 7-19
7.7 Fast position capture . . . . . . . . . . . . . . . 7-20
7.8 Monitoring functions . . . . . . . . . . . . . . . . 7-22
7.8.1 Monitoring of axis signals . . . . . . . . . . . 7-22
7.8.2 Monitoring internal signals . . . . . . . . . . . 7-25
7.9 Braking function with TL HBC . . . . . . . . . . . 7-26
8 Diagnosis and error rectification . . . . . . . . . . . . . . . 8-1
8.1 Operational status indicators and transitions . . . . 8-1
8.2 Error display and rectification . . . . . . . . . . . . 8-2
8.3 Malfunctions in movement mode . . . . . . . . . . 8-8
8.4 Table of error numbers . . . . . . . . . . . . . . . 8-9
9 Service, Maintenance and Warranty . . . . . . . . . . . . . . 9-1
9.1 Service address . . . . . . . . . . . . . . . . . . . 9-1
9.2 Shipping, storage and disposal . . . . . . . . . . . 9-2
V-4 Twin Line Controller 51x
Table of Content TLC51x
98441113117,c325,11.00
10 Accessories and spare part. . . . . . . . . . . . . . . . . . 10-1
10.1 List of accessories . . . . . . . . . . . . . . . . . 10-1
10.2 List of spare parts . . . . . . . . . . . . . . . . . 10-2
10.3 Suppliers . . . . . . . . . . . . . . . . . . . . . . 10-2
11 Unit label . . . . . . . . . . . . . . . . . . . . . . . . . . . . 11-1
11.1 Illustration of the unit label . . . . . . . . . . . . . 11-1
12 Parameters . . . . . . . . . . . . . . . . . . . . . . . . . . . 12-1
12.1 Overview . . . . . . . . . . . . . . . . . . . . . . 12-1
12.2 Parameter groups . . . . . . . . . . . . . . . . . 12-3
12.2.1 Parameter group Settings . . . . . . . . . . . 12-3
12.2.2 Parameter group Commands . . . . . . . . . . 12-4
12.2.3 Parameter group PA . . . . . . . . . . . . . . 12-4
12.2.4 Parameter group Motion . . . . . . . . . . . . 12-5
12.2.5 Parameter group Manual . . . . . . . . . . . . 12-6
12.2.6 Parameter group VEL . . . . . . . . . . . . . . 12-6
12.2.7 Parameter group PTP . . . . . . . . . . . . . 12-7
12.2.8 Parameter group Gear . . . . . . . . . . . . . 12-7
12.2.9 Parameter group Home . . . . . . . . . . . . . 12-9
12.2.10 Parameter group Teach . . . . . . . . . . . . 12-9
12.2.11 Parameter group List . . . . . . . . . . . . . 12-10
12.2.12 Parameter group L1Data0..L1Data63 . . . . 12-11
12.2.13 Parameter group L2Data0..L2Data63 . . . . 12-11
12.2.14 Parameter group Capture . . . . . . . . . . . 12-12
12.2.15 Parameter group I/O . . . . . . . . . . . . . 12-13
12.2.16 Parameter group M1 . . . . . . . . . . . . . 12-14
12.2.17 Parameter group M4 . . . . . . . . . . . . . 12-14
12.2.18 Parameter group Status . . . . . . . . . . . 12-15
12.2.19 Parameter group ErrMem0..ErrMem19 . . . . 12-20
Index . . . . . . . . . . . . . . . . . . . . . . . . . . . . . A-1
98441113117,c325,11.00
TLC51x Glossaries
Twin Line Controller 51x V-5
Glossaries
Abbreviations
Product name
Abbrevia-
tion
Meaning
AC Alternating current
ASCII American Standard Code for Information Interchange
COS Controller Operating System
DC Direct current
E Encoder
I/O Inputs / output
EMV Electromagnetic compatibility
EG European Community
EU European Union
RC Residual current
HMI Human-Machine Interface, plug-in hand-held operating unit
Inc Increment
IT system I: isolated; T: terre (Fr.), ground. System without potential to
ground, not earthed
LED Light-Emitting Diode
M Motor
PC Personal Computer
PELV Protected Extra-Low Voltage
PLC Programmable logic controller
Abbrevia-
tion
Product designation Term used
TLC51x Twin Line Controller
51xstandard unit
Positioning controller
TLC51xP Twin Line Controller 51x
version P
Positioning controller Protection grade
IP54, second category industrial envi-
ronment
TL HMI Twin Line HMI Human Machine Interface HMI
TL CT Twin Line Control Tool Operating Software
TL HBC Twin Line Holding
Brake Controller
Holding Brake Controller
V-6 Twin Line Controller 51x
Glossaries TLC51x
98441113117,c325,11.00
Technical Terms
Actual position of the drive system The actual position of the drive system gives the absolute or relative
positions of moved components in the system.
Actual position of the motor See Angular position of the motor
Angular position of the motor The angular position of the motor corresponds to the angular position of
the rotor in the motor housing, and refers to the zero point or index point
of the position sensor.
CAN-C Field bus module which connects the positioning controller to a CAN
field bus. The selection of a field bus profile defines whether the device
works with CAN bus, CANOpen or DeviceNet protocol.
DC-line The DC-line generates the necessary direct current for operating the
motor and provides the amplifier with the necessary energy. The DC-line
acts as a buffer to energy fed back by the motor.
Default values Preset values for the parameters of the Twin Line Unit before the first
commissioning, factory settings
Direction of rotation Rotation of the motor shaft in a clockwise or anticlockwise direction.
A clockwise direction of rotation is given when the motor shaft rotates
clockwise as the observer faces the end of the protruding shaft.
Drive solution The drive solution comprises the drive system with its Twin Line Unit and
motor, as well as the system mechanics forming an integral part of the
chain of motion.
Drive system The drive system consists of the Twin Line Unit and the motor.
Electronic gear An input speed is recalculated by the Twin Line Unit using the values of
an adjustable gear ratio to produce a new output speed for the motor
movement.
Encoder Sensor for recording the angular position of a rotating element. Mounted
on the motor, the encoder signals the angular position of the rotor.
Error class Reaction of the Twin Line Unit to an operational malfunction correspon-
ding to one of five error classes
Forcing To change signal states irrespective of the hardware switching status in
the unit; with the control tool, for example. The hardware signals remain
unchanged.
High/open Signal status of an input or output signal; when no signal is present,
signal voltage is high (high level).
HMI Hand-held operating unit which can be plugged into the Twin Line Unit.
HMI: Human-machine interface.
I2t monitoring Predictive temperature monitoring. On the basis of the motor current,
the expecting heating of unit components is calculated in advance.
Should a limit value be exceeded, the Twin Line Unit reduces the unit
current.
IBS-C Field bus module which couples the positioning controller to an interbus
field bus.
Index-impuls Encoder signal for referencing the rotor position in the motor.
The encoder sends one index pulse per revolution.
Incremental signals Angular steps of an encoder in the form of square-wave pulse
sequences. The pulses signal changes in position.
Input device Input device is the device which can be connected to the RS232
interface for the purpose of commissioning; it is either the HMI hand-
held operating unit or a PC with the Operating Software.
98441113117,c325,11.00
TLC51x Glossaries
Twin Line Controller 51x V-7
Internal unit The actual position of the drive system gives the absolute or relative
positions of moved components in the system.
IT system Mains with no ground potential reference, since it is not grounded
I: iso-lation ; T: terre (French): ground
Limit switch Switches which signal any overrun on the permissible travel.
Low/open Signal status of an input or output signal; when no signal is present,
signal voltage is low (low level)
Module code Internal electronic code (8 bit) which describes the hardware and the
functionality of modules. This code is held in an EEPROM in every
module.
Node guarding Monitoring function at the RS232 interface
Optically isolated Electrical transmission of signals with electrical isolation
Parameter Device data and values which can be set by the user
PBDP-C Field bus module with which the positioning controller can be integrated
into a Profibus-DP network
Power amplifier This is the unit that controls the motor. The power amplifier generates
currents for controlling the motor in accordance with the positioning
signals from the control unit.
Power controller See Power amplifier
Pulse direction signals Digital signals with variable pulse frequencies which signal changes in
position and rotation direction via separate signal wires.
Quick-stop This function is used in the event of faults, the stop command or in an
emergency for rapidly braking a motor.
RS232 interface Communications interface of the Twin Line unit for the connection of a
PC or the HMI hand-held operating unit
RS422-C The signal status is calculated from the differential voltage of one
posi-tive and one inverted negative signal. Two signal wires must
therefore be connected for one signal.
RS422 level The signal status is calculated from the differential voltage of one
posi-tive and one inverted negative signal. Two signal wires must
therefore be connected for one signal.
RS485-C Field bus module which enables the field bus to be used via a multipoint
connection with serial data transmission. A multipoint connection - in
contrast to a point-to-point connection - can swap data with several
devices on the bus.
RS485 level The signal status is calculated from the differential voltage of one
positive and one inverted negative signal. Two signal wires must
therefore be connected for one signal. RS485 signal transmission is
bidirectional.
Sense regulation The voltage drop on the supply lines is compensated in such a way that
the output voltage at the sense terminals has the correct value. The
output voltage is only activated once the sense lines have been
connected.
SMART Operating system software
User units A user unit corresponds to the maximum precision at which a distance,
speed or acceleration value can be input. User units can be set for all
normalizable parameters.
Watchdog Device in the unit which detects internal faults. If a fault occurs, the
amplifier is switched off immediately.
V-8 Twin Line Controller 51x
Glossaries TLC51x
98441113117,c325,11.00
Written conventions and note symbols
Action symbols „̈“ This action symbol is used for step-by-step instructions which can be
carried out as they are described. If one of the instructions leads to a
noticeable response from the unit, this will be given after the description
of the action to be carried out. In this way you will receive direct
confirmation that a particular step has been correctly carried out.
Enumeration symbol „•“ The enumeration symbol is used for listing individual points in a given
information group in summary form. If the result of steps or sequences
is described, the step to be carried out is described first.
Menu paths „©“ In the Twin Line Control Tool operating software an action is launched
via ’Menu © Menu item © ...’. For example, ’File © Save’ in the menu
’File’; under the menu item ’Save’ saves data to the data storage
medium.
This symbol is used for general notes which give additional
information about the unit.
Passages which are preceded by this symbol may have to
be discussed in more detail with SIG Positec’s customer
service. You will find contact addresses for SIG Positec
under ’Service address’, page 9-1.
98441113117,c325,11.00
TLC51x The positioning controller
Twin Line Controller 51x 1-1
1 The positioning controller
1.1 Scope of supply
̈ Check the parts supplied to make sure they are complete.
Keep the original packaging in case the unit has to be returned to the
manufacturer to be added to or repaired.
Scope of supply of positioning
controller standard unit
The scope of supply of the TLC51x positioning controller includes:
Modules Option module configurations for the positioning controller:
Fig. 1.1 TLC51x and modules
No. Qty. Designation Order no.
1 1 TLC511, TLC512 type code
2 1 Hood for front cover -
3 1 or 2 Shielding terminal SK 14 for motor connec-
tion (two shielding terminals in case of units
without internal mains filter)
6250 1101 400
4 1 Connector mountings for the terminal strips -
5 1 Documentation for the TLC51x 9844 1113 117
No. Qty. Designation Order no.
6 1 Encoder module RS422-C or
Pulse-/direction module PULSE-C
type code
6 1 Rotation monitoring RM-C type code
6 1 Field bus module PBDP-C, CAN-C, RS485-C
or IBS-C
type code
Tw
in
Line
RS422-C
PULSE-C
RM-C
PBDP-C
CAN-C
RS485-C
IBS-C
4
1
3
65
2
1-2 Twin Line Controller 51x
The positioning controller TLC51x
98441113117,c325,11.00
Scope of supply of positioning
controller version P
The scope of supply of the TLC51xP positioning controller includes:
Modules Optional modules are identical with those of the standard unit.
Fig. 1.2 TLC51xP and Modules
Item Qty Designation Order Number
1 1 TLC511P, TLC512P Type code
2 1 mains plug (round plug, 4-pin) -
3 1 shielding terminal SK14 for motor connection 6250 1101 400
4 1 Sub-D cover for RS232 interface -
5 1 Documentation on the &device type; on
CD-ROM, multilingual
9844 1113 138
- 1 Built in holding brake controller HBC
(optional)
type code
98441113117,c325,11.00
TLC51x The positioning controller
Twin Line Controller 51x 1-3
Accessories Accessories for the standard unit and for version P are:
Figures. 1.3 and 1.4 on page 1-4.
Item Qty Designation Standard unit/
version P
(S/P)
Order Number
1 1 operating software with online documentation on data carrier,
multilingual
S/P 6250 1101 803
2 1 hand-held operating unit HMI with manual S/P 6250 1101 503
3 1 connector set for complete assembly S/P 6250 1519 002
4 1 motor cable 1.5 mm2
S/P 6250 1317 xxx 1)
5 1 encoder cable for module RM-C S/P 6250 1440 xxx 1)
6 1 pulse direction cable for module PULSE-C S/P 6250 1447 yyy 2)
7 1 encoder cable for module RS422-C S/P 6250 1448 yyy 2)
8 field bus cable for module
CAN-C
IBS-C
S/P
6250 1446 yyy 2)
6250 1451 yyy 2)
- 1 CAN terminator, 9-pin socket
CAN terminator, 9-pin plug
S/P 6250 1518 002
6250 1518 003
9 1 RS232 programming cable 5 m
RS232 programming cable 10 m
S/P 6250 1441 050
6250 1441 100
- 1 TL HMI cable S/P 6250 1442 yyy 2)
10 1 holding brake controller TL HBC S 6250 1101 606
11 1 external mains filter for units with no internal filter
for TLC511 NF, 4A
for TLC512 NF, 10A
S
5905 1100 200
6250 1101 900
12 1 terminal angle with top-hat rail TS 15, e.g. for terminal Messrs.
Phoenix Contact Typ MBK
P 6250 1102 200
13 1 set grommets, type KDT/Z 3)
( Murrplastic GmbH, see chap. 10.3,
Suppliers)
P 6250 1102 202
1) cable length xxx: 003, 005, 010, 020: 3 m, 5 m, 10 m, 20 m, longer cable lengths on request.
2) cable length yyy: 005, 015, 030, 050: 0.5 m, 1.5 m, 3 m, 5 m.
3) The inside diameter of the grommets must match the diameter of the cables used.
1-4 Twin Line Controller 51x
The positioning controller TLC51x
98441113117,c325,11.00
Fig. 1.3 Accessories for the TLC51x
Fig. 1.4 Special accessories for the TLC51xP
98441113117,c325,11.00
TLC51x The positioning controller
Twin Line Controller 51x 1-5
1.2 Documentation and literature
Manuals for the positioning
controller
Twin Line HMI, Manual for the Human-Machine Interface HMI, Order
no.: 9844 1113 091
Twin Line Control Tool, Manual for the operating software, English Order
no.: 9844 1113 096
1-6 Twin Line Controller 51x
The positioning controller TLC51x
98441113117,c325,11.00
1.3 Unit series
The positioning controller TLC51x forms part of SIG Positec’s Twin Line
device series for controlling stepper motors and AC servomotors. The
positioning controller with built-in control electronics and power amplifier
works as a stand-alone amplifier or as part of a field bus configuration.
It can operate position control on an AC synchronous servomotor and
carry out positioning operations on its own.
The positioning controller is available with two power amplifiers with a
similar housing design. Electrical connections and functional scope are
identical for both units.
The positioning controller comes in two versions with identical functions:
• standard unit, TLC51x, for use in a control cabinet
• version P, TLC51xP, with protection grade IP54, category 2 for use
outside the control cabinet close to the motor.
Fig. 1.5 Positioning controller 11P, TLC511 and TLC512
98441113117,c325,11.00
TLC51x The positioning controller
Twin Line Controller 51x 1-7
Type code The power class of the positioning controller is indicated by the last digit
in the device name ’TLC51x’ of the type code.
version Version P with IP54 protection is designated by an additional "P" for
"protected" in the type code device name.
Fig. 1.6 Type code of the positioning controller TLC51x
Version P There is an option to supply the positioning controller with built-in
holding brake control.
Accessories TL HBC and TL BRC are not suitable for version P, as they
only have IP20 protection.
1-8 Twin Line Controller 51x
The positioning controller TLC51x
98441113117,c325,11.00
1.4 Unit overview
Fig. 1.7 Positioning controller TLC51x
Mains connection The power supply for the amplifier is connected to the mains. A
positioning controller with a built-in mains filter can be operated without
any further noise suppression on the supply side.
The power supply for control loops and for controlling the fan must be
provided by an external 24 VDC power supply.
Motor connection The positioning controller supplies the power for a permanent-field AC
synchronous servomotor via the three-phase connection. The motor
connection is short-circuit protected and is checked for ground faults
when the amplifier is enabled.
DC-line connection The device’s DC-line voltage is available at the DC-line terminals.
DC-line capacitors can be supported by external capacitors in order to
absorb sudden, excess braking energy.
Status display A seven-segment display provides information about the operating
status of the positioning controller. If there is an operating malfunction
the display will flash and display an error code.
LED for DC-line voltage The LED comes on when there is voltage in the DC-line.
LEDs for operating signals Five LEDs display the signal states of these adjacent inputs: positive
and negative limit switches, motor stop signal, power amplifier
enablement and automatic operation.
98441113117,c325,11.00
TLC51x The positioning controller
Twin Line Controller 51x 1-9
Voltage selector switch The voltage selector switch can be used to run the unit off a mains
voltage of 115 V or 230 V. The voltage selector switch is only available
for units with no mains filter (NF option).
Version P units are always fitted with voltage selection.
Signal interfaces The input and output signals are routed via the signal interface and an
external 24 VDC supply voltage injected for the closed-loop control unit.
RS232 interface The RS232 connection is the communications interface of the unit and
is used for connecting a PC or the HMI hand-held operating unit.
Air outlet and fan A built-in fan sucks cold air into the unit from below to cool the power
amplifier and ballast resistor. It discharges the warmed air through the
upper air outlet vents. Temperature sensors on the power amplifier’s
heat sink protect the unit from overheating.
Module slots Four module slots allow the positioning controller to be matched flexibly
to your particular area of application. The minimum configuration
required to drive an AC servomotor is a module in slot M2. The other slot
modules expand the scope of functions of the positioning controller.
Configuration variants You can choose between several module variants in slots M1, M2 and
M4 and thereby configure the positioning controller for a particular
arrangement of installations.
Slot M3 remains free for later extensions.
Parameter memory All settings of the positioning controller are administered in a motor data
record, two records for control parameters and one for movement
parameters. The parameters are stored in the unit, protected against
power outages, and can be displayed and changed via the RS232 inter-
face on the PC, via the HMI hand-held operating unit or over the field
bus.
Movement parameters The set of movement parameters contains specific data for the various
operating modes of the positioning controller. Should the operating
mode change, the controller will switch over to the appropriate set of
movement parameters.
Slot Functions when module fitted Possible modules
fitted
M1 External setpoint signals for moving and
positioning the motor
PULSE-C or RS422-C
M2 Actual position of an encoder for
monitoring rotation of motor
RM-C
M4 Field bus module for integrating into the
following field bus systems: Profibus-DP,
CAN-Bus, CANOpen, DeviceNet, serial
online connection or Interbus-S
PBDP-C, CAN-C,
RS485-C or IBS-C
1-10 Twin Line Controller 51x
The positioning controller TLC51x
98441113117,c325,11.00
1.5 Modules of the positioning controller
The block diagram shows the modules and interface signals of the
positioning controller.
Fig. 1.8 Block diagram with modules and interface signals
Module PULSE-C The PULSE-C pulse-direction module passes on externally injected
frequency signals to the controller as reference signals for positioning.
The module registers the position data as pulse-direction signal or as
pulseforward / pulseback signal.
Module RS422-C The RS422-C encoder module evaluates externally injected encoder
signals as reference signals for positioning. The signals take the form of
A/B signals from an encoder, from a higher-ranking controller or from the
encoder simulation of a first positioning controller.
Module RM-C The positioning controller receives A/B signals from the RM-C rotation
monitoring module in order to monitor the position of the stepping motor,
and also a signal for checking the temperature of the motor. The encoder
electronics in the motor receive their power via the rotation monitoring
terminals.
The rotation monitoring is optional.
Module PBDP-C The PBDP-C field bus module serves to integrate the positioning con-
troller into the Profibus-DP field bus. The positioning controller works as
a command receiver or as a slave device. It executes the control and
work commands from a higher-ranking controller.
Module CAN-C The CAN-C field bus module couples the positioning controller to a
CAN-Bus, CANOpen or DeviceNet field bus
Module IBS-C The IBS-C field bus module allows the positioning controller to be used
as a slave device in an Interbus network. The module is designed to
Interbus specification version 1.
Module RS485-C The RS485-C field bus module permits field bus applications via a
multipoint connection with serial data transmission. A multipoint connec-
tion - in contrast to a point-to-point connection - is able to swap data with
several devices.
98441113117,c325,11.00
TLC51x The positioning controller
Twin Line Controller 51x 1-11
1.6 Module configuration, operating modes and functions
Overwiew Depending on the module configuration, the positioning controller
functions in one manual and several automatic modes, which can be
swapped during travel.
• Manual movement with positioning
• Speed mode
• Point-to-point mode
• Electronic gear
• Referencing
Fig. 1.9 Operating modes of the positioning controller TLC51x
The following table shows the modules that require to be fitted for each
operating mode, and possible configurations for additional functions.
Manual movement with
positional reference
In manual movement mode the positioning controllermoves the motor a
defined distance or in continuous motion at a constant speed. Distance,
speed steps and the time for changing from united inching to continuous
motion can be set.
Speed mode In speed mode, the motor is given a set speed and a movement is
started with no defined target position. The motor continues to move at
this speed until a new speed is set or the mode is terminated.
Minimum module configuration in slot
Operating mode M1 M2 M3 M4
Manual mode,
Speed mode,
Point-to-point mode,
Referencing movement
optional optional - PBDP-C,
CAN-C,
IBS-C
oder
RS485-C
Register reference pulses
Electronic gear mode
PULSE-C
or
RS422-C
optional - PBDP-C,
CAN-C,
IBS-C
oder
RS485-C
Operation with rotation
monitoring
optional RM-C - PBDP-C,
CAN-C,
IBS-C
oder
RS485-C
1-12 Twin Line Controller 51x
The positioning controller TLC51x
98441113117,c325,11.00
Point-to-point mode In point-to-point mode (also PTP mode), the motor is moved from a point
A to a point B by means of a positioning command. The positioning
distance is given either in absolute terms with reference to the axis zero
point or in relative terms with reference to the current axis position.
Referencing In referencing mode, an absolute dimension reference is created
between the position of the motor and a defined axis position.
Referencing can be carried out by a referencing movement or by
dimension setting.
In a referencing movement, the motor is moved to a defined position, the
zero or reference point, on the axis in order to create an absolute dimen-
sion reference between the position of the motor and the axis. The
reference point is used as the point of reference for all following absolute
positioning operations.
Dimension setting offers the chance to define the current motor position
as the new axis reference point to which all following position data relate.
Field bus mode The primary area of application of the positioning controller is in field bus
operation via a module in slot M4. There are four modules available for
field bus operation:
• Profibus-DP with the PBDP-C module
• CAN-Bus, CANOpen or DeviceNet with the CAN-C module
• serial RS485 bus with the RS485-C module
• Interbus-S with the IBS-C module
You will find information on connecting, programming and operating the
positioning controller in a field bus in the relevant field bus manuals from
SIG Positec.
List control While the positioning controller is carrying out a movement command,
the direction of movement is monitored in the background by means of
list control. When a list position is reached, the positioning control-
lerresponds with the relevant reaction depending on the list type.
• List type for position values and signal values: when the motor
reaches a list position, the output signal 'TRIGGER' is set or reset
depending on the list entry.
• List type for position values and speed values: when the motor
reaches a position value, the positioning controller switches to the
new speed value in the list, and moves the motor at this speed.
Teach-In Entries can be made in the list with the HMI hand-held operating unit, the
operating software or via the field bus. For entering the position values,
the positioning controller offers teach-in processing: the motor is moved
to successive list positions with respect to the reference point, and these
positions are then committed to the parameter memory together with a
value for trigger output or speed.
98441113117,c325,11.00
TLC51x The positioning controller
Twin Line Controller 51x 1-13
1.7 Guidelines and standards
1.7.1 Declaration of conformity and CE labelling
The EG guidelines define the minimum requirements - particularly
safety requirements - applicable to a product and must be complied with
by all manufacturers and dealers marketing the product in the member
states of the European Union (EU).
The EC guidelines describe the main requirements made of a product.
The technical details are laid down in the harmonized standards, which
for Germany take the form of the DIN EN standards. If there is not yet
any EC standard applicable to a particular product area, existing
technical standards and regulations will apply.
CE labelling With the declaration of conformity and the CE labelling of the product the
manufacturer certifies that his product complies with all relevant require-
ments of the EC guidelines. He is permitted to sell and use the product
throughout the EC.
Machine guideline The Twin Line unit is not a machine in the sense of the machines EC
guideline (89/392/EEC). It has no function-associated moving parts.
The unit may however be a component part of a machine or installation.
Provided the rest of the machine complies with the machines guideline
and it has been set up in accordance with the EMC testing code of SIG
Positec, conformity with the machines guidelines can be certificated.
EMC guideline The EC guidelines on electromagnetic compatibility (89/336/EEC)
applies to units which can cause electromagnetic interference or whose
operation can be impaired by such interference.
Compliance with the EMC guideline cannot be checked for the Twin Line
unit until it has been installed into a machine or installation. The instruc-
tions provided under ’Installation’ must be complied with to guarantee
the Twin Line unit is EMC-safe when fitted in the machine or installation
and before use of the unit is permitted.
Low voltage guideline The EC guideline on low voltages (73/23/EEC) lays down safety require-
ments for 'electrical apparatus' as protection against the risks which can
originate in such devices and which can be created in response to
external influences.
As specified by the low voltage guidelines the Twin Line unit conforms to
EN 50178 and to the following peripheral conditions:
• Protection class 1
• Contamination degree 2 (only standard unit)
Declaration of conformity The declaration of conformity certificates that the device satisfies the
requirements of the EC guideline cited. For the Twin Line unit a decla-
ration of conformity in accordance with the EC low voltages guideline
has been issued.
1-14 Twin Line Controller 51x
The positioning controller TLC51x
98441113117,c325,11.00
Fig. 1.10 Conformity as per the EC low voltages guideline
98441113117,c325,11.00
TLC51x The positioning controller
Twin Line Controller 51x 1-15
1.7.2 Regulations and standards
Standards concerning safe
operation of the Twin Line units
EN 60204 - (VDE 0113 Part 1: 1998): Electrical equipment of machines,
General requirements
DIN VDE 0100, Regulations regarding the installation of high-voltage
systems with voltages up to 1000 V
DIN VDE 0106-100, 1983, Protection against electrical shock; Location
of actuation elements in the vicinity of operating resources liable to acci-
dental contact
DIN VDE 0470-1,1992, IP protection types
EN 954-1: Safety of machines, Safety of components of control devices,
Part 1: General design principles
Standards regarding compliance
with EMC limit values
EN 61000-4-1 (IEC 1000-4-1: 1992): Testing and measurement
procedures, Section 1: Overview of noise immunity testing procedures
EN 618500-3:1996 and prA11:1999: Speed variable electrical driving
units.
1-16 Twin Line Controller 51x
The positioning controller TLC51x
98441113117,c325,11.00
TLC51x Safety
Twin Line Controller 51x 2-1
2 Safety
2.1 Danger categories
Safety notes and general information are indicated by special symbols
in the manual. In addition you will find symbols and instructions affixed
to your Twin Line unit which warn you of possible dangers and help you
to operate the unit safely.
Depending on the seriousness of the danger, danger symbols are
divided into three danger categories. The symbols shown emphasize
the danger situation to which the warning applies.
DANGER!
This is an indication of direct personal danger.
Can lead to serious injuries with fatal consequences if not
observed.
WARNING!
Indication of a recognizable danger.
If the warning is ignored, the danger can lead to serious
injury with fatal consequences, and to the unit or system
parts being permanently damaged.
CAUTION!
Indication of a danger.
If this is ignored, minor personal injury and light damage to
the unit or system may be the result.
2.2 Safety instructions
DANGER!
Electric shock from high voltage!
Follow safety rules when working on electrical systems:
• Switch off the power to the unit
• Make sure the unit cannot be switched on again inadvertently
• Confirm that no voltage is present
• Cover or shield neighboring system parts which are live.
DANGER!
Electric shock from high voltage!
Before starting work on the connections of the power unit
or on the motor terminals, wait for the 4 minutes discharge
time and then measure the residual voltage on the DC-line
terminals “DC+” and “DC-” . The residual voltage must not
be higher than 48 VDC before you work on the connections.
If additional DC-line capacitors are fitted, the discharge
time increases to up to 10 minutes. Wait for this length of
time, and then measure the residual voltage.
2-2 Twin Line Controller 51x
Safety TLC51x
98441113117,c325,11.00
2.3 Use for the purpose intended
2.3.1 Ambient conditions
Transportation and storage temperature -40 °C to +70 °C
Installation height,
operation with no reduction in performance h <1000 m above m.s.l.
Vibration stress during operation to DIN IEC 68-2-6
Number of cycles: 10
frequency range: 10Hz to 500Hz
acceleration: 20m/s2
Continuous shocks to DIN IEC 68-2-29
Number of shocks: 1000/direction
(X,Y,Z for each clockwise,
anticlockwise direction, total 6000)
Peak acceleration: 150m/s2
TLC51x Protection type IP20
Ambient temperature 0 °C to +50 °C
Relative humidity 15% to 85%
(no condensation permissible)
TLC51xP Protection type IP54, category 2
Protection grade of
internal cooling air duct IP34
Ambient temperature 0 °C to +45 °C
Version P is not suitable for use in the open air or in sticky environments
(danger of fan glueing up).
2.3.2 Intended use
The positioning controller is an electrical device for controlling a
variable-speed drive with a stepping motor.
Only 3-phase stepping motors may be operated with the positioning
controller. The motor must be approved by SIG Positec for operation
with the device.
The motor connections of multiple units may not be connected to each
other.
Units may not be connected in parallel to the DC-line output.
The positioning controller may be used for industrial applications in the
system configuration described.
The positioning controller must be installed and operated in an environ-
ment which meets at least protection grade IP54. The standard unit
must therefore be installed and properly mounted in a control cabinet.
Version P may be operated outside a control cabinet.
The positioning controller may only be set up and operated after correct
EMC installation has taken place. It may only be used with the cables
and accessories specified by SIG Positec.
The positioning controller may not be used in IT networks, as they have
no ground potential. Interference suppression filters for correct EMC
installation will only work properly with a ground potential connection.
98441113117,c325,11.00
TLC51x Safety
Twin Line Controller 51x 2-3
2.4 Qualification of the personnel
Work on and with the positioning controller may only be carried out by
qualified personnel.
Qualified personnel can use their technical training, knowledge and
experience to assess the work to be done and to recognize and avoid
possible dangers.
Qualified personnel will be aware of the current standards, regulations
and accident prevention regulations which must be observed when
working on the unit.
2.5 Safety devices
The positioning controller unit monitors a range of signals from system
and installation components.
Safety devices coupled with the unit protect the system and operating
personnel.
The following components and limit values are monitored internally:
Savety devices Tasks and protective functions
Limit switch signals Monitoring the permissible ranges of movement in
order to protect personnel and the system
Stop switch signal Stops the drive with maximum braking energy and
at standstill hold the motor still under positional
control. Protection of persons and system in the
event of unexpected movements due to the motor
being switched off.
Monitoring Task and protective function
Short-circuit Motor line monitored for short circuit between the
motor phases
functional safety and device protection
Over- and undervoltage Monitoring DC line for overvoltage and undervoltage
functional safety and device protection
Temperature Monitor motor 1)
and power amplifier with sensors for
excess temperature
device protection
1) Motor monitoring only for units with optional rotation monitoring
Rotation monitoring
error
For units with rotation monitoring, contouring error
threshold value when positional deviation too large
functional safety
Motor speed Speed limit at maximum permitted motor speed,
device protection
Data connection with a
hand-held operating
unit
Functioning of the connection during motor control
via the hand-held operating unit,
functional safety
2-4 Twin Line Controller 51x
Safety TLC51x
98441113117,c325,11.00
TLC51x Technical data
Twin Line Controller 51x 3-1
3 Technical data
3.1 Mechanical data
3.1.1 Positioning controller TLC51x
Weight TLC511, TLC512 with 3 modules 2,7 kg
Device protection Protection type as per DIN EN 60529: 1991 IP 20
Dimensions
Fig. 3.1 Dimensions TLC511 and TLC512. The Twin Line HMI shown in the
drawing is an option.
TLC511 TLC512
Width [mm] 108 108
Height [mm] 212,5 212,5
Depth [mm] 184,5 184,5
Front width [mm] 105,5 105,5
Connection dimension
[mm]
63 63
3-2 Twin Line Controller 51x
Technical data TLC51x
98441113117,c325,11.00
3.1.2 positioning controller TLC51xP
Weight TLC511P SF with 3 modules 8 kg
TLC512P SF with 3 modules 8 kg
Device protection Protection type as per DIN EN 60529: 1991 IP 54, Category 2
Dimensions
Fig. 3.2 Dimensions TLC51xP
TLC511P TLC512P
Width A [mm] 127 127
Height B [mm] 360 360
Depth C [mm] 245 245
Front width D [mm] 127 127
Connection dimension
E [mm]
80 80
337
2
4
5
127
360
80
127
21
21
6.5
343
98441113117,c325,11.00
TLC51x Technical data
Twin Line Controller 51x 3-3
3.1.3 Accessories for standard unit
Holding brake controller
TL HBC
Dimensions (H x W x D) 107 mm x 104 mm x 76 mm
Installation on top-hat rail 55 mm
Fig. 3.3 Holding brake controller
3-4 Twin Line Controller 51x
Technical data TLC51x
98441113117,c325,11.00
3.2 Electronic data
3.2.1 Positioning controller
Mains connection
Motor connection
TLC511/TLC511P TLC512/TLC512P
Mains voltage [VAC]
only for TLC51xNF:
1 x
230 -20%/+15%
1 x
115 -20%/+15%
1 x
230 -20%/+15%
1 x
115 -20%/+15%
Mains frequency [Hz] 47 - 63 47 - 63
Current consumption
[A]
2 (230 V)
4 (115 V)
5 (230 V)
10 (115 V)
Starting current [A] < 60 < 60
Power factor cosϕ > 0.6 > 0.6
Power loss [W] ≤ 40 ≤ 60
Mains buffering [ms] < 5 < 5
Overvoltage strength
(DIN EN 61800-3)
between phases: 1 kV, phases to earth: 1 kV
Leakage current 1)
[mA]
1) Leakage currents are measured with an RC circuit in accordance with IEC60990.
The value can be higher if measured directly. Advice on using earth leakage cir-
cuit-breakers on request.
< 30 < 30
Fuse, external [A] /
characteristic
for 230 V
for 115 V
10 C, K or similar
10 C, K or similar
10 C, K or similar
10 C, K or similar
TLC511/TLC511P TLC512/TLC512P
Power class 1)
[kW]
1) Max. effective electrical power of the unit for nominal current and 115 V AC or
230 VAC mains voltage
0.35 0.75
Switching frequency [kHz] 16 16
Rated current [Arms], r.m.s. value 3 7
Maximum speed [r.p.m.] 3000 3000
Cable length 2)
[m]
2) longer cable lengths on request
20 20
Cable diameter [mm2
] 1.5 1.5
98441113117,c325,11.00
TLC51x Technical data
Twin Line Controller 51x 3-5
24 V DC supply PELV, DIN 19240, reverse-polarity-protected
Input
Voltage range 20 V to 30 V
Ripple < 2 VSS
Input current (without loading of the outputs) < 2.5 A
Signal interface Digital signal inputs Reverse-polarity-protected
No electrical isolation
Debounced,
debounce interval 0.7 to 1.5 ms
DC-voltage Uhigh 12 V to 30 V (I ≥ 3 mA)
DC-voltage Ulow ≤ 5V (I ≤ 0,5 mA)
Current at 24 V ≤ 7 mA
Digital signal outputs Inductive loadability (150 mH / 11 W)
Short-circuit protected
DC-voltage ≤ 30 V
Switching current ≤ 400 mA
Voltage drop at 400 mA ≤ 1 V
Analogue signal input
Voltage range +10 V to -10 V
Input resistance 5 kΩ
UL 508C certification You will find the thresholds for UL 508C certification in the chapter enti-
tled ’UL 508C certification’ from page 3-8.
3-6 Twin Line Controller 51x
Technical data TLC51x
98441113117,c325,11.00
3.2.2 Modules
Note: You will find more detailed data on individual modules in the
chapter entitled ’Electrical installation’ from page 4-11.
RS422-C encoder module Signal inputs (A, B, I) RS422-compatible
Connected electrically to 24VGND
Input frequency ≤ 400 kHz
1 600 000 Inc/s
Output
Encoder supply (SENSE) 5 V ± 5%, max. 300 mA
Sense-controlled
Short-circuit- and overload-proof
PULSE-C pulse direction module Signal inputs
Symmetrical Compatible with RS422-voltage
Asymmetrical 4.5 V to 30 V
Connected electrically to 24VGND
Input resistance 5 kΩ
Input frequencies: Stepping frequency (PULSE/PV, DIR/PR)≤ 200 kHz
Motor current control (PWM) 6 kHz to 25 kHz
Number of steps 200, 400, 500, 1000,
2000, 4000, 5000, 10000
Signal outputs (ACTIVE, FUNCT_OUT) Open collector outputs
Short-circuit-proof
Output voltage ≤ 30 V
Output current, maximum ≤ 50 mA
Rotation monitoring RM-C Signal inputs (A, B)RS422 level
electrically connected to 24VGND
Input frequencies: ≤ 400 kHz
1 600 00 Inc/s
Encoder resolution 1000 lines
Encoder power supply output (SENSE) 5 V ± 5%, ≤ 300 mA
sense controlled
short-circuit and overload protected
RS485-C module Signal inputs / outputs in accordance with RS485 norm
electrically isolated
4-wire interface
Transmission rates 1200, 2400, 4800, 9600
19200, 38400 Baud
PBDP-C module Signal inputs / outputs in accordance with RS485 norm
electrically isolated
Transmission rate ≤ 12 MBaud
CAN-C module Signal inputs / outputs level to ISO 11898
electrically isolated
Transmission rate ≤ 1 MBaud
98441113117,c325,11.00
TLC51x Technical data
Twin Line Controller 51x 3-7
IBS-C module Signal inputs / outputs in accordance with INTERBUS
specification, category 1
Two-wire remote bus
Transmission rate 500 kBaud
For units with the IBS-C module, 24 VGND is internally connected to PE.
Version P optional holding brake
controller
Power supplyinput 20 V to 30 V input currentinput current = 0.1 A + brak-
ing current
output, brake not short-circuit protected current at 24 V for 100 ms
max. 2.5 A DC voltage 20 V to 30 V
With voltage reduction continuous current max. 1.25 ADC voltage9.5 V
to 15 V
3-8 Twin Line Controller 51x
Technical data TLC51x
98441113117,c325,11.00
3.2.3 UL 508C certification
The Twin Line Twin Line Controller 51x is certified to UL 508C with the
following data.
Mains connection
Motor data
Accessories • Holding brake controller, TL HBC
Power supply 24 V
3.2.4 Accessories for standard unit
TL HBC holding brake controller Supply voltage, input 20 V to 30 V
Input current Input current = 0.5 A + brake current
Output, brake
DC-voltage 20 V to 30 V
Power at 24 V for 100 ms 0.5 A to 2.5 A
Continuous current 0.5 A to 1.5 A
DC-voltage with voltage drop 9.5 V to 15 V
Current at 12 V 0.5 A to 2 A
Safe electrical isolation between 24 V input, control input and brake
output
Unit Mains voltage
[V]
Mains
frequency [Hz]
Current [A] Phases
TLCX11 230
115
47-63 2 4 1
TLCX12 230
115
47-63 5 7.5 1
Unit Motor voltage
[V]
Motor
frequency [Hz]
Motor current
[A]
Phases
TLCX11 0-230 0-2500 3 3
TLCX12 0-230 0-2500 7 3
98441113117,c325,11.00
TLC51x Installation
Twin Line Controller 51x 4-1
4 Installation
4.1 Electromagnetic compatibility, EMC
Strong electromagnetic interference occurs in the power area of the
positioning controller which can influence signals coming from control
cables and system parts and which can endanger the operational
reliability of the system if suitable protective measures are not taken.
The positioning controller meets the requirements of the EC directives
on EMC noise resistance and on noise output as specified in
EN-61800-3, as long as the following steps have been taken during
installation.
Control cabinet setup
Cabling
EMC measures Effect
Use zinc or chrome-plated mounting plates, make
large contact surface connections for metal parts,
remove paint from bearing surfaces
Good conductivity due
to two-dimensional
contacts
Ground the control cabinet, door and mounting
plate by means of metal tapes or cables with a
diameter greater than 10 mm2
Reduction of EMC
emissions
Mount power components and control components
separately, minimum distance 25 cm, reduce inter-
ference injection from either component by using
multiple-ground dividing plates
Reduction of mutual
interference injection
Fit switching devices such as contactors, relays or
solenoids with interference suppressors or spark
suppressors (e.g. diodes, varistors, RC elements)
Reduction of mutual
interference injection
EMC measures Effect
Keep cables as short as possible, no ’safety loops’,
short cables from the star point in the control
cabinet to outlying ground connection
Avoidance of capacitive
and inductive interfer-
ence injection
Use cable clamps to connect a large surface area of
the shield from all shielded cables to the mounting
plate at the control cabinet entry.
Reduction of EMC
emissions
Lay the cables spatially separated from each other:
- Signal cables and power cables
- Mains and motor cables
- Mains filter input and output cables
Reduction of mutual
interference injection,
reduction of emissions,
increasing resistance to
interference
Connect large surface areas of cable shields, use
cable sleeves and tapes
Low shielding effect if
the connection is not
made over large surface
area, reduction of
emissions
Ground a large surface area of the shields of digital
signal cables at each end or via sub-D housing
Avoidance of interfer-
ence on control cables,
reduction of emissions
Screen analogue signal lines at one end only at the
power drive, at the other end via capacitor, e.g. 10
nF / 100V MKT
Avoidance of ripple
loops due to low-fre-
quency interference
4-2 Twin Line Controller 51x
Installation TLC51x
98441113117,c325,11.00
Fig. 4.1 EMC measures and subdivisions of the control cabinet
Use only shielded motor cables with copper braid-
ing and at least 85% covering, ground a large sur-
face area of the shield at each end. Only use motor
and encoder cables recommended by SIG Positec.
Controlled discharge of
interference currents,
reduction of emissions
If the motor and machine are not conductively con-
nected, for example by an insulated Flange or a
non-flat connection, ground the motor with a
grounding wire (> 10 mm2
) or ground strap.
Reduction of emissions,
increase in resistance to
interference
Ground unused cable wires from control circuits at
both ends of the cable (does not apply to motor
cable)
Additional shielding
effect
EMC measures Effect
98441113117,c325,11.00
TLC51x Installation
Twin Line Controller 51x 4-3
WARNING!
Malfunctions and risk of injury!
The EMC of cables must be guaranteed if the unit is to
function reliably and free of faults. The use of unsuitable,
non-EMC-secure cables can damage the unit and lead to
malfunctions.
Motor leads and encoder cables are especially critical signal circuits.
Use SIG Positec cables for them. SIG Positec motor and encoder cables
have been tested for EMC stability. In addition these cables can be used
as trailing cables.
You can find information on the cables in the section ’Accessories and
spare part’ on page 10-1.
4-4 Twin Line Controller 51x
Installation TLC51x
98441113117,c325,11.00
4.2 System components
Besides the components included in the scope of delivery, further
system components are required for connecting the positioning control-
ler:
• Three phase stepping motor
• Motor cable
• Signal cable to fit device version:
RS422-C module: encoder cable for RS422-C
RM-C module (optional): encoder cable for RM-C
PULSE-C module: encoder cable for PULSE-C
PBDP-C module: bus cable for Profibus-DP
CAN-C module: bus cable for CAN-Bus, CANOpen and DeviceNet
RS485-C-module: bus cable for serial online bus
IBS-C module: bus cable for Interbus
• RS232 cable with PC connecting plug
• Mains cable and mains fuses
• External power supply unit, 24 VDC with safe isolation - PELV
• External mains filter for units with no built-in mains filter
• Additional filters and chokes for mains connection and motor
connection, depending on system configuration
• NC control or PLC for automatic operation
• PC or laptop with Windows 95, 98 or NT for commissioning with
operating software.
98441113117,c325,11.00
TLC51x Installation
Twin Line Controller 51x 4-5
4.3 Mechanical installation
Before installation... ̈ Check the unit for outwardly visible damage such as dents in the
housing or broken connection terminals. Do not install damaged
units.
DANGER!
Danger from high voltages, possibility of permanent dam-
age to the unit’s electronic circuitry
Make sure when installing that no loose parts such as
pieces of wire or mounting parts fall into the unit. Loose,
conductive parts inside the unit can endanger life by
forming parasitic voltages and permanently damaging the
unit through short-circuits.
4-6 Twin Line Controller 51x
Installation TLC51x
98441113117,c325,11.00
4.3.1 Positioning controller TLC51x mounting
Control cabinet The control cabinet must be big enough to allow both unit and accesso-
ries such as ballast resistor controller and holding brake controller to be
firmly mounted and connected in line with EMC requirements.
Operating heat from the unit and other components as well as the heat
produced by the ballast resistors must be able to dissipate by means of
the switch cabinet ventilation.
Mounting distances The unit is fitted with a built-in fan. Ventilation slots on and under the unit
must be kept at least 70 mm away from neighbouring units or walls.
Fig. 4.2 Mounting distances, dimensions in mm
̈ Position the unit in the control cabinet such that the heated air flow
from other units, for example from an external ballast resistor, does
not result in undesired heating of the cooling air.
̈ Mount the unit vertically with the mains connection at the top.
̈ Mount the unit on a galvanized metal plate. The back wall of the unit
must be in good contact with the metal plate across its whole
surface area.
Painted surfaces have an insulating effect. Before fixing the
unit to a painted mounting plate, scratch off the paint over
a wide surface area in the places where the unit is to be
mounted, to ensure that it has a good connection with the
grounded plate.
98441113117,c325,11.00
TLC51x Installation
Twin Line Controller 51x 4-7
4.3.2 Mounting the positioning controller TLC51xP
Mounting distances Version P units must be mounted at a minimum distance of 10 mm from
neighbouring devices.
Positioning controller connections are routed out of the bottom of the
housing. There must be 20 centimetres of space under the unit in order
to ensure that connecting cables do not have to be bent.
There is a ventilation element on the bottom of the unit. Do not remove
the protective cover!
The unit must be mounted vertically in order to maintain its water
protection grade.
Fig. 4.3 Mounting distances, dimensions in mm
4-8 Twin Line Controller 51x
Installation TLC51x
98441113117,c325,11.00
4.3.3 Fitting the unit label
The unit label supplies information on the meaning of all operating states
displayed on the 7-segment display, and on signal interface assignment.
An example of the unit label which you can copy is provided in section
’Unit label’, Page 11-1.
TLC51x ̈ Stick the unit label on the inside of the hood on the side where the
signal plugs are connected.
̈ After the electrical installation has been completed and the unit
hood mounted, the cables for connection to the mains and the
cables for both upper signal connections are led out through the top
of the hood, while the motor cable and other signal cables are taken
out through the bottom.
TLC51xP ̈ Stick the label to the side of the Twin Line Unit.
Fig. 4.4 Sticking the unit label in the side of the hoodto the side of the Twin
Line Unit
98441113117,c325,11.00
TLC51x Installation
Twin Line Controller 51x 4-9
4.3.4 Installing accessories to the standard unit
Mains filter The positioning controller is supplied with a built-in mains filter as
standard. A special version of the unit can also be ordered with no mains
filter.
Do not use the units with external mains filters unless you can make test
measurements at the unit of the functioning and the EMC of a selected
mains filter.
The type plate on the front of the unit states whether a mains filter is built
in or not:
• F: With mains filter, e.g. TLC51x F
• NF: Without mains filter, e.g. TLC51x NF
Select a two-stage mains filter, e.g. for a frequency converter. The size
and selection of a suitable filter is for the system designer to decide.
̈ Fit the mains filter near the mains connection and on the same
mounting plate. The length of cable to the positioning controller
should not be longer than 50 cm. The cable must be shielded and
grounded at both ends.
4-10 Twin Line Controller 51x
Installation TLC51x
98441113117,c325,11.00
4.3.5 Mounting version P accessories
Terminal angle Version P offers a terminal angle as an accessory which is used for
additional wiring.
̈ Open the front plate with the three mounting screws.
̈ Fix the terminal angle to the top left-hand side of the top of the
housing, using two M3 screws.
Fig. 4.5 Connection of terminal angle
98441113117,c325,11.00
TLC51x Installation
Twin Line Controller 51x 4-11
4.4 Electrical installation
WARNING!
Malfunctions and danger of injury arising from interference
with other units!
Connect the unit correctly with respect to EMC. Control
signals suffering interference can generate unexpected
signal states which can impair the functioning of the unit.
DANGER!
Electric shock from high voltage!
Follow safety rules when working on electrical systems:
• Switch off the power to the unit
• Make sure the unit cannot be switched on again inadvertently
• Confirm that no voltage is present
• Cover or shield any neighbouring system parts which are live.
DANGER!
Electric shock from high voltage!
Work on the power supply circuit may only be carried out
when the power supply has been switched off.
Lock the main switch and lock access to it.
Installing the positioning controller and other components and connect-
ing it to the power supply may only be carried out by qualified personnel.
4-12 Twin Line Controller 51x
Installation TLC51x
98441113117,c325,11.00
4.4.1 Electrical installation TLC51xP
For TLC51xP units, most of the electrical connections are made inside
the housing.
The following connections are made to the underside of the housing:
• connection for PC or HMI operating unit via 9-pin sub-D socket
• mains connections via circular power plug
Fig. 4.6 Connection example for the TLC51xP unit
̈ Open the front plate via the three mounting screws.
̈ Make the necessary connections to:
• motor
• position response signal
• field bus
• signal interface for manual operation
98441113117,c325,11.00
TLC51x Installation
Twin Line Controller 51x 4-13
You will find details on individual connections in the following
sub-sections
̈ Place the grommets on the cables. Only use grommets whose
inside diameter matches that of the cables.
̈ Mount the grommets as shown in Fig. 4.6.
̈ Earth the unit at the grounding point at the back of the unit near the
bottom. Connect them to system earth and the machine bed.
̈ Close the front plate with the three screws.
The holding brake controller can be built into the unit as an optional
extra.
The fan and the holding brake controller are already connected to pins
32 and 34.
4-14 Twin Line Controller 51x
Installation TLC51x
98441113117,c325,11.00
4.4.2 Mains connection
Fig. 4.7 Mains connection for single-phase units
Standard unit ̈ In the case of the single-phase unit, connect the mains cables to
screw terminals PE, N and L
• The correct torque for the terminal screws is 0.4 - 0.5 Nm.
• For units without a mains filter, any mains cable over 20 cm in
length must be shielded between the filter and the unit terminals
and grounded at both ends.
• The individual wires of the cable can be connected without wire end
ferrules.
• For units with a hood, the cable must be routed upwards from the
point of connection.
Version P ̈ Connect the power cable to the mains plug using terminals 1, 2 and
PE.
̈ Do not use a plug in for a three-phase unit instead of one for
single-phase units. The unit can be damaged.
Both versions • The connection diameter for the mains cables is 1.5 to 2.5 mm2
.
• Fit a fuse in the mains phase: for a 230 V connection: 10 A
(C, K-characteristic or similar).
• The additional PE terminal must be connected to the housing on
account of the high leakage currents.
Wire end ferrules If you use wire end ferrules, pay attention to the following:
• Applies to TLC532 only: Do not use end ferrules with a plastic collar
on wires with a cable diameter of 2.5 mm2
.
• Only use square end ferrules to ensure that they cannot work loose
after screws are tightened.
• Strip the insulation from the cable to a length of 10 mm.
Earth leakage circuit-breaker If a fault occurs, fault currents with DC component may arise. For
single-phase units, an e.l.c.b. for fault currents with a pulsating DC
component can be fitted.
98441113117,c325,11.00
TLC51x Installation
Twin Line Controller 51x 4-15
4.4.3 Motor connection TLC51x
DANGER!
High voltage danger due to induced voltage!
Do not touch the wires or contacts of the motor cable when
the motor is turning. Even when they are not connected to
the positioning controller motors will create high induced
voltages when the motor shaft rotates. Make sure that the
motor is not driven by external sources while installation
work is going on.
Connecting motor wires ̈ Connect the motor wires and protective ground to terminals U, V, W
and PE. The assignment of wires must be the same at the motor as
at the unit.
Fig. 4.8 Motor cable connection to unit
Fig. 4.9 Motor cable connection to motor, motor plug from the outside
Terminal Connection Colour
U motor wire brown (bn)
V motor wire blue (bl)
W motor wire black (bk)
PE protective conductor (screen tracer wire) -
4-16 Twin Line Controller 51x
Installation TLC51x
98441113117,c325,11.00
• Cable cross-section: 1.5 mm2
• Maximum cable length: 20 m
• The tightening torque for the terminal screws is 0.4 Nm-0.5 Nm.
• The individual conductors of the cable can be connected without
wire end ferrules.
• For units with a hood, the cable must be routed upwards from the
point of connection.
• For the PE connection you must use the shield drain wires.
Fig. 4.10 Preparing the motor cable
Wire end ferrules If you use wire end ferrules, pay attention to the following:
• Only use square end ferrules to ensure that they cannot work loose
after screws are tightened.
• Do not use end ferrules with a plastic collar on wires with a cable
diameter of 2.5 mm2.
• The wire must fill the wire end ferrule over its whole length. Only
then has the connection been safely carried out, ensuring maximum
current carrying capacity and vibration resistance.
EMC measures The motor cable is a source of interference and must be carefully laid:
• The shield braiding of the motor cable must be connected to the
motor housing and to the unit housing as well as to the switch
cabinet entry with a large surface area connection. Use the
supplied shielded terminal for the connection to the housing.
• The motor cable and signal cables must be laid at a distance of at
least 20 cm from each other. If the distance is less than this, the
motor cable and signal cables must be separated by grounded
screening plates.
98441113117,c325,11.00
TLC51x Installation
Twin Line Controller 51x 4-17
4.4.4 Motor connection with holding brake to TLC51xP
DANGER!
Danger of high voltages from inductance!
Do not touch motor cable wires and contacts while the
motor is moving. Even when they are not connected to the
positioning controller, motors will build up dangerous
induced voltages if the motor shaft is turned. Make sure
during installation that the motor cannot be driven by
another device.
Connecting the motor cable ̈ Connect motor wires and protective conductor to terminals U, V, W
and PE. Wiring assignment for motor and unit must match.
Fig. 4.11 Connection of motor cable and holding brake controls to the unit
You will find details on connecting the motor cable to the motor, the use
of wire end ferrules and EMC measures in the chapter entitled ’Motor
connection TLC51x’ from page 4-15.
A holding brake connection can be built into the unit as an optional extra.
̈ Connect the holding brake control wires to terminals B+ und B-.
The power required by the holding break controller depends on the
holding brake switching current:
holding brake controller input current [A]= 0.5 A + switching current [A]
The voltage reduction function is described in the chapter entitled
’Braking function with TL HBC’ from page 7-26.
4-18 Twin Line Controller 51x
Installation TLC51x
98441113117,c325,11.00
4.4.5 Connecting the 24 V supply voltage
̈ Route the 24 V supply lines to the unit via a grounded 24 VDC
transformer (PELV).
Fig. 4.12 24 V connection
• The second 24 VDC and GND connection can be used as a 24 V
output for further consumers or for cascading several Twin Line
units; the maximum terminal current is 7.5 A.
• In selecting your 24 V power supply unit make sure you take into
account any additional consumers, such as the holding brake and
the holding brake controller.
• To ensure that the position of the motor is preserved when the
supply voltage to the power unit is switched off, the external 24 V
supply voltage must remain switched on, and no external torque
may affect the motor.
• Lay the 24 V supply line at a distance of at least 20 cm from other
lines to ensure EMC protection. For cable lengths of more than 2 m,
make a twisted pair of the 0 V and 24 V supply wires.
• The tightening torque for the terminal screws 1-34 is
0.22 Nm-0.25 Nm.
Version P • Fan and holding brake controller are already connected to pins 32
and 34.
Pin Signal Active Explanation I/O
31 24VDC - 24 VDC supply voltage, internally connected to pin 32 -
32 24VDC - 24 VDC supply voltage -
33 24VGND - GND for 24 VDC voltage, connected internally to pins 34 and 16
(ACTIVE_GND)
-
34 24VGND - GND für 24 VDC voltage -
98441113117,c325,11.00
TLC51x Installation
Twin Line Controller 51x 4-19
4.4.6 Connection to the signal interface
The positioning controller can be controlled manually or automatically
via the lines of the signal interface.
Fig. 4.13 Signal interface: 1-30: inputs / outputs, 31-34: 24 V connection
Connection ̈ The connections of the signal interface should be wired up as
required by the operating mode selected. See also the wiring
examples starting on page 4-44.
̈ Connect inputs LIMP, LIMN and STOP to the +24 V voltage if they
are not being used or switch them out via the parameter
’Settings.SignEnabl’. See page 7-22.
The terminal blocks of the signal interface must only be wired up when
the unit is in a de-energized state.
Variable interface connections The assignment of signal interface connections depends on the
switching status of the ’Settings.IO_mode’ parameter, see page 6-3:
• 'IO_mode' = '0': input signals are used for setting addresses and
baud rates in field bus operation This is the preset on switching on
the positioning controller.
• 'IO_mode' = '1': input signals I_0 to I_13 and output signals Q_0 to
Q_4 can be freely set.
• 'IO_mode' = '2': input / output signals are fixed.
4-20 Twin Line Controller 51x
Installation TLC51x
98441113117,c325,11.00
The following table shows the assignment of interface connections.
Identical signals for all assignments are shown in the left-hand column
by an arrow ’⇒’.
Pin Signal at
IO_mode=0/1
Signal at
IO_mode=2
aktive Explanation I/O
1 ADR_1 / I_8 DATA_1 high ADR_1: Bit 0 for the network address
DATA_1: Bit 0 for selecting a list number
I
2 ADR_2 / I_9 DATA_2 high ADR_2: Bit 1for the network address
DATA_2: Bit 1 for selecting a list number
I
3 ADR_4 / I_10 DATA_4 high ADR_4: Bit 2 for the network address
DATA_4: Bit 2 for selecting a list number
I
4 ADR_8 / I_11 DATA_8 high ADR_8: Bit 3 for the network address
DATA_8: Bit 3 for selecting a list number
I
5 ADR_16 / I_12 DATA_16 high ADR_16: Bit 4 for the network address
DATA_16: Bit 4 for selecting a list number
I
6 ADR_32 / I_13 DATA_32 high ADR_32: Bit 5 for the network address
DATA_32: Bit 5 for selecting a list number
I
7 ⇒ IO24VDC - Power supply for inputs / outputs I
8 ⇒ IO24VDC - Power supply for inputs / outputs I
9 Q_0 / Q_0 AUTOM_ACK high AUTOM_ACK: acknowledgment signal to AUTOM signal O
10 Q_1 / Q_1 AXIS_ADD_INF
O
high AXIS_ADD_INFO: additional information on current
movement
O
11 Q_2 / Q_2 AXIS_END high AXIS_END: end of movement processing, drive at standstill O
12 Q_3 / Q_3 AXIS_ERR high AXIS_ERR: fault detection during movement O
13 Q_4 / Q_4 RDY_TSO/Q4 high RDY_TSO: data set ready, active in operating states 4 to 7,
max. 400 mA
O
14 ⇒ TRIGGER high Trigger output, signal value is switched via position / signal
list
O
15 ⇒ ACTIVE_CON high Motor under power, control signal for brake controller
TL HBC, output max. 400 mA 1)
O
16 ⇒ ACTIVE_GND high 0 V signal for brake controller TL HBC, internally to
24VGND 1)
O
17 ⇒ ANALOG_IN+ - analogue control input ±10 V I
18 ⇒ ANALOG_IN- - analogue control input 0 V, reference potential to pin 17
ANALOG_IN+
I
19 BAUD_1 / I_0 MAN_P high BAUD_1: Bit 0 for setting baud rate
MAN_P: manual movement, positive motor rotation
I
20 BAUD_2 / I_1 MAN_N high BAUD_2: Bit 1 for setting baud rate
MAN_N: manual movement, negative motor rotation
I
21 BAUD_4 / I_2 MAN_FAST high BAUD_4: Bit 2 for setting baud rate
MAN_FAST: manual selection slow or fast
I
22 CAPTURE1 or
I_5
FAULT_RESET high CAPTURE1: quick input for exact capture of current position
data
FAULT_RESET: reset fault signal
I
23 ⇒ CAPTURE2 or
I_6
high CAPTURE2: quick input for exact capture of current position
data
I
24 ADR_64 / I_7 TEACH_IN high ADR_64: Bit 6 for the network address
TEACH_IN: trigger signal for storing current setpoint in list
data memory
I
25 ⇒ REF low 2)
Reference switch signal I
98441113117,c325,11.00
TLC51x Installation
Twin Line Controller 51x 4-21
Minimum interface connections The following signal interface connections must be made:
• Pin 26: LIMP
• Pin 27: LIMN
• Pin 28: STOP
• Pin 31 and Pin 33: 24 V GND
• Pin 7 and Pin 8 must be connected even if the signal interface is
not used.
Cable specification Cables for digital signals:
• Minimum cross-section 0.14 mm2
, max. cross-section 1.5 mm2
• Maximum length of the minimum cross-section 15 m.
Function The signal interface can be used to control the positioning controller
manually or in automated mode, to report operating states and to control
peripheral devices.
The signal interface is principally designed for field bus operation. Signal
inputs such as MAN_N, MAN_P or AUTOM, and outputs such as
AXIS_ERR, AXIS_END or AUTOM_ACK are not required for it. In field
bus operation these signals are changed and evaluated via transmitted
and received data.
The signal interface can operate in three pin assignment modes:
• Settings for address, baud rate and field bus profile in field bus
operation
• free assignment of interface
• fixed assignment of interface
Pin assignment can be changed by means of the 'Settings.IO_mode'
parameter, for this see ’Operating modes of the positioning controller’,
page 6-1.
26 ⇒ LIMP low 2)
limit switch signal positive motor rotation I
27 ⇒ LIMN low 2)
limit switch signal negative motor rotation I
28 ⇒ STOP low 2)
Quick-Stop I
29 MODE_2 / I_4 AUTOM high MODE_2: bit1 for setting field bus profile
AUTOM: automatic mode (high) or manual mode (low),
acknowledgement via AUTOM_ACK
I
30 MODE_1 / I_3 ENABLE high MODE_1: bit0 for setting field bus profile
ENABLE: enable (high) or disable (low) power amplifier
I
1) Version P: Holding brake fix connected
2) Signal level for default setting of ’Settings.SignEnabl’ and ’Settings.SignLevel’ parameters
Pin Signal at
IO_mode=0/1
Signal at
IO_mode=2
aktive Explanation I/O
4-22 Twin Line Controller 51x
Installation TLC51x
98441113117,c325,11.00
Setting address and baud rate in
field bus operation
Condition: parameter ’Settings.IO_mode’ = 0:
After switching on the positioning controller, device address and baud
rate can be specified via input signals.
Fig. 4.14 Signal interface inputs for field bus addressing
Network address The network address is bit-coded via inputs ADR_1 to ADR_64. ADR_1
is the lowest value bit.
Example: for address 17, inputs ADR_16 and ADR_1 must carry 24 V.
The remaining inputs remain open.
Network address: 0 1 2 3 4 5 6 ... 125 126 127
Pin: input
1: ADR_1 1)
1) Required for DeviceNet
0 1 0 1 0 1 0 ... 1 0 1
2: ADR_2 1)
0 0 1 1 0 0 1 ... 0 1 1
3: ADR_4 1)
0 0 0 0 1 1 1 ... 1 1 1
4: ADR_8 1)
0 0 0 0 0 0 0 ... 1 1 1
5: ADR_16 1)
0 0 0 0 0 0 0 ... 1 1 1
6: ADR_32 1)
0 0 0 0 0 0 0 ... 1 1 1
24: ADR_64 0 0 0 0 0 0 0 ... 1 1 1
98441113117,c325,11.00
TLC51x Installation
Twin Line Controller 51x 4-23
Baud rate For field bus modules CAN-C and RS485-C, the baud rate can be
specified bit-coded at inputs BAUD_1 to BAUD_4 when the unit is
started up. BAUD_1 is the lowest value bit.
If an illegal baud rate is set, field bus processing cannot be activated.
The Twin Line unit issues an error message on a connected operating
unit. A network branch can only be run on one baud rate which must be
set on all devices.
Profile setting For the CAN-field bus module, the field bus profile can be set in bit-
coded form via inputs MODE_1 and MODE_2 when the unit is started
up.
A network branch can only be run on one network profile which must be
set on all devices.
Baud rate CAN-C Baud rate RS485-C BAUD_4 BAUD_2 BAUD_1
20 kBaud 1200 Baud 0 0 0
125 kBaud 1)
1) Can be set in DeviceNet
9600 Baud 0 0 1
250 kBaud 1)
19,2 kBaud 0 1 0
500 kBaud 1)
38,4 kBaud 0 1 1
800 kBaud reserved 1 0 0
1 MBaud reserved 1 0 1
reserved reserved 1 1 0
reserved reserved 1 1 1
Profile MODE_2 MODE_1
CAN-Bus 0 0
CANOpen-Profil 0 1
DeviceNet-Profil 1 0
4-24 Twin Line Controller 51x
Installation TLC51x
98441113117,c325,11.00
Free assignment of interface Parameter ’Settings.IO_mode’ = 1:
With free interface assignment, inputs I_0 to I_13 and outputs Q_0 to
Q_4 can be assigned additional functions by means of field bus
commands.
Fig. 4.15 Signal interface inputs and outputs for free assignment
Input and output signal states can be read and changed via parameters.:
• Read input signals via the 'I/O.IW1_act' parameter“
• write output signals via the 'I/O.QW0_act' parameter.
You will find details on this in ’Checking inputs and outputs’ on page
5-12.
98441113117,c325,11.00
TLC51x Installation
Twin Line Controller 51x 4-25
Fixed interface assignment Parameter ’Settings.IO_mode’ = 2:
With fixed assignment, control signals and switching signals for manual
mode and for teach-in are available at the signal interface.
Fig. 4.16 Signal interface inputs and outputs for fixed assignment
Manual operation is described on page 6-9 in the chapter ’Operating
modes of the positioning controller’ and teach-in mode on page 7-7 in
the chapter ’Functions of the positioning controller’.
Signal interface LEDs Five LEDs at the signal interface show when current is flowing through
signal inputs.
The positioning controller will abort movement as soon as one of the
signal inputs LIMP, LIMN or STOP becomes active.
Fig. 4.17 LED display of signal interface
Enablement of the input signals LIMP, LIMN and STOP and evaluation
as active low or high can be changed via the parameters
'Settings.SignEnabl' and 'Settings.SignLevel'. See page 7-22.
Output signals remain unchanged for at least 0.5 ms.
4-26 Twin Line Controller 51x
Installation TLC51x
98441113117,c325,11.00
4.4.7 Connection to the RS232 interface
Connection The RS232 interface, equipped with a 9-pole Sub-D socket with UNC
thread is wired up 1:1 with the PC or with the Twin Line HMI. The
positioning controller supplies the Twin Line HMI with the operational
voltage via pin 9.
Fig. 4.18 Cables for the RS232 interface at the PC or Twin Line HMI View:
Solder side of cable connectors
Cable specification • Screened cable
• Cable length maximum 15 m
• Minimum cross-section of the signal conductors 0.25 mm2
, for
supply voltage and ground line 0.5 mm2
• Shield grounded at both ends
Function The positioning controller is started up and operated via the serial
RS232 interface. Use the Twin Line Control Tool operating software here
to connect up the Twin Line HMI hand-held operating unit or a PC.
You can plug the Twin Line HMI directly into the unit or connect it by
cable to the unit. It is supplied with voltage by the unit.
Networking of additional units via the RS232 interface is not possible.
Pin Signal Colour 1)
Pair Explanation I/O
1 - - - Not assigned -
2 TxD brown - Send data to the input device O
3 RxD white - Data received from the input device I
4 - - - Not assigned -
5 GND green - Ground line -
6 - - - Not assigned -
7 - - - Not assigned -
8 - - - Not assigned -
9 VDD yellow - 10 VDC supply for the TL HMI O
1) Colour details refer to the cable which is available as an accessory.
98441113117,c325,11.00
TLC51x Installation
Twin Line Controller 51x 4-27
4.4.8 Connection to the RS422-C module
Module interface The RS422-C module is equipped with a Sub-D socket, 15-pin with an
M3 threaded connection.
Fig. 4.19 Interface of the encoder module
In the case of units with a hood the cable must be routed downwards
from the connection.
Cable specification • Shielded cable
• Minimum diameter of signal wires 0.25 mm2
, 5VDC and 5VGND
0.5 mm2
• Twisted-pair wires
• Shield grounded at each end
• Maximum cable length 100 m
Pin Signal Colour 1)
Pair Explanation I/O
1 A white 1 Encoder signal channel A I
9 A brown 1 Channel A, negated I
12 B green 2 Encoder signal channel B I
5 B yellow 2 Channel B, negated I
2 2)
5VDC rot 3 Encoder supply, 5 V, max. 300 mA O
3 5VGND blue 3 Encoder supply, ground O
10 +SENSE violet 4 Sense line positive, connect on encoder side to
5VDC
3)
I
11 -SENSE black 4 Sense line negative, connect on encoder side to
5VGND
3)
I
13 I grey 5 Channel index pulse I
6 I pink 5 Channel index pulse, negated I
7 2)
T_MOT (5VDC) grey / pink 6 Line monitoring, connect signal at encoder to
pin 2: 5VDC
I
4 - red / blue 6 Not assigned -
8 - - Not assigned -
14 - - Not assigned -
15 - - Not assigned -
1) Colour details refer to the cable which is available as an accessory.
2) Connect together signals 2 (5VDC) and 7 (T_MOT) for line monitoring in the encoder plug
3) Sense line must be connected for activating the 5VDC.
4-28 Twin Line Controller 51x
Installation TLC51x
98441113117,c325,11.00
CAUTION!
Destruction of external encoder!
Only connect cable when power supply is switched off.
Otherwise the encoder can be destroyed.
Function Setpoints are specified via externally injected A/B signals and index
pulse under electronic gear operating mode
The RS422-C module receives the A/B encoder signals and index pulse
as a position setpoint for the positioning controller. The maximum input
frequency is 400 kHz.
Fig. 4.20 Time diagram with A-, B and index pulse signal, counting forwards
and backwards
Monitoring The T_MOD signal displays wire break at low signal.
Incorrect transmission of position data when voltage drop
excessive. The difference in the ground potential of
24VGND between two units connected via ESIM1-C/
ESIM2-C or RS422-C must be less than 1 volt. Otherwise
use cable of larger cross-section for 24VGND.
98441113117,c325,11.00
TLC51x Installation
Twin Line Controller 51x 4-29
4.4.9 Connection to the PULSE-C module
Module interface The PULSE-C module is fitted with a 15-pole sub-D plug with an M3
thread.
Fig. 4.21 Interface of the pulse direction module
For units with a hood, the cable must be led upwards from the point of
connection.
Cable specification • Shielded cable
• Minimum diameter of signal wires 0.14 mm2
• Twisted-pair wires
• Grounding of screen at both ends
• Maximum length at RS422 connection 100 m with open collector
connection up to 10 m
Function Setpoints are specified via externally injected pulse direction signals
under electronic gear operating mode
Pin Signal Colour 1)
Pair Explanation I/O
1 PULSE (PV) white 1 motor step „Pulse“ or motor step forwards „PV“ I
9 PULSE (PV) brown 1 motor step „Pulse“ or motor step forwards „PV“, inverted I
2 DIR (PR) green 2 sense of rotation „Dir“ or motor step backwards „PR“ I
10 DIR (PR) yellow 2 sense of rotation „Dir“ or motor step backwards „PR“,
inverted
I
3 ENABLE grey 3 enable signal I
11 ENABLE pink 3 enable signal, inverted I
7 GND grey/pink 4 ground, internally via resistor to 24 VGND I
8 ACTIVE red/blue 4 drive ready O
13 FUNCT_OUT white/green 5 reserved, internally to Low level O
14 GND brown/
green
5 ground, internally via resistor to 24 VGND I
15 GND white/yel-
low
6 ground, internally via resistor to 24 VGND I
4 - blue - not assigned -
12 - red - not assigned -
5 - black - not assigned -
6 - purple - not assigned -
1) Colour specifications relate to the cable which is available as an accessory.
4-30 Twin Line Controller 51x
Installation TLC51x
98441113117,c325,11.00
Reference signals for step-by-step positioning of the motor and control
signals for the motor current, angular resolution and for enabling the
power amplifier are transmitted via the pulse direction interface. At the
same time the unit signals operational readiness of the drive or a
possible malfunction via the interface.
PULSE (PV), DIR (PR) The square-wave signals PULSE (PV) and DIR (PR) can be combined
for two operating modes. The operating mode is set with the parameter
’M1.PULSE-C’.
• PULSE/DIR: Pulse direction signal
PV/PR: Pulseforward - Pulsebackward signal
Pulse direction operating mode The motor executes an angular step with the leading edge of the PULSE
signal. The direction of rotation is controlled by the DIR signal.
Fig. 4.22 Pulse direction signal
Pulseforward - pulsebackward
operating mode
The PV (PULSE) signal is used to execute a movement of the motor in
a clockwise direction, and the PR (DIR) signal a movement in an anti-
clockwise direction.
Fig. 4.23 Pulseforward/Pulsebackward signal
Pin Signal Function Value
1, 9 PULSE Motor step low -> high
2, 10 DIR Clockwise direction of rotation
Anticlockwise direction of rotation
low / open
high
Pin Signal Function Value
1, 9 PULSE (PV) PV: Step in a clockward direction of
rotation
low -> high
2, 10 DIR (PR) PR: Step in anticlockwise direction of
rotation
low -> high
98441113117,c325,11.00
TLC51x Installation
Twin Line Controller 51x 4-31
The maximum permissible frequency of PULSE (PV) and DIR (PR) is
200 kHz.
ENABLE The ENABLE signal enables the power amplifier so that the motor can
be controlled.
If there is no operating fault, the ACTIVE output displays operational
readiness for approx 100 ms after the power amplifier is enabled.
ACTIVE The output shows the operational readiness of the positioning controller.
ACTIVE is an open collector output to GND. The logically negated signal
function is available at the ACTIVE_CON output of the signal interface.
Circuit of the signal inputs It is recommended that signal inputs be switched via the RS422
interface.
The diagram shows the circuitry of the signal inputs PULSE (PV), DIR
(PR) and ENABLE. Up to 10 inputs of the PULSE-C module can be
connected to an RS422-C transmitter.
Fig. 4.24 Circuit of the signal inputs, L: Cable length
For cable lengths ≤10 m and frequencies ≤50 kHz, Open Collector
outputs can be used if interference resistance requirements are low.
Pin Signal Function Value
3, 11 ENABLE Disable power amplifier
Enable power amplifier
low / open
high
Pin Signal Function Value
8 ACTIVE Power amplifier is disabled Power
amplifier is enabled
high
low
4-32 Twin Line Controller 51x
Installation TLC51x
98441113117,c325,11.00
4.4.10 Connection to the RM-C module
The optional encoder interface is only included in units with rotation
monitoring.
Module interface The interface is fitted with a 15-pole, M3 threaded Sub-D socket.
Fig. 4.25 Interface for rotation monitoring, view of motor plug:soldering side
For units with a hood, the cable must be led upwards away from the
terminals.
Cable specification • Shielded cable
• Minimum cross-section of signal wires 0.25 mm2
, 5VDC and
5VGND 0.5 mm2
• Twisted-pair wires
• Screen earthed on both sides
• Maximum cable length 100 m
Pin Signal Colour 1)
Pair Explanation I/O
1 A white 1 encoder signal channel A I
9 A brown 1 channel A, inverted I
12 B green 2 channel B I
5 B yellow 2 channel B, inverted I
2 5VDC red 3 Encoder power supply, 5 V, max. 300 mA O
3 5VGND blue 3 Encoder power supply, ground O
10 +SENSE purple 4 Sense wire positive 2)
I
11 -SENSE black 4 Sense wire negative 2)
I
13 I grey 5 Index pulse channel I
6 I pink 5 Index pulse channel, inverted I
7 TEMP_MOT grey/pink 6 temperature error, inverted I
4 - red/blue 6 not assigned -
8 - - - not assigned -
14 - - - not assigned -
15 - - - not assigned -
1) Colour details refer to the cable available as an accessory.
2) Sense line must be connected for activating the 5VDC.
98441113117,c325,11.00
TLC51x Installation
Twin Line Controller 51x 4-33
ATTENTION!
Destruction of external encoder!
Only connect cable when power supply is switched off.
Otherwise the encoder can be destroyed.
Function The connection is used to convey the angular position of the motor
incrementally by means of A/B square-wave signals. The unit detects
stepping errors by making comparisons with the setpoint and reports a
contouring error if the threshold value of 6.4° is exceeded. Monitoring
can be switched off via the "Settings.monitorM" parameter, see Chapter
entitled ’Setting phase current and device parameters’ from page 5-7.
Fig. 4.26 Time diagram with A, B and index pulse signals, counting forwards
and backwards
Monitoring The winding temperature of the motor is monitored via the TEMP_MOT
signal. The signal also shows whether the encoder is connected.
Encoder type In order to use the monitoring function, an encoder with 1000 lines must
be fitted.
Pin Signal Function Value
7 TEMP_MOT Temperature range OK
Motor overheating or cable break
high
low
4-34 Twin Line Controller 51x
Installation TLC51x
98441113117,c325,11.00
4.4.11 Connection to the PBDP-C module
Module interface The PBDP-C module is fitted with a 9-pole, SUB-D socket, with UNC
thread.
Fig. 4.27 Field bus module interface connection
A bus terminal forms the docking station to the Profibus. Data lines
between module and bus terminal are wired up 1:1.
Terminals A_LT and B_LT must be connected to wires A and B in the
network by way of the minimum wiring requirement.
For units with a hood, the cable must led downwards from the point of
connection.
Cable specification for connection
to a bus terminal
• Screened cable
• Minimum cross-section of signal wires: 0.14 mm2
• Twisted-pair wires
• Screen grounded at both ends
• Maximum length 100 m
To protect against interference, the screen for digital cables
is connected at both ends. Differences in potential can lead
to excessive current in the screen, and these have to be
prevented by means of bonding lines. Cable cross-section
for lengths up to 200: 16 mm2, for lengths over 200 m: 20
mm2.
Pin Signal Colour Pair Explanation I/O
1 - - 1 not assigned -
6 5VDC - 1 power supply, max. 10 mA for terminator O
2 - - - not assigned -
7 - - - not assigned -
3 B_LT - 2 data line, inverted I/O
8 A_LT - 2 data line I/O
4 RTS - 3 transmission request O
9 - - 3 not assigned -
5 GND - - ground -
98441113117,c325,11.00
TLC51x Installation
Twin Line Controller 51x 4-35
Function Using the PBDP-C field bus module, the positioning controller can be
connected as a slave device to a Profibus-DP network.
The positioning controller receives data and commands from a higher-
ranking device on the bus, or master. By way of acknowledgement the
controller sends status information such as device status and
processing status back to the master device. The exchange of data is
carried out using a special communications protocol.
Data are exchanged cyclically between master and slave devices. Each
device in the network is identified by means of a unique device address
which can be set.
Setting the address The address can be set via the ’M4.addrPbd’ parameter or via inputs
ADR_1 to ADR_64 of the signal interface, see page 4-22.
Baud rate The baud rate is determined by the transmission speed of the master
device.
Display The DATAEXCHANGE LED displays signal connection to the Profibus
master device.
Field bus manual The integration of a Twin Line unit into the field bus is described in the
relevant field bus manuals from SIG Positec in the chapters on
installation and set-up.
4-36 Twin Line Controller 51x
Installation TLC51x
98441113117,c325,11.00
4.4.12 Connection to the CAN-C module
Module interface The CAN-C module is fitted with a SUB-D plug and a SUB-D socket,
both 9-pole with UNC thread. Pin assignment is identical for both
interface connections.
Fig. 4.28 Interface connections of the field bus module with plug and socket
For units with a hood, the cable must be led downwards from the point
of connection.
Cable specification • Screened cable
• Minimum cross-section of signal wires: 0.14 mm2
• Twisted-pair lines
• Screen grounded at both ends
• Maximum length dependent on the number of devices, the baud
rate and signal times. The higher the baud rates, the shorter the bus
cable has to be.Guide values: 40 m at 1 Mbit/s, 500 m at 100 kbit/s
guide values for DeviceNet: 100 m at 500 kbit/s, 500 m at 125 kbit/s
To protect against interference, the screen for digital cables
is connected at both ends. Differences in potential can lead
to excessive current in the screen, and these have to be
prevented by means of bonding lines. Cable cross-section
for lengths up to 200: 16 mm2, for lengths over 200 m:
20 mm2
.
Pin Signal Colour 1)
Pair Explanation I/O
1 - - 1 not assigned -
6 GND green 1 ground -
2 CAN_LOW white 2 Data wire, inverted I/O
7 CAN_HIGH brown 2 Data wire I/O
3 GND grey 3 ground -
8 - pink 3 not assigned -
4 - - - not assigned -
9 - - - not assigned -
5 - - - not assigned -
1) Colour details refer to the cable available as an accessory – the colours used match the CAN guidelines. ! Remember that the
colours do not match the DeviceNet specification.
98441113117,c325,11.00
TLC51x Installation
Twin Line Controller 51x 4-37
Function With the CAN-C field bus module, the positioning controller can be con-
nected as a slave to the following networks:
• CAN-Bus
• CANOpen
• DeviceNet.
The positioning controller receives data and commands from a higher-
ranking device on the bus, or master. By way of acknowledgement the
controller sends status information such as device status and
processing status back to the master device. The exchange of data is
carried out using a special communications protocol.
Every device in the network is identified by means of a unique address
which can be set.
CAN bus display The „CAN-OK“ LED on the CAN-C module lights for approx. two sec-
onds when the field bus data have been correctly received.
CANOpen display The „CAN-OK“ LED on the CAN-C module lights up when a connection
to the device exists. If the connection is broken, the LED flashes: 0.5 sec
on / 0.5 sec off.
DeviceNet display The „CAN-OK“ LED on the CAN-C module displays the status of the
DeviceNet node:
Setting the address The address can be set via the 'M4.addrCan' parameter (see page
12-14) or via inputs ADR_1 to ADR_64 of the signal interface (see
page 4-22).
Baud rate The baud rate can be set with the 'M4.baudCan' parameter (see page
12-14) or via inputs BAUD_1 to BAUD_4 of the signal interface (see
page 4-23).
Field bus profile The field bus profile can be set with the „M4.profilCAN“ parameter (see
page 12-14) or via inputs MODE_1 and MODE_2 of the signal interface
(see page 4-23).
Terminating resistors A terminating resistor of 120 Ω must therefore be connected at both
ends. You will find an appropriate terminator plug in the chapter entitled
„Accessories and spare parts“.
Field bus manual The integration of a Twin Line unit into the field bus is described in the
relevant field bus manual from SIG Positec in the chapter on installation
and set-up.
DeviceNet status Display
OFFLINE flashes (0.2 sec on / 0.8 sec off)
ONLINE (Duplicate MAC ID
Check)
flashes (0.8 sec on / 0.2 sec off)
LINK_OK on
TIMEOUT/FAILURE flashes (0.2 sec on / 0.2 sec off)
4-38 Twin Line Controller 51x
Installation TLC51x
98441113117,c325,11.00
4.4.13 Connection to the RS485-C module
Module interface The RS485-C module is fitted with a SUB-D socket and a SUB-D plug,
both 9-pole with UNC thread. Pin assignment is identical for both
interface connections.
Fig. 4.29 Field bus module interface connection
Only one 12VDC output of the two Sub-D connections may be loaded
with a current of max. 150 mA.
Cable specification • Screened cable
• Minimum cross-section of signal wires: 0.14 mm2
• Twisted-pair wires
• Screen grounded at both ends
• Maximum length 400 m
For units with a hood, the cable must be led downwards from the point
of connection.
To protect against interference, the screen for digital cables
is connected at both ends. Differences in potential can lead
to excessive current in the screen, and these have to be
prevented by means of bonding lines. Cable cross-section
for lengths up to 200: 16 m2
, for lengths over 200 m:
20 mm2 .
Pin Signal Colour Pair Explanation I/O
1 12VDC - 1 power supply O
6 12VDC - 1 power supply O
2 GND - 2 ground for 12VDC power supply O
7 GND - 2 ground for 12VDC power supply O
3 TxD - 3 Transmitted data O
8 TxD - 3 Transmitted data, inverted O
4 RxD - 4 Received data I
9 RxD - 4 Received data, inverted I
5 SGND - - ground -
98441113117,c325,11.00
TLC51x Installation
Twin Line Controller 51x 4-39
Function Using the RS485-C field bus module, the positioning controller can be
connected to a serial bus as a slave device.
The positioning controller receives data and commands from a higher-
ranking device on the bus, a master device. By way of acknowledgement
the controller sends status information such as device status and
processing status back to the master device. The exchange of data is
carried out using a special communications protocol.
Every device in the network is identified by means of a unique address
which can be set.
Display Two LEDs on the RS485-C module show the transfer of transmitted and
received data.
Setting the address The address can be set via the ’M4.addrSer’ parameter or via inputs
ADR_1 to ADR_16 of the signal interface. See page 4-22.
Baud rate The baud rate can be set via the ’M4.baudSer’ parameter or via inputs
BAUD_1 to BAUD_4 of the signal interface, see page 4-23.
Field bus manual The integration of a Twin Line unit into the field bus is described in the
relevant field bus manual from SIG Positec in the chapter on installation
and set-up.
Drive berger lahr
Drive berger lahr
Drive berger lahr
Drive berger lahr
Drive berger lahr
Drive berger lahr
Drive berger lahr
Drive berger lahr
Drive berger lahr
Drive berger lahr
Drive berger lahr
Drive berger lahr
Drive berger lahr
Drive berger lahr
Drive berger lahr
Drive berger lahr
Drive berger lahr
Drive berger lahr
Drive berger lahr
Drive berger lahr
Drive berger lahr
Drive berger lahr
Drive berger lahr
Drive berger lahr
Drive berger lahr
Drive berger lahr
Drive berger lahr
Drive berger lahr
Drive berger lahr
Drive berger lahr
Drive berger lahr
Drive berger lahr
Drive berger lahr
Drive berger lahr
Drive berger lahr
Drive berger lahr
Drive berger lahr
Drive berger lahr
Drive berger lahr
Drive berger lahr
Drive berger lahr
Drive berger lahr
Drive berger lahr
Drive berger lahr
Drive berger lahr
Drive berger lahr
Drive berger lahr
Drive berger lahr
Drive berger lahr
Drive berger lahr
Drive berger lahr
Drive berger lahr
Drive berger lahr
Drive berger lahr
Drive berger lahr
Drive berger lahr
Drive berger lahr
Drive berger lahr
Drive berger lahr
Drive berger lahr
Drive berger lahr
Drive berger lahr
Drive berger lahr
Drive berger lahr
Drive berger lahr
Drive berger lahr
Drive berger lahr
Drive berger lahr
Drive berger lahr
Drive berger lahr
Drive berger lahr
Drive berger lahr
Drive berger lahr
Drive berger lahr
Drive berger lahr
Drive berger lahr
Drive berger lahr
Drive berger lahr
Drive berger lahr
Drive berger lahr
Drive berger lahr
Drive berger lahr
Drive berger lahr
Drive berger lahr
Drive berger lahr
Drive berger lahr
Drive berger lahr
Drive berger lahr
Drive berger lahr
Drive berger lahr
Drive berger lahr
Drive berger lahr
Drive berger lahr
Drive berger lahr
Drive berger lahr
Drive berger lahr
Drive berger lahr
Drive berger lahr
Drive berger lahr
Drive berger lahr
Drive berger lahr
Drive berger lahr
Drive berger lahr
Drive berger lahr
Drive berger lahr
Drive berger lahr
Drive berger lahr
Drive berger lahr
Drive berger lahr
Drive berger lahr
Drive berger lahr
Drive berger lahr
Drive berger lahr
Drive berger lahr
Drive berger lahr
Drive berger lahr
Drive berger lahr
Drive berger lahr
Drive berger lahr
Drive berger lahr
Drive berger lahr
Drive berger lahr
Drive berger lahr
Drive berger lahr
Drive berger lahr
Drive berger lahr
Drive berger lahr
Drive berger lahr
Drive berger lahr
Drive berger lahr
Drive berger lahr
Drive berger lahr
Drive berger lahr
Drive berger lahr
Drive berger lahr

More Related Content

What's hot

esquema+electrico+MB+sprinter+full.pdf
esquema+electrico+MB+sprinter+full.pdfesquema+electrico+MB+sprinter+full.pdf
esquema+electrico+MB+sprinter+full.pdf
AUTOSCLASICOS
 
2005 engine electrical
2005 engine electrical2005 engine electrical
2005 engine electricalJeff Sparks
 
2009 Yamaha RS Venture RST900YS SNOWMOBILE Service Repair Manual
2009 Yamaha RS Venture RST900YS SNOWMOBILE Service Repair Manual2009 Yamaha RS Venture RST900YS SNOWMOBILE Service Repair Manual
2009 Yamaha RS Venture RST900YS SNOWMOBILE Service Repair Manual
hdjksmemm
 
1997 polaris magnum 425 4x4 service repair manual
1997 polaris magnum 425 4x4 service repair manual1997 polaris magnum 425 4x4 service repair manual
1997 polaris magnum 425 4x4 service repair manual
fjskekdmmse
 
Yamaha ft50 bet outboard service repair manual l 406850
Yamaha ft50 bet outboard service repair manual l 406850 Yamaha ft50 bet outboard service repair manual l 406850
Yamaha ft50 bet outboard service repair manual l 406850
fjjsekdmme
 
11 customizing the os v1.00_en
11 customizing the os v1.00_en11 customizing the os v1.00_en
11 customizing the os v1.00_en
confidencial
 
Perkins 1200 series 1206 e e70tta industrial engine service repair manual
Perkins 1200 series 1206 e e70tta industrial engine service repair manualPerkins 1200 series 1206 e e70tta industrial engine service repair manual
Perkins 1200 series 1206 e e70tta industrial engine service repair manual
fjjskeknjufksemm
 
PERKINS 2200 SERIES 2206D-E13TA INDUSTRIAL ENGINE Service Repair Manual
PERKINS 2200 SERIES 2206D-E13TA INDUSTRIAL ENGINE Service Repair ManualPERKINS 2200 SERIES 2206D-E13TA INDUSTRIAL ENGINE Service Repair Manual
PERKINS 2200 SERIES 2206D-E13TA INDUSTRIAL ENGINE Service Repair Manual
jsnekmse
 
manual de uso equipo de monitoreo de gases.pdf
manual de uso  equipo de monitoreo  de gases.pdfmanual de uso  equipo de monitoreo  de gases.pdf
manual de uso equipo de monitoreo de gases.pdf
ARTURO VASQUEZ
 
Manual de Operação Primme Acesso Henry - LojaTotalseg.com.br
Manual de Operação Primme Acesso Henry - LojaTotalseg.com.brManual de Operação Primme Acesso Henry - LojaTotalseg.com.br
Manual de Operação Primme Acesso Henry - LojaTotalseg.com.br
LojaTotalseg
 
08 basics control functions v1.00_en
08 basics control functions v1.00_en08 basics control functions v1.00_en
08 basics control functions v1.00_en
confidencial
 
1999 sea doo speedster service repair manual
1999 sea doo speedster service repair manual1999 sea doo speedster service repair manual
1999 sea doo speedster service repair manual
fjsjjfkskeme
 
Caterpillar Diesel Engine Control Systems [PDF, ENG, 588 KB].pdf
Caterpillar Diesel Engine Control Systems [PDF, ENG, 588 KB].pdfCaterpillar Diesel Engine Control Systems [PDF, ENG, 588 KB].pdf
Caterpillar Diesel Engine Control Systems [PDF, ENG, 588 KB].pdf
Eguima Guima
 
Idoc.pub apc200 basic-training
Idoc.pub apc200 basic-trainingIdoc.pub apc200 basic-training
Idoc.pub apc200 basic-training
YosethJose
 
2004 yamaha yzf r6 sc service repair manual
2004 yamaha yzf r6 sc service repair manual2004 yamaha yzf r6 sc service repair manual
2004 yamaha yzf r6 sc service repair manual
jkmsedopl
 
14 mass data engineering v1.00_en
14 mass data engineering v1.00_en14 mass data engineering v1.00_en
14 mass data engineering v1.00_en
confidencial
 
JCB-diagnostic-trouble-codes-pdf
JCB-diagnostic-trouble-codes-pdfJCB-diagnostic-trouble-codes-pdf
JCB-diagnostic-trouble-codes-pdf
Joseph Crow
 
Innova 3020d User Manual
Innova 3020d User ManualInnova 3020d User Manual
Innova 3020d User Manual
Tim Miller
 
PERKINS 1100 SERIES 1104D INDUSTRIAL ENGINE (Model NJ)Service Repair Manual
PERKINS 1100 SERIES 1104D INDUSTRIAL ENGINE (Model NJ)Service Repair ManualPERKINS 1100 SERIES 1104D INDUSTRIAL ENGINE (Model NJ)Service Repair Manual
PERKINS 1100 SERIES 1104D INDUSTRIAL ENGINE (Model NJ)Service Repair Manual
jknmms ekdms
 

What's hot (20)

esquema+electrico+MB+sprinter+full.pdf
esquema+electrico+MB+sprinter+full.pdfesquema+electrico+MB+sprinter+full.pdf
esquema+electrico+MB+sprinter+full.pdf
 
2005 engine electrical
2005 engine electrical2005 engine electrical
2005 engine electrical
 
2009 Yamaha RS Venture RST900YS SNOWMOBILE Service Repair Manual
2009 Yamaha RS Venture RST900YS SNOWMOBILE Service Repair Manual2009 Yamaha RS Venture RST900YS SNOWMOBILE Service Repair Manual
2009 Yamaha RS Venture RST900YS SNOWMOBILE Service Repair Manual
 
1997 polaris magnum 425 4x4 service repair manual
1997 polaris magnum 425 4x4 service repair manual1997 polaris magnum 425 4x4 service repair manual
1997 polaris magnum 425 4x4 service repair manual
 
Yamaha ft50 bet outboard service repair manual l 406850
Yamaha ft50 bet outboard service repair manual l 406850 Yamaha ft50 bet outboard service repair manual l 406850
Yamaha ft50 bet outboard service repair manual l 406850
 
11 customizing the os v1.00_en
11 customizing the os v1.00_en11 customizing the os v1.00_en
11 customizing the os v1.00_en
 
Perkins 1200 series 1206 e e70tta industrial engine service repair manual
Perkins 1200 series 1206 e e70tta industrial engine service repair manualPerkins 1200 series 1206 e e70tta industrial engine service repair manual
Perkins 1200 series 1206 e e70tta industrial engine service repair manual
 
PERKINS 2200 SERIES 2206D-E13TA INDUSTRIAL ENGINE Service Repair Manual
PERKINS 2200 SERIES 2206D-E13TA INDUSTRIAL ENGINE Service Repair ManualPERKINS 2200 SERIES 2206D-E13TA INDUSTRIAL ENGINE Service Repair Manual
PERKINS 2200 SERIES 2206D-E13TA INDUSTRIAL ENGINE Service Repair Manual
 
manual de uso equipo de monitoreo de gases.pdf
manual de uso  equipo de monitoreo  de gases.pdfmanual de uso  equipo de monitoreo  de gases.pdf
manual de uso equipo de monitoreo de gases.pdf
 
Manual de Operação Primme Acesso Henry - LojaTotalseg.com.br
Manual de Operação Primme Acesso Henry - LojaTotalseg.com.brManual de Operação Primme Acesso Henry - LojaTotalseg.com.br
Manual de Operação Primme Acesso Henry - LojaTotalseg.com.br
 
08 basics control functions v1.00_en
08 basics control functions v1.00_en08 basics control functions v1.00_en
08 basics control functions v1.00_en
 
1999 sea doo speedster service repair manual
1999 sea doo speedster service repair manual1999 sea doo speedster service repair manual
1999 sea doo speedster service repair manual
 
Caterpillar Diesel Engine Control Systems [PDF, ENG, 588 KB].pdf
Caterpillar Diesel Engine Control Systems [PDF, ENG, 588 KB].pdfCaterpillar Diesel Engine Control Systems [PDF, ENG, 588 KB].pdf
Caterpillar Diesel Engine Control Systems [PDF, ENG, 588 KB].pdf
 
Idoc.pub apc200 basic-training
Idoc.pub apc200 basic-trainingIdoc.pub apc200 basic-training
Idoc.pub apc200 basic-training
 
2004 yamaha yzf r6 sc service repair manual
2004 yamaha yzf r6 sc service repair manual2004 yamaha yzf r6 sc service repair manual
2004 yamaha yzf r6 sc service repair manual
 
14 mass data engineering v1.00_en
14 mass data engineering v1.00_en14 mass data engineering v1.00_en
14 mass data engineering v1.00_en
 
Ch8 v70 os_en
Ch8 v70 os_enCh8 v70 os_en
Ch8 v70 os_en
 
JCB-diagnostic-trouble-codes-pdf
JCB-diagnostic-trouble-codes-pdfJCB-diagnostic-trouble-codes-pdf
JCB-diagnostic-trouble-codes-pdf
 
Innova 3020d User Manual
Innova 3020d User ManualInnova 3020d User Manual
Innova 3020d User Manual
 
PERKINS 1100 SERIES 1104D INDUSTRIAL ENGINE (Model NJ)Service Repair Manual
PERKINS 1100 SERIES 1104D INDUSTRIAL ENGINE (Model NJ)Service Repair ManualPERKINS 1100 SERIES 1104D INDUSTRIAL ENGINE (Model NJ)Service Repair Manual
PERKINS 1100 SERIES 1104D INDUSTRIAL ENGINE (Model NJ)Service Repair Manual
 

Similar to Drive berger lahr

Simocode dp = manual de parametrização e operação
Simocode dp = manual de parametrização e operaçãoSimocode dp = manual de parametrização e operação
Simocode dp = manual de parametrização e operação
confidencial
 
Siemens s7 300-400-simatic couter module cm35
Siemens s7 300-400-simatic couter module cm35Siemens s7 300-400-simatic couter module cm35
Siemens s7 300-400-simatic couter module cm35
Dien Ha The
 
Ks 50-1-ks-52-1-manual-english
Ks 50-1-ks-52-1-manual-englishKs 50-1-ks-52-1-manual-english
Ks 50-1-ks-52-1-manual-english
jeferson tadeu
 
A1800 Technical Manual_rev.02.pdf
A1800 Technical Manual_rev.02.pdfA1800 Technical Manual_rev.02.pdf
A1800 Technical Manual_rev.02.pdf
MoHsinKh2
 
Promass80 flow meter
Promass80 flow meterPromass80 flow meter
Promass80 flow meter
Sajid Mahmood
 
Philips Respironics V60 - Service manual.pdf
Philips Respironics V60 - Service manual.pdfPhilips Respironics V60 - Service manual.pdf
Philips Respironics V60 - Service manual.pdf
FatiEspindola
 
PLC and SCADA Training.pdf
PLC and SCADA Training.pdfPLC and SCADA Training.pdf
PLC and SCADA Training.pdf
MarioHaguila
 
Ct2000 v english_ver 1.36
Ct2000 v english_ver 1.36Ct2000 v english_ver 1.36
Ct2000 v english_ver 1.36
Toàn Huỳnh
 
PLC: Manual de usuario de PLC Micrologix1500.pdf
PLC: Manual de usuario de PLC Micrologix1500.pdfPLC: Manual de usuario de PLC Micrologix1500.pdf
PLC: Manual de usuario de PLC Micrologix1500.pdf
SantiagoPabloAlberto1
 
Manual de PLC Micrologix 1500.pdf
Manual de PLC Micrologix 1500.pdfManual de PLC Micrologix 1500.pdf
Manual de PLC Micrologix 1500.pdf
SANTIAGO PABLO ALBERTO
 
Manual de PLC Micrologix 1500
Manual de PLC Micrologix 1500 Manual de PLC Micrologix 1500
Manual de PLC Micrologix 1500
SANTIAGO PABLO ALBERTO
 
Medrad Vistron CT Injection System - Service manual.pdf
Medrad Vistron CT Injection System - Service manual.pdfMedrad Vistron CT Injection System - Service manual.pdf
Medrad Vistron CT Injection System - Service manual.pdf
joelKouakou5
 
1 scorbot-er-iii_user_manual
1  scorbot-er-iii_user_manual1  scorbot-er-iii_user_manual
1 scorbot-er-iii_user_manualTecnica Adestra
 
Siemens s7 300-400-sm 338 ultrasonic position encoding module
Siemens s7 300-400-sm 338 ultrasonic position encoding moduleSiemens s7 300-400-sm 338 ultrasonic position encoding module
Siemens s7 300-400-sm 338 ultrasonic position encoding module
Dien Ha The
 
Toro groundsmaster 322 d mower service repair manual
Toro groundsmaster 322 d mower service repair manualToro groundsmaster 322 d mower service repair manual
Toro groundsmaster 322 d mower service repair manual
ufujjdfjjskekemm
 
Toro groundsmaster 325 d mower service repair manual
Toro groundsmaster 325 d mower service repair manualToro groundsmaster 325 d mower service repair manual
Toro groundsmaster 325 d mower service repair manual
ufjjdjjkskemme
 
Toro groundsmaster 325 d mower service repair manual
Toro groundsmaster 325 d mower service repair manualToro groundsmaster 325 d mower service repair manual
Toro groundsmaster 325 d mower service repair manual
ufjjdfjkskemfmme
 
Toro groundsmaster 345 mower service repair manual
Toro groundsmaster 345 mower service repair manualToro groundsmaster 345 mower service repair manual
Toro groundsmaster 345 mower service repair manual
ufjdjfjkskefmme
 
Toro groundsmaster 345 mower service repair manual
Toro groundsmaster 345 mower service repair manualToro groundsmaster 345 mower service repair manual
Toro groundsmaster 345 mower service repair manual
ufjjjsejfjksekm
 
Toro groundsmaster 322 d mower service repair manual
Toro groundsmaster 322 d mower service repair manualToro groundsmaster 322 d mower service repair manual
Toro groundsmaster 322 d mower service repair manual
fjjsfkskemem
 

Similar to Drive berger lahr (20)

Simocode dp = manual de parametrização e operação
Simocode dp = manual de parametrização e operaçãoSimocode dp = manual de parametrização e operação
Simocode dp = manual de parametrização e operação
 
Siemens s7 300-400-simatic couter module cm35
Siemens s7 300-400-simatic couter module cm35Siemens s7 300-400-simatic couter module cm35
Siemens s7 300-400-simatic couter module cm35
 
Ks 50-1-ks-52-1-manual-english
Ks 50-1-ks-52-1-manual-englishKs 50-1-ks-52-1-manual-english
Ks 50-1-ks-52-1-manual-english
 
A1800 Technical Manual_rev.02.pdf
A1800 Technical Manual_rev.02.pdfA1800 Technical Manual_rev.02.pdf
A1800 Technical Manual_rev.02.pdf
 
Promass80 flow meter
Promass80 flow meterPromass80 flow meter
Promass80 flow meter
 
Philips Respironics V60 - Service manual.pdf
Philips Respironics V60 - Service manual.pdfPhilips Respironics V60 - Service manual.pdf
Philips Respironics V60 - Service manual.pdf
 
PLC and SCADA Training.pdf
PLC and SCADA Training.pdfPLC and SCADA Training.pdf
PLC and SCADA Training.pdf
 
Ct2000 v english_ver 1.36
Ct2000 v english_ver 1.36Ct2000 v english_ver 1.36
Ct2000 v english_ver 1.36
 
PLC: Manual de usuario de PLC Micrologix1500.pdf
PLC: Manual de usuario de PLC Micrologix1500.pdfPLC: Manual de usuario de PLC Micrologix1500.pdf
PLC: Manual de usuario de PLC Micrologix1500.pdf
 
Manual de PLC Micrologix 1500.pdf
Manual de PLC Micrologix 1500.pdfManual de PLC Micrologix 1500.pdf
Manual de PLC Micrologix 1500.pdf
 
Manual de PLC Micrologix 1500
Manual de PLC Micrologix 1500 Manual de PLC Micrologix 1500
Manual de PLC Micrologix 1500
 
Medrad Vistron CT Injection System - Service manual.pdf
Medrad Vistron CT Injection System - Service manual.pdfMedrad Vistron CT Injection System - Service manual.pdf
Medrad Vistron CT Injection System - Service manual.pdf
 
1 scorbot-er-iii_user_manual
1  scorbot-er-iii_user_manual1  scorbot-er-iii_user_manual
1 scorbot-er-iii_user_manual
 
Siemens s7 300-400-sm 338 ultrasonic position encoding module
Siemens s7 300-400-sm 338 ultrasonic position encoding moduleSiemens s7 300-400-sm 338 ultrasonic position encoding module
Siemens s7 300-400-sm 338 ultrasonic position encoding module
 
Toro groundsmaster 322 d mower service repair manual
Toro groundsmaster 322 d mower service repair manualToro groundsmaster 322 d mower service repair manual
Toro groundsmaster 322 d mower service repair manual
 
Toro groundsmaster 325 d mower service repair manual
Toro groundsmaster 325 d mower service repair manualToro groundsmaster 325 d mower service repair manual
Toro groundsmaster 325 d mower service repair manual
 
Toro groundsmaster 325 d mower service repair manual
Toro groundsmaster 325 d mower service repair manualToro groundsmaster 325 d mower service repair manual
Toro groundsmaster 325 d mower service repair manual
 
Toro groundsmaster 345 mower service repair manual
Toro groundsmaster 345 mower service repair manualToro groundsmaster 345 mower service repair manual
Toro groundsmaster 345 mower service repair manual
 
Toro groundsmaster 345 mower service repair manual
Toro groundsmaster 345 mower service repair manualToro groundsmaster 345 mower service repair manual
Toro groundsmaster 345 mower service repair manual
 
Toro groundsmaster 322 d mower service repair manual
Toro groundsmaster 322 d mower service repair manualToro groundsmaster 322 d mower service repair manual
Toro groundsmaster 322 d mower service repair manual
 

Recently uploaded

Empowering Limpopo Entrepreneurs Consulting SMEs.pptx
Empowering Limpopo Entrepreneurs  Consulting SMEs.pptxEmpowering Limpopo Entrepreneurs  Consulting SMEs.pptx
Empowering Limpopo Entrepreneurs Consulting SMEs.pptx
Precious Mvulane CA (SA),RA
 
What Does the PARKTRONIC Inoperative, See Owner's Manual Message Mean for You...
What Does the PARKTRONIC Inoperative, See Owner's Manual Message Mean for You...What Does the PARKTRONIC Inoperative, See Owner's Manual Message Mean for You...
What Does the PARKTRONIC Inoperative, See Owner's Manual Message Mean for You...
Autohaus Service and Sales
 
Digital Fleet Management - Why Your Business Need It?
Digital Fleet Management - Why Your Business Need It?Digital Fleet Management - Why Your Business Need It?
Digital Fleet Management - Why Your Business Need It?
jennifermiller8137
 
Why Isn't Your BMW X5's Comfort Access Functioning Properly Find Out Here
Why Isn't Your BMW X5's Comfort Access Functioning Properly Find Out HereWhy Isn't Your BMW X5's Comfort Access Functioning Properly Find Out Here
Why Isn't Your BMW X5's Comfort Access Functioning Properly Find Out Here
Masters European & Gapanese Auto Repair
 
Antique Plastic Traders Company Profile
Antique Plastic Traders Company ProfileAntique Plastic Traders Company Profile
Antique Plastic Traders Company Profile
Antique Plastic Traders
 
gtyccccccccccccccccccccccccccccccccccccccccccccccccccccccc
gtycccccccccccccccccccccccccccccccccccccccccccccccccccccccgtyccccccccccccccccccccccccccccccccccccccccccccccccccccccc
gtyccccccccccccccccccccccccccccccccccccccccccccccccccccccc
4thzenzstar
 
Ec460b lc Excavator Volvo Service Repair.pdf
Ec460b lc Excavator Volvo Service Repair.pdfEc460b lc Excavator Volvo Service Repair.pdf
Ec460b lc Excavator Volvo Service Repair.pdf
Excavator
 
Things to remember while upgrading the brakes of your car
Things to remember while upgrading the brakes of your carThings to remember while upgrading the brakes of your car
Things to remember while upgrading the brakes of your car
jennifermiller8137
 
Tyre Industrymarket overview with examples of CEAT
Tyre Industrymarket overview with examples of CEATTyre Industrymarket overview with examples of CEAT
Tyre Industrymarket overview with examples of CEAT
kshamashah95
 
欧洲杯比赛投注官网-欧洲杯比赛投注官网网站-欧洲杯比赛投注官网|【​网址​🎉ac123.net🎉​】
欧洲杯比赛投注官网-欧洲杯比赛投注官网网站-欧洲杯比赛投注官网|【​网址​🎉ac123.net🎉​】欧洲杯比赛投注官网-欧洲杯比赛投注官网网站-欧洲杯比赛投注官网|【​网址​🎉ac123.net🎉​】
欧洲杯比赛投注官网-欧洲杯比赛投注官网网站-欧洲杯比赛投注官网|【​网址​🎉ac123.net🎉​】
ahmedendrise81
 
Ec330B Lc Excavator Volvo Service Repair.pdf
Ec330B Lc Excavator Volvo Service Repair.pdfEc330B Lc Excavator Volvo Service Repair.pdf
Ec330B Lc Excavator Volvo Service Repair.pdf
Excavator
 
What Causes 'Trans Failsafe Prog' to Trigger in BMW X5
What Causes 'Trans Failsafe Prog' to Trigger in BMW X5What Causes 'Trans Failsafe Prog' to Trigger in BMW X5
What Causes 'Trans Failsafe Prog' to Trigger in BMW X5
European Service Center
 
Core technology of Hyundai Motor Group's EV platform 'E-GMP'
Core technology of Hyundai Motor Group's EV platform 'E-GMP'Core technology of Hyundai Motor Group's EV platform 'E-GMP'
Core technology of Hyundai Motor Group's EV platform 'E-GMP'
Hyundai Motor Group
 
一比一原版(AUT毕业证)奥克兰理工大学毕业证成绩单如何办理
一比一原版(AUT毕业证)奥克兰理工大学毕业证成绩单如何办理一比一原版(AUT毕业证)奥克兰理工大学毕业证成绩单如何办理
一比一原版(AUT毕业证)奥克兰理工大学毕业证成绩单如何办理
mymwpc
 
Bài tập - Tiếng anh 11 Global Success UNIT 1 - Bản HS.doc
Bài tập - Tiếng anh 11 Global Success UNIT 1 - Bản HS.docBài tập - Tiếng anh 11 Global Success UNIT 1 - Bản HS.doc
Bài tập - Tiếng anh 11 Global Success UNIT 1 - Bản HS.doc
daothibichhang1
 
Wondering if Your Mercedes EIS is at Fault Here’s How to Tell
Wondering if Your Mercedes EIS is at Fault Here’s How to TellWondering if Your Mercedes EIS is at Fault Here’s How to Tell
Wondering if Your Mercedes EIS is at Fault Here’s How to Tell
Vic Auto Collision & Repair
 
一比一原版(AIS毕业证)奥克兰商学院毕业证成绩单如何办理
一比一原版(AIS毕业证)奥克兰商学院毕业证成绩单如何办理一比一原版(AIS毕业证)奥克兰商学院毕业证成绩单如何办理
一比一原版(AIS毕业证)奥克兰商学院毕业证成绩单如何办理
eygkup
 
Statistics5,c.xz,c.;c.;d.c;d;ssssss.pptx
Statistics5,c.xz,c.;c.;d.c;d;ssssss.pptxStatistics5,c.xz,c.;c.;d.c;d;ssssss.pptx
Statistics5,c.xz,c.;c.;d.c;d;ssssss.pptx
coc7987515756
 
What Exactly Is The Common Rail Direct Injection System & How Does It Work
What Exactly Is The Common Rail Direct Injection System & How Does It WorkWhat Exactly Is The Common Rail Direct Injection System & How Does It Work
What Exactly Is The Common Rail Direct Injection System & How Does It Work
Motor Cars International
 
What do the symbols on vehicle dashboard mean?
What do the symbols on vehicle dashboard mean?What do the symbols on vehicle dashboard mean?
What do the symbols on vehicle dashboard mean?
Hyundai Motor Group
 

Recently uploaded (20)

Empowering Limpopo Entrepreneurs Consulting SMEs.pptx
Empowering Limpopo Entrepreneurs  Consulting SMEs.pptxEmpowering Limpopo Entrepreneurs  Consulting SMEs.pptx
Empowering Limpopo Entrepreneurs Consulting SMEs.pptx
 
What Does the PARKTRONIC Inoperative, See Owner's Manual Message Mean for You...
What Does the PARKTRONIC Inoperative, See Owner's Manual Message Mean for You...What Does the PARKTRONIC Inoperative, See Owner's Manual Message Mean for You...
What Does the PARKTRONIC Inoperative, See Owner's Manual Message Mean for You...
 
Digital Fleet Management - Why Your Business Need It?
Digital Fleet Management - Why Your Business Need It?Digital Fleet Management - Why Your Business Need It?
Digital Fleet Management - Why Your Business Need It?
 
Why Isn't Your BMW X5's Comfort Access Functioning Properly Find Out Here
Why Isn't Your BMW X5's Comfort Access Functioning Properly Find Out HereWhy Isn't Your BMW X5's Comfort Access Functioning Properly Find Out Here
Why Isn't Your BMW X5's Comfort Access Functioning Properly Find Out Here
 
Antique Plastic Traders Company Profile
Antique Plastic Traders Company ProfileAntique Plastic Traders Company Profile
Antique Plastic Traders Company Profile
 
gtyccccccccccccccccccccccccccccccccccccccccccccccccccccccc
gtycccccccccccccccccccccccccccccccccccccccccccccccccccccccgtyccccccccccccccccccccccccccccccccccccccccccccccccccccccc
gtyccccccccccccccccccccccccccccccccccccccccccccccccccccccc
 
Ec460b lc Excavator Volvo Service Repair.pdf
Ec460b lc Excavator Volvo Service Repair.pdfEc460b lc Excavator Volvo Service Repair.pdf
Ec460b lc Excavator Volvo Service Repair.pdf
 
Things to remember while upgrading the brakes of your car
Things to remember while upgrading the brakes of your carThings to remember while upgrading the brakes of your car
Things to remember while upgrading the brakes of your car
 
Tyre Industrymarket overview with examples of CEAT
Tyre Industrymarket overview with examples of CEATTyre Industrymarket overview with examples of CEAT
Tyre Industrymarket overview with examples of CEAT
 
欧洲杯比赛投注官网-欧洲杯比赛投注官网网站-欧洲杯比赛投注官网|【​网址​🎉ac123.net🎉​】
欧洲杯比赛投注官网-欧洲杯比赛投注官网网站-欧洲杯比赛投注官网|【​网址​🎉ac123.net🎉​】欧洲杯比赛投注官网-欧洲杯比赛投注官网网站-欧洲杯比赛投注官网|【​网址​🎉ac123.net🎉​】
欧洲杯比赛投注官网-欧洲杯比赛投注官网网站-欧洲杯比赛投注官网|【​网址​🎉ac123.net🎉​】
 
Ec330B Lc Excavator Volvo Service Repair.pdf
Ec330B Lc Excavator Volvo Service Repair.pdfEc330B Lc Excavator Volvo Service Repair.pdf
Ec330B Lc Excavator Volvo Service Repair.pdf
 
What Causes 'Trans Failsafe Prog' to Trigger in BMW X5
What Causes 'Trans Failsafe Prog' to Trigger in BMW X5What Causes 'Trans Failsafe Prog' to Trigger in BMW X5
What Causes 'Trans Failsafe Prog' to Trigger in BMW X5
 
Core technology of Hyundai Motor Group's EV platform 'E-GMP'
Core technology of Hyundai Motor Group's EV platform 'E-GMP'Core technology of Hyundai Motor Group's EV platform 'E-GMP'
Core technology of Hyundai Motor Group's EV platform 'E-GMP'
 
一比一原版(AUT毕业证)奥克兰理工大学毕业证成绩单如何办理
一比一原版(AUT毕业证)奥克兰理工大学毕业证成绩单如何办理一比一原版(AUT毕业证)奥克兰理工大学毕业证成绩单如何办理
一比一原版(AUT毕业证)奥克兰理工大学毕业证成绩单如何办理
 
Bài tập - Tiếng anh 11 Global Success UNIT 1 - Bản HS.doc
Bài tập - Tiếng anh 11 Global Success UNIT 1 - Bản HS.docBài tập - Tiếng anh 11 Global Success UNIT 1 - Bản HS.doc
Bài tập - Tiếng anh 11 Global Success UNIT 1 - Bản HS.doc
 
Wondering if Your Mercedes EIS is at Fault Here’s How to Tell
Wondering if Your Mercedes EIS is at Fault Here’s How to TellWondering if Your Mercedes EIS is at Fault Here’s How to Tell
Wondering if Your Mercedes EIS is at Fault Here’s How to Tell
 
一比一原版(AIS毕业证)奥克兰商学院毕业证成绩单如何办理
一比一原版(AIS毕业证)奥克兰商学院毕业证成绩单如何办理一比一原版(AIS毕业证)奥克兰商学院毕业证成绩单如何办理
一比一原版(AIS毕业证)奥克兰商学院毕业证成绩单如何办理
 
Statistics5,c.xz,c.;c.;d.c;d;ssssss.pptx
Statistics5,c.xz,c.;c.;d.c;d;ssssss.pptxStatistics5,c.xz,c.;c.;d.c;d;ssssss.pptx
Statistics5,c.xz,c.;c.;d.c;d;ssssss.pptx
 
What Exactly Is The Common Rail Direct Injection System & How Does It Work
What Exactly Is The Common Rail Direct Injection System & How Does It WorkWhat Exactly Is The Common Rail Direct Injection System & How Does It Work
What Exactly Is The Common Rail Direct Injection System & How Does It Work
 
What do the symbols on vehicle dashboard mean?
What do the symbols on vehicle dashboard mean?What do the symbols on vehicle dashboard mean?
What do the symbols on vehicle dashboard mean?
 

Drive berger lahr

  • 1. A product from: SIG Positec BERGERLAHR GmbH & Co. KG Breslauer Str. 7 D-77933 Lahr Tel. +49 (0) 7821 946 01 Fax +49 (0) 7821 946 313 http://www.sig-berger.de Technical documentation Advice, Service and Sales: SIG Positec Automation GmbH Breslauer Str. 7 D-77933 Lahr Tel. +49 (0) 7821 946 02 Fax +49 (0) 7821 946 220 http://www.sig-positec.de Twin Line Controller 51x Positioning controller for stepper motors TLC51x Operating system 1.1xx Order No.: 9844 1113 117 Edition: c325, 11.00
  • 2. -2 Twin Line Controller 51x TLC51x 98441113117,c325,11.00
  • 3. 98441113117,c325,11.00 TLC51x Table of Content Twin Line Controller 51x V-1 Table of Content Glossaries . . . . . . . . . . . . . . . . . . . . . . . . . . . V-5 Abbreviations. . . . . . . . . . . . . . . . . . . . . . . . . . V-5 Product name . . . . . . . . . . . . . . . . . . . . . . . . . V-5 Technical Terms . . . . . . . . . . . . . . . . . . . . . . . . V-6 Written conventions and note symbols. . . . . . . . . . . . . V-8 1 The positioning controller . . . . . . . . . . . . . . . . . . . 1-1 1.1 Scope of supply . . . . . . . . . . . . . . . . . . . 1-1 1.2 Documentation and literature . . . . . . . . . . . . 1-5 1.3 Unit series . . . . . . . . . . . . . . . . . . . . . . 1-6 1.4 Unit overview . . . . . . . . . . . . . . . . . . . . 1-8 1.5 Modules of the positioning controller . . . . . . . 1-10 1.6 Module configuration, operating modes and functions 1-11 1.7 Guidelines and standards . . . . . . . . . . . . . 1-13 1.7.1 Declaration of conformity and CE labelling . . 1-13 1.7.2 Regulations and standards . . . . . . . . . . 1-15 2 Safety . . . . . . . . . . . . . . . . . . . . . . . . . . . . . . 2-1 2.1 Danger categories . . . . . . . . . . . . . . . . . . 2-1 2.2 Safety instructions . . . . . . . . . . . . . . . . . . 2-1 2.3 Use for the purpose intended . . . . . . . . . . . . 2-2 2.3.1 Ambient conditions . . . . . . . . . . . . . . . . 2-2 2.3.2 Intended use . . . . . . . . . . . . . . . . . . . 2-2 2.4 Qualification of the personnel . . . . . . . . . . . . 2-3 2.5 Safety devices . . . . . . . . . . . . . . . . . . . . 2-3 3 Technical data. . . . . . . . . . . . . . . . . . . . . . . . . . 3-1 3.1 Mechanical data . . . . . . . . . . . . . . . . . . . 3-1 3.1.1 Positioning controller TLC51x . . . . . . . . . . 3-1 3.1.2 positioning controller TLC51xP . . . . . . . . . 3-2 3.1.3 Accessories for standard unit . . . . . . . . . . 3-3 3.2 Electronic data . . . . . . . . . . . . . . . . . . . . 3-4 3.2.1 Positioning controller . . . . . . . . . . . . . . . 3-4 3.2.2 Modules . . . . . . . . . . . . . . . . . . . . . 3-6 3.2.3 UL 508C certification . . . . . . . . . . . . . . . 3-8 3.2.4 Accessories for standard unit . . . . . . . . . . 3-8
  • 4. V-2 Twin Line Controller 51x Table of Content TLC51x 98441113117,c325,11.00 4 Installation . . . . . . . . . . . . . . . . . . . . . . . . . . . 4-1 4.1 Electromagnetic compatibility, EMC . . . . . . . . 4-1 4.2 System components . . . . . . . . . . . . . . . . 4-4 4.3 Mechanical installation . . . . . . . . . . . . . . . 4-5 4.3.1 Positioning controller TLC51x mounting . . . . . 4-6 4.3.2 Mounting the positioning controller TLC51xP . . . 4-7 4.3.3 Fitting the unit label . . . . . . . . . . . . . . . . 4-8 4.3.4 Installing accessories to the standard unit . . . . 4-9 4.3.5 Mounting version P accessories . . . . . . . . 4-10 4.4 Electrical installation . . . . . . . . . . . . . . . . 4-11 4.4.1 Electrical installation TLC51xP . . . . . . . . . 4-12 4.4.2 Mains connection . . . . . . . . . . . . . . . . 4-14 4.4.3 Motor connection TLC51x . . . . . . . . . . . 4-15 4.4.4 Motor connection with holding brake to TLC51xP 4-17 4.4.5 Connecting the 24 V supply voltage . . . . . . 4-18 4.4.6 Connection to the signal interface . . . . . . . 4-19 4.4.7 Connection to the RS232 interface . . . . . . 4-26 4.4.8 Connection to the RS422-C module . . . . . . 4-27 4.4.9 Connection to the PULSE-C module . . . . . . 4-29 4.4.10 Connection to the RM-C module . . . . . . . . 4-32 4.4.11 Connection to the PBDP-C module . . . . . . . 4-34 4.4.12 Connection to the CAN-C module . . . . . . . 4-36 4.4.13 Connection to the RS485-C module . . . . . . 4-38 4.4.14 Connection to the IBS-C module . . . . . . . . 4-40 4.4.15 Connection of accessories to the standard unit 4-42 4.5 Wiring examples . . . . . . . . . . . . . . . . . . 4-44 4.5.1 Manual set-up and operation on the field bus . 4-44 4.5.2 Operation via field bus, configuration via TL HMI or TL CT 4-47 4.5.3 Operation via field bus, field bus configuration via inputs 4-49 4.6 Function test . . . . . . . . . . . . . . . . . . . . 4-51 4.7 Installation troubleshooting . . . . . . . . . . . . . 4-52 5 Commissioning . . . . . . . . . . . . . . . . . . . . . . . . 5-1 5.1 Commissioning procedure . . . . . . . . . . . . . 5-1 5.2 Safety instructions . . . . . . . . . . . . . . . . . 5-2 5.3 Commissioning tools . . . . . . . . . . . . . . . . 5-3 5.3.1 Overview . . . . . . . . . . . . . . . . . . . . . 5-3 5.3.2 The Twin Line HMI hand-held operating unit . . . 5-3 5.3.3 Operating software Twin Line Control Tool . . . . 5-5 5.4 Commissioning the positioning controller . . . . . 5-7 5.4.1 Commissioning stages . . . . . . . . . . . . . . 5-7 5.4.2 Setting phase current and device parameters . . 5-7 5.4.3 Starting the positioning controller . . . . . . . . . 5-8 5.4.4 Checking the limit switches . . . . . . . . . . . . 5-9 5.4.5 Checking the holding brake . . . . . . . . . . . . 5-9 5.4.6 Testing the motor under manual movement . . 5-10 5.4.7 Checking inputs and outputs . . . . . . . . . . 5-12 5.4.8 Optimizing the performance of the motor . . . . 5-15
  • 5. 98441113117,c325,11.00 TLC51x Table of Content Twin Line Controller 51x V-3 6 Operating modes of the positioning controller . . . . . . . . 6-1 6.1 Changing the operating mode . . . . . . . . . . . 6-1 6.1.1 Access channels . . . . . . . . . . . . . . . . . 6-1 6.1.2 Access control for selecting operating mode or function 6-3 6.1.3 Selecting the operating mode . . . . . . . . . . 6-4 6.1.4 Monitoring the set operating mode . . . . . . . . 6-5 6.1.5 Status monitoring in movement mode . . . . . . 6-7 6.2 Manual movement . . . . . . . . . . . . . . . . . . 6-9 6.3 Speed mode . . . . . . . . . . . . . . . . . . . . 6-14 6.4 Point-to-point mode . . . . . . . . . . . . . . . . 6-15 6.5 Electronic gear . . . . . . . . . . . . . . . . . . 6-17 6.5.1 Gear settings . . . . . . . . . . . . . . . . . . 6-19 6.5.2 Synchronisation with compensatory movement 6-22 6.5.3 Offset positioning . . . . . . . . . . . . . . . 6-23 6.6 Referencing . . . . . . . . . . . . . . . . . . . . 6-26 6.6.1 Reference movement . . . . . . . . . . . . . 6-26 6.6.2 Dimension setting . . . . . . . . . . . . . . . 6-30 7 Functions of the positioning controller . . . . . . . . . . . . 7-1 7.1 List control and list processing . . . . . . . . . . . 7-1 7.2 Teach-in processing . . . . . . . . . . . . . . . . 7-7 7.3 Normalisation . . . . . . . . . . . . . . . . . . . 7-10 7.3.1 User-defined units and normalisation factors . 7-10 7.3.2 Setting normalisation factors . . . . . . . . . . 7-11 7.3.3 Residual value in user-defined normalisation . 7-15 7.4 Ramp function . . . . . . . . . . . . . . . . . . . 7-16 7.5 Quick-Stop function . . . . . . . . . . . . . . . . 7-18 7.6 Reversal of direction of rotation . . . . . . . . . . 7-19 7.7 Fast position capture . . . . . . . . . . . . . . . 7-20 7.8 Monitoring functions . . . . . . . . . . . . . . . . 7-22 7.8.1 Monitoring of axis signals . . . . . . . . . . . 7-22 7.8.2 Monitoring internal signals . . . . . . . . . . . 7-25 7.9 Braking function with TL HBC . . . . . . . . . . . 7-26 8 Diagnosis and error rectification . . . . . . . . . . . . . . . 8-1 8.1 Operational status indicators and transitions . . . . 8-1 8.2 Error display and rectification . . . . . . . . . . . . 8-2 8.3 Malfunctions in movement mode . . . . . . . . . . 8-8 8.4 Table of error numbers . . . . . . . . . . . . . . . 8-9 9 Service, Maintenance and Warranty . . . . . . . . . . . . . . 9-1 9.1 Service address . . . . . . . . . . . . . . . . . . . 9-1 9.2 Shipping, storage and disposal . . . . . . . . . . . 9-2
  • 6. V-4 Twin Line Controller 51x Table of Content TLC51x 98441113117,c325,11.00 10 Accessories and spare part. . . . . . . . . . . . . . . . . . 10-1 10.1 List of accessories . . . . . . . . . . . . . . . . . 10-1 10.2 List of spare parts . . . . . . . . . . . . . . . . . 10-2 10.3 Suppliers . . . . . . . . . . . . . . . . . . . . . . 10-2 11 Unit label . . . . . . . . . . . . . . . . . . . . . . . . . . . . 11-1 11.1 Illustration of the unit label . . . . . . . . . . . . . 11-1 12 Parameters . . . . . . . . . . . . . . . . . . . . . . . . . . . 12-1 12.1 Overview . . . . . . . . . . . . . . . . . . . . . . 12-1 12.2 Parameter groups . . . . . . . . . . . . . . . . . 12-3 12.2.1 Parameter group Settings . . . . . . . . . . . 12-3 12.2.2 Parameter group Commands . . . . . . . . . . 12-4 12.2.3 Parameter group PA . . . . . . . . . . . . . . 12-4 12.2.4 Parameter group Motion . . . . . . . . . . . . 12-5 12.2.5 Parameter group Manual . . . . . . . . . . . . 12-6 12.2.6 Parameter group VEL . . . . . . . . . . . . . . 12-6 12.2.7 Parameter group PTP . . . . . . . . . . . . . 12-7 12.2.8 Parameter group Gear . . . . . . . . . . . . . 12-7 12.2.9 Parameter group Home . . . . . . . . . . . . . 12-9 12.2.10 Parameter group Teach . . . . . . . . . . . . 12-9 12.2.11 Parameter group List . . . . . . . . . . . . . 12-10 12.2.12 Parameter group L1Data0..L1Data63 . . . . 12-11 12.2.13 Parameter group L2Data0..L2Data63 . . . . 12-11 12.2.14 Parameter group Capture . . . . . . . . . . . 12-12 12.2.15 Parameter group I/O . . . . . . . . . . . . . 12-13 12.2.16 Parameter group M1 . . . . . . . . . . . . . 12-14 12.2.17 Parameter group M4 . . . . . . . . . . . . . 12-14 12.2.18 Parameter group Status . . . . . . . . . . . 12-15 12.2.19 Parameter group ErrMem0..ErrMem19 . . . . 12-20 Index . . . . . . . . . . . . . . . . . . . . . . . . . . . . . A-1
  • 7. 98441113117,c325,11.00 TLC51x Glossaries Twin Line Controller 51x V-5 Glossaries Abbreviations Product name Abbrevia- tion Meaning AC Alternating current ASCII American Standard Code for Information Interchange COS Controller Operating System DC Direct current E Encoder I/O Inputs / output EMV Electromagnetic compatibility EG European Community EU European Union RC Residual current HMI Human-Machine Interface, plug-in hand-held operating unit Inc Increment IT system I: isolated; T: terre (Fr.), ground. System without potential to ground, not earthed LED Light-Emitting Diode M Motor PC Personal Computer PELV Protected Extra-Low Voltage PLC Programmable logic controller Abbrevia- tion Product designation Term used TLC51x Twin Line Controller 51xstandard unit Positioning controller TLC51xP Twin Line Controller 51x version P Positioning controller Protection grade IP54, second category industrial envi- ronment TL HMI Twin Line HMI Human Machine Interface HMI TL CT Twin Line Control Tool Operating Software TL HBC Twin Line Holding Brake Controller Holding Brake Controller
  • 8. V-6 Twin Line Controller 51x Glossaries TLC51x 98441113117,c325,11.00 Technical Terms Actual position of the drive system The actual position of the drive system gives the absolute or relative positions of moved components in the system. Actual position of the motor See Angular position of the motor Angular position of the motor The angular position of the motor corresponds to the angular position of the rotor in the motor housing, and refers to the zero point or index point of the position sensor. CAN-C Field bus module which connects the positioning controller to a CAN field bus. The selection of a field bus profile defines whether the device works with CAN bus, CANOpen or DeviceNet protocol. DC-line The DC-line generates the necessary direct current for operating the motor and provides the amplifier with the necessary energy. The DC-line acts as a buffer to energy fed back by the motor. Default values Preset values for the parameters of the Twin Line Unit before the first commissioning, factory settings Direction of rotation Rotation of the motor shaft in a clockwise or anticlockwise direction. A clockwise direction of rotation is given when the motor shaft rotates clockwise as the observer faces the end of the protruding shaft. Drive solution The drive solution comprises the drive system with its Twin Line Unit and motor, as well as the system mechanics forming an integral part of the chain of motion. Drive system The drive system consists of the Twin Line Unit and the motor. Electronic gear An input speed is recalculated by the Twin Line Unit using the values of an adjustable gear ratio to produce a new output speed for the motor movement. Encoder Sensor for recording the angular position of a rotating element. Mounted on the motor, the encoder signals the angular position of the rotor. Error class Reaction of the Twin Line Unit to an operational malfunction correspon- ding to one of five error classes Forcing To change signal states irrespective of the hardware switching status in the unit; with the control tool, for example. The hardware signals remain unchanged. High/open Signal status of an input or output signal; when no signal is present, signal voltage is high (high level). HMI Hand-held operating unit which can be plugged into the Twin Line Unit. HMI: Human-machine interface. I2t monitoring Predictive temperature monitoring. On the basis of the motor current, the expecting heating of unit components is calculated in advance. Should a limit value be exceeded, the Twin Line Unit reduces the unit current. IBS-C Field bus module which couples the positioning controller to an interbus field bus. Index-impuls Encoder signal for referencing the rotor position in the motor. The encoder sends one index pulse per revolution. Incremental signals Angular steps of an encoder in the form of square-wave pulse sequences. The pulses signal changes in position. Input device Input device is the device which can be connected to the RS232 interface for the purpose of commissioning; it is either the HMI hand- held operating unit or a PC with the Operating Software.
  • 9. 98441113117,c325,11.00 TLC51x Glossaries Twin Line Controller 51x V-7 Internal unit The actual position of the drive system gives the absolute or relative positions of moved components in the system. IT system Mains with no ground potential reference, since it is not grounded I: iso-lation ; T: terre (French): ground Limit switch Switches which signal any overrun on the permissible travel. Low/open Signal status of an input or output signal; when no signal is present, signal voltage is low (low level) Module code Internal electronic code (8 bit) which describes the hardware and the functionality of modules. This code is held in an EEPROM in every module. Node guarding Monitoring function at the RS232 interface Optically isolated Electrical transmission of signals with electrical isolation Parameter Device data and values which can be set by the user PBDP-C Field bus module with which the positioning controller can be integrated into a Profibus-DP network Power amplifier This is the unit that controls the motor. The power amplifier generates currents for controlling the motor in accordance with the positioning signals from the control unit. Power controller See Power amplifier Pulse direction signals Digital signals with variable pulse frequencies which signal changes in position and rotation direction via separate signal wires. Quick-stop This function is used in the event of faults, the stop command or in an emergency for rapidly braking a motor. RS232 interface Communications interface of the Twin Line unit for the connection of a PC or the HMI hand-held operating unit RS422-C The signal status is calculated from the differential voltage of one posi-tive and one inverted negative signal. Two signal wires must therefore be connected for one signal. RS422 level The signal status is calculated from the differential voltage of one posi-tive and one inverted negative signal. Two signal wires must therefore be connected for one signal. RS485-C Field bus module which enables the field bus to be used via a multipoint connection with serial data transmission. A multipoint connection - in contrast to a point-to-point connection - can swap data with several devices on the bus. RS485 level The signal status is calculated from the differential voltage of one positive and one inverted negative signal. Two signal wires must therefore be connected for one signal. RS485 signal transmission is bidirectional. Sense regulation The voltage drop on the supply lines is compensated in such a way that the output voltage at the sense terminals has the correct value. The output voltage is only activated once the sense lines have been connected. SMART Operating system software User units A user unit corresponds to the maximum precision at which a distance, speed or acceleration value can be input. User units can be set for all normalizable parameters. Watchdog Device in the unit which detects internal faults. If a fault occurs, the amplifier is switched off immediately.
  • 10. V-8 Twin Line Controller 51x Glossaries TLC51x 98441113117,c325,11.00 Written conventions and note symbols Action symbols „̈“ This action symbol is used for step-by-step instructions which can be carried out as they are described. If one of the instructions leads to a noticeable response from the unit, this will be given after the description of the action to be carried out. In this way you will receive direct confirmation that a particular step has been correctly carried out. Enumeration symbol „•“ The enumeration symbol is used for listing individual points in a given information group in summary form. If the result of steps or sequences is described, the step to be carried out is described first. Menu paths „©“ In the Twin Line Control Tool operating software an action is launched via ’Menu © Menu item © ...’. For example, ’File © Save’ in the menu ’File’; under the menu item ’Save’ saves data to the data storage medium. This symbol is used for general notes which give additional information about the unit. Passages which are preceded by this symbol may have to be discussed in more detail with SIG Positec’s customer service. You will find contact addresses for SIG Positec under ’Service address’, page 9-1.
  • 11. 98441113117,c325,11.00 TLC51x The positioning controller Twin Line Controller 51x 1-1 1 The positioning controller 1.1 Scope of supply ̈ Check the parts supplied to make sure they are complete. Keep the original packaging in case the unit has to be returned to the manufacturer to be added to or repaired. Scope of supply of positioning controller standard unit The scope of supply of the TLC51x positioning controller includes: Modules Option module configurations for the positioning controller: Fig. 1.1 TLC51x and modules No. Qty. Designation Order no. 1 1 TLC511, TLC512 type code 2 1 Hood for front cover - 3 1 or 2 Shielding terminal SK 14 for motor connec- tion (two shielding terminals in case of units without internal mains filter) 6250 1101 400 4 1 Connector mountings for the terminal strips - 5 1 Documentation for the TLC51x 9844 1113 117 No. Qty. Designation Order no. 6 1 Encoder module RS422-C or Pulse-/direction module PULSE-C type code 6 1 Rotation monitoring RM-C type code 6 1 Field bus module PBDP-C, CAN-C, RS485-C or IBS-C type code Tw in Line RS422-C PULSE-C RM-C PBDP-C CAN-C RS485-C IBS-C 4 1 3 65 2
  • 12. 1-2 Twin Line Controller 51x The positioning controller TLC51x 98441113117,c325,11.00 Scope of supply of positioning controller version P The scope of supply of the TLC51xP positioning controller includes: Modules Optional modules are identical with those of the standard unit. Fig. 1.2 TLC51xP and Modules Item Qty Designation Order Number 1 1 TLC511P, TLC512P Type code 2 1 mains plug (round plug, 4-pin) - 3 1 shielding terminal SK14 for motor connection 6250 1101 400 4 1 Sub-D cover for RS232 interface - 5 1 Documentation on the &device type; on CD-ROM, multilingual 9844 1113 138 - 1 Built in holding brake controller HBC (optional) type code
  • 13. 98441113117,c325,11.00 TLC51x The positioning controller Twin Line Controller 51x 1-3 Accessories Accessories for the standard unit and for version P are: Figures. 1.3 and 1.4 on page 1-4. Item Qty Designation Standard unit/ version P (S/P) Order Number 1 1 operating software with online documentation on data carrier, multilingual S/P 6250 1101 803 2 1 hand-held operating unit HMI with manual S/P 6250 1101 503 3 1 connector set for complete assembly S/P 6250 1519 002 4 1 motor cable 1.5 mm2 S/P 6250 1317 xxx 1) 5 1 encoder cable for module RM-C S/P 6250 1440 xxx 1) 6 1 pulse direction cable for module PULSE-C S/P 6250 1447 yyy 2) 7 1 encoder cable for module RS422-C S/P 6250 1448 yyy 2) 8 field bus cable for module CAN-C IBS-C S/P 6250 1446 yyy 2) 6250 1451 yyy 2) - 1 CAN terminator, 9-pin socket CAN terminator, 9-pin plug S/P 6250 1518 002 6250 1518 003 9 1 RS232 programming cable 5 m RS232 programming cable 10 m S/P 6250 1441 050 6250 1441 100 - 1 TL HMI cable S/P 6250 1442 yyy 2) 10 1 holding brake controller TL HBC S 6250 1101 606 11 1 external mains filter for units with no internal filter for TLC511 NF, 4A for TLC512 NF, 10A S 5905 1100 200 6250 1101 900 12 1 terminal angle with top-hat rail TS 15, e.g. for terminal Messrs. Phoenix Contact Typ MBK P 6250 1102 200 13 1 set grommets, type KDT/Z 3) ( Murrplastic GmbH, see chap. 10.3, Suppliers) P 6250 1102 202 1) cable length xxx: 003, 005, 010, 020: 3 m, 5 m, 10 m, 20 m, longer cable lengths on request. 2) cable length yyy: 005, 015, 030, 050: 0.5 m, 1.5 m, 3 m, 5 m. 3) The inside diameter of the grommets must match the diameter of the cables used.
  • 14. 1-4 Twin Line Controller 51x The positioning controller TLC51x 98441113117,c325,11.00 Fig. 1.3 Accessories for the TLC51x Fig. 1.4 Special accessories for the TLC51xP
  • 15. 98441113117,c325,11.00 TLC51x The positioning controller Twin Line Controller 51x 1-5 1.2 Documentation and literature Manuals for the positioning controller Twin Line HMI, Manual for the Human-Machine Interface HMI, Order no.: 9844 1113 091 Twin Line Control Tool, Manual for the operating software, English Order no.: 9844 1113 096
  • 16. 1-6 Twin Line Controller 51x The positioning controller TLC51x 98441113117,c325,11.00 1.3 Unit series The positioning controller TLC51x forms part of SIG Positec’s Twin Line device series for controlling stepper motors and AC servomotors. The positioning controller with built-in control electronics and power amplifier works as a stand-alone amplifier or as part of a field bus configuration. It can operate position control on an AC synchronous servomotor and carry out positioning operations on its own. The positioning controller is available with two power amplifiers with a similar housing design. Electrical connections and functional scope are identical for both units. The positioning controller comes in two versions with identical functions: • standard unit, TLC51x, for use in a control cabinet • version P, TLC51xP, with protection grade IP54, category 2 for use outside the control cabinet close to the motor. Fig. 1.5 Positioning controller 11P, TLC511 and TLC512
  • 17. 98441113117,c325,11.00 TLC51x The positioning controller Twin Line Controller 51x 1-7 Type code The power class of the positioning controller is indicated by the last digit in the device name ’TLC51x’ of the type code. version Version P with IP54 protection is designated by an additional "P" for "protected" in the type code device name. Fig. 1.6 Type code of the positioning controller TLC51x Version P There is an option to supply the positioning controller with built-in holding brake control. Accessories TL HBC and TL BRC are not suitable for version P, as they only have IP20 protection.
  • 18. 1-8 Twin Line Controller 51x The positioning controller TLC51x 98441113117,c325,11.00 1.4 Unit overview Fig. 1.7 Positioning controller TLC51x Mains connection The power supply for the amplifier is connected to the mains. A positioning controller with a built-in mains filter can be operated without any further noise suppression on the supply side. The power supply for control loops and for controlling the fan must be provided by an external 24 VDC power supply. Motor connection The positioning controller supplies the power for a permanent-field AC synchronous servomotor via the three-phase connection. The motor connection is short-circuit protected and is checked for ground faults when the amplifier is enabled. DC-line connection The device’s DC-line voltage is available at the DC-line terminals. DC-line capacitors can be supported by external capacitors in order to absorb sudden, excess braking energy. Status display A seven-segment display provides information about the operating status of the positioning controller. If there is an operating malfunction the display will flash and display an error code. LED for DC-line voltage The LED comes on when there is voltage in the DC-line. LEDs for operating signals Five LEDs display the signal states of these adjacent inputs: positive and negative limit switches, motor stop signal, power amplifier enablement and automatic operation.
  • 19. 98441113117,c325,11.00 TLC51x The positioning controller Twin Line Controller 51x 1-9 Voltage selector switch The voltage selector switch can be used to run the unit off a mains voltage of 115 V or 230 V. The voltage selector switch is only available for units with no mains filter (NF option). Version P units are always fitted with voltage selection. Signal interfaces The input and output signals are routed via the signal interface and an external 24 VDC supply voltage injected for the closed-loop control unit. RS232 interface The RS232 connection is the communications interface of the unit and is used for connecting a PC or the HMI hand-held operating unit. Air outlet and fan A built-in fan sucks cold air into the unit from below to cool the power amplifier and ballast resistor. It discharges the warmed air through the upper air outlet vents. Temperature sensors on the power amplifier’s heat sink protect the unit from overheating. Module slots Four module slots allow the positioning controller to be matched flexibly to your particular area of application. The minimum configuration required to drive an AC servomotor is a module in slot M2. The other slot modules expand the scope of functions of the positioning controller. Configuration variants You can choose between several module variants in slots M1, M2 and M4 and thereby configure the positioning controller for a particular arrangement of installations. Slot M3 remains free for later extensions. Parameter memory All settings of the positioning controller are administered in a motor data record, two records for control parameters and one for movement parameters. The parameters are stored in the unit, protected against power outages, and can be displayed and changed via the RS232 inter- face on the PC, via the HMI hand-held operating unit or over the field bus. Movement parameters The set of movement parameters contains specific data for the various operating modes of the positioning controller. Should the operating mode change, the controller will switch over to the appropriate set of movement parameters. Slot Functions when module fitted Possible modules fitted M1 External setpoint signals for moving and positioning the motor PULSE-C or RS422-C M2 Actual position of an encoder for monitoring rotation of motor RM-C M4 Field bus module for integrating into the following field bus systems: Profibus-DP, CAN-Bus, CANOpen, DeviceNet, serial online connection or Interbus-S PBDP-C, CAN-C, RS485-C or IBS-C
  • 20. 1-10 Twin Line Controller 51x The positioning controller TLC51x 98441113117,c325,11.00 1.5 Modules of the positioning controller The block diagram shows the modules and interface signals of the positioning controller. Fig. 1.8 Block diagram with modules and interface signals Module PULSE-C The PULSE-C pulse-direction module passes on externally injected frequency signals to the controller as reference signals for positioning. The module registers the position data as pulse-direction signal or as pulseforward / pulseback signal. Module RS422-C The RS422-C encoder module evaluates externally injected encoder signals as reference signals for positioning. The signals take the form of A/B signals from an encoder, from a higher-ranking controller or from the encoder simulation of a first positioning controller. Module RM-C The positioning controller receives A/B signals from the RM-C rotation monitoring module in order to monitor the position of the stepping motor, and also a signal for checking the temperature of the motor. The encoder electronics in the motor receive their power via the rotation monitoring terminals. The rotation monitoring is optional. Module PBDP-C The PBDP-C field bus module serves to integrate the positioning con- troller into the Profibus-DP field bus. The positioning controller works as a command receiver or as a slave device. It executes the control and work commands from a higher-ranking controller. Module CAN-C The CAN-C field bus module couples the positioning controller to a CAN-Bus, CANOpen or DeviceNet field bus Module IBS-C The IBS-C field bus module allows the positioning controller to be used as a slave device in an Interbus network. The module is designed to Interbus specification version 1. Module RS485-C The RS485-C field bus module permits field bus applications via a multipoint connection with serial data transmission. A multipoint connec- tion - in contrast to a point-to-point connection - is able to swap data with several devices.
  • 21. 98441113117,c325,11.00 TLC51x The positioning controller Twin Line Controller 51x 1-11 1.6 Module configuration, operating modes and functions Overwiew Depending on the module configuration, the positioning controller functions in one manual and several automatic modes, which can be swapped during travel. • Manual movement with positioning • Speed mode • Point-to-point mode • Electronic gear • Referencing Fig. 1.9 Operating modes of the positioning controller TLC51x The following table shows the modules that require to be fitted for each operating mode, and possible configurations for additional functions. Manual movement with positional reference In manual movement mode the positioning controllermoves the motor a defined distance or in continuous motion at a constant speed. Distance, speed steps and the time for changing from united inching to continuous motion can be set. Speed mode In speed mode, the motor is given a set speed and a movement is started with no defined target position. The motor continues to move at this speed until a new speed is set or the mode is terminated. Minimum module configuration in slot Operating mode M1 M2 M3 M4 Manual mode, Speed mode, Point-to-point mode, Referencing movement optional optional - PBDP-C, CAN-C, IBS-C oder RS485-C Register reference pulses Electronic gear mode PULSE-C or RS422-C optional - PBDP-C, CAN-C, IBS-C oder RS485-C Operation with rotation monitoring optional RM-C - PBDP-C, CAN-C, IBS-C oder RS485-C
  • 22. 1-12 Twin Line Controller 51x The positioning controller TLC51x 98441113117,c325,11.00 Point-to-point mode In point-to-point mode (also PTP mode), the motor is moved from a point A to a point B by means of a positioning command. The positioning distance is given either in absolute terms with reference to the axis zero point or in relative terms with reference to the current axis position. Referencing In referencing mode, an absolute dimension reference is created between the position of the motor and a defined axis position. Referencing can be carried out by a referencing movement or by dimension setting. In a referencing movement, the motor is moved to a defined position, the zero or reference point, on the axis in order to create an absolute dimen- sion reference between the position of the motor and the axis. The reference point is used as the point of reference for all following absolute positioning operations. Dimension setting offers the chance to define the current motor position as the new axis reference point to which all following position data relate. Field bus mode The primary area of application of the positioning controller is in field bus operation via a module in slot M4. There are four modules available for field bus operation: • Profibus-DP with the PBDP-C module • CAN-Bus, CANOpen or DeviceNet with the CAN-C module • serial RS485 bus with the RS485-C module • Interbus-S with the IBS-C module You will find information on connecting, programming and operating the positioning controller in a field bus in the relevant field bus manuals from SIG Positec. List control While the positioning controller is carrying out a movement command, the direction of movement is monitored in the background by means of list control. When a list position is reached, the positioning control- lerresponds with the relevant reaction depending on the list type. • List type for position values and signal values: when the motor reaches a list position, the output signal 'TRIGGER' is set or reset depending on the list entry. • List type for position values and speed values: when the motor reaches a position value, the positioning controller switches to the new speed value in the list, and moves the motor at this speed. Teach-In Entries can be made in the list with the HMI hand-held operating unit, the operating software or via the field bus. For entering the position values, the positioning controller offers teach-in processing: the motor is moved to successive list positions with respect to the reference point, and these positions are then committed to the parameter memory together with a value for trigger output or speed.
  • 23. 98441113117,c325,11.00 TLC51x The positioning controller Twin Line Controller 51x 1-13 1.7 Guidelines and standards 1.7.1 Declaration of conformity and CE labelling The EG guidelines define the minimum requirements - particularly safety requirements - applicable to a product and must be complied with by all manufacturers and dealers marketing the product in the member states of the European Union (EU). The EC guidelines describe the main requirements made of a product. The technical details are laid down in the harmonized standards, which for Germany take the form of the DIN EN standards. If there is not yet any EC standard applicable to a particular product area, existing technical standards and regulations will apply. CE labelling With the declaration of conformity and the CE labelling of the product the manufacturer certifies that his product complies with all relevant require- ments of the EC guidelines. He is permitted to sell and use the product throughout the EC. Machine guideline The Twin Line unit is not a machine in the sense of the machines EC guideline (89/392/EEC). It has no function-associated moving parts. The unit may however be a component part of a machine or installation. Provided the rest of the machine complies with the machines guideline and it has been set up in accordance with the EMC testing code of SIG Positec, conformity with the machines guidelines can be certificated. EMC guideline The EC guidelines on electromagnetic compatibility (89/336/EEC) applies to units which can cause electromagnetic interference or whose operation can be impaired by such interference. Compliance with the EMC guideline cannot be checked for the Twin Line unit until it has been installed into a machine or installation. The instruc- tions provided under ’Installation’ must be complied with to guarantee the Twin Line unit is EMC-safe when fitted in the machine or installation and before use of the unit is permitted. Low voltage guideline The EC guideline on low voltages (73/23/EEC) lays down safety require- ments for 'electrical apparatus' as protection against the risks which can originate in such devices and which can be created in response to external influences. As specified by the low voltage guidelines the Twin Line unit conforms to EN 50178 and to the following peripheral conditions: • Protection class 1 • Contamination degree 2 (only standard unit) Declaration of conformity The declaration of conformity certificates that the device satisfies the requirements of the EC guideline cited. For the Twin Line unit a decla- ration of conformity in accordance with the EC low voltages guideline has been issued.
  • 24. 1-14 Twin Line Controller 51x The positioning controller TLC51x 98441113117,c325,11.00 Fig. 1.10 Conformity as per the EC low voltages guideline
  • 25. 98441113117,c325,11.00 TLC51x The positioning controller Twin Line Controller 51x 1-15 1.7.2 Regulations and standards Standards concerning safe operation of the Twin Line units EN 60204 - (VDE 0113 Part 1: 1998): Electrical equipment of machines, General requirements DIN VDE 0100, Regulations regarding the installation of high-voltage systems with voltages up to 1000 V DIN VDE 0106-100, 1983, Protection against electrical shock; Location of actuation elements in the vicinity of operating resources liable to acci- dental contact DIN VDE 0470-1,1992, IP protection types EN 954-1: Safety of machines, Safety of components of control devices, Part 1: General design principles Standards regarding compliance with EMC limit values EN 61000-4-1 (IEC 1000-4-1: 1992): Testing and measurement procedures, Section 1: Overview of noise immunity testing procedures EN 618500-3:1996 and prA11:1999: Speed variable electrical driving units.
  • 26. 1-16 Twin Line Controller 51x The positioning controller TLC51x 98441113117,c325,11.00
  • 27. 98441113117,c325,11.00 TLC51x Safety Twin Line Controller 51x 2-1 2 Safety 2.1 Danger categories Safety notes and general information are indicated by special symbols in the manual. In addition you will find symbols and instructions affixed to your Twin Line unit which warn you of possible dangers and help you to operate the unit safely. Depending on the seriousness of the danger, danger symbols are divided into three danger categories. The symbols shown emphasize the danger situation to which the warning applies. DANGER! This is an indication of direct personal danger. Can lead to serious injuries with fatal consequences if not observed. WARNING! Indication of a recognizable danger. If the warning is ignored, the danger can lead to serious injury with fatal consequences, and to the unit or system parts being permanently damaged. CAUTION! Indication of a danger. If this is ignored, minor personal injury and light damage to the unit or system may be the result. 2.2 Safety instructions DANGER! Electric shock from high voltage! Follow safety rules when working on electrical systems: • Switch off the power to the unit • Make sure the unit cannot be switched on again inadvertently • Confirm that no voltage is present • Cover or shield neighboring system parts which are live. DANGER! Electric shock from high voltage! Before starting work on the connections of the power unit or on the motor terminals, wait for the 4 minutes discharge time and then measure the residual voltage on the DC-line terminals “DC+” and “DC-” . The residual voltage must not be higher than 48 VDC before you work on the connections. If additional DC-line capacitors are fitted, the discharge time increases to up to 10 minutes. Wait for this length of time, and then measure the residual voltage.
  • 28. 2-2 Twin Line Controller 51x Safety TLC51x 98441113117,c325,11.00 2.3 Use for the purpose intended 2.3.1 Ambient conditions Transportation and storage temperature -40 °C to +70 °C Installation height, operation with no reduction in performance h <1000 m above m.s.l. Vibration stress during operation to DIN IEC 68-2-6 Number of cycles: 10 frequency range: 10Hz to 500Hz acceleration: 20m/s2 Continuous shocks to DIN IEC 68-2-29 Number of shocks: 1000/direction (X,Y,Z for each clockwise, anticlockwise direction, total 6000) Peak acceleration: 150m/s2 TLC51x Protection type IP20 Ambient temperature 0 °C to +50 °C Relative humidity 15% to 85% (no condensation permissible) TLC51xP Protection type IP54, category 2 Protection grade of internal cooling air duct IP34 Ambient temperature 0 °C to +45 °C Version P is not suitable for use in the open air or in sticky environments (danger of fan glueing up). 2.3.2 Intended use The positioning controller is an electrical device for controlling a variable-speed drive with a stepping motor. Only 3-phase stepping motors may be operated with the positioning controller. The motor must be approved by SIG Positec for operation with the device. The motor connections of multiple units may not be connected to each other. Units may not be connected in parallel to the DC-line output. The positioning controller may be used for industrial applications in the system configuration described. The positioning controller must be installed and operated in an environ- ment which meets at least protection grade IP54. The standard unit must therefore be installed and properly mounted in a control cabinet. Version P may be operated outside a control cabinet. The positioning controller may only be set up and operated after correct EMC installation has taken place. It may only be used with the cables and accessories specified by SIG Positec. The positioning controller may not be used in IT networks, as they have no ground potential. Interference suppression filters for correct EMC installation will only work properly with a ground potential connection.
  • 29. 98441113117,c325,11.00 TLC51x Safety Twin Line Controller 51x 2-3 2.4 Qualification of the personnel Work on and with the positioning controller may only be carried out by qualified personnel. Qualified personnel can use their technical training, knowledge and experience to assess the work to be done and to recognize and avoid possible dangers. Qualified personnel will be aware of the current standards, regulations and accident prevention regulations which must be observed when working on the unit. 2.5 Safety devices The positioning controller unit monitors a range of signals from system and installation components. Safety devices coupled with the unit protect the system and operating personnel. The following components and limit values are monitored internally: Savety devices Tasks and protective functions Limit switch signals Monitoring the permissible ranges of movement in order to protect personnel and the system Stop switch signal Stops the drive with maximum braking energy and at standstill hold the motor still under positional control. Protection of persons and system in the event of unexpected movements due to the motor being switched off. Monitoring Task and protective function Short-circuit Motor line monitored for short circuit between the motor phases functional safety and device protection Over- and undervoltage Monitoring DC line for overvoltage and undervoltage functional safety and device protection Temperature Monitor motor 1) and power amplifier with sensors for excess temperature device protection 1) Motor monitoring only for units with optional rotation monitoring Rotation monitoring error For units with rotation monitoring, contouring error threshold value when positional deviation too large functional safety Motor speed Speed limit at maximum permitted motor speed, device protection Data connection with a hand-held operating unit Functioning of the connection during motor control via the hand-held operating unit, functional safety
  • 30. 2-4 Twin Line Controller 51x Safety TLC51x 98441113117,c325,11.00
  • 31. 98441113117,c325,11.00 TLC51x Technical data Twin Line Controller 51x 3-1 3 Technical data 3.1 Mechanical data 3.1.1 Positioning controller TLC51x Weight TLC511, TLC512 with 3 modules 2,7 kg Device protection Protection type as per DIN EN 60529: 1991 IP 20 Dimensions Fig. 3.1 Dimensions TLC511 and TLC512. The Twin Line HMI shown in the drawing is an option. TLC511 TLC512 Width [mm] 108 108 Height [mm] 212,5 212,5 Depth [mm] 184,5 184,5 Front width [mm] 105,5 105,5 Connection dimension [mm] 63 63
  • 32. 3-2 Twin Line Controller 51x Technical data TLC51x 98441113117,c325,11.00 3.1.2 positioning controller TLC51xP Weight TLC511P SF with 3 modules 8 kg TLC512P SF with 3 modules 8 kg Device protection Protection type as per DIN EN 60529: 1991 IP 54, Category 2 Dimensions Fig. 3.2 Dimensions TLC51xP TLC511P TLC512P Width A [mm] 127 127 Height B [mm] 360 360 Depth C [mm] 245 245 Front width D [mm] 127 127 Connection dimension E [mm] 80 80 337 2 4 5 127 360 80 127 21 21 6.5 343
  • 33. 98441113117,c325,11.00 TLC51x Technical data Twin Line Controller 51x 3-3 3.1.3 Accessories for standard unit Holding brake controller TL HBC Dimensions (H x W x D) 107 mm x 104 mm x 76 mm Installation on top-hat rail 55 mm Fig. 3.3 Holding brake controller
  • 34. 3-4 Twin Line Controller 51x Technical data TLC51x 98441113117,c325,11.00 3.2 Electronic data 3.2.1 Positioning controller Mains connection Motor connection TLC511/TLC511P TLC512/TLC512P Mains voltage [VAC] only for TLC51xNF: 1 x 230 -20%/+15% 1 x 115 -20%/+15% 1 x 230 -20%/+15% 1 x 115 -20%/+15% Mains frequency [Hz] 47 - 63 47 - 63 Current consumption [A] 2 (230 V) 4 (115 V) 5 (230 V) 10 (115 V) Starting current [A] < 60 < 60 Power factor cosϕ > 0.6 > 0.6 Power loss [W] ≤ 40 ≤ 60 Mains buffering [ms] < 5 < 5 Overvoltage strength (DIN EN 61800-3) between phases: 1 kV, phases to earth: 1 kV Leakage current 1) [mA] 1) Leakage currents are measured with an RC circuit in accordance with IEC60990. The value can be higher if measured directly. Advice on using earth leakage cir- cuit-breakers on request. < 30 < 30 Fuse, external [A] / characteristic for 230 V for 115 V 10 C, K or similar 10 C, K or similar 10 C, K or similar 10 C, K or similar TLC511/TLC511P TLC512/TLC512P Power class 1) [kW] 1) Max. effective electrical power of the unit for nominal current and 115 V AC or 230 VAC mains voltage 0.35 0.75 Switching frequency [kHz] 16 16 Rated current [Arms], r.m.s. value 3 7 Maximum speed [r.p.m.] 3000 3000 Cable length 2) [m] 2) longer cable lengths on request 20 20 Cable diameter [mm2 ] 1.5 1.5
  • 35. 98441113117,c325,11.00 TLC51x Technical data Twin Line Controller 51x 3-5 24 V DC supply PELV, DIN 19240, reverse-polarity-protected Input Voltage range 20 V to 30 V Ripple < 2 VSS Input current (without loading of the outputs) < 2.5 A Signal interface Digital signal inputs Reverse-polarity-protected No electrical isolation Debounced, debounce interval 0.7 to 1.5 ms DC-voltage Uhigh 12 V to 30 V (I ≥ 3 mA) DC-voltage Ulow ≤ 5V (I ≤ 0,5 mA) Current at 24 V ≤ 7 mA Digital signal outputs Inductive loadability (150 mH / 11 W) Short-circuit protected DC-voltage ≤ 30 V Switching current ≤ 400 mA Voltage drop at 400 mA ≤ 1 V Analogue signal input Voltage range +10 V to -10 V Input resistance 5 kΩ UL 508C certification You will find the thresholds for UL 508C certification in the chapter enti- tled ’UL 508C certification’ from page 3-8.
  • 36. 3-6 Twin Line Controller 51x Technical data TLC51x 98441113117,c325,11.00 3.2.2 Modules Note: You will find more detailed data on individual modules in the chapter entitled ’Electrical installation’ from page 4-11. RS422-C encoder module Signal inputs (A, B, I) RS422-compatible Connected electrically to 24VGND Input frequency ≤ 400 kHz 1 600 000 Inc/s Output Encoder supply (SENSE) 5 V ± 5%, max. 300 mA Sense-controlled Short-circuit- and overload-proof PULSE-C pulse direction module Signal inputs Symmetrical Compatible with RS422-voltage Asymmetrical 4.5 V to 30 V Connected electrically to 24VGND Input resistance 5 kΩ Input frequencies: Stepping frequency (PULSE/PV, DIR/PR)≤ 200 kHz Motor current control (PWM) 6 kHz to 25 kHz Number of steps 200, 400, 500, 1000, 2000, 4000, 5000, 10000 Signal outputs (ACTIVE, FUNCT_OUT) Open collector outputs Short-circuit-proof Output voltage ≤ 30 V Output current, maximum ≤ 50 mA Rotation monitoring RM-C Signal inputs (A, B)RS422 level electrically connected to 24VGND Input frequencies: ≤ 400 kHz 1 600 00 Inc/s Encoder resolution 1000 lines Encoder power supply output (SENSE) 5 V ± 5%, ≤ 300 mA sense controlled short-circuit and overload protected RS485-C module Signal inputs / outputs in accordance with RS485 norm electrically isolated 4-wire interface Transmission rates 1200, 2400, 4800, 9600 19200, 38400 Baud PBDP-C module Signal inputs / outputs in accordance with RS485 norm electrically isolated Transmission rate ≤ 12 MBaud CAN-C module Signal inputs / outputs level to ISO 11898 electrically isolated Transmission rate ≤ 1 MBaud
  • 37. 98441113117,c325,11.00 TLC51x Technical data Twin Line Controller 51x 3-7 IBS-C module Signal inputs / outputs in accordance with INTERBUS specification, category 1 Two-wire remote bus Transmission rate 500 kBaud For units with the IBS-C module, 24 VGND is internally connected to PE. Version P optional holding brake controller Power supplyinput 20 V to 30 V input currentinput current = 0.1 A + brak- ing current output, brake not short-circuit protected current at 24 V for 100 ms max. 2.5 A DC voltage 20 V to 30 V With voltage reduction continuous current max. 1.25 ADC voltage9.5 V to 15 V
  • 38. 3-8 Twin Line Controller 51x Technical data TLC51x 98441113117,c325,11.00 3.2.3 UL 508C certification The Twin Line Twin Line Controller 51x is certified to UL 508C with the following data. Mains connection Motor data Accessories • Holding brake controller, TL HBC Power supply 24 V 3.2.4 Accessories for standard unit TL HBC holding brake controller Supply voltage, input 20 V to 30 V Input current Input current = 0.5 A + brake current Output, brake DC-voltage 20 V to 30 V Power at 24 V for 100 ms 0.5 A to 2.5 A Continuous current 0.5 A to 1.5 A DC-voltage with voltage drop 9.5 V to 15 V Current at 12 V 0.5 A to 2 A Safe electrical isolation between 24 V input, control input and brake output Unit Mains voltage [V] Mains frequency [Hz] Current [A] Phases TLCX11 230 115 47-63 2 4 1 TLCX12 230 115 47-63 5 7.5 1 Unit Motor voltage [V] Motor frequency [Hz] Motor current [A] Phases TLCX11 0-230 0-2500 3 3 TLCX12 0-230 0-2500 7 3
  • 39. 98441113117,c325,11.00 TLC51x Installation Twin Line Controller 51x 4-1 4 Installation 4.1 Electromagnetic compatibility, EMC Strong electromagnetic interference occurs in the power area of the positioning controller which can influence signals coming from control cables and system parts and which can endanger the operational reliability of the system if suitable protective measures are not taken. The positioning controller meets the requirements of the EC directives on EMC noise resistance and on noise output as specified in EN-61800-3, as long as the following steps have been taken during installation. Control cabinet setup Cabling EMC measures Effect Use zinc or chrome-plated mounting plates, make large contact surface connections for metal parts, remove paint from bearing surfaces Good conductivity due to two-dimensional contacts Ground the control cabinet, door and mounting plate by means of metal tapes or cables with a diameter greater than 10 mm2 Reduction of EMC emissions Mount power components and control components separately, minimum distance 25 cm, reduce inter- ference injection from either component by using multiple-ground dividing plates Reduction of mutual interference injection Fit switching devices such as contactors, relays or solenoids with interference suppressors or spark suppressors (e.g. diodes, varistors, RC elements) Reduction of mutual interference injection EMC measures Effect Keep cables as short as possible, no ’safety loops’, short cables from the star point in the control cabinet to outlying ground connection Avoidance of capacitive and inductive interfer- ence injection Use cable clamps to connect a large surface area of the shield from all shielded cables to the mounting plate at the control cabinet entry. Reduction of EMC emissions Lay the cables spatially separated from each other: - Signal cables and power cables - Mains and motor cables - Mains filter input and output cables Reduction of mutual interference injection, reduction of emissions, increasing resistance to interference Connect large surface areas of cable shields, use cable sleeves and tapes Low shielding effect if the connection is not made over large surface area, reduction of emissions Ground a large surface area of the shields of digital signal cables at each end or via sub-D housing Avoidance of interfer- ence on control cables, reduction of emissions Screen analogue signal lines at one end only at the power drive, at the other end via capacitor, e.g. 10 nF / 100V MKT Avoidance of ripple loops due to low-fre- quency interference
  • 40. 4-2 Twin Line Controller 51x Installation TLC51x 98441113117,c325,11.00 Fig. 4.1 EMC measures and subdivisions of the control cabinet Use only shielded motor cables with copper braid- ing and at least 85% covering, ground a large sur- face area of the shield at each end. Only use motor and encoder cables recommended by SIG Positec. Controlled discharge of interference currents, reduction of emissions If the motor and machine are not conductively con- nected, for example by an insulated Flange or a non-flat connection, ground the motor with a grounding wire (> 10 mm2 ) or ground strap. Reduction of emissions, increase in resistance to interference Ground unused cable wires from control circuits at both ends of the cable (does not apply to motor cable) Additional shielding effect EMC measures Effect
  • 41. 98441113117,c325,11.00 TLC51x Installation Twin Line Controller 51x 4-3 WARNING! Malfunctions and risk of injury! The EMC of cables must be guaranteed if the unit is to function reliably and free of faults. The use of unsuitable, non-EMC-secure cables can damage the unit and lead to malfunctions. Motor leads and encoder cables are especially critical signal circuits. Use SIG Positec cables for them. SIG Positec motor and encoder cables have been tested for EMC stability. In addition these cables can be used as trailing cables. You can find information on the cables in the section ’Accessories and spare part’ on page 10-1.
  • 42. 4-4 Twin Line Controller 51x Installation TLC51x 98441113117,c325,11.00 4.2 System components Besides the components included in the scope of delivery, further system components are required for connecting the positioning control- ler: • Three phase stepping motor • Motor cable • Signal cable to fit device version: RS422-C module: encoder cable for RS422-C RM-C module (optional): encoder cable for RM-C PULSE-C module: encoder cable for PULSE-C PBDP-C module: bus cable for Profibus-DP CAN-C module: bus cable for CAN-Bus, CANOpen and DeviceNet RS485-C-module: bus cable for serial online bus IBS-C module: bus cable for Interbus • RS232 cable with PC connecting plug • Mains cable and mains fuses • External power supply unit, 24 VDC with safe isolation - PELV • External mains filter for units with no built-in mains filter • Additional filters and chokes for mains connection and motor connection, depending on system configuration • NC control or PLC for automatic operation • PC or laptop with Windows 95, 98 or NT for commissioning with operating software.
  • 43. 98441113117,c325,11.00 TLC51x Installation Twin Line Controller 51x 4-5 4.3 Mechanical installation Before installation... ̈ Check the unit for outwardly visible damage such as dents in the housing or broken connection terminals. Do not install damaged units. DANGER! Danger from high voltages, possibility of permanent dam- age to the unit’s electronic circuitry Make sure when installing that no loose parts such as pieces of wire or mounting parts fall into the unit. Loose, conductive parts inside the unit can endanger life by forming parasitic voltages and permanently damaging the unit through short-circuits.
  • 44. 4-6 Twin Line Controller 51x Installation TLC51x 98441113117,c325,11.00 4.3.1 Positioning controller TLC51x mounting Control cabinet The control cabinet must be big enough to allow both unit and accesso- ries such as ballast resistor controller and holding brake controller to be firmly mounted and connected in line with EMC requirements. Operating heat from the unit and other components as well as the heat produced by the ballast resistors must be able to dissipate by means of the switch cabinet ventilation. Mounting distances The unit is fitted with a built-in fan. Ventilation slots on and under the unit must be kept at least 70 mm away from neighbouring units or walls. Fig. 4.2 Mounting distances, dimensions in mm ̈ Position the unit in the control cabinet such that the heated air flow from other units, for example from an external ballast resistor, does not result in undesired heating of the cooling air. ̈ Mount the unit vertically with the mains connection at the top. ̈ Mount the unit on a galvanized metal plate. The back wall of the unit must be in good contact with the metal plate across its whole surface area. Painted surfaces have an insulating effect. Before fixing the unit to a painted mounting plate, scratch off the paint over a wide surface area in the places where the unit is to be mounted, to ensure that it has a good connection with the grounded plate.
  • 45. 98441113117,c325,11.00 TLC51x Installation Twin Line Controller 51x 4-7 4.3.2 Mounting the positioning controller TLC51xP Mounting distances Version P units must be mounted at a minimum distance of 10 mm from neighbouring devices. Positioning controller connections are routed out of the bottom of the housing. There must be 20 centimetres of space under the unit in order to ensure that connecting cables do not have to be bent. There is a ventilation element on the bottom of the unit. Do not remove the protective cover! The unit must be mounted vertically in order to maintain its water protection grade. Fig. 4.3 Mounting distances, dimensions in mm
  • 46. 4-8 Twin Line Controller 51x Installation TLC51x 98441113117,c325,11.00 4.3.3 Fitting the unit label The unit label supplies information on the meaning of all operating states displayed on the 7-segment display, and on signal interface assignment. An example of the unit label which you can copy is provided in section ’Unit label’, Page 11-1. TLC51x ̈ Stick the unit label on the inside of the hood on the side where the signal plugs are connected. ̈ After the electrical installation has been completed and the unit hood mounted, the cables for connection to the mains and the cables for both upper signal connections are led out through the top of the hood, while the motor cable and other signal cables are taken out through the bottom. TLC51xP ̈ Stick the label to the side of the Twin Line Unit. Fig. 4.4 Sticking the unit label in the side of the hoodto the side of the Twin Line Unit
  • 47. 98441113117,c325,11.00 TLC51x Installation Twin Line Controller 51x 4-9 4.3.4 Installing accessories to the standard unit Mains filter The positioning controller is supplied with a built-in mains filter as standard. A special version of the unit can also be ordered with no mains filter. Do not use the units with external mains filters unless you can make test measurements at the unit of the functioning and the EMC of a selected mains filter. The type plate on the front of the unit states whether a mains filter is built in or not: • F: With mains filter, e.g. TLC51x F • NF: Without mains filter, e.g. TLC51x NF Select a two-stage mains filter, e.g. for a frequency converter. The size and selection of a suitable filter is for the system designer to decide. ̈ Fit the mains filter near the mains connection and on the same mounting plate. The length of cable to the positioning controller should not be longer than 50 cm. The cable must be shielded and grounded at both ends.
  • 48. 4-10 Twin Line Controller 51x Installation TLC51x 98441113117,c325,11.00 4.3.5 Mounting version P accessories Terminal angle Version P offers a terminal angle as an accessory which is used for additional wiring. ̈ Open the front plate with the three mounting screws. ̈ Fix the terminal angle to the top left-hand side of the top of the housing, using two M3 screws. Fig. 4.5 Connection of terminal angle
  • 49. 98441113117,c325,11.00 TLC51x Installation Twin Line Controller 51x 4-11 4.4 Electrical installation WARNING! Malfunctions and danger of injury arising from interference with other units! Connect the unit correctly with respect to EMC. Control signals suffering interference can generate unexpected signal states which can impair the functioning of the unit. DANGER! Electric shock from high voltage! Follow safety rules when working on electrical systems: • Switch off the power to the unit • Make sure the unit cannot be switched on again inadvertently • Confirm that no voltage is present • Cover or shield any neighbouring system parts which are live. DANGER! Electric shock from high voltage! Work on the power supply circuit may only be carried out when the power supply has been switched off. Lock the main switch and lock access to it. Installing the positioning controller and other components and connect- ing it to the power supply may only be carried out by qualified personnel.
  • 50. 4-12 Twin Line Controller 51x Installation TLC51x 98441113117,c325,11.00 4.4.1 Electrical installation TLC51xP For TLC51xP units, most of the electrical connections are made inside the housing. The following connections are made to the underside of the housing: • connection for PC or HMI operating unit via 9-pin sub-D socket • mains connections via circular power plug Fig. 4.6 Connection example for the TLC51xP unit ̈ Open the front plate via the three mounting screws. ̈ Make the necessary connections to: • motor • position response signal • field bus • signal interface for manual operation
  • 51. 98441113117,c325,11.00 TLC51x Installation Twin Line Controller 51x 4-13 You will find details on individual connections in the following sub-sections ̈ Place the grommets on the cables. Only use grommets whose inside diameter matches that of the cables. ̈ Mount the grommets as shown in Fig. 4.6. ̈ Earth the unit at the grounding point at the back of the unit near the bottom. Connect them to system earth and the machine bed. ̈ Close the front plate with the three screws. The holding brake controller can be built into the unit as an optional extra. The fan and the holding brake controller are already connected to pins 32 and 34.
  • 52. 4-14 Twin Line Controller 51x Installation TLC51x 98441113117,c325,11.00 4.4.2 Mains connection Fig. 4.7 Mains connection for single-phase units Standard unit ̈ In the case of the single-phase unit, connect the mains cables to screw terminals PE, N and L • The correct torque for the terminal screws is 0.4 - 0.5 Nm. • For units without a mains filter, any mains cable over 20 cm in length must be shielded between the filter and the unit terminals and grounded at both ends. • The individual wires of the cable can be connected without wire end ferrules. • For units with a hood, the cable must be routed upwards from the point of connection. Version P ̈ Connect the power cable to the mains plug using terminals 1, 2 and PE. ̈ Do not use a plug in for a three-phase unit instead of one for single-phase units. The unit can be damaged. Both versions • The connection diameter for the mains cables is 1.5 to 2.5 mm2 . • Fit a fuse in the mains phase: for a 230 V connection: 10 A (C, K-characteristic or similar). • The additional PE terminal must be connected to the housing on account of the high leakage currents. Wire end ferrules If you use wire end ferrules, pay attention to the following: • Applies to TLC532 only: Do not use end ferrules with a plastic collar on wires with a cable diameter of 2.5 mm2 . • Only use square end ferrules to ensure that they cannot work loose after screws are tightened. • Strip the insulation from the cable to a length of 10 mm. Earth leakage circuit-breaker If a fault occurs, fault currents with DC component may arise. For single-phase units, an e.l.c.b. for fault currents with a pulsating DC component can be fitted.
  • 53. 98441113117,c325,11.00 TLC51x Installation Twin Line Controller 51x 4-15 4.4.3 Motor connection TLC51x DANGER! High voltage danger due to induced voltage! Do not touch the wires or contacts of the motor cable when the motor is turning. Even when they are not connected to the positioning controller motors will create high induced voltages when the motor shaft rotates. Make sure that the motor is not driven by external sources while installation work is going on. Connecting motor wires ̈ Connect the motor wires and protective ground to terminals U, V, W and PE. The assignment of wires must be the same at the motor as at the unit. Fig. 4.8 Motor cable connection to unit Fig. 4.9 Motor cable connection to motor, motor plug from the outside Terminal Connection Colour U motor wire brown (bn) V motor wire blue (bl) W motor wire black (bk) PE protective conductor (screen tracer wire) -
  • 54. 4-16 Twin Line Controller 51x Installation TLC51x 98441113117,c325,11.00 • Cable cross-section: 1.5 mm2 • Maximum cable length: 20 m • The tightening torque for the terminal screws is 0.4 Nm-0.5 Nm. • The individual conductors of the cable can be connected without wire end ferrules. • For units with a hood, the cable must be routed upwards from the point of connection. • For the PE connection you must use the shield drain wires. Fig. 4.10 Preparing the motor cable Wire end ferrules If you use wire end ferrules, pay attention to the following: • Only use square end ferrules to ensure that they cannot work loose after screws are tightened. • Do not use end ferrules with a plastic collar on wires with a cable diameter of 2.5 mm2. • The wire must fill the wire end ferrule over its whole length. Only then has the connection been safely carried out, ensuring maximum current carrying capacity and vibration resistance. EMC measures The motor cable is a source of interference and must be carefully laid: • The shield braiding of the motor cable must be connected to the motor housing and to the unit housing as well as to the switch cabinet entry with a large surface area connection. Use the supplied shielded terminal for the connection to the housing. • The motor cable and signal cables must be laid at a distance of at least 20 cm from each other. If the distance is less than this, the motor cable and signal cables must be separated by grounded screening plates.
  • 55. 98441113117,c325,11.00 TLC51x Installation Twin Line Controller 51x 4-17 4.4.4 Motor connection with holding brake to TLC51xP DANGER! Danger of high voltages from inductance! Do not touch motor cable wires and contacts while the motor is moving. Even when they are not connected to the positioning controller, motors will build up dangerous induced voltages if the motor shaft is turned. Make sure during installation that the motor cannot be driven by another device. Connecting the motor cable ̈ Connect motor wires and protective conductor to terminals U, V, W and PE. Wiring assignment for motor and unit must match. Fig. 4.11 Connection of motor cable and holding brake controls to the unit You will find details on connecting the motor cable to the motor, the use of wire end ferrules and EMC measures in the chapter entitled ’Motor connection TLC51x’ from page 4-15. A holding brake connection can be built into the unit as an optional extra. ̈ Connect the holding brake control wires to terminals B+ und B-. The power required by the holding break controller depends on the holding brake switching current: holding brake controller input current [A]= 0.5 A + switching current [A] The voltage reduction function is described in the chapter entitled ’Braking function with TL HBC’ from page 7-26.
  • 56. 4-18 Twin Line Controller 51x Installation TLC51x 98441113117,c325,11.00 4.4.5 Connecting the 24 V supply voltage ̈ Route the 24 V supply lines to the unit via a grounded 24 VDC transformer (PELV). Fig. 4.12 24 V connection • The second 24 VDC and GND connection can be used as a 24 V output for further consumers or for cascading several Twin Line units; the maximum terminal current is 7.5 A. • In selecting your 24 V power supply unit make sure you take into account any additional consumers, such as the holding brake and the holding brake controller. • To ensure that the position of the motor is preserved when the supply voltage to the power unit is switched off, the external 24 V supply voltage must remain switched on, and no external torque may affect the motor. • Lay the 24 V supply line at a distance of at least 20 cm from other lines to ensure EMC protection. For cable lengths of more than 2 m, make a twisted pair of the 0 V and 24 V supply wires. • The tightening torque for the terminal screws 1-34 is 0.22 Nm-0.25 Nm. Version P • Fan and holding brake controller are already connected to pins 32 and 34. Pin Signal Active Explanation I/O 31 24VDC - 24 VDC supply voltage, internally connected to pin 32 - 32 24VDC - 24 VDC supply voltage - 33 24VGND - GND for 24 VDC voltage, connected internally to pins 34 and 16 (ACTIVE_GND) - 34 24VGND - GND für 24 VDC voltage -
  • 57. 98441113117,c325,11.00 TLC51x Installation Twin Line Controller 51x 4-19 4.4.6 Connection to the signal interface The positioning controller can be controlled manually or automatically via the lines of the signal interface. Fig. 4.13 Signal interface: 1-30: inputs / outputs, 31-34: 24 V connection Connection ̈ The connections of the signal interface should be wired up as required by the operating mode selected. See also the wiring examples starting on page 4-44. ̈ Connect inputs LIMP, LIMN and STOP to the +24 V voltage if they are not being used or switch them out via the parameter ’Settings.SignEnabl’. See page 7-22. The terminal blocks of the signal interface must only be wired up when the unit is in a de-energized state. Variable interface connections The assignment of signal interface connections depends on the switching status of the ’Settings.IO_mode’ parameter, see page 6-3: • 'IO_mode' = '0': input signals are used for setting addresses and baud rates in field bus operation This is the preset on switching on the positioning controller. • 'IO_mode' = '1': input signals I_0 to I_13 and output signals Q_0 to Q_4 can be freely set. • 'IO_mode' = '2': input / output signals are fixed.
  • 58. 4-20 Twin Line Controller 51x Installation TLC51x 98441113117,c325,11.00 The following table shows the assignment of interface connections. Identical signals for all assignments are shown in the left-hand column by an arrow ’⇒’. Pin Signal at IO_mode=0/1 Signal at IO_mode=2 aktive Explanation I/O 1 ADR_1 / I_8 DATA_1 high ADR_1: Bit 0 for the network address DATA_1: Bit 0 for selecting a list number I 2 ADR_2 / I_9 DATA_2 high ADR_2: Bit 1for the network address DATA_2: Bit 1 for selecting a list number I 3 ADR_4 / I_10 DATA_4 high ADR_4: Bit 2 for the network address DATA_4: Bit 2 for selecting a list number I 4 ADR_8 / I_11 DATA_8 high ADR_8: Bit 3 for the network address DATA_8: Bit 3 for selecting a list number I 5 ADR_16 / I_12 DATA_16 high ADR_16: Bit 4 for the network address DATA_16: Bit 4 for selecting a list number I 6 ADR_32 / I_13 DATA_32 high ADR_32: Bit 5 for the network address DATA_32: Bit 5 for selecting a list number I 7 ⇒ IO24VDC - Power supply for inputs / outputs I 8 ⇒ IO24VDC - Power supply for inputs / outputs I 9 Q_0 / Q_0 AUTOM_ACK high AUTOM_ACK: acknowledgment signal to AUTOM signal O 10 Q_1 / Q_1 AXIS_ADD_INF O high AXIS_ADD_INFO: additional information on current movement O 11 Q_2 / Q_2 AXIS_END high AXIS_END: end of movement processing, drive at standstill O 12 Q_3 / Q_3 AXIS_ERR high AXIS_ERR: fault detection during movement O 13 Q_4 / Q_4 RDY_TSO/Q4 high RDY_TSO: data set ready, active in operating states 4 to 7, max. 400 mA O 14 ⇒ TRIGGER high Trigger output, signal value is switched via position / signal list O 15 ⇒ ACTIVE_CON high Motor under power, control signal for brake controller TL HBC, output max. 400 mA 1) O 16 ⇒ ACTIVE_GND high 0 V signal for brake controller TL HBC, internally to 24VGND 1) O 17 ⇒ ANALOG_IN+ - analogue control input ±10 V I 18 ⇒ ANALOG_IN- - analogue control input 0 V, reference potential to pin 17 ANALOG_IN+ I 19 BAUD_1 / I_0 MAN_P high BAUD_1: Bit 0 for setting baud rate MAN_P: manual movement, positive motor rotation I 20 BAUD_2 / I_1 MAN_N high BAUD_2: Bit 1 for setting baud rate MAN_N: manual movement, negative motor rotation I 21 BAUD_4 / I_2 MAN_FAST high BAUD_4: Bit 2 for setting baud rate MAN_FAST: manual selection slow or fast I 22 CAPTURE1 or I_5 FAULT_RESET high CAPTURE1: quick input for exact capture of current position data FAULT_RESET: reset fault signal I 23 ⇒ CAPTURE2 or I_6 high CAPTURE2: quick input for exact capture of current position data I 24 ADR_64 / I_7 TEACH_IN high ADR_64: Bit 6 for the network address TEACH_IN: trigger signal for storing current setpoint in list data memory I 25 ⇒ REF low 2) Reference switch signal I
  • 59. 98441113117,c325,11.00 TLC51x Installation Twin Line Controller 51x 4-21 Minimum interface connections The following signal interface connections must be made: • Pin 26: LIMP • Pin 27: LIMN • Pin 28: STOP • Pin 31 and Pin 33: 24 V GND • Pin 7 and Pin 8 must be connected even if the signal interface is not used. Cable specification Cables for digital signals: • Minimum cross-section 0.14 mm2 , max. cross-section 1.5 mm2 • Maximum length of the minimum cross-section 15 m. Function The signal interface can be used to control the positioning controller manually or in automated mode, to report operating states and to control peripheral devices. The signal interface is principally designed for field bus operation. Signal inputs such as MAN_N, MAN_P or AUTOM, and outputs such as AXIS_ERR, AXIS_END or AUTOM_ACK are not required for it. In field bus operation these signals are changed and evaluated via transmitted and received data. The signal interface can operate in three pin assignment modes: • Settings for address, baud rate and field bus profile in field bus operation • free assignment of interface • fixed assignment of interface Pin assignment can be changed by means of the 'Settings.IO_mode' parameter, for this see ’Operating modes of the positioning controller’, page 6-1. 26 ⇒ LIMP low 2) limit switch signal positive motor rotation I 27 ⇒ LIMN low 2) limit switch signal negative motor rotation I 28 ⇒ STOP low 2) Quick-Stop I 29 MODE_2 / I_4 AUTOM high MODE_2: bit1 for setting field bus profile AUTOM: automatic mode (high) or manual mode (low), acknowledgement via AUTOM_ACK I 30 MODE_1 / I_3 ENABLE high MODE_1: bit0 for setting field bus profile ENABLE: enable (high) or disable (low) power amplifier I 1) Version P: Holding brake fix connected 2) Signal level for default setting of ’Settings.SignEnabl’ and ’Settings.SignLevel’ parameters Pin Signal at IO_mode=0/1 Signal at IO_mode=2 aktive Explanation I/O
  • 60. 4-22 Twin Line Controller 51x Installation TLC51x 98441113117,c325,11.00 Setting address and baud rate in field bus operation Condition: parameter ’Settings.IO_mode’ = 0: After switching on the positioning controller, device address and baud rate can be specified via input signals. Fig. 4.14 Signal interface inputs for field bus addressing Network address The network address is bit-coded via inputs ADR_1 to ADR_64. ADR_1 is the lowest value bit. Example: for address 17, inputs ADR_16 and ADR_1 must carry 24 V. The remaining inputs remain open. Network address: 0 1 2 3 4 5 6 ... 125 126 127 Pin: input 1: ADR_1 1) 1) Required for DeviceNet 0 1 0 1 0 1 0 ... 1 0 1 2: ADR_2 1) 0 0 1 1 0 0 1 ... 0 1 1 3: ADR_4 1) 0 0 0 0 1 1 1 ... 1 1 1 4: ADR_8 1) 0 0 0 0 0 0 0 ... 1 1 1 5: ADR_16 1) 0 0 0 0 0 0 0 ... 1 1 1 6: ADR_32 1) 0 0 0 0 0 0 0 ... 1 1 1 24: ADR_64 0 0 0 0 0 0 0 ... 1 1 1
  • 61. 98441113117,c325,11.00 TLC51x Installation Twin Line Controller 51x 4-23 Baud rate For field bus modules CAN-C and RS485-C, the baud rate can be specified bit-coded at inputs BAUD_1 to BAUD_4 when the unit is started up. BAUD_1 is the lowest value bit. If an illegal baud rate is set, field bus processing cannot be activated. The Twin Line unit issues an error message on a connected operating unit. A network branch can only be run on one baud rate which must be set on all devices. Profile setting For the CAN-field bus module, the field bus profile can be set in bit- coded form via inputs MODE_1 and MODE_2 when the unit is started up. A network branch can only be run on one network profile which must be set on all devices. Baud rate CAN-C Baud rate RS485-C BAUD_4 BAUD_2 BAUD_1 20 kBaud 1200 Baud 0 0 0 125 kBaud 1) 1) Can be set in DeviceNet 9600 Baud 0 0 1 250 kBaud 1) 19,2 kBaud 0 1 0 500 kBaud 1) 38,4 kBaud 0 1 1 800 kBaud reserved 1 0 0 1 MBaud reserved 1 0 1 reserved reserved 1 1 0 reserved reserved 1 1 1 Profile MODE_2 MODE_1 CAN-Bus 0 0 CANOpen-Profil 0 1 DeviceNet-Profil 1 0
  • 62. 4-24 Twin Line Controller 51x Installation TLC51x 98441113117,c325,11.00 Free assignment of interface Parameter ’Settings.IO_mode’ = 1: With free interface assignment, inputs I_0 to I_13 and outputs Q_0 to Q_4 can be assigned additional functions by means of field bus commands. Fig. 4.15 Signal interface inputs and outputs for free assignment Input and output signal states can be read and changed via parameters.: • Read input signals via the 'I/O.IW1_act' parameter“ • write output signals via the 'I/O.QW0_act' parameter. You will find details on this in ’Checking inputs and outputs’ on page 5-12.
  • 63. 98441113117,c325,11.00 TLC51x Installation Twin Line Controller 51x 4-25 Fixed interface assignment Parameter ’Settings.IO_mode’ = 2: With fixed assignment, control signals and switching signals for manual mode and for teach-in are available at the signal interface. Fig. 4.16 Signal interface inputs and outputs for fixed assignment Manual operation is described on page 6-9 in the chapter ’Operating modes of the positioning controller’ and teach-in mode on page 7-7 in the chapter ’Functions of the positioning controller’. Signal interface LEDs Five LEDs at the signal interface show when current is flowing through signal inputs. The positioning controller will abort movement as soon as one of the signal inputs LIMP, LIMN or STOP becomes active. Fig. 4.17 LED display of signal interface Enablement of the input signals LIMP, LIMN and STOP and evaluation as active low or high can be changed via the parameters 'Settings.SignEnabl' and 'Settings.SignLevel'. See page 7-22. Output signals remain unchanged for at least 0.5 ms.
  • 64. 4-26 Twin Line Controller 51x Installation TLC51x 98441113117,c325,11.00 4.4.7 Connection to the RS232 interface Connection The RS232 interface, equipped with a 9-pole Sub-D socket with UNC thread is wired up 1:1 with the PC or with the Twin Line HMI. The positioning controller supplies the Twin Line HMI with the operational voltage via pin 9. Fig. 4.18 Cables for the RS232 interface at the PC or Twin Line HMI View: Solder side of cable connectors Cable specification • Screened cable • Cable length maximum 15 m • Minimum cross-section of the signal conductors 0.25 mm2 , for supply voltage and ground line 0.5 mm2 • Shield grounded at both ends Function The positioning controller is started up and operated via the serial RS232 interface. Use the Twin Line Control Tool operating software here to connect up the Twin Line HMI hand-held operating unit or a PC. You can plug the Twin Line HMI directly into the unit or connect it by cable to the unit. It is supplied with voltage by the unit. Networking of additional units via the RS232 interface is not possible. Pin Signal Colour 1) Pair Explanation I/O 1 - - - Not assigned - 2 TxD brown - Send data to the input device O 3 RxD white - Data received from the input device I 4 - - - Not assigned - 5 GND green - Ground line - 6 - - - Not assigned - 7 - - - Not assigned - 8 - - - Not assigned - 9 VDD yellow - 10 VDC supply for the TL HMI O 1) Colour details refer to the cable which is available as an accessory.
  • 65. 98441113117,c325,11.00 TLC51x Installation Twin Line Controller 51x 4-27 4.4.8 Connection to the RS422-C module Module interface The RS422-C module is equipped with a Sub-D socket, 15-pin with an M3 threaded connection. Fig. 4.19 Interface of the encoder module In the case of units with a hood the cable must be routed downwards from the connection. Cable specification • Shielded cable • Minimum diameter of signal wires 0.25 mm2 , 5VDC and 5VGND 0.5 mm2 • Twisted-pair wires • Shield grounded at each end • Maximum cable length 100 m Pin Signal Colour 1) Pair Explanation I/O 1 A white 1 Encoder signal channel A I 9 A brown 1 Channel A, negated I 12 B green 2 Encoder signal channel B I 5 B yellow 2 Channel B, negated I 2 2) 5VDC rot 3 Encoder supply, 5 V, max. 300 mA O 3 5VGND blue 3 Encoder supply, ground O 10 +SENSE violet 4 Sense line positive, connect on encoder side to 5VDC 3) I 11 -SENSE black 4 Sense line negative, connect on encoder side to 5VGND 3) I 13 I grey 5 Channel index pulse I 6 I pink 5 Channel index pulse, negated I 7 2) T_MOT (5VDC) grey / pink 6 Line monitoring, connect signal at encoder to pin 2: 5VDC I 4 - red / blue 6 Not assigned - 8 - - Not assigned - 14 - - Not assigned - 15 - - Not assigned - 1) Colour details refer to the cable which is available as an accessory. 2) Connect together signals 2 (5VDC) and 7 (T_MOT) for line monitoring in the encoder plug 3) Sense line must be connected for activating the 5VDC.
  • 66. 4-28 Twin Line Controller 51x Installation TLC51x 98441113117,c325,11.00 CAUTION! Destruction of external encoder! Only connect cable when power supply is switched off. Otherwise the encoder can be destroyed. Function Setpoints are specified via externally injected A/B signals and index pulse under electronic gear operating mode The RS422-C module receives the A/B encoder signals and index pulse as a position setpoint for the positioning controller. The maximum input frequency is 400 kHz. Fig. 4.20 Time diagram with A-, B and index pulse signal, counting forwards and backwards Monitoring The T_MOD signal displays wire break at low signal. Incorrect transmission of position data when voltage drop excessive. The difference in the ground potential of 24VGND between two units connected via ESIM1-C/ ESIM2-C or RS422-C must be less than 1 volt. Otherwise use cable of larger cross-section for 24VGND.
  • 67. 98441113117,c325,11.00 TLC51x Installation Twin Line Controller 51x 4-29 4.4.9 Connection to the PULSE-C module Module interface The PULSE-C module is fitted with a 15-pole sub-D plug with an M3 thread. Fig. 4.21 Interface of the pulse direction module For units with a hood, the cable must be led upwards from the point of connection. Cable specification • Shielded cable • Minimum diameter of signal wires 0.14 mm2 • Twisted-pair wires • Grounding of screen at both ends • Maximum length at RS422 connection 100 m with open collector connection up to 10 m Function Setpoints are specified via externally injected pulse direction signals under electronic gear operating mode Pin Signal Colour 1) Pair Explanation I/O 1 PULSE (PV) white 1 motor step „Pulse“ or motor step forwards „PV“ I 9 PULSE (PV) brown 1 motor step „Pulse“ or motor step forwards „PV“, inverted I 2 DIR (PR) green 2 sense of rotation „Dir“ or motor step backwards „PR“ I 10 DIR (PR) yellow 2 sense of rotation „Dir“ or motor step backwards „PR“, inverted I 3 ENABLE grey 3 enable signal I 11 ENABLE pink 3 enable signal, inverted I 7 GND grey/pink 4 ground, internally via resistor to 24 VGND I 8 ACTIVE red/blue 4 drive ready O 13 FUNCT_OUT white/green 5 reserved, internally to Low level O 14 GND brown/ green 5 ground, internally via resistor to 24 VGND I 15 GND white/yel- low 6 ground, internally via resistor to 24 VGND I 4 - blue - not assigned - 12 - red - not assigned - 5 - black - not assigned - 6 - purple - not assigned - 1) Colour specifications relate to the cable which is available as an accessory.
  • 68. 4-30 Twin Line Controller 51x Installation TLC51x 98441113117,c325,11.00 Reference signals for step-by-step positioning of the motor and control signals for the motor current, angular resolution and for enabling the power amplifier are transmitted via the pulse direction interface. At the same time the unit signals operational readiness of the drive or a possible malfunction via the interface. PULSE (PV), DIR (PR) The square-wave signals PULSE (PV) and DIR (PR) can be combined for two operating modes. The operating mode is set with the parameter ’M1.PULSE-C’. • PULSE/DIR: Pulse direction signal PV/PR: Pulseforward - Pulsebackward signal Pulse direction operating mode The motor executes an angular step with the leading edge of the PULSE signal. The direction of rotation is controlled by the DIR signal. Fig. 4.22 Pulse direction signal Pulseforward - pulsebackward operating mode The PV (PULSE) signal is used to execute a movement of the motor in a clockwise direction, and the PR (DIR) signal a movement in an anti- clockwise direction. Fig. 4.23 Pulseforward/Pulsebackward signal Pin Signal Function Value 1, 9 PULSE Motor step low -> high 2, 10 DIR Clockwise direction of rotation Anticlockwise direction of rotation low / open high Pin Signal Function Value 1, 9 PULSE (PV) PV: Step in a clockward direction of rotation low -> high 2, 10 DIR (PR) PR: Step in anticlockwise direction of rotation low -> high
  • 69. 98441113117,c325,11.00 TLC51x Installation Twin Line Controller 51x 4-31 The maximum permissible frequency of PULSE (PV) and DIR (PR) is 200 kHz. ENABLE The ENABLE signal enables the power amplifier so that the motor can be controlled. If there is no operating fault, the ACTIVE output displays operational readiness for approx 100 ms after the power amplifier is enabled. ACTIVE The output shows the operational readiness of the positioning controller. ACTIVE is an open collector output to GND. The logically negated signal function is available at the ACTIVE_CON output of the signal interface. Circuit of the signal inputs It is recommended that signal inputs be switched via the RS422 interface. The diagram shows the circuitry of the signal inputs PULSE (PV), DIR (PR) and ENABLE. Up to 10 inputs of the PULSE-C module can be connected to an RS422-C transmitter. Fig. 4.24 Circuit of the signal inputs, L: Cable length For cable lengths ≤10 m and frequencies ≤50 kHz, Open Collector outputs can be used if interference resistance requirements are low. Pin Signal Function Value 3, 11 ENABLE Disable power amplifier Enable power amplifier low / open high Pin Signal Function Value 8 ACTIVE Power amplifier is disabled Power amplifier is enabled high low
  • 70. 4-32 Twin Line Controller 51x Installation TLC51x 98441113117,c325,11.00 4.4.10 Connection to the RM-C module The optional encoder interface is only included in units with rotation monitoring. Module interface The interface is fitted with a 15-pole, M3 threaded Sub-D socket. Fig. 4.25 Interface for rotation monitoring, view of motor plug:soldering side For units with a hood, the cable must be led upwards away from the terminals. Cable specification • Shielded cable • Minimum cross-section of signal wires 0.25 mm2 , 5VDC and 5VGND 0.5 mm2 • Twisted-pair wires • Screen earthed on both sides • Maximum cable length 100 m Pin Signal Colour 1) Pair Explanation I/O 1 A white 1 encoder signal channel A I 9 A brown 1 channel A, inverted I 12 B green 2 channel B I 5 B yellow 2 channel B, inverted I 2 5VDC red 3 Encoder power supply, 5 V, max. 300 mA O 3 5VGND blue 3 Encoder power supply, ground O 10 +SENSE purple 4 Sense wire positive 2) I 11 -SENSE black 4 Sense wire negative 2) I 13 I grey 5 Index pulse channel I 6 I pink 5 Index pulse channel, inverted I 7 TEMP_MOT grey/pink 6 temperature error, inverted I 4 - red/blue 6 not assigned - 8 - - - not assigned - 14 - - - not assigned - 15 - - - not assigned - 1) Colour details refer to the cable available as an accessory. 2) Sense line must be connected for activating the 5VDC.
  • 71. 98441113117,c325,11.00 TLC51x Installation Twin Line Controller 51x 4-33 ATTENTION! Destruction of external encoder! Only connect cable when power supply is switched off. Otherwise the encoder can be destroyed. Function The connection is used to convey the angular position of the motor incrementally by means of A/B square-wave signals. The unit detects stepping errors by making comparisons with the setpoint and reports a contouring error if the threshold value of 6.4° is exceeded. Monitoring can be switched off via the "Settings.monitorM" parameter, see Chapter entitled ’Setting phase current and device parameters’ from page 5-7. Fig. 4.26 Time diagram with A, B and index pulse signals, counting forwards and backwards Monitoring The winding temperature of the motor is monitored via the TEMP_MOT signal. The signal also shows whether the encoder is connected. Encoder type In order to use the monitoring function, an encoder with 1000 lines must be fitted. Pin Signal Function Value 7 TEMP_MOT Temperature range OK Motor overheating or cable break high low
  • 72. 4-34 Twin Line Controller 51x Installation TLC51x 98441113117,c325,11.00 4.4.11 Connection to the PBDP-C module Module interface The PBDP-C module is fitted with a 9-pole, SUB-D socket, with UNC thread. Fig. 4.27 Field bus module interface connection A bus terminal forms the docking station to the Profibus. Data lines between module and bus terminal are wired up 1:1. Terminals A_LT and B_LT must be connected to wires A and B in the network by way of the minimum wiring requirement. For units with a hood, the cable must led downwards from the point of connection. Cable specification for connection to a bus terminal • Screened cable • Minimum cross-section of signal wires: 0.14 mm2 • Twisted-pair wires • Screen grounded at both ends • Maximum length 100 m To protect against interference, the screen for digital cables is connected at both ends. Differences in potential can lead to excessive current in the screen, and these have to be prevented by means of bonding lines. Cable cross-section for lengths up to 200: 16 mm2, for lengths over 200 m: 20 mm2. Pin Signal Colour Pair Explanation I/O 1 - - 1 not assigned - 6 5VDC - 1 power supply, max. 10 mA for terminator O 2 - - - not assigned - 7 - - - not assigned - 3 B_LT - 2 data line, inverted I/O 8 A_LT - 2 data line I/O 4 RTS - 3 transmission request O 9 - - 3 not assigned - 5 GND - - ground -
  • 73. 98441113117,c325,11.00 TLC51x Installation Twin Line Controller 51x 4-35 Function Using the PBDP-C field bus module, the positioning controller can be connected as a slave device to a Profibus-DP network. The positioning controller receives data and commands from a higher- ranking device on the bus, or master. By way of acknowledgement the controller sends status information such as device status and processing status back to the master device. The exchange of data is carried out using a special communications protocol. Data are exchanged cyclically between master and slave devices. Each device in the network is identified by means of a unique device address which can be set. Setting the address The address can be set via the ’M4.addrPbd’ parameter or via inputs ADR_1 to ADR_64 of the signal interface, see page 4-22. Baud rate The baud rate is determined by the transmission speed of the master device. Display The DATAEXCHANGE LED displays signal connection to the Profibus master device. Field bus manual The integration of a Twin Line unit into the field bus is described in the relevant field bus manuals from SIG Positec in the chapters on installation and set-up.
  • 74. 4-36 Twin Line Controller 51x Installation TLC51x 98441113117,c325,11.00 4.4.12 Connection to the CAN-C module Module interface The CAN-C module is fitted with a SUB-D plug and a SUB-D socket, both 9-pole with UNC thread. Pin assignment is identical for both interface connections. Fig. 4.28 Interface connections of the field bus module with plug and socket For units with a hood, the cable must be led downwards from the point of connection. Cable specification • Screened cable • Minimum cross-section of signal wires: 0.14 mm2 • Twisted-pair lines • Screen grounded at both ends • Maximum length dependent on the number of devices, the baud rate and signal times. The higher the baud rates, the shorter the bus cable has to be.Guide values: 40 m at 1 Mbit/s, 500 m at 100 kbit/s guide values for DeviceNet: 100 m at 500 kbit/s, 500 m at 125 kbit/s To protect against interference, the screen for digital cables is connected at both ends. Differences in potential can lead to excessive current in the screen, and these have to be prevented by means of bonding lines. Cable cross-section for lengths up to 200: 16 mm2, for lengths over 200 m: 20 mm2 . Pin Signal Colour 1) Pair Explanation I/O 1 - - 1 not assigned - 6 GND green 1 ground - 2 CAN_LOW white 2 Data wire, inverted I/O 7 CAN_HIGH brown 2 Data wire I/O 3 GND grey 3 ground - 8 - pink 3 not assigned - 4 - - - not assigned - 9 - - - not assigned - 5 - - - not assigned - 1) Colour details refer to the cable available as an accessory – the colours used match the CAN guidelines. ! Remember that the colours do not match the DeviceNet specification.
  • 75. 98441113117,c325,11.00 TLC51x Installation Twin Line Controller 51x 4-37 Function With the CAN-C field bus module, the positioning controller can be con- nected as a slave to the following networks: • CAN-Bus • CANOpen • DeviceNet. The positioning controller receives data and commands from a higher- ranking device on the bus, or master. By way of acknowledgement the controller sends status information such as device status and processing status back to the master device. The exchange of data is carried out using a special communications protocol. Every device in the network is identified by means of a unique address which can be set. CAN bus display The „CAN-OK“ LED on the CAN-C module lights for approx. two sec- onds when the field bus data have been correctly received. CANOpen display The „CAN-OK“ LED on the CAN-C module lights up when a connection to the device exists. If the connection is broken, the LED flashes: 0.5 sec on / 0.5 sec off. DeviceNet display The „CAN-OK“ LED on the CAN-C module displays the status of the DeviceNet node: Setting the address The address can be set via the 'M4.addrCan' parameter (see page 12-14) or via inputs ADR_1 to ADR_64 of the signal interface (see page 4-22). Baud rate The baud rate can be set with the 'M4.baudCan' parameter (see page 12-14) or via inputs BAUD_1 to BAUD_4 of the signal interface (see page 4-23). Field bus profile The field bus profile can be set with the „M4.profilCAN“ parameter (see page 12-14) or via inputs MODE_1 and MODE_2 of the signal interface (see page 4-23). Terminating resistors A terminating resistor of 120 Ω must therefore be connected at both ends. You will find an appropriate terminator plug in the chapter entitled „Accessories and spare parts“. Field bus manual The integration of a Twin Line unit into the field bus is described in the relevant field bus manual from SIG Positec in the chapter on installation and set-up. DeviceNet status Display OFFLINE flashes (0.2 sec on / 0.8 sec off) ONLINE (Duplicate MAC ID Check) flashes (0.8 sec on / 0.2 sec off) LINK_OK on TIMEOUT/FAILURE flashes (0.2 sec on / 0.2 sec off)
  • 76. 4-38 Twin Line Controller 51x Installation TLC51x 98441113117,c325,11.00 4.4.13 Connection to the RS485-C module Module interface The RS485-C module is fitted with a SUB-D socket and a SUB-D plug, both 9-pole with UNC thread. Pin assignment is identical for both interface connections. Fig. 4.29 Field bus module interface connection Only one 12VDC output of the two Sub-D connections may be loaded with a current of max. 150 mA. Cable specification • Screened cable • Minimum cross-section of signal wires: 0.14 mm2 • Twisted-pair wires • Screen grounded at both ends • Maximum length 400 m For units with a hood, the cable must be led downwards from the point of connection. To protect against interference, the screen for digital cables is connected at both ends. Differences in potential can lead to excessive current in the screen, and these have to be prevented by means of bonding lines. Cable cross-section for lengths up to 200: 16 m2 , for lengths over 200 m: 20 mm2 . Pin Signal Colour Pair Explanation I/O 1 12VDC - 1 power supply O 6 12VDC - 1 power supply O 2 GND - 2 ground for 12VDC power supply O 7 GND - 2 ground for 12VDC power supply O 3 TxD - 3 Transmitted data O 8 TxD - 3 Transmitted data, inverted O 4 RxD - 4 Received data I 9 RxD - 4 Received data, inverted I 5 SGND - - ground -
  • 77. 98441113117,c325,11.00 TLC51x Installation Twin Line Controller 51x 4-39 Function Using the RS485-C field bus module, the positioning controller can be connected to a serial bus as a slave device. The positioning controller receives data and commands from a higher- ranking device on the bus, a master device. By way of acknowledgement the controller sends status information such as device status and processing status back to the master device. The exchange of data is carried out using a special communications protocol. Every device in the network is identified by means of a unique address which can be set. Display Two LEDs on the RS485-C module show the transfer of transmitted and received data. Setting the address The address can be set via the ’M4.addrSer’ parameter or via inputs ADR_1 to ADR_16 of the signal interface. See page 4-22. Baud rate The baud rate can be set via the ’M4.baudSer’ parameter or via inputs BAUD_1 to BAUD_4 of the signal interface, see page 4-23. Field bus manual The integration of a Twin Line unit into the field bus is described in the relevant field bus manual from SIG Positec in the chapter on installation and set-up.