Downloaded 321 times
![Data ONTAP 7G Cook Book
Data ONTAP 8.x 7-Mode Cook Book
Version: 1.1
Sep 2012
An unofficial compilation of step-by-step procedures for performing common tasks in the 7-Mode
version of Data ONTAP 8. Most of the content is based on Data ONTAP 8.0.3. Features exclusive to
Data ONTAP 8.1 are preceded by [8.1]
Table of Contents
Best Practices for Installation and Maintenance ................................................................................ 7
1
Aggregates and FlexVols ............................................................................................................ 8
1.1 Creating Aggregates ...................................................................................................................... 8
1.1.1. Software Disk Ownership ......................................................................................................... 8
1.1.1.1
1.1.1.2
Modifying disk ownership ........................................................................................... 8
Associated Key OPTIONS .......................................................................................... 9
1.1.2 Aggregates ................................................................................................................................. 9
1.1.2.1
1.1.2.2
1.1.2.3
Add disks to Aggregates ............................................................................................. 9
Disk right-size and max disk per aggregate matrix .................................................. 10
Key aggregate OPTIONS ......................................................................................... 11
1.1.3 Modifying RAID groups............................................................................................................. 11
1.1.4 Create Flexible Volumes (FlexVols) ......................................................................................... 12
1.1.4.1
Root volume minimum size ...................................................................................... 12
1.1.5 Manage Flexible Volumes (FlexVols) ....................................................................................... 13
1.1.5.1
1.1.5.2
1.1.5.3
1.1.5.4
General management commands ............................................................................ 13
Resize a FlexVol ....................................................................................................... 13
Prioritize volume I/O with FlexShare ........................................................................ 13
Key Volume command Options ................................................................................ 14
1.1.6 SnapLock volumes [8.1] ........................................................................................................... 14
1.1.6.1
Associated Key OPTIONS ........................................................................................ 15
1.1.7 Create Qtrees ........................................................................................................................... 15
2
NAS Implementation .................................................................................................................. 16
2.1 NFS exports ................................................................................................................................. 16
2.1.1 Support NFSv4 clients .............................................................................................................. 17
2.1.2 Associated Key NFS OPTIONS ............................................................................................... 17
2.2 CIFS shares ................................................................................................................................. 17
2.2.1 Associated Key CIFS Shares OPTIONS .................................................................................. 19
2.3 Using Quotas ............................................................................................................................... 20
2.3.1 Guidelines for using quotas ...................................................................................................... 20
3
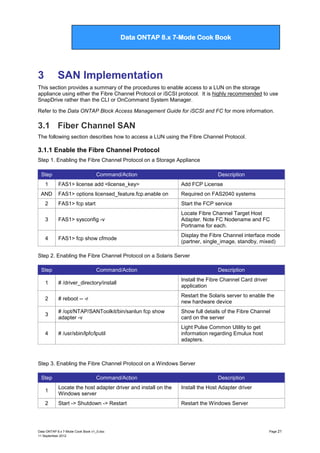
SAN Implementation .................................................................................................................. 21
3.1 Fiber Channel SAN ...................................................................................................................... 21
3.1.1 Enable the Fibre Channel Protocol .......................................................................................... 21
3.1.2 Configure FCP ports ................................................................................................................. 22
Data ONTAP 8.x 7-Mode Cook Book v1_0.doc
11 September 2012
Page 1](https://image.slidesharecdn.com/dataontap8-131208114100-phpapp02/85/Data-ontap-8-x-7-mode-cook-book-v1-1-1-320.jpg)
![Data ONTAP 7G Cook Book
Data ONTAP 8.x 7-Mode Cook Book
Version: 1.1
Sep 2012
An unofficial compilation of step-by-step procedures for performing common tasks in the 7-Mode
version of Data ONTAP 8. Most of the content is based on Data ONTAP 8.0.3. Features exclusive to
Data ONTAP 8.1 are preceded by [8.1]
Table of Contents
Best Practices for Installation and Maintenance ................................................................................ 7
1
Aggregates and FlexVols ............................................................................................................ 8
1.1 Creating Aggregates ...................................................................................................................... 8
1.1.1. Software Disk Ownership ......................................................................................................... 8
1.1.1.1
1.1.1.2
Modifying disk ownership ........................................................................................... 8
Associated Key OPTIONS .......................................................................................... 9
1.1.2 Aggregates ................................................................................................................................. 9
1.1.2.1
1.1.2.2
1.1.2.3
Add disks to Aggregates ............................................................................................. 9
Disk right-size and max disk per aggregate matrix .................................................. 10
Key aggregate OPTIONS ......................................................................................... 11
1.1.3 Modifying RAID groups............................................................................................................. 11
1.1.4 Create Flexible Volumes (FlexVols) ......................................................................................... 12
1.1.4.1
Root volume minimum size ...................................................................................... 12
1.1.5 Manage Flexible Volumes (FlexVols) ....................................................................................... 13
1.1.5.1
1.1.5.2
1.1.5.3
1.1.5.4
General management commands ............................................................................ 13
Resize a FlexVol ....................................................................................................... 13
Prioritize volume I/O with FlexShare ........................................................................ 13
Key Volume command Options ................................................................................ 14
1.1.6 SnapLock volumes [8.1] ........................................................................................................... 14
1.1.6.1
Associated Key OPTIONS ........................................................................................ 15
1.1.7 Create Qtrees ........................................................................................................................... 15
2
NAS Implementation .................................................................................................................. 16
2.1 NFS exports ................................................................................................................................. 16
2.1.1 Support NFSv4 clients .............................................................................................................. 17
2.1.2 Associated Key NFS OPTIONS ............................................................................................... 17
2.2 CIFS shares ................................................................................................................................. 17
2.2.1 Associated Key CIFS Shares OPTIONS .................................................................................. 19
2.3 Using Quotas ............................................................................................................................... 20
2.3.1 Guidelines for using quotas ...................................................................................................... 20
3
SAN Implementation .................................................................................................................. 21
3.1 Fiber Channel SAN ...................................................................................................................... 21
3.1.1 Enable the Fibre Channel Protocol .......................................................................................... 21
3.1.2 Configure FCP ports ................................................................................................................. 22
Data ONTAP 8.x 7-Mode Cook Book v1_0.doc
11 September 2012
Page 1](https://image.slidesharecdn.com/dataontap8-131208114100-phpapp02/75/Data-ontap-8-x-7-mode-cook-book-v1-1-1-2048.jpg)
![Data ONTAP 7G Cook Book
Data ONTAP 8.x 7-Mode Cook Book
3.1.3 Create WWPN aliases .............................................................................................................. 22
3.1.4 Create a LUN ............................................................................................................................ 22
3.1.5 Access LUNs on a Unix/Linux Host .......................................................................................... 23
3.1.6 Access LUNs on a Windows Host ............................................................................................ 23
3.1.7 Obtain HBA information ............................................................................................................ 23
3.1.8 Resolving “FCP Partner Path Misconfigured” messages ......................................................... 24
3.2 iSCSI SAN ................................................................................................................................... 24
3.2.1 Enable the iSCSI Protocol ........................................................................................................ 24
3.2.2 Install iSCSI Initiator and SnapDrive for Windows ................................................................... 24
3.2.3 Connect Windows to a LUN with iSCSI.................................................................................... 25
3.2.4 Create an iSCSI LUN using SnapDrive for Windows ............................................................... 25
3.3 Resize a LUN ............................................................................................................................... 26
3.4 Clone a LUN ................................................................................................................................ 26
3.5 FlexClone a LUN .......................................................................................................................... 26
3.6 Delete a LUN ............................................................................................................................... 27
3.7 Access a LUN with NFS/CIFS protocols...................................................................................... 27
4
Networking and Appliance Access .......................................................................................... 28
4.1 Configure Network Interfaces ...................................................................................................... 28
4.2 Setting Time and Date ................................................................................................................. 28
4.2.1 Synchronize with a time server ................................................................................................ 28
4.3 Creating VLANS ........................................................................................................................... 28
4.4 Managing Interface Groups ......................................................................................................... 29
4.4.1 Create an ifgrp .......................................................................................................................... 29
4.4.2 Delete an ifgrp or ifgrp interface ............................................................................................... 30
4.5 IP version 6 [8.1] .......................................................................................................................... 30
4.5.1 Associated Key OPTIONS ....................................................................................................... 30
4.6 Baseboard Management Controller (BMC) ................................................................................. 30
4.6.1 Configure the BMC ................................................................................................................... 30
4.6.2 Using the BMC ......................................................................................................................... 30
4.6.3 Upgrade the BMC ..................................................................................................................... 31
4.7 Remote LAN Module (RLM) ........................................................................................................ 31
4.7.1 Configure the RLM ................................................................................................................... 32
4.7.2 Configure the Remote Support Agent (RSA) ........................................................................... 32
4.7.3 Use the RLM ............................................................................................................................. 32
4.7.4 Upgrade RLM firmware ............................................................................................................ 33
Data ONTAP 8.x 7-Mode Cook Book v1_0.doc
11 September 2012
Page 2](https://image.slidesharecdn.com/dataontap8-131208114100-phpapp02/85/Data-ontap-8-x-7-mode-cook-book-v1-1-2-320.jpg)

![Data ONTAP 7G Cook Book
Data ONTAP 8.x 7-Mode Cook Book
1
Aggregates and FlexVols
1.1 Creating Aggregates
Refer to the Data ONTAP Storage Management Guide for more information.
1.1.1. Software Disk Ownership
NetApp storage controllers rely on ownership labels written to disk rather than physical connections to
a shelf to determine ownership of a disk drive. This section describes how to assign and remove disk
ownership.
NOTE: Unowned disks cannot be used for data or as spares without being assigned ownership.
Step
Command/Action
Description
1
*> disk upgrade_ownership
Used in Maintenance Mode to convert
hardware-based disk ownership systems
to use software disk ownership
2
FAS1> disk show -v
Display all visible disks and whether they
are owned or not
3
FAS1> disk show –n
Show all unowned disks
4
FAS1> disk assign 0b.43 0b.41
Assigns the listed unowned disks to FAS1
OR
FAS1> storage show shelf
[8.1] FAS1> disk assign –T –shelf 2b.1
In ONTAP 8.1, assign all unowned disks
in shelf 1 on port 2b to FAS1
OR
FAS1> disk assign 2a.*
Assigns all unowned disks connected to
the 2a adapter interface to FAS1
OR
FAS1> disk assign all
Warning: Use with caution. Not restricted by A
and B loop connections in HA pairs
Assign all unowned disks to FAS1
V-FAS1> disk assign <lun_id_list> –c {block |
zoned}
Assign LUNs to a V-Series controller
-
1.1.1.1 Modifying disk ownership
Step
Command/Action
1
FAS1> disk assign 0b.43 0b.41 –s unowned [ -f ]
Change disks from owned to unowned
FAS1> priv set advanced
FAS1*> disk remove_ownership 0b.41 0b.43
Removes ownership from two disk drives
FAS1> disk show -n
Verify disks are available for assignment.
OR
2
Description
Alternative: reboot system and go into Maintenance Mode
1
*> storage release disk
*> disk reassign -s <old sysid> -d <new sysid>
2
Data ONTAP 8.x 7-Mode Cook Book v1_0.doc
11 September 2012
Used in Maintenance Mode to release
disk reservations
Used in Maintenance Mode to reassign
disk ownership of all disks owned by a
single system to another system
Page 8](https://image.slidesharecdn.com/dataontap8-131208114100-phpapp02/85/Data-ontap-8-x-7-mode-cook-book-v1-1-8-320.jpg)
![Data ONTAP 7G Cook Book
Data ONTAP 8.x 7-Mode Cook Book
6040, 3270,
3170
3240, 3160
3210, 3140
2240-2 / -4
2040
70
28 / 42
43 / 63
86 / 126
115 / 169
173 / 254
50
50
30
FAS/V-Series
Model
105
90
75
60
30
20 / 36
20 / 30
- / 24
12 / 12
30 / 54
30 / 45
- / 36
18 / 18
61 / 108
61 / 90
- / 72
37 / 37
82 / 145
82 / 120
- / 96
49 / 49
123 / 217
123 / 181
- / 145
74 / 74
Max 8.0
Aggregate
Size (TB
Max 8.1
Aggregate
Size (TB)
SAS/FC - Maximum number of data disks
600 GB
450 GB
300 GB
(8.0 / 8.1)
(8.0 / 8.1)
(8.0 / 8.1)
6280, 6240,
100
162
187 / 296
6080
6210
70
162
131 / 296
6040, 3270,
70
105
131 / 192
3170
3240, 3160
50
90
93 / 164
3210, 3140
50
75
93 / 137
2240-2, 2240-4
60
- / 109
2040
30
30
56 / 56
* actual value exceeds model‟s maximum spindles
250 / 406
385 / 609
175 / 406
269 / 609
175 / 263
269 / 395
125 / 225
125 / 188
- / 144*
75 / 75
192 / 338
192 / 282
- / 144*
115 / 115
Refer to TR-3786 A Thorough Introduction to 64-Bit Aggregates for more information.
https://fieldportal.netapp.com/viewcontent.asp?qv=1&docid=29411
1.1.2.3 Key aggregate OPTIONS
Option
Default
Description
fas> aggr options raidsize**
16 (FC/SAS)
14 (SATA)
Maximum number of disks in each RAID group
fas> aggr options raidtype
raid_dp
Set RAID parity type to raid4, raid_dp or raid0
fas> aggr options nosnap
Off
When on, disables aggregate snapshots
options raid.disktype.enable
Off
Enforces separations of disks by disk type to prevent
mixing of disk types in aggregates
options raid.rpm.ata.enable
On
Enforce separation of ATA drives by rotational speed
(5400 and 7200 RPM)
options raid.rpm.fcal.enable
On
Enforces separation of FC drives by rotational speed
(10k and 15k RPM)
1.1.3 Modifying RAID groups
Command/Action
Description
FAS1> aggr options aggr_name raidtype
[ raid_dp | raid4 ]
switch RAID type in an aggregate or
traditional volume to RAID-DP or RAID 4
FAS1> aggr options aggr_name raidsize <numeric
value>
Change the number of disks that compose a
raid group in an aggregate or traditional
volume
Data ONTAP 8.x 7-Mode Cook Book v1_0.doc
11 September 2012
Page 11](https://image.slidesharecdn.com/dataontap8-131208114100-phpapp02/85/Data-ontap-8-x-7-mode-cook-book-v1-1-11-320.jpg)

![Data ONTAP 7G Cook Book
Data ONTAP 8.x 7-Mode Cook Book
1.1.5 Manage Flexible Volumes (FlexVols)
1.1.5.1 General management commands
Command/Action
Description
FAS1> vol options <vol_name> <option>
Change volume specific options
FAS1> vol rename flex1 vol1
Rename volume flex1 to vol1
NOTE: Do NOT change names of SnapMirror or
SnapVault volumes
FAS1> vol container flex1
Displays which aggregate the volume is
contained within
FAS1> aggr status aggr05 –i
Lists all flexvols contained in aggr05
FAS1> df –[k | m | g] <vol_name>
Display volume size and space usage in
kilobytes, megabytes, or gigabytes.
FAS1> df –x <vol_name>
Suppress the display of the .snapshot output.
May be combined with other command flags
FAS1> vol restrict <vol_name>
Make a flexvol read-only
1.1.5.2 Resize a FlexVol
Step
Command/Action
Description
1
FAS1> vol container vol4
Determine which aggregate vol4 resides in.
2
FAS1> df –A aggr07
OR
FAS1> aggr show_space –g aggr07
Check size and available space in the
containing aggregate named “aggr07”
FAS1> vol size vol4 150g
Set the size of flexvol vol4 to 150GB
FAS1> vol size vol4 [+ | -] 30g
Add or remove 30GB from flexvol vol4
3
Note: See chapter 5 of this guide for procedures to auto-manage volume growth.
1.1.5.3 Prioritize volume I/O with FlexShare
FlexShare is built into ONTAP for prioritizing system resources for volumes. If you assign a priority to
one volume, you should assign a priority to all volumes. Any volumes without a priority are assigned
to the default queue where they share the same resources. This may degrade their performance.
Step
Command/Action
Description
1
FAS1> priority on
FAS2> priority on
Enables FlexShare. Both nodes of an
HA cluster must enable FlexShare even
if only one uses it
2
FAS1> priority set volume dbvol
level=VeryHigh system=30
dbvol is given the highest priority and
system operations (e.g, SnapMirror)
are selected over user operations 30%
of the time
Data ONTAP 8.x 7-Mode Cook Book v1_0.doc
11 September 2012
Page 13](https://image.slidesharecdn.com/dataontap8-131208114100-phpapp02/85/Data-ontap-8-x-7-mode-cook-book-v1-1-13-320.jpg)
![Data ONTAP 7G Cook Book
Data ONTAP 8.x 7-Mode Cook Book
3
FAS1> priority set volume dbvol cache=keep
Instruct ONTAP to retain data in the
buffer cache from dbvol as long as
possible
4
FAS1> priority set volume db_logs
cache=reuse
Instruct ONTAP to quickly flush data in
the buffer cache from db_logs
5
FAS1> priority show volume user_vol03
Display the priority assigned to
user_vol03
6
FAS1> priority set volume testvol1 service=off
Temporarily disable priority on testvol1
and places it into the default queu
7
FAS1> priority delete volume testvol1
Removes all priority settings on testvol1
and places it into the default queue
1.1.5.4 Key Volume command Options
Volume option
Default
Description
convert_ucode
off
Turns UNICODE character set on/off. Should be on for
SnapMirror and SnapVault volumes
create_ucode
off
Force UNICODE character use on/off when files are
created. Turn on for SnapMirror and SnapVault volumes
volume
Volume setting preallocates disk space for entire
volume. File only allocates space for space reserved
files and LUNs in the volume. None means no disk
space is guaranteed
minra
off
When on, turns speculative file read-ahead OFF and
may reduce performance.
no_atime_update
off
When on, prevents update of access time in inode when
a file is read, possibly increasing performance. Use with
caution.
nosnap
off
When on, disables automatic snapshots of the volume
nosnapdir
off
When on, disables the .snapshot directory for NFS
root
N/A
Designates the volume as the root volume.
guarantee
1.1.6 SnapLock volumes [8.1]
Not all versions of Data ONTAP support SnapLock. SnapLock volumes are special volumes (WORM)
which, after a user-specified delay, turn new files inside to read-only and cannot be edited or deleted
until a user defined retention period has expired. Read the Data ONTAP Archive and Complaiance
Guide and the SnapLock Tech Reports before creating or altering SnapLock volumes.
Step
Command/Action
1
FAS1> aggr create aggr_name -L
<compliance | enterprise> -t raid_dp [other
aggr create options]
2
FAS1> aggr status
3
FAS1> date –c initialize
Data ONTAP 8.x 7-Mode Cook Book v1_0.doc
11 September 2012
Description
NOTE: ALL volumes in this aggregate will be
SnapLock volumes by default and inherit the
aggregate‟s SnapLock attributes.
Verify creation and SnapLock settings of new
aggregate
Runs a wizard to initiate the ComplianceClock
Page 14](https://image.slidesharecdn.com/dataontap8-131208114100-phpapp02/85/Data-ontap-8-x-7-mode-cook-book-v1-1-14-320.jpg)
![Data ONTAP 7G Cook Book
Data ONTAP 8.x 7-Mode Cook Book
4
5
FAS1> date –c
FAS1> vol create lock_vol01 lock_aggr01
100g
6
FAS1> vol options lock_vol01
snaplock_minimum_period 6m
7
FAS1> vol options lock_vol01
snaplock_maximum_period 10y
8
FAS1> vol options lock_vol01
snaplock_default_period 7y
View the ComplianceClock time
Create a 100GB FlexVol named lock_vol01
inside the lock_aggr01 aggregate
Sets the minimum retention period that can be
assigned to WORM files in lock_vol01 to 6
months
Sets the maximum retention period that can
be assigned to WORM files in lock_vol01 to
10 years
Sets the default retention period for WORM
files in lock_vol01 to 7 years
1.1.6.1 Associated Key OPTIONS
Option
snaplock.autocommit_period
none | {count|h|d|m|y}
snaplock.compliance.write_verify
Default
none
Off
snaplock.log.default_retention
6
months
Snaplock.log.maximum_size
10 MB
Description
When set, files not changed during the delay period are
turned into WORM files
An immediate verification occurs after every write to
provide an additional level of data integrity.
NOTE: effects performance and may affect data
throughput. Only valid with a Compliance license
Determines how long the SnapLock log file is kept.
Cannot be less than 6 months.
Specifies maximum size of the SnapLock log file before
a new log file is created.
1.1.7 Create Qtrees
Step
Command/Action
Description
1
FAS1> qtree status flex1
Display lists of qtrees in the volume flex1
2
FAS1> qtree create /vol/flex1/qt_alpha
Create a Qtree called "qt_alpha" on
flexible volume flex1
3
FAS1> qtree security /vol/flex1/qt_alpha [ ntfs |
unix ]
Configure the security style for the Qtree
to be NTFS or Unix
Data ONTAP 8.x 7-Mode Cook Book v1_0.doc
11 September 2012
Page 15](https://image.slidesharecdn.com/dataontap8-131208114100-phpapp02/85/Data-ontap-8-x-7-mode-cook-book-v1-1-15-320.jpg)

![Data ONTAP 7G Cook Book
Data ONTAP 8.x 7-Mode Cook Book
interface.cifs.blocked
Null
A comma-seperated list of network interfaces for
which CIFS is blocked
2.3 Using Quotas
This section describes the commands uses to manage qtree and volume quotas.
Step
Command/Action
Description
1
FAS1> wrfile –a /etc/quotas <text>
Create/append to quota configuration file
(See chapter 13 for sample /etc/quotas)
2
FAS1> quota on /vol/vol2
Enables quotas if /etc/quotas exists or
implement changes in /etc/quotas for vol2
3
FAS1> quota off /vol/vol_db1
Disables quotas applied to /vol/vol_db1
4
FAS1> quota resize
Implements updates made to /etc/quotas
5
FAS1> quota off /vol/user_vol
FAS1> quota on /vol/user_vol
Reinitilize quotas after modifying a qtree
or adding a new entry to /etc/quotas
6
FAS1> quota report
prints the current file and space
consumption for each user or group with a
quota and for each qtree.
2.3.1 Guidelines for using quotas
a. Update the /etc/quotas file after renaming a qtree
b. Reinitialize quotas after changing the qtree security style. This process may take some time
and quotas are not enforced until the process has completed.
c.
When using quotas with MultiStore, the quotas for a volume are deactivated when the volume
moves to another vfiler. Quotas are linked to a vfiler and not to a volume.
d. The syntax of a quota entry in the quotas file is quota_target
type[@/vol/dir/qtree_path] disk [files] [threshold] [soft_disk] [soft_files]. Fields are separated by
space characters or tabs.
The following sample quotas file contains both default and explicit quotas:
#Quota Target
#-----------*
*
*
jdoe
msmith
msmith
type
disk files
------- ----user@/vol/vol1
50M
15K
group@/vol/vol1
750M 85K
tree@/vol/vol1
100M 75K
user@/vol/vol1/proj1 100M 75K
user@/vol/vol1
75M
75K
user@/vol/vol1/proj1 75M
75K
Data ONTAP 8.x 7-Mode Cook Book v1_0.doc
11 September 2012
thold
-----
sdisk
-----
sfile
-----
Page 20](https://image.slidesharecdn.com/dataontap8-131208114100-phpapp02/85/Data-ontap-8-x-7-mode-cook-book-v1-1-20-320.jpg)
![Data ONTAP 7G Cook Book
Data ONTAP 8.x 7-Mode Cook Book
3
C:WINNTsystem32lputilnt.exe
Run Light Pulse Common Utility to gather
information regarding the host adapter
3.1.2 Configure FCP ports
Changes the settings of onboard adapter ports to serve as target or initiators.
NOTE: in most cases, expansion cards can not be disabled or configured
Step
Command/Action
1
FAS1> fcadmin config
2
FAS1> storage disable adapter 0c
OR
FAS1> fcadmin config –d 0c
3
FAS1> fcadmin config –t [ target ] initiator ] 0c
4
FAS1> reboot
5
FAS1> storage enable adapter 0c
Description
lists all available FC ports and their
current settings
disables adapter port 0c so it can be
reconfigured.
Changes the port to be a target or an
initiator.
The system must be rebooted for the
changes to take effect
Turn the port back on
3.1.3 Create WWPN aliases
Data ONTAP 7.3 introduced user created 32-character long aliases for World Wide Port Names which
can be referenced by the fcp and igroup commands.
Command/Action
FAS1> fcp wwpn-alias set <alias> <wwpn>
FAS1> fcp wwpn-alias remove { -a <alias> | -w
<wwwpn> }
FAS1> fcp wwpn-alias show
Description
Assign an alias to a WWPN
Remove a given alias or all aliases from a
specific WWPN
Displays all WWPN aliases
3.1.4 Create a LUN
Step
1
2
Command/Action
Description
Create a LUN:
* SnapDrive on client
* lun setup
* System Manager: Storage -> LUNs -> Create
Create a LUN on the storage appliance
via a CLI script or through System
Manager.
NOTE: ALWAYS use SnapDrive to create
and manage LUNs on clients with
SnapDrive installed
Enter LUN details during setup process:
* LUN Path: /vol/flex1/QTUser/UserLun
* LUN Size: 2g
* Space-reserved: Yes
* Protocol: Solaris
* Description: User LUNa
* iGroup Name: UserIG
* iGroup Type: FCP
* OS: Solaris
Enter the appropriate details for the LUN
Data ONTAP 8.x 7-Mode Cook Book v1_0.doc
11 September 2012
Page 22](https://image.slidesharecdn.com/dataontap8-131208114100-phpapp02/85/Data-ontap-8-x-7-mode-cook-book-v1-1-22-320.jpg)

![Data ONTAP 7G Cook Book
Data ONTAP 8.x 7-Mode Cook Book
3
FAS1> clone status <vol_name>
Reports status of running or failed clone
operations
4
FAS1> clone clear <vol_name> <ID>
Clears information about a failed clone
operation
3
Mount the new LUN to a host using commands
in sections 3.1.6, 3.2.3, or 3.2.4
Connect the LUN to client systems
3.6 Delete a LUN
Step
Command/Action
Description
1
FAS1> lun show -m
Show lun mapping information
2
FAS1> lun unmap /vol/vol1/lun1.lun
Unmap the LUN from any clients
3
FAS1> lun destroy /vol/vol1/lun1.lun
Delete the LUN file from vol1
3.7 Access a LUN with NFS/CIFS protocols
NOTE: By default the LUN will be read-only. The LUN must be unmapped from FCP/iSCSI targets
and taken offline to be writeable.
Step
1
Command/Action
FAS1> lun share /vol/data/lun2
[none|read|write|all]
Data ONTAP 8.x 7-Mode Cook Book v1_0.doc
11 September 2012
Description
Makes the LUN named lun2 accessible by
NFS or CIFS and assigns the designated
permissions.
Page 27](https://image.slidesharecdn.com/dataontap8-131208114100-phpapp02/85/Data-ontap-8-x-7-mode-cook-book-v1-1-27-320.jpg)
![Data ONTAP 7G Cook Book
Data ONTAP 8.x 7-Mode Cook Book
4.4.2 Delete an ifgrp or ifgrp interface
Note: Remove or edit the ifgrp creation entries in /etc/rc to make these changes persistent
Step
Command/Action
Description
1
FAS1> ifconfig Trunk1 down
Down the ifgrp named “Trunk1”
2
FAS1> ifgrp delete Trunk1 e4
remove interface e4 from ifgrp “Trunk1”
3
FAS1> ifgrp destroy Trunk1
Delete the entire ifgrp
4.5 IP version 6 [8.1]
4.5.1 Associated Key OPTIONS
Option
Default
Description
ip.v6.enable
Off
Turn on to enable support for IPv6. See options
below to enable IPv6 by protocol.
ip.v6.ra_enable
off
Turn on to enable router-advertised address
autoconfiguration.
cifs.ipv6.enable
Off
Turn on to pass CIFS traffic over IPv6
nfs.ipv6.enable
Off
Turn on to pass NFS traffic over IPv6
4.6 Baseboard Management Controller (BMC)
The FAS2000 series has a Baseboard Management Controller for remote management. Refer to the
Data ONTAP System Administration Guide and KB 3101254 for more information
https://kb.netapp.com/support/index?page=content&id=3011254
4.6.1 Configure the BMC
Step
Command/Action
Description
1
Obtain an IP address for the BMC and the gateway IP address.
2
FAS1> bmc setup
Run the setup wizard
3
FAS1> bmc status
Verify functionality
4
FAS1> bmc test autosupport
Send a test ASUP to verify network
settings
5
FAS1> bmc reboot
Reboot the BMC and perform a self-test
4.6.2 Using the BMC
Step
1
OR
Command/Action
SSH to the BMC IP address and log in as user
“naroot”
Description
The naroot user is a restricted account
proving enhanced security
Press Ctrl+G while in a console session
Data ONTAP 8.x 7-Mode Cook Book v1_0.doc
11 September 2012
Page 30](https://image.slidesharecdn.com/dataontap8-131208114100-phpapp02/85/Data-ontap-8-x-7-mode-cook-book-v1-1-30-320.jpg)
![Data ONTAP 7G Cook Book
Data ONTAP 8.x 7-Mode Cook Book
2
bmc shell -> sensors show
Get current values of system sensors
3
bmc shell -> events [ all | info | latest {N} ]
Displays storage system events logged by
the BMC
4
bmc shell -> system console
Access the system console CLI
5
bmc shell -> system core
Dump system core and reset the
appliance
6
bmc shell -> system reset {primary | backup |
current}
Reset the system using the specified
firmware image
7
bmc shell -> system power { on | off | cycle }
Turn power on, off, or off and back on
(performs a dirty shutdown)
4.6.3 Upgrade the BMC
Step
Command/Action
Description
1
Download the Data ONTAP software from the NetApp Support website and place in the
/etc/software folder on the root volume
2
FAS1> version -b
Display current firmware version info
3
FAS1> software update 7311_setup_e.exe –d -r
Extract the systems files but do not run
the download or reboot commands
4
FAS1> priv set advanced
FAS1> download –d
FAS1> priv set
Copy the system firmware executable
image to the CompactFlash card.
5
For standalone systems:
FAS1> halt
Halt the system to get the system prompt
For HA pairs:
FAS2> cf takeover
Takeover system from partner and press
CTRL+C on FAS1 to get system prompt
LOADER> update_bmc
Install the new firmware
LOADER> bye
Reset the hardware and boot the system
into Data ONTAP
7
For HA pairs:
LOADER-A> bye
FAS2> cf giveback
Reset the system then perform a
giveback to boot FAS1 into Data ONTAP.
Repeat steps 2 – 7 on FAS2
8
FAS1> bmc status
Check status of BMC
9
FAS1> version -b
Verify new firmware has been installed
6
4.7 Remote LAN Module (RLM)
The RLM is a management interface on the FAS3000, FAS3100 and FAS6000 series. The RLM is
better than a console connection because it remains available when the storage controller has crashed
or is powered off. RLM firmware version 3.0 and newer includes the Remote Support Agent (RSA)
which provides more information to Technical Support which can reduce case resolution times. Refer
to the Data ONTAP System Administration Guide and KB 3011169 for more information.
https://kb.netapp.com/support/index?page=content&id=3011169
Data ONTAP 8.x 7-Mode Cook Book v1_0.doc
11 September 2012
Page 31](https://image.slidesharecdn.com/dataontap8-131208114100-phpapp02/85/Data-ontap-8-x-7-mode-cook-book-v1-1-31-320.jpg)

![Data ONTAP 7G Cook Book
Data ONTAP 8.x 7-Mode Cook Book
Step
Command/Action
Description
1
FAS1> reallocate on
Turn on the reallocation process on the
storage controller.
2
FAS1> vol options oradb03 guarantee=volume
Set the space guarantee to „volume‟ to
ensure reallocate does not create an
overcommitment issue in the aggregate
3
FAS1> snap list oradb3
Snapshots lock blocks in place so delete
unneeded snapshots for better results
FAS1> reallocate start /vol/oradb03
Enable reallocation on the oradb03
volume. now reallocate will run on the
volume every day at midnight (see step 3)
FAS1> reallocate start –p /vol/oradb03
Run reallocate, but do not change logical
layout so snapshots may be preserved.
Warning: This will degrade performance
when reading old, unoptimized snapshots
(e.g,. SnapRestores and using cloned
LUNs and volumes).
FAS1> reallocate start –A –o aggr03
Reallocate free space in aggr03. This will
not move data blocks
5
FAS1> reallocate schedule -s "0 23 * 6"
/vol/db/lun1
Run reallocate on the LUN every
Saturday at 11 PM.
6
FAS1> reallocate status [ pathname ]
Display status of reallocation jobs for
entire system or specified pathname.
7
FAS1> reallocate stop /vol/exchdb/lun2.lun
Delete a reallocate job.
4
The read_realloc volume option is not part of the reallocation command but uses many of the same
system processes to perform a similar function to defragment files read sequentially.
Note: Files in a volume are identified as defragmented only after they have been read into memory
once and determined to be fragmented. Not all files will be reallocated and volumes with small files
and mostly random reads may not see any benefit.
Step
1
2
Command/Action
Description
FAS1> vol options testvol read_realloc on
Turn on file read reallocation . Use on
volumes with few snapshots because it
may duplicate blocks and consume space
FAS1> vol options VM_vol05 read_realloc
space_optimized
Turn on file read reallocation but save
space by not reallocating files in
snapshots. This will reduce read
performance when reading files in a
snapshot (during file restore or using
FlexClone volumes)
5.1.4 Managing inodes
Inodes determine how many „files‟ a volume can hold. The default inode points to a 32KB chunk of
data blocks to handle a typical mix of large and small files. Volumes with many small files and volumes
larger than 1TB can run out of inodes before they run out of free space.
Data ONTAP 8.x 7-Mode Cook Book v1_0.doc
11 September 2012
Page 38](https://image.slidesharecdn.com/dataontap8-131208114100-phpapp02/85/Data-ontap-8-x-7-mode-cook-book-v1-1-38-320.jpg)
![Data ONTAP 7G Cook Book
Data ONTAP 8.x 7-Mode Cook Book
Warning: Inodes consume disk space and some system memory. They can only be increased so
make small changes. Aggregates can reference up to 2 billion inodes. For high file count environments
refer to the Best Practices: https://fieldportal.netapp.com/viewcontent.asp?qv=1&docid=26076
Step
Command/Action
Description
1
FAS1> df –i users_vol
Display inode usage in the users_vol
volume.
2
FAS1> maxfiles users_vol
Display current maximum number of files
as well as number of files present in the
volume.
3
FAS1> maxfiles users_vol <number>
Increase the number of inodes (increase
by number divisible by 4).
5.1.5 Automatic Space Preservation (vol_autogrow, snap autodelete)
Data ONTAP can automatically make free space available when a FlexVol volume reaches 98% full by
growing the volume and/or deleting snapshots. One or both options can be configured on a volume.
Note: These options are not recommended on volumes smaller than 100GB because the volume may
fill up before the triggers execute.
Step
Command/Action
Description
FAS1> vol options vol17 try_first volume_grow
When vol17 fills up ONTAP will try to
grow the volume before deleting
snapshots. This is the default.
FAS1> vol options vol17 try_first snap_delete
ONTAP will try to delete snapshots before
growing the volume.
FAS1> vol autosize vol17 on
Turn space preservation on using default
settings. The volume will grow to 120% of
original size in increments of 5% of the
original volume size.
FAS1> vol size apps_vol
FAS1> vol autosize apps_vol –m 50g –i 500m on
Check size of volume then set maximum
volume size to 50GB and grow by 500MB
increments
3
FAS1> vol status –v apps_vol
View the autogrow maximum size and
increment settings (bottom of listing)
4
FAS1> snap autodelete vol17 show
FAS1> snap autodelete vol17 on
View current settings then enable
snapshot autodelete
5
FAS1> snap autodelete vol17 commitment
[ try | disrupt ]
The default, try only permits snapshots
not locked by data protection utilities
(mirroring, NDMPcopy) AND data backing
functionalities (volume and LUN clones)
to be deleted. disrupt only permits
snapshots not locked by data backing
functionalities (volume and LUN clones)
to be deleted.
6
FAS1> snap autodelete vol17 trigger volume
The default, volume triggers snapshot
delete when the volume reaches 98% full
AND the snap reserve is full.
1
2
Data ONTAP 8.x 7-Mode Cook Book v1_0.doc
11 September 2012
Page 39](https://image.slidesharecdn.com/dataontap8-131208114100-phpapp02/85/Data-ontap-8-x-7-mode-cook-book-v1-1-39-320.jpg)
![Data ONTAP 7G Cook Book
Data ONTAP 8.x 7-Mode Cook Book
FAS1> snap autodelete vol17 trigger
snap_reserve
snap_reserve triggers snapshot delete
when the snap reserve reaches 98%.
7
FAS1> snap autodelete vol17
target_free_space 10
Stop deleting snapshots when either
volume or snap_reserve (determined by
the „trigger‟ setting) reaches 10%. Default
setting is 20%.
8
FAS1> snap autodelete vol17 delete order
[ newest_first | oldest_first ]
The default is to delete oldest snapshots
first.
FAS1> snap autodelete vol17 defer_delete
[ scheduled | user_created ]
By default, user_created (manual or
script created snapshots - including
SnapDrive, SnapMirror, and SnapVault)
are deleted last. If set to scheduled then
snapshots created by snap sched are
deleted last.
8
5.2 Deduplication
Deduplication is a form of compression that looks for identical data blocks in a volume and deletes
duplicates blocks by adding reference counters in the metadata of a few „master‟ blocks. Read TR3505 for detailed information: http://media.netapp.com/documents/tr-3505.pdf. For Data ONTAP 8.1,
read TR-3958. Field Portal contains at least seven Deployment Implementation Guides for
Deduplication titled TR-3505i.<a - g> that address dedupe with applications like Exchange and SQL.
Note: NDMP copies and backups, SnapVault and Qtree SnapMirror decompress or “rehydrate” the
data which will consume space on the destination tape or disk system.
Warning: Each storage controller model has a volume size limit and limit on how much non-duplicate
and deduplicated data those volumes can hold. Check the matrix in TR-3505 for your systems‟ limits.
Deduplication requires some free space to store metadata. General recommendations are to maintain
2% volume free space and 4% aggregate free space (snapshot reserve is not counted as free space).
Step
Command/Action
Description
1
FAS1> license add <code>
Add licenses for A_SIS and Nearstore to
use deduplication.
2
FAS1> sis on /vol/group_vol
Enable duplication on specified volume.
3
FAS1> sis start –s /vol/group_vol
Start a scan of the volume and then run
every day at midnight.
4
FAS1> sis config /vol/group_vol
Display the schedules of SIS enabled
volumes.
FAS1> sis config –s /vol/group_vol wed, sat@03
Schedule deduplication scan every
Wednesday and Saturday at 3 AM.
Note: Stagger schedules because an HA
cluster can only support 8 concurrent
deduplication operations.
5
Data ONTAP 8.x 7-Mode Cook Book v1_0.doc
11 September 2012
Page 40](https://image.slidesharecdn.com/dataontap8-131208114100-phpapp02/85/Data-ontap-8-x-7-mode-cook-book-v1-1-40-320.jpg)
![Data ONTAP 7G Cook Book
Data ONTAP 8.x 7-Mode Cook Book
6.2 Volume Copy
Volume copy is a block-level copy of a volume, and optionally its snapshots, to another volume of
equal or greater size. The destination volume may be on the same system or on a remote system.
Step
Command/Action
Description
1
FAS2> vol restrict destination_vol
Restrict the destination volume
2
FAS2> options rsh.enable on
Enable RSH on the destination FAS
3
Add an entry in /etc/hosts.equiv on both systems
for the other system
Create a trusted relationship between the
systems
4
FAS1> vol copy start [-S] source_vol
fas2:destination_vol
Start copying the source volume (and it‟s
SnapShots with –S) to the destination
volume on a remote system
OR
FAS1> vol copy start [-S] source_vol
destination_vol
Start copying the source volume (and it‟s
SnapShots with –S) to the local
destination volume
5
FAS1> vol copy status
Check on progress of vol copy operation
6
FAS1> options vol.copy.throttle [value]
Optional: Set the speed of the copy from
1 (10%) to 10 (100%) to reduce impact on
network traffic
7
FAS1> vol copy abort [operation_number]
Cancel one or more volume copy
operations
8
FAS1> vol options destination_vol online
Make the new volume useable
6.3 Snapshots
Step
Command/Action
Description
1
FAS1> snap reserve vol1 12
set the snap reserve on vol1 to 12%
2
FAS1> snap create vol1 mysnap
Create a snapshot of volume vol1
3
FAS1> snap sched vol1 1 6
12@8,10,12.14,16,18
Shedule snapshots of vol1 to retain 1
weekly, 6 nightly and 12 hourly
snapshots. Take the snapshots at 0800,
1000, 1200, 1400, 1600 and 1800
4
FAS1> snap list vol1
List all snapshots for vol1
5
FAS1> snap delta vol1 [snap1 snap2]
Show the amount of change between
snapshots on vol1 (or between 2
snapshots)
6
FAS1> snap reclaimable vol1 snap1 [snap2 …]
List amount of space freed if listed
snapshot(s) were deleted
7
FAS1> snap rename vol1 old_name new_name
Rename a snapshot in vol1
8
FAS1> snap delete vol1 snap1
Delete snapshot snap1 in vol1
9
FAS1> snap autodelete vol1
set/change settings to automatically
delete snapshots when volume and snap
reserve are nearly full
Data ONTAP 8.x 7-Mode Cook Book v1_0.doc
11 September 2012
Page 44](https://image.slidesharecdn.com/dataontap8-131208114100-phpapp02/85/Data-ontap-8-x-7-mode-cook-book-v1-1-44-320.jpg)
![Data ONTAP 7G Cook Book
Data ONTAP 8.x 7-Mode Cook Book
6.4 SnapRestore
Warning: All file changes and snapshots created after the snapshot used for the SnapRestore will be
permanently lost
Step
Command/Action
Description
1
FAS1> license add <code>
Install license code for SnapRestore
2
FAS1> snap restore -t file /vol/root/etc/rc
SnapRestore specific file from snapshot
3
FAS1> snap restore -t vol –s weekly.1 vol1
SnapRestore entire volume from a weekly
Snapshot
Command syntax:
snap restore [ -t file|vol] [-s snapshot_name] [ -r restore_as_path] vol_name
6.5 Asynchronous SnapMirror
SnapMirror is a replication function for maintaining up-to-date copies of data in another volume or
another storage controller which may be thousands of kilometres away. Refer to the Data ONTAP
Data Protection Online Backup and Recovery Guide and the best practices for more information:
https://fieldportal.netapp.com/viewcontent.asp?qv=1&docid=12199
6.5.1 Create an Asynchronous Volume SnapMirror Relationship
This section describes the procedure to set up asynchronous Volume SnapMirror replication between
two storage controllers.
Step
Command/Action
Description
1
FAS1> license add <snapmirror_code>
License snapmirror on the source and
destination Storage Appliance.
2
FAS1> df –k vol1
FAS2> df –k vol1
Ensure destination volume is equal to or
larger than source volume. FAS1 is the
source and FAS2 is the destination.
3
FAS1> vol options vol1 convert_ucode on
Set the source volume to Unicode ON for
source volumes that support CIFS clients
4
FAS1> vol status vol1
Verify volume status and unicode setting
5
FAS2> vol create vol1
Create a volume of the same size or
larger on the destination system
6
FAS2> vol restrict vol1
Restrict the destination volume
7
FAS2> vol status vol1
Verify volume is now restricted
8
FAS1> options snapmirror.access host=fas2
FAS2> options snapmirror.access host=fas1
Allow snapmirror access by each storage
controller to the other.
9
FAS2> wrfile -a /etc/snapmirror.conf
fas1:vol1 fas2:vol1 - * * * *
or
fas1:vol1 fas2:vol1 – 0-55/5 * * *
(every 5 mins of every hour)
Create a snapmirror schedule on the
destination FAS defining when to
synchronise (Min of Hr, Hr of Day, Day of
Mth, Day of Wk)
See section 11.6 for a sample
snapmirror.conf file
Data ONTAP 8.x 7-Mode Cook Book v1_0.doc
11 September 2012
Page 45](https://image.slidesharecdn.com/dataontap8-131208114100-phpapp02/85/Data-ontap-8-x-7-mode-cook-book-v1-1-45-320.jpg)
![Data ONTAP 7G Cook Book
Data ONTAP 8.x 7-Mode Cook Book
6.5.7 Purging Asynchronous Mirrors
Step
Command/Action
Description
1
FAS2> wrfile /etc/snapmirror.conf
Remove redundant entries
2
FAS2> snapmirror quiesce <dst_qtree>
FAS2> snapmirror break <dst_vol_or_qtree>
Quiesce any qtree snapmirrors and break
SnapMirror relationships.
3
FAS1> snapmirror destinations
Display any snapmirror destinations
4
FAS1> snapmirror release <src_path>
<dst_hostname>:<dst_path>
Release the source associated with
snapmirror relationships.
5
FAS1> snap list <vol>
FAS1> snap delete <vol> <snapshot>
List and delete any snapshots that are for
redundant snapmirror relationships.
6
FAS> snapmirror off
Disable snapmirror on source and
destination if appropriate.
6.6 SnapVault
SnapVault performs backup of qtrees and directories from a primary storage system (source) to a
secondary storage system (destination).
Step
Command/Action
Description
1
FAS1> license add <sv_primary_license>
FAS2> license add <sv_secondary_license>
License SnapVault on the primary and
secondary systems.
2
FAS> ndmpd on
Enable the NDMP service.
3
FAS> options snapvault.enable on
Enable SnapVault.
FAS1> options snapvault.access host=fas2
Allow host access from the SnapVault
Secondary (destination) system.
5
FAS2> options snapvault.access
host=fas1,fas3
Allow host access from all the clients.
6
FAS2> snapvault start –S fas1:/vol/vol1/qtree1
/vol/sv_vol/na1_qtree1
Initialize the relationship between source
qtree1 on FAS1 to a unique destination
qtree in /vol/sv_vol
7
FAS1> snapvault snap sched vol1 sv_weekly
1@sat@19
FAS1> snapvault snap sched vol1 sv_nightly
6@mon-fri@19
FAS1> snapvault snap sched vol1 sv_hourly
14@mon-fri@7-18
Create a schedule of snapshots for
SnapVault use on each client volume
containing qtrees to backup. There are
weekly, nightly and hourly snapshots.
Specify number to retain, @what days
to run, @what times to take snapshots
8
FAS2> snapvault snap sched -x vol1
sv_weekly 1@sat@19
FAS2> snapvault snap sched –x vol1
sv_nightly 6@mon-fri@19
FAS2> snapvault snap sched –x vol1 sv_hourly
14@mon-fri@7-18
Create a schedule of transfers from all
clients containing qtrees in vol1. There
are weekly, nightly and hourly
snapshots. Specify number to retain,
@what days to run, @what times to take
snapshots
9
FAS> snapvault status [-l] [-s]
Check on the status of SnapVault
transfers
4
Data ONTAP 8.x 7-Mode Cook Book v1_0.doc
11 September 2012
Page 48](https://image.slidesharecdn.com/dataontap8-131208114100-phpapp02/85/Data-ontap-8-x-7-mode-cook-book-v1-1-48-320.jpg)

![Data ONTAP 7G Cook Book
Data ONTAP 8.x 7-Mode Cook Book
7.2.3 CIFS Network Security OPTIONS
Option
Default
Description
cifs.enable_share_browsing
On
Turn off to enable Access Based Enumeration
(ABE)
cifs.idle_timout <time>
30
Specify how many minutes ONTAP will wait
before disconnecting an idle CIFS session
cifs.restrict_anonymous.enable
0
See below
0
Controls the access restrictions of nonauthenticated sessions. Default is no access
restrictions. Set to 1 disallows enumeration of
users and shares. Set to 2 to fully restrict
access.
cifs.signing.enable
Off
Turn on to enable SMB signing to prevent „manin-the-middle‟ intrusions by requiring each CIFS
sessions use a security signatures. Imposes a
performance penalty on the client and controller.
cifs.smb2.client.enable
Off
Turn on support for clients using SMB2
cifs.smb2.durable_handle.enable
On
Preserves open files when a client unexpectedly
disconnects and later reconnects to a share
cifs.smb2.durable_handle.timeout
16m
Delay to allow a client to reconnect before
closing their open files
cifs.smb2.enable
off
Turn on SMB2
cifs.smb2.signing.required
off
Turn on SMB signing for the SMB2 protocol
interface.blocked.cifs [port | ifgrp ]
Null
Blocks CIFS traffic from using the commaseparated list of Ethernet ports and/or ifgrps.
cifs.restrict_anonymous [ 0|1|2 ]
(replaces cifs.restrict_anonymous.enable)
7.3 AntiVirus
Data ONTAP is not vulnerable to viruses or other malware. However, the data stored on the system is
not protected by Data ONTAP so external antivirus servers must screen files for viruses.
Step
Command/Action
Description
1
Install and configure a Data ONTAP compliant
virus scanner on a PC server(s)
Most major AV vendors have compliant
versions of their software
2
FAS1> vscan scanners
Scan the network for AV servers
3
FAS1> vscan scanners secondary_scanners <IP
addresses>
For multiple AV scanners, designate all
but one as secondary scanners
4
FAS1> vscan on
Enable virus scanning. By default, Data
ONTAP sends every CIFS file a client
accesses to the scanner(s) for scanning
5
FAS1> cifs shares –change cifs.homedir -vscan
Turn on scanning of the home directories
6
FAS1> cifs shares –change App_logs –novscan
Disable virus scanning of the App_logs
CIFS share
Data ONTAP 8.x 7-Mode Cook Book v1_0.doc
11 September 2012
Page 54](https://image.slidesharecdn.com/dataontap8-131208114100-phpapp02/85/Data-ontap-8-x-7-mode-cook-book-v1-1-54-320.jpg)


![Data ONTAP 7G Cook Book
Data ONTAP 8.x 7-Mode Cook Book
5
FAS2/FAS1> sysconfig -v
*** This system has been taken over by fas1
…
No hardware device information is available.
Check to verify FAS1 has
taken over partner.
6
FAS2/FAS1> ifconfig –a
FAS2/FAS1> ifgrp status
Verify FAS2‟s network
interfaces and ifgrps have
been created and are online.
7
FAS2/FAS1> partner
Switch back to FAS1 CLI
8
FAS1(takeover)> cf giveback
[lots of console messages]
Cluster monitor: takeover of fas2 enabled
Partner node reboots and
functions normally
Note: It is sometimes
necessary to run cf giveback
–f to terminate certain
services that will prevent a
giveback.
9
Verify clients can access data using all licensed protocols
10
FAS1> cf status
Cluster enabled, fas2 is up.
Data ONTAP 8.x 7-Mode Cook Book v1_0.doc
11 September 2012
Verify cluster is back to
normal status
Page 63](https://image.slidesharecdn.com/dataontap8-131208114100-phpapp02/85/Data-ontap-8-x-7-mode-cook-book-v1-1-63-320.jpg)
![Data ONTAP 7G Cook Book
Data ONTAP 8.x 7-Mode Cook Book
1Gb – 2GB
5
26
2GB or more
11
65
Step
Command/Action
Description
1
FAS1> sysconfig -v
Verify system memory size
2
FAS1> vfiler limit
Display current limit setting
3
FAS1> vfiler limit <number>
Increase/decrease limit to number
specified (using maximums above)
10.2 MultiStore (vfiler) Administration
Step
Command/Action
Description
1
FAS1> vfiler status [-a|-r]
fas1_vfiler1 running
Check vFiler status [-a shows Allowed
protocols]
2
FAS1> ipspace list
Display IPspaces configured
3
FAS1> vfiler disallow fas1_vfiler1
proto=nfs
Disallow nfs protocol on a per-vFiler basis
4
FAS1> vfiler add fas1_vfiler1 –I
10.10.17.102
Assigns another IP address to fas1_vfiler1
5
FAS1> vfiler add fa1_vfiler1 /vol/vol3
Assigns vol3 to fas1_vfiler1
6
FAS1> vfiler context fas1_vfiler1*
Switch CLI context to run all subsequent
commands from within the specified vFiler.
7
vfiler1> setup
Run setup on the vFiler
8
vfiler1> cifs setup
Setup CIFS on vfiler. Be sure to give the vFiler
a unique default name in the domain being
configured.
9
vfiler1> qtree create eng /vol/vol1/eng
Create a qtree in the volume. Only possible if
the vFiler is assigned to a volume.
10
vfiler1> cifs shares –add eng /vol/vol1/eng
Create CIFS shares in the vfiler
11
Verify clients in the same IPspace can
access the share within this vfiler
Verify everything worked
FAS1> vfiler rename fas1_vfiler1
fas1_vfiler2
Renames fas1_vfiler1 to fas1_vfiler2
-
-
FAS1> vfiler move fas1_vfiler1 fas1_vfiler3
/vol/vol3
Moves vol3 (with all data intact) to fas1_vfiler3
Note: When moving resources, network traffic
to both vfilers is terminated during the move
FAS1> vfiler remove fas1_vfiler1 –I
Removes an IP address and vol3 from
10.10.17.102 /vol/vol3
fas1_vfiler1
* To return to the root vFiler, type vfiler context vfiler0. Additionally, you may type vfiler run before
every command to run the command on the specified vFiler‟s context.
-
Data ONTAP 8.x 7-Mode Cook Book v1_0.doc
11 September 2012
Page 65](https://image.slidesharecdn.com/dataontap8-131208114100-phpapp02/85/Data-ontap-8-x-7-mode-cook-book-v1-1-65-320.jpg)
![Data ONTAP 7G Cook Book
Data ONTAP 8.x 7-Mode Cook Book
10.2.2 Stop/Destroy a vFiler
Step
Command/Action
Description
1
FAS1> vfiler stop vfiler1
Stops vfiler1 from receiving incoming
packets
2
FAS1> ifconfig e0 down
or
FAS1> ifconfig –alias <alias interface>
Down the interface associated with the
vFiler‟s IPspace
-alias if the interface is an alias
3
FAS1> vfiler destroy vfiler1
[...]
Resources for vfiler1 moved to hosting system.
Disassociate resources from a vFiler.
This will not destroy any of the user data.
All resources return to vfiler0
4
FAS1> vfiler status vfiler1
Check status of vfilers
Data ONTAP 8.x 7-Mode Cook Book v1_0.doc
11 September 2012
Page 67](https://image.slidesharecdn.com/dataontap8-131208114100-phpapp02/85/Data-ontap-8-x-7-mode-cook-book-v1-1-67-320.jpg)


Disk ownership Launches the Disk Ownership Assistant to assign ownership to unowned disks 3 *> disk assign Manually assign ownership of unowned disks 4 *> disk show -o Display disk ownership information 5 *> disk remove Remove ownership label from a disk 1.1.1.1 Modifying disk ownership To modify disk ownership, use the disk assign and disk remove commands. For example: *> disk assign -d 0b.83 -s 0 *> disk remove -d 0b.84 This assigns ownership of disk 0b.83 to the local storage system and removes ownership of


