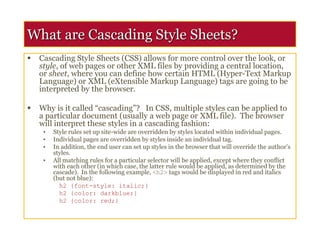
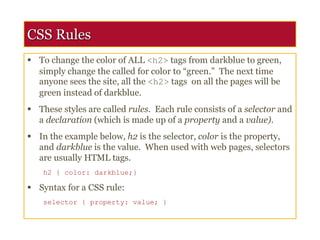
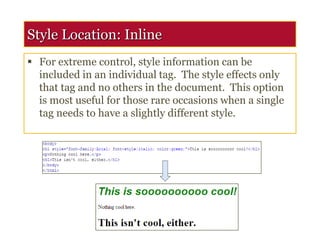
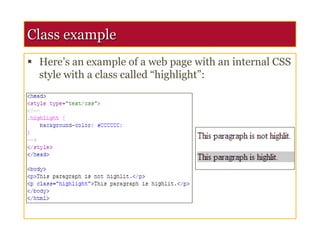
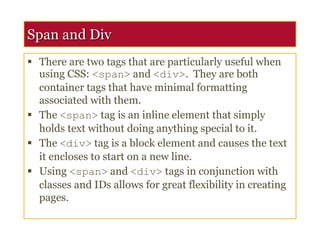
Cascading Style Sheets (CSS) allow for more control over the look and style of web pages by providing a central location to define how HTML and XML tags are interpreted. CSS rules consist of selectors that specify elements to style and declarations that define properties and values to apply. CSS styles can be defined internally, inline, or externally in style sheets and rules are applied following the cascade order.
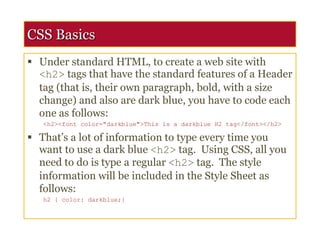

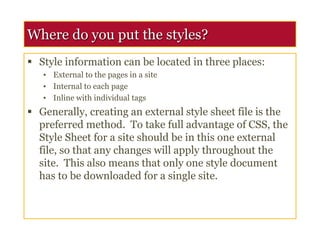
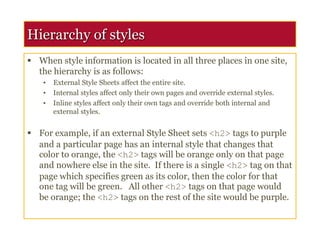
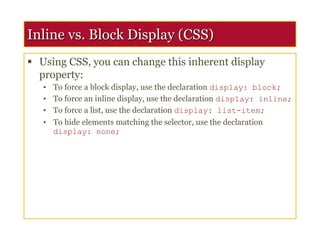
![Inline vs. Block Display (HTML)
All HTML elements (tags) are assigned a display
property value of either inline or block.
Inline elements display in browsers horizontally.
[INLINE ELEMENT 1] [INLINE ELEMENT 2] [INLINE ELEMENT 3]
Block elements display in browsers vertically (stacked
one on top of the other).
[BLOCK ELEMENT 1]
[BLOCK ELEMENT 2]
[BLOCK ELEMENT 3]
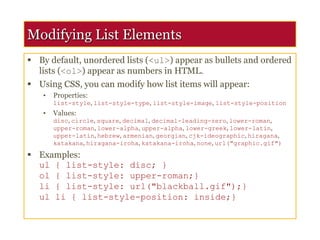
Examples of inline elements:
<a> <img> <strong> <em> <span>
Examples of block elements:
<p> <h1-h6> <div> <hr> <table> <ul> <ol>](https://image.slidesharecdn.com/css-presentation-240204180837-7c2b2114/85/css-presentation-ppt-14-320.jpg)


![[Deck] What's New in Spark-Iceberg Integration via DSV2.pptx](https://cdn.slidesharecdn.com/ss_thumbnails/deckwhatsnewinspark-icebergintegrationviadsv2-260210005337-25955b12-thumbnail.jpg?width=640&height=640&fit=bounds)


