The Array Helper file in CodeIgniter contains functions for working with arrays. It includes functions like element() to fetch an item from an array, random_element() to return a random element from an array, and elements() to fetch multiple items from an array. The helper is loaded using $this->load->helper('array'). It provides convenient methods for common array operations like retrieving elements and random elements without having to write these functions manually.


![Something More About base_url 12
What happens if I don't set base_url ? 12
If I did't set it what will show up? 12
What does this mean http://[::1]/ ?? 12
How to set proper base_url()?? 12
How to use base_url()?? 12
Smart way to setting up the base_url 13
Chapter 5: Calling a model method in a view 14
Introduction 14
Examples 14
Save a method call in a variable 14
Chapter 6: CAPTCHA Helper 15
Examples 15
Loading this Helper 15
create_captcha($data) 15
Using the CAPTCHA helper 15
Complete example 16
Chapter 7: CodeIgniter - Internationalization 18
Introduction 18
Examples 18
Example 18
Chapter 8: Codeigniter Pagination 22
Examples 22
in this section i assume you know to calling helper, in the controller 22
in the view 22
Chapter 9: CodeIgniter Shopping Cart 23
Introduction 23
Examples 23
Adding Items In Cart 23
and you can insert multiple item like this 23
Basic Elements of CI Shopping Cart 24](https://image.slidesharecdn.com/codeigniter-190515051700/85/Codeigniter-3-320.jpg)
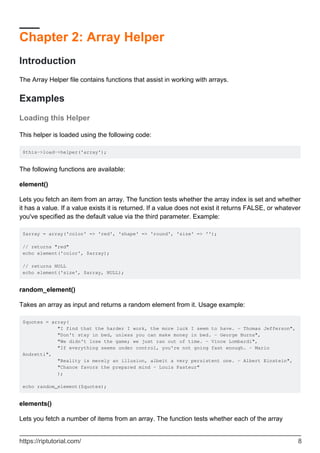
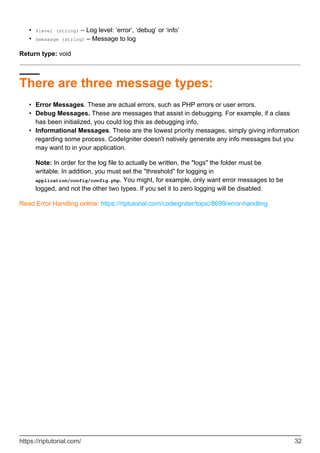
![Mac Environment
Install MAMP1.
Download and Unzip the package from Codeigniter.com2.
Extract all the document in the server space (htdocs)3.
Linux Environment
Download and Unzip the package from Codeigniter.com1.
Place the extracted folder in /var/www (in WAMP) or xampp/htdocs (XAMPP)2.
GitHub
git clone https://github.com/bcit-ci/CodeIgniter.git
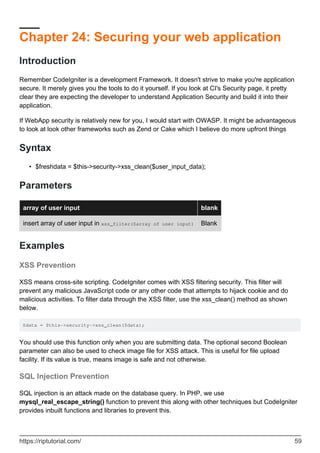
If you follow the system correctly, you will get the below screen.
Base URL
Go to application/config/config.php1.
Define base URL as $config['base_url'] = 'http://localhost/path/to/folder';2.
Remove index.php from URL
Apache Configuration
https://riptutorial.com/ 3](https://image.slidesharecdn.com/codeigniter-190515051700/85/Codeigniter-11-320.jpg)
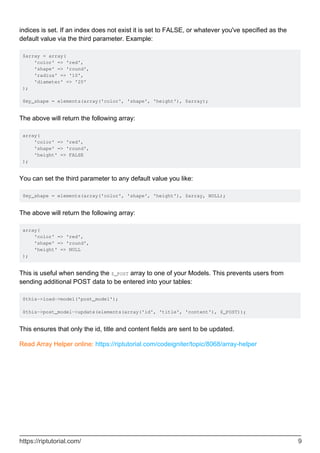
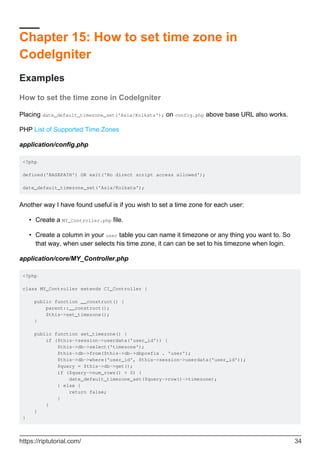
![go to root1.
create htaccess file2.
Add below code inside it
RewriteEngine on
RewriteCond $1 !^(index.php|assets|image|resources|robots.txt)
RewriteCond %{REQUEST_FILENAME} !-f
RewriteCond %{REQUEST_FILENAME} !-d
RewriteRule ^(.*)$ index.php/$1 [L,QSA]
3.
Note: .htaccess code vary depending on hosting server. In some hosting server (e.g.: Godaddy)
need to use an extra ? in the last line of above code. The following line will be replaced with last
line in applicable case:
RewriteRule ^(.*)$ index.php?/$1 [L,QSA]
Nginx Configuration
Open nginx config file (by default: /etc/nginx/sites-available/default)1.
Add below code inside it
server {
server_name domain.tld;
root /path-to-codeigniter-folder; //you codeigniter path
index index.html index.php;
# set expiration of assets to MAX for caching
location ~* .(ico|css|js|gif|jpe?g|png)(?[0-9]+)?$ {
expires max;
log_not_found off;
}
location / {
# Check if a file or directory index file exists, else route it to index.php.
try_files $uri $uri/ /index.php;
}
location ~* .php$ {
fastcgi_pass 127.0.0.1:9000;
include fastcgi.conf;
}
}
2.
Database Configuration
Go to application/config/database.php1.
Set the following configuration variables.2.
https://riptutorial.com/ 4](https://image.slidesharecdn.com/codeigniter-190515051700/85/Codeigniter-12-320.jpg)
![Host•
Username•
Password•
Database Name•
Port•
Set Default Controller
Go to application/config/routes.php1.
set the following configuration variable value with your controller name.
default_controller•
2.
AutoLoad Library And Helper
Go to application/config/autoload.php1.
set Auto load value like $autoload['libraries'] = array('database', 'session');2.
set Helper value like $autoload['helper'] = array('url', 'file', 'form', 'html', 'text');3.
Run multiple applications on one CI system
Codeigniter may be configured to run more than one project without duplicating CI core files.
It's possible by splitting CI Application side. For example let's take project of website, which
contains front-end and back-end Content Management System (CMS) applications. In this case CI
folder structure will be like:
Folder structure:
├── Codeigniter
│ ├── applications
│ │ ├─ front-end
│ │ │ ├── views
│ │ │ ├── models
│ │ │ ├── controllers
│ │ │ ├── config
│ │ │ └── ...
│ │ ├─ back-end
│ │ │ ├── views
│ │ │ ├── models
│ │ │ ├── controllers
│ │ │ ├── config
│ │ │ └── ...
│ │ │
│ ├── system
│ │ ├── core
│ │ ├── database
│ │ ├── helpers
│ │ └── ...
│ │
https://riptutorial.com/ 5](https://image.slidesharecdn.com/codeigniter-190515051700/85/Codeigniter-13-320.jpg)

![Chapter 4: Base url in Codeigniter
Examples
Setting your base url in Codeigniter
You will need to set your base URL in application/config/config.php
If it is not set, then CodeIgniter will try to guess the protocol and path to your installation, but due
to the security concerns the hostname will be set to $_SERVER['SERVER_ADDR'] if available, or
localhost otherwise. The auto-detection mechanism exists only for convenience during
development and MUST NOT be used in production!
$config['base_url'] = '';
It should be filed like
$config['base_url'] = 'http://localhost/projectname/';
$config['base_url'] = 'http://www.example.com/';
Always good to use / at end of base_url
When you do not set your base URL you might run into some errors where you can not load your
CSS, images, and other assets items. And also you might have trouble submitting forms as some
users have come across.
Update
If you do not want to set your base URL another way is.
Create a new core file in application/core/MY_Config.php
And paste this code
<?php
class MY_Config extends CI_Config {
public function __construct() {
$this->config =& get_config();
log_message('debug', "Config Class Initialized");
// Set the base_url automatically if none was provided
if ($this->config['base_url'] == '')
{
if (isset($_SERVER['HTTP_HOST']))
https://riptutorial.com/ 11](https://image.slidesharecdn.com/codeigniter-190515051700/85/Codeigniter-19-320.jpg)
![{
$base_url = isset($_SERVER['HTTPS']) && strtolower($_SERVER['HTTPS']) !==
'off' ? 'https' : 'http';
$base_url .= '://'. $_SERVER['HTTP_HOST'];
$base_url .= str_replace(basename($_SERVER['SCRIPT_NAME']), '',
$_SERVER['SCRIPT_NAME']);
}
else
{
$base_url = 'http://localhost/';
}
$this->set_item('base_url', $base_url);
}
}
}
Something More About base_url
What happens if I don't set base_url ?
You will not get any Impotency error to set this and proceed. You can continue without setting, but
you should know about HTTP header injection
If I did't set it what will show up?
You will get http://[::1]/ instead of your actual URL.
What does this mean http://[::1]/ ??
This is temporary URL which set by CI by Default. This will point the root of your document.
::1 - Server address (localhost) Read More about this
How to set proper base_url()??
Base URL should always point to root of your project folder. (outside application folder)
$config['base_url'] = 'http://localhost/path/to/project'; # If localhost
$config['base_url'] = 'http://stackoverflow.com/'; # If live
$config['base_url'] = 'http://stackoverflow.com/documentation'; # If live & inside subdomain
(assume documentation is subfolder/subdomain)
https://riptutorial.com/ 12](https://image.slidesharecdn.com/codeigniter-190515051700/85/Codeigniter-20-320.jpg)
![How to use base_url()??
Most common use is to find the right path to your js or css files.
<link rel="stylesheet" href="<?php echo base_url('styles/style.css');?>" />
<script src="<?php echo base_url('vendor/jquery/jquery.min.js');?>"></script>
Adding the code above in your view will produce HTML as below:
<link rel="stylesheet" href="http://localhost/path/to/project/styles/style.css" />
<script src="http://localhost/path/to/project/vendor/jquery/jquery.min.js"></script>
Links
URL Helper1.
Smart way to setting up the base_url
The following lines of code is more smart way to setting up the base_url in codeigniter:
$config['base_url'] = ((isset($_SERVER['HTTPS']) && $_SERVER['HTTPS'] == "on") ? "https" :
"http");
$config['base_url'] .= "://".$_SERVER['HTTP_HOST'];
$config['base_url'] .=
str_replace(basename($_SERVER['SCRIPT_NAME']),"",$_SERVER['SCRIPT_NAME']);
Recommended is
$config['base_url'] = 'https://stackoverflow.com/';
Because everyone knows the hosting space. So if you set like this you can prevent
Injection to your site/host.
Read Base url in Codeigniter online: https://riptutorial.com/codeigniter/topic/3643/base-url-in-
codeigniter
https://riptutorial.com/ 13](https://image.slidesharecdn.com/codeigniter-190515051700/85/Codeigniter-21-320.jpg)
![Chapter 5: Calling a model method in a view
Introduction
Sometimes is more usefull make a call to a model's method in our view, so this is a way to make it
Examples
Save a method call in a variable
In Controller:
$this->load->model('your_model');
$data['model'] = $this->your_model;
In view:
$model->your_method;
Read Calling a model method in a view online:
https://riptutorial.com/codeigniter/topic/8163/calling-a-model-method-in-a-view
https://riptutorial.com/ 14](https://image.slidesharecdn.com/codeigniter-190515051700/85/Codeigniter-22-320.jpg)
![Chapter 6: CAPTCHA Helper
Examples
Loading this Helper
This helper is loaded using the following code:
In Controller itself(* can repeat again and again*)
$this->load->helper('captcha');
In config/autoload.php (Load only once)
$autoload['helper'] = array('captcha');
create_captcha($data)
Takes an array of information to generate the CAPTCHA as input and creates the image to your
specifications, returning an array of associative data about the image.
[array]
(
'image' => IMAGE TAG
'time' => TIMESTAMP (in microtime)
'word' => CAPTCHA WORD
)
The "image" is the actual image tag:
<img src="http://example.com/captcha/12345.jpg" width="140" height="50" />
The "time" is the micro timestamp used as the image name without the file extension. It will be a
number like this: 1139612155.3422
The "word" is the word that appears in the captcha image, which if not supplied to the function, will
be a random string.
Using the CAPTCHA helper
Once loaded you can generate a captcha like this:
$vals = array(
'word' => 'Random word',
'img_path' => './captcha/',
'img_url' => 'http://example.com/captcha/',
'font_path' => './path/to/fonts/texb.ttf',
https://riptutorial.com/ 15](https://image.slidesharecdn.com/codeigniter-190515051700/85/Codeigniter-23-320.jpg)
!['img_width' => '150',
'img_height' => 30,
'expiration' => 7200
);
$cap = create_captcha($vals);
echo $cap['image'];
The captcha function requires the GD image library.•
Only the img_path and img_url are required.•
If a "word" is not supplied, the function will generate a random ASCII string. You might put
together your own word library that you can draw randomly from.
•
If you do not specify a path to a TRUE TYPE font, the native ugly GD font will be used. The
"captcha" folder must be writable (666, or 777)
•
The "expiration" (in seconds) signifies how long an image will remain in the captcha folder
before it will be deleted. The default is two hours.
•
Complete example
Here is an example of usage with a database. On the page where the CAPTCHA will be shown
you'll have something like this:
$this->load->helper('captcha');
$vals = array(
'img_path' => './captcha/',
'img_url' => 'http://example.com/captcha/'
);
$cap = create_captcha($vals);
$data = array(
'captcha_time' => $cap['time'],
'ip_address' => $this->input->ip_address(),
'word' => $cap['word']
);
$query = $this->db->insert_string('captcha', $data);
$this->db->query($query);
echo 'Submit the word you see below:';
echo $cap['image'];
echo '<input type="text" name="captcha" value="" />';
Then, on the page that accepts the submission you'll have something like this:
// First, delete old captchas
$expiration = time()-7200; // Two hour limit
$this->db->query("DELETE FROM captcha WHERE captcha_time < ".$expiration);
// Then see if a captcha exists:
$sql = "SELECT COUNT(*) AS count FROM captcha WHERE word = ? AND ip_address = ? AND
captcha_time > ?";
$binds = array($_POST['captcha'], $this->input->ip_address(), $expiration);
$query = $this->db->query($sql, $binds);
$row = $query->row();
https://riptutorial.com/ 16](https://image.slidesharecdn.com/codeigniter-190515051700/85/Codeigniter-24-320.jpg)
![Chapter 7: CodeIgniter - Internationalization
Introduction
The language class in CodeIgniter provides an easy way to support multiple languages for
internationalization. To some extent, we can use different language files to display text in many
different languages.
Examples
Example
Creating files Language
To create a language file, you must end it with _lang.php. For example, you want to create a
language file for French language, then you must save it with french_lang.php. Within this file you
can store all your language texts in key, value combination in $lang array as shown below.
$lang['key'] = 'val';
Loading Language file
To use any of the language in your application, you must first load the file of that particular
language to retrieve various texts stored in that file. You can use the following code to load the
language file.
$this->lang->load('filename', 'language');
filename : It is the name of file you want to load. Don’t use extension of file here but only name of
file. Language : It is the language set containing it.
Fetching Language Text
$this->lang->line('language_key');
To fetch a line from the language file simply execute the following code. Where language_key is
the key parameter used to fetch value of the key in the loaded language file.
Autoload Languages
If you need some language globally, then you can autoload it in application/config/autoload.php
file as shown below.
| -----------------------------------------------------------------------
| Auto-load Language files
| -----------------------------------------------------------------------
https://riptutorial.com/ 18](https://image.slidesharecdn.com/codeigniter-190515051700/85/Codeigniter-26-320.jpg)
![| Prototype:
| $autoload['language'] = array('lang1', 'lang2');
|
| NOTE: Do not include the "_lang" part of your file. For example
| "codeigniter_lang.php" would be referenced as array('codeigniter');
|
*/
$autoload['language'] = array();
Simply, pass the different languages to be autoloaded by CodeIgniter.
Create a controller called Lang_controller.php and save it in
application/controller/Lang_controller.php
<?php
class Lang_controller extends CI_Controller {
public function index(){
//Load form helper
$this->load->helper('form');
//Get the selected language
$language = $this->input->post('language');
//Choose language file according to selected lanaguage
if($language == "french")
$this->lang->load('french_lang','french');
else if($language == "german")
$this->lang->load('german_lang','german');
else
$this->lang->load('english_lang','english');
//Fetch the message from language file.
$data['msg'] = $this->lang->line('msg');
$data['language'] = $language;
//Load the view file
$this->load->view('lang_view',$data);
}
}
?>
Create a view file called lang_view.php and save it at application/views/lang_view.php
<!DOCTYPE html>
<html lang = "en">
<head>
<meta charset = "utf-8">
<title>CodeIgniter Internationalization Example</title>
</head>
<body>
<?php
echo form_open('/lang');
?>
<select name = "language" onchange = "javascript:this.form.submit();">
<?php
https://riptutorial.com/ 19](https://image.slidesharecdn.com/codeigniter-190515051700/85/Codeigniter-27-320.jpg)
![$lang = array('english'=>"English",'french'=>"French",'german'=>"German");
foreach($lang as $key=>$val) {
if($key == $language)
echo "<option value = '".$key."' selected>".$val."</option>";
else
echo "<option value = '".$key."'>".$val."</option>";
}
?>
</select>
<?php
form_close();
echo $msg;
?>
</body>
</html>
Create three folders called English, French, and German in application/language as shown in
the figure below.
Copy the below given code and save it in english_lang.php file in application/language/english
folder.
<?php
$lang['msg'] = "CodeIgniter Internationalization example.";
?>
Copy the below given code and save it in french_lang.php file in application/language/French folder.
https://riptutorial.com/ 20](https://image.slidesharecdn.com/codeigniter-190515051700/85/Codeigniter-28-320.jpg)
![<?php
$lang['msg'] = "Exemple CodeIgniter internationalisation.";
?>
Copy the below given code and save it in german_lang.php file in application/language/german folder.
<?php
$lang['msg'] = "CodeIgniter Internationalisierung Beispiel.";
?>
Change the routes.php file in application/config/routes.php to add route for the above controller
and add the following line at the end of the file.
$route['lang'] = "Lang_controller";
Execute the following URL in the browser to execute the above example.
http://yoursite.com/index.php/lang
Then Check in Your Browser. Thank you.
Read CodeIgniter - Internationalization online:
https://riptutorial.com/codeigniter/topic/9864/codeigniter---internationalization
https://riptutorial.com/ 21](https://image.slidesharecdn.com/codeigniter-190515051700/85/Codeigniter-29-320.jpg)
![Chapter 8: Codeigniter Pagination
Examples
in this section i assume you know to calling helper, in the controller
public function house()
{
$config['base_url'] = site_url().'/user/house/';
$config['total_rows'] = $this->houses->select_row_house_design();
$config['per_page'] = 12;
$config['cur_tag_open'] = '<li><a><b>';
$config['cur_tag_close'] = '</li></a></b>';
$config['prev_tag_open'] = '<li>';
$config['prev_tag_close'] = '</li>';
$config['next_tag_open'] = '<li>';
$config['next_tag_close'] = '</li>';
$config['num_tag_open'] = '<li>';
$config['num_tag_close'] = '</li>';
$config['last_tag_open'] = '<li>';
$config['last_tag_close'] = '</li>';
$config['first_tag_open'] = '<li>';
$config['first_tag_close'] = '</li>';
$this->pagination->initialize($config);
$from = $this->uri->segment('3');
$data['design'] = $this->houses->select_all_house_design($config['per_page'],$from);
$title['menu'] = 'house design';
$this->load->view('user/template/header',$title);
$this->load->view('user/house',$data);
$this->load->view('user/template/footer');
}
in the view
pagination->create_links(); ?>
Read Codeigniter Pagination online: https://riptutorial.com/codeigniter/topic/9393/codeigniter-
pagination
https://riptutorial.com/ 22](https://image.slidesharecdn.com/codeigniter-190515051700/85/Codeigniter-30-320.jpg)
![),
array(
'id' => 'sku_567ZYX',
'qty' => 1,
'price' => 9.95,
'name' => 'Coffee Mug'
),
array(
'id' => 'sku_965QRS',
'qty' => 1,
'price' => 29.95,
'name' => 'Shot Glass'
)
);
$this->cart->insert($data);
Basic Elements of CI Shopping Cart
As we can add multiple elements in Cart array and then add it to cart session, but there are 4
basic elements which Cart class requires to add data successfully in cart session.
id (string)1.
qty (number)2.
price (number, decimal)3.
name (String)4.
And if you want to add more options regarding product then you can use 5th element which is
"options". you can set array of options in this element.
It will look like this :
$cartItem = array(
'id' => 'MOTOG5',
'qty' => 5,
'price' => 100.99,
'name' => 'Motorola Moto G5 - 16 GB',
'options' => array(
'ram' => '3GB',
'Color' => 'Fine Gold'
)
);
Display Cart Items
You can show cart items by loop through cart or you can display single item from cart.
$cartContents = $this->cart->contents();
This will return an array of cart items so you can loop through this array using foreach loop.
foreach ($cartContents as $items){
echo "ID : ". $items["id"] . "<br>";
https://riptutorial.com/ 24](https://image.slidesharecdn.com/codeigniter-190515051700/85/Codeigniter-32-320.jpg)
![echo "Name : ". $items["name"] . "<br>";
echo "Quantity : ". $items["qty"] . "<br>";
echo "Price : ". $items["price"] . "<br>";
}
You can format this data as table cell or some div and then show in view.
Update cart item
Rowid : The row ID is a unique identifier that is generated by the cart code when an item is added
to the cart. The reason a unique ID is created is so that identical products with different options
can be managed by the cart.
Every item in cart has a rowid element and by rowid you can update cart item.
$updateItem = array(
'rowid' => 'b99ccdf16028f015540f341130b6d8ec',
'qty' => 3
);
and then below code
$this->cart->update($data);
Delete cart items
By using rowid element you can delete an item from cart. you just have to set item's qty to 0
$deleteItem = array(
'rowid' => 'b99ccdf16028f015540f341130b6d8ec',
'qty' => 0
);
$this->cart->update($data);
this will delete item with this rowid.
Read CodeIgniter Shopping Cart online: https://riptutorial.com/codeigniter/topic/9372/codeigniter-
shopping-cart
https://riptutorial.com/ 25](https://image.slidesharecdn.com/codeigniter-190515051700/85/Codeigniter-33-320.jpg)
![Chapter 10: Codeigniter Troubleshooting
Introduction
For debugging and troubleshooting in Codeigniter, you can use Profiler, part of Output library
Examples
Troubleshooting
If you find that no matter what you put in your URL only your default page is loading, it might be
that your server does not support the PATH_INFO variable needed to serve search-engine friendly
URLs.
As a first step, open your application/config/config.php file and look for the URI Protocol
information. It will recommend that you try a couple alternate settings.
If it still doesn't work after you've tried this you'll need to force Codeigniter to add a question mark
to your URLs. To do this open your application/config/config.php file and change this:
$config['index_page'] = "index.php";
To this:
$config['index_page'] = "index.php?";
Read Codeigniter Troubleshooting online: https://riptutorial.com/codeigniter/topic/7901/codeigniter-
troubleshooting
https://riptutorial.com/ 26](https://image.slidesharecdn.com/codeigniter-190515051700/85/Codeigniter-34-320.jpg)
![Chapter 11: CodeIgniter URI Segment
Examples
URI Segments:
For example, please consider the following URI:
http://stackoverflow.com/questions/some-number/how-can-i-do-this/others
Segment allows to retrieve a specific segment form URI string where n is a segment number.
Segments are numbered from left to right. For example, the following code:
$this->uri->segment(n)
Is used to retrieve a specific segment from the URI where n is the segment number.
echo $this->uri->segment(0);//it will print stackoverflow.com
echo $this->uri->segment(1);//it will print questions
echo $this->uri->segment(2);//it will print some-number
echo $this->uri->segment(3);//it will print how-can-i-do-this
echo $this->uri->segment(4);//it will print others
Get last and before last URI segment
Get last segment
echo end($this->uri->segment_array()); //it will print others
Get before last segment
echo $this->uri->segment(count($this->uri->segment_array())-1); //it will print how-can-i-do-
this
More info: [http://stackoverflow.com/questions/9221164/code-igniter-get-before-last-uri-
segment][1]
Read CodeIgniter URI Segment online: https://riptutorial.com/codeigniter/topic/5402/codeigniter-
uri-segment
https://riptutorial.com/ 27](https://image.slidesharecdn.com/codeigniter-190515051700/85/Codeigniter-35-320.jpg)
![Chapter 12: Creating cronjob in codeigniter
on linux hosting server
Examples
Calling a CodeIgniter controller from cron
// application/controllers/Company_controller.php
<?php
if(!defined('BASEPATH'))
exit('No direct script access allowed');
class Company_controller extends CI_Controller {
public function __construct() {
parent::__construct();
$this->load->model('companies_model');
}
// cron entry would be something like this:
// 1 1 * * * /usr/bin/php [full path to]/index.php company_controller cronCLI AcmeCorp
>/dev/null 2>&1
public function cronCLI($firmName) {
if(php_sapi_name() == 'cli') {
$this->companies_model->doSomeDB_Process($firmName);
} else {
echo 'CLI only';
}
}
}
Cronjob in Codeigniter
<?php if ( ! defined('BASEPATH')) exit('No direct script access allowed');
class Cron extends CI_Controller
{
/**
* This is default constructor of the class
*/
public function __construct()
{
parent::__construct();
$this->load->library('input');
$this->load->model('cron_model');
}
/**
* This function is used to update the age of users automatically
* This function is called by cron job once in a day at midnight 00:00
*/
public function updateAge()
{
// is_cli_request() is provided by default input library of codeigniter
if($this->input->is_cli_request())
https://riptutorial.com/ 28](https://image.slidesharecdn.com/codeigniter-190515051700/85/Codeigniter-36-320.jpg)
![Chapter 14: Form Validation
Examples
Validate Form Example
// initialize library
$this->load->library('form_validation');
$this->form_validation->set_rules('username', 'Username', 'required|max_length[20]'); // Add
validation rules for require and max
$this->form_validation->set_rules('password', 'Password', 'required|matches[password]'); //
Validation for the input match
$this->form_validation->set_rules('passconf', 'Password Confirmation', 'required');
$this->form_validation->set_rules('email', 'Email',
'required|valid_email|is_unique[userTable.emailColumn'); // add validation for the email and
check the emailColumn in userTable for unique value
$this->form_validation->set_message('is_unique', 'The %s is already taken, Please use another
%s'); // add message for the is_unique
if ($this->form_validation->run() === FALSE)
{
// fail
}
else
{
// success
}
Link
Read Form Validation online: https://riptutorial.com/codeigniter/topic/7398/form-validation
https://riptutorial.com/ 33](https://image.slidesharecdn.com/codeigniter-190515051700/85/Codeigniter-41-320.jpg)
![Also, to get the list of time zones in PHP:
$timezones = DateTimeZone::listIdentifiers(DateTimeZone::ALL);
foreach ($timezones as $timezone) {
echo $timezone;
echo "<br />";
}
Another way to set timezone in codeigniter
To set the timezone in Codeigniter by extending date helper is an alternative way. For doing that
need to follow the following two step activity.
Extend date helper with the following function:1.
if ( ! function_exists('now'))
{
/**
* Get "now" time
*
* Returns time() based on the timezone parameter or on the
* "time_reference" setting
*
* @param string
* @return int
*/
function now($timezone = NULL)
{
if (empty($timezone))
{
$timezone = config_item('time_reference');
}
if ($timezone === 'local' OR $timezone === date_default_timezone_get())
{
return time();
}
$datetime = new DateTime('now', new DateTimeZone($timezone));
sscanf($datetime->format('j-n-Y G:i:s'), '%d-%d-%d %d:%d:%d', $day, $month, $year,
$hour, $minute, $second);
return mktime($hour, $minute, $second, $month, $day, $year);
}
}
Now set the timezone as a value of time_reference of config.php like:
$config['time_reference'] = 'Asia/Dhaka';
2.
This is all set for using time zone.
FYI: List of Timezone List is added in the first example.
Read How to set time zone in CodeIgniter online:
https://riptutorial.com/codeigniter/topic/3767/how-to-set-time-zone-in-codeigniter
https://riptutorial.com/ 35](https://image.slidesharecdn.com/codeigniter-190515051700/85/Codeigniter-43-320.jpg)
![Chapter 16: How to use the CI libraries and
helper
Examples
Using libraries and helpers
The example is for illustration purpose of using libraries and helpers and not a valid code. Do not
copy / paste it on your projects.
HELPER helpers/sendEmail_helper.php
if ( ! function_exists('sendEmail'))
{
function sendEmail($email, $subject, $message, $lang, $cc = null, $file = null) {
$CI =& get_instance();
$mail_config['protocol'] = 'smtp';
$mail_config['smtp_host'] = 'host';
$mail_config['smtp_user'] = 'user';
$mail_config['smtp_pass'] = 'pass';
$mail_config['smtp_port'] = '587';
$mail_config['smtp_timeout'] = 5;
$mail_config['charset'] = 'utf-8';
$mail_config['mailtype'] = 'html';
$mail_config['wrapchars'] = 76;
$mail_config['wordwrap'] = TRUE;
$CI->email->initialize($mail_config);
$CI->email->set_newLine('rn');
if ($lang == "en"){
$CI->email->from('support.en@domain.com', 'English Support');
}else{
$CI->email->from('support.fr@domain.com', 'Support en francais');
}
$CI->email->to($email);
if ($cc != null){
$CI->email->cc($cc);
}
$CI->email->subject($subject);
$CI->email->message($message);
if ($file != null){
$CI->email->attach($file);
}
//$CI->email->print_debugger();
return $CI->email->send();
}
}
LIBRARY libraries/Alerter.php
https://riptutorial.com/ 36](https://image.slidesharecdn.com/codeigniter-190515051700/85/Codeigniter-44-320.jpg)
![class Alerter {
public function alert_user($user_email, $subject, $message, $lang) {
//load helper
$this->load->helper('sendEmail');
//using helper
sendEmail($user_email, $subject, $message, $lang);
}
public function alert_admin($admin_email, $subject, $message, $lang, $reason){
//load helper
$this->load->helper('sendEmail');
.....
//using helper
sendEmail($admin_email, $subject, $message, $lang);
.....
}
}
CONTROLLER
class Alerts extends CI_Controller {
function __construct() {
parent::__construct();
}
public function send_alert($userid) {
//load library and model
$this->load->library('Alerter');
$this->load->model('alerter_model');
//get user
$user = $this->alerter_model->get_one_by_id($userid);
//using library
$this->Alerter->alert_user($user->email, $subject, $message, $lang);
}
}
Helper
Autoload your helper function. if you use many time in your project
$autoload['helper'] = array('url', 'form');
Use form helper in view
<?php echo form_open('Public/Login/loginAuth'); ?>
<?php
echo "<div class='row'>";
echo "<label for='inputEmail' class='col-lg-2 control-label col-lg-offset-2 col-md-2
control-label col-md-offset-2 col-sm-2 control-label col-sm-offset-2'>Enter Email</label>";
$email = array(
https://riptutorial.com/ 37](https://image.slidesharecdn.com/codeigniter-190515051700/85/Codeigniter-45-320.jpg)
![Chapter 18: Image/File Uploader In
CodeIgniter
Remarks
It is not necessary that you have to use the same names for the (Controller,File,Class,ID) or
whatever it might be. All the things what I have used is for the understanding purpose of the
coding flow and my assumptions. It is up to the developer who takes the code and edits the
code/name according to their wish and then host the code and succeed.
Examples
Single File/ Image Uploader
We shall now see how the Image/File Uploading code works in the native CI method with the help
of the forms that has been proposed by the CI way.
File uploading in PHP has Two Scenarios. It is mentioned below as follows.
Single Image/File uploader - This can be saved with the help of the normal variable in the
form attribute. (E.g.) <input type="file" name="image" />
•
Multi-image/File Uploader - This can be saved only with the help of the array variable for the
name in the file type. (E.g.) <input type="file" name="image[]" />.
•
The array variable namely name="profile[]" can also be kept for the single image uploader as well
as the multi-image uploader too.
Hence the Single Image/File Uploader Code in the Native CodeIgnitor format is as
follows:
View Part:
<?php
echo form_open_multipart('employee/addemployee', array('name' => 'addemployee',
'class'=>'form-horizontal'));
?>
<div class="form-group">
<label class="control-label col-sm-4" for="pwd">Profile:</label>
<div class="col-sm-8">
<input type="file" class="" id="profile" name="userimage">
</div>
</div>
<div class="form-group">
<div class="col-sm-offset-2 col-sm-10">
<input type="submit" class="btn btn-primary pull-right" name="save" value="Save
Employee" />
</div>
</div>
https://riptutorial.com/ 40](https://image.slidesharecdn.com/codeigniter-190515051700/85/Codeigniter-48-320.jpg)
![<?php
echo form_close();
?>
Hence if we submit the form it will be going to the
Employee - Controller and search for the function named addemployee•
If you need the required attribute for the file uploader code you can add up the HTML5
attribute called required to the input tag.
•
Below is the two examples of how to use the required attribute but both the methods are the same
as well.
Method One: <input type="file" name="photo" required="required" />1.
Method Two: <input type="file" name="photo" required />2.
Hence these are the some of the important tips that are to be followed in the view part of the
image/file uploader.
Controller Part:
<?php if ( ! defined('BASEPATH')) exit('No direct script access allowed');
class Employee extends CI_Controller {
function __construct() {
parent::__construct();
$this->load->model('employee_model');
$this->load->helper('url'); //This will load up all the URL parameters from the helper
class
$this->load->helper('form'); //This will load up all the form attributes that are need by
the form.
}
public function addemployee()
{
if($_FILES["userimage"]['name']=='')
{
// Here you can directly redirect to the form page itself with the Error Message
}
else
{
$new_name = time().$_FILES["userimage"]['name']; //This line will be generating
random name for images that are uploaded
$config['upload_path'] = FCPATH ."assets/fileupload/";
$config['allowed_types'] = 'gif|jpg|png';
$config['file_name'] = $new_name;
$this->load->library('upload', $config); //Loads the Uploader Library
$this->upload->initialize($config);
if ( ! $this->upload->do_upload('userimage')) {}
else
{
$data = $this->upload->data(); //This will upload the `image/file` using native
image upload
}
$data_value = array(
'profile'=>$new_name,
https://riptutorial.com/ 41](https://image.slidesharecdn.com/codeigniter-190515051700/85/Codeigniter-49-320.jpg)
![$this->load->view('hello_world');
}
}
The default function for a controller is the index function.
Now you will be able to see the content of your Hello World page accessing the following address:
http://[your_domain_name]/index.php/hello_world
or, in case you applied the fix using .htaccess (go back to the installation page for the fix)
http://[your_domain_name]/hello_world
(If you are working locally, most likely the address where you'll find your page is:
http://localhost/hello_world)
The URL is actually formed calling your controller class (in this case Hello_world, but using all
lowercase in the URL). In this case it is enough, since we used the index function. If we would
have used a different function name (let's say greetings), we should have used an URL like this:
http://[your_domain_name]/hello_world/greetings
Which is structured as /[controller_name]/[method_name].
Here you go! Your first Codeigniter application is working!
Let's use the controller a little more
Now we'll try going for a little more complex example, using the capabilities of the controller to fill
in the view.
Here is our view: /application/views/hello_world.php
<!DOCTYPE html>
<html lang="en">
<head>
<meta charset="utf-8">
<title>Hello World</title>
</head>
<body>
<h1><?php echo $greetings;?></h1>
</body>
</html>
Now we have a placeholder for our greetings to be displayed.
Here is how we change the controller in order for this to work:
https://riptutorial.com/ 44](https://image.slidesharecdn.com/codeigniter-190515051700/85/Codeigniter-52-320.jpg)
![Now we have multiple greetings options! In order for them to be visualized, we are going to add
the parameter at the URL, as follows:
http://[your_domain_name]/hello_world/greetings/goodbye
This will show us the message: "Good Bye World".
The structure of the URL is as follows:
http://[your_domain_name]/[controller_name]/[function_name]/[parameter_1]
In this case, in order to get back to our good old "Hello World", it's enough to call the former url,
without parameters:
http://localhost/hello_world/greetings
You can add multiple parameters to your function (for instance, if you need 3 of them):
public function greetings($param1,$param2,$param3)
and they can be filled up using the url as follows:
http://[your_domain_name]/[controller_name]/[function_name]/[param1]/[param2]/[param3]
e.g. http://localhost/hello_world/greetings/goodbye/italian/red
This way you can have parameters passed to you directly from the URL that will affect the content
of what will be shown.
To know more about how to pass parameters through the URL, you might want look into the topic
of routing!
Read Let's start: Hello World online: https://riptutorial.com/codeigniter/topic/2411/let-s-start--hello-
world
https://riptutorial.com/ 46](https://image.slidesharecdn.com/codeigniter-190515051700/85/Codeigniter-54-320.jpg)
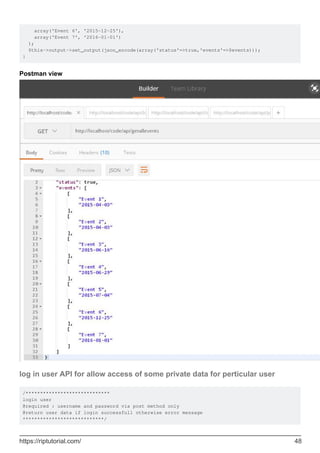
![public function login(){
$username=$this->input->post('username');
$password=$this->input->post('password');
if($username && $password){
//check username and password
if($this->login_credential['username']==$username && $this-
>login_credential['password']==$password){
//set user data to store in session
$userdata = array(
'username' => $this->login_credential['username'],
'email' => $this->login_credential['email'],
'logged_in' => true
);
//set session
$this->session->set_userdata($userdata);
//display log in successfull msg
$this->output->set_output(json_encode(array('status'=>true,'msg'=>'log in
successfully','data'=>$userdata)));
}else{
//wrong username or password
$this->output->set_output(json_encode(array('status'=>false,'msg'=>'invalid Username or
password')));
}
}else{
//when username and password not set
$this->output->set_output(json_encode(array('status'=>false,'msg'=>'provide Username and
password')));
}
}
https://riptutorial.com/ 49](https://image.slidesharecdn.com/codeigniter-190515051700/85/Codeigniter-57-320.jpg)
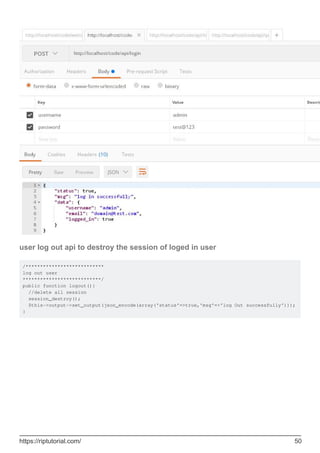
![return $query->result();
Select data with condition, maximum rows and order descending
$query = $this->db->select('*')
->from('table_name')
->where('column_name', $value) // Condition
->limit(10) // Maximum 10 rows
->order_by('id','DESC') // Order data descending
->get();
return $query->result();
Selecting data with second Optional Parameter
Usually we are not using second parameter in select([$select = '*'[, $escape = NULL]]) in
CodeIgniter. If you set it to FALSE, CodeIgniter will not try to protect your field or table names.
In the following example, we are going to select the datetime type field by formatting it using sql
query and set it FALSE (By doing this, we are going to tell CI not to escape the query automatically).
public function getUserInfo($id)
{
$this->db->select('BaseTbl.id, BaseTbl.name, DATE_FORMAT(BaseTbl.createdDtm, "%d-%m-%Y")
AS createdDtm', FALSE); // FALSE is the second optional parameter
$this->db->from('tbl_users as BaseTbl');
$this->db->where('isDeleted', 0);
$this->db->where('BaseTbl.id', $id);
$query = $this->db->get();
return $query->result();
}
If we are not set it to FALSE, it will automatically escapes and break the query.
Join Tables Using Query Builder
Sometimes we need to join multiple tables to get aggregate data in return. here is how we can
achieve the same using CodeIgniter Query Builder / Active Records.
public function getStudentInfo($studentid){
$query = $this->db->select("st.id, st.name, st.class, mk.maths, mk.science")
->from("students as st")
->join("marks as mk", "mk.student_id = st.id", "inner")
->where("st.id", $studentId)
->get();
return $query->result();
}
Here we use join() to join multiple tables and we can change join type in 3rd parameter like "inner",
"left", "right" etc.
Read Query Structure online: https://riptutorial.com/codeigniter/topic/3769/query-structure
https://riptutorial.com/ 56](https://image.slidesharecdn.com/codeigniter-190515051700/85/Codeigniter-64-320.jpg)
![Options +FollowSymLinks
RewriteEngine on
RewriteCond $1 !^(index.php|images|robots.txt)
RewriteCond %{REQUEST_FILENAME} !-f
RewriteCond %{REQUEST_FILENAME} !-d
RewriteRule ^(.*)$ ./index.php/$1 [L]
If not here is some more htaccess examples
Then go to the config.php file. Set your base_url and make the index_page blank
$config['base_url'] = ((isset($_SERVER['HTTPS']) && $_SERVER['HTTPS'] == "on") ? "https" :
"http");
$config['base_url'] .= "://".$_SERVER['HTTP_HOST'];
$config['base_url'] .=
str_replace(basename($_SERVER['SCRIPT_NAME']),"",$_SERVER['SCRIPT_NAME']);
$config['index_page'] = '';
Hope this helps you can use the htaccess files from examples for others.
Read Removing index.php using WAMP and CodeIgniter online:
https://riptutorial.com/codeigniter/topic/4340/removing-index-php-using-wamp-and-codeigniter
https://riptutorial.com/ 58](https://image.slidesharecdn.com/codeigniter-190515051700/85/Codeigniter-66-320.jpg)
![errors but testing and live will hide them. There is a file called index.php in root directory of
CodeIgniter, which is used for this purpose. If we pass zero as argument to error_reporting()
function then that will hide all the errors.
CSRF Prevention
CSRF stands for cross-site request forgery. You can prevent this attack by enabling an option in
the application/config/config.php file as shown below.
$config['csrf_protection'] = TRUE;
When you create a form using the form_open() function, it will automatically insert a CSRF token in
a hidden field. You can also manually add the CSRF token using the get_csrf_token_name() and
get_csrf_hash() function. As their names suggest, the get_csrf_token_name() function will return the
name of the CSRF token, while get_csrf_hash() will return the hash.
The CSRF token can be regenerated every time for submission or you can also keep it the same
throughout the life of the CSRF cookie. Setting the configuration option ‘csrf_regenerate’ will force
regeneration of the token as shown below.
$config['csrf_regenerate'] = TRUE;
You can whitelist URLs from CSRF protection by setting matches for them in the configuration
array using the key ‘csrf_exclude_uris’ as shown below. You can also use regular expressions.
$config['csrf_exclude_uris'] = array('api/person/add');
Remove Abuse Data from User input
// XSS Filtering
$data = array(
'name'=> '<script>Abuse Data</script>'
);
$data = $this->security->xss_clean($data); // Clean Data
// Escaping Queries
<?php $username = $this->input->post('username'); $query = 'SELECT * FROM subscribers_tbl
WHERE user_name = '. $this->db->escape($email); $this->db->query($query); ?>
XSS Prevention on User Input
Don't rely on any user input. user input everything like <script> tag or any javascript alert(); so
we have to prevent this all data will no run in our browser. so we have to use xss prevention
method to restrict our secure data to kept in hacker hand and also it's developer's responsibility to
user's input validation and solve error by programatically.
so, check this is a example of xss prevention in CodeIgniter.
https://riptutorial.com/ 61](https://image.slidesharecdn.com/codeigniter-190515051700/85/Codeigniter-69-320.jpg)
![$data = array(
'name' => "<script>alert('abc')</script>",
'email' => "useremail@gmail.com"
);
var_dump($data);
// Print array without xss cleaning/xss filtering
array(2) { ["name"]=> string(29) "" ["email"]=> string(19) "useremail@gmail.com" } // Result
with alert
// now print data after xss filtering
$data = $this->security->xss_clean($data);
var_dump($data);
//Print array without xss cleaning/xss filtering
array(2) { ["name"]=> string(38) "[removed]alert('abc')[removed]" ["email"]=> string(19)
"useremail@gmail.com" } // Result Without alert
so, after added xss_filtering we don't have any issue to run any abuse code which input by user.
and CodeIgniter replace this abuse tag with [removed] keyword.
Read Securing your web application online: https://riptutorial.com/codeigniter/topic/9857/securing-
your-web-application
https://riptutorial.com/ 62](https://image.slidesharecdn.com/codeigniter-190515051700/85/Codeigniter-70-320.jpg)
![Chapter 25: Sending Email
Remarks
In CodeIgniter 3 you have to include the parameter:
$config['newline'] = "rn";
It just won't work without it.
If you don't care about new lines and you're using CodeIgniter 2 then this config parameter is
optional.
Examples
Load The Email Library
First you need to load the email library.
Do this either in the controller file that will be sending the email:
$this->load->library('email');
Or load it globally in the autoload.php file in the config folder:
$autoload['libraries'] = array('email');
While you're there, you may want to load the email helper if you want to use some of CodeIgniter's
built in shortcuts:
$autoload['helper'] = array('email');
The email helper can be loaded in the Controller file in a similar way to the email library:
$this->load->helper('email');
Set Your Email Config Parameters
Create a new file in the application/config folder named email.php
Set the parameters for sending email. These will load when you send your email.
$config['newline'] = "rn"; //You must use double quotes on this one
$config['protocol'] = 'smtp';
$config['smtp_host'] = 'ssl://smtp.gmail.com'; //Change for your specific needs
https://riptutorial.com/ 63](https://image.slidesharecdn.com/codeigniter-190515051700/85/Codeigniter-71-320.jpg)
![$config['smtp_port'] = 465; //Change for your specific needs
$config['smtp_user'] = 'test@test.com'; //Change for your specific needs
$config['smtp_pass'] = 'yourpassword'; //Change for your specific needs
$config['charset'] = 'iso-8859-1';
$config['mailtype'] = 'text'; //This can be set as 'html' too
Create Your Email
$this->email->from('accounts@yourwebsite.com', 'Tom Webmaster');
$this->email->to('fred@fake.com', 'Freddie Fakeperson');
$this->email->subject('Your Account Is Active');
$this->email->message('Welcome to our new site!');
In the 'from' method, the first parameter is the email address your are sending from, the second
parameter is the name you'd like the receiver to see.
In the 'to' method, you define who the email is being sent to.
The 'subject' method defines the subject of the email.
The 'message' method defines what will be in the body of your email.
Any of these could be a data that was sent to your site by a user. So you may have a variable in
here that holds posted data. So they may look more like this:
$this->email->to($email, $username);
Send Your Email
$sent = $this->email->send();
//This is optional - but good when you're in a testing environment.
if(isset($sent)){
echo "It sent!";
}else{
echo "It did not send.";
}
Send An HTML Email
But you don't just want a plain text email. You want a pretty html email.
Set your config file as html:
$config['mailtype'] = 'html';
If you want to pass data (like a username for example) to the html email, put them in an array:
$data = array('name' => $name,
https://riptutorial.com/ 64](https://image.slidesharecdn.com/codeigniter-190515051700/85/Codeigniter-72-320.jpg)
!['email' => $email,
'phone' => $phone,
'date' => $date);
Then when sending, point your 'message' to a view. Then pass your data array to it:
$this->email->message($this->load->view('new_user',$data, true));
In your application/view folder create your view.
In this case it's named 'new_user.php'.
You can style this anyway you'd like. Here's a quick example:
<html>
<head>
<style type='text/css'>
body {background-color: #CCD9F9;
font-family: Verdana, Geneva, sans-serif}
h3 {color:#4C628D}
p {font-weight:bold}
</style>
</head>
<body>
<h3>Hi <?php echo $name;?>,</h3>
<h3>Thanks for contacting us.</h3>
<p>You've taken your first step into a larger world.</p>
<p>We really appreciate your interest.</p>
</body>
</html>
Contact Form
Controller (Pages.php)
public function contact()
{
$this->load->library('email');
$this->load->library('form_validation');
//Set form validation
$this->form_validation->set_rules('name', 'Name',
'trim|required|min_length[4]|max_length[16]');
$this->form_validation->set_rules('email', 'Email',
'trim|required|valid_email|min_length[6]|max_length[60]');
$this->form_validation->set_rules('message', 'Message',
'trim|required|min_length[12]|max_length[200]');
//Run form validation
if ($this->form_validation->run() === FALSE)
https://riptutorial.com/ 65](https://image.slidesharecdn.com/codeigniter-190515051700/85/Codeigniter-73-320.jpg)
![{
$this->load->view('contact');
} else {
//Get the form data
$name = $this->input->post('name');
$from_email = $this->input->post('email');
$subject = $this->input->post('subject');
$message = $this->input->post('message');
//Web master email
$to_email = 'admin@domain.com'; //Webmaster email, who receive mails
//Mail settings
$config['protocol'] = 'smtp';
$config['smtp_host'] = 'ssl://smtp.gmail.com';
$config['smtp_port'] = '465';
$config['smtp_user'] = 'mail@domain.com'; // Your email address
$config['smtp_pass'] = 'mailpassword'; // Your email account password
$config['mailtype'] = 'html'; // or 'text'
$config['charset'] = 'iso-8859-1';
$config['wordwrap'] = TRUE; //No quotes required
$config['newline'] = "rn"; //Double quotes required
$this->email->initialize($config);
//Send mail with data
$this->email->from($from_email, $name);
$this->email->to($to_email);
$this->email->subject($subject);
$this->email->message($message);
if ($this->email->send())
{
$this->session->set_flashdata('msg','<div class="alert alert-success">Mail
sent!</div>');
redirect('contact');
} else {
$this->session->set_flashdata('msg','<div class="alert alert-danger">Problem in
sending</div>');
$this->load->view('contact');
}
}
Views (contact.php)
<div class="container">
<h2>Contact</h2>
<div class="row">
<div class="col-lg-6">
<?php echo $this->session->flashdata('msg'); ?>
<form action="<?php echo base_url('contact'); ?>" method="post">
<div class="form-group">
<input name="name" placeholder="Your name" type="text" value="<?php echo
set_value('name'); ?>" class="form-control" />
<?php echo form_error('name', '<span class="text-danger">','</span>'); ?>
</div>
<div class="form-group">
https://riptutorial.com/ 66](https://image.slidesharecdn.com/codeigniter-190515051700/85/Codeigniter-74-320.jpg)
![Chapter 27: url suffix
Examples
url suffix
$config['url_suffix'] = 'html';
change everything you want like html or asp, this is will work after your rwmoving index.php on
config.php
Read url suffix online: https://riptutorial.com/codeigniter/topic/9379/url-suffix
https://riptutorial.com/ 69](https://image.slidesharecdn.com/codeigniter-190515051700/85/Codeigniter-77-320.jpg)
![Chapter 28: Use of hooks
Examples
Enabling Hooks
The hooks feature can be globally enabled/disabled by setting the following item in the
application/config/config.php file:
$config['enable_hooks'] = TRUE;
Defining a Hook
Hooks are defined in the application/config/hooks.php file. Each hook is specified as an
array with this prototype
$hook['pre_controller'] = array(
'class' => 'MyClass',
'function' => 'Myfunction',
'filename' => 'Myclass.php',
'filepath' => 'hooks',
'params' => array('beer', 'wine', 'snacks')
);
The array index correlates to the name of the particular hook point you want to use. In the above
example, the hook point is pre_controller. A list of hook points is found below. The following items
should be defined in your associative hook array:
class The name of the class you wish to invoke. If you prefer to use a procedural function instead
of a class, leave this item blank.
function The function (or method) name you wish to call.
filename The file name containing your class/function.
file-path The name of the directory containing your script.
params Any parameters you wish to pass to your script. This item is optional.
Hook Points
pre_system
Called very early during system execution. Only the benchmark and hooks class have been
loaded at this point. No routing or other processes have happened.
pre_controller
https://riptutorial.com/ 70](https://image.slidesharecdn.com/codeigniter-190515051700/85/Codeigniter-78-320.jpg)
![Called immediately prior to any of your controllers being called. All base classes, routing, and
security checks have been done.
post_controller_constructor
Called immediately after your controller is instantiated, but prior to any method calls happening.
post_controller
Called immediately after your controller is fully executed.
display_override
Overrides the _display() method, used to send the finalized page to the web browser at the end of
system execution. This permits you to use your own display methodology. Note that you will need
to reference the CI super-object with $this->CI =& get_instance() and then the finalized data will
be available by calling $this->CI->output->get_output().
cache_override
Enables you to call your own method instead of the _display_cache() method in the Output Library.
This permits you to use your own cache display mechanism.
post_system
Called after the final rendered page is sent to the browser, at the end of system execution after the
finalized data is sent to the browser.
Pre Controller Hook example using CodeIgniter
In application/hooks folder, create a file with name Blocker.php and paste the below code.
<?php
class Blocker {
function Blocker(){
}
/**
* This function used to block the every request except allowed ip address
*/
function requestBlocker(){
if($_SERVER["REMOTE_ADDR"] != "49.248.51.230"){
echo "not allowed";
die;
}
}
}
?>
In application/config/hooks.php, declare the following hook.
https://riptutorial.com/ 71](https://image.slidesharecdn.com/codeigniter-190515051700/85/Codeigniter-79-320.jpg)
![$hook['pre_controller'] = array(
'class' => 'Blocker',
'function' => 'requestBlocker',
'filename' => 'Blocker.php',
'filepath' => 'hooks',
'params' => ""
);
In application/config/config.php, set following value as true
Defining a Hook
Hooks are defined in application/config/hooks.php file. Each hook is specified as an array with this
prototype:
$hook['pre_controller'] = array(
'class' => 'MyClass',
'function' => 'Myfunction',
'filename' => 'Myclass.php',
'filepath' => 'hooks',
'params' => array('bread', 'wine', 'butter')
);
CLASS- The class that you wish to invoke if it is procedural code leave it as blank.•
FUNCTION- The function name you wish to call.•
FILENAME- The file name containing your class/function.•
FILEPATH- Location of the hook file.•
PARAMS-Additional parameter if needed it is optional•
Read Use of hooks online: https://riptutorial.com/codeigniter/topic/3953/use-of-hooks
https://riptutorial.com/ 72](https://image.slidesharecdn.com/codeigniter-190515051700/85/Codeigniter-80-320.jpg)


![Getting Started with Apache Spark: Big Data Made Simple [Free Meetup]](https://cdn.slidesharecdn.com/ss_thumbnails/apachesparkgettingstarted-260203175547-8361bcc3-thumbnail.jpg?width=640&height=640&fit=bounds)


