Building a hyper v cluster for under $2,000 - ข้อมูลสำหรับ สร้าง Hyper-V 2012 เป็น Cluster แบบใช้ ค่าใช้จ่ายต่ำ ประมาณ 57,XXX
•
1 like•1,510 views

Building Hyper-V Cluster for under $2,000 - ข้อมูลสำหรับ สร้าง Hyper-V 2012 เป็น Cluster แบบใช้ค่าใช้จ่ายต่ำ ประมาณ 5-6 หมืนบาท

Recommended
More Related Content
Similar to Building a hyper v cluster for under $2,000 - ข้อมูลสำหรับ สร้าง Hyper-V 2012 เป็น Cluster แบบใช้ ค่าใช้จ่ายต่ำ ประมาณ 57,XXX
Similar to Building a hyper v cluster for under $2,000 - ข้อมูลสำหรับ สร้าง Hyper-V 2012 เป็น Cluster แบบใช้ ค่าใช้จ่ายต่ำ ประมาณ 57,XXX (20)
More from Tũi Wichets
More from Tũi Wichets (20)
Recently uploaded
Recently uploaded (20)
Building a hyper v cluster for under $2,000 - ข้อมูลสำหรับ สร้าง Hyper-V 2012 เป็น Cluster แบบใช้ ค่าใช้จ่ายต่ำ ประมาณ 57,XXX
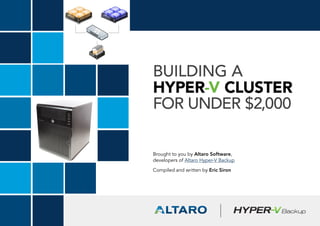
- 1. Brought to you by Altaro Software, developers of Altaro Hyper-V Backup Compiled and written by Eric Siron Building a Hyper-V Cluster for Under $2,000
- 2. Warning: The network cards in the purchase list are full-height cards while the computer chassis can only accept half-height cards. You’ll need to do some minor modifications, all documented here with pictures, to get them to fit. If this concerns you, half-height cards are available but the cheapest come in at around 5 times the cost of the listed products. Note #1: Most of the hardware in this posting was acquired from NewEgg, which only ships to destinations in the United States. Of course, the hardware can be obtained elsewhere and from other resellers, but pricing may be different, sometimes significantly. Note #2: The provided solution does not include any software licenses at all. This posting strictly discusses the involved hardware. Disclaimer: Neither I nor Altaro are endorsing any of these vendors, nor are any of them endorsing us. We needed a solution and were able to use these products to achieve it. That is the extent of the relationship. Furthermore, just because we were able to make this work doesn’t mean that everyone else in the world will be able to. You assume all risks if you choose to follow these purchasing and build guidelines. This document describes how to acquire all the parts necessary to build a complete two-host Hyper-V cluster with an iSCSI shared storage device at an extremely low price point. It also shows, pictorially, how to assemble one of the computers. It does not cover any software configurations.
- 3. Free Hyper-V Backup More Info & Download Like this ebook? Share it! What You’ll Need Hardware to Purchase What You Can Build With the Above Limitations to be Aware Of Ideas About Possible Alternatives Computer Assembly Assembly Wrap-Up BIOS and Hardware Configuration Operating System Installation Drivers Finishing Up Where to Go From Here Questions/comments? 4 4 5 5 6 7 15 15 16 16 18 18 18 Table of contents
- 4. Free Hyper-V Backup More Info & Download Like this ebook? Share it! 4 What You’ll Need These are items that you’ll need for the implementation phase only. • Aviator snips • USB mouse and keyboard • VGA monitor • Small Phillips screwdriver • Pliers Hardware to Purchase The links will lead you to the hardware that I purchased for my test cluster but the text only indicates the generic component. You are certainly welcome, even encouraged, to look at alternatives. Due to normal price fluctuations, periodic sales, and product introductions/ discontinuations, you may be able to find substantially better pricing or you might be forced to find other products to match the prices that I got. • 3x Hewlett-Packard N40L Micrososervers • 2x Two pack of Kingston 4GB DDR3 memory sticks (KVR1333D3E9SK2/8G) for a total of 16GB of RAM • 5x SYBA dual-port gigabit PCI-E Ethernet adapters (SY-PEX24028) • 3x Lite-On SATA DVD drives • 1x Netgear 16-port switch (GS716T) • 1x 2TB Seagate SATA hard drive • 3x DirectUPS devices • 3x 18-inch (or longer) SATA power and data cables • 14x network cables My total invoice was about $1800, including shipping.
- 5. Free Hyper-V Backup More Info & Download Like this ebook? Share it! 5 What You Can Build With the Above I used these parts to construct a two-node cluster using two of the N40Ls. The third N40 has the 2TB drive. A software iSCSI target is installed to set up that drive as a Cluster Shared Volume for the two Hyper-V hosts. The memory upgrade kits were used to bring the two hosts up to 8GB and one of the removed sticks was moved to the third N40L to bring it up to 4GB. The two hosts were each given two of the dual-port network cards so that they have one port apiece for each Hyper-V cluster node role and iSCSI traffic. The fifth dual NIC was used in the storage host. Limitations to be Aware Of “You get what you pay for.” This certainly isn’t a one-size- fits-all solution. However, it can scale out inexpensively, so it can be easily built up to handle the loads that almost any small business could ever need. • The N40L comes with a Turion II CPU, which is somewhat dated technology. • The hosts can accept no more than 8GB of RAM. • The switch in this solution can work with VLANs, but it’s layer-2 so it cannot route between them. • The switch itself represents a single point of failure. • The indicated network cards are full-height cards whereas the N40L can only accept half-height cards; half-height dual port cards do exist, but I was unable to find any that were anywhere near the sub- $40 price tag of the adapters linked above. • The indicated UPSs have no way of notifying the hosts of a power outage. • I chose a combo cable to connect the DVD drives, but it’s not required. You do need some way to convert 4-pin Molex power to SATA power, and that can be a very short run. You also need a SATA data cable, and that needs to be at least 18 inches. The Final Product
- 6. Free Hyper-V Backup More Info & Download Like this ebook? Share it! Ideas About Possible Alternatives This solution was initially crafted around the idea of a test system so some of its architecture reflects that usage. There are any number of ways to change the configuration to address other concerns while staying in budget. Here are a few: • You don’t really need a smart switch. It is a best practice to isolate the various cluster networks and iSCSI traffic, but it’s not required. All you really have to do is keep them on their own subnets which can be done without using VLANs. • You could use 8-port switches instead of a single 16-port switch. If balanced correctly, this can eliminate the single point of failure. • The storage host should use an add-in NIC so that it doesn’t share iSCSI traffic with its management traffic, but you could use a single-port NIC. • You probably won’t be using optical discs in any of these computers very often, so you could use external optical or thumb drives and forgo the optical units. • The N40L holds four drives and has a RAID controller, so you could build a proper redundant array out of it. • You could spend a little more for smart UPS devices. You could replace one of the UPSs with a smart UPS and have its attached host run a script that sends shutdown commands to the other two hosts. 6
- 7. Free Hyper-V Backup More Info & Download Like this ebook? Share it! 7 Computer Assembly The assembly process isn’t difficult, even the trimming of the network cards. Remember that you’re working with static-sensitive devices and so you’re supposed to use a grounding mat and cable and all that. Here is a pictorial guide. In order to open the Microserver chassis, you have to unlock the front cover using a key. You can then twist off the single thumbscrew in the top rear which will allow you to slide off the top cover. The pre-assembly stack of hardware Inside the N40L Once the top cover is off, the door can be removed completely. One thing I didn’t like was that the front cover will only stay shut if it’s locked, which means you’d better take very good care of the keys. Personally, I leave the keys in the baggie dangling on the back of the chassis -- of course, that’s exactly what you’re not supposed to do. Anyway, I found that, for the most part, the N40L is a fairly ingeniously designed piece of equipment. I didn’t particularly appreciate finding all those power cables protruding into the 5.25” bay, though. You’ll have to spread those out and tuck them under in order to add the optical drive.
- 8. Free Hyper-V Backup More Info & Download Like this ebook? Share it! 8 It wasn’t immediately obvious how to get to the memory and expansion slots. I confess that, alas, I had to actually read the directions. They guided me toward those two thumbscrews that you can see at the extreme left and right sides of the motherboard. Just loosen those up and use the handle to pull the motherboard tray forward a bit. I spent a fair bit of time cursing the people who bolted those thumbscrews down, although I was later to find a “hidden” gem that rectified this (you’ll have to keep reading to find it). Once the tray is out far enough, remove the attaching cables. You would do well to pay attention to how the cables were laid over each other as there are a lot of ways to stack the cables back up and some of them prevent the door from closing. Once they’re all out, the tray can be removed completely. N40L Motherboard Tray, partially removed
- 9. Free Hyper-V Backup More Info & Download Like this ebook? Share it! 9 With the tray out, you’re free to add the RAM and add- in cards. I’ll come back to how to doctor the full-height NICs so that they’ll fit. Take a look at the inside of the door for the surprise I mentioned earlier. This discovery made me feel so good about HP that I almost forgave them for the years of torture I endured wrestling with their printer drivers. Almost. N40L Motherboard Tray, partially removed ENOUGH HDD BOLTS FOR EVERY SLOT DVD DRIVE BOLTS TORX DRIVER
- 10. Free Hyper-V Backup More Info & Download Like this ebook? Share it! 10 For now the guide will turn to installing the DVD drive. I’m going in that order because the first thing I did was pull all the guts out of the equipment to see how it was put together and and then I re-assembled the whole thing with the new parts from the top down. Feel free to skip around if you want to get that motherboard back in as soon as possible. The first thing you need to do is put the mounting bolts into the side of the DVD drive. Just screw them right in. The following picture shows where the bolts go. It also shows where to connect your Molex-to-SATA power cable. DVD drive bolt installation and power cable connection
- 11. Free Hyper-V Backup More Info & Download Like this ebook? Share it! Next, you need to get the cables set up and ready. The power cable can just be tucked into the back of the chassis. The data cable needs to be threaded through the left side of the chassis so that it can be attached to the SATA connector on the motherboard near the front. Once that’s prepared, partially insert the DVD drive by guiding the bolts into the grooves. Once the drive is partway in, connect the power and data cables to it, then slide the drive all the way in until it snaps into place. DVD Installation, part 2 11 GROOVE DATA CABLE > >>>
- 12. Free Hyper-V Backup More Info & Download Like this ebook? Share it! 12 Now it’s time to install your network cards. First, write a nice letter to the manufacturer asking them to provide a half-height slot cover. Next, if desired, use your Phillips screwdriver to remove the two screws that hold the full- height slot cover onto the NIC. Place the cover-less NIC into one of the two PCI-E slots on the motherboard (just because it’s a safe place to keep it while you operate). The biggest thing to remember in doctoring the network card is that absolute precision is not required. I sort of guessed at the first one and it worked fine. I got better as I went, but all five times I tried this, I succeeded. Take your time and be calm, and this is no big deal. To begin, hold the card vertically as shown above and use a ballpoint pen to make a line across the slot cover that is even with the top of the card itself. This is where you’re going to bend it. One side of the card as shown in the above picture, use your aviator snips to make a cut in the small lip at the edge of the card where you drew the line. You aren’t trying to cut into the face of the slot cover, although if you do it won’t really matter. If it helps any, remember that you can buy three of these cards and mess up two and you’ll still be saving money over the cheapest dual-port NIC that comes in a half-height configuration.
- 13. Free Hyper-V Backup More Info & Download Like this ebook? Share it! 13 Next, use the original slot cover from the server as a guide as shown in the picture. Use your pen to draw another line across the face of the slot cover. This is where you’ll make the full cut across to shorten the slot cover. The image shows the card after being bent. Use your snips to cut along the second line. The metal will warp a bit. See image. The lip will need to be removed or you won’t be able to bolt the card in properly. Use your snips to trim it off as shown. Take care to cut no more of the flat portion of the card than necessary. Use your pliers to hold the card along the first line that you drew. The line should be below your pliers. Hold the bottom part of the card and twist the pliers to bend the top of the slot cover away from the card. You want this to be as close to a 90 degree bend as possible, but absolute precision is not required. The bend will be warped somewhat by later steps and need to be tweaked a bit later.
- 14. Free Hyper-V Backup More Info & Download Like this ebook? Share it! 14 Use the server’s original as a template again. This time, you’re trying to get an idea for where to cut for the screw holder. You won’t be cutting very deeply from the outer edge of the cover. Use your pliers to bend the cut piece of metal upward as shown above. Then bend it back down. Repeat until it breaks off. Use your pliers to flatten out the remaining metal. You don’t need to get it perfectly flat. The image shows the newly notched NIC. Insert the card into the slot and test pushing the motherboard all the way in before placing the cables and resetting the thumbscrews. Ensure that you try screwing the card in. You’ll find that the card on the right will need to have some metal removed from its left side because the chassis has a small vertical jut of metal that serves as a divider. Ensure that when you screw a card in, it doesn’t lean too far to the right. Test attaching a network cable. Use your snips to cut along your drawn guides. These are very short cuts, but it’s OK to cut too much. In the picture, the cut nearest to the card actually should have been a little closer to the card as this slot wasn’t wide enough and I had to cut it again. Making these cuts will warp the slot cover. They’ll be straightened out later
- 15. Free Hyper-V Backup More Info & Download Like this ebook? Share it! 15 From here, everything is easy. You’ll need to seat all the cables in the motherboard prior to pushing it all the way in. Pay special attention to the SATA cable you installed for the DVD drive as you’re going to have to guide it around the chassis as you slide it back in. Getting the thumbscrews to seat can be a challenge. Applying pressure to push the tray toward the back of the chassis might help. You’re also going to need to work on the top cover a bit so that the DVD drive can fit through. The plastic cover has to be removed as well as the metal sheet. I was able to take both off without tools. If you have trouble, use a large Phillips screwdriver in the two cross-shaped punchouts in the metal sheet and wrench the sides loose. Pushing the plastic piece from the center back can enable you to squeeze its sides to pop the piece out. Once that’s done, re-hang the front door, slide the top cover back on, close the door, and keylock it shut. Repeat these steps on your other computers. Remember as a recap The two computers to be used as Hyper-V hosts each get two network cards and 8GB of RAM. The third gets one NIC and one of the removed sticks of RAM to bring it to 4GB. It also gets the 2TB drive. Assembly Wrap-Up At this point, your host computers are physically completed. Next you’ll need to go through placing them in their final resting home and wiring them up to the switch. There is no right or wrong way, but make sure you document how everything is hooked up. It’s not fun to be digging behind units to get information that was more easily attained earlier. BIOS and Hardware Configuration There are a few things you’ll need to do to ensure you don’t have troubles with your Hyper-V installation. The biggest thing here is to access the BIOS on all of these servers and disable C1E power management. In order to do that: 1. During the boot cycle, press F10 when prompted to access system configuration. 2. From the main screen, press the right arrow key to switch to the Advanced screen. 3. Press the Enter key on “CPU Configuration” 4. Press the down arrow key until C1E Support is highlighted. Press the Enter key. 5. Arrow up to highlight “Disabled”. Press the Enter key.
- 16. Free Hyper-V Backup More Info & Download Like this ebook? Share it! 6. Press F10, then press the Enter key with “OK” highlighted. 7. The server will restart with the configuration change. Operating System Installation To start, I have elected to install Hyper-V 2012 directly to the hardware on two of the host computers. The original intention was to use the third host as an iSCSI target, but I’m using a fully licensed Windows Server 2012 installation instead. This way, I can leverage iSCSI or SMB 3.0 shares to host clustered virtual machines. This document doesn’t cover the actual installation of these operating systems, but it’s fairly simple. Drivers I have run the host computers both with and without specialized hardware drivers and have found no differences. Installing these drivers probably takes more time than it’s worth. However, the steps I followed are included below in case you wish to follow my path. I installed all these drivers on Hyper-V 2012 although some were intended for 2008 R2. You may need to locate different driver packages for other operating systems. • The AMD driver installation package for the hosts can be downloaded from: http://support.amd.com/ us/gpudownload/windows/Pages/raid_windows. aspx • The Broadcom driver and management application for the onboard network card is available at: http://www.broadcom.com/support/ethernet_nic/ netxtreme_server.php. You will need the 2012 driver standalone pack whether or not you choose to install the Management Applications, as that installer does not properly place the driver. • The Realtek driver for the add-in dual-port NICs is available at (I used the 2008 R2 set): http://www. realtek.com.tw/downloads/downloadsView.aspx?La ngid=1&PNid=13&PFid=5&Level=5&Conn=4&Dow nTypeID=3&GetDown=false If you’re using 2008 R2, Core Configurator 2.0 can be used to ease driver installation. If you’re using 2012, I have updated the previous tool and re-released it as Corefig. It’s really not difficult to install drivers on Hyper-V, though. The toughest part is locating the driver files themselves. From there, installation is simple. To get started, download the desired driver packs using a GUI installation of Windows. Transfer the downloaded files to your host computers. 16
- 17. Free Hyper-V Backup More Info & Download Like this ebook? Share it! 17 For reference, I created a TEMP directory on the root of each host’s C: drive and copied the drivers there. If you’re struggling with network connectivity, feel free to use removal USB storage for the transfer. You’ll want to extract the .ZIP files for the Broadcom and Realtek drivers on your GUI system. So, for example, let’s say you use a USB drive. Create a folder on it called “HPMicroDrivers”. Copy the AMD installer .EXE to that folder. Within the folder, create “Realtek”, “BroadcomApp”, and “BroadcomDrivers” subfolders. Extract the contents of the respective ZIP files to those folders. Move the USB drive to the host. Assuming you left the CD drive at drive letter D: and haven’t added or formatted any other drives and you created the TEMP folder, just type the following: ROBOCOPY /E E:HPMicroDrivers C:TEMP The above command isn’t case-sensitive. Now you’re ready to install the drivers. Once you’ve located a driver, installing it is as simple as entering “PNPUTIL -I -A driver.inf” without the quotes. The command is not case-sensitive. It will tell you if it found a useful driver to install or not. You may need to reboot; it will not prompt so you’ll need to do it manually. You can use the following information to verify if a driver is installed and in the running state. Verifying driver installation is a little tougher. The base command you want to use is “DRIVERQUERY.EXE”. Running that by itself shows all the drivers on the system. “DRIVERQUERY -V” shows all the details about the drivers. You’ll want to expand your window to hold more than the default of 80 characters (this starts to become readable at around 120 characters) or run it out to a file: “DRIVERQUERY -V > DRIVERLIST.TXT”. The most important feature of this is if the status is “RUNNING” or not. To see if a specific driver is loaded, you can use string queries; be advised that this won’t always get you the information that you want: “DRIVERQUERY | FINDSTR -I Realtek”. If a new driver was installed but is not in the running state, then a reboot may be necessary to bring it online. AMD Driver Pack The AMD driver pack is the worst. It wants to run a GUI installer of some sort, but it doesn’t function on Hyper-V. So, when you run the executable file, it will first ask you to extract the files. Once that’s done, it’s just going to return to the command prompt. Fortunately, all the files are still extracted, so you can deep dive into them to get your drivers. For reference, I left the default folder structure mostly intact, but I redirected its root to the C:TEMP folder. If you did not, then you
- 18. Free Hyper-V Backup More Info & Download Like this ebook? Share it! 18 replace the beginning portion of my path with yours. All of the drivers start from a base path of: C:TEMPAMD Support12-10_vista_win7_win8_32-64_sbPackages DriversSBDrv. Use the PNPUTIL command as instructed above with the following .INF files: SATA driver 1: SB7xxAHCIW864Aamd_sata.inf SATA driver 2: SB7xxAHCIW864Aamd_xata.inf SMBus driver: SMBusW764ASMBUSamd.inf Broadcom Management Applications Just run the .EXE file. It contains a wizard that will step right through. Broadcom Drivers As with the AMD drivers, use the PNPUTIL program on the b57n60a.inf file. Realtek Drivers The installation file in this folder is rt64win7.inf. Finishing Up You’ll need to reboot for some of these files, but there isn’t anything else to do. If you installed the Broadcom Management Applications, the GUI is accessible from “C:Program FilesBroadcomBACSBACS.exe” and the CLI version is available in the same folder as “BACScli. exe”. Where to Go From Here Now you can begin loading Hyper-V and building your cluster. At this time, we are putting the final touches on a comprehensive Hyper-V installation guide. In the interim, we already have many resources available on Hyper-V. You can read those articles at http://www.altaro.com/ hyper-v/. When the comprehensive guide is published, that’s where you’ll find it. Alternatively, sign up to the newsletter here: http://www.altaro.com/hyper-v/sign-up. Questions/comments? Do you have any questions or comments? Let us know in the comments section on the related blog post: http://www.altaro.com/hyper-v/cluster-ebook
- 19. About Altaro Altaro Software (www.altaro.com) is a fast growing developer of easy to use backup solutions targeted towards SMBs and focused on Microsoft Hyper-V. Altaro take pride in their software and their high level of personal customer service and support, and it shows; founded in 2009, Altaro already service over 9,000 satisfied customers worldwide. About Altaro Hyper-V Backup Altaro Hyper-V Backup is an easy to use, yet powerful backup solution for Microsoft Hyper-V, which takes the guesswork out of backing up VMs and does all the complex Hyper-V backup configuration for the admin. This means best in class technology at the most competitive price on the market. Demonstrating Altaro’s dedication to Hyper-V, they were the first backup provider for Hyper-V to support Windows Server 2012 and also continues to support Windows Server 2008 R2. For more information on features and pricing, please visit http://www.altaro.com/hyper-v-backup/ Don’t take our word for it – Take it for a spin! Download your FREE copy of Altaro Hyper-V backup now and enjoy unlimited functionality for 30 days. After your 30-day trial expires, you can continue using the product for up to 2 VMs for free, forever. No catch, no sales pitch. Follow Altaro Like our eBook? There’s more! Subscribe to our Hyper-V blog http://www.altaro.com/hyper-v/ and receive best practices, tips, free scripts and more here: http://www.altaro.com/hyper-v/sign-up/ Follow Altaro at: