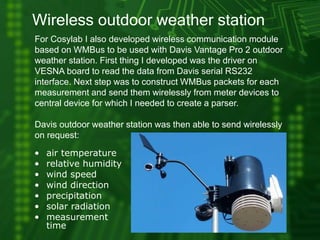
Download to read offline


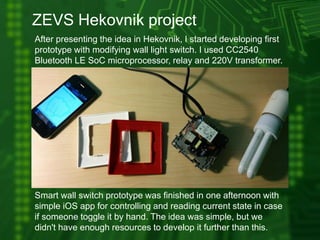


Blaž Remškar worked at the Jozef Stefan Institute from 2012-2015 where he developed several wireless sensor nodes and boards, including the VESNA wireless sensor node platform and the SNE-SENS multisensor board with 12 sensors. He wrote drivers for the sensors and other devices on the boards to enable their use in applications. Remškar also created proof-of-concept devices for various projects involving environmental sensing, smart home devices, and item tracking. These included prototypes for indoor air quality indicators, hydration trackers, temperature monitors, and smart light switches.


