Downloaded 16 times
![Table of contents 4 B4X CustomViews
Main contributors: Klaus Christl (klaus) Erel Uziel (Erel).
To search for a given word or sentence use the Search function in the Edit menu.
All the source code and files needed (layouts, images etc.) of the example projects in this guide are
included in the SourceCode folder.
Updated for:
B4A version 9.80
B4i version 6.50
B4J version 8.10
B4X Booklets:
B4X Getting Started
B4X Basic Language
B4X IDE Integrated Development Environment
B4X Visual Designer
B4X Help tools
B4X CustomViews
B4X Graphics
B4X XUI B4X User Interface
B4X SQLite Database
B4X JavaObject NativeObject
B4X Cross-platform projects
B4R ExampleProjects
You can consult these booklets online in this link [B4X] Documentation Booklets.
Be aware that external links don’t work in the online display.](https://image.slidesharecdn.com/b4xcustomviewsv18-200526131145/75/B4X-Custom-Views-4-2048.jpg)


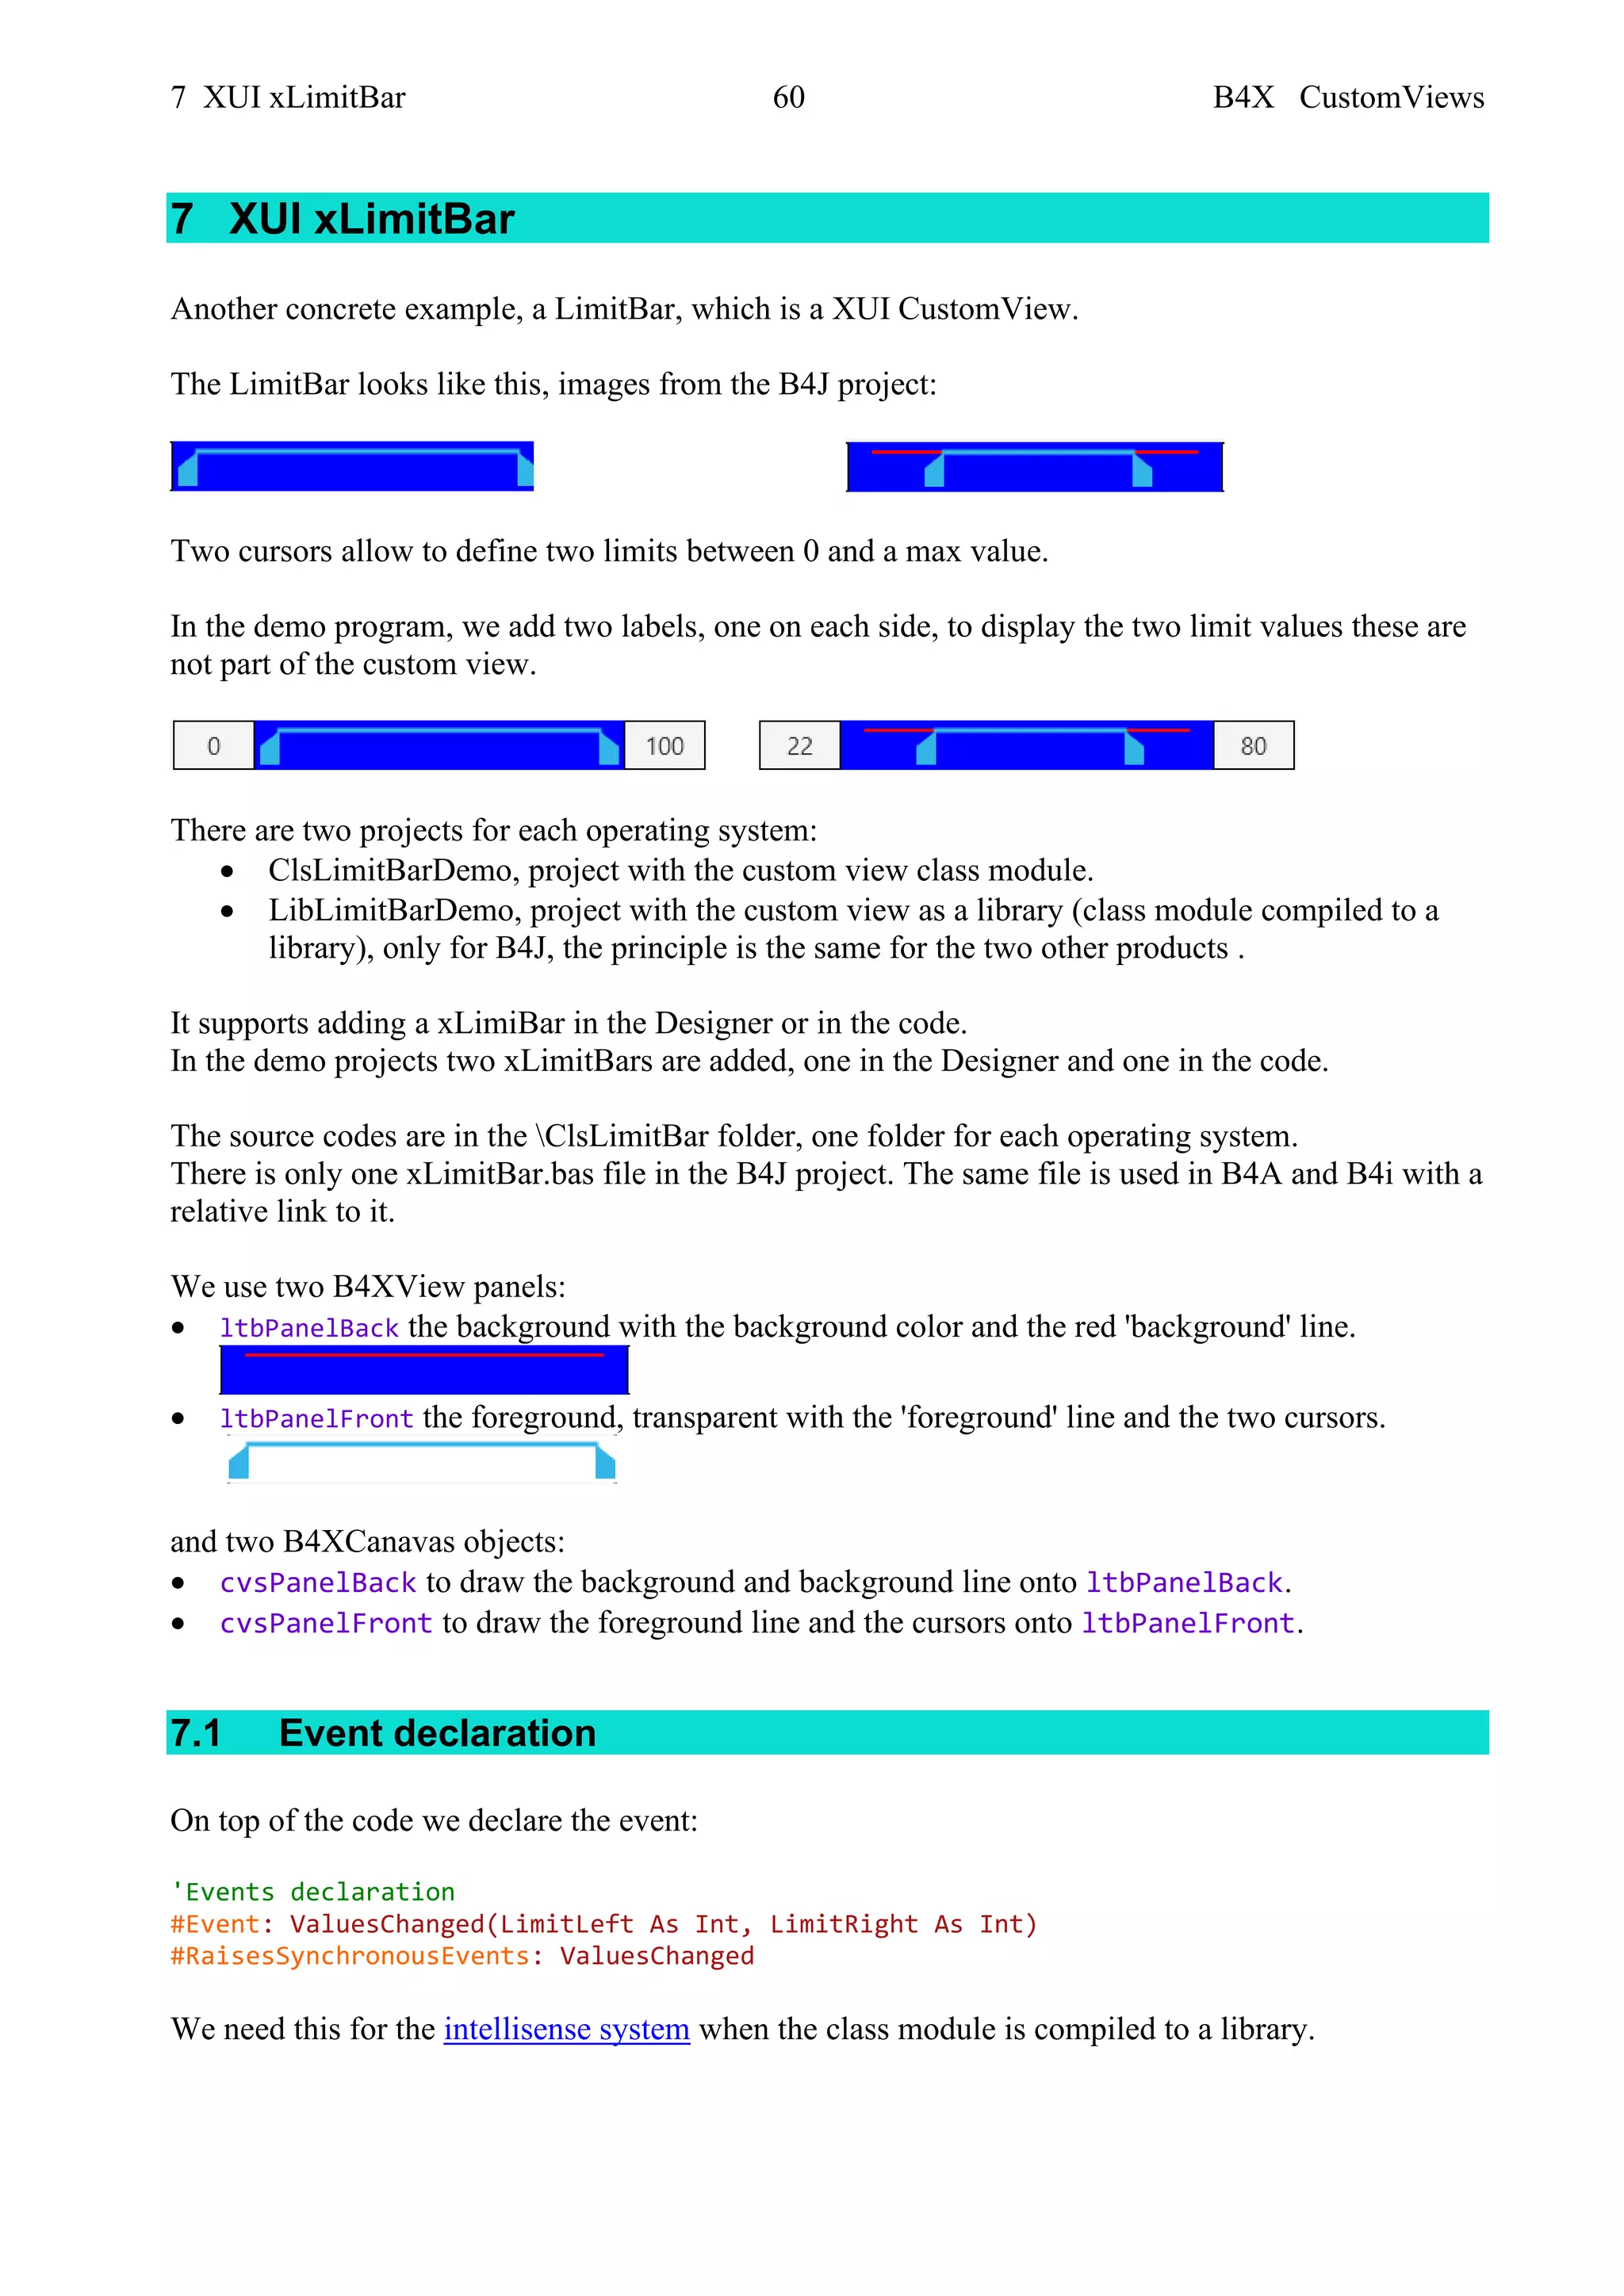


This document provides an overview of creating custom views in B4X. It discusses the structure of CustomView class modules, including predefined event declarations, designer properties, global variables, initialization routines, and routines for designer support and getting the base panel. Example code is provided for adding custom views by code, adding properties and events, and using custom views and properties in the designer. It also covers creating B4X libraries and compiling custom views to platform-specific libraries.