Designation: B 265 – 09a


                   Standard Specification for
                   Titanium and Titanium Alloy Strip, Sheet, and Plate1
                   This standard is issued under the fixed designation B 265; the number immediately following the designation indicates the year of
                   original adoption or, in the case of revision, the year of last revision. A number in parentheses indicates the year of last reapproval. A
                   superscript epsilon (´) indicates an editorial change since the last revision or reapproval.
                   This standard has been approved for use by agencies of the Department of Defense.


1. Scope*                                                                                      1.1.17 Grade 19—Titanium alloy (3 % aluminum, 8 %
  1.1 This specification2 covers annealed titanium and tita-                                  vanadium, 6 % chromium, 4 % zirconium, 4 % molybdenum),
nium alloy strip, sheet, and plate as follows:                                                 1.1.18 Grade 20—Titanium alloy (3 % aluminum, 8 %
  1.1.1 Grade 1—Unalloyed titanium,                                                          vanadium, 6 % chromium, 4 % zirconium, 4 % molybdenum)
  1.1.2 Grade 2—Unalloyed titanium,                                                          plus 0.04 % to 0.08 % palladium,
  1.1.2.1 Grade 2H—Unalloyed titanium (Grade 2 with 58                                         1.1.19 Grade 21—Titanium alloy (15 % molybdenum, 3 %
ksi minimum UTS),                                                                            aluminum, 2.7 % niobium, 0.25 % silicon),
  1.1.3 Grade 3—Unalloyed titanium,                                                            1.1.20 Grade 23—Titanium alloy (6 % aluminum, 4 %
  1.1.4 Grade 4—Unalloyed titanium,                                                          vanadium with extra low interstitial elements, ELI),
  1.1.5 Grade 5—Titanium alloy (6 % aluminum, 4 % vana-                                        1.1.21 Grade 24—Titanium alloy (6 % aluminum, 4 %
dium),                                                                                       vanadium) plus 0.04 % to 0.08 % palladium,
  1.1.6 Grade 6—Titanium alloy (5 % aluminum, 2.5 % tin),                                      1.1.22 Grade 25—Titanium alloy (6 % aluminum, 4 %
  1.1.7 Grade 7—Unalloyed titanium plus 0.12 to 0.25 %                                       vanadium) plus 0.3 % to 0.8 % nickel and 0.04 % to 0.08 %
palladium,                                                                                   palladium,
  1.1.7.1 Grade 7H—Unalloyed titanium plus 0.12 to 0.25 %                                      1.1.23 Grade 26—Unalloyed titanium plus 0.08 to 0.14 %
palladium (Grade 7 with 58 ksi minimum UTS),                                                 ruthenium,
  1.1.8 Grade 9—Titanium alloy (3.0 % aluminum, 2.5 %                                          1.1.23.1 Grade 26H—Unalloyed titanium plus 0.08 to
vanadium),                                                                                   0.14 % ruthenium (Grade 26 with 58 ksi minimum UTS),
  1.1.9 Grade 11—Unalloyed titanium plus 0.12 to 0.25 %                                        1.1.24 Grade 27—Unalloyed titanium plus 0.08 to 0.14 %
palladium,                                                                                   ruthenium,
  1.1.10 Grade 12—Titanium alloy (0.3 % molybdenum,                                            1.1.25 Grade 28—Titanium alloy (3 % aluminum, 2.5 %
0.8 % nickel),                                                                               vanadium) plus 0.08 to 0.14 % ruthenium,
  1.1.11 Grade 13—Titanium alloy (0.5 % nickel, 0.05 %                                         1.1.26 Grade 29—Titanium alloy (6 % aluminum, 4 %
ruthenium),                                                                                  vanadium with extra low interstitial elements, ELI) plus 0.08 to
  1.1.12 Grade 14—Titanium alloy (0.5 % nickel, 0.05 %                                       0.14 % ruthenium,
ruthenium),                                                                                    1.1.27 Grade 30—Titanium alloy (0.3 % cobalt, 0.05 %
  1.1.13 Grade 15—Titanium alloy (0.5 % nickel, 0.05 %                                       palladium),
ruthenium),                                                                                    1.1.28 Grade 31—Titanium alloy (0.3 % cobalt, 0.05 %
  1.1.14 Grade 16—Unalloyed titanium plus 0.04 to 0.08 %                                     palladium),
palladium,                                                                                     1.1.29 Grade 32—Titanium alloy (5 % aluminum, 1 % tin,
  1.1.14.1 Grade 16H—Unalloyed titanium plus 0.04 to                                         1 % zirconium, 1 % vanadium, 0.8 % molybdenum),
0.08 % palladium (Grade 16 with 58 ksi minimum UTS),                                           1.1.30 Grade 33—Titanium alloy (0.4 % nickel, 0.015 %
  1.1.15 Grade 17—Unalloyed titanium plus 0.04 to 0.08 %                                     palladium, 0.02 5 % ruthenium, 0.15 % chromium),
palladium,                                                                                     1.1.31 Grade 34—Titanium alloy (0.4 % nickel, 0.015 %
  1.1.16 Grade 18—Titanium alloy (3 % aluminum, 2.5 %                                        palladium, 0.025 % ruthenium, 0.15 % chromium),
vanadium) plus 0.04 to 0.08 % palladium,                                                       1.1.32 Grade 35—Titanium alloy (4.5 % aluminum, 2 %
                                                                                             molybdenum, 1.6 % vanadium, 0.5 % iron, 0.3 % silicon),
                                                                                               1.1.33 Grade 36—Titanium alloy (45 % niobium),
   1
     This specification is under the jurisdiction of ASTM Committee B10 on                      1.1.34 Grade 37—Titanium alloy (1.5 % aluminum), and
Reactive and Refractory Metals and Alloys and is the direct responsibility of
Subcommittee B10.01 on Titanium.                                                               1.1.35 Grade 38—Titanium alloy (4 % aluminum, 2.5 %
   Current edition approved May 1, 2009. Published June 2009. Originally                     vanadium, 1.5 % iron).
approved in 1952. Last previous edition approved in 2009 as B 265 – 09.
   2
     For ASME Boiler and Pressure Vessel Code applications see related Specifi-                 NOTE 1—H grade material is identical to the corresponding numeric
cations SB-265 in Section II of that Code.                                                   grade (that is, Grade 2H = Grade 2) except for the higher guaranteed


                                                *A Summary of Changes section appears at the end of this standard.
Copyright © ASTM International, 100 Barr Harbor Drive, PO Box C700, West Conshohocken, PA 19428-2959, United States.

                                                                                         1
B 265 – 09a
minimum UTS, and may always be certified as meeting the requirements                  5. Chemical Composition
of its corresponding numeric grade. Grades 2H, 7H, 16H, and 26H are
intended primarily for pressure vessel use.
                                                                                        5.1 The grades of titanium and titanium alloy metal covered
   The H grades were added in response to a user association request based           by this specification shall conform to the chemical composition
on its study of over 5200 commercial Grade 2, 7, 16, and 26 test reports,            requirements prescribed in Table 2.
where over 99 % met the 58 ksi minimum UTS.                                             5.1.1 The elements listed in Table 2 are intentional alloy
  1.2 The values stated in inch-pound units are to be regarded                       additions or elements which are inherent to the manufacture of
as standard. The values given in parentheses are mathematical                        titanium sponge, ingot or mill product.
conversions to SI units that are provided for information only                          5.1.1.1 Elements other than those listed in Table 2 are
and are not considered standard.                                                     deemed to be capable of occurring in the grades listed in Table
                                                                                     2 by and only by way of unregulated or unanalyzed scrap
2. Referenced Documents                                                              additions to the ingot melt. Therefore, product analysis for
                                                                                     elements not listed in Table 2 shall not be required unless
  2.1 ASTM Standards:3
                                                                                     specified and shall be considered to be in excess of the intent
   E 8 Test Methods for Tension Testing of Metallic Materials
                                                                                     of this specification.
   E 29 Practice for Using Significant Digits in Test Data to
                                                                                        5.1.2 Elements intentionally added to the melt must be
    Determine Conformance with Specifications
                                                                                     identified, analyzed, and reported in the chemical analysis.
   E 290 Test Methods for Bend Testing of Material for
                                                                                        5.2 When agreed upon by producer and purchaser and
    Ductility
                                                                                     requested by the purchaser in his written purchase order,
   E 539 Test Method for X-Ray Fluorescence Spectrometric
                                                                                     chemical analysis shall be completed for specific residual
    Analysis of 6Al-4V Titanium Alloy
                                                                                     elements not listed in this specification.
   E 1409 Test Method for Determination of Oxygen and
                                                                                        5.3 Product Analysis—Product analysis tolerances do not
    Nitrogen in Titanium and Titanium Alloys by the Inert Gas
                                                                                     broaden the specified heat analysis requirements but cover
    Fusion Technique
                                                                                     variations between laboratories in the measurement of chemi-
   E 1447 Test Method for Determination of Hydrogen in
                                                                                     cal content. The manufacturer shall not ship material that is
    Titanium and Titanium Alloys by Inert Gas Fusion Ther-
                                                                                     outside the limits specified in Table 2 for the applicable grade.
    mal Conductivity/Infrared Detection Method
                                                                                     Product analysis limits shall be as specified in Table 3.
   E 1941 Test Method for Determination of Carbon in Refrac-
                                                                                        5.4 At least two samples for chemical analysis shall be
    tory and Reactive Metals and Their Alloys
                                                                                     tested to determine chemical composition. Samples shall be
   E 2371 Test Method for Analysis of Titanium and Titanium
                                                                                     taken from the ingot or the extremes of the product to be
    Alloys by Atomic Emission Plasma Spectrometry
                                                                                     analyzed.
  E 2626 Guide for Spectrometric Analysis of Reactive and
    Refractory Metals                                                                6. Mechanical Properties
                                                                                        6.1 Material supplied under this specification shall conform
3. Terminology                                                                       to the mechanical property requirements given in Table 1 for
   3.1 Definitions of Terms Specific to This Standard:                                 the grade specified.
   3.1.1 Any product 0.187 in. (4.75 mm) and under in                                   6.2 Tension testing specimens are to be machined and tested
thickness and less than 24 in. (610 mm) in width is classified                        in accordance with Test Methods E 8. Tensile properties shall
as strip; products 0.187 in. (4.75 mm) and under in thickness                        be determined using a strain rate of 0.003 to 0.007 in./in./min
and 24 in. (610 mm) or more in width are classified as sheet;                         through the specified yield strength, and then increasing the
any product over 0.187 in. (4.75 mm) in thickness and over 10                        rate so as to produce failure in approximately one additional
in. (254 mm) in width is classified as plate.                                         minute.
                                                                                        6.3 For sheet and strip, the bend test specimen shall with-
4. Ordering Information                                                              stand being bent cold through an angle of 105° without fracture
  4.1 Orders for materials under this specification shall in-                         in the outside of the bent portion. The bend shall be made on
clude the following information as applicable:                                       a radius equal to that shown in Table 1 for the applicable
  4.1.1 Grade number (Section 1),                                                    grade. The bends are to be made in accordance with Test
  4.1.2 Product limitations (Section 3),                                             Method E 290, using Method 1, Guided Bend Test described in
  4.1.3 Special mechanical properties (Table 1),                                     paragraph 3.6, bent through 105°, and allowed to spring back
  4.1.4 Marking (Section 16),                                                        naturally. The surface of the specimen must include the original
  4.1.5 Finish (Section 8),                                                          material surface with no material removal or surface condi-
  4.1.6 Packaging (Section 16),                                                      tioning, except corners may be rounded to a maximum radius
  4.1.7 Additional required reports (Section 15), and                                of 0.032 in. (0.8 mm). The width of the bend shall be at least
  4.1.8 Disposition of rejected material (Section 14).                               5 times the thickness. The test report shall, at minimum,
                                                                                     indicate acceptable or unacceptable results.
                                                                                     7. Permissible Variations in Dimensions
  3
     For referenced ASTM standards, visit the ASTM website, www.astm.org, or
contact ASTM Customer Service at service@astm.org. For Annual Book of ASTM
                                                                                       7.1 Dimensional tolerances on titanium and titanium alloy
Standards volume information, refer to the standard’s Document Summary page on       material covered by this specification shall be as specified in
the ASTM website.                                                                    Tables 4-13, as applicable.

                                                                                 2
B 265 – 09a
                                                                 TABLE 1 Tensile RequirementsA
                      Tensile Strength, min                          Yield Strength, 0.2 % Offset                                    Bend Test (Radius of Mandrel)B
                                                                                                                     Elongation in
     Grade                                                     min                              max                 2 in. or 50 mm, Under 0.070 in. 0.070 to 0.187 in.
                       ksi            MPa                                                                                min, %      (1.8 mm) in    (1.8–4.75 mm) in
                                                        ksi             MPa              ksi             MPa                          Thickness         Thickness
 1                     35              240              20              138              45              310              24               1.5T               2T
 2                     50              345              40              275              65              450              20               2T                 2.5T
2HC,D                  58              400              40              275              65              450              20               2T                 2T
 3                     65              450              55              380              80              550              18               2T                 2.5T
 4                     80              550              70              483              95              655              15               2.5T               3T
 5                    130              895             120              828               ...             ...             10E              4.5T               5T
 6                    120              828             115              793               ...             ...             10E              4T                 4.5T
 7                     50              345              40              275              65              450              20               2T                 2.5T
7HC,D                  58              400              40              275              65              450              20               2T                 2T
 9                     90              620              70              483               ...             ...             15F              2.5T               3T
11                     35              240              20              138              45              310              24               1.5T               2T
12                     70              483              50              345               ...             ...             18               2T                 2.5T
13                     40              275              25              170               ...             ...             24               1.5T               2T
14                     60              410              40              275               ...             ...             20               2T                 2.5T
15                     70              483              55              380               ...             ...             18               2T                 2.5T
16                     50              345              40              275              65              450              20               2T                 2.5T
16HC,D                 58              400              40              275              65              450              20               2T                 2T
17                     35              240              20              138              45              310              24               1.5T               2T
18                     90              620              70              483               ...             ...             15F              2.5T               3T
19G,H                 115              793             110              759              ...              ...             15               3T                 3T
20G,H                 115              793             110              759              ...              ...             15               3T                 3T
21G,H                 115              793             110              759              ...              ...             15               3T                 3T
23G,H                 120              828             110              759              ...              ...             10               4.5T               5T
24                    130              895             120              828              ...              ...             10               4.5T               5T
25                    130              895             120              828              ...              ...             10               4.5T               5T
26                     50              345              40              275              65              450              20               2T                 2.5T
26HC,D                 58              400              40              275              65              450              20               2T                 4T
27                     35              240              20              138              45              310              24               1.5T               2T
28                     90              620              70              483              ...              ...             15               2.5T               3T
29                    120              828             110              759              ...              ...             10               4.5T               5T
30                     50              345              40              275              65              450              20               2T                 2.5T
31                     65              450              55              380              80              550              18               2T                 2.5T
32                    100              689              85              586              ...              ...             10E              3.5T               4.5T
33                     50              345              40              275              65              450              20               2T                 2.5T
34                     65              450              55              380              80              550              18               2T                 2.5T
35                    130              895             120              828              ...              ...              5               8T                 8T
36                     65              450              60              410              95              655              10               4.5T               5T
37                     50              345              31              215              65              450              20               2T                 2.5T
38                    130              895             115              794              ...              ...             10               4T                 4.5T
   A
     Minimum and maximum limits apply to tests taken both longitudinal and transverse to the direction of rolling. Mechanical properties for conditions other than annealed
or plate thickness over 1 in. (25 mm) may be established by agreement between the manufacturer and the purchaser.
   B
     Bend to Radius of Mandrel, T equals the thickness of the bend test specimen. Bend tests are not applicable to material over 0.187 in. (4.75 mm) in thickness.
   C
     Material is identical to the corresponding numeric grade (that is, Grade 2H = Grade 2) except for the higher guaranteed minimum UTS, and may always be certified
as meeting the requirements of its corresponding numeric grade. Grade 2H, 7H, 16H, and 26H are intended primarily for pressure vessel use.
   D
     The H grades were added in response to a user association request based on its study of over 5200 commercial Grade 2, 7, 16, and 26 test reports, where over 99 %
met the 58 ksi minimum UTS.
   E
      For Grades 5, 6 and 32 the elongation on materials under 0.025 in. (0.635 mm) in thickness may be obtained only by negotiation.
   F
     Elongation for continuous rolled and annealed (strip product from coil) for Grade 9 and Grade 18 shall be 12 % minimum in the longitudinal direction and 8 % minimum
in the transverse direction.
   G
     Properties for material in the solution treated condition.
   H
      Material is normally purchased in the solution treated condition. Therefore, properties for aged material shall be negotiated between manufacturer and purchaser.


8. Finish                                                                                9. Sampling for Chemical Analysis
   8.1 Titanium and titanium alloy sheet, strip, and plate shall                            9.1 Samples for chemical analysis shall be representative of
be free of injurious external and internal imperfections of a                            the material being tested. The utmost care must be used in
nature that will interfere with the purpose for which it is                              sampling titanium for chemical analysis because of its great
intended. Annealed material may be furnished as descaled, as                             affinity for elements such as oxygen, nitrogen, and hydrogen.
sandblasted, or as ground, or both sandblasted and ground. If                            Therefore, in cutting samples for analysis, the operation should
shipped as descaled, sandblasted, or ground, the manufacturer                            be carried out insofar as possible in a dust-free atmosphere.
shall be permitted to remove minor surface imperfections by
                                                                                         Chips should be collected from clean metal and tools should be
spot grinding if such grinding does not reduce the thickness of
                                                                                         clean and sharp. Samples for analysis should be stored in
the material below the minimum permitted by the tolerance for
                                                                                         suitable containers.
the thickness ordered.


                                                                                     3
TABLE 2 Chemical Requirements
                                                                                             Composition, Weight PercentA,B,C,D,E
                                                                                                                                                                                                         Other     Other
                       Oxygen                            Iron                                                                                                                                         Elements, Elements,
            Carbon,     range Nitrogen, Hydrogen,       range                                                                                                                                            max.      max.
    Grade    max.      or max.  max.      max.         or max. Aluminum Vanadium Palladium Ruthenium            Nickel Molybdenum Chromium         Cobalt     Zirconium   Niobium     Tin     Silicon    each      total


    1          0.08      0.18      0.03     0.015        0.20      --          --         --          --        --        --             --          --          --          --       --       --         0.1        0.4
    2          0.08      0.25      0.03     0.015        0.30      --          --         --          --        --        --             --          --          --          --       --       --         0.1        0.4
    2H         0.08      0.25      0.03     0.015        0.30      --          --         --          --        --        --             --          --          --          --       --       --         0.1        0.4
    3          0.08      0.35      0.05     0.015        0.30      --          --         --          --        --        --             --          --          --          --       --       --         0.1        0.4
    4          0.08      0.40      0.05     0.015        0.50      --          --         --          --        --        --             --          --          --          --       --       --         0.1        0.4
    5          0.08      0.20      0.05     0.015        0.40   5.5-6.75     3.5-4.5      --          --        --        --             --          --          --          --       --       --          0.1       0.4
    6          0.08      0.20      0.03     0.015        0.50   4.0-6.0        --         --          --        --        --             --          --          --          --     2.0-3.0    --          0.1       0.4
    7          0.08      0.25      0.03     0.015        0.30      --          --      0.12-0.25      --        --        --             --          --          --          --       --       --         0.1        0.4
    7H         0.08      0.25      0.03     0.015        0.30      --          --      0.12-0.25      --        --        --             --          --          --          --       --       --         0.1        0.4
    9          0.08      0.15      0.03     0.015        0.25   2.5-3.5      2.0-3.0      --          --        --        --             --          --          --          --       --       --         0.1        0.4
    11         0.08      0.18      0.03     0.015        0.20      --          --      0.12-0.25      --        --        --             --          --          --          --       --       --         0.1        0.4
    12         0.08      0.25      0.03     0.015        0.30      --          --         --          --      0.6-0.9   0.2-0.4          --          --          --          --       --       --         0.1        0.4
    13         0.08      0.10      0.03     0.015        0.20      --          --         --       0.04-0.06  0.4-0.6     --             --          --          --          --       --       --         0.1        0.4
    14         0.08      0.15      0.03     0.015        0.30      --          --         --       0.04-0.06  0.4-0.6     --             --          --          --          --       --       --         0.1        0.4
    15         0.08      0.25      0.05     0.015        0.30      --          --         --       0.04-0.06  0.4-0.6     --             --          --          --          --       --       --         0.1        0.4
    16         0.08      0.25      0.03     0.015        0.30      --          --      0.04-0.08      --        --        --             --          --          --          --       --       --         0.1        0.4
    16H        0.08      0.25      0.03     0.015        0.30      --          --      0.04-0.08      --        --        --             --          --          --          --       --       --         0.1        0.4
    17         0.08      0.18      0.03     0.015        0.20      --          --      0.04-0.08      --        --        --             --          --          --          --       --       --         0.1        0.4


                                                                                                                                                                                                                               B 265 – 09a
    18         0.08      0.15      0.03     0.015        0.25    2.5-3.5     2.0-3.0   0.04-0.08      --        --        --             --          --          --          --       --       --          0.1       0.4
    19         0.05      0.12      0.03      0.02        0.30   3.0-4.0      7.5-8.5      --          --        --      3.5-4.5        5.5-6.5       --        3.5-4.5       --       --       --         0.15       0.4
4


    20         0.05      0.12      0.03      0.02        0.30   3.0-4.0      7.5-8.5   0.04-0.08      --        --      3.5-4.5        5.5-6.5       --        3.5-4.5       --       --       --         0.15       0.4
    21         0.05      0.17      0.03     0.015        0.40    2.5-3.5       --         --          --        --     14.0-16.0         --          --          --        2.2-3.2    --    0.15-0.25      0.1       0.4
    23         0.08      0.13      0.03     0.0125       0.25    5.5-6.5     3.5-4.5      --          --        --        --             --          --          --          --       --       --          0.1       0.4
    24         0.08      0.20      0.05     0.015        0.40   5.5-6.75     3.5-4.5   0.04-0.08      --        --        --             --          --          --          --       --       --          0.1       0.4
    25         0.08      0.20      0.05     0.015        0.40   5.5-6.75     3.5-4.5   0.04-0.08      --      0.3-0.8     --             --          --          --          --       --       --          0.1       0.4
    26         0.08      0.25      0.03     0.015        0.30      --          --         --       0.08-0.14    --        --             --          --          --          --       --       --         0.1        0.4
    26H        0.08      0.25      0.03     0.015        0.30      --          --         --       0.08-0.14    --        --             --          --          --          --       --       --         0.1        0.4
    27         0.08      0.18      0.03     0.015        0.20      --          --         --       0.08-0.14    --        --             --          --          --          --       --       --         0.1        0.4
    28         0.08      0.15      0.03     0.015        0.25    2.5-3.5     2.0-3.0      --       0.08-0.14    --        --             --          --          --          --       --       --          0.1       0.4
    29         0.08      0.13      0.03     0.0125       0.25    5.5-6.5     3.5-4.5      --       0.08-0.14    --        --             --          --          --          --       --       --          0.1       0.4
    30         0.08      0.25      0.03     0.015        0.30      --          --      0.04-0.08      --        --        --             --       0.20-0.80      --          --       --       --          0.1       0.4
    31         0.08      0.35      0.05     0.015        0.30      --          --      0.04-0.08      --        --        --             --       0.20-0.80      --          --       --       --          0.1       0.4
    32         0.08      0.11      0.03     0.015        0.25   4.5-5.5      0.6-1.4      --          --        --      0.6-1.2          --          --        0.6-1.4       --     0.6-1.4 0.06-0.14     0.1.       0.4
    33         0.08      0.25      0.03     0.015        0.30      --          --      0.01-0.02   0.02-0.04 0.35-0.55    --           0.1-0.2       --          --          --       --       --         0.1        0.4
    34         0.08      0.35      0.05     0.015        0.30      --          --      0.01-0.02   0.02-0.04 0.35-0.55    --           0.1-0.2       --          --          --       --       --         0.1        0.4
    35         0.08      0.25      0.05     0.015     0.20-0.80 4.0-5.0      1.1-2.1      --          --        --      1.5-2.5          --          --          --          --       --    0.20-0.40     0.1        0.4
    36         0.04      0.16      0.03     0.0035       0.03      --          --         --          --        --        --             --          --          --       42.0-47.0   --       --          0.1       0.4
    37         0.08      0.25      0.03     0.015        0.30    1.0-2.0       --         --          --        --        --             --          --          --          --       --       --          0.1       0.4
    38         0.08   0.20-0.30    0.03     0.015      1.2-1.8   3.5-4.5     2.0-3.0      --          --        --        --             --          --          --          --       --       --          0.1       0.4
      A
         At minimum, the analysis of samples from the top and bottom of the ingot shall be completed and reported for all elements listed for the respective grade in this table.
      B
         Final product hydrogen shall be reported. Ingot hydrogen need not be reported. Lower hydrogen may be obtained by negotiation with the manufacturer.
      C
         Single values are maximum. The percentage of titanium is determined by difference.
       D
         Other elements need not be reported unless the concentration level is greater than 0.1 % each, or 0.4 % total. Other elements may not be added intentionally. Other elements may be present in titanium or titanium
    alloys in small quantities and are inherent to the manufacturing process. In titanium these elements typically include aluminum, vanadium, tin, chromium, molybdenum, niobium, zirconium, hafnium, bismuth, ruthenium,
    palladium, yttrium, copper, silicon, cobalt, tantalum, nickel, boron, manganese, and tungsten.
       E
         The purchaser may, in the written purchase order, request analysis for specific elements not listed in this specification.
B 265 – 09a
        TABLE 3 Permissible Variations in Product Analysis                                  TABLE 4 Permissible Variations in Thickness of Titanium Sheet
                            Product Analysis Limits,     Permissible Variation in                                                 Permissible Variations in Thickness,
         Element                                                                                 Specified Thickness, in. (mm)
                               max or Range, %              Product Analysis                                                          plus and minus, in. (mm)
                                                                                           0.146 to 0.1875 (3.71 to 4.76), excl           0.014 (0.36)
Aluminum                        0.5 to 2.5                     60.20                       0.131 to 0.145 (3.33 to 3.68)                  0.012 (0.31)
Aluminum                        2.5 to 6.75                    60.40                       0.115 to 0.130 (2.92 to 3.30)                  0.010 (0.25)
Carbon                          0.10                           +0.02                       0.099 to 0.114 (2.51 to 2.90)                  0.009 (0.23)
Chromium                        0.1 to 0.2                     60.02                       0.084 to 0.098 (2.13 to 2.49)                  0.008 (0.20)
Chromium                        5.5 to 6.5                     60.30                       0.073 to 0.083 (1.85 to 2.11)                  0.007 (0.18)
Cobalt                          0.2 to 0.8                     60.05                       0.059 to 0.072 (1.50 to 1.83)                  0.006 (0.15)
Hydrogen                        0.02                           +0.002                      0.041 to 0.058 (1.04 to 1.47)                  0.005 (0.13)
Iron                            0.80                           +0.15                       0.027 to 0.040 (0.69 to 1.02)                  0.004 (0.10)
Iron                            1.2 to 1.8                     60.20                       0.017 to 0.026 (0.43 to 0.66)                  0.003 (0.08)
Molybdenum                      0.2 to 0.4                     60.03                       0.008 to 0.016 (0.20 to 0.41)                  0.002 (0.05)
Molybdenum                      0.6 to 1.2                     60.15                       0.006 to 0.007 (0.15 to 0.18)                  0.0015 (0.04)
Molybdenum                      1.5 to 4.5                     60.20                       0.005 (0.13)                                   0.001 (0.03)
Molybdenum                      14.0 to 16.0                   60.50
Nickel                          0.3 to 0.9                     60.05
Niobium                         2.2 to 3.2                     60.15
Niobium                         >30                            60.50                             TABLE 5 Permissible Variations in Width and Length of
Nitrogen                        0.05                           +0.02                                               Titanium Sheet
Oxygen                          0.30                           +0.03                            Specified Width, in. (mm), for        Permissible Variations in
Oxygen                          0.31 to 0.40                   60.04                             Thicknesses Under 3⁄16 in.                Width, in. (mm)
Palladium                       0.01 to 0.02                   60.002                      24 to 48 (610 to 1220), excl             +1⁄16 (+1.60), −0
Palladium                       0.04 to 0.08                   60.005                      48 (1220) and over                       +1⁄8 (+3.20), −0
Palladium                       0.12 to 0.25                   60.02                                                                   Permissible Variations
Ruthenium                       0.02 to 0.04                   60.005                             Specified Length, ft (m)
                                                                                                                                         in Length, in. (mm)
Ruthenium                       0.04 to 0.06                   60.005                      Up to 10 (3)                             +1⁄4 (+6.35), −0
Ruthenium                       0.08 to 0.14                   60.01                       Over 10 to 20 (3 to 6)                   +1⁄2 (+12.7), −0
Silicon                         0.06 to 0.40                   60.02
Tin                             0.6 to 3.0                     60.15
Vanadium                        0.6 to 4.5                     60.15
Vanadium                        7.5 to 8.5                     60.40                       industry standard methods may be used where the ASTM test
Zirconium                       0.6 to 1.4                     60.15
ResidualsA (each)               0.15                           +0.02                       methods in 2.1 do not adequately cover the elements in the
   A
     A residual is an element present in a metal or alloy in small quantities and is
                                                                                           material or by agreement between the producer and purchaser.
inherent to the manufacturing process but not added intentionally. In titanium these       Alternate techniques are discussed in Guide E 2626.
elements include aluminum, vanadium, tin, iron, chromium, molybdenum, niobium,
zirconium, hafnium, bismuth, ruthenium, palladium, yttrium, copper, silicon, cobalt,       11. Retests
tantalum, nickel, boron, manganese and tungsten.
                                                                                              11.1 If the results of any chemical or mechanical property
                                                                                           test lot are not in conformance with the requirements of this
10. Methods of Chemical Analysis                                                           specification, the lot may be retested at the option of the
  10.1 The chemical analysis shall normally be conducted                                   manufacturer. The frequency of the retest will double the initial
using the ASTM standard test methods referenced in 2.1. Other                              number of tests. If the results of the retest conform to the


                                                                                       5
B 265 – 09a
  TABLE 6 Permissible Variations in Weight of Titanium Sheet                           tured, inspected, sampled, and tested in accordance with the
The actual weight of any one item of an ordered thickness and size in any              requirements of this specification and that the results of
finish is limited in overweight by the following tolerance:                             chemical analysis, tensile, and other tests meet the require-
     Any item of five sheets or less, or any item estimated to weigh 200 lb (91
     kg) or less, may actually weigh as much as 10 % over the estimated                ments of this specification for the grade specified. The report
     weight.                                                                           shall include results of all chemical analysis, tensile tests, and
     Any item of more than five sheets and estimated to weigh more than 200 lb          all other tests required by the specification.
     may actually weigh as much as 71⁄2 % over the estimated weight.
There is no under tolerance in weight for titanium sheets, under tolerance being
restricted by the permissible thickness variations.                                    16. Marking and Packaging
Only random (or mill size) sheets may be ordered on a square foot basis, and
the number of square feet shipped may exceed the number ordered by as                     16.1 Marking:
much as 5 %.                                                                              16.1.1 Identification—Unless otherwise specified, each
                                                                                       plate, sheet, and strip shall be marked in the respective location
                                                                                       indicated below, with the number of this specification, heat
specification, then the retest values will become the test values                       number, manufacturer’s identification, and the nominal thick-
for certification. Only original conforming test results or the                         ness in inches. The characters shall be not less than 3⁄8 in. (9.52
conforming retest results shall be reported to the purchaser. If                       mm) in height, shall be applied using a suitable marking fluid,
the results for the retest fail to conform to the specification, the                    and shall be capable of being removed with a hot alkaline
material will be rejected in accordance with Section 14.                               cleaning solution without rubbing. The markings shall have no
12. Referee Test and Analysis                                                          deleterious effect on the material or its performance. The
                                                                                       characters shall be sufficiently stable to withstand ordinary
   12.1 In the event of disagreement between the manufacturer                          handling.
and the purchaser on the conformance of the material to the                               16.1.2 Plate, flat sheet, and flat strip over 6 in. (152 mm) in
requirements of this specification, a mutually acceptable ref-                          width shall be marked in lengthwise rows of characters
eree shall perform the tests in question using the ASTM                                recurring at intervals not greater than 3 in. (76 mm), the rows
standard methods in 2.1. The referee’s testing shall be used in                        being spaced not more than 2 in. (51 mm) apart and alternately
determining conformance of the material to this specification.                          staggered. Heat numbers shall occur at least 3 times across the
13. Rounding-Off Procedure                                                             width of the sheet and at intervals not greater than 2 ft (0.610
                                                                                       m) along the length. As an option, when permitted, each plate,
  13.1 For purposes of determining conformance with this
                                                                                       sheet, or cut length strip may be marked in at least one corner
specification, an observed or a calculated value shall be
                                                                                       with the number of this specification, heat number, manufac-
rounded off to the nearest “unit” in the last right-hand signifi-
                                                                                       turer’s identification, and the nominal thickness in inches or
cant digit used in expressing the limiting value. This is in
                                                                                       millimetres as required.
accordance with the round-off method of Practice E 29.
                                                                                          16.1.3 Flat strip 6 in. (152 mm) and under in width shall be
14. Rejection                                                                          marked near one end.
  14.1 Material not conforming to the specification or to                                  16.1.4 Coiled sheet and strip shall be marked near the
authorized modifications shall be subject to rejection. Unless                          outside end of the coil.
otherwise specified, rejected material may be returned to the                              16.2 Packaging—Unless otherwise specified, material pur-
manufacturer at the manufacturer’s expense, unless the pur-                            chased under this specification may be packaged for shipment
chaser receives, within three weeks of notice of rejection, other                      either by boxing, crating, single boarding, burlapping, or with
instructions for disposition.                                                          no protection in accordance with the manufacturer’s standard
                                                                                       practice.
15. Certification
  15.1 The manufacturer shall supply at least one copy of the                          17. Keywords
report certifying that the material supplied has been manufac-                           17.1 plate; sheet; strip; titanium; titanium alloys


                                                                                   6
B 265 – 09a
                                                     TABLE 7 Permissible Variations in WidthA of Titanium Strip
                                                                   Permissible Variations in Thickness, plus and minus, for Widths Given, in. (mm)
                                  Under 1⁄2 to                ⁄ to 6 (12.70
                                                              12                       Over 6 to 9                 Over 9 to 12           Over 12 to 20              Over 20 to 24
 Specified Thickness, in.         3⁄16 (12.70 to                to 152.40),              (152.40 to                  (228.60 to             (304.80 to                  (508.0 to
         (mm)
                                   4.76), incl                     incl                228.60), incl               304.80), incl           508.0), incl               609.6), excl
Under 3⁄16 to 0.161 (4.76               ...                   0.016 (0.41)               0.020 (0.51)              0.020 (0.51)            0.031 (0.79)              0.031 (0.79)
  to 4.09), incl
0.160 to 0.100 (4.06 to           0.010 (0.25)                0.010 (0.25)               0.016 (0.41)              0.016 (0.41)            0.020 (0.51)              0.020 (0.51)
  2.54), incl
0.099 to 0.069 (2.51 to           0.008 (0.20)                0.008 (0.20)               0.010 (0.25)              0.010 (0.25)            0.016 (0.41)              0.020 (0.51)
  1.75), incl
0.068 (1.73) and under            0.005 (0.13)                0.005 (0.13)               0.005 (0.13)              0.010 (0.25)            0.016 (0.41)              0.020 (0.51)
  A
      These tolerances are applicable for a standard No. 3 edge.


                                                     TABLE 8 Permissible Variations in Length of Titanium Strip
                                                                                                         Permissible Variations in
                                                               Specified Length, ft (m)
                                                                                                            Length, in. (mm)
                                                  To 5 (1.524), incl                                     +3⁄8 (+9.52), −0
                                                  Over 5 to 10 (1.524 to 3.048), incl                    +1⁄2 (+12.70), −0
                                                  Over 10 to 20 (3.048 to 6.096), incl                   +5⁄8 (+15.88), −0


                                                  TABLE 9 Permissible Variations in Thickness of Titanium StripA
                                                                        Permissible Variations in Thickness, plus and minus, for Widths Given, in. (mm)
           Specified Thickness,                Under 1 to 3⁄16 Under 3 to 1                          Over 6 to 9       Over 9 to 12   Over 12 to 16 Over 16 to 20 Over 20 to 24
                in. (mm)                                                      3 to 6 (76.2 to
                                              (25.4 to 4.76), (76.2 to 25.4),                        (152.4 to         (228.6 to       (304.8 to     (406.4 to     (508.0 to
                                                                               152.4), incl
                                                   incl            incl                             228.6), incl      304.8), incl    406.4), incl  508.0), incl  609.6), incl
Under 3⁄16 to 0.161 (4.76 to                  0.002 (0.05)     0.003 (0.08)     0.004 (0.10)     0.004 (0.10)       0.004 (0.10)     0.005 (0.13)    0.006 (0.16)     0.006 (0.16)
  4.09), incl
0.160 to 0.100 (4.06 to 2.54),   incl         0.002 (0.05)     0.002 (0.05)     0.003 (0.08)     0.004 (0.10)       0.004 (0.10)     0.004 (0.10)    0.005 (0.13)     0.005 (0.13)
0.099 to 0.069 (2.51 to 1.75),   incl         0.002 (0.05)     0.002 (0.05)     0.003 (0.08)     0.003 (0.08)       0.003 (0.08)     0.004 (0.10)    0.004 (0.10)     0.004 (0.10)
0.068 to 0.050 (1.73 to 1.27),   incl         0.002 (0.05)     0.002 (0.05)     0.003 (0.08)     0.003 (0.08)       0.003 (0.08)     0.003 (0.08)    0.004 (0.10)     0.004 (0.10)
0.049 to 0.040 (1.24 to 1.02),   incl         0.002 (0.05)     0.002 (0.05)     0.0025 (0.06)    0.003 (0.08)       0.003 (0.08)     0.003 (0.08)    0.004 (0.10)     0.004 (0.10)
0.039 to 0.035 (0.99 to 0.89),   incl         0.002 (0.05)     0.002 (0.05)     0.0025 (0.06)    0.003 (0.08)       0.003 (0.08)     0.003 (0.08)    0.003 (0.08)     0.003 (0.08)
0.034 to 0.029 (0.86 to 0.74),   incl         0.0015 (0.04)    0.0015 (0.04)    0.002 (0.05)     0.0025 (0.06)      0.0025 (0.06)    0.0025 (0.06)   0.003 (0.08)     0.003 (0.08)
0.028 to 0.026 (0.71 to 0.66),   incl         0.001 (0.03)     0.0015 (0.04)    0.0015 (0.04)    0.002 (0.05)       0.002 (0.05)     0.002 (0.05)    0.0025 (0.06)    0.003 (0.08)
0.025 to 0.020 (0.64 to 0.51),   incl         0.001 (0.03)     0.001 (0.03)     0.0015 (0.04)    0.002 (0.05)       0.002 (0.05)     0.002 (0.05)    0.0025 (0.06)    0.0025 (0.06)
0.019 to 0.017 (0.48 to 0.43),   incl         0.001 (0.03)     0.001 (0.03)     0.001 (0.03)     0.0015 (0.04)      0.0015 (0.04)    0.002 (0.05)    0.002 (0.05)     0.002 (0.05)
0.016 to 0.013 (0.41 to 0.33),   incl         0.001 (0.03)     0.001 (0.03)     0.001 (0.03)     0.0015 (0.04)      0.0015 (0.04)    0.0015 (0.04)   0.002 (0.05)     0.002 (0.05)
0.02 (0.30)                                   0.001 (0.03)     0.001 (0.03)     0.001 (0.03)     0.001 (0.03)       0.001 (0.03)     0.0015 (0.04)   0.0015 (0.04)    0.0015 (0.04)
0.011 (0.28)                                  0.001 (0.03)     0.001 (0.03)     0.001 (0.03)     0.001 (0.03)       0.001 (0.03)     0.0015 (0.04)   0.0015 (0.04)    0.0015 (0.04)
0.010B (0.25)                                 0.001 (0.03)     0.001 (0.03)     0.001 (0.03)     0.001 (0.03)                        0.001 (0.03)    0.0015 (0.04)    0.0015 (0.04)
 A
   Thickness measurements are taken 3⁄8 in. (9.5 mm) from the edge of the strip, except that on widths less than 1 in. (25.4 mm) the tolerances given are applicable for
measurements at all locations.
 B
   For thicknesses under 0.010 in. (0.25 mm), in widths to 16 in. (406 mm) a tolerance of 6 10 % of the thickness shall apply. In widths over 16 to 2315⁄16 in. (406 to 608
mm), incl, a tolerance of 615 % of the thickness shall apply.


                                                    TABLE 10         Permissible Variations in Weight of Titanium Strip
                                                  The actual shipping weight of any one item of an ordered thickness and width
                                                  in any finish may exceed estimated weight by as much as 10 %.


                                                                                             7
B 265 – 09a
                             TABLE 11 Permissible Variations in Width and LengthA of Titanium Plate, Rectangular, Sheared
                                                                                                Permissible Variations Over Specified Dimension for Thicknesses Given, in. (mm)
          Specified Length, in. (mm)               Specified Width, in. (mm)                        Under 3⁄8 (9.52)                  ⁄ to 5⁄8 (9.52 to 15.88), excl
                                                                                                                                   38                                           ⁄ (15.88) and over
                                                                                                                                                                               58


                                                                                               Width               Length                Width              Length            Width           Length
Under 120 (3048)                          Under 60 (1524)                              ⁄ (9.52)
                                                                                      38                      ⁄ (12.70)
                                                                                                             12                   ⁄ (11.11)
                                                                                                                                 7 16                  ⁄ (15.88)
                                                                                                                                                      58                  ⁄ (12.70)
                                                                                                                                                                         12               ⁄ (19.05)
                                                                                                                                                                                         34

                                          60 to 84 (1524 to 2134), excl               7⁄16 (11.11)           5⁄8 (15.88)         1⁄2 (12.70)          11⁄16 (17.46)      5⁄8 (15.88)     7⁄8 (22.22)

                                          84 to 108 (2134 to 2743), excl              1⁄2 (12.70)            3⁄4 (19.05)         5⁄8 (15.88)          7⁄8 (22.22)        3⁄4 (19.05)     1 (25.40)
                                          108 (2743) or over                          5⁄8 (15.88)            7⁄8 (22.22)         3⁄4 (19.05)          1 (25.40)          7⁄8 (22.22)     11⁄8 (28.58)
120 to 240 (3048 to 6096), excl           Under 60 (1524)                             3⁄8 (9.52)             3⁄4 (19.05)         1⁄2 (12.70)          7⁄8 (22.22)        5⁄8 (15.88)     1 (25.40)
                                          60 to 84 (1524 to 2134), excl               1⁄2 (12.70)            3⁄4 (19.05)         5⁄8 (15.88)          7⁄8 (22.22)        3⁄4 (19.05)     1 (25.40)
                                          84 to 108 (2134 to 2743), excl              9⁄16 (14.29)           7⁄8 (22.22)         11⁄16 (17.46)        15⁄16 (23.81)      13⁄16 (20.64)   11⁄8 (28.58)
                                          108 (2743) or over                          5⁄8 (15.88)            1 (25.40)           3⁄4 (19.05)          11⁄8 (28.58)       7⁄8 (22.22)     11⁄4 (31.75)
240 to 360 (6096 to 9144), excl           Under 60 (1524)                             3⁄8 (9.52)             1 (25.40)           1⁄2 (12.70)          11⁄8 (28.58)       5⁄8 (15.88)     11⁄4 (31.75)
                                          60 to 84 (1524 to 2134), excl               1⁄2 (12.70)            1 (25.40)           5⁄8 (15.88)          11⁄8 (28.58)       3⁄4 (19.05)     11⁄4 (31.75)
                                          84 to 108 (2134 to 2743), excl              9⁄16 (14.29)           1 (25.40)           11⁄16 (17.46)        11⁄8 (28.58)       7⁄8 (22.22)     13⁄8 (34.92)
                                          108 (2743) or over                          11⁄16 (17.46)          11⁄8 (28.58)        7⁄8 (22.22)          11⁄4 (31.75)       1 (25.40)       13⁄8 (34.92)
360 to 480 (9144 to 7112), excl           Under 60 (1524)                             7⁄16 (11.11)           11⁄8 (28.58)        1⁄2 (12.70)          11⁄4 (31.75)       5⁄8 (15.88)     11⁄2 (38.10)
                                          60 to 84 (1524 to 2134), excl               1⁄2 (12.70)            11⁄4 (31.75)        5⁄8 (15.88)          1 3⁄8 (34.92)      3⁄4 (19.05)     11⁄2 (38.10)
                                          84 to 108 (2134 to 2743), excl              9⁄16 (14.29)           11⁄4 (31.75)        3⁄4 (19.05)          13⁄8 (34.92)       7⁄8 (22.22)     11⁄2 (38.10)
                                          108 (2743) or over                          3⁄4 (19.05)            13⁄8 (34.92)        7⁄8 (22.22)          11⁄2 (38.10)       1 (25.40)       15⁄8 (41.28)
480 to 600 (7112 to 15 240), excl         Under 60 (1524)                             7⁄16 (11.11)           11⁄4 (31.75)        1⁄2 (12.70)          11⁄2 (38.10)       5⁄8 (15.88)     15⁄8 (41.28)
                                          60 to 84 (1524 to 2134), excl               1⁄2 (12.70)            13⁄8 (34.92)        5⁄8 (15.88)          11⁄2 (38.10)       3⁄4 (19.05)     15⁄8 (41.28)
                                          84 to 108 (2134 to 2743), excl              5⁄8 (15.88)            13⁄8 (34.92)        3⁄4 (19.05)          11⁄2 (38.10)       7⁄8 (22.22)     15⁄8 (41.28)
                                          108 (2743) or over                          3⁄4 (19.05)            11⁄2 (38.10)        7⁄8 (22.22)          15⁄8 (41.28)       1 (25.40)       13⁄4 (44.45)
600 (15 240) or over                      Under 60 (1524)                             1⁄2 (12.70)            13⁄4 (44.45)        5⁄8 (15.88)          17⁄8 (47.62)       3⁄4 (19.05)     17⁄8 (47.62)
                                          60 to 84 (1524 to 2134), excl               5⁄8 (15.88)            13⁄4 (44.45)        3⁄4 (19.05)          17⁄8 (47.62)       7⁄8 (22.22)     17⁄8 (47.62)
                                          84 to 108 (2134 to 2743), excl              5⁄8 (15.88)            13⁄4 (44.45)        3⁄4 (19.05)          17⁄8 (47.62)       7⁄8 (22.22)     17⁄8 (47.62)
                                          108 (2743) or over                          7⁄8 (22.22)            13⁄4 (44.45)        1 (25.40)            2 (50.80)          11⁄8 (28.58)    21⁄4 (57.15)
     A
         The tolerance under the specified width and length is 1⁄4 in. (6.35 mm).


                                      TABLE 12 Permissible Variations from a Flat Surface for Titanium Plate, Annealed
  NOTE 1—Variations in flatness apply to plates up to 15 ft (4.57 m) in length, or to any 15 ft of longer plates.
  NOTE 2—If the longer dimension is under 36 in. (914 mm) the variation is not greater than 1⁄4 in. (6.35 mm).
  NOTE 3—The shorter dimension specified is considered the width and the variation in flatness across the width does not exceed the tabular amount for
that dimension.
  NOTE 4—The maximum deviation from a flat surface does not customarily exceed the tabular tolerance for the longer dimension specified.
                                                     48, excl to 60      60 to 72               72 to 84            84 to 96             96 to 108         108 to 120      120 to 144
                                       48 (1219)                                                                                                                                           144 (3658)
 Specified Thickness, in. (mm)                          (1219 to          (1524 to               (1829 to            (2134 to             (2438 to           (2743 to        (3048 to
                                       or Under                                                                                                                                             and Over
                                                      1524), excl       1829), excl            2134), excl         2438), excl          2743), excl        3048), excl     3658), excl


 ⁄ to 1⁄4 (4.76 to 6.35), excl
3 16                              3⁄4 (19.05)        11⁄16 (26.99)    11⁄4 (31.75)      13⁄8 (34.92)          15⁄8 (41.28)         15⁄8 (41.28)       ...                ...             ...
 ⁄ to 3⁄8 (6.35 to 9.54), excl
14                                11⁄16 (17.46)       ⁄ (19.05)
                                                     34                  ⁄ (23.81)
                                                                      15 16             11⁄8 (28.58)          13⁄8 (34.92)         17⁄16 (36.51)      19⁄16 (36.69)      17⁄8 (47.62)    ...
3⁄8 to 1⁄2 (9.54 to 12.70), excl  1⁄2 (12.70)        9⁄16 (14.29)     11⁄16 (17.46)     3⁄4 (19.05)           15⁄16 (23.81)        11⁄8 (28.58)       11⁄4 (31.75)       17⁄16 (36.51)   13⁄4 (44.45)
1⁄2 to 3⁄4 (12.70 to 19.05), excl 1⁄2 (12.70)        9⁄16 (14.29)     5⁄8 (15.88)       5⁄8 (15.88)           13⁄16 (20.64)        11⁄8 (28.58)       11⁄8 (28.58)       11⁄8 (28.58)    13⁄8 (34.92)
3⁄4 to 1 (19.05 to 25.40), excl   1⁄2 (12.70)        9⁄16 (14.29)     5⁄8 (15.88)       5⁄8 (15.88)           3⁄4 (19.05)          13⁄16 (20.64)      15⁄16 (23.81)      1 (25.40)       11⁄8 (28.58)
1 to 11⁄2 (25.40 to 38.10), excl 1⁄2 (12.70)         9⁄16 (14.29)     9⁄16 (14.29)      9⁄16 (14.29)          11⁄16 (17.46)        11⁄16 (17.46)      11⁄16 (17.46)      3⁄4 (19.05)     1 (25.40)
Over 11⁄2 to 4 (38.10 to 101.6), 3⁄16 (4.76)         5⁄16 (7.94)      3⁄8 (9.54)        7⁄16 (11.11)          1⁄2 (12.70)          9⁄16 (14.29)       5⁄8 (15.88)        3⁄4 (19.05)     7⁄8 (22.22)

   excl
Over 4 to 6 (101.6 to 152.4), 1⁄4 (6.35)             ⁄ (9.54)
                                                     38                ⁄ (12.70)
                                                                      12                   ⁄
                                                                                        9 16    (14.29)       58  ⁄ (15.88)         ⁄ (19.05)
                                                                                                                                   34                  ⁄ (22.22)
                                                                                                                                                      78                 1 (25.40)       11⁄8 (28.58)
   excl


                                                                                                  8
B 265 – 09a
                                            TABLE 13 Permissible Variations in Thickness for Titanium Plate
                                                                                                              Width, in. (mm)A
                                                                                         Over 84 (2134) to 120        Over 120 (3048) to 144
             Specified Thickness, in. (mm)                     To 84 (2134), incl                                                                      Over 144 (3658)
                                                                                              (3048), incl                 (3658), incl
                                                                                          Tolerances Over Specified Thickness, in. (mm)B
0.1875 (4.76) to 0.375 (9.52), excl                              0.045   (1.14)             0.050   (1.27)                 ...                           ...
0.375 (9.52) to 0.750 (19.05), excl                              0.055   (1.40)             0.060   (1.52)                 0.075   (1.90)                0.090 (2.29)
0.750 (19.05) to 1.000 (25.40), excl                             0.060   (1.52)             0.065   (1.65)                 0.085   (2.16)                0.100 (2.54)
1.000 (25.40) to 2.000 (50.80), excl                             0.070   (1.78)             0.075   (1.90)                 0.095   (2.41)                0.115 (2.92)
2.000 (50.80) to 3.000 (76.20), excl                             0.125   (3.18)             0.150   (3.81)                 0.175   (4.44)                0.200 (5.08)
3.000 (76.20) to 4.000 (101.6), excl                             0.175   (4.44)             0.210   (5.33)                 0.245   (6.22)                0.280 (7.11)
4.000 (101.6) to 6.000 (152.4), excl                             0.250   (6.35)             0.300   (7.62)                 0.350   (8.89)                0.400 (10.16)
6.000 (152.4) to 8.000 (203.2), excl                             0.350   (8.89)             0.420   (10.67)                0.490   (12.45)               0.560 (14.22)
8.000 (203.2) to 10.000 (254.0), incl                            0.450   (11.43)            0.540   (13.72)                0.630   (16.00)               ...
  A
    Thickness is measured along the longitudinal edges of the plate at least 3⁄8 in. (9.52 mm), but not more than 3 in. (76.20 mm), from the edge.
  B
    For circles, the over thickness tolerances in this table apply to the diameter of the circle corresponding to the width ranges shown. For plates of irregular shape, the
over thickness tolerances apply to the greatest width corresponding to the width ranges shown. For plates up to 10 in. (254.0 mm) incl. in thickness, the tolerance under
the specified thickness is 0.010 in. (0.25 mm).


                                                         SUPPLEMENTARY REQUIREMENTS

                    These requirements shall apply only when specified in the purchase order, in which event the
                  specified tests shall be made by the manufacturer before shipment of the plates.

S1. Surface Requirement Bend Tests                                                                    Applicable Grades                  Minimum Elongation   Bend Radius

   S1.1 The purpose of this test is to measure the cleanliness or                         1,11,13, 17, 27                                      24 %             1.6 3 T
ductility, or both, of the metal surface. Specimens shall be                              2, 2H, 7, 7H, 14, 16, 16H,
                                                                                            26, 26H, 30, 33, 37                                20 %             2.0 3 T
taken from sheet or plate material produced from the same                                 3, 12, 15, 31, 33                                    18 %             2.3 3 T
ingot or bloom materials, processed the same way to the same                              4, 9, 18, 19, 20, 28                                 15 %             2.8 3 T
                                                                                          5, 6, 21, 23, 24, 25, 26, 29, 32, 36, 38             10 %             4.5 3 T
nominal thickness, width and length, produced in one produc-                              35                                                    5%              10 3 T
tion run or campaign, finished in the same way, and otherwise
                                                                                           S1.5 Criteria for acceptance will be the absence of any
representative of the material supplied.
                                                                                         cracking or surface separations not originating at the edge of
   S1.2 Four guided- or free-bend tests of sheet or plate                                specimen viewed with the unaided eye.
material limited to the grades listed in S1.4. Two bends shall be                          S1.6 The results of the test shall be reported as required by
made in the L direction and two in the T direction. Each pair of                         paragraph 10 of Test Method E 290.
these bends will place opposite surfaces of the sheet or plate
material in tension.                                                                     S2. Alternate Yield Strength Maximum
   S1.3 The bends are to be made in accordance with Test                                   S2.1 Maximum yield strength (0.2 % Offset) of Grade 1, 11,
Method E 290, using Method 1, Guided Bend Test described in                              17, or 27 shall be limited to 40 ksi (275 MPa).
paragraph 3.6, bent through 180°, and allowed to spring back                             S3. Special Flatness Requirements
naturally. The bend specimen may be of less than full material                              S3.1 These requirements apply only for material to be used
thickness; however, the outer surface of the specimen must                               for explosive cladding.
include the original material surface with no material removal                              S3.2 These requirements apply only to Grades 1, 11, 17, and
or surface conditioning other than at the rounded corners, and                           27 and only in thickness ranging from 0.078 to 0.78 in. (2.0 to
must otherwise be representative of the product as supplied.                             20 mm), inclusive.
The width of the bend test specimen shall be at least 5 times the                           S3.3 The overall out-of-flatness shall be no greater than
thickness.                                                                               50 % of that permitted in Table 12.
   S1.4 The bend radius will be such to provide minimum                                     S3.4 Localized out-of-flatness shall be no greater than 0.12
elongation of the outer fibers of the bent specimen at 180° bend                          in. (3.0 mm) deviation from a 39 in. (1000 mm) long straight
as follows:                                                                              edge when placed at any location on the plate surface. When
                                                                                         the straight edge is placed on a single high point, the maximum
                                                                                         deviation from the plate at each end shall be no greater than
                                                                                         0.12 in. (3.0 mm).


                                                                                     9
B 265 – 09a
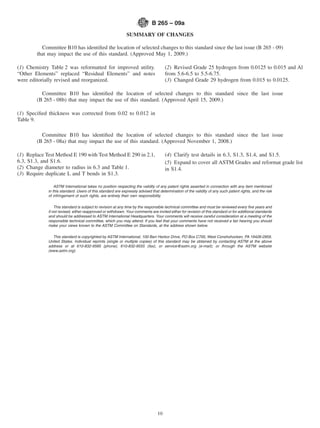
                                                             SUMMARY OF CHANGES

          Committee B10 has identified the location of selected changes to this standard since the last issue (B 265 - 09)
        that may impact the use of this standard. (Approved May 1, 2009.)

(1) Chemistry Table 2 was reformatted for improved utility.                          (2) Revised Grade 25 hydrogen from 0.0125 to 0.015 and Al
“Other Elements” replaced “Residual Elements” and notes                              from 5.6-6.5 to 5.5-6.75.
were editorially revised and reorganized.                                            (3) Changed Grade 29 hydrogen from 0.015 to 0.0125.

          Committee B10 has identified the location of selected changes to this standard since the last issue
        (B 265 - 08b) that may impact the use of this standard. (Approved April 15, 2009.)

(1) Specified thickness was corrected from 0.02 to 0.012 in
Table 9.

          Committee B10 has identified the location of selected changes to this standard since the last issue
        (B 265 - 08a) that may impact the use of this standard. (Approved November 1, 2008.)

(1) Replace Test Method E 190 with Test Method E 290 in 2.1,                         (4) Clarify test details in 6.3, S1.3, S1.4, and S1.5.
6.3, S1.3, and S1.6.                                                                 (5) Expand to cover all ASTM Grades and reformat grade list
(2) Change diameter to radius in 6.3 and Table 1.                                    in S1.4.
(3) Require duplicate L and T bends in S1.3.

                 ASTM International takes no position respecting the validity of any patent rights asserted in connection with any item mentioned
             in this standard. Users of this standard are expressly advised that determination of the validity of any such patent rights, and the risk
             of infringement of such rights, are entirely their own responsibility.

                 This standard is subject to revision at any time by the responsible technical committee and must be reviewed every five years and
             if not revised, either reapproved or withdrawn. Your comments are invited either for revision of this standard or for additional standards
             and should be addressed to ASTM International Headquarters. Your comments will receive careful consideration at a meeting of the
             responsible technical committee, which you may attend. If you feel that your comments have not received a fair hearing you should
             make your views known to the ASTM Committee on Standards, at the address shown below.

               This standard is copyrighted by ASTM International, 100 Barr Harbor Drive, PO Box C700, West Conshohocken, PA 19428-2959,
             United States. Individual reprints (single or multiple copies) of this standard may be obtained by contacting ASTM at the above
             address or at 610-832-9585 (phone), 610-832-9555 (fax), or service@astm.org (e-mail); or through the ASTM website
             (www.astm.org).


                                                                                10

Astm b265 09a

  • 1.
    Designation: B 265– 09a Standard Specification for Titanium and Titanium Alloy Strip, Sheet, and Plate1 This standard is issued under the fixed designation B 265; the number immediately following the designation indicates the year of original adoption or, in the case of revision, the year of last revision. A number in parentheses indicates the year of last reapproval. A superscript epsilon (´) indicates an editorial change since the last revision or reapproval. This standard has been approved for use by agencies of the Department of Defense. 1. Scope* 1.1.17 Grade 19—Titanium alloy (3 % aluminum, 8 % 1.1 This specification2 covers annealed titanium and tita- vanadium, 6 % chromium, 4 % zirconium, 4 % molybdenum), nium alloy strip, sheet, and plate as follows: 1.1.18 Grade 20—Titanium alloy (3 % aluminum, 8 % 1.1.1 Grade 1—Unalloyed titanium, vanadium, 6 % chromium, 4 % zirconium, 4 % molybdenum) 1.1.2 Grade 2—Unalloyed titanium, plus 0.04 % to 0.08 % palladium, 1.1.2.1 Grade 2H—Unalloyed titanium (Grade 2 with 58 1.1.19 Grade 21—Titanium alloy (15 % molybdenum, 3 % ksi minimum UTS), aluminum, 2.7 % niobium, 0.25 % silicon), 1.1.3 Grade 3—Unalloyed titanium, 1.1.20 Grade 23—Titanium alloy (6 % aluminum, 4 % 1.1.4 Grade 4—Unalloyed titanium, vanadium with extra low interstitial elements, ELI), 1.1.5 Grade 5—Titanium alloy (6 % aluminum, 4 % vana- 1.1.21 Grade 24—Titanium alloy (6 % aluminum, 4 % dium), vanadium) plus 0.04 % to 0.08 % palladium, 1.1.6 Grade 6—Titanium alloy (5 % aluminum, 2.5 % tin), 1.1.22 Grade 25—Titanium alloy (6 % aluminum, 4 % 1.1.7 Grade 7—Unalloyed titanium plus 0.12 to 0.25 % vanadium) plus 0.3 % to 0.8 % nickel and 0.04 % to 0.08 % palladium, palladium, 1.1.7.1 Grade 7H—Unalloyed titanium plus 0.12 to 0.25 % 1.1.23 Grade 26—Unalloyed titanium plus 0.08 to 0.14 % palladium (Grade 7 with 58 ksi minimum UTS), ruthenium, 1.1.8 Grade 9—Titanium alloy (3.0 % aluminum, 2.5 % 1.1.23.1 Grade 26H—Unalloyed titanium plus 0.08 to vanadium), 0.14 % ruthenium (Grade 26 with 58 ksi minimum UTS), 1.1.9 Grade 11—Unalloyed titanium plus 0.12 to 0.25 % 1.1.24 Grade 27—Unalloyed titanium plus 0.08 to 0.14 % palladium, ruthenium, 1.1.10 Grade 12—Titanium alloy (0.3 % molybdenum, 1.1.25 Grade 28—Titanium alloy (3 % aluminum, 2.5 % 0.8 % nickel), vanadium) plus 0.08 to 0.14 % ruthenium, 1.1.11 Grade 13—Titanium alloy (0.5 % nickel, 0.05 % 1.1.26 Grade 29—Titanium alloy (6 % aluminum, 4 % ruthenium), vanadium with extra low interstitial elements, ELI) plus 0.08 to 1.1.12 Grade 14—Titanium alloy (0.5 % nickel, 0.05 % 0.14 % ruthenium, ruthenium), 1.1.27 Grade 30—Titanium alloy (0.3 % cobalt, 0.05 % 1.1.13 Grade 15—Titanium alloy (0.5 % nickel, 0.05 % palladium), ruthenium), 1.1.28 Grade 31—Titanium alloy (0.3 % cobalt, 0.05 % 1.1.14 Grade 16—Unalloyed titanium plus 0.04 to 0.08 % palladium), palladium, 1.1.29 Grade 32—Titanium alloy (5 % aluminum, 1 % tin, 1.1.14.1 Grade 16H—Unalloyed titanium plus 0.04 to 1 % zirconium, 1 % vanadium, 0.8 % molybdenum), 0.08 % palladium (Grade 16 with 58 ksi minimum UTS), 1.1.30 Grade 33—Titanium alloy (0.4 % nickel, 0.015 % 1.1.15 Grade 17—Unalloyed titanium plus 0.04 to 0.08 % palladium, 0.02 5 % ruthenium, 0.15 % chromium), palladium, 1.1.31 Grade 34—Titanium alloy (0.4 % nickel, 0.015 % 1.1.16 Grade 18—Titanium alloy (3 % aluminum, 2.5 % palladium, 0.025 % ruthenium, 0.15 % chromium), vanadium) plus 0.04 to 0.08 % palladium, 1.1.32 Grade 35—Titanium alloy (4.5 % aluminum, 2 % molybdenum, 1.6 % vanadium, 0.5 % iron, 0.3 % silicon), 1.1.33 Grade 36—Titanium alloy (45 % niobium), 1 This specification is under the jurisdiction of ASTM Committee B10 on 1.1.34 Grade 37—Titanium alloy (1.5 % aluminum), and Reactive and Refractory Metals and Alloys and is the direct responsibility of Subcommittee B10.01 on Titanium. 1.1.35 Grade 38—Titanium alloy (4 % aluminum, 2.5 % Current edition approved May 1, 2009. Published June 2009. Originally vanadium, 1.5 % iron). approved in 1952. Last previous edition approved in 2009 as B 265 – 09. 2 For ASME Boiler and Pressure Vessel Code applications see related Specifi- NOTE 1—H grade material is identical to the corresponding numeric cations SB-265 in Section II of that Code. grade (that is, Grade 2H = Grade 2) except for the higher guaranteed *A Summary of Changes section appears at the end of this standard. Copyright © ASTM International, 100 Barr Harbor Drive, PO Box C700, West Conshohocken, PA 19428-2959, United States. 1
  • 2.
    B 265 –09a minimum UTS, and may always be certified as meeting the requirements 5. Chemical Composition of its corresponding numeric grade. Grades 2H, 7H, 16H, and 26H are intended primarily for pressure vessel use. 5.1 The grades of titanium and titanium alloy metal covered The H grades were added in response to a user association request based by this specification shall conform to the chemical composition on its study of over 5200 commercial Grade 2, 7, 16, and 26 test reports, requirements prescribed in Table 2. where over 99 % met the 58 ksi minimum UTS. 5.1.1 The elements listed in Table 2 are intentional alloy 1.2 The values stated in inch-pound units are to be regarded additions or elements which are inherent to the manufacture of as standard. The values given in parentheses are mathematical titanium sponge, ingot or mill product. conversions to SI units that are provided for information only 5.1.1.1 Elements other than those listed in Table 2 are and are not considered standard. deemed to be capable of occurring in the grades listed in Table 2 by and only by way of unregulated or unanalyzed scrap 2. Referenced Documents additions to the ingot melt. Therefore, product analysis for elements not listed in Table 2 shall not be required unless 2.1 ASTM Standards:3 specified and shall be considered to be in excess of the intent E 8 Test Methods for Tension Testing of Metallic Materials of this specification. E 29 Practice for Using Significant Digits in Test Data to 5.1.2 Elements intentionally added to the melt must be Determine Conformance with Specifications identified, analyzed, and reported in the chemical analysis. E 290 Test Methods for Bend Testing of Material for 5.2 When agreed upon by producer and purchaser and Ductility requested by the purchaser in his written purchase order, E 539 Test Method for X-Ray Fluorescence Spectrometric chemical analysis shall be completed for specific residual Analysis of 6Al-4V Titanium Alloy elements not listed in this specification. E 1409 Test Method for Determination of Oxygen and 5.3 Product Analysis—Product analysis tolerances do not Nitrogen in Titanium and Titanium Alloys by the Inert Gas broaden the specified heat analysis requirements but cover Fusion Technique variations between laboratories in the measurement of chemi- E 1447 Test Method for Determination of Hydrogen in cal content. The manufacturer shall not ship material that is Titanium and Titanium Alloys by Inert Gas Fusion Ther- outside the limits specified in Table 2 for the applicable grade. mal Conductivity/Infrared Detection Method Product analysis limits shall be as specified in Table 3. E 1941 Test Method for Determination of Carbon in Refrac- 5.4 At least two samples for chemical analysis shall be tory and Reactive Metals and Their Alloys tested to determine chemical composition. Samples shall be E 2371 Test Method for Analysis of Titanium and Titanium taken from the ingot or the extremes of the product to be Alloys by Atomic Emission Plasma Spectrometry analyzed. E 2626 Guide for Spectrometric Analysis of Reactive and Refractory Metals 6. Mechanical Properties 6.1 Material supplied under this specification shall conform 3. Terminology to the mechanical property requirements given in Table 1 for 3.1 Definitions of Terms Specific to This Standard: the grade specified. 3.1.1 Any product 0.187 in. (4.75 mm) and under in 6.2 Tension testing specimens are to be machined and tested thickness and less than 24 in. (610 mm) in width is classified in accordance with Test Methods E 8. Tensile properties shall as strip; products 0.187 in. (4.75 mm) and under in thickness be determined using a strain rate of 0.003 to 0.007 in./in./min and 24 in. (610 mm) or more in width are classified as sheet; through the specified yield strength, and then increasing the any product over 0.187 in. (4.75 mm) in thickness and over 10 rate so as to produce failure in approximately one additional in. (254 mm) in width is classified as plate. minute. 6.3 For sheet and strip, the bend test specimen shall with- 4. Ordering Information stand being bent cold through an angle of 105° without fracture 4.1 Orders for materials under this specification shall in- in the outside of the bent portion. The bend shall be made on clude the following information as applicable: a radius equal to that shown in Table 1 for the applicable 4.1.1 Grade number (Section 1), grade. The bends are to be made in accordance with Test 4.1.2 Product limitations (Section 3), Method E 290, using Method 1, Guided Bend Test described in 4.1.3 Special mechanical properties (Table 1), paragraph 3.6, bent through 105°, and allowed to spring back 4.1.4 Marking (Section 16), naturally. The surface of the specimen must include the original 4.1.5 Finish (Section 8), material surface with no material removal or surface condi- 4.1.6 Packaging (Section 16), tioning, except corners may be rounded to a maximum radius 4.1.7 Additional required reports (Section 15), and of 0.032 in. (0.8 mm). The width of the bend shall be at least 4.1.8 Disposition of rejected material (Section 14). 5 times the thickness. The test report shall, at minimum, indicate acceptable or unacceptable results. 7. Permissible Variations in Dimensions 3 For referenced ASTM standards, visit the ASTM website, www.astm.org, or contact ASTM Customer Service at service@astm.org. For Annual Book of ASTM 7.1 Dimensional tolerances on titanium and titanium alloy Standards volume information, refer to the standard’s Document Summary page on material covered by this specification shall be as specified in the ASTM website. Tables 4-13, as applicable. 2
  • 3.
    B 265 –09a TABLE 1 Tensile RequirementsA Tensile Strength, min Yield Strength, 0.2 % Offset Bend Test (Radius of Mandrel)B Elongation in Grade min max 2 in. or 50 mm, Under 0.070 in. 0.070 to 0.187 in. ksi MPa min, % (1.8 mm) in (1.8–4.75 mm) in ksi MPa ksi MPa Thickness Thickness 1 35 240 20 138 45 310 24 1.5T 2T 2 50 345 40 275 65 450 20 2T 2.5T 2HC,D 58 400 40 275 65 450 20 2T 2T 3 65 450 55 380 80 550 18 2T 2.5T 4 80 550 70 483 95 655 15 2.5T 3T 5 130 895 120 828 ... ... 10E 4.5T 5T 6 120 828 115 793 ... ... 10E 4T 4.5T 7 50 345 40 275 65 450 20 2T 2.5T 7HC,D 58 400 40 275 65 450 20 2T 2T 9 90 620 70 483 ... ... 15F 2.5T 3T 11 35 240 20 138 45 310 24 1.5T 2T 12 70 483 50 345 ... ... 18 2T 2.5T 13 40 275 25 170 ... ... 24 1.5T 2T 14 60 410 40 275 ... ... 20 2T 2.5T 15 70 483 55 380 ... ... 18 2T 2.5T 16 50 345 40 275 65 450 20 2T 2.5T 16HC,D 58 400 40 275 65 450 20 2T 2T 17 35 240 20 138 45 310 24 1.5T 2T 18 90 620 70 483 ... ... 15F 2.5T 3T 19G,H 115 793 110 759 ... ... 15 3T 3T 20G,H 115 793 110 759 ... ... 15 3T 3T 21G,H 115 793 110 759 ... ... 15 3T 3T 23G,H 120 828 110 759 ... ... 10 4.5T 5T 24 130 895 120 828 ... ... 10 4.5T 5T 25 130 895 120 828 ... ... 10 4.5T 5T 26 50 345 40 275 65 450 20 2T 2.5T 26HC,D 58 400 40 275 65 450 20 2T 4T 27 35 240 20 138 45 310 24 1.5T 2T 28 90 620 70 483 ... ... 15 2.5T 3T 29 120 828 110 759 ... ... 10 4.5T 5T 30 50 345 40 275 65 450 20 2T 2.5T 31 65 450 55 380 80 550 18 2T 2.5T 32 100 689 85 586 ... ... 10E 3.5T 4.5T 33 50 345 40 275 65 450 20 2T 2.5T 34 65 450 55 380 80 550 18 2T 2.5T 35 130 895 120 828 ... ... 5 8T 8T 36 65 450 60 410 95 655 10 4.5T 5T 37 50 345 31 215 65 450 20 2T 2.5T 38 130 895 115 794 ... ... 10 4T 4.5T A Minimum and maximum limits apply to tests taken both longitudinal and transverse to the direction of rolling. Mechanical properties for conditions other than annealed or plate thickness over 1 in. (25 mm) may be established by agreement between the manufacturer and the purchaser. B Bend to Radius of Mandrel, T equals the thickness of the bend test specimen. Bend tests are not applicable to material over 0.187 in. (4.75 mm) in thickness. C Material is identical to the corresponding numeric grade (that is, Grade 2H = Grade 2) except for the higher guaranteed minimum UTS, and may always be certified as meeting the requirements of its corresponding numeric grade. Grade 2H, 7H, 16H, and 26H are intended primarily for pressure vessel use. D The H grades were added in response to a user association request based on its study of over 5200 commercial Grade 2, 7, 16, and 26 test reports, where over 99 % met the 58 ksi minimum UTS. E For Grades 5, 6 and 32 the elongation on materials under 0.025 in. (0.635 mm) in thickness may be obtained only by negotiation. F Elongation for continuous rolled and annealed (strip product from coil) for Grade 9 and Grade 18 shall be 12 % minimum in the longitudinal direction and 8 % minimum in the transverse direction. G Properties for material in the solution treated condition. H Material is normally purchased in the solution treated condition. Therefore, properties for aged material shall be negotiated between manufacturer and purchaser. 8. Finish 9. Sampling for Chemical Analysis 8.1 Titanium and titanium alloy sheet, strip, and plate shall 9.1 Samples for chemical analysis shall be representative of be free of injurious external and internal imperfections of a the material being tested. The utmost care must be used in nature that will interfere with the purpose for which it is sampling titanium for chemical analysis because of its great intended. Annealed material may be furnished as descaled, as affinity for elements such as oxygen, nitrogen, and hydrogen. sandblasted, or as ground, or both sandblasted and ground. If Therefore, in cutting samples for analysis, the operation should shipped as descaled, sandblasted, or ground, the manufacturer be carried out insofar as possible in a dust-free atmosphere. shall be permitted to remove minor surface imperfections by Chips should be collected from clean metal and tools should be spot grinding if such grinding does not reduce the thickness of clean and sharp. Samples for analysis should be stored in the material below the minimum permitted by the tolerance for suitable containers. the thickness ordered. 3
  • 4.
    TABLE 2 ChemicalRequirements Composition, Weight PercentA,B,C,D,E Other Other Oxygen Iron Elements, Elements, Carbon, range Nitrogen, Hydrogen, range max. max. Grade max. or max. max. max. or max. Aluminum Vanadium Palladium Ruthenium Nickel Molybdenum Chromium Cobalt Zirconium Niobium Tin Silicon each total 1 0.08 0.18 0.03 0.015 0.20 -- -- -- -- -- -- -- -- -- -- -- -- 0.1 0.4 2 0.08 0.25 0.03 0.015 0.30 -- -- -- -- -- -- -- -- -- -- -- -- 0.1 0.4 2H 0.08 0.25 0.03 0.015 0.30 -- -- -- -- -- -- -- -- -- -- -- -- 0.1 0.4 3 0.08 0.35 0.05 0.015 0.30 -- -- -- -- -- -- -- -- -- -- -- -- 0.1 0.4 4 0.08 0.40 0.05 0.015 0.50 -- -- -- -- -- -- -- -- -- -- -- -- 0.1 0.4 5 0.08 0.20 0.05 0.015 0.40 5.5-6.75 3.5-4.5 -- -- -- -- -- -- -- -- -- -- 0.1 0.4 6 0.08 0.20 0.03 0.015 0.50 4.0-6.0 -- -- -- -- -- -- -- -- -- 2.0-3.0 -- 0.1 0.4 7 0.08 0.25 0.03 0.015 0.30 -- -- 0.12-0.25 -- -- -- -- -- -- -- -- -- 0.1 0.4 7H 0.08 0.25 0.03 0.015 0.30 -- -- 0.12-0.25 -- -- -- -- -- -- -- -- -- 0.1 0.4 9 0.08 0.15 0.03 0.015 0.25 2.5-3.5 2.0-3.0 -- -- -- -- -- -- -- -- -- -- 0.1 0.4 11 0.08 0.18 0.03 0.015 0.20 -- -- 0.12-0.25 -- -- -- -- -- -- -- -- -- 0.1 0.4 12 0.08 0.25 0.03 0.015 0.30 -- -- -- -- 0.6-0.9 0.2-0.4 -- -- -- -- -- -- 0.1 0.4 13 0.08 0.10 0.03 0.015 0.20 -- -- -- 0.04-0.06 0.4-0.6 -- -- -- -- -- -- -- 0.1 0.4 14 0.08 0.15 0.03 0.015 0.30 -- -- -- 0.04-0.06 0.4-0.6 -- -- -- -- -- -- -- 0.1 0.4 15 0.08 0.25 0.05 0.015 0.30 -- -- -- 0.04-0.06 0.4-0.6 -- -- -- -- -- -- -- 0.1 0.4 16 0.08 0.25 0.03 0.015 0.30 -- -- 0.04-0.08 -- -- -- -- -- -- -- -- -- 0.1 0.4 16H 0.08 0.25 0.03 0.015 0.30 -- -- 0.04-0.08 -- -- -- -- -- -- -- -- -- 0.1 0.4 17 0.08 0.18 0.03 0.015 0.20 -- -- 0.04-0.08 -- -- -- -- -- -- -- -- -- 0.1 0.4 B 265 – 09a 18 0.08 0.15 0.03 0.015 0.25 2.5-3.5 2.0-3.0 0.04-0.08 -- -- -- -- -- -- -- -- -- 0.1 0.4 19 0.05 0.12 0.03 0.02 0.30 3.0-4.0 7.5-8.5 -- -- -- 3.5-4.5 5.5-6.5 -- 3.5-4.5 -- -- -- 0.15 0.4 4 20 0.05 0.12 0.03 0.02 0.30 3.0-4.0 7.5-8.5 0.04-0.08 -- -- 3.5-4.5 5.5-6.5 -- 3.5-4.5 -- -- -- 0.15 0.4 21 0.05 0.17 0.03 0.015 0.40 2.5-3.5 -- -- -- -- 14.0-16.0 -- -- -- 2.2-3.2 -- 0.15-0.25 0.1 0.4 23 0.08 0.13 0.03 0.0125 0.25 5.5-6.5 3.5-4.5 -- -- -- -- -- -- -- -- -- -- 0.1 0.4 24 0.08 0.20 0.05 0.015 0.40 5.5-6.75 3.5-4.5 0.04-0.08 -- -- -- -- -- -- -- -- -- 0.1 0.4 25 0.08 0.20 0.05 0.015 0.40 5.5-6.75 3.5-4.5 0.04-0.08 -- 0.3-0.8 -- -- -- -- -- -- -- 0.1 0.4 26 0.08 0.25 0.03 0.015 0.30 -- -- -- 0.08-0.14 -- -- -- -- -- -- -- -- 0.1 0.4 26H 0.08 0.25 0.03 0.015 0.30 -- -- -- 0.08-0.14 -- -- -- -- -- -- -- -- 0.1 0.4 27 0.08 0.18 0.03 0.015 0.20 -- -- -- 0.08-0.14 -- -- -- -- -- -- -- -- 0.1 0.4 28 0.08 0.15 0.03 0.015 0.25 2.5-3.5 2.0-3.0 -- 0.08-0.14 -- -- -- -- -- -- -- -- 0.1 0.4 29 0.08 0.13 0.03 0.0125 0.25 5.5-6.5 3.5-4.5 -- 0.08-0.14 -- -- -- -- -- -- -- -- 0.1 0.4 30 0.08 0.25 0.03 0.015 0.30 -- -- 0.04-0.08 -- -- -- -- 0.20-0.80 -- -- -- -- 0.1 0.4 31 0.08 0.35 0.05 0.015 0.30 -- -- 0.04-0.08 -- -- -- -- 0.20-0.80 -- -- -- -- 0.1 0.4 32 0.08 0.11 0.03 0.015 0.25 4.5-5.5 0.6-1.4 -- -- -- 0.6-1.2 -- -- 0.6-1.4 -- 0.6-1.4 0.06-0.14 0.1. 0.4 33 0.08 0.25 0.03 0.015 0.30 -- -- 0.01-0.02 0.02-0.04 0.35-0.55 -- 0.1-0.2 -- -- -- -- -- 0.1 0.4 34 0.08 0.35 0.05 0.015 0.30 -- -- 0.01-0.02 0.02-0.04 0.35-0.55 -- 0.1-0.2 -- -- -- -- -- 0.1 0.4 35 0.08 0.25 0.05 0.015 0.20-0.80 4.0-5.0 1.1-2.1 -- -- -- 1.5-2.5 -- -- -- -- -- 0.20-0.40 0.1 0.4 36 0.04 0.16 0.03 0.0035 0.03 -- -- -- -- -- -- -- -- -- 42.0-47.0 -- -- 0.1 0.4 37 0.08 0.25 0.03 0.015 0.30 1.0-2.0 -- -- -- -- -- -- -- -- -- -- -- 0.1 0.4 38 0.08 0.20-0.30 0.03 0.015 1.2-1.8 3.5-4.5 2.0-3.0 -- -- -- -- -- -- -- -- -- -- 0.1 0.4 A At minimum, the analysis of samples from the top and bottom of the ingot shall be completed and reported for all elements listed for the respective grade in this table. B Final product hydrogen shall be reported. Ingot hydrogen need not be reported. Lower hydrogen may be obtained by negotiation with the manufacturer. C Single values are maximum. The percentage of titanium is determined by difference. D Other elements need not be reported unless the concentration level is greater than 0.1 % each, or 0.4 % total. Other elements may not be added intentionally. Other elements may be present in titanium or titanium alloys in small quantities and are inherent to the manufacturing process. In titanium these elements typically include aluminum, vanadium, tin, chromium, molybdenum, niobium, zirconium, hafnium, bismuth, ruthenium, palladium, yttrium, copper, silicon, cobalt, tantalum, nickel, boron, manganese, and tungsten. E The purchaser may, in the written purchase order, request analysis for specific elements not listed in this specification.
  • 5.
    B 265 –09a TABLE 3 Permissible Variations in Product Analysis TABLE 4 Permissible Variations in Thickness of Titanium Sheet Product Analysis Limits, Permissible Variation in Permissible Variations in Thickness, Element Specified Thickness, in. (mm) max or Range, % Product Analysis plus and minus, in. (mm) 0.146 to 0.1875 (3.71 to 4.76), excl 0.014 (0.36) Aluminum 0.5 to 2.5 60.20 0.131 to 0.145 (3.33 to 3.68) 0.012 (0.31) Aluminum 2.5 to 6.75 60.40 0.115 to 0.130 (2.92 to 3.30) 0.010 (0.25) Carbon 0.10 +0.02 0.099 to 0.114 (2.51 to 2.90) 0.009 (0.23) Chromium 0.1 to 0.2 60.02 0.084 to 0.098 (2.13 to 2.49) 0.008 (0.20) Chromium 5.5 to 6.5 60.30 0.073 to 0.083 (1.85 to 2.11) 0.007 (0.18) Cobalt 0.2 to 0.8 60.05 0.059 to 0.072 (1.50 to 1.83) 0.006 (0.15) Hydrogen 0.02 +0.002 0.041 to 0.058 (1.04 to 1.47) 0.005 (0.13) Iron 0.80 +0.15 0.027 to 0.040 (0.69 to 1.02) 0.004 (0.10) Iron 1.2 to 1.8 60.20 0.017 to 0.026 (0.43 to 0.66) 0.003 (0.08) Molybdenum 0.2 to 0.4 60.03 0.008 to 0.016 (0.20 to 0.41) 0.002 (0.05) Molybdenum 0.6 to 1.2 60.15 0.006 to 0.007 (0.15 to 0.18) 0.0015 (0.04) Molybdenum 1.5 to 4.5 60.20 0.005 (0.13) 0.001 (0.03) Molybdenum 14.0 to 16.0 60.50 Nickel 0.3 to 0.9 60.05 Niobium 2.2 to 3.2 60.15 Niobium >30 60.50 TABLE 5 Permissible Variations in Width and Length of Nitrogen 0.05 +0.02 Titanium Sheet Oxygen 0.30 +0.03 Specified Width, in. (mm), for Permissible Variations in Oxygen 0.31 to 0.40 60.04 Thicknesses Under 3⁄16 in. Width, in. (mm) Palladium 0.01 to 0.02 60.002 24 to 48 (610 to 1220), excl +1⁄16 (+1.60), −0 Palladium 0.04 to 0.08 60.005 48 (1220) and over +1⁄8 (+3.20), −0 Palladium 0.12 to 0.25 60.02 Permissible Variations Ruthenium 0.02 to 0.04 60.005 Specified Length, ft (m) in Length, in. (mm) Ruthenium 0.04 to 0.06 60.005 Up to 10 (3) +1⁄4 (+6.35), −0 Ruthenium 0.08 to 0.14 60.01 Over 10 to 20 (3 to 6) +1⁄2 (+12.7), −0 Silicon 0.06 to 0.40 60.02 Tin 0.6 to 3.0 60.15 Vanadium 0.6 to 4.5 60.15 Vanadium 7.5 to 8.5 60.40 industry standard methods may be used where the ASTM test Zirconium 0.6 to 1.4 60.15 ResidualsA (each) 0.15 +0.02 methods in 2.1 do not adequately cover the elements in the A A residual is an element present in a metal or alloy in small quantities and is material or by agreement between the producer and purchaser. inherent to the manufacturing process but not added intentionally. In titanium these Alternate techniques are discussed in Guide E 2626. elements include aluminum, vanadium, tin, iron, chromium, molybdenum, niobium, zirconium, hafnium, bismuth, ruthenium, palladium, yttrium, copper, silicon, cobalt, 11. Retests tantalum, nickel, boron, manganese and tungsten. 11.1 If the results of any chemical or mechanical property test lot are not in conformance with the requirements of this 10. Methods of Chemical Analysis specification, the lot may be retested at the option of the 10.1 The chemical analysis shall normally be conducted manufacturer. The frequency of the retest will double the initial using the ASTM standard test methods referenced in 2.1. Other number of tests. If the results of the retest conform to the 5
  • 6.
    B 265 –09a TABLE 6 Permissible Variations in Weight of Titanium Sheet tured, inspected, sampled, and tested in accordance with the The actual weight of any one item of an ordered thickness and size in any requirements of this specification and that the results of finish is limited in overweight by the following tolerance: chemical analysis, tensile, and other tests meet the require- Any item of five sheets or less, or any item estimated to weigh 200 lb (91 kg) or less, may actually weigh as much as 10 % over the estimated ments of this specification for the grade specified. The report weight. shall include results of all chemical analysis, tensile tests, and Any item of more than five sheets and estimated to weigh more than 200 lb all other tests required by the specification. may actually weigh as much as 71⁄2 % over the estimated weight. There is no under tolerance in weight for titanium sheets, under tolerance being restricted by the permissible thickness variations. 16. Marking and Packaging Only random (or mill size) sheets may be ordered on a square foot basis, and the number of square feet shipped may exceed the number ordered by as 16.1 Marking: much as 5 %. 16.1.1 Identification—Unless otherwise specified, each plate, sheet, and strip shall be marked in the respective location indicated below, with the number of this specification, heat specification, then the retest values will become the test values number, manufacturer’s identification, and the nominal thick- for certification. Only original conforming test results or the ness in inches. The characters shall be not less than 3⁄8 in. (9.52 conforming retest results shall be reported to the purchaser. If mm) in height, shall be applied using a suitable marking fluid, the results for the retest fail to conform to the specification, the and shall be capable of being removed with a hot alkaline material will be rejected in accordance with Section 14. cleaning solution without rubbing. The markings shall have no 12. Referee Test and Analysis deleterious effect on the material or its performance. The characters shall be sufficiently stable to withstand ordinary 12.1 In the event of disagreement between the manufacturer handling. and the purchaser on the conformance of the material to the 16.1.2 Plate, flat sheet, and flat strip over 6 in. (152 mm) in requirements of this specification, a mutually acceptable ref- width shall be marked in lengthwise rows of characters eree shall perform the tests in question using the ASTM recurring at intervals not greater than 3 in. (76 mm), the rows standard methods in 2.1. The referee’s testing shall be used in being spaced not more than 2 in. (51 mm) apart and alternately determining conformance of the material to this specification. staggered. Heat numbers shall occur at least 3 times across the 13. Rounding-Off Procedure width of the sheet and at intervals not greater than 2 ft (0.610 m) along the length. As an option, when permitted, each plate, 13.1 For purposes of determining conformance with this sheet, or cut length strip may be marked in at least one corner specification, an observed or a calculated value shall be with the number of this specification, heat number, manufac- rounded off to the nearest “unit” in the last right-hand signifi- turer’s identification, and the nominal thickness in inches or cant digit used in expressing the limiting value. This is in millimetres as required. accordance with the round-off method of Practice E 29. 16.1.3 Flat strip 6 in. (152 mm) and under in width shall be 14. Rejection marked near one end. 14.1 Material not conforming to the specification or to 16.1.4 Coiled sheet and strip shall be marked near the authorized modifications shall be subject to rejection. Unless outside end of the coil. otherwise specified, rejected material may be returned to the 16.2 Packaging—Unless otherwise specified, material pur- manufacturer at the manufacturer’s expense, unless the pur- chased under this specification may be packaged for shipment chaser receives, within three weeks of notice of rejection, other either by boxing, crating, single boarding, burlapping, or with instructions for disposition. no protection in accordance with the manufacturer’s standard practice. 15. Certification 15.1 The manufacturer shall supply at least one copy of the 17. Keywords report certifying that the material supplied has been manufac- 17.1 plate; sheet; strip; titanium; titanium alloys 6
  • 7.
    B 265 –09a TABLE 7 Permissible Variations in WidthA of Titanium Strip Permissible Variations in Thickness, plus and minus, for Widths Given, in. (mm) Under 1⁄2 to ⁄ to 6 (12.70 12 Over 6 to 9 Over 9 to 12 Over 12 to 20 Over 20 to 24 Specified Thickness, in. 3⁄16 (12.70 to to 152.40), (152.40 to (228.60 to (304.80 to (508.0 to (mm) 4.76), incl incl 228.60), incl 304.80), incl 508.0), incl 609.6), excl Under 3⁄16 to 0.161 (4.76 ... 0.016 (0.41) 0.020 (0.51) 0.020 (0.51) 0.031 (0.79) 0.031 (0.79) to 4.09), incl 0.160 to 0.100 (4.06 to 0.010 (0.25) 0.010 (0.25) 0.016 (0.41) 0.016 (0.41) 0.020 (0.51) 0.020 (0.51) 2.54), incl 0.099 to 0.069 (2.51 to 0.008 (0.20) 0.008 (0.20) 0.010 (0.25) 0.010 (0.25) 0.016 (0.41) 0.020 (0.51) 1.75), incl 0.068 (1.73) and under 0.005 (0.13) 0.005 (0.13) 0.005 (0.13) 0.010 (0.25) 0.016 (0.41) 0.020 (0.51) A These tolerances are applicable for a standard No. 3 edge. TABLE 8 Permissible Variations in Length of Titanium Strip Permissible Variations in Specified Length, ft (m) Length, in. (mm) To 5 (1.524), incl +3⁄8 (+9.52), −0 Over 5 to 10 (1.524 to 3.048), incl +1⁄2 (+12.70), −0 Over 10 to 20 (3.048 to 6.096), incl +5⁄8 (+15.88), −0 TABLE 9 Permissible Variations in Thickness of Titanium StripA Permissible Variations in Thickness, plus and minus, for Widths Given, in. (mm) Specified Thickness, Under 1 to 3⁄16 Under 3 to 1 Over 6 to 9 Over 9 to 12 Over 12 to 16 Over 16 to 20 Over 20 to 24 in. (mm) 3 to 6 (76.2 to (25.4 to 4.76), (76.2 to 25.4), (152.4 to (228.6 to (304.8 to (406.4 to (508.0 to 152.4), incl incl incl 228.6), incl 304.8), incl 406.4), incl 508.0), incl 609.6), incl Under 3⁄16 to 0.161 (4.76 to 0.002 (0.05) 0.003 (0.08) 0.004 (0.10) 0.004 (0.10) 0.004 (0.10) 0.005 (0.13) 0.006 (0.16) 0.006 (0.16) 4.09), incl 0.160 to 0.100 (4.06 to 2.54), incl 0.002 (0.05) 0.002 (0.05) 0.003 (0.08) 0.004 (0.10) 0.004 (0.10) 0.004 (0.10) 0.005 (0.13) 0.005 (0.13) 0.099 to 0.069 (2.51 to 1.75), incl 0.002 (0.05) 0.002 (0.05) 0.003 (0.08) 0.003 (0.08) 0.003 (0.08) 0.004 (0.10) 0.004 (0.10) 0.004 (0.10) 0.068 to 0.050 (1.73 to 1.27), incl 0.002 (0.05) 0.002 (0.05) 0.003 (0.08) 0.003 (0.08) 0.003 (0.08) 0.003 (0.08) 0.004 (0.10) 0.004 (0.10) 0.049 to 0.040 (1.24 to 1.02), incl 0.002 (0.05) 0.002 (0.05) 0.0025 (0.06) 0.003 (0.08) 0.003 (0.08) 0.003 (0.08) 0.004 (0.10) 0.004 (0.10) 0.039 to 0.035 (0.99 to 0.89), incl 0.002 (0.05) 0.002 (0.05) 0.0025 (0.06) 0.003 (0.08) 0.003 (0.08) 0.003 (0.08) 0.003 (0.08) 0.003 (0.08) 0.034 to 0.029 (0.86 to 0.74), incl 0.0015 (0.04) 0.0015 (0.04) 0.002 (0.05) 0.0025 (0.06) 0.0025 (0.06) 0.0025 (0.06) 0.003 (0.08) 0.003 (0.08) 0.028 to 0.026 (0.71 to 0.66), incl 0.001 (0.03) 0.0015 (0.04) 0.0015 (0.04) 0.002 (0.05) 0.002 (0.05) 0.002 (0.05) 0.0025 (0.06) 0.003 (0.08) 0.025 to 0.020 (0.64 to 0.51), incl 0.001 (0.03) 0.001 (0.03) 0.0015 (0.04) 0.002 (0.05) 0.002 (0.05) 0.002 (0.05) 0.0025 (0.06) 0.0025 (0.06) 0.019 to 0.017 (0.48 to 0.43), incl 0.001 (0.03) 0.001 (0.03) 0.001 (0.03) 0.0015 (0.04) 0.0015 (0.04) 0.002 (0.05) 0.002 (0.05) 0.002 (0.05) 0.016 to 0.013 (0.41 to 0.33), incl 0.001 (0.03) 0.001 (0.03) 0.001 (0.03) 0.0015 (0.04) 0.0015 (0.04) 0.0015 (0.04) 0.002 (0.05) 0.002 (0.05) 0.02 (0.30) 0.001 (0.03) 0.001 (0.03) 0.001 (0.03) 0.001 (0.03) 0.001 (0.03) 0.0015 (0.04) 0.0015 (0.04) 0.0015 (0.04) 0.011 (0.28) 0.001 (0.03) 0.001 (0.03) 0.001 (0.03) 0.001 (0.03) 0.001 (0.03) 0.0015 (0.04) 0.0015 (0.04) 0.0015 (0.04) 0.010B (0.25) 0.001 (0.03) 0.001 (0.03) 0.001 (0.03) 0.001 (0.03) 0.001 (0.03) 0.0015 (0.04) 0.0015 (0.04) A Thickness measurements are taken 3⁄8 in. (9.5 mm) from the edge of the strip, except that on widths less than 1 in. (25.4 mm) the tolerances given are applicable for measurements at all locations. B For thicknesses under 0.010 in. (0.25 mm), in widths to 16 in. (406 mm) a tolerance of 6 10 % of the thickness shall apply. In widths over 16 to 2315⁄16 in. (406 to 608 mm), incl, a tolerance of 615 % of the thickness shall apply. TABLE 10 Permissible Variations in Weight of Titanium Strip The actual shipping weight of any one item of an ordered thickness and width in any finish may exceed estimated weight by as much as 10 %. 7
  • 8.
    B 265 –09a TABLE 11 Permissible Variations in Width and LengthA of Titanium Plate, Rectangular, Sheared Permissible Variations Over Specified Dimension for Thicknesses Given, in. (mm) Specified Length, in. (mm) Specified Width, in. (mm) Under 3⁄8 (9.52) ⁄ to 5⁄8 (9.52 to 15.88), excl 38 ⁄ (15.88) and over 58 Width Length Width Length Width Length Under 120 (3048) Under 60 (1524) ⁄ (9.52) 38 ⁄ (12.70) 12 ⁄ (11.11) 7 16 ⁄ (15.88) 58 ⁄ (12.70) 12 ⁄ (19.05) 34 60 to 84 (1524 to 2134), excl 7⁄16 (11.11) 5⁄8 (15.88) 1⁄2 (12.70) 11⁄16 (17.46) 5⁄8 (15.88) 7⁄8 (22.22) 84 to 108 (2134 to 2743), excl 1⁄2 (12.70) 3⁄4 (19.05) 5⁄8 (15.88) 7⁄8 (22.22) 3⁄4 (19.05) 1 (25.40) 108 (2743) or over 5⁄8 (15.88) 7⁄8 (22.22) 3⁄4 (19.05) 1 (25.40) 7⁄8 (22.22) 11⁄8 (28.58) 120 to 240 (3048 to 6096), excl Under 60 (1524) 3⁄8 (9.52) 3⁄4 (19.05) 1⁄2 (12.70) 7⁄8 (22.22) 5⁄8 (15.88) 1 (25.40) 60 to 84 (1524 to 2134), excl 1⁄2 (12.70) 3⁄4 (19.05) 5⁄8 (15.88) 7⁄8 (22.22) 3⁄4 (19.05) 1 (25.40) 84 to 108 (2134 to 2743), excl 9⁄16 (14.29) 7⁄8 (22.22) 11⁄16 (17.46) 15⁄16 (23.81) 13⁄16 (20.64) 11⁄8 (28.58) 108 (2743) or over 5⁄8 (15.88) 1 (25.40) 3⁄4 (19.05) 11⁄8 (28.58) 7⁄8 (22.22) 11⁄4 (31.75) 240 to 360 (6096 to 9144), excl Under 60 (1524) 3⁄8 (9.52) 1 (25.40) 1⁄2 (12.70) 11⁄8 (28.58) 5⁄8 (15.88) 11⁄4 (31.75) 60 to 84 (1524 to 2134), excl 1⁄2 (12.70) 1 (25.40) 5⁄8 (15.88) 11⁄8 (28.58) 3⁄4 (19.05) 11⁄4 (31.75) 84 to 108 (2134 to 2743), excl 9⁄16 (14.29) 1 (25.40) 11⁄16 (17.46) 11⁄8 (28.58) 7⁄8 (22.22) 13⁄8 (34.92) 108 (2743) or over 11⁄16 (17.46) 11⁄8 (28.58) 7⁄8 (22.22) 11⁄4 (31.75) 1 (25.40) 13⁄8 (34.92) 360 to 480 (9144 to 7112), excl Under 60 (1524) 7⁄16 (11.11) 11⁄8 (28.58) 1⁄2 (12.70) 11⁄4 (31.75) 5⁄8 (15.88) 11⁄2 (38.10) 60 to 84 (1524 to 2134), excl 1⁄2 (12.70) 11⁄4 (31.75) 5⁄8 (15.88) 1 3⁄8 (34.92) 3⁄4 (19.05) 11⁄2 (38.10) 84 to 108 (2134 to 2743), excl 9⁄16 (14.29) 11⁄4 (31.75) 3⁄4 (19.05) 13⁄8 (34.92) 7⁄8 (22.22) 11⁄2 (38.10) 108 (2743) or over 3⁄4 (19.05) 13⁄8 (34.92) 7⁄8 (22.22) 11⁄2 (38.10) 1 (25.40) 15⁄8 (41.28) 480 to 600 (7112 to 15 240), excl Under 60 (1524) 7⁄16 (11.11) 11⁄4 (31.75) 1⁄2 (12.70) 11⁄2 (38.10) 5⁄8 (15.88) 15⁄8 (41.28) 60 to 84 (1524 to 2134), excl 1⁄2 (12.70) 13⁄8 (34.92) 5⁄8 (15.88) 11⁄2 (38.10) 3⁄4 (19.05) 15⁄8 (41.28) 84 to 108 (2134 to 2743), excl 5⁄8 (15.88) 13⁄8 (34.92) 3⁄4 (19.05) 11⁄2 (38.10) 7⁄8 (22.22) 15⁄8 (41.28) 108 (2743) or over 3⁄4 (19.05) 11⁄2 (38.10) 7⁄8 (22.22) 15⁄8 (41.28) 1 (25.40) 13⁄4 (44.45) 600 (15 240) or over Under 60 (1524) 1⁄2 (12.70) 13⁄4 (44.45) 5⁄8 (15.88) 17⁄8 (47.62) 3⁄4 (19.05) 17⁄8 (47.62) 60 to 84 (1524 to 2134), excl 5⁄8 (15.88) 13⁄4 (44.45) 3⁄4 (19.05) 17⁄8 (47.62) 7⁄8 (22.22) 17⁄8 (47.62) 84 to 108 (2134 to 2743), excl 5⁄8 (15.88) 13⁄4 (44.45) 3⁄4 (19.05) 17⁄8 (47.62) 7⁄8 (22.22) 17⁄8 (47.62) 108 (2743) or over 7⁄8 (22.22) 13⁄4 (44.45) 1 (25.40) 2 (50.80) 11⁄8 (28.58) 21⁄4 (57.15) A The tolerance under the specified width and length is 1⁄4 in. (6.35 mm). TABLE 12 Permissible Variations from a Flat Surface for Titanium Plate, Annealed NOTE 1—Variations in flatness apply to plates up to 15 ft (4.57 m) in length, or to any 15 ft of longer plates. NOTE 2—If the longer dimension is under 36 in. (914 mm) the variation is not greater than 1⁄4 in. (6.35 mm). NOTE 3—The shorter dimension specified is considered the width and the variation in flatness across the width does not exceed the tabular amount for that dimension. NOTE 4—The maximum deviation from a flat surface does not customarily exceed the tabular tolerance for the longer dimension specified. 48, excl to 60 60 to 72 72 to 84 84 to 96 96 to 108 108 to 120 120 to 144 48 (1219) 144 (3658) Specified Thickness, in. (mm) (1219 to (1524 to (1829 to (2134 to (2438 to (2743 to (3048 to or Under and Over 1524), excl 1829), excl 2134), excl 2438), excl 2743), excl 3048), excl 3658), excl ⁄ to 1⁄4 (4.76 to 6.35), excl 3 16 3⁄4 (19.05) 11⁄16 (26.99) 11⁄4 (31.75) 13⁄8 (34.92) 15⁄8 (41.28) 15⁄8 (41.28) ... ... ... ⁄ to 3⁄8 (6.35 to 9.54), excl 14 11⁄16 (17.46) ⁄ (19.05) 34 ⁄ (23.81) 15 16 11⁄8 (28.58) 13⁄8 (34.92) 17⁄16 (36.51) 19⁄16 (36.69) 17⁄8 (47.62) ... 3⁄8 to 1⁄2 (9.54 to 12.70), excl 1⁄2 (12.70) 9⁄16 (14.29) 11⁄16 (17.46) 3⁄4 (19.05) 15⁄16 (23.81) 11⁄8 (28.58) 11⁄4 (31.75) 17⁄16 (36.51) 13⁄4 (44.45) 1⁄2 to 3⁄4 (12.70 to 19.05), excl 1⁄2 (12.70) 9⁄16 (14.29) 5⁄8 (15.88) 5⁄8 (15.88) 13⁄16 (20.64) 11⁄8 (28.58) 11⁄8 (28.58) 11⁄8 (28.58) 13⁄8 (34.92) 3⁄4 to 1 (19.05 to 25.40), excl 1⁄2 (12.70) 9⁄16 (14.29) 5⁄8 (15.88) 5⁄8 (15.88) 3⁄4 (19.05) 13⁄16 (20.64) 15⁄16 (23.81) 1 (25.40) 11⁄8 (28.58) 1 to 11⁄2 (25.40 to 38.10), excl 1⁄2 (12.70) 9⁄16 (14.29) 9⁄16 (14.29) 9⁄16 (14.29) 11⁄16 (17.46) 11⁄16 (17.46) 11⁄16 (17.46) 3⁄4 (19.05) 1 (25.40) Over 11⁄2 to 4 (38.10 to 101.6), 3⁄16 (4.76) 5⁄16 (7.94) 3⁄8 (9.54) 7⁄16 (11.11) 1⁄2 (12.70) 9⁄16 (14.29) 5⁄8 (15.88) 3⁄4 (19.05) 7⁄8 (22.22) excl Over 4 to 6 (101.6 to 152.4), 1⁄4 (6.35) ⁄ (9.54) 38 ⁄ (12.70) 12 ⁄ 9 16 (14.29) 58 ⁄ (15.88) ⁄ (19.05) 34 ⁄ (22.22) 78 1 (25.40) 11⁄8 (28.58) excl 8
  • 9.
    B 265 –09a TABLE 13 Permissible Variations in Thickness for Titanium Plate Width, in. (mm)A Over 84 (2134) to 120 Over 120 (3048) to 144 Specified Thickness, in. (mm) To 84 (2134), incl Over 144 (3658) (3048), incl (3658), incl Tolerances Over Specified Thickness, in. (mm)B 0.1875 (4.76) to 0.375 (9.52), excl 0.045 (1.14) 0.050 (1.27) ... ... 0.375 (9.52) to 0.750 (19.05), excl 0.055 (1.40) 0.060 (1.52) 0.075 (1.90) 0.090 (2.29) 0.750 (19.05) to 1.000 (25.40), excl 0.060 (1.52) 0.065 (1.65) 0.085 (2.16) 0.100 (2.54) 1.000 (25.40) to 2.000 (50.80), excl 0.070 (1.78) 0.075 (1.90) 0.095 (2.41) 0.115 (2.92) 2.000 (50.80) to 3.000 (76.20), excl 0.125 (3.18) 0.150 (3.81) 0.175 (4.44) 0.200 (5.08) 3.000 (76.20) to 4.000 (101.6), excl 0.175 (4.44) 0.210 (5.33) 0.245 (6.22) 0.280 (7.11) 4.000 (101.6) to 6.000 (152.4), excl 0.250 (6.35) 0.300 (7.62) 0.350 (8.89) 0.400 (10.16) 6.000 (152.4) to 8.000 (203.2), excl 0.350 (8.89) 0.420 (10.67) 0.490 (12.45) 0.560 (14.22) 8.000 (203.2) to 10.000 (254.0), incl 0.450 (11.43) 0.540 (13.72) 0.630 (16.00) ... A Thickness is measured along the longitudinal edges of the plate at least 3⁄8 in. (9.52 mm), but not more than 3 in. (76.20 mm), from the edge. B For circles, the over thickness tolerances in this table apply to the diameter of the circle corresponding to the width ranges shown. For plates of irregular shape, the over thickness tolerances apply to the greatest width corresponding to the width ranges shown. For plates up to 10 in. (254.0 mm) incl. in thickness, the tolerance under the specified thickness is 0.010 in. (0.25 mm). SUPPLEMENTARY REQUIREMENTS These requirements shall apply only when specified in the purchase order, in which event the specified tests shall be made by the manufacturer before shipment of the plates. S1. Surface Requirement Bend Tests Applicable Grades Minimum Elongation Bend Radius S1.1 The purpose of this test is to measure the cleanliness or 1,11,13, 17, 27 24 % 1.6 3 T ductility, or both, of the metal surface. Specimens shall be 2, 2H, 7, 7H, 14, 16, 16H, 26, 26H, 30, 33, 37 20 % 2.0 3 T taken from sheet or plate material produced from the same 3, 12, 15, 31, 33 18 % 2.3 3 T ingot or bloom materials, processed the same way to the same 4, 9, 18, 19, 20, 28 15 % 2.8 3 T 5, 6, 21, 23, 24, 25, 26, 29, 32, 36, 38 10 % 4.5 3 T nominal thickness, width and length, produced in one produc- 35 5% 10 3 T tion run or campaign, finished in the same way, and otherwise S1.5 Criteria for acceptance will be the absence of any representative of the material supplied. cracking or surface separations not originating at the edge of S1.2 Four guided- or free-bend tests of sheet or plate specimen viewed with the unaided eye. material limited to the grades listed in S1.4. Two bends shall be S1.6 The results of the test shall be reported as required by made in the L direction and two in the T direction. Each pair of paragraph 10 of Test Method E 290. these bends will place opposite surfaces of the sheet or plate material in tension. S2. Alternate Yield Strength Maximum S1.3 The bends are to be made in accordance with Test S2.1 Maximum yield strength (0.2 % Offset) of Grade 1, 11, Method E 290, using Method 1, Guided Bend Test described in 17, or 27 shall be limited to 40 ksi (275 MPa). paragraph 3.6, bent through 180°, and allowed to spring back S3. Special Flatness Requirements naturally. The bend specimen may be of less than full material S3.1 These requirements apply only for material to be used thickness; however, the outer surface of the specimen must for explosive cladding. include the original material surface with no material removal S3.2 These requirements apply only to Grades 1, 11, 17, and or surface conditioning other than at the rounded corners, and 27 and only in thickness ranging from 0.078 to 0.78 in. (2.0 to must otherwise be representative of the product as supplied. 20 mm), inclusive. The width of the bend test specimen shall be at least 5 times the S3.3 The overall out-of-flatness shall be no greater than thickness. 50 % of that permitted in Table 12. S1.4 The bend radius will be such to provide minimum S3.4 Localized out-of-flatness shall be no greater than 0.12 elongation of the outer fibers of the bent specimen at 180° bend in. (3.0 mm) deviation from a 39 in. (1000 mm) long straight as follows: edge when placed at any location on the plate surface. When the straight edge is placed on a single high point, the maximum deviation from the plate at each end shall be no greater than 0.12 in. (3.0 mm). 9
  • 10.
    B 265 –09a SUMMARY OF CHANGES Committee B10 has identified the location of selected changes to this standard since the last issue (B 265 - 09) that may impact the use of this standard. (Approved May 1, 2009.) (1) Chemistry Table 2 was reformatted for improved utility. (2) Revised Grade 25 hydrogen from 0.0125 to 0.015 and Al “Other Elements” replaced “Residual Elements” and notes from 5.6-6.5 to 5.5-6.75. were editorially revised and reorganized. (3) Changed Grade 29 hydrogen from 0.015 to 0.0125. Committee B10 has identified the location of selected changes to this standard since the last issue (B 265 - 08b) that may impact the use of this standard. (Approved April 15, 2009.) (1) Specified thickness was corrected from 0.02 to 0.012 in Table 9. Committee B10 has identified the location of selected changes to this standard since the last issue (B 265 - 08a) that may impact the use of this standard. (Approved November 1, 2008.) (1) Replace Test Method E 190 with Test Method E 290 in 2.1, (4) Clarify test details in 6.3, S1.3, S1.4, and S1.5. 6.3, S1.3, and S1.6. (5) Expand to cover all ASTM Grades and reformat grade list (2) Change diameter to radius in 6.3 and Table 1. in S1.4. (3) Require duplicate L and T bends in S1.3. ASTM International takes no position respecting the validity of any patent rights asserted in connection with any item mentioned in this standard. Users of this standard are expressly advised that determination of the validity of any such patent rights, and the risk of infringement of such rights, are entirely their own responsibility. This standard is subject to revision at any time by the responsible technical committee and must be reviewed every five years and if not revised, either reapproved or withdrawn. Your comments are invited either for revision of this standard or for additional standards and should be addressed to ASTM International Headquarters. Your comments will receive careful consideration at a meeting of the responsible technical committee, which you may attend. If you feel that your comments have not received a fair hearing you should make your views known to the ASTM Committee on Standards, at the address shown below. This standard is copyrighted by ASTM International, 100 Barr Harbor Drive, PO Box C700, West Conshohocken, PA 19428-2959, United States. Individual reprints (single or multiple copies) of this standard may be obtained by contacting ASTM at the above address or at 610-832-9585 (phone), 610-832-9555 (fax), or service@astm.org (e-mail); or through the ASTM website (www.astm.org). 10