
Recommended
More Related Content
Similar to Aruino Lesson 1 - Led Blink
Similar to Aruino Lesson 1 - Led Blink (20)
Recently uploaded
Recently uploaded (17)
Aruino Lesson 1 - Led Blink
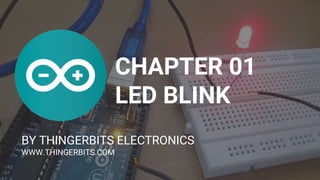
- 1. CHAPTER 01 LED BLINK BY THINGERBITS ELECTRONICS WWW.THINGERBITS.COM
- 2. Control LED by Manual Button Project 1.1 First, try using the push button to make the LED blink manually. Component list ➔ Arduino UNO x1 ➔ Breadboard x1 ➔ USB cable x1 ➔ LED x1 ➔ Jumper M/M x2 ➔ Resistor 220Ω x1 ➔ Push button x1
- 4. Power supply
- 5. Voltage (V) The unit of voltage(U) is volt(V). ● 1kV=1000V ● 1V=1000mV ● 1mV=1000μV
- 6. Current (I) The unit of current(I) is ampere(A). ● 1A=1000mA ● 1mA=1000μA.
- 7. Resistor The unit of resistance(R) is ohm(Ω). ● 1mΩ=1000kΩ ● 1kΩ=1000Ω.
- 10. Breadboard Some small holes are connected inside breadboard. The following figure shows the inner links among those holes.
- 11. Push button Push button has 4 pins. Two pins on the left is connected, andthe right is similar as the left, which is shown in the below:
- 12. LED LED is a kind of diode. LED will shine only if the long pin of LED is connected to the positive electrode and the short pin is connected to negative electrode. This is also the features of the common diode. Diode works only if the voltage of its positive electrode is higher than its negative electrode.
- 13. Circuit
- 14. Control LED by Arduino Project 1.2 Components are basically the same with those in last section Component list ➔ Arduino UNO x1 ➔ Breadboard x1 ➔ USB cable x1 ➔ LED x1 ➔ Jumper M/M x2 ➔ Resistor 220Ω x1 ➔ Push button x1
- 16. Analog signal & Digital signal
- 17. Low level & high level In circuit, the form of binary (0 and 1) is present as low level and high level.
- 18. Code Knowledge
- 19. Comments
- 20. Data type 1) When programming, we often use digital, characters and other data. C language has several basic data types as follows: a) int: A number that does not have a fractional part, an integer, such as 0, 12, -1; b) float: A number that has a fractional part, such as 0.1, -1.2; c) char: It means character, such as 'a', '@', '0'; 2) For more date types, please visit the website: https://www.arduino.cc-Learning-Reference-Data Types.
- 21. Constant Constant is a kind of data that can not be changed, such as int type 0, 1, float type 0.1, -0.1, char type 'a', 'B'.
- 22. Variables A variable is a kind of data that can be changed. It consists of a name, a value, and a type. Variables need to be defined before use, such as:
- 23. Function Function is a collection of statements with a sequence of order, which perform a defined task.
- 24. Circuit
- 25. Sketch
- 26. Summary Chapter 1 - LED Blink ❖ Project 1.1 - Control LED by Manual Button. ❖ Circuit Knowledge ➢ Power supply ➢ Voltage ➢ Current (I) ➢ Resistor ❖ Component knowledge ➢ Jumper ➢ Breadboard ➢ Push button ➢ LED ❖ Circuit ❖ Project 1.2 - Control LED by Arduino ❖ Circuit knowledge ➢ Analog signal & Digital signal ➢ Low level & high level ❖ Code knowledge ➢ Comments ➢ Data type ➢ Constant ➢ Variable ➢ Function ❖ Circuit ❖ Sketch
- 27. What’s Next? Chapter 2 - Two LEDs Blink ❖ Project 2.1 - Two LEDs Blink ❖ Circuit Knowledge ➢ Parameters of function ➢ Boolean data type ➢ Logical operator ➢ Relation operator ➢ Conditional statement ❖ Circuit ❖ Sketch