Need a better way to apply your labels? Primera’s AP360 Label Applicator applies labels fast and accurately to bottles and other cylindrical containers. This user manual takes you through the usage of the AP360/62 Label Applicators. To know more, visit us: https://www.primera.com/equipment/label-applicators.html
Dukane proudly offers a full line of data-video projectors, document cameras, visual presenters, interactive products, screens, voice amplification systems, speaker systems, technology carts, security systems, accessories and more.
Dukane is an American company serving the education, corporate, government and house of worship markets for over 85 years.
For more information contact:
Delia Valdez
Dukane Customer Service Representative
Phone: 800-676-2485
Fax: (630) 584-5156
Email; avsales@dukane.com
Website: www.Dukane.com/AV
Dukane AV
2900 Dukane Drive
St. Charles, IL 60174
Info on Dukane’s Classroom/Audience Response system can be found at :
Convey Website: www.conveyclassrooms.com
This document contains important notices and safety instructions for an equipment manual. It states that the operator must read the manual to understand how to properly operate and maintain the equipment. It provides guidelines for how to dispose of the product and batteries in accordance with environmental regulations. It also lists safety hazards to avoid such as electric shock and warns that improper use could damage the equipment or cause injury.
The document contains warning and caution labels that identify safety risks and proper use of the equipment. It instructs technicians on safe installation practices.
This 3 sentence summary provides the essential information about the document:
The document is a concise user's manual for LCD Data Video Projector models 8928A/8930A that provides instructions on connecting, using, and maintaining the projector. It includes safety warnings and instructions, information on package contents, and guides for setup, projection, replacement of lamps and filters, and specifications. The manual is intended to help users safely use and maintain the projector.
A concise user guide for the 8928a/8030a Data video projectors from Dukane
For more than fifty years, Dukane’s Audio Visual Products Division has provided schools and businesses around the world with technology solutions that helped increase learning. With a network of trained professional dealers available to provide personal and localized sales support, Dukane is committed to meeting each customer’s particular needs.
For more information contact:
Delia Valdez
Dukane Customer Service Representative
Phone: 888-245-1966
Fax: (630) 584-5156
Emai; avsales@dukane.com
Website: www.Dukane.com/AV
For information on Dukane’s Innovative Convey Response system, go to
www.conveyclassrooms.com
Dukane AV
2900 Dukane Drive
St. Charles, IL 60174
Concise User Guide for Dukane Ultra Short Throw Projectors
For more than fifty years, Dukane’s Audio Visual Products Division has provided schools and businesses around the world with technology solutions that helped increase learning. With a network of trained professional dealers available to provide personal and localized sales support, Dukane is committed to meeting each customer’s particular needs.
For more information contact:
Delia Valdez
Dukane Customer Service Representative
Phone: 888-245-1966
Fax: (630) 584-5156
Emai; avsales@dukane.com
Website: www.Dukane.com/AV
For information on Dukane’s Innovative Convey Response system, go to
www.conveyclassrooms.com
Dukane AV
2900 Dukane Drive
St. Charles, IL 60174
Schwinn 270 Recument Exercise bike ManualRita Swanson
The assembly instructions provide step-by-step directions to assemble an exercise bike. It involves attaching the stabilizers, seat frame, seat pads, console mast, pedals, and other components to the bike frame. Special attention should be paid to connecting cables correctly and not overtightening fasteners to avoid damage. Once assembled, the bike should be inspected to ensure all hardware is securely fastened before use.
Schwinn 270 Recument Exercise bike ManualRita Swanson
The assembly manual provides instructions to assemble an exercise bike. It involves 17 steps to attach all parts including the frame, seat, pedals, console, and stabilizers using various screws, bolts and other hardware. Safety warnings are provided throughout advising to use proper safety precautions during assembly. Assembly may require two people for some steps involving heavy or awkward parts.
Royal Sovereign RSC-1402HW Heat Assist Wide Format Laminator Machine - PrintF...Print Finish
Print Finish offers Royal Sovereign RSC-1402HW Heat Assist Wide Format Laminator Machine at best price. Machine has 55″ wide format laminating width. It has a laminating speed of up to 16.4 feet per minute. It has a heat assist top roller for improved application. It has high quality silicone rubber rollers. For more information about Royal Sovereign RSC-1402HW Heat Assist Wide Format Laminator Machine, then visits @ https://printfinish.com/shop/roll_laminators/royal-sovereign-rsc-1402hw/.
Mercury mer cruiser blackhawk stern drive unit 1996 service repair manualhhjsekmdmm
This document is a service manual for the Blackhawk Stern Drive Unit. It provides information on using the manual, directional references, propeller rotation, a 10-hour break-in period for new or replacement gears, serial number location, special information on the Blackhawk compared to the Bravo, and converting a Bravo transom to the high-performance transom without electrical trim components. Warnings are provided about trimming beyond the point of gimbal ring support.
Replacing antenna integrated radio units air32Roberto Rojas
This document provides instructions for replacing an Antenna Integrated Radio (AIR) 32 unit and fan unit. It describes unpacking replacement parts, handling the AIR unit safely, preparing the unit for removal by disconnecting cables and power, removing the unit from a pole or wall installation, and installing the replacement unit. Safety warnings and prerequisite documents, tools, and conditions are also outlined. The procedures aim to minimize potential traffic disturbances during the replacement work.
Daewoo doosan solar 015 plus excavator service repair manualufjjjsekkmdm
The document provides safety information and guidelines for operating a Daewoo excavator. It discusses general safety essentials, location of safety labels, unauthorized modifications, work site precautions, safe operation, equipment safety, maintenance safety, and shipping/transportation safety. Specific topics covered include avoiding power lines, using spotters for visibility issues, not relying on inadequate supports, being aware of overhead hazards, using caution on slopes, and only operating from the operator's station while seated.
Daewoo doosan solar 018 vt excavator service repair manualufjjskekmmd
The document provides safety information and guidelines for operating a Daewoo excavator. It discusses general safety essentials, location of safety labels, unauthorized modifications, work site precautions, safe operation, equipment safety, maintenance safety, and shipping/transportation safety. Specific topics covered include avoiding power lines, using spotters for visibility issues, not relying on inadequate supports, being aware of overhead hazards, using caution on slopes, and only operating from the operator's station while seated.
Daewoo doosan solar 015 plus excavator service repair manualfjjsekfksemmer
1) The shop manual provides safety, specification, maintenance, and repair information for Daewoo Solar 015 PLUS and Solar 018-VT track excavators.
2) Operators should be aware of all safety hazards including power lines, underground utilities, height obstacles, and loose ground when operating excavation equipment.
3) Unauthorized modifications to excavators can create safety hazards and should be avoided. Operators and maintenance personnel should follow all safety guidelines.
Daewoo doosan solar 018 vt excavator service repair manualfujsjezaqwfkskemm
1) The shop manual provides safety, specification, maintenance, and repair information for Daewoo Solar 015 PLUS and Solar 018-VT track excavators.
2) Operators must follow all safety precautions when operating or working on the excavator to prevent serious injury or death from hazards such as contact with overhead power lines, falling objects, tipping, and more.
3) Unauthorized modifications to the excavator could create safety hazards and should not be made without approval from the manufacturer.
Daewoo doosan solar 015 plus excavator service repair manualufjjskekfmmse
The document provides safety information and guidelines for operating a Daewoo excavator. It discusses general safety essentials, location of safety labels, unauthorized modifications, work site precautions, safe operation, equipment safety, maintenance safety, and shipping/transportation safety. Specific topics covered include avoiding power lines, using spotters for visibility issues, not relying on inadequate supports, being aware of overhead hazards, using caution on slopes, and only operating from the operator's station while seated.
Daewoo doosan solar 015 plus excavator service repair manualfjjsekwsxkdmmem
1) The shop manual provides safety, specification, maintenance, and repair information for Daewoo Solar 015 PLUS and Solar 018-VT track excavators.
2) Operators must follow all safety precautions when operating or working on the excavator to prevent serious injury or death from hazards such as contact with overhead power lines, falling objects, tipping, and more.
3) Unauthorized modifications to the excavator could create safety hazards and should not be made without approval from the manufacturer.
Daewoo doosan solar 018 vt excavator service repair manualfusjekfksmem
1) The shop manual provides safety, specification, maintenance, and repair information for Daewoo Solar 015 PLUS and Solar 018-VT track excavators.
2) Operators must follow all safety precautions when operating or working on the excavator to prevent serious injury or death from hazards such as contact with overhead power lines, falling objects, tipping, and more.
3) Unauthorized modifications to the excavator could create safety hazards and should not be made without approval from the manufacturer.
The user's manual provides instructions for safely setting up and using the projector. It warns that all manuals should be read before use and cautions the user to follow all instructions and heed all warnings. The manual describes connecting the projector to devices via various ports, connecting the power supply, and turning the projector on and off. It also covers adjusting the projector and replacing consumables.
The user's manual provides instructions for safely using the projector. It warns that all manuals should be read before use and cautions the user to follow all instructions and heed all warnings. The manual describes the contents of the package, how to set up and arrange the projector, and how to connect devices and the power supply. It also provides instructions for turning the projector on and off and replacing parts like the lamp and air filter.
The LD3SBF case sealer operates by manually adjusting the side belt drives and raising the head assembly to accommodate boxes of various sizes. The side belt drives are adjusted outward by rotating a hand wheel to grip the box. The head assembly is raised by loosening a lock knob, lifting it clear of the box, then lowering it just above the flaps before sealing. Proper manual adjustment is required for each new box size.
Daewoo doosan solar 015 plus excavator service repair manualufjsjefjkkemd
1) The document provides safety information and guidelines for operating a Daewoo excavator, including general safety essentials, work-site precautions, operation, equipment, maintenance, and shipping/transportation.
2) It warns of hazards such as contact with power lines, underground utilities, overhead obstacles, and loose ground, and provides minimum safe distances for working near power lines.
3) The document emphasizes taking responsibility for safety and following all safety procedures and recommendations. Failure to do so could result in serious injury or death.
operating instructions for sony a6300.pdfPulkit878643
1. The document provides instructions for operating an interchangeable lens digital camera, including identifying camera parts, inserting batteries and memory cards, attaching lenses, and basic shooting and playback functions.
2. It explains how to access an online manual for more in-depth instructions on camera functions and details various buttons, dials, and ports on the camera body and lenses.
3. Regulatory information and safety instructions are provided at the end regarding the use of batteries, electrical equipment, and disposal of waste.
Daewoo doosan solar 015 plus excavator service repair manualfusjefkskefmsme
The document provides safety information for operating a Daewoo excavator. It discusses general safety essentials, work-site precautions, safe operation, equipment safety, maintenance safety, and shipping/transportation safety. Specific safety hazards addressed include avoiding contact with power lines, being aware of overhead and underground utilities, using caution on slopes, and ensuring proper ventilation when starting the engine. The document emphasizes only allowing trained operators and maintaining all safety equipment and labels.
Daewoo doosan solar 015 plus excavator service repair manualfjskemdzaqmme
1) The document provides safety information and guidelines for operating a Daewoo excavator, including general safety essentials, work-site precautions, operation, equipment, maintenance, and shipping/transportation.
2) It warns that unauthorized modifications could create safety hazards and that the excavator is designed for excavating and loading only, not lifting.
3) Guidelines are provided for avoiding power lines, contacting authorities before digging, being aware of overhead height obstacles, and using caution on loose ground.
Building Production Ready Search Pipelines with Spark and MilvusZilliz
Spark is the widely used ETL tool for processing, indexing and ingesting data to serving stack for search. Milvus is the production-ready open-source vector database. In this talk we will show how to use Spark to process unstructured data to extract vector representations, and push the vectors to Milvus vector database for search serving.
Main news related to the CCS TSI 2023 (2023/1695)Jakub Marek
An English 🇬🇧 translation of a presentation to the speech I gave about the main changes brought by CCS TSI 2023 at the biggest Czech conference on Communications and signalling systems on Railways, which was held in Clarion Hotel Olomouc from 7th to 9th November 2023 (konferenceszt.cz). Attended by around 500 participants and 200 on-line followers.
The original Czech 🇨🇿 version of the presentation can be found here: https://www.slideshare.net/slideshow/hlavni-novinky-souvisejici-s-ccs-tsi-2023-2023-1695/269688092 .
The videorecording (in Czech) from the presentation is available here: https://youtu.be/WzjJWm4IyPk?si=SImb06tuXGb30BEH .
Royal Sovereign RSC-1402HW Heat Assist Wide Format Laminator Machine - PrintF...Print Finish
Print Finish offers Royal Sovereign RSC-1402HW Heat Assist Wide Format Laminator Machine at best price. Machine has 55″ wide format laminating width. It has a laminating speed of up to 16.4 feet per minute. It has a heat assist top roller for improved application. It has high quality silicone rubber rollers. For more information about Royal Sovereign RSC-1402HW Heat Assist Wide Format Laminator Machine, then visits @ https://printfinish.com/shop/roll_laminators/royal-sovereign-rsc-1402hw/.
Mercury mer cruiser blackhawk stern drive unit 1996 service repair manualhhjsekmdmm
This document is a service manual for the Blackhawk Stern Drive Unit. It provides information on using the manual, directional references, propeller rotation, a 10-hour break-in period for new or replacement gears, serial number location, special information on the Blackhawk compared to the Bravo, and converting a Bravo transom to the high-performance transom without electrical trim components. Warnings are provided about trimming beyond the point of gimbal ring support.
Replacing antenna integrated radio units air32Roberto Rojas
This document provides instructions for replacing an Antenna Integrated Radio (AIR) 32 unit and fan unit. It describes unpacking replacement parts, handling the AIR unit safely, preparing the unit for removal by disconnecting cables and power, removing the unit from a pole or wall installation, and installing the replacement unit. Safety warnings and prerequisite documents, tools, and conditions are also outlined. The procedures aim to minimize potential traffic disturbances during the replacement work.
Daewoo doosan solar 015 plus excavator service repair manualufjjjsekkmdm
The document provides safety information and guidelines for operating a Daewoo excavator. It discusses general safety essentials, location of safety labels, unauthorized modifications, work site precautions, safe operation, equipment safety, maintenance safety, and shipping/transportation safety. Specific topics covered include avoiding power lines, using spotters for visibility issues, not relying on inadequate supports, being aware of overhead hazards, using caution on slopes, and only operating from the operator's station while seated.
Daewoo doosan solar 018 vt excavator service repair manualufjjskekmmd
The document provides safety information and guidelines for operating a Daewoo excavator. It discusses general safety essentials, location of safety labels, unauthorized modifications, work site precautions, safe operation, equipment safety, maintenance safety, and shipping/transportation safety. Specific topics covered include avoiding power lines, using spotters for visibility issues, not relying on inadequate supports, being aware of overhead hazards, using caution on slopes, and only operating from the operator's station while seated.
Daewoo doosan solar 015 plus excavator service repair manualfjjsekfksemmer
1) The shop manual provides safety, specification, maintenance, and repair information for Daewoo Solar 015 PLUS and Solar 018-VT track excavators.
2) Operators should be aware of all safety hazards including power lines, underground utilities, height obstacles, and loose ground when operating excavation equipment.
3) Unauthorized modifications to excavators can create safety hazards and should be avoided. Operators and maintenance personnel should follow all safety guidelines.
Daewoo doosan solar 018 vt excavator service repair manualfujsjezaqwfkskemm
1) The shop manual provides safety, specification, maintenance, and repair information for Daewoo Solar 015 PLUS and Solar 018-VT track excavators.
2) Operators must follow all safety precautions when operating or working on the excavator to prevent serious injury or death from hazards such as contact with overhead power lines, falling objects, tipping, and more.
3) Unauthorized modifications to the excavator could create safety hazards and should not be made without approval from the manufacturer.
Daewoo doosan solar 015 plus excavator service repair manualufjjskekfmmse
The document provides safety information and guidelines for operating a Daewoo excavator. It discusses general safety essentials, location of safety labels, unauthorized modifications, work site precautions, safe operation, equipment safety, maintenance safety, and shipping/transportation safety. Specific topics covered include avoiding power lines, using spotters for visibility issues, not relying on inadequate supports, being aware of overhead hazards, using caution on slopes, and only operating from the operator's station while seated.
Daewoo doosan solar 015 plus excavator service repair manualfjjsekwsxkdmmem
1) The shop manual provides safety, specification, maintenance, and repair information for Daewoo Solar 015 PLUS and Solar 018-VT track excavators.
2) Operators must follow all safety precautions when operating or working on the excavator to prevent serious injury or death from hazards such as contact with overhead power lines, falling objects, tipping, and more.
3) Unauthorized modifications to the excavator could create safety hazards and should not be made without approval from the manufacturer.
Daewoo doosan solar 018 vt excavator service repair manualfusjekfksmem
1) The shop manual provides safety, specification, maintenance, and repair information for Daewoo Solar 015 PLUS and Solar 018-VT track excavators.
2) Operators must follow all safety precautions when operating or working on the excavator to prevent serious injury or death from hazards such as contact with overhead power lines, falling objects, tipping, and more.
3) Unauthorized modifications to the excavator could create safety hazards and should not be made without approval from the manufacturer.
The user's manual provides instructions for safely setting up and using the projector. It warns that all manuals should be read before use and cautions the user to follow all instructions and heed all warnings. The manual describes connecting the projector to devices via various ports, connecting the power supply, and turning the projector on and off. It also covers adjusting the projector and replacing consumables.
The user's manual provides instructions for safely using the projector. It warns that all manuals should be read before use and cautions the user to follow all instructions and heed all warnings. The manual describes the contents of the package, how to set up and arrange the projector, and how to connect devices and the power supply. It also provides instructions for turning the projector on and off and replacing parts like the lamp and air filter.
The LD3SBF case sealer operates by manually adjusting the side belt drives and raising the head assembly to accommodate boxes of various sizes. The side belt drives are adjusted outward by rotating a hand wheel to grip the box. The head assembly is raised by loosening a lock knob, lifting it clear of the box, then lowering it just above the flaps before sealing. Proper manual adjustment is required for each new box size.
Daewoo doosan solar 015 plus excavator service repair manualufjsjefjkkemd
1) The document provides safety information and guidelines for operating a Daewoo excavator, including general safety essentials, work-site precautions, operation, equipment, maintenance, and shipping/transportation.
2) It warns of hazards such as contact with power lines, underground utilities, overhead obstacles, and loose ground, and provides minimum safe distances for working near power lines.
3) The document emphasizes taking responsibility for safety and following all safety procedures and recommendations. Failure to do so could result in serious injury or death.
operating instructions for sony a6300.pdfPulkit878643
1. The document provides instructions for operating an interchangeable lens digital camera, including identifying camera parts, inserting batteries and memory cards, attaching lenses, and basic shooting and playback functions.
2. It explains how to access an online manual for more in-depth instructions on camera functions and details various buttons, dials, and ports on the camera body and lenses.
3. Regulatory information and safety instructions are provided at the end regarding the use of batteries, electrical equipment, and disposal of waste.
Daewoo doosan solar 015 plus excavator service repair manualfusjefkskefmsme
The document provides safety information for operating a Daewoo excavator. It discusses general safety essentials, work-site precautions, safe operation, equipment safety, maintenance safety, and shipping/transportation safety. Specific safety hazards addressed include avoiding contact with power lines, being aware of overhead and underground utilities, using caution on slopes, and ensuring proper ventilation when starting the engine. The document emphasizes only allowing trained operators and maintaining all safety equipment and labels.
Daewoo doosan solar 015 plus excavator service repair manualfjskemdzaqmme
1) The document provides safety information and guidelines for operating a Daewoo excavator, including general safety essentials, work-site precautions, operation, equipment, maintenance, and shipping/transportation.
2) It warns that unauthorized modifications could create safety hazards and that the excavator is designed for excavating and loading only, not lifting.
3) Guidelines are provided for avoiding power lines, contacting authorities before digging, being aware of overhead height obstacles, and using caution on loose ground.
Similar to AP360/62 Label Applicators by Primera (18)
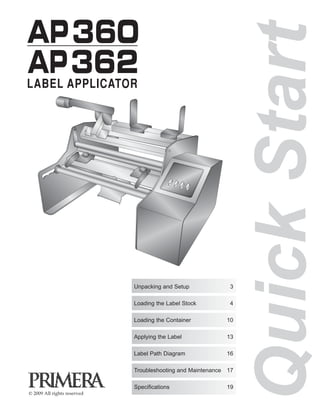
Building Production Ready Search Pipelines with Spark and MilvusZilliz
Spark is the widely used ETL tool for processing, indexing and ingesting data to serving stack for search. Milvus is the production-ready open-source vector database. In this talk we will show how to use Spark to process unstructured data to extract vector representations, and push the vectors to Milvus vector database for search serving.
Main news related to the CCS TSI 2023 (2023/1695)Jakub Marek
An English 🇬🇧 translation of a presentation to the speech I gave about the main changes brought by CCS TSI 2023 at the biggest Czech conference on Communications and signalling systems on Railways, which was held in Clarion Hotel Olomouc from 7th to 9th November 2023 (konferenceszt.cz). Attended by around 500 participants and 200 on-line followers.
The original Czech 🇨🇿 version of the presentation can be found here: https://www.slideshare.net/slideshow/hlavni-novinky-souvisejici-s-ccs-tsi-2023-2023-1695/269688092 .
The videorecording (in Czech) from the presentation is available here: https://youtu.be/WzjJWm4IyPk?si=SImb06tuXGb30BEH .
Letter and Document Automation for Bonterra Impact Management (fka Social Sol...Jeffrey Haguewood
Sidekick Solutions uses Bonterra Impact Management (fka Social Solutions Apricot) and automation solutions to integrate data for business workflows.
We believe integration and automation are essential to user experience and the promise of efficient work through technology. Automation is the critical ingredient to realizing that full vision. We develop integration products and services for Bonterra Case Management software to support the deployment of automations for a variety of use cases.
This video focuses on automated letter generation for Bonterra Impact Management using Google Workspace or Microsoft 365.
Interested in deploying letter generation automations for Bonterra Impact Management? Contact us at sales@sidekicksolutionsllc.com to discuss next steps.
GraphRAG for Life Science to increase LLM accuracyTomaz Bratanic
GraphRAG for life science domain, where you retriever information from biomedical knowledge graphs using LLMs to increase the accuracy and performance of generated answers
Driving Business Innovation: Latest Generative AI Advancements & Success StorySafe Software
Are you ready to revolutionize how you handle data? Join us for a webinar where we’ll bring you up to speed with the latest advancements in Generative AI technology and discover how leveraging FME with tools from giants like Google Gemini, Amazon, and Microsoft OpenAI can supercharge your workflow efficiency.
During the hour, we’ll take you through:
Guest Speaker Segment with Hannah Barrington: Dive into the world of dynamic real estate marketing with Hannah, the Marketing Manager at Workspace Group. Hear firsthand how their team generates engaging descriptions for thousands of office units by integrating diverse data sources—from PDF floorplans to web pages—using FME transformers, like OpenAIVisionConnector and AnthropicVisionConnector. This use case will show you how GenAI can streamline content creation for marketing across the board.
Ollama Use Case: Learn how Scenario Specialist Dmitri Bagh has utilized Ollama within FME to input data, create custom models, and enhance security protocols. This segment will include demos to illustrate the full capabilities of FME in AI-driven processes.
Custom AI Models: Discover how to leverage FME to build personalized AI models using your data. Whether it’s populating a model with local data for added security or integrating public AI tools, find out how FME facilitates a versatile and secure approach to AI.
We’ll wrap up with a live Q&A session where you can engage with our experts on your specific use cases, and learn more about optimizing your data workflows with AI.
This webinar is ideal for professionals seeking to harness the power of AI within their data management systems while ensuring high levels of customization and security. Whether you're a novice or an expert, gain actionable insights and strategies to elevate your data processes. Join us to see how FME and AI can revolutionize how you work with data!
Best 20 SEO Techniques To Improve Website Visibility In SERPPixlogix Infotech
Boost your website's visibility with proven SEO techniques! Our latest blog dives into essential strategies to enhance your online presence, increase traffic, and rank higher on search engines. From keyword optimization to quality content creation, learn how to make your site stand out in the crowded digital landscape. Discover actionable tips and expert insights to elevate your SEO game.
Trusted Execution Environment for Decentralized Process MiningLucaBarbaro3
Presentation of the paper "Trusted Execution Environment for Decentralized Process Mining" given during the CAiSE 2024 Conference in Cyprus on June 7, 2024.
This presentation provides valuable insights into effective cost-saving techniques on AWS. Learn how to optimize your AWS resources by rightsizing, increasing elasticity, picking the right storage class, and choosing the best pricing model. Additionally, discover essential governance mechanisms to ensure continuous cost efficiency. Whether you are new to AWS or an experienced user, this presentation provides clear and practical tips to help you reduce your cloud costs and get the most out of your budget.
leewayhertz.com-AI in predictive maintenance Use cases technologies benefits ...alexjohnson7307
Predictive maintenance is a proactive approach that anticipates equipment failures before they happen. At the forefront of this innovative strategy is Artificial Intelligence (AI), which brings unprecedented precision and efficiency. AI in predictive maintenance is transforming industries by reducing downtime, minimizing costs, and enhancing productivity.
5th LF Energy Power Grid Model Meet-up SlidesDanBrown980551
5th Power Grid Model Meet-up
It is with great pleasure that we extend to you an invitation to the 5th Power Grid Model Meet-up, scheduled for 6th June 2024. This event will adopt a hybrid format, allowing participants to join us either through an online Mircosoft Teams session or in person at TU/e located at Den Dolech 2, Eindhoven, Netherlands. The meet-up will be hosted by Eindhoven University of Technology (TU/e), a research university specializing in engineering science & technology.
Power Grid Model
The global energy transition is placing new and unprecedented demands on Distribution System Operators (DSOs). Alongside upgrades to grid capacity, processes such as digitization, capacity optimization, and congestion management are becoming vital for delivering reliable services.
Power Grid Model is an open source project from Linux Foundation Energy and provides a calculation engine that is increasingly essential for DSOs. It offers a standards-based foundation enabling real-time power systems analysis, simulations of electrical power grids, and sophisticated what-if analysis. In addition, it enables in-depth studies and analysis of the electrical power grid’s behavior and performance. This comprehensive model incorporates essential factors such as power generation capacity, electrical losses, voltage levels, power flows, and system stability.
Power Grid Model is currently being applied in a wide variety of use cases, including grid planning, expansion, reliability, and congestion studies. It can also help in analyzing the impact of renewable energy integration, assessing the effects of disturbances or faults, and developing strategies for grid control and optimization.
What to expect
For the upcoming meetup we are organizing, we have an exciting lineup of activities planned:
-Insightful presentations covering two practical applications of the Power Grid Model.
-An update on the latest advancements in Power Grid -Model technology during the first and second quarters of 2024.
-An interactive brainstorming session to discuss and propose new feature requests.
-An opportunity to connect with fellow Power Grid Model enthusiasts and users.
Salesforce Integration for Bonterra Impact Management (fka Social Solutions A...Jeffrey Haguewood
Sidekick Solutions uses Bonterra Impact Management (fka Social Solutions Apricot) and automation solutions to integrate data for business workflows.
We believe integration and automation are essential to user experience and the promise of efficient work through technology. Automation is the critical ingredient to realizing that full vision. We develop integration products and services for Bonterra Case Management software to support the deployment of automations for a variety of use cases.
This video focuses on integration of Salesforce with Bonterra Impact Management.
Interested in deploying an integration with Salesforce for Bonterra Impact Management? Contact us at sales@sidekicksolutionsllc.com to discuss next steps.
How to Interpret Trends in the Kalyan Rajdhani Mix Chart.pdfChart Kalyan
A Mix Chart displays historical data of numbers in a graphical or tabular form. The Kalyan Rajdhani Mix Chart specifically shows the results of a sequence of numbers over different periods.
Nunit vs XUnit vs MSTest Differences Between These Unit Testing Frameworks.pdfflufftailshop
When it comes to unit testing in the .NET ecosystem, developers have a wide range of options available. Among the most popular choices are NUnit, XUnit, and MSTest. These unit testing frameworks provide essential tools and features to help ensure the quality and reliability of code. However, understanding the differences between these frameworks is crucial for selecting the most suitable one for your projects.
Dive into the realm of operating systems (OS) with Pravash Chandra Das, a seasoned Digital Forensic Analyst, as your guide. 🚀 This comprehensive presentation illuminates the core concepts, types, and evolution of OS, essential for understanding modern computing landscapes.
Beginning with the foundational definition, Das clarifies the pivotal role of OS as system software orchestrating hardware resources, software applications, and user interactions. Through succinct descriptions, he delineates the diverse types of OS, from single-user, single-task environments like early MS-DOS iterations, to multi-user, multi-tasking systems exemplified by modern Linux distributions.
Crucial components like the kernel and shell are dissected, highlighting their indispensable functions in resource management and user interface interaction. Das elucidates how the kernel acts as the central nervous system, orchestrating process scheduling, memory allocation, and device management. Meanwhile, the shell serves as the gateway for user commands, bridging the gap between human input and machine execution. 💻
The narrative then shifts to a captivating exploration of prominent desktop OSs, Windows, macOS, and Linux. Windows, with its globally ubiquitous presence and user-friendly interface, emerges as a cornerstone in personal computing history. macOS, lauded for its sleek design and seamless integration with Apple's ecosystem, stands as a beacon of stability and creativity. Linux, an open-source marvel, offers unparalleled flexibility and security, revolutionizing the computing landscape. 🖥️
Moving to the realm of mobile devices, Das unravels the dominance of Android and iOS. Android's open-source ethos fosters a vibrant ecosystem of customization and innovation, while iOS boasts a seamless user experience and robust security infrastructure. Meanwhile, discontinued platforms like Symbian and Palm OS evoke nostalgia for their pioneering roles in the smartphone revolution.
The journey concludes with a reflection on the ever-evolving landscape of OS, underscored by the emergence of real-time operating systems (RTOS) and the persistent quest for innovation and efficiency. As technology continues to shape our world, understanding the foundations and evolution of operating systems remains paramount. Join Pravash Chandra Das on this illuminating journey through the heart of computing. 🌟
2. Notices: The information in this document is subject to change without notice. NO WARRANTY OF ANY KIND IS MADE WITH REGARD
TO THIS MATERIAL, INCLUDING, BUT NOT LIMITED TO, THE IMPLIED WARRANTIES OF MERCHANTABILITY AND FITNESS FOR A
PARTICULAR PURPOSE. No liability is assumed for errors contained herein or for incidental or consequential damages in connection with the
furnishing, performance, or use of this material. This document contains proprietary information that is protected by copyright. All rights are
reserved. No part of this document may be photocopied, reproduced, or translated into another language without prior written consent.
Trademark Acknowledgments: Windows is a registered trademark of Microsoft Corporation. All other trademarks are the property of their
respective owners.
Printing History
Edition 1.4, #021214, Copyright 2009, All rights reserved.
FCC Compliance Statement: This device complies with part 15 of the FCC rules. Operation is subject to the following two conditions:
(1) this device may not cause harmful interference, and (2) this device must accept any interference received, including interference that
may cause undesired operation.
For Users in the United States: This product is intended to be supplied by a UL listed Direct Plug-In Power Supply marked "Class 2"or a UL listed ITE
Power Supply marked "LPS" with output rated 12VDC, 4.5A or higher. This equipment has been tested and found to comply with the limits for a Class
A digital device, pursuant to Part 15 of the FCC Rules. In a domestic environment this product may cause radio interference, in which case the user
may be required to take adequate measures. This equipment generates, uses, and can radiate radio frequency energy and, if not installed and used in
accordance with the instructions, may cause harmful interference to radio communications. However, there is no guarantee that interference will not
occur in a particular installation. If this equipment does cause harmful interference to radio or television reception, which can be determined by
turning the equipment off and on, the user is encouraged to try to correct the interference by one or more of the following measures:
Re-orient or relocate the receiving antenna.
Increase the separation between the equipment and receiver.
Connect the equipment into an outlet on a circuit different from that to which the receiver is connected.
Consult the dealer or an experienced radio/TV technician for help.
Use of shielded cables is required to comply with the Class A limits of Part 15 of the FCC Rules. You are cautioned that any changes or
modifications not expressly approved in this manual could void your authority to operate and/or obtain warranty service for this equipment.
For Users in Canada: This digital apparatus does not exceed the Class A limits for radio noise for digital apparatus set out on the Radio Interference
Regulations of the Canadian Department of Communications. Le present appareil numerique n'emet pas de bruits radioelectriques depassant les
limites applicables aux appareils numeriques de la class A prescrites dans le Reglement sur le brouillage radioelectrique edicte par le ministere des
Communications du Canada.
General Safety Information.
Note: Notes are used to notify of installation,operation, or maintenance information that is important but not safety related.
Caution: Caution is used to indicate the presence of a hazard, which if ignored may result in damage to the unit.
Warning: Warning means that a potential safety hazard exists and indicates procedures that must be followed exactly to avoid serious personal injury.
WARNING!
TO PREVENT FIRE OR SHOCK HAZARD, DO NOT EXPOSE THE UNIT TO RAIN OR MOISTURE. TO REDUCE THE RISK OF
ELECTRIC SHOCK, DO NOT REMOVE EXTERIOR PANELS. NO USER-SERVICEABLE PARTS INSIDE. REFER SERVICING TO
QUALIFIED SERVICE PERSONNEL. OPERATE THE UNIT WITH ONLY THE PROPER ELECTRICAL SPECIFICATIONS AS LABELED
ON THE PRINTER AND AC ADAPTER.
WARNING!
DO NOT WEAR LOOSE FITTING CLOTHING SUCH AS NECK TIES OR LOOSE LONG SLEEVES WHEN OPERATING THE AP360/362.
THE MOTOR IS VERY POWERFUL AND THE LINEr DRIVE ROLLER COULD CATCH THE CLOTHING WHILE THE LABELS ARE
BEING APPLIED.
!
!
3. Thank you for purchasing the AP360 or AP362 Label Applicator (hereafter referred to as "Label
Applicator"). Bottles, cans etc. will collectively be referred to as "containers." This manual applies
to two label applicator models. The AP362 has a Control Panel that allows you to count labels and
apply two labels to the same container. The AP360 does not have a Control Panel or two-label
capability.
The Label Applicator includes a Power Cord, 12 volt Power Adapter and the parts shown in
Figure 1-1. The Roll Bar, Roll Guides and Roll Drag Arm are located in the supply box along with
the Power Cord. You will need to assemble them as shown in Figure 1-1. Attach the Power Cord
and switch on the power as shown in Figure 1-2. Feed the Foot Switch and Foot Switch cord out
through the front of the Label Applicator. Remove the tape securing the Container Rollers.
Section 1: Unpacking and Setup
Figure 1-2.
Figure 1-1.
Roll Bar
Roll Guides
Label Sensor Flag
Label Sensor Bracket
Container Guides
Container Idler
Roller
Container Drive
Roller
Container Pressure Arm
Liner Idler Roller
Liner Drive Roller
Control Panel
(AP362 only)
Foot Switch
Peel Edge
Power Switch
Power Input 12V
Roll Bar
Roll Guides
Feed Area
(under grey bar)
AP360/362 Label Applicator 3
Power Cord
Roll Drag Arm
Power Adapter
4. 1. Remove the Roll Bar and Roll Guides from the Label Applicator. The Roll Guides and Roll
Drag Arm are removable and adjustable. They are held in place magnetically. (Figure 2-1.)
2. Remove one Roll Guide and the Roll Drag Arm from the Roll Bar.
3. Place the label stock roll on the Roll Bar with one side against the upright of the remaining
Roll Guide. Place it on the Roll Bar with the loose end of the stock feeding underneath the
roll. (Figure 2-2.)
Section 2: Loading the Label Stock
Figure 2-1.
Figure 2-2.
4 AP360/362 Label Applicator
Tip! For smaller diameter label roll
cores you may need to reverse the
Roll Guides so that the bottom of the
guides are facing out to allow the
uprights to be placed next to the roll.
5. 4. Place the Roll Drag Arm under the Roll Bar. The Roll Drag Arm may be placed on either side
of the Roll Bar but the rounded tip of the Roll Drag Arm should be located in the center of the
inside of the core. The arm is spring loaded so that there is downward pressure on the inside
of the roll. This helps prevent application alignment problems near the end of a roll.
(Figure 2-3.)
5. Place the removed Roll Guide back on the Roll Bar and slide it close to, but not touching the
label stock roll. (Figure 2-4.)
AP360/362 Label Applicator 5
Tip! Roll Guide Uprights must
not pinch the label stock roll.
(The label stock roll must have
free-play between guides.)
Figure 2-4.
Figure 2-3.
6. 6. Now position the stock to correspond with the general area where it will be applied to
the container.
7. Pull the loose end of the label stock forward and then push it into the Feed Area from the back
of the label applicator. Move the label guides to the sides for now. These will be adjusted later.
The labels will come out just underneath the Peel Edge. (Figure 2-6.)
8. Pull approximately 12 inches of label stock out beyond the Peel Edge. (Figure 2-6.)
6 AP360/362 Label Applicator
Figure 2-6.
Figure 2-5.
Tip! See Section 5 for
a Label Path diagram.
Label Guides
Peel Edge
7. 9. Take the loose label stock and feed it between the Liner Idler Roller and the Liner Drive Roller.
(Figure 2-7.) In order to feed the label stock between the rollers, the Liner Idler Roller
should be in the unclamped position. For some thicker label stock, it may be necessary to
remove the labels from the liner before performing this step. (See Figure 2-10 for a detailed
diagram of the Liner Idler Roller positions.)
Note: This procedure assumes that the first 12 inches of labels will not be applied to the
container using the Label Applicator. Of course, you may still apply these labels by hand.
10. Pull the stock all the way through until the end of the roll is laying over the top of the label
stock roll. Adjust the label stock forward or backward so that the Peel Edge is between two
labels. (Figure 2-8.)
AP360/362 Label Applicator 7
Figure 2-8.
Figure 2-7.
Tip! There must be no
labels wrapped around
the Peel Edge.
8. 11. If necessary, adjust the position of the liner on the Peel Edge left/right to align the liner with
the label stock roll. Also, adjust the Label Sensor using the Label Sensor Bracket so that the
Label Sensor Flag is roughly centered on the label stock. (Figure 2-9.)
12. Push the Liner Idler Roller into the clamped position. (Figure 2-10.)
13. The labels are now ready for application.
Note: Position the Label Applicator on the edge of a table so that the liner falls to the floor.
This will prevent excess labels from interfering with label applications.
8 AP360/362 Label Applicator
Clamped Position
Unclamped Position
Figure 2-9.
Figure 2-10.
9. AP360/362 Label Applicator 9
14. Adjust the label guides so that they are just touching the edge of the label stock. Do not pinch
the labels between the guides. If the guides are loose pull them away from the label stock and
tighten the thumbscrews. When the thumbscrews are tight, you can still move the guides.
Note: Guides can be removed and swapped to accommodate narrower labels. To accomplish this
it is only necessary to remove one of the guides. See Section 6 for instructions.
Figure 2-11.
Figure 2-12.
Thumbscrews
10. 10 AP360/362 Label Applicator
The AP360/362 can apply labels to a variety of containers including wine bottles, soda bottles,
jars, cans, etc. Depending on the container type that you are labeling, you have several different
options. You may use the Container Pressure Arm to hold the containers against the rollers, but
that may not be necessary. You may use one or both of the Container Guides. Use these steps as a
guide for applying labels. Ultimately, you will find the method that is fastest for you, which may
or may not include use of the Container Pressure Arm and/or one or both Container Guides.
1. Lift the Container Pressure Arm to a height well above the imagined height of the container.
(Figure 3-1.)
2. Position the Container Idler Roller so
that the container is at the highest
possible position that is still stable.
There are four optional positions for
the Container Idler Roller provided
by the notches in the side plates.
If the Container Idler Roller is
spaced too far from the Container
Drive Roller the container will be
positioned too low for the label to
be applied. This will cause the label
to fold, wrinkle, or eject above the
container. The smaller the diameter
of the container, the closer the rollers
need to be positioned to each other.
(Figure 3-2.)
Section 3: Loading the Container
Figure 3-1.
Figure 3-2.
Idler Roller Notches
Container Idler Roller
11. AP360/362 Label Applicator 11
3. Place the container on the Container Idler Roller and Container Drive Roller. Orient the
container with the top to the left or the right, depending on the orientation of your labels on
the label stock roll. (Figure 3-3.)
4. Adjust the Container Guides so the labels will be placed in the desired location on the
container. Since it is difficult to get the label stock in the same position each time, we
recommend that you adjust the container relative to the label stock using the Container
Guides. If you have several containers that have different labels for each it may be useful to
record the distance between the edge of the label stock and the container guides for each job
using the Position Scale. (Figure 3-4.)
5. Once the Container Guides are
in the correct position use the
Thumb Screws to secure them
in place.
Note: Guides can be removed and
swapped to accommodate narrower
containers. To accomplish this it is
only necessary to remove one of the
guides. See Section 6 for
instructions.
Figure 3-3.
Tip! Both Container Guides may be
used, but for maximum efficiency,
typically only one is used to position
the container.
Figure 3-4.
Thumb Screw
Position Scale
Tip! If the label
stock covers the
Thumb Screw,
try using the
other guide and/
or moving the
position of the
roll.
12. 12 AP360/362 Label Applicator
Important Note: For bottles with a neck such soda, beer or wine bottles only one Container Guide can be
used. Move the unused Container Guide to the far right or left side of the labeling area. For cans or
other containers that do not have a tapered neck, both Container Guides can be used, if desired.
6. With the container in place, move the Container Pressure Arm right or left until it is roughly
centered on the container. Push down on the arm until the roller on the end of the arm touches
the container. Remove the container. Push down the arm approximately 1/2 inch more.
Attempt to place the container back on the rollers. The goal is to easily be able to place the
container, yet still have sufficient downward pressure on the container. This downward
pressure is more important for smaller, lighter containers such as pill bottles. The Container
Pressure Arm is optional for larger and/or heavier bottles such as wine bottles.
(Figure 3-5.)
Figure 3-5.
13. AP360/362 Label Applicator 13
A. Apply the Label
1. Power on the Label Applicator using the Power Switch. This can be done at any point with or
without the container in place.
2. Place the container on the rollers using the instructions in Section 3.
Important Note: For label stock 6” and wider, it may be necessary to reduce the speed of the Label
Applicator. The AP360/362 includes a half-speed mode that generates more power from the motors for
wider label stock. To activate this mode, hold down the Foot Switch while switching on the unit. The
AP360/362 will revert back to the default mode when switched on without holding down the Foot Switch.
3. Press the Foot Switch to apply the label.
4. Remove the container. The rollers will continue to spin the container for fifteen minutes after
each application. If you need to make an adjustment, do so now.
5. While the rollers are still spinning, place the next container on the rollers and press the Foot Switch.
6. Continue this process until all containers are labeled.
B. Apply two labels to the same container (AP362 only)
The AP362 has the ability to apply two labels to the same container. Using the control panel you
may also adjust the distance between the two labels. Nine different distances can be saved in the
unit’s memory. These distances are represented by nine different memory locations: F1 - F9.
(F-0 represents the single label application mode.) By choosing the desired memory location/
distance you can easily switch between multiple two-label containers without having to readjust
label distances.
Follow this procedure to apply two labels to each container:
Important Note: In order for two label mode to work the two labels must be printed one after another on
the same roll of stock.
1. Press the Mode Button once to display the current memory location.
2. While in the memory mode, press the Recall/Reset Button repeatedly
to move to the desired memory location (F1 - F9). (Press Recall/
Reset repeatedly to move back to F0 for single-label mode.)
(Figure 4-1.)
3. The desired memory location (F1 - F9) will be displayed for 2 seconds,
followed by the current value set for that memory location for
another 8 seconds. During this time, press the + or - Button to adjust
the distance value to be set for this memory location. (Figure 4-2.)
Hold down the button to move more quickly through the values.
Once the value is set it will be displayed for 8 seconds and then
stored in memory. The screen will then revert to label counter mode.
The value displayed corresponds to inches. The unit accepts values
between 0.01 and 9.99 inches (0.25 mm to 253.7 mm).
For metric versions of the AP362 the value displayed corresponds
to centimeters. The unit accepts values between 00.1 cm (1mm)
and 25.4 cm.
Section 4: Applying the Label
Mode
Recall/
Reset + -
Mode
Recall/
Reset + -
Figure 4-1.
Figure 4-2.
14. 4. Press the Foot Switch to apply the labels. Both labels will be applied
without pressing the Foot Switch again.
To set a value for another memory location, repeat this procedure.
Note: The distance values are approximate. Adjusting the position of the
Container Idler Roller will affect the actual distance between the labels on the container.
C. Calculate distances for two-label mode.
If you intend to apply two labels to the same container you will typically want to center the
second label so that you have the same distance between each label on both sides. Use this
formula to calculate the proper distance setting (see Section 4B).
1. First Calculate the circumference of your container.
diameter of container x Pi = circumference
2. Now subtract the width of both front and back labels from the circumference and
divide by two.
(circumference - width of front label - width of back label) / 2
3. Subtract the distance between the labels on the liner (the distance between the labels while
they are still attached to the roll) from the value received in step 2.
Example:
If your bottle is 3 inches in diameter, your front label is 4 inches wide, your back label is
2.5 inches wide, and the distance between the labels on the liner is .12, the distance value
to enter would be 1.34 inches.
3 x = 9.42
(9.42 - 4 - 2.5)/2 = 1.46 - 0.12 = 1.34
Note: The value given by this formula is a good starting point. Some
adjustments may be needed depending on the particular container
and the Container Idler Roller position.
D. Count labels (AP362 Only)
By default the AP362 Label Applicator will begin to count labels. This
count will be displayed on the LCD. If you press any of the buttons on
the control panel the label count will momentarily disappear. It will
reappear ten seconds after the button is pressed. (Figure 4.3.)
Press and hold the Recall/Reset Button for five seconds to reset the label
counter to zero.
Note: The label counter will reset to zero if power is switched off.
14 AP360/362 Label Applicator
Mode
Recall/
Reset + -
Figure 4-3.
15. AP360/362 Label Applicator 15
E. Change the Unit of Measure between Metric and English.
The AP362 can display measurements in both centimeters and inches. Follow these steps to
switch between the two.
English (Inches):
1. Turn off the unit.
2. Press and hold both the "Mode" button and the "+" button while you switch on the unit.
3. While the unit is booting up a "-" will appear as the first digit of the firmware version
number on the display.
Metric (Centimeters):
1. Turn off the unit.
2. Press and hold both the "Mode" button and the "-" button while you switch on the unit.
3. While the unit is booting up a " " will appear as the first digit of the firmware version
number on the display.
F. Set the Mode of Container Roller Motor:
By default the container rollers continue to spin after every application. This is done to
increase application speeds. However, using this method it is not possible to apply the label
at a specific point on the container. To do this you can put the unit in Stop After Apply mode.
See the instructions below:
Run After Apply (Default):
1. Turn off the unit.
2. Press and hold the Recall button with the ‘+’ key and turn on the unit.
Stop After Apply:
1. Turn off the unit.
2. Press and hold the Recall button with the ‘-’ key and turn on the unit.
17. Troubleshooting
Labels are applied to the container crooked.
1. Check for container taper. Some containers such as wine bottles may have a slight taper
that will cause the label to be applied crooked. You may be able to apply your label
straight if you angle the container idler roller to correspond with the angel of the taper.
For example, if you normally apply labels to the bottle with both sides of the container
idler roller in the third notch from the drive roller, try putting one side in notch three and
the other side in notch four.
2. Roll Guides should also be positioned very close to the roll, but not squeezing any part of
the roll (so the roll has very little play side-to-side between the guides).
3. It may take several labels to allow the label stock to “straighten-out” or “settle-in” where
it will run for the duration of the roll. It will “settle-in” quicker if you make sure to get the
label stock loaded relatively square to the roll.
4. For larger heavier rolls make sure that the roll is positioned on top of the Roll Guides with
the magnetic portions facing in. This will minimize the chances that the heavy roll will
push the guides out of place.
5. For lighter rolls make sure the Roll Drag Arm is in place as described in the manual. If
you do not have a Roll Drag Arm please contact tech support.
Tapered bottles.
Many wine bottles have a slight taper to them. Using the normal procedures outlined in the
manual will cause the labels to be applied crooked. You may be able to apply your label
straight if you angle the container idler roller to correspond with the angel of the taper. For
example, if you normally apply labels to the bottle with both sides of the container idler roller
in the third notch from the drive roller, try putting one side in notch three and the other side
in notch four.
Motor stalling on labels 6" (15.3 cm) or wider.
For label stock 6” (15.3 cm) and wider, it may be necessary to reduce the speed of the Label
Applicator. The AP360/362 includes a half-speed mode that generates more power from
the motors for wider label stock. To activate this mode, hold down the Foot Switch while
switching on the unit. The AP362 will remain in this mode until it is deactivated. To
deactivate this mode, hold down the Foot Switch again while switching on the unit.
AP360/362 is running slow.
See Section 6.2. Make sure the foot switch is not depressed at any time during the boot up
sequence.
Small diameter containers.
Small containers such as chap stick containers which are close to the edge of the minimum
allowed diameter specification (0.6") will occasionally get pushed off the rollers by the
oncoming label. To solve this problem add pressure to the arm by hand while applying labels
on extremely small containers. This will prevent the label from pushing the container off the
rollers.
There are bubbles or wrinkles in the label.
Wrinkles or bubbles can appear on the applied label if the container is not completely round,
is not smooth or has bumps or ridges. To minimize bubbling or wrinkling with such bottles
smooth the labels by hand as the container rotates around. For this procedure you must apply
labels with out using the container pressure arm.
AP360/362 Label Applicator 17
Section 6: Troubleshooting and Maintenance
18. Maintenance
Label edges fold over or catch on the sensor as they are applied to the container.
1. Over time adhesive from the labels can build up on the sensor flag just above the
container rollers. Periodically clean the top of the sensor with a Q-tip and alcohol.
2. Make sure the sensor is positioned in the middle of the the label.
Unclamp Liner Idler Roller.
When not in use, leave the Liner Idler Roller in the unclamped position. This will minimize the
possibility that permanent indentations will be made in the Liner Drive Roller.
Lubricate bearings.
Primera recommends oiling the four bearings associated with the Liner Drive Roller and Liner
Idler Roller. Oil these four bearings for every 50,000 containers labeled. They should only be
oiled after the first 50,000 containers as they are lubricated with a special grease at the factory.
One drop of any machine oil or motor oil for each bearing should be adequate. This
maintenance is optional but will increase the life of the applicators for heavy users who use the
applicator for several hours each day.
Clean Label Gap Sensor Flag
Over time adhesive from the labels can build up on the sensor flag just above the container
rollers. Periodically clean the top of the sensor with a Q-tip and alcohol.
Swapping/Flipping the label/container guide positions to accommodate
narrower labels.
You can swap the positions of the container guides or the label guides to accommodate shorter
containers or narrower labels.
Label Guide Instructions
1. Loosen one of the thumbscrews until it is removed. Hold your hand underneath guide plate
to catch the nut as it falls.
2. Move the remaining guide to the
opposite side.
3. Place the label guide back onto the
guide plate so that the locator tab is
inside the slot.
4. Place the nut on the underside of the
guide plate so that the locator tab is
closest to the locator tab on the label
guide.
5. Insert the Thumbscrew and turn
clockwise until it is tight.
Container Guide Instructions
1. Move one of the guides to the outer
edges. Loosen one of the thumbscrews
until it is removed. Hold your hand
underneath guide plate to catch the
nut as it falls. Access to the underside
is only available on the far edge of either side.
2. Move the remaining guide to the opposite side.
3. Place the label guide back onto the guide plate so that the locator tab is inside the slot.
4. Place the nut on the underside of the guide plate so that the locator tab is closest to the
locator tab on the label guide.
5. Insert the Thumbscrew and turn clockwise until it is tight.
18 AP360/362 Label Applicator
Thumbscrew
Guide Plate
Locator Tabs
Nut
Slot
19. AP360/362 Label Applicator 19
Section 7: Specifications
Container width: 1.0" to 9.4" (25.4mm to 238.8mm)
Container diameter: 0.6" to 6.7" (15.2mm to 170.2mm)
Container shape: Cylindrical and many tapered
Supply roll diameter: Up to 8" (203mm)
Media liner width: 1.00" to 8.38" (25.4mm to 213.0mm)
Supply roll core: 2" to 3" ID (51.8mm to 76.2mm)
Electrical rating: 12 VDC, 5.0A
Power requirements: 100-240 VAC, 50/60 Hz, 60 watts
Feed speed: 4.0 in/sec. in Default Mode.
2.0 in/sec in Half-Speed mode for 6-8" wide label
See Section 4A, Step 2 for details.
Agency certifications: UL, UL-C, CE, FCC Class B
Weight: 16 lb (7.3 kg)
Dimensions: 13.4"W x 8.9"H x 12.9"D
(340mm W x 226mm H x 328mm D)
Label width: 0.75" to 8.25" (19.1mm to 209.6mm)
Label height/length: 0.75" to 24.00" (19.1mm to 609.6mm)
Liner thickness: 2 mil - 10mil (smoothness will affect feeding - a liner that is too slippery
or too thin will slip through the drive rollers)
Label + adhesive
thickness: 5 mil - 15 mil*
*Important Note: Pliability/Flexibility/Rigidity of the label is also a factor. If the label is too
flexible, no matter the thickness, it can get caught on the sensor flag. Polypropylene, Polyester
and Vinyl labels tend to be more flexible. It is HIGHLY recommended that the stock and container
be tested on the Applicator before making any label stock purchase decisions.