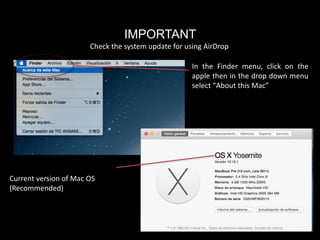
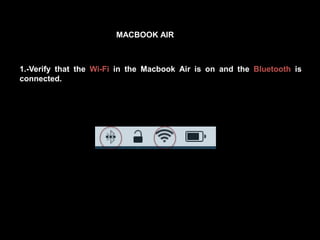
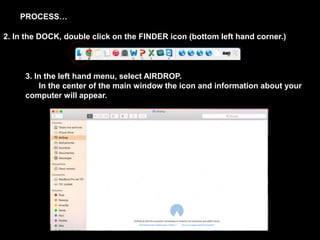
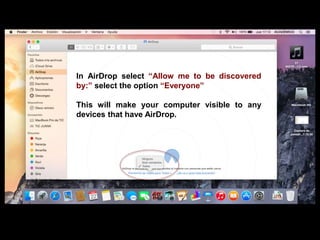
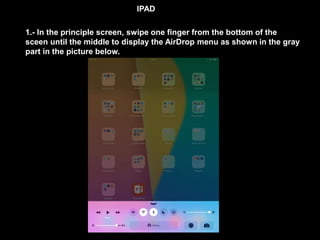
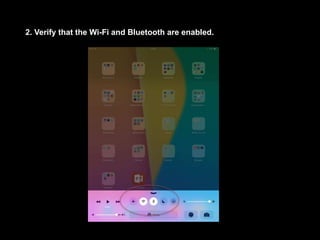
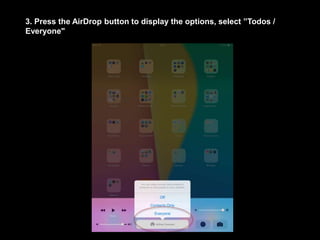
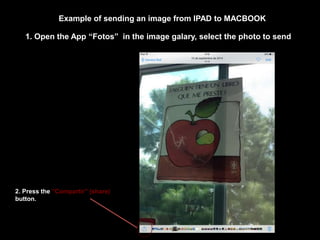
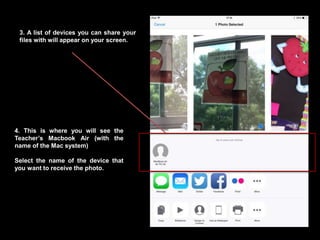
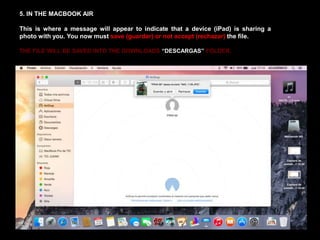
AirDrop
For sending files from IPAD – MACBOOK AIR
IMPORTANT
Check the system update for using AirDrop
In the Finder menu, click on the
apple then in the drop down menu
select "About this Mac”
Current version of Mac OS
(Recommended)
1.-Verify that the Wi-Fi in the Macbook Air is on and the Bluetooth is
connected.
MACBOOK AIR
PROCESS…
3. In the left hand menu, select AIRDROP.
In the center of the main window the icon and information about your
computer will appear.
2. In the DOCK, double click on the FINDER icon (bottom left hand corner.)
In AirDrop select “Allow me to be discovered
by:” select the option “Everyone”
This will make your computer visible to any
devices that have AirDrop.
IPAD
1.- In the principle screen, swipe one finger from the bottom of the
sceen until the middle to display the AirDrop menu as shown in the gray
part in the picture below.
2. Verify that the Wi-Fi and Bluetooth are enabled.
3. Press the AirDrop button to display the options, select ”Todos /
Everyone"
Example of sending an image from IPAD to MACBOOK
1. Open the App “Fotos” in the image galary, select the photo to send
2. Press the “Compartir” (share)
button.
3. A list of devices you can share your
files with will appear on your screen.
4. This is where you will see the
Teacher’s Macbook Air (with the
name of the Mac system)
Select the name of the device that
you want to receive the photo.
5. IN THE MACBOOK AIR
This is where a message will appear to indicate that a device (iPad) is sharing a
photo with you. You now must save (guardar) or not accept (rechazar) the file.
THE FILE WILL BE SAVED INTO THE DOWNLOADS “DESCARGAS” FOLDER.

Airdrop Manual English

  • 1.
    AirDrop For sending filesfrom IPAD – MACBOOK AIR
  • 2.
    IMPORTANT Check the systemupdate for using AirDrop In the Finder menu, click on the apple then in the drop down menu select "About this Mac” Current version of Mac OS (Recommended)
  • 3.
    1.-Verify that theWi-Fi in the Macbook Air is on and the Bluetooth is connected. MACBOOK AIR
  • 4.
    PROCESS… 3. In theleft hand menu, select AIRDROP. In the center of the main window the icon and information about your computer will appear. 2. In the DOCK, double click on the FINDER icon (bottom left hand corner.)
  • 5.
    In AirDrop select“Allow me to be discovered by:” select the option “Everyone” This will make your computer visible to any devices that have AirDrop.
  • 6.
    IPAD 1.- In theprinciple screen, swipe one finger from the bottom of the sceen until the middle to display the AirDrop menu as shown in the gray part in the picture below.
  • 7.
    2. Verify thatthe Wi-Fi and Bluetooth are enabled.
  • 8.
    3. Press theAirDrop button to display the options, select ”Todos / Everyone"
  • 9.
    Example of sendingan image from IPAD to MACBOOK 1. Open the App “Fotos” in the image galary, select the photo to send 2. Press the “Compartir” (share) button.
  • 10.
    3. A listof devices you can share your files with will appear on your screen. 4. This is where you will see the Teacher’s Macbook Air (with the name of the Mac system) Select the name of the device that you want to receive the photo.
  • 11.
    5. IN THEMACBOOK AIR This is where a message will appear to indicate that a device (iPad) is sharing a photo with you. You now must save (guardar) or not accept (rechazar) the file. THE FILE WILL BE SAVED INTO THE DOWNLOADS “DESCARGAS” FOLDER.