What is aFile path
● A file path tells you where a file or directory is located in your system
● Two types:
○ Absolute path: Starts from the root (C:Users..., /home/user/...)
○ Relative path: Relative to the current working directory
# Absolute path
"C:/Users/John/Documents/file.txt"
# Relative path
"./data/file.txt"
3.
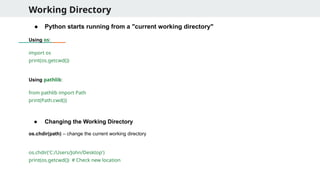
Working Directory
● Pythonstarts running from a "current working directory"
Using os:
import os
print(os.getcwd())
Using pathlib:
from pathlib import Path
print(Path.cwd())
● Changing the Working Directory
os.chdir(path) – change the current working directory
os.chdir('C:/Users/John/Desktop')
print(os.getcwd()) # Check new location
4.
Building File Paths
Usingos.path.join():
folder = "data"
filename = "report.csv"
path = os.path.join(folder, filename)
print(path) # "data/report.csv"
Using pathlib:
p = Path("data") / "report.csv"
print(p) # data/report.csv
Using os.path.join():
folder = "data"
filename = "report.csv"
path = os.path.join(folder, filename)
print(path) # "data/report.csv"
Using pathlib:
p = Path("data") / "report.csv"
print(p) # data/report.csv
5.
Directories
● Checking File/DirectoryExistence
os.path.exists() and pathlib.Path.exists()
# Using os
os.path.exists("data/report.csv")
# Using pathlib
Path("data/report.csv").exists()
● Creating Directories
# os
os.mkdir("my_folder")
# pathlib
Path("my_folder").mkdir()
- Use exist_ok=True to avoid errors if folder exists
Path("my_folder").mkdir(exist_ok=True)
6.
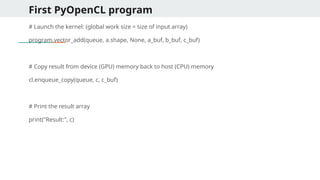
Directories
● Creating NestedDirectories
# With os
os.makedirs("projects/2025/reports")
# With pathlib
Path("projects/2025/reports").mkdir(parents=True, exist_ok=True)
parents=True creates all intermediate folders
● Listing Files in a Directory
# os
os.listdir(".")
# pathlib
list(Path(".").iterdir())
You can also filter files:
[p for p in Path(".").iterdir() if p.is_file()]
7.
Directories
● File vsDirectory Check
# os
os.path.isfile("example.txt")
os.path.isdir("folder")
# pathlib
p = Path("example.txt")
p.is_file()
p.is_dir()
● Deleting Files and Directories
# Deleting files
os.remove("old.txt")
Path("old.txt").unlink()
# Deleting empty directories
os.rmdir("empty_folder")
Path("empty_folder").rmdir()
For non-empty folders, use shutil.rmtree()
8.
Directories
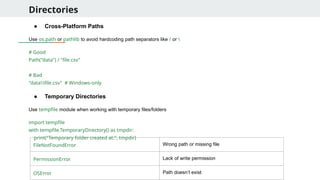
● Cross-Platform Paths
Useos.path or pathlib to avoid hardcoding path separators like / or
# Good
Path("data") / "file.csv"
# Bad
"datafile.csv" # Windows-only
● Temporary Directories
Use tempfile module when working with temporary files/folders
import tempfile
with tempfile.TemporaryDirectory() as tmpdir:
print("Temporary folder created at:", tmpdir)
FileNotFoundError Wrong path or missing file
PermissionError Lack of write permission
OSError Path doesn’t exist
9.
Lab Activity
Problem 1:Move all .txt files from Downloads/ to TextFiles/
Problem 2: Create a folder Reports2025, create subfolders: Jan, Feb, Mar, create an empty file
summary.txt in each and finally list all .txt files in Reports2025
from pathlib import Path
src = Path("Downloads")
dst = Path("TextFiles")
dst.mkdir(exist_ok=True)
for file in src.glob("*.txt"):
file.rename(dst / file.name)
10.
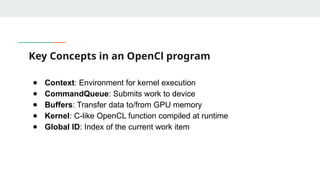
solutions
import os
import shutil
#Define source and destination directories
source_dir = 'Downloads'
dest_dir = 'TextFiles'
# Create destination directory if it doesn't exist
os.makedirs(dest_dir, exist_ok=True)
# Iterate through all files in the source directory
for filename in os.listdir(source_dir):
if filename.endswith('.txt'):
src_path = os.path.join(source_dir, filename)
dest_path = os.path.join(dest_dir, filename)
# Move the file
shutil.move(src_path, dest_path)
print(f"Moved: {filename}")
solutions
# Step 3:Create an empty summary.txt in each subfolder
summary_path = os.path.join(path, 'summary.txt')
open(summary_path, 'w').close() # Creates an empty file
# Step 4: List all .txt files in Reports2025
print("List of .txt files in Reports2025:")
for root, dirs, files in os.walk(main_folder):
for file in files:
if file.endswith('.txt'):
print(os.path.join(root, file))
13.
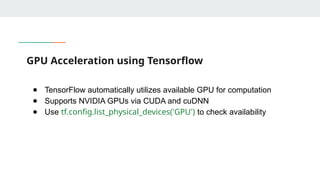
Solutions (using Path)
frompathlib import Path
# Step 1: Create main directory
main_folder = Path('Reports2025')
main_folder.mkdir(exist_ok=True)
# Step 2: Create subfolders
subfolders = ['Jan', 'Feb', 'Mar']
for month in subfolders:
month_folder = main_folder / month
month_folder.mkdir(exist_ok=True)
# Step 3: Create an empty summary.txt in each subfolder
summary_file = month_folder / 'summary.txt'
summary_file.touch(exist_ok=True) # Creates empty file if it doesn't exist
# Step 4: List all .txt files in Reports2025
print("List of .txt files in Reports2025:")
for txt_file in main_folder.rglob('*.txt'):
print(txt_file)
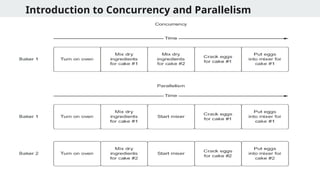
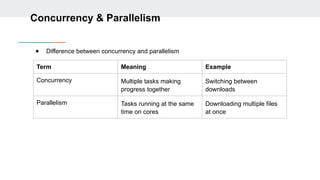
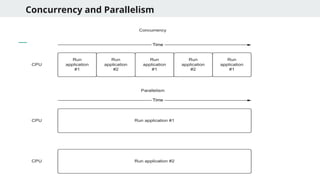
Concurrency & Parallelism
●Difference between concurrency and parallelism
Term Meaning Example
Concurrency Multiple tasks making
progress together
Switching between
downloads
Parallelism Tasks running at the same
time on cores
Downloading multiple files
at once
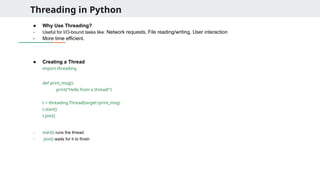
Threading in Python
●Why Use Threading?
- Useful for I/O-bound tasks like: Network requests, File reading/writing, User interaction
- More time efficient.
● Creating a Thread
import threading
def print_msg():
print("Hello from a thread!")
t = threading.Thread(target=print_msg)
t.start()
t.join()
- start() runs the thread
- join() waits for it to finish
19.
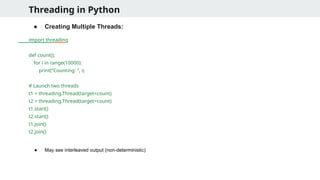
Threading in Python
●Creating Multiple Threads:
import threading
def count():
for i in range(10000):
print(“Counting: ”, i)
# Launch two threads
t1 = threading.Thread(target=count)
t2 = threading.Thread(target=count)
t1.start()
t2.start()
t1.join()
t2.join()
● May see interleaved output (non-deterministic)
20.
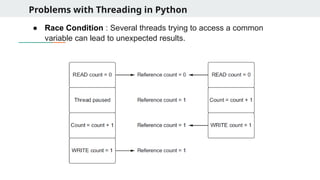
Problems with Threadingin Python
● Race Condition : Several threads trying to access a common
variable can lead to unexpected results.
21.
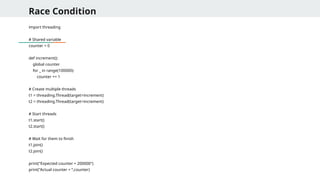
Race Condition
import threading
#Shared variable
counter = 0
def increment():
global counter
for _ in range(100000):
counter += 1
# Create multiple threads
t1 = threading.Thread(target=increment)
t2 = threading.Thread(target=increment)
# Start threads
t1.start()
t2.start()
# Wait for them to finish
t1.join()
t2.join()
print("Expected counter = 200000")
print("Actual counter = “,counter)
22.
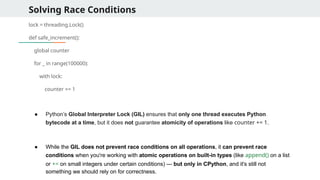
Solving Race Conditions
lock= threading.Lock()
def safe_increment():
global counter
for _ in range(100000):
with lock:
counter += 1
● Python’s Global Interpreter Lock (GIL) ensures that only one thread executes Python
bytecode at a time, but it does not guarantee atomicity of operations like counter += 1.
● While the GIL does not prevent race conditions on all operations, it can prevent race
conditions when you're working with atomic operations on built-in types (like append() on a list
or += on small integers under certain conditions) — but only in CPython, and it's still not
something we should rely on for correctness.
23.
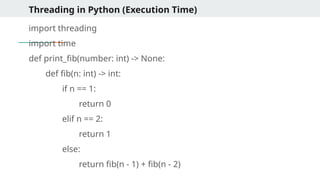
Threading in Python(Execution Time)
import time
def print_fib(number: int) -> None:
def fib(n: int) -> int:
if n == 1:
return 0
elif n == 2:
return 1
else:
return fib(n - 1) + fib(n - 2)
print(“fib(“,number,”) is”, fib(number))
start = time.time()
print_fib(40)
print_fib(41)
end = time.time()
print(“Completed in”, end – start, “seconds”)
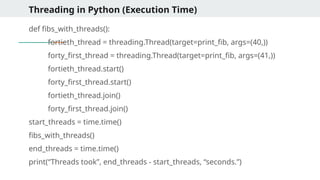
24.
Threading in Python(Execution Time)
import threading
import time
def print_fib(number: int) -> None:
def fib(n: int) -> int:
if n == 1:
return 0
elif n == 2:
return 1
else:
return fib(n - 1) + fib(n - 2)
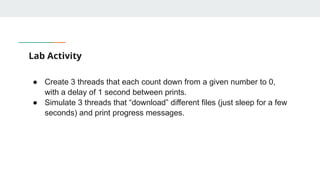
Lab Activity
● Create3 threads that each count down from a given number to 0,
with a delay of 1 second between prints.
● Simulate 3 threads that “download” different files (just sleep for a few
seconds) and print progress messages.
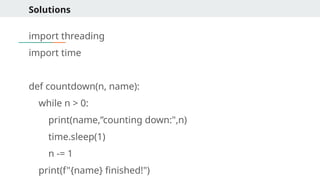
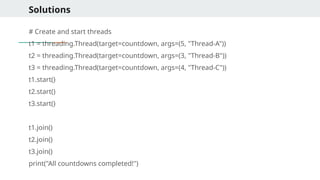
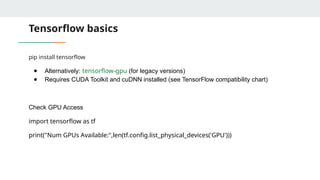
Solutions
# List ofmock files with "download times"
files = [("file1.txt", 3), ("file2.jpg", 5), ("file3.mp4", 2),]
threads = []
for file_name, duration in files:
t = threading.Thread(target=download_file, args=(file_name, duration))
threads.append(t)
t.start()
for t in threads:
t.join()
print("All downloads completed!")
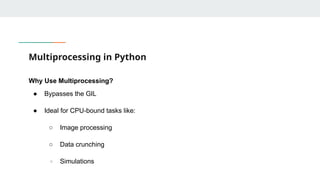
Multiprocessing in Python
WhyUse Multiprocessing?
● Bypasses the GIL
● Ideal for CPU-bound tasks like:
○ Image processing
○ Data crunching
○ Simulations
33.
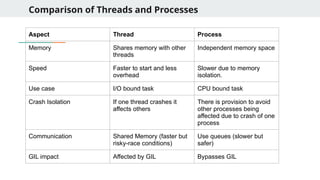
Comparison of Threadsand Processes
Aspect Thread Process
Memory Shares memory with other
threads
Independent memory space
Speed Faster to start and less
overhead
Slower due to memory
isolation.
Use case I/O bound task CPU bound task
Crash Isolation If one thread crashes it
affects others
There is provision to avoid
other processes being
affected due to crash of one
process
Communication Shared Memory (faster but
risky-race conditions)
Use queues (slower but
safer)
GIL impact Affected by GIL Bypasses GIL
34.
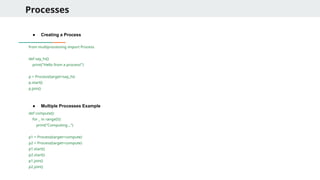
Processes
● Creating aProcess
from multiprocessing import Process
def say_hi():
print("Hello from a process!")
p = Process(target=say_hi)
p.start()
p.join()
● Multiple Processes Example
def compute():
for _ in range(5):
print("Computing...")
p1 = Process(target=compute)
p2 = Process(target=compute)
p1.start()
p2.start()
p1.join()
p2.join()
35.
Processes
● Process withArguments
def square(n):
print("{n}^2 = “, n*n)
p = Process(target=square, args=(5,))
p.start()
● Using Process Pool
from multiprocessing import Pool
def square(x):
return x * x
with Pool(4) as pool:
results = pool.map(square, [1, 2, 3, 4])
print(results)
● Pool handles worker processes
● Automatically distributes workload
36.
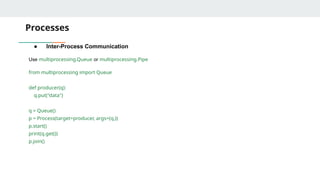
Processes
● Inter-Process Communication
Usemultiprocessing.Queue or multiprocessing.Pipe
from multiprocessing import Queue
def producer(q):
q.put("data")
q = Queue()
p = Process(target=producer, args=(q,))
p.start()
print(q.get())
p.join()
37.
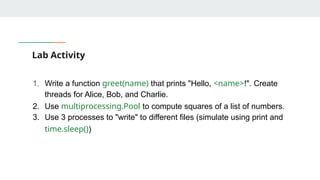
Lab Activity
1. Writea function greet(name) that prints "Hello, <name>!". Create
threads for Alice, Bob, and Charlie.
2. Use multiprocessing.Pool to compute squares of a list of numbers.
3. Use 3 processes to "write" to different files (simulate using print and
time.sleep())
38.
solns.
from multiprocessing importPool
def square(x):
return x * x
if __name__ == "__main__":
with Pool(4) as pool:
results = pool.map(square, [1, 2, 3, 4, 5])
print("Squares:", results)
39.
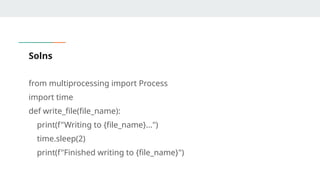
Solns
from multiprocessing importProcess
import time
def write_file(file_name):
print(f"Writing to {file_name}...")
time.sleep(2)
print(f"Finished writing to {file_name}")
40.
Solns
if __name__ =="__main__":
files = ["file1.txt", "file2.txt", "file3.txt"]
processes = []
for f in files:
p = Process(target=write_file, args=(f,))
processes.append(p)
p.start()
for p in processes:
p.join()
print("All files processed.")
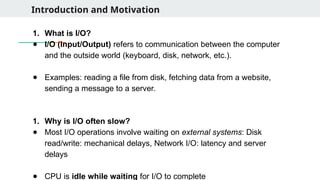
Introduction and Motivation
1.What is I/O?
● I/O (Input/Output) refers to communication between the computer
and the outside world (keyboard, disk, network, etc.).
● Examples: reading a file from disk, fetching data from a website,
sending a message to a server.
1. Why is I/O often slow?
● Most I/O operations involve waiting on external systems: Disk
read/write: mechanical delays, Network I/O: latency and server
delays
● CPU is idle while waiting for I/O to complete
43.
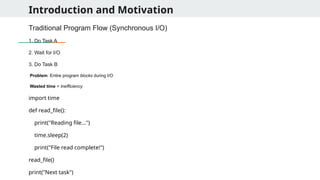
Introduction and Motivation
TraditionalProgram Flow (Synchronous I/O)
1. Do Task A
2. Wait for I/O
3. Do Task B
Problem: Entire program blocks during I/O
Wasted time = Inefficiency
import time
def read_file():
print("Reading file...")
time.sleep(2)
print("File read complete!")
read_file()
print("Next task")
Comparison
Features Synchronous Asynchronous
ExecutionBlocking Non Blocking
Efficiency Less efficient for I/O More Efficient for I/O
Complexity Easy Requires event loop, async
wait
Use case Simple scripts Web servers, I/O heavy
apps
46.
The Event Loop& Syntax
What is an Event Loop?
● Central controller of async programs
● Runs and manages all async tasks
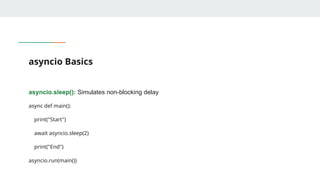
async / await Syntax:
import asyncio
async def greet():
print("Hello")
await asyncio.sleep(1)
print("World")
asyncio.run(greet())
async def defines an async function
await pauses function until result is ready
asyncio.run() starts the event loop and runs the coroutine
Introduction to GPUComputing in Python: CUDA vs. OpenCL
Understand the role and architecture of GPUs in modern computing
Understand the use of CuPy which is GPU accelerated Numpy like syntax.
Use Numba to write CUDA programs in Python. We can also also use
PyCUDA.
Use PyOpenCL for OpenCL programming in Python
Compare CUDA and OpenCL based on performance, portability, and ease of
use
52.
CuPy: GPU acceleratedcomputing with Numpy like syntax
What is CuPy?
● NumPy-compatible array library that runs on NVIDIA GPUs
● Developed by Preferred Networks
● Uses CUDA under the hood
Why CuPy?
● No new syntax – uses NumPy-like API
● Automatically dispatches computations to GPU
● Great for vectorized math, matrix ops, FFTs, and more
Use Cases:
● GPU-accelerated data science
● Deep learning preprocessing
● Replacing slow NumPy CPU cod
53.
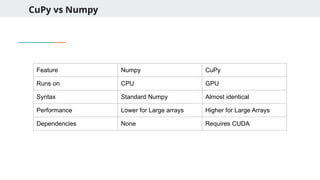
CuPy vs Numpy
FeatureNumpy CuPy
Runs on CPU GPU
Syntax Standard Numpy Almost identical
Performance Lower for Large arrays Higher for Large Arrays
Dependencies None Requires CUDA
54.
CuPy Basics
Import andArray Creation:
import cupy as cp
a = cp.array([1, 2, 3])
b = cp.arange(10)
c = cp.random.rand(3, 3)
CuPy to/from NumPy:
import numpy as np
a = np.array([1, 2, 3])
b = cp.asarray(a) # NumPy CuPy
→
c = cp.asnumpy(b) # CuPy NumPy
→
55.
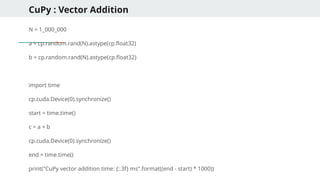
CuPy : VectorAddition
N = 1_000_000
a = cp.random.rand(N).astype(cp.float32)
b = cp.random.rand(N).astype(cp.float32)
import time
cp.cuda.Device(0).synchronize()
start = time.time()
c = a + b
cp.cuda.Device(0).synchronize()
end = time.time()
print("CuPy vector addition time: {:.3f} ms".format((end - start) * 1000))
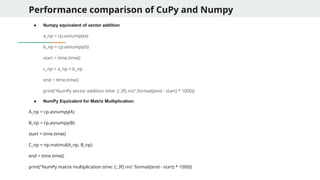
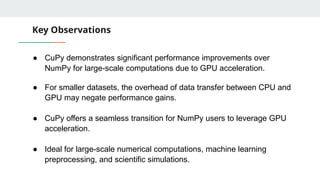
Key Observations
● CuPydemonstrates significant performance improvements over
NumPy for large-scale computations due to GPU acceleration.
● For smaller datasets, the overhead of data transfer between CPU and
GPU may negate performance gains.
● CuPy offers a seamless transition for NumPy users to leverage GPU
acceleration.
● Ideal for large-scale numerical computations, machine learning
preprocessing, and scientific simulations.
60.
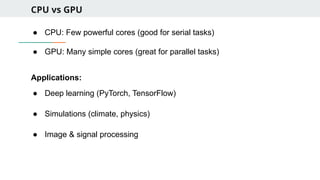
CPU vs GPU
●CPU: Few powerful cores (good for serial tasks)
● GPU: Many simple cores (great for parallel tasks)
Applications:
● Deep learning (PyTorch, TensorFlow)
● Simulations (climate, physics)
● Image & signal processing
61.
Numba
Numba is aJust-In-Time (JIT) compiler that can compile Python
functions to optimized machine code using LLVM (Low Level Virtual
Machine).
With @cuda.jit, you can run Python code directly on the GPU (using
CUDA).
62.
CUDA Programming Model
CUDA(Compute Unified Device Architecture)
Thread hierarchy: gridDim, blockDim, threadIdx, blockIdx
Memory hierarchy:
● Global
● Shared
● Constant
● Local
63.
CPU vs GPU
●Compute the element-wise square of a matrix (CPU)
import numpy as np
import time
# Simple element-wise square
N = 1_000_000
a = np.arange(N)
start = time.time()
b = a * a
print("CPU time:", time.time() - start)
64.
CPU vs GPU
fromnumba import cuda
@cuda.jit //Converts the square_gpu function into a GPU kernel.
def square_gpu(a, b):
i = cuda.grid(1)
// Computes the global thread index in 1D. For example, thread 0 handles element 0, thread 1 handles element 1, etc.
if i < a.size:
b[i] = a[i] * a[i]
# Allocate arrays
a_gpu = np.arange(N, dtype=np.float32)
b_gpu = np.zeros_like(a_gpu)
65.
CPU vs GPU
#Set up thread/block config
threads_per_block = 256
blocks_per_grid = (a_gpu.size + threads_per_block - 1) // threads_per_block
//GPUs run threads in groups called blocks.
//We choose 256 threads per block (common convention).
# Time the GPU kernel
start_gpu = time.time()
square_gpu[blocks_per_grid, threads_per_block](a_gpu, b_gpu)
//This syntax tells Numba to run the GPU function in parallel.
cuda.synchronize() //waits until the GPU is done computing before recording the time.
end_gpu = time.time()
print("GPU Time:", end_gpu - start_gpu)
66.
CUDA vector addition
fromnumba import cuda
import numpy as np
import time
@cuda.jit
def vector_add(a, b, c):
idx = cuda.grid(1)
if idx < a.size:
c[idx] = a[idx] + b[idx]
67.
CUDA vector addition
N= 1_000_000
a = np.arange(N, dtype=np.float32)
b = np.arange(N, dtype=np.float32)
c = np.zeros_like(a)
threads_per_block = 256
blocks_per_grid = (a.size + threads_per_block - 1) // threads_per_block
start = time.time()
vector_add[blocks_per_grid, threads_per_block](a, b, c)
cuda.synchronize()
print("CUDA time:", time.time() - start)
print("c[0] =", c[0]) # Should be 0 + 0
68.
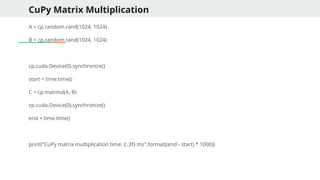
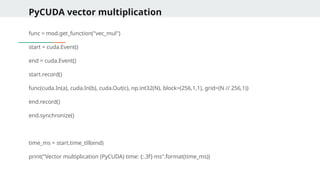
CUDA vector multiplication
@cuda.jit
defelementwise_multiply(a, b, out):
i = cuda.grid(1)
if i < a.size:
out[i] = a[i] * b[i]
N = 1000000
a = np.full(N, 2.0, dtype=np.float32)
b = np.full(N, 3.0, dtype=np.float32)
out = np.zeros_like(a)
elementwise_multiply[blocks_per_grid, threads_per_block](a, b, out)
cuda.synchronize()
print("out[0] =", out[0]) # should be 6.0
69.
CUDA matrix Addition
@cuda.jit
defmatrix_add(A, B, C):
row, col = cuda.grid(2)
if row < A.shape[0] and col < A.shape[1]:
C[row, col] = A[row, col] + B[row, col]
rows, cols = 512, 512
A = np.ones((rows, cols), dtype=np.float32)
B = np.ones((rows, cols), dtype=np.float32)
C = np.zeros((rows, cols), dtype=np.float32)
70.
CUDA matrix addition
threads_per_block= (16, 16)
blocks_per_grid_x = (A.shape[0] + threads_per_block[0] - 1) // threads_per_block[0]
blocks_per_grid_y = (A.shape[1] + threads_per_block[1] - 1) // threads_per_block[1]
matrix_add[(blocks_per_grid_x, blocks_per_grid_y), threads_per_block](A, B, C)
cuda.synchronize()
print("C[0, 0] =", C[0, 0]) # Should be 2.0
71.
PyCuda
● CUDA: NVIDIA'sparallel computing architecture
● PyCUDA: Python wrapper for CUDA (via pycuda library)
● Offers GPU acceleration with Python using NVIDIA GPUs
72.
PyCUDA
● Native CUDAin Python
● High-level APIs + access to raw kernels
● Fast prototyping for Python users
Features:
● Uses numpy arrays on host
● Device functions written in CUDA C
● Easy memory transfer
73.
Pycuda Setup andSyntax
● Basic Setup
import pycuda.autoinit
import pycuda.driver as cuda
from pycuda.compiler import SourceModule
import numpy as np
● Kernel in Cuda
mod = SourceModule("""
__global__ void add(float *a, float *b, float *c) {
int idx = threadIdx.x;
c[idx] = a[idx] + b[idx];
}
""")
add_func = mod.get_function("add")
74.
Full Example
a =np.random.randn(256).astype(np.float32)
b = np.random.randn(256).astype(np.float32)
c = np.empty_like(a)
add_func(
cuda.In(a), cuda.In(b), cuda.Out(c),
block=(256,1,1), grid=(1,1)
)
print(c[:5])
75.
PyCUDA Memory Management
Typesof Memory:
● cuda.In() – Host to device
● cuda.Out() – Device to host
● cuda.InOut() – Bidirectional
Manual allocation:
a_gpu = cuda.mem_alloc(a.nbytes)
cuda.memcpy_htod(a_gpu, a)
76.
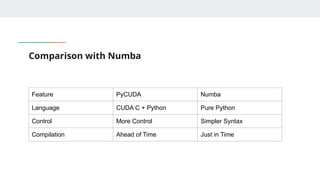
Comparison with Numba
FeaturePyCUDA Numba
Language CUDA C + Python Pure Python
Control More Control Simpler Syntax
Compilation Ahead of Time Just in Time
77.
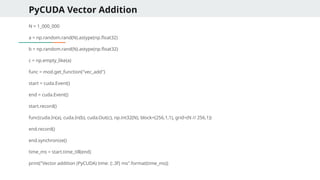
PyCUDA - VectorAddition
import pycuda.autoinit
import pycuda.driver as cuda
from pycuda.compiler import SourceModule
import numpy as np
mod = SourceModule("""
__global__ void vec_add(float *a, float *b, float *c, int N) {
int idx = threadIdx.x + blockIdx.x * blockDim.x;
if (idx < N)
c[idx] = a[idx] + b[idx];
}
""")
PyOpenCL
● Python wrapperfor the OpenCL API
● Enables GPU and parallel programming from Python
● Supports CPUs, GPUs, FPGAs across vendors (AMD, Intel, NVIDIA)
● Combines flexibility of Python with power of OpenCL
85.
Advantages of PyOpenCL
●Vendor-neutral (runs on many types of devices)
● Portable: Write once, run anywhere
● Fine-grained control over device, kernel, memory
● Great for:
○ Heterogeneous computing
○ Custom GPU kernel development
○ Research prototypes in Python
86.
Advantages of PyOpenCLover Numba
● Cross-Platform Compatibility:
○ Runs on GPUs, CPUs, FPGAs from multiple vendors
○ Ideal for heterogeneous computing
● Explicit Device and Memory Control:
○ Better control over buffer allocation and kernel dispatch
● Support for Non-NVIDIA Hardware:
○ Works with Intel, AMD, Apple M-series GPUs
● Standards-Based:
○ Follows Khronos OpenCL specification
● Advanced Kernel Features:
○ Access to OpenCL-specific tuning like workgroups, barriers, local
memory
● OpenCL Interoperability:
○ Can be integrated into C/C++ or multi-language systems
87.
First PyOpenCL program
Performparallel computation on a GPU (or any OpenCL-supported device) from Python
using PyOpenCL.
Set up an OpenCL context and command queue.
Transfer data between host (CPU) and device (GPU).
Define a simple GPU kernel in OpenCL C that adds two vectors.
Execute that kernel on the GPU.
Retrieve and verify the result on the host.
88.
First PyOpenCL program
importpyopencl as cl
import numpy as np
# Create OpenCL context using any available platform and device
devices = cl.get_platforms()[0].get_devices()
ctx = cl.Context(devices=devices)
# Create a command queue to submit work to the device
queue = cl.CommandQueue(ctx)
# Prepare input arrays (on host/CPU)
a = np.array([1, 2, 3, 4], dtype=np.float32)
b = np.array([5, 6, 7, 8], dtype=np.float32)
c = np.empty_like(a) # output array (initially empty)
# Memory flags for buffer creation
mf = cl.mem_flags
89.
First PyOpenCL program
#Transfer data from host to device memory (READ_ONLY + COPY_HOST_PTR)
a_buf = cl.Buffer(ctx, mf.READ_ONLY | mf.COPY_HOST_PTR, hostbuf=a)
b_buf = cl.Buffer(ctx, mf.READ_ONLY | mf.COPY_HOST_PTR, hostbuf=b)
# Allocate device memory for output array (WRITE_ONLY)
c_buf = cl.Buffer(ctx, mf.WRITE_ONLY, a.nbytes)
# Define the OpenCL kernel for vector addition
program = cl.Program(ctx, """
__kernel void vector_add(__global const float *a,
__global const float *b,
__global float *c) {
int gid = get_global_id(0); // unique thread index
c[gid] = a[gid] + b[gid]; // element-wise addition
}
""").build()
90.
First PyOpenCL program
#Launch the kernel: (global work size = size of input array)
program.vector_add(queue, a.shape, None, a_buf, b_buf, c_buf)
# Copy result from device (GPU) memory back to host (CPU) memory
cl.enqueue_copy(queue, c, c_buf)
# Print the result array
print("Result:", c)
91.
Key Concepts inan OpenCl program
● Context: Environment for kernel execution
● CommandQueue: Submits work to device
● Buffers: Transfer data to/from GPU memory
● Kernel: C-like OpenCL function compiled at runtime
● Global ID: Index of the current work item
2D Matrix Addition
program= cl.Program(ctx, """
__kernel void mat_add(__global float* A, __global float* B, __global float* C, int width) {
int row = get_global_id(0);
int col = get_global_id(1);
int idx = row * width + col;
C[idx] = A[idx] + B[idx];
}
""").build()
program.mat_add(queue, (rows, cols), None, A_buf, B_buf, C_buf, np.int32(cols))
cl.enqueue_copy(queue, C, C_buf)
95.
GPU Acceleration usingTensorflow
● TensorFlow automatically utilizes available GPU for computation
● Supports NVIDIA GPUs via CUDA and cuDNN
● Use tf.config.list_physical_devices('GPU') to check availability
96.
Tensorflow basics
pip installtensorflow
● Alternatively: tensorflow-gpu (for legacy versions)
● Requires CUDA Toolkit and cuDNN installed (see TensorFlow compatibility chart)
Check GPU Access
import tensorflow as tf
print("Num GPUs Available:",len(tf.config.list_physical_devices('GPU')))
97.
Tensorflow - VectorAddition
import tensorflow as tf
import time
N = 1000000
a = tf.random.normal([N])
b = tf.random.normal([N])
start = time.time()
c = tf.add(a, b)
tf.print("Vector Addition Time (GPU):", time.time() - start)
98.
Tensorflow - MatrixAddition
import tensorflow as tf
import time
M, N = 512, 512
a = tf.random.normal([M, N])
b = tf.random.normal([M, N])
start = time.time()
c = tf.add(a, b)
tf.print("Matrix Addition Time (GPU):", time.time() - start)
99.
Tensorflow - MatrixMultiplication
import tensorflow as tf
import time
a = tf.random.normal([1000, 1000])
b = tf.random.normal([1000, 1000])
start = time.time()
c = tf.matmul(a, b)
tf.print("Matrix Multiplication Time (GPU):", time.time() - start)
100.
Further features ofTensorflow
with tf.device('/GPU:0'):
result = tf.matmul(a, b)
with tf.device('/CPU:0'):
result = tf.matmul(a, b)
import tensorflow as tf
Enable XLA (Accelerated Linear Algebra) for further speed-up:
# Enable XLA globally
tf.config.optimizer.set_jit(True)
@tf.function(jit_compile=True)
def matmul_xla(a, b):
return tf.matmul(a, b)
a = tf.random.normal([512, 512])
b = tf.random.normal([512, 512])
tf.print(matmul_xla(a, b)[0][0])
101.
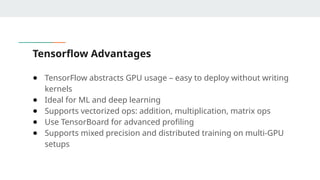
Tensorflow Advantages
● TensorFlowabstracts GPU usage – easy to deploy without writing
kernels
● Ideal for ML and deep learning
● Supports vectorized ops: addition, multiplication, matrix ops
● Use TensorBoard for advanced profiling
● Supports mixed precision and distributed training on multi-GPU
setups
102.
Advanced Programming (DS40108):
DataExtraction from Web in Python
(BeautifulSoup + Scrapy)
Level: 400
Credit: 2
Domain: Data Science
Instructor: Manjish Pal
103.
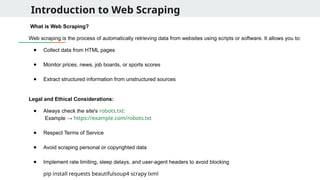
Introduction to WebScraping
What is Web Scraping?
Web scraping is the process of automatically retrieving data from websites using scripts or software. It allows you to:
● Collect data from HTML pages
● Monitor prices, news, job boards, or sports scores
● Extract structured information from unstructured sources
Legal and Ethical Considerations:
● Always check the site's robots.txt:
Example → https://example.com/robots.txt
● Respect Terms of Service
● Avoid scraping personal or copyrighted data
● Implement rate limiting, sleep delays, and user-agent headers to avoid blocking
pip install requests beautifulsoup4 scrapy lxml
104.
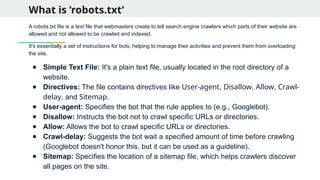
What is ‘robots.txt’
Arobots.txt file is a text file that webmasters create to tell search engine crawlers which parts of their website are
allowed and not allowed to be crawled and indexed.
It's essentially a set of instructions for bots, helping to manage their activities and prevent them from overloading
the site.
● Simple Text File: It's a plain text file, usually located in the root directory of a
website.
● Directives: The file contains directives like User-agent, Disallow, Allow, Crawl-
delay, and Sitemap.
● User-agent: Specifies the bot that the rule applies to (e.g., Googlebot).
● Disallow: Instructs the bot not to crawl specific URLs or directories.
● Allow: Allows the bot to crawl specific URLs or directories.
● Crawl-delay: Suggests the bot wait a specified amount of time before crawling
(Googlebot doesn't honor this, but it can be used as a guideline).
● Sitemap: Specifies the location of a sitemap file, which helps crawlers discover
all pages on the site.
105.
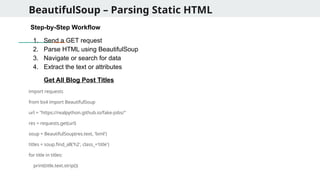
BeautifulSoup – ParsingStatic HTML
Step-by-Step Workflow
1. Send a GET request
2. Parse HTML using BeautifulSoup
3. Navigate or search for data
4. Extract the text or attributes
Get All Blog Post Titles
import requests
from bs4 import BeautifulSoup
url = "https://realpython.github.io/fake-jobs/"
res = requests.get(url)
soup = BeautifulSoup(res.text, 'lxml')
titles = soup.find_all('h2', class_='title')
for title in titles:
print(title.text.strip())
106.
BeautifulSoup – ParsingStatic HTML
Get all image URLs in a Page
images = soup.find_all('img')
for img in images:
print(img.get('src'))
Extract Table Data into a List of Dicts
table = soup.find("table")
rows = table.find_all("tr")
data = []
for row in rows[1:]: # skip header
cols = row.find_all("td")
data.append({
'Name': cols[0].text.strip(),
'Email': cols[1].text.strip()
})
107.
BeautifulSoup – ParsingStatic HTML
Nested Navigation
quote = soup.find("div", class_="quote")
text = quote.find("span", class_="text").text
author = quote.find("small", class_="author").text
tags = [tag.text for tag in quote.find_all("a", class_="tag")]
print(text, author, tags)
Accessing elements inside other elements by chaining find(), find_all(), or using CSS selectors
to drill down through the HTML structure.
It allows you to navigate the DOM hierarchy step by step — much like how you’d inspect
elements in browser developer tools.
108.
BeautifulSoup – ParsingStatic HTML
What will be the output for this web page ?
<div class="quote">
<span class="text">"Talk is cheap. Show me the code."</span>
<span>
<small class="author">Linus Torvalds</small>
<a class="tag" href="/tag/code">code</a>
<a class="tag" href="/tag/linux">linux</a>
</span>
</div>
109.
BeautifulSoup – ParsingStatic HTML
Using lambda function in BeautifulSoup
1. Find all tags with text longer than 20 characters
soup.find_all(lambda tag: tag.name == 'p' and len(tag.text) > 20)
Use Case: Filter <p> tags with substantial content.
2. Find all tags that have an href attribute containing “login”
soup.find_all(lambda tag: tag.has_attr('href') and 'login' in tag['href'])
Use Case: Find login links like <a href="/user/login">
110.
BeautifulSoup – ParsingStatic HTML
Using lambda function in BeautifulSoup
3. Find elements with a certain text pattern
soup.find_all(lambda tag: tag.string and 'Python' in tag.string)
Use Case: Locate any tag with exact text containing "Python".
4. Filter div tags whose ID starts with “section-”
soup.find_all(lambda tag: tag.name == 'div' and tag.get('id', '').startswith('section-'))
Use Case: Scraping page sections like section-1, section-2.
111.
Use of RegularExpressions in Beautifulsoup
What are Regular Expressions?
● A way to match patterns in text
● Used for searching, filtering, extracting or validating strings
Why use them in BeautifulSoup?
● To match tags or attributes when values are dynamic or inconsistent
● More flexible than exact string matching
Regex usage inPython
import re
text = "user_123_atleast123#@example.com"
# Match word characters before the '@'
match = re.match(r"w+", text) #w matches all alphanumeric and underscore
print(match.group()) # Output: user_123
Basic Functions:
● re.search() – finds first match
● re.findall() – returns all matches
● re.sub() – substitutes matched pattern
114.
Regex usage inPython
import re
text = "The price is $199.99 and the discount is 25%."
# Extract dollar amount
match = re.search(r"$d+.d+", text)
print(match.group()) # Output: $199.99
# Extract all numbers
numbers = re.findall(r"d+", text)
print(numbers) # Output: ['199', '99', '25']
Regex Usage withBeautifulSoup
from bs4 import BeautifulSoup
import re
html = '''
<a href="index.html">Home</a>
<a href="contact.html">Contact</a>
<a href="resume.pdf">Resume</a>
'''
soup = BeautifulSoup(html, 'html.parser')
# Find only <a> tags with href ending in .html
html_links = soup.find_all('a', href=re.compile(r'.html$'))
for link in html_links:
print(link.text, ' ', link['href'])
→
117.
Web Crawling
What isWeb Crawling?
● Systematically visiting and extracting data from multiple web pages
● Often involves following links and recursively scraping data
Crawling with BeautifulSoup:
● Use requests to fetch page content
● Use soup.find_all('a') to find links
● Follow and scrape each link recursively or iteratively
118.
Web Crawling -Example
import requests
from bs4 import BeautifulSoup
def crawl_page(url):
response = requests.get(url)
soup = BeautifulSoup(response.text, 'html.parser')
print("Page Title:", soup.title.text)
for link in soup.find_all('a'):
href = link.get('href')
if href and href.startswith('http'):
print("Found link:", href)
crawl_page('https://quotes.toscrape.com')
Crawling Models
1. Breadth-FirstSearch (BFS) Model
● Crawls all links on a page before moving deeper
● Suitable for shallow but wide websites
2. Depth-First Search (DFS) Model
● Follows links as deep as possible before backtracking
● Useful when deep data structures or hierarchies are present
3. Focused Crawling
● Targets pages based on keywords or link patterns
● Filters irrelevant pages early using rules or regex
4. Incremental Crawling
● Only crawls pages that have changed since the last visit
● Reduces load and improves efficiency (requires timestamps or hashes)
121.
DFS Crawling
def dfs_crawl(url,depth, visited=set()):
if depth == 0 or url in visited:
return
try:
res = requests.get(url)
soup = BeautifulSoup(res.text, 'html.parser')
print("[DFS] Visited:", url)
visited.add(url)
for link in soup.find_all('a'):
href = link.get('href')
if href and href.startswith('http'):
dfs_crawl(href, depth - 1, visited)
except:
pass
122.
Introduction to Scrapy
Whatis Scrapy?
● An open-source web crawling and scraping framework written in
Python
● Designed for fast, large-scale data extraction
● Built-in support for following links, handling pagination, exporting data
Why Scrapy over BeautifulSoup?
● Asynchronous and fast
● Built-in crawling support
● Better suited for structured, multi-page scraping
123.
Python Spider (WebSpider)
● Web spiders are called by technocrats using different names.
● The other names of web spider are web crawler, automatic indexer, crawler or simply
spider.
● A web spider is actually a bot that is programmed for crawling websites.
● The primary duty of a web spider is to generate indices for websites and these indices
can be accessed by other software.
● For instance, the indices generated by a spider could be used by another party to assign
ranks for websites.
pip install scrapy
scrapy startproject quotespider
cd quotespider
● quotespider/spiders/ → your spider scripts
● items.py → define fields
● settings.py → configure behavior
124.
Creating your firstSpider
● Create a new spider in the spiders directory:
scrapy genspider quotes quotes.toscrape.com
● Edit quotes.py:
import scrapy
class QuotesSpider(scrapy.Spider):
name = "quotes" # Unique name to run the spider
start_urls = ['https://quotes.toscrape.com'] # Start scraping from this URL
def parse(self, response):
for quote in response.css('div.quote'): # Loop through each quote container
yield {
'text': quote.css('span.text::text').get(), # Extract quote text
'author': quote.css('small.author::text').get(), # Extract author name
'tags': quote.css('a.tag::text').getall() # Get list of tags
}
125.
Understanding .css inScrapy
The .css() method in Scrapy is used to select HTML elements using CSS selectors, similar to how
elements are targeted in web development (like in browser DevTools or jQuery).
response.css('selector') # returns a SelectorList
response.css('selector::text') # returns text inside the tag
response.css('selector::attr(href)') # returns value of an attribute (e.g., href)
Examples:
● response.css('div.quote'): selects all <div> elements with class "quote" from the HTML response.
● quote.css('span.text::text'): selects the text inside <span class="text">...</span> within each quote block.
● quote.css('a.tag::text').getall(): extracts all tag texts from multiple <a class="tag"> inside the quote.
● response.css('li.next a::attr(href)'): grabs the href attribute from the <a> tag inside a <li class="next">, used for pagination.
Why Use .css()?
● Cleaner and more readable than XPath for most use cases
● Fast, efficient, and very similar to what developers use in HTML/CSS
126.
Running the Spiderand Export Results
● Run the spider
scrapy crawl quotes
● Export to JSON/CSV:
scrapy crawl quotes -o quotes.json
scrapy crawl quotes -o quotes.csv
127.
Extracting from morecomplex data.
Scrape quotes from https://quotes.toscrape.com along with additional details (birthdate, bio) from each
author's profile page.
def parse(self, response):
# This method handles the response from the start_urls or any followed links.
for quote in response.css('div.quote'):
# Loops through all divs with class 'quote' to process each quote block.
item = {'text': quote.css('span.text::text').get(), # Extracts the quote text.
'author': quote.css('small.author::text').get() # Extracts the author's name.
}
author_url = quote.css('span a::attr(href)').get()
# Gets the relative link to the author's bio page.
128.
Extracting from morecomplex data
if author_url:
# Ensures the URL is valid before following it.
yield response.follow(author_url, self.parse_author, meta={'item': item})
# Makes a new request to the author's page and passes the item using meta.
def parse_author(self, response):
# This function is called for each author's page visited by response.follow.
item = response.meta['item']
# Retrieves the item passed from the previous parse function.
item['birthdate'] = response.css('span.author-born-date::text').get()
# Extracts author's birth date from the author's page.
item['bio'] = response.css('div.author-description::text').get()
# Extracts author's biography/description from the author's page.
yield item
# Final step: yields the complete item containing quote, author, birthdate, and bio.
129.
Scraping with Pagination
Scrapeall quotes across multiple pages on https://quotes.toscrape.com by following "Next" page links.
def parse(self, response):
# Handles the response and parses current page content
for quote in response.css('div.quote'):
# Iterates through each quote block on the page
yield {
'text': quote.css('span.text::text').get(), # Extracts quote text
'author': quote.css('small.author::text').get(), # Extracts author name
'tags': quote.css('a.tag::text').getall() # Extracts all associated tags
}
next_page = response.css('li.next a::attr(href)').get()
# Finds the link to the next page, if available
if next_page:
# If a next page exists, schedule a follow-up request
yield response.follow(next_page, self.parse)
# Recursively call the same parse function for the next page
130.
Scrapy Items andItem loaders
Define a structured format (fields) to store extracted data (quotes, authors, tags).
import scrapy
class QuoteItem(scrapy.Item):
text = scrapy.Field() # Defines a field for the quote text
author = scrapy.Field() # Defines a field for the author's name
tags = scrapy.Field() # Defines a field for tags associated with the quote
from quotespider.items import QuoteItem
item = QuoteItem()
item['text'] = quote.css('span.text::text').get() # Assigns extracted quote text to the item field
131.
Scrapy Pipelines
Clean ortransform data before storing or exporting (e.g., trim whitespace).
# In settings.py
ITEM_PIPELINES = {
'quotespider.pipelines.QuotespiderPipeline': 300,
# Registers the QuotespiderPipeline class and sets its priority
}
# In pipelines.py
class QuotespiderPipeline:
def process_item(self, item, spider):
item['text'] = item['text'].strip() # Cleans whitespace from the quote text
return item # Returns the processed item to the pipeline chain
132.
Changing Scrapy Settings
Configurehow Scrapy behaves during crawling (speed, headers, robots.txt adherence).
ROBOTSTXT_OBEY = True # Ensures crawler respects robots.txt
DOWNLOAD_DELAY = 1 # Adds delay between requests to avoid overloading the
server
CONCURRENT_REQUESTS = 16 # Sets max concurrent requests
USER_AGENT = 'Mozilla/5.0' # Custom user-agent to mimic a real browser
● These settings help manage crawler behavior and compliance with web etiquette.
● Middleware can modify requests and responses; useful for adding headers, retry logic, or
proxy support.
133.
Introduction to Selenium
Whatis Selenium?
● A browser automation library used for testing and web scraping.
● Works with real browsers like Chrome, Firefox, Edge.
Use Cases:
● Scraping content that is dynamically rendered by JavaScript.
● Automating form submissions and button clicks.
Installation:
pip install selenium
Javascript and Webscraping
Why JavaScript matters:
● Many modern websites use JavaScript to dynamically load content
after the page initially loads. Eg. Google, Wikipedia, Facebook,
Twitter and many more are JS enabled websites.
● Example: News feeds, product listings, comment sections are often
loaded via JS.
Impact on scraping:
● BeautifulSoup and Scrapy cannot see JS-generated content.
● Selenium renders the page like a real browser, allowing access to
dynamic data.
136.
Javascript and Selenium
HowSelenium helps:
● Executes JavaScript as part of page rendering.
● Waits for JavaScript-based elements to load.
● Can interact with elements that only appear after JS execution (e.g.,
modals, infinite scroll).
Example Use Cases:
● Scraping content behind login modals.
● Clicking “Load More” buttons.
● Capturing interactive charts or dynamic tables.
137.
Launching a Browserand Opening a Page
from selenium import webdriver
from selenium.webdriver.chrome.service import Service
from webdriver_manager.chrome import ChromeDriverManager
# Launch browser
driver = webdriver.Chrome(service=Service(ChromeDriverManager().install()))
driver.get("https://example.com")
print("Page Title:", driver.title)
● Launches Chrome browser
● Opens the target webpage
● Displays the page title
138.
Javascript Example: LoadMore Button
●
How to automate scrolling through a JS-powered infinite scroll page and capture
content ?
●
This example shows how Selenium interacts with JS-generated content on real
website
from selenium.webdriver.common.by import By
from selenium.webdriver.support.ui import WebDriverWait
from selenium.webdriver.support import expected_conditions as EC
# Load a dynamic site
driver.get("https://infinite-scroll.com/demo/full-page/")
# Scroll down or simulate clicking to load more content
import time
last_height = driver.execute_script("return document.body.scrollHeight")
139.
Javascript example: LoadMore Button
while True:
# Scroll to bottom
driver.execute_script("window.scrollTo(0, document.body.scrollHeight);")
time.sleep(2) # Wait for content to load
new_height = driver.execute_script("return document.body.scrollHeight")
if new_height == last_height:
break # No more content to load
last_height = new_height
# Optionally, capture loaded items
items = driver.find_elements(By.CLASS_NAME, "post")
print(f"Loaded {len(items)} posts.")
140.
More Selenium Usage
●Finding Elements (Extract visible text or attributes from page elements)
from selenium.webdriver.common.by import By
element = driver.find_element(By.TAG_NAME, "h1")
print("Heading:", element.text)
# Find multiple elements (e.g., all links)
links = driver.find_elements(By.TAG_NAME, "a")
for link in links:
print(link.get_attribute("href"))
141.
More Selenium Usage
●Working with Forms and Inputs
from selenium import webdriver
from selenium.webdriver.common.by import By
from selenium.webdriver.chrome.service import Service
from webdriver_manager.chrome import ChromeDriverManager
# Launch the browser
driver = webdriver.Chrome(service=Service(ChromeDriverManager().install()))
# Open a webpage with a search box
driver.get("https://www.google.com ")
# Locate the search box using its 'name' attribute (commonly 'q' on many search engines)
search_box = driver.find_element(By.NAME, "q")
# Simulate typing text into the search input field
search_box.send_keys("Python Selenium")
# Submit the form that the input belongs to (triggers the search action)
search_box.submit()
142.
Advanced Programming (DS40108):
SampleMCQs from topics after Quiz-1 for Exam
Preparation
Level: 400
Credit: 2
Domain: Data Science
Instructor: Manjish Pal
143.
Multiprocessing and theading
Q1.What would be the output of the following code?
from multiprocessing import Pool
def f(x):
return x*x
if __name__ == '__main__':
with Pool(2) as p:
print(p.map(f, [1, 2, 3, 4]))
A) [1, 4, 9, 16]
B) May vary based on number of cores
C) Error due to function not being pickleable
D) Only first two results returned due to pool size
Q2. Which of the following is true about multiprocessing.Process?
A) It shares memory space with the main process
B) It runs in a new thread
C) It runs in a separate process with its own memory
D) It cannot run on Windows systems
A- Explanation: Pool size limits concurrency, but all inputs are processed.
C- Explanation: Processes are independent with separate memory space.
144.
Multiprocessing and threading
Q3.Why doesn’t Python threading.Thread improve performance on CPU-bound tasks?
A) Threads are not real in Python
B) GIL prevents true parallel execution
C) CPU-bound tasks can't be threaded
D) Python threads can't access CPU
Q4. Which of the following is true about multiprocessing.Process?
A) It shares memory space with the main process
B) It runs in a new thread
C) It runs in a separate process with its own memory
D) It cannot run on Windows systems
Q5. Which of the following can result in a race condition?
A) Accessing a list in a single thread
B) Two threads updating a shared variable without locks
C) Forking a child process
D) All of the above
B - Explanation: The Global Interpreter Lock (GIL) prevents true parallelism in CPU-bound threads.
D - Explanation: join() blocks until the thread terminates
B- Explanation: Unsynchronized access to shared variables by threads causes race conditions.
145.
Asynchronous I/O
Q6. Whydoesn’t Python threading.Thread improve performance on CPU-bound tasks?
A) Threads are not real in Python
B) GIL prevents true parallel execution
C) CPU-bound tasks can't be threaded
D) Python threads can't access CPU
Q7. Which of the following is true about multiprocessing.Process?
A) It shares memory space with the main process
B) It runs in a new thread
C) It runs in a separate process with its own memory
D) It cannot run on Windows systems
Q8. Which of the following can result in a race condition?
A) Accessing a list in a single thread
B) Two threads updating a shared variable without locks
C) Forking a child process
D) All of the above
B - Explanation: The Global Interpreter Lock (GIL) prevents true parallelism in CPU-bound threads.
D - Explanation: join() blocks until the thread terminates
B- Explanation: Unsynchronized access to shared variables by threads causes race conditions.
146.
Multiprocessing and threading
Q9.What does await asyncio.sleep(1) do?
A) Pauses the thread
B) Sleeps the coroutine
C) Blocks I/O
D) Makes the coroutine finish instantly
Q10. Which of the following is a valid asyncio pattern?
A) await asyncio.run(...)
B) asyncio.run(await foo())
C) await foo() inside a regular function
D) Use async def for coroutine definitions
B - Explanation: await asyncio.sleep(1) suspends the coroutine for 1 second without blocking the event loop
D - Explanation: async def defines an asynchronous coroutine.
Q11. When is asyncio.run() used?
A) Inside every coroutine
B) Only in child coroutines
C) To start the event loop for top-level coroutine ✅
D) To run multiple coroutines in a loop
C- Explanation: asyncio.run() is used to run the top-level coroutine and manage the event loop.
147.
Asynchronous I/O
Q12. Whydoesn’t Python threading.Thread improve performance on CPU-bound tasks?
A) Threads are not real in Python
B) GIL prevents true parallel execution
C) CPU-bound tasks can't be threaded
D) Python threads can't access CPU
Q13. Which of the following is true about multiprocessing.Process?
A) It shares memory space with the main process
B) It runs in a new thread
C) It runs in a separate process with its own memory
D) It cannot run on Windows systems
Q14. Which of the following can result in a race condition?
A) Accessing a list in a single thread
B) Two threads updating a shared variable without locks
C) Forking a child process
D) All of the above
B - Explanation: The Global Interpreter Lock (GIL) prevents true parallelism in CPU-bound threads.
D - Explanation: join() blocks until the thread terminates
B- Explanation: Unsynchronized access to shared variables by threads causes race conditions.
148.
GPU Computing inPython
Q15. What does PyCUDA primarily provide?
A) Python bindings to OpenCL
B) A compiler for Python GPU code
C) Interface for writing CUDA kernels in Python
D) JIT for vector operations
Q16. Why must PyCUDA code define __global__ functions?
A) It helps PyCUDA run on CPUs
B) These are kernel functions callable from host
C) Only global variables are used in GPU
D) It is deprecated syntax
Q17. What is the purpose of drv.InOut(a) in PyCUDA?
A) It copies a to GPU only
B) It makes a mutable and GPU-accessible
C) It prevents memory leaks
D) It converts a to float32
C - Explanation: PyCUDA allows Python to interface with CUDA kernels written in C/C++
B - Explanation: __global__ marks a function as a GPU kernel callable from host.
B- Explanation: InOut makes a NumPy array available for reading and writing by the GPU.
149.
GPU Computing inPython
Q18. What’s a key difference between PyOpenCL and PyCUDA?
A) PyOpenCL uses C++
B) PyOpenCL is cross-platform and not NVIDIA-specific
C) PyOpenCL can't handle memory buffers
D) PyOpenCL works only with AMD GPUs
Q19. What does context = cl.create_some_context() do?
A) Creates a CPU context
B) Finds a random GPU and creates context
C) Raises error if no NVIDIA GPU
D) Compiles OpenCL kernel
Q20. Which one compiles OpenCL kernels in PyOpenCL?
A) cl.KernelBuild()
B) cl.Program(context, source).build()
C) compile.opencl()
D) launch(source)
B - Explanation: PyOpenCL works across different vendors (AMD, Intel, NVIDIA) unlike PyCUDA.
B - Explanation: Explanation: It auto-selects an available device to create the execution context.
B- Explanation: PyOpenCL uses cl.Program(...).build() to compile kernel source.
150.
GPU Computing inPython
Q21. What does @numba.jit do?
A) Interprets Python at runtime
B) Compiles Python to C++
C) Compiles annotated function to optimized machine code
D) Optimizes only NumPy functions
Q22. What mode does @jit(nopython=True) enforce?
A) Python fallback on error
B) Full JIT optimization with no Python object overhead
C) Debug mode
D) Safe JIT sandboxing
Q23. What does cp.asarray() do?
A) Copies NumPy array to CPU
B) Converts NumPy array to GPU CuPy array ✅
C) Frees memory
D) Flattens CuPy array
C- Explanation: Numba compiles functions to fast native code using LLVM.
B - Explanation: nopython=True forces use of only native types for best performance.
B- Explanation: It creates a CuPy array on the GPU from a NumPy array.
151.
GPU Computing inPython
Q24. CuPy array operations:
A) Use NumPy backend
B) Are CPU-bound
C) Are run asynchronously on GPU
D) Block GPU context
Q25. What is @tf.function used for?
A) Declares TensorFlow constants
B) Converts Python code to a computational graph
C) Enables multi-GPU training
D) Uses PyTorch API
Q26. How do you run tensorflow training on GPU?
A) Use tf.device('CPU')
B) Use cuda=True flag
C) Ensure CUDA/cuDNN and GPU drivers are installed
D) Install CuPy
C- Explanation: Operations are GPU-accelerated and executed asynchronously.
B - Explanation: TensorFlow compiles annotated Python code into an efficient static graph.
3
C- Explanation: TensorFlow auto-detects GPU if drivers and CUDA/cuDNN are installed.
152.
RegEX in Python
Q27.What does the regular expression r'bw{4}b' match?
A) Words longer than 4 characters
B) Exactly 4-letter words
C) Any 4 characters
D) All uppercase 4-letter words
Q28. What will re.findall(r'[a-z]{3,}', 'abc defg h ijkl') return?
A) ['abc', 'defg', 'ijkl']
B) ['abc', 'defg', 'h', 'ijkl']
C) ['abc', 'defg', 'ij']
D) ['abc', 'defg']
Q29. What is the output of re.sub(r'(d+)', r'#1#', 'abc123xyz456')?
A) abc123xyz456
B) abc#123#xyz#456#
C) abc#xyz#
D) abc#1#xyz#2#
B- Explanation: b is a word boundary. w{4} matches exactly 4 word characters. So the regex matches
words that are exactly 4 letters long.
A - Explanation: [a-z]{3,} matches sequences of lowercase letters that are 3 or more characters long.
B- Explanation: d+ matches digits. 1 references the captured digits and wraps them with #.
153.
BeautifulSoup, Scrapy andSelenium
Q30. What does soup.find('p') return?
A) All <p> tags
B) First <p> tag
C) Raises error
D) List of tags
Q31. What does soup.select('.title') do?
A) Finds tags with class="title"
B) Selects titles from database
C) Parses XML only
D) Finds all h1 elements
Q32. Which parser is fastest in most cases?
A) html.parser
B) lxml
C) html5lib
D) xml.sax
B- Explanation: find() returns the first occurrence of the specified tag.
A - Explanation: .select() allows CSS-style selection for classes and tags.
B- Explanation: lxml is usually the fastest and most efficient parser.
154.
BeautifulSoup, Scrapy andSelenium
Q33 What is parse() in a Scrapy spider?
A) Compiles CSS
B) Parses the settings
C) Default callback for start_requests
D) Runs before spider starts
Q34. What does yield scrapy.Request(...) do?
A) Starts a new thread
B) Schedules a request to be processed
C) Parses settings file
D) Restarts spider
Q35. How to extract multiple values from a selector?
A) Use extract_first()
B) Use extract_all()
C) Use get()
D) Use extract()
C- Explanation: parse is the main method to handle responses in a spider.
B- Explanation: Scrapy handles the yielded request asynchronously.
D- Explanation: .extract() or .getall() fetch all matches from a selector.


![Directories
● Creating Nested Directories
# With os
os.makedirs("projects/2025/reports")
# With pathlib
Path("projects/2025/reports").mkdir(parents=True, exist_ok=True)
parents=True creates all intermediate folders
● Listing Files in a Directory
# os
os.listdir(".")
# pathlib
list(Path(".").iterdir())
You can also filter files:
[p for p in Path(".").iterdir() if p.is_file()]](https://image.slidesharecdn.com/advancedprogrammingds40108workingwithfilepathsanddirectoriesinpython-250711035304-c87052a2/85/Advanced-Programming-DS40108-_-Working-with-File-Paths-and-Directories-in-Python-pptx-6-320.jpg)


![Solutions (using os)
import os
# Step 1: Create main directory
main_folder = 'Reports2025'
os.makedirs(main_folder, exist_ok=True)
# Step 2: Create subfolders
subfolders = ['Jan', 'Feb', 'Mar']
for month in subfolders:
path = os.path.join(main_folder, month)
os.makedirs(path, exist_ok=True)](https://image.slidesharecdn.com/advancedprogrammingds40108workingwithfilepathsanddirectoriesinpython-250711035304-c87052a2/85/Advanced-Programming-DS40108-_-Working-with-File-Paths-and-Directories-in-Python-pptx-11-320.jpg)

![Solutions (using Path)
from pathlib import Path
# Step 1: Create main directory
main_folder = Path('Reports2025')
main_folder.mkdir(exist_ok=True)
# Step 2: Create subfolders
subfolders = ['Jan', 'Feb', 'Mar']
for month in subfolders:
month_folder = main_folder / month
month_folder.mkdir(exist_ok=True)
# Step 3: Create an empty summary.txt in each subfolder
summary_file = month_folder / 'summary.txt'
summary_file.touch(exist_ok=True) # Creates empty file if it doesn't exist
# Step 4: List all .txt files in Reports2025
print("List of .txt files in Reports2025:")
for txt_file in main_folder.rglob('*.txt'):
print(txt_file)](https://image.slidesharecdn.com/advancedprogrammingds40108workingwithfilepathsanddirectoriesinpython-250711035304-c87052a2/85/Advanced-Programming-DS40108-_-Working-with-File-Paths-and-Directories-in-Python-pptx-13-320.jpg)


![Solutions
# List of mock files with "download times"
files = [("file1.txt", 3), ("file2.jpg", 5), ("file3.mp4", 2),]
threads = []
for file_name, duration in files:
t = threading.Thread(target=download_file, args=(file_name, duration))
threads.append(t)
t.start()
for t in threads:
t.join()
print("All downloads completed!")](https://image.slidesharecdn.com/advancedprogrammingds40108workingwithfilepathsanddirectoriesinpython-250711035304-c87052a2/85/Advanced-Programming-DS40108-_-Working-with-File-Paths-and-Directories-in-Python-pptx-30-320.jpg)

![Processes
● Process with Arguments
def square(n):
print("{n}^2 = “, n*n)
p = Process(target=square, args=(5,))
p.start()
● Using Process Pool
from multiprocessing import Pool
def square(x):
return x * x
with Pool(4) as pool:
results = pool.map(square, [1, 2, 3, 4])
print(results)
● Pool handles worker processes
● Automatically distributes workload](https://image.slidesharecdn.com/advancedprogrammingds40108workingwithfilepathsanddirectoriesinpython-250711035304-c87052a2/85/Advanced-Programming-DS40108-_-Working-with-File-Paths-and-Directories-in-Python-pptx-35-320.jpg)
![solns.
from multiprocessing import Pool
def square(x):
return x * x
if __name__ == "__main__":
with Pool(4) as pool:
results = pool.map(square, [1, 2, 3, 4, 5])
print("Squares:", results)](https://image.slidesharecdn.com/advancedprogrammingds40108workingwithfilepathsanddirectoriesinpython-250711035304-c87052a2/85/Advanced-Programming-DS40108-_-Working-with-File-Paths-and-Directories-in-Python-pptx-38-320.jpg)
![Solns
if __name__ == "__main__":
files = ["file1.txt", "file2.txt", "file3.txt"]
processes = []
for f in files:
p = Process(target=write_file, args=(f,))
processes.append(p)
p.start()
for p in processes:
p.join()
print("All files processed.")](https://image.slidesharecdn.com/advancedprogrammingds40108workingwithfilepathsanddirectoriesinpython-250711035304-c87052a2/85/Advanced-Programming-DS40108-_-Working-with-File-Paths-and-Directories-in-Python-pptx-40-320.jpg)


![CuPy Basics
Import and Array Creation:
import cupy as cp
a = cp.array([1, 2, 3])
b = cp.arange(10)
c = cp.random.rand(3, 3)
CuPy to/from NumPy:
import numpy as np
a = np.array([1, 2, 3])
b = cp.asarray(a) # NumPy CuPy
→
c = cp.asnumpy(b) # CuPy NumPy
→](https://image.slidesharecdn.com/advancedprogrammingds40108workingwithfilepathsanddirectoriesinpython-250711035304-c87052a2/85/Advanced-Programming-DS40108-_-Working-with-File-Paths-and-Directories-in-Python-pptx-54-320.jpg)

![CPU vs GPU
from numba import cuda
@cuda.jit //Converts the square_gpu function into a GPU kernel.
def square_gpu(a, b):
i = cuda.grid(1)
// Computes the global thread index in 1D. For example, thread 0 handles element 0, thread 1 handles element 1, etc.
if i < a.size:
b[i] = a[i] * a[i]
# Allocate arrays
a_gpu = np.arange(N, dtype=np.float32)
b_gpu = np.zeros_like(a_gpu)](https://image.slidesharecdn.com/advancedprogrammingds40108workingwithfilepathsanddirectoriesinpython-250711035304-c87052a2/85/Advanced-Programming-DS40108-_-Working-with-File-Paths-and-Directories-in-Python-pptx-64-320.jpg)

//This syntax tells Numba to run the GPU function in parallel.
cuda.synchronize() //waits until the GPU is done computing before recording the time.
end_gpu = time.time()
print("GPU Time:", end_gpu - start_gpu)](https://image.slidesharecdn.com/advancedprogrammingds40108workingwithfilepathsanddirectoriesinpython-250711035304-c87052a2/85/Advanced-Programming-DS40108-_-Working-with-File-Paths-and-Directories-in-Python-pptx-65-320.jpg)
![CUDA vector addition
from numba import cuda
import numpy as np
import time
@cuda.jit
def vector_add(a, b, c):
idx = cuda.grid(1)
if idx < a.size:
c[idx] = a[idx] + b[idx]](https://image.slidesharecdn.com/advancedprogrammingds40108workingwithfilepathsanddirectoriesinpython-250711035304-c87052a2/85/Advanced-Programming-DS40108-_-Working-with-File-Paths-and-Directories-in-Python-pptx-66-320.jpg)

cuda.synchronize()
print("CUDA time:", time.time() - start)
print("c[0] =", c[0]) # Should be 0 + 0](https://image.slidesharecdn.com/advancedprogrammingds40108workingwithfilepathsanddirectoriesinpython-250711035304-c87052a2/85/Advanced-Programming-DS40108-_-Working-with-File-Paths-and-Directories-in-Python-pptx-67-320.jpg)
![CUDA vector multiplication
@cuda.jit
def elementwise_multiply(a, b, out):
i = cuda.grid(1)
if i < a.size:
out[i] = a[i] * b[i]
N = 1000000
a = np.full(N, 2.0, dtype=np.float32)
b = np.full(N, 3.0, dtype=np.float32)
out = np.zeros_like(a)
elementwise_multiply[blocks_per_grid, threads_per_block](a, b, out)
cuda.synchronize()
print("out[0] =", out[0]) # should be 6.0](https://image.slidesharecdn.com/advancedprogrammingds40108workingwithfilepathsanddirectoriesinpython-250711035304-c87052a2/85/Advanced-Programming-DS40108-_-Working-with-File-Paths-and-Directories-in-Python-pptx-68-320.jpg)
![CUDA matrix Addition
@cuda.jit
def matrix_add(A, B, C):
row, col = cuda.grid(2)
if row < A.shape[0] and col < A.shape[1]:
C[row, col] = A[row, col] + B[row, col]
rows, cols = 512, 512
A = np.ones((rows, cols), dtype=np.float32)
B = np.ones((rows, cols), dtype=np.float32)
C = np.zeros((rows, cols), dtype=np.float32)](https://image.slidesharecdn.com/advancedprogrammingds40108workingwithfilepathsanddirectoriesinpython-250711035304-c87052a2/85/Advanced-Programming-DS40108-_-Working-with-File-Paths-and-Directories-in-Python-pptx-69-320.jpg)
![CUDA matrix addition
threads_per_block = (16, 16)
blocks_per_grid_x = (A.shape[0] + threads_per_block[0] - 1) // threads_per_block[0]
blocks_per_grid_y = (A.shape[1] + threads_per_block[1] - 1) // threads_per_block[1]
matrix_add[(blocks_per_grid_x, blocks_per_grid_y), threads_per_block](A, B, C)
cuda.synchronize()
print("C[0, 0] =", C[0, 0]) # Should be 2.0](https://image.slidesharecdn.com/advancedprogrammingds40108workingwithfilepathsanddirectoriesinpython-250711035304-c87052a2/85/Advanced-Programming-DS40108-_-Working-with-File-Paths-and-Directories-in-Python-pptx-70-320.jpg)
![Pycuda Setup and Syntax
● Basic Setup
import pycuda.autoinit
import pycuda.driver as cuda
from pycuda.compiler import SourceModule
import numpy as np
● Kernel in Cuda
mod = SourceModule("""
__global__ void add(float *a, float *b, float *c) {
int idx = threadIdx.x;
c[idx] = a[idx] + b[idx];
}
""")
add_func = mod.get_function("add")](https://image.slidesharecdn.com/advancedprogrammingds40108workingwithfilepathsanddirectoriesinpython-250711035304-c87052a2/85/Advanced-Programming-DS40108-_-Working-with-File-Paths-and-Directories-in-Python-pptx-73-320.jpg)
![Full Example
a = np.random.randn(256).astype(np.float32)
b = np.random.randn(256).astype(np.float32)
c = np.empty_like(a)
add_func(
cuda.In(a), cuda.In(b), cuda.Out(c),
block=(256,1,1), grid=(1,1)
)
print(c[:5])](https://image.slidesharecdn.com/advancedprogrammingds40108workingwithfilepathsanddirectoriesinpython-250711035304-c87052a2/85/Advanced-Programming-DS40108-_-Working-with-File-Paths-and-Directories-in-Python-pptx-74-320.jpg)

![PyCUDA - Vector Addition
import pycuda.autoinit
import pycuda.driver as cuda
from pycuda.compiler import SourceModule
import numpy as np
mod = SourceModule("""
__global__ void vec_add(float *a, float *b, float *c, int N) {
int idx = threadIdx.x + blockIdx.x * blockDim.x;
if (idx < N)
c[idx] = a[idx] + b[idx];
}
""")](https://image.slidesharecdn.com/advancedprogrammingds40108workingwithfilepathsanddirectoriesinpython-250711035304-c87052a2/85/Advanced-Programming-DS40108-_-Working-with-File-Paths-and-Directories-in-Python-pptx-77-320.jpg)
![PyCUDA Vector Multiplication
mod = SourceModule("""
__global__ void vec_mul(float *a, float *b, float *c, int N) {
int idx = threadIdx.x + blockIdx.x * blockDim.x;
if (idx < N)
c[idx] = a[idx] * b[idx];
}
""")
a = np.random.rand(N).astype(np.float32)
b = np.random.rand(N).astype(np.float32)
c = np.empty_like(a)](https://image.slidesharecdn.com/advancedprogrammingds40108workingwithfilepathsanddirectoriesinpython-250711035304-c87052a2/85/Advanced-Programming-DS40108-_-Working-with-File-Paths-and-Directories-in-Python-pptx-79-320.jpg)
![PyCUDA Matrix Addition
mod = SourceModule("""
__global__ void mat_add(float *A, float *B, float *C, int width, int height) {
int row = blockIdx.y * blockDim.y + threadIdx.y;
int col = blockIdx.x * blockDim.x + threadIdx.x;
int idx = row * width + col;
if (row < height && col < width)
C[idx] = A[idx] + B[idx];
}
""")
width, height = 1024, 1024
size = width * height](https://image.slidesharecdn.com/advancedprogrammingds40108workingwithfilepathsanddirectoriesinpython-250711035304-c87052a2/85/Advanced-Programming-DS40108-_-Working-with-File-Paths-and-Directories-in-Python-pptx-81-320.jpg)


![First PyOpenCL program
import pyopencl as cl
import numpy as np
# Create OpenCL context using any available platform and device
devices = cl.get_platforms()[0].get_devices()
ctx = cl.Context(devices=devices)
# Create a command queue to submit work to the device
queue = cl.CommandQueue(ctx)
# Prepare input arrays (on host/CPU)
a = np.array([1, 2, 3, 4], dtype=np.float32)
b = np.array([5, 6, 7, 8], dtype=np.float32)
c = np.empty_like(a) # output array (initially empty)
# Memory flags for buffer creation
mf = cl.mem_flags](https://image.slidesharecdn.com/advancedprogrammingds40108workingwithfilepathsanddirectoriesinpython-250711035304-c87052a2/85/Advanced-Programming-DS40108-_-Working-with-File-Paths-and-Directories-in-Python-pptx-88-320.jpg)
![First PyOpenCL program
# Transfer data from host to device memory (READ_ONLY + COPY_HOST_PTR)
a_buf = cl.Buffer(ctx, mf.READ_ONLY | mf.COPY_HOST_PTR, hostbuf=a)
b_buf = cl.Buffer(ctx, mf.READ_ONLY | mf.COPY_HOST_PTR, hostbuf=b)
# Allocate device memory for output array (WRITE_ONLY)
c_buf = cl.Buffer(ctx, mf.WRITE_ONLY, a.nbytes)
# Define the OpenCL kernel for vector addition
program = cl.Program(ctx, """
__kernel void vector_add(__global const float *a,
__global const float *b,
__global float *c) {
int gid = get_global_id(0); // unique thread index
c[gid] = a[gid] + b[gid]; // element-wise addition
}
""").build()](https://image.slidesharecdn.com/advancedprogrammingds40108workingwithfilepathsanddirectoriesinpython-250711035304-c87052a2/85/Advanced-Programming-DS40108-_-Working-with-File-Paths-and-Directories-in-Python-pptx-89-320.jpg)
![Vector Squaring
program = cl.Program(ctx, """
__kernel void square(__global float *a, __global float *b) {
int gid = get_global_id(0);
b[gid] = a[gid] * a[gid];
}
""").build()
program.square(queue, a.shape, None, a_buf, b_buf)
cl.enqueue_copy(queue, b, b_buf)](https://image.slidesharecdn.com/advancedprogrammingds40108workingwithfilepathsanddirectoriesinpython-250711035304-c87052a2/85/Advanced-Programming-DS40108-_-Working-with-File-Paths-and-Directories-in-Python-pptx-92-320.jpg)
![Vector Multiplication
program = cl.Program(ctx, """
__kernel void multiply(__global float *a, __global float *b, __global float *out) {
int gid = get_global_id(0);
out[gid] = a[gid] * b[gid];
}
""").build()
program.multiply(queue, a.shape, None, a_buf, b_buf, out_buf)
cl.enqueue_copy(queue, out, out_buf)](https://image.slidesharecdn.com/advancedprogrammingds40108workingwithfilepathsanddirectoriesinpython-250711035304-c87052a2/85/Advanced-Programming-DS40108-_-Working-with-File-Paths-and-Directories-in-Python-pptx-93-320.jpg)
![2D Matrix Addition
program = cl.Program(ctx, """
__kernel void mat_add(__global float* A, __global float* B, __global float* C, int width) {
int row = get_global_id(0);
int col = get_global_id(1);
int idx = row * width + col;
C[idx] = A[idx] + B[idx];
}
""").build()
program.mat_add(queue, (rows, cols), None, A_buf, B_buf, C_buf, np.int32(cols))
cl.enqueue_copy(queue, C, C_buf)](https://image.slidesharecdn.com/advancedprogrammingds40108workingwithfilepathsanddirectoriesinpython-250711035304-c87052a2/85/Advanced-Programming-DS40108-_-Working-with-File-Paths-and-Directories-in-Python-pptx-94-320.jpg)
![Tensorflow - Vector Addition
import tensorflow as tf
import time
N = 1000000
a = tf.random.normal([N])
b = tf.random.normal([N])
start = time.time()
c = tf.add(a, b)
tf.print("Vector Addition Time (GPU):", time.time() - start)](https://image.slidesharecdn.com/advancedprogrammingds40108workingwithfilepathsanddirectoriesinpython-250711035304-c87052a2/85/Advanced-Programming-DS40108-_-Working-with-File-Paths-and-Directories-in-Python-pptx-97-320.jpg)
![Tensorflow - Matrix Addition
import tensorflow as tf
import time
M, N = 512, 512
a = tf.random.normal([M, N])
b = tf.random.normal([M, N])
start = time.time()
c = tf.add(a, b)
tf.print("Matrix Addition Time (GPU):", time.time() - start)](https://image.slidesharecdn.com/advancedprogrammingds40108workingwithfilepathsanddirectoriesinpython-250711035304-c87052a2/85/Advanced-Programming-DS40108-_-Working-with-File-Paths-and-Directories-in-Python-pptx-98-320.jpg)
![Tensorflow - Matrix Multiplication
import tensorflow as tf
import time
a = tf.random.normal([1000, 1000])
b = tf.random.normal([1000, 1000])
start = time.time()
c = tf.matmul(a, b)
tf.print("Matrix Multiplication Time (GPU):", time.time() - start)](https://image.slidesharecdn.com/advancedprogrammingds40108workingwithfilepathsanddirectoriesinpython-250711035304-c87052a2/85/Advanced-Programming-DS40108-_-Working-with-File-Paths-and-Directories-in-Python-pptx-99-320.jpg)
![Further features of Tensorflow
with tf.device('/GPU:0'):
result = tf.matmul(a, b)
with tf.device('/CPU:0'):
result = tf.matmul(a, b)
import tensorflow as tf
Enable XLA (Accelerated Linear Algebra) for further speed-up:
# Enable XLA globally
tf.config.optimizer.set_jit(True)
@tf.function(jit_compile=True)
def matmul_xla(a, b):
return tf.matmul(a, b)
a = tf.random.normal([512, 512])
b = tf.random.normal([512, 512])
tf.print(matmul_xla(a, b)[0][0])](https://image.slidesharecdn.com/advancedprogrammingds40108workingwithfilepathsanddirectoriesinpython-250711035304-c87052a2/85/Advanced-Programming-DS40108-_-Working-with-File-Paths-and-Directories-in-Python-pptx-100-320.jpg)

![BeautifulSoup – Parsing Static HTML
Get all image URLs in a Page
images = soup.find_all('img')
for img in images:
print(img.get('src'))
Extract Table Data into a List of Dicts
table = soup.find("table")
rows = table.find_all("tr")
data = []
for row in rows[1:]: # skip header
cols = row.find_all("td")
data.append({
'Name': cols[0].text.strip(),
'Email': cols[1].text.strip()
})](https://image.slidesharecdn.com/advancedprogrammingds40108workingwithfilepathsanddirectoriesinpython-250711035304-c87052a2/85/Advanced-Programming-DS40108-_-Working-with-File-Paths-and-Directories-in-Python-pptx-106-320.jpg)
![BeautifulSoup – Parsing Static HTML
Nested Navigation
quote = soup.find("div", class_="quote")
text = quote.find("span", class_="text").text
author = quote.find("small", class_="author").text
tags = [tag.text for tag in quote.find_all("a", class_="tag")]
print(text, author, tags)
Accessing elements inside other elements by chaining find(), find_all(), or using CSS selectors
to drill down through the HTML structure.
It allows you to navigate the DOM hierarchy step by step — much like how you’d inspect
elements in browser developer tools.](https://image.slidesharecdn.com/advancedprogrammingds40108workingwithfilepathsanddirectoriesinpython-250711035304-c87052a2/85/Advanced-Programming-DS40108-_-Working-with-File-Paths-and-Directories-in-Python-pptx-107-320.jpg)
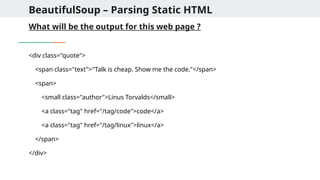
![BeautifulSoup – Parsing Static HTML
Using lambda function in BeautifulSoup
1. Find all tags with text longer than 20 characters
soup.find_all(lambda tag: tag.name == 'p' and len(tag.text) > 20)
Use Case: Filter <p> tags with substantial content.
2. Find all tags that have an href attribute containing “login”
soup.find_all(lambda tag: tag.has_attr('href') and 'login' in tag['href'])
Use Case: Find login links like <a href="/user/login">](https://image.slidesharecdn.com/advancedprogrammingds40108workingwithfilepathsanddirectoriesinpython-250711035304-c87052a2/85/Advanced-Programming-DS40108-_-Working-with-File-Paths-and-Directories-in-Python-pptx-109-320.jpg)
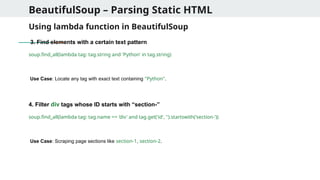
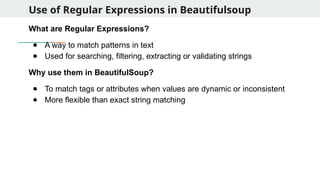
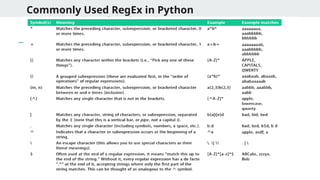
![Regex usage in Python
import re
text = "The price is $199.99 and the discount is 25%."
# Extract dollar amount
match = re.search(r"$d+.d+", text)
print(match.group()) # Output: $199.99
# Extract all numbers
numbers = re.findall(r"d+", text)
print(numbers) # Output: ['199', '99', '25']](https://image.slidesharecdn.com/advancedprogrammingds40108workingwithfilepathsanddirectoriesinpython-250711035304-c87052a2/85/Advanced-Programming-DS40108-_-Working-with-File-Paths-and-Directories-in-Python-pptx-114-320.jpg)
![Regex in validation and Filtering
# Validate email address
email = "user@example.com"
pattern = r"^[w.-]+@[w.-]+.w{2,}$"
if re.match(pattern, email):
print("Valid email")
# Filter lines that start with numbers
lines = ["1. Start", "A. Skip", "2. Continue"]
filtered = list(filter(lambda l: re.match(r"^d", l), lines))
print(filtered) # Output: ['1. Start', '2. Continue']](https://image.slidesharecdn.com/advancedprogrammingds40108workingwithfilepathsanddirectoriesinpython-250711035304-c87052a2/85/Advanced-Programming-DS40108-_-Working-with-File-Paths-and-Directories-in-Python-pptx-115-320.jpg)
![Regex Usage with BeautifulSoup
from bs4 import BeautifulSoup
import re
html = '''
<a href="index.html">Home</a>
<a href="contact.html">Contact</a>
<a href="resume.pdf">Resume</a>
'''
soup = BeautifulSoup(html, 'html.parser')
# Find only <a> tags with href ending in .html
html_links = soup.find_all('a', href=re.compile(r'.html$'))
for link in html_links:
print(link.text, ' ', link['href'])
→](https://image.slidesharecdn.com/advancedprogrammingds40108workingwithfilepathsanddirectoriesinpython-250711035304-c87052a2/85/Advanced-Programming-DS40108-_-Working-with-File-Paths-and-Directories-in-Python-pptx-116-320.jpg)
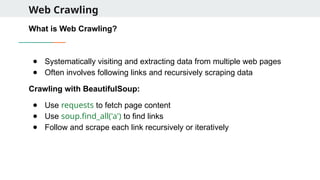
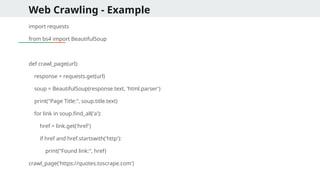

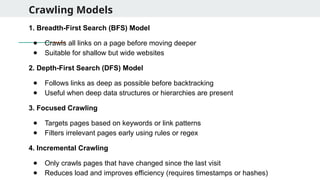
![DFS Crawling
def dfs_crawl(url, depth, visited=set()):
if depth == 0 or url in visited:
return
try:
res = requests.get(url)
soup = BeautifulSoup(res.text, 'html.parser')
print("[DFS] Visited:", url)
visited.add(url)
for link in soup.find_all('a'):
href = link.get('href')
if href and href.startswith('http'):
dfs_crawl(href, depth - 1, visited)
except:
pass](https://image.slidesharecdn.com/advancedprogrammingds40108workingwithfilepathsanddirectoriesinpython-250711035304-c87052a2/85/Advanced-Programming-DS40108-_-Working-with-File-Paths-and-Directories-in-Python-pptx-121-320.jpg)
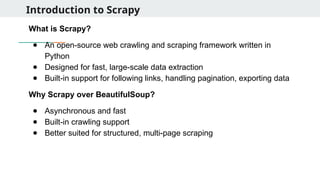
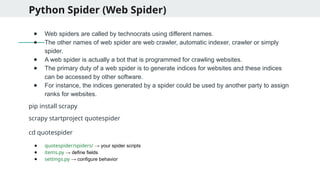
![Creating your first Spider
● Create a new spider in the spiders directory:
scrapy genspider quotes quotes.toscrape.com
● Edit quotes.py:
import scrapy
class QuotesSpider(scrapy.Spider):
name = "quotes" # Unique name to run the spider
start_urls = ['https://quotes.toscrape.com'] # Start scraping from this URL
def parse(self, response):
for quote in response.css('div.quote'): # Loop through each quote container
yield {
'text': quote.css('span.text::text').get(), # Extract quote text
'author': quote.css('small.author::text').get(), # Extract author name
'tags': quote.css('a.tag::text').getall() # Get list of tags
}](https://image.slidesharecdn.com/advancedprogrammingds40108workingwithfilepathsanddirectoriesinpython-250711035304-c87052a2/85/Advanced-Programming-DS40108-_-Working-with-File-Paths-and-Directories-in-Python-pptx-124-320.jpg)


![Extracting from more complex data
if author_url:
# Ensures the URL is valid before following it.
yield response.follow(author_url, self.parse_author, meta={'item': item})
# Makes a new request to the author's page and passes the item using meta.
def parse_author(self, response):
# This function is called for each author's page visited by response.follow.
item = response.meta['item']
# Retrieves the item passed from the previous parse function.
item['birthdate'] = response.css('span.author-born-date::text').get()
# Extracts author's birth date from the author's page.
item['bio'] = response.css('div.author-description::text').get()
# Extracts author's biography/description from the author's page.
yield item
# Final step: yields the complete item containing quote, author, birthdate, and bio.](https://image.slidesharecdn.com/advancedprogrammingds40108workingwithfilepathsanddirectoriesinpython-250711035304-c87052a2/85/Advanced-Programming-DS40108-_-Working-with-File-Paths-and-Directories-in-Python-pptx-128-320.jpg)
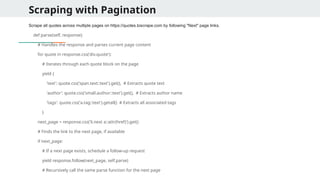
![Scrapy Items and Item loaders
Define a structured format (fields) to store extracted data (quotes, authors, tags).
import scrapy
class QuoteItem(scrapy.Item):
text = scrapy.Field() # Defines a field for the quote text
author = scrapy.Field() # Defines a field for the author's name
tags = scrapy.Field() # Defines a field for tags associated with the quote
from quotespider.items import QuoteItem
item = QuoteItem()
item['text'] = quote.css('span.text::text').get() # Assigns extracted quote text to the item field](https://image.slidesharecdn.com/advancedprogrammingds40108workingwithfilepathsanddirectoriesinpython-250711035304-c87052a2/85/Advanced-Programming-DS40108-_-Working-with-File-Paths-and-Directories-in-Python-pptx-130-320.jpg)
![Scrapy Pipelines
Clean or transform data before storing or exporting (e.g., trim whitespace).
# In settings.py
ITEM_PIPELINES = {
'quotespider.pipelines.QuotespiderPipeline': 300,
# Registers the QuotespiderPipeline class and sets its priority
}
# In pipelines.py
class QuotespiderPipeline:
def process_item(self, item, spider):
item['text'] = item['text'].strip() # Cleans whitespace from the quote text
return item # Returns the processed item to the pipeline chain](https://image.slidesharecdn.com/advancedprogrammingds40108workingwithfilepathsanddirectoriesinpython-250711035304-c87052a2/85/Advanced-Programming-DS40108-_-Working-with-File-Paths-and-Directories-in-Python-pptx-131-320.jpg)
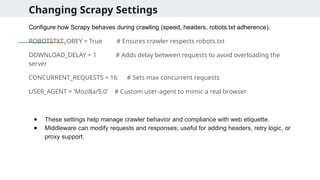


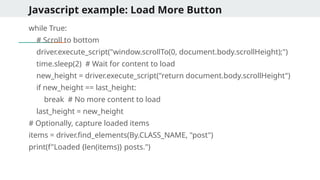


![Multiprocessing and theading
Q1. What would be the output of the following code?
from multiprocessing import Pool
def f(x):
return x*x
if __name__ == '__main__':
with Pool(2) as p:
print(p.map(f, [1, 2, 3, 4]))
A) [1, 4, 9, 16]
B) May vary based on number of cores
C) Error due to function not being pickleable
D) Only first two results returned due to pool size
Q2. Which of the following is true about multiprocessing.Process?
A) It shares memory space with the main process
B) It runs in a new thread
C) It runs in a separate process with its own memory
D) It cannot run on Windows systems
A- Explanation: Pool size limits concurrency, but all inputs are processed.
C- Explanation: Processes are independent with separate memory space.](https://image.slidesharecdn.com/advancedprogrammingds40108workingwithfilepathsanddirectoriesinpython-250711035304-c87052a2/85/Advanced-Programming-DS40108-_-Working-with-File-Paths-and-Directories-in-Python-pptx-143-320.jpg)


![RegEX in Python
Q27. What does the regular expression r'bw{4}b' match?
A) Words longer than 4 characters
B) Exactly 4-letter words
C) Any 4 characters
D) All uppercase 4-letter words
Q28. What will re.findall(r'[a-z]{3,}', 'abc defg h ijkl') return?
A) ['abc', 'defg', 'ijkl']
B) ['abc', 'defg', 'h', 'ijkl']
C) ['abc', 'defg', 'ij']
D) ['abc', 'defg']
Q29. What is the output of re.sub(r'(d+)', r'#1#', 'abc123xyz456')?
A) abc123xyz456
B) abc#123#xyz#456#
C) abc#xyz#
D) abc#1#xyz#2#
B- Explanation: b is a word boundary. w{4} matches exactly 4 word characters. So the regex matches
words that are exactly 4 letters long.
A - Explanation: [a-z]{3,} matches sequences of lowercase letters that are 3 or more characters long.
B- Explanation: d+ matches digits. 1 references the captured digits and wraps them with #.](https://image.slidesharecdn.com/advancedprogrammingds40108workingwithfilepathsanddirectoriesinpython-250711035304-c87052a2/85/Advanced-Programming-DS40108-_-Working-with-File-Paths-and-Directories-in-Python-pptx-152-320.jpg)
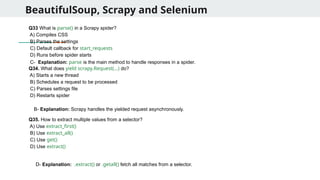


![[DSC Europe 25] Andrzej Kowalczyk - AI - how to start small and grow in the f...](https://cdn.slidesharecdn.com/ss_thumbnails/oy1zmo94qv6vpcqjvno2-andrzej-kowalczyk-ai-how-to-start-small-and-grow-in-the-future-1-260119121559-cf093b23-thumbnail.jpg?width=640&height=640&fit=bounds)


![[DSC Europe 25] Ivan Lukovic & Marija Djukic - From Data to Value: Why Maturi...](https://cdn.slidesharecdn.com/ss_thumbnails/ahrfps8xr6knowwhacxh-1-ivan-marija-dsc-2025-ld-v1-presentation-260115093812-be21adfc-thumbnail.jpg?width=640&height=640&fit=bounds)