Download as PDF, PPTX

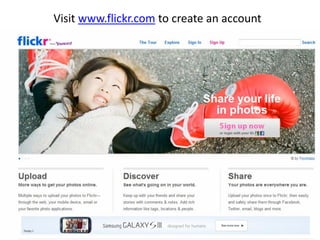

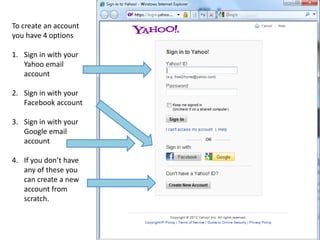
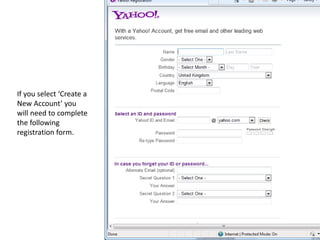
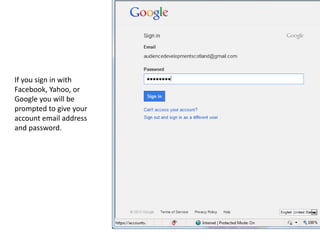
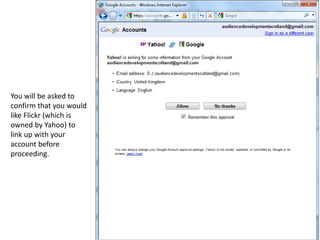
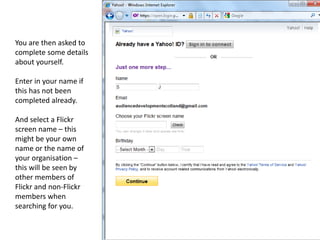
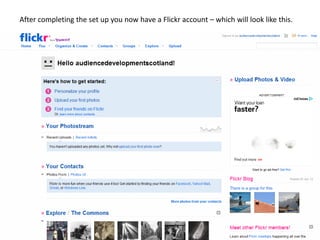
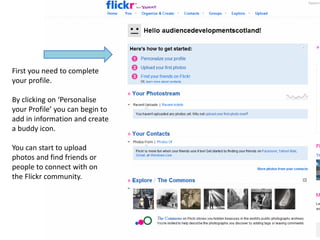

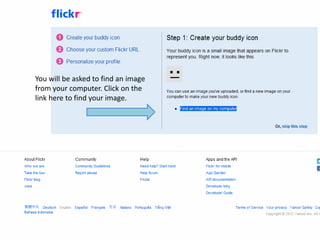
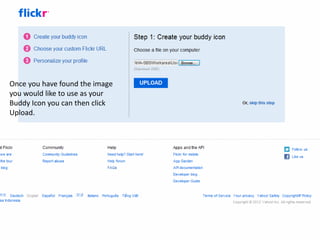
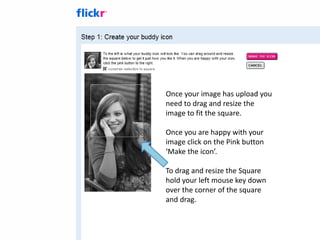
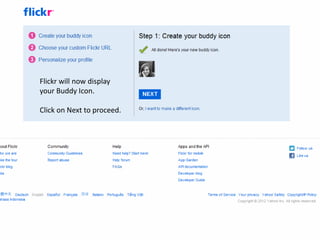
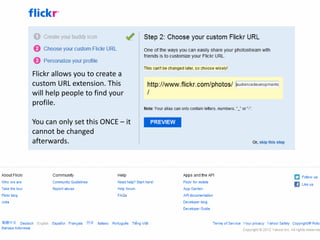
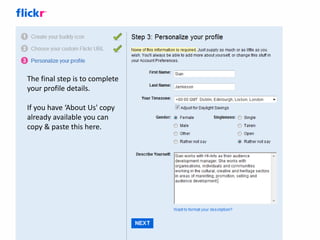
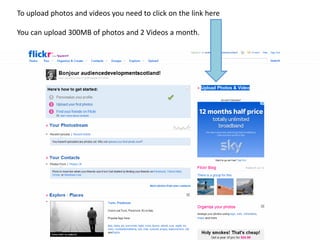
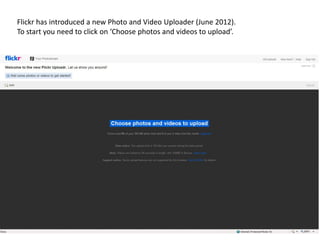

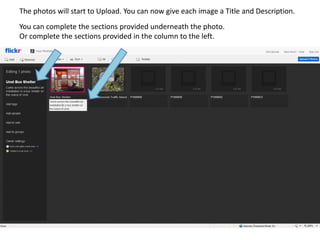
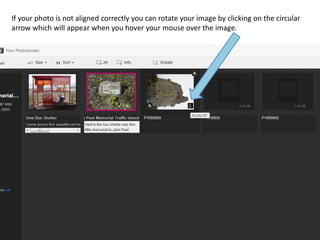
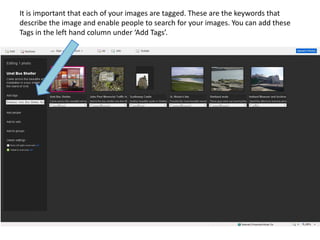
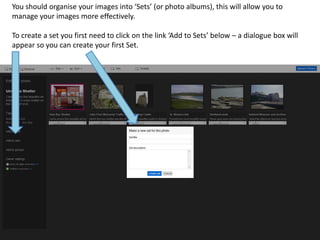
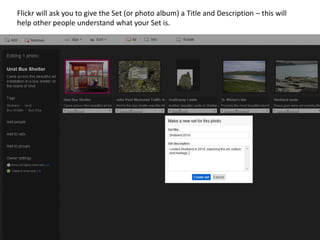
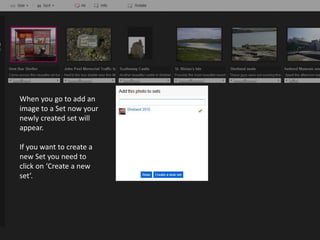
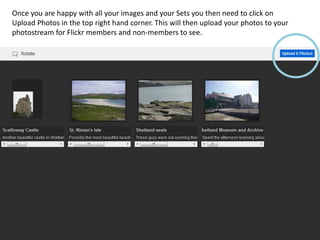
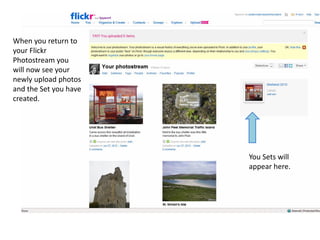
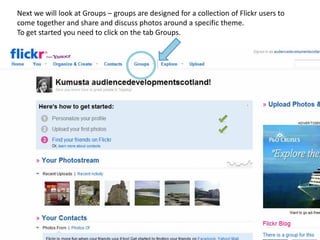
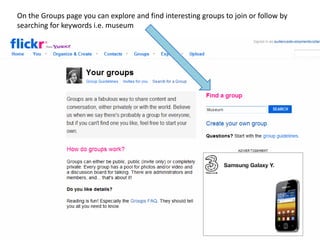
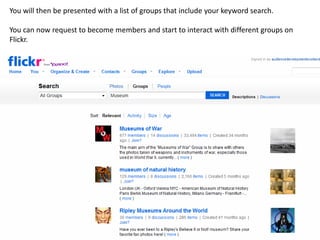
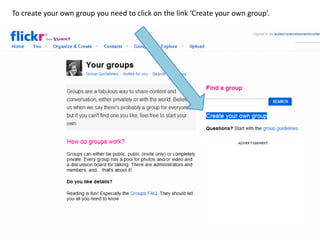
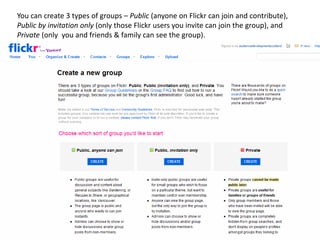
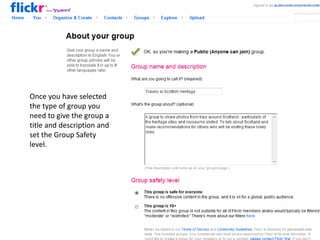
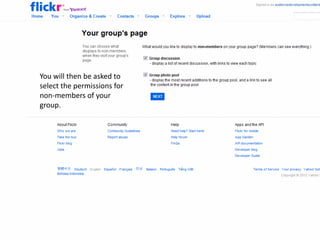
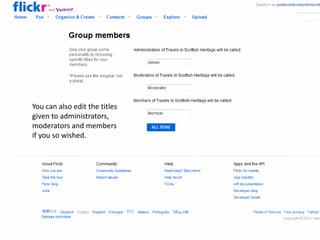
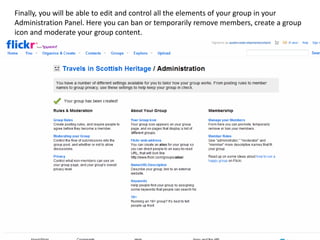
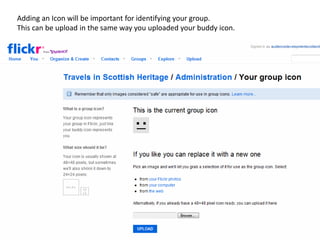
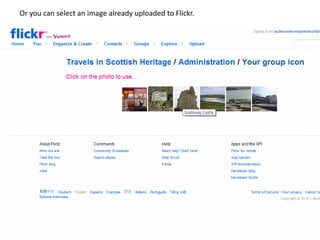
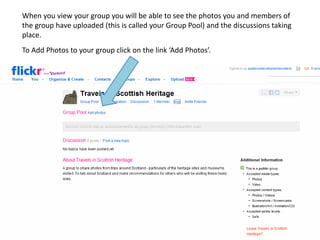
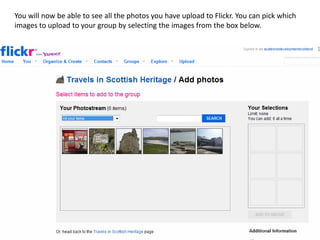
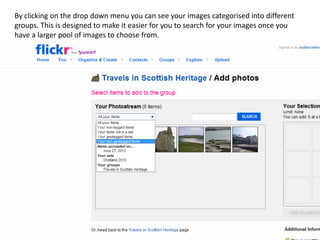
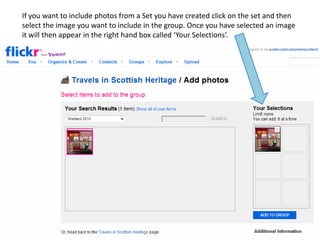
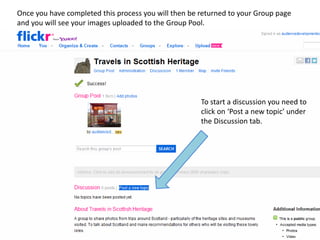
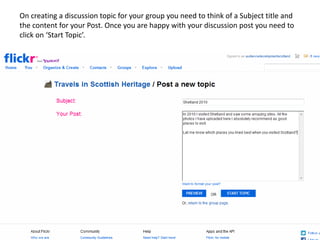
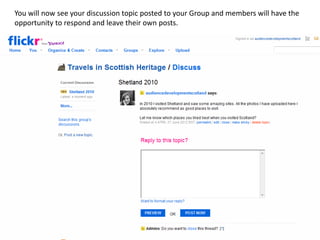
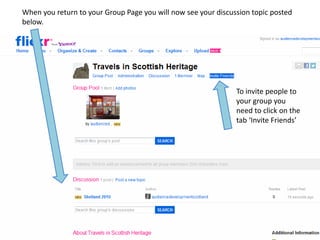
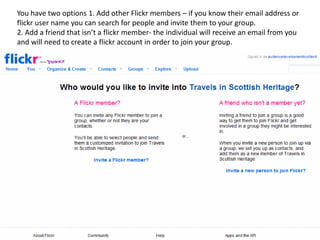
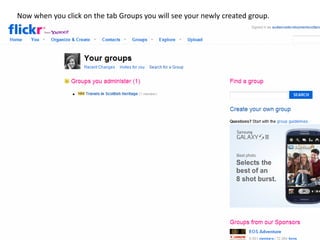
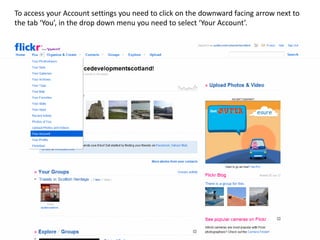
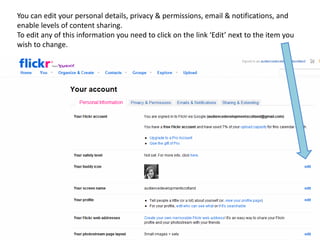
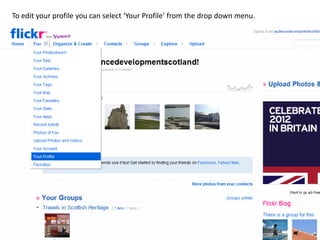
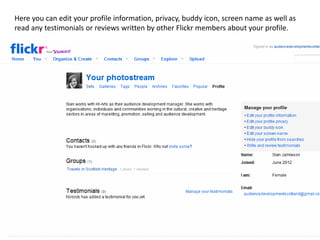
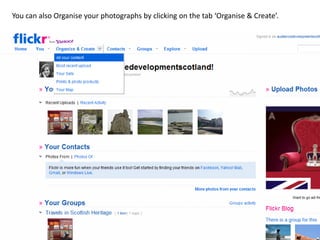
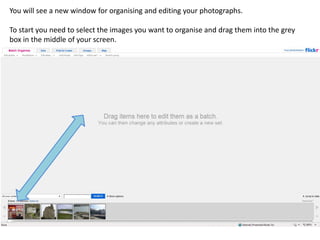
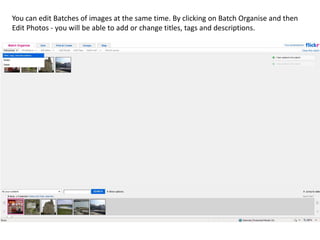
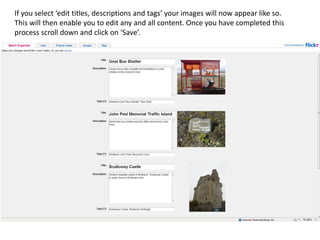
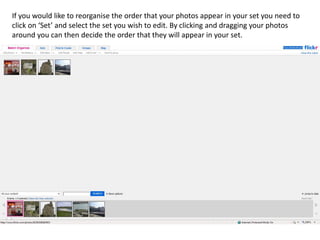
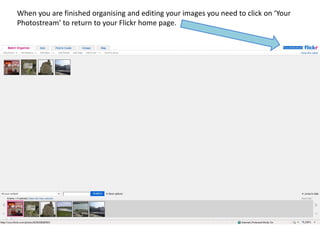
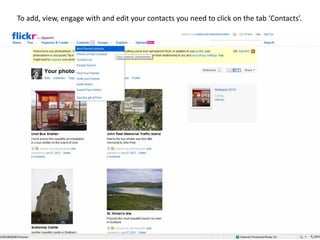
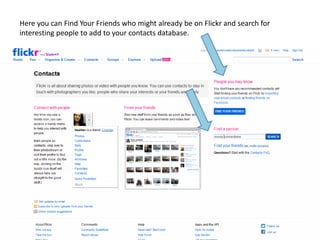
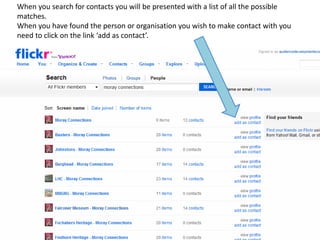
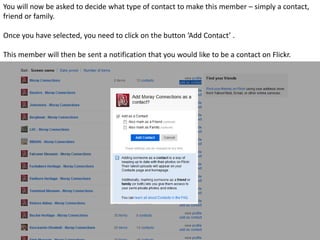
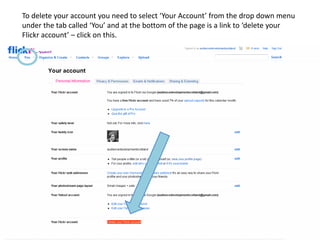
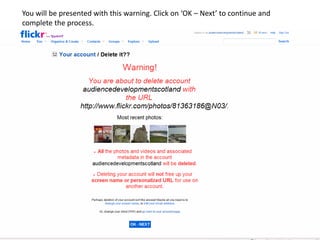

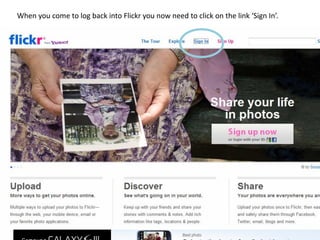

This document provides instructions for setting up and using a Flickr account. It explains how to create an account, upload photos and videos, organize photos into sets, join and create groups, add contacts, and customize account settings. The document guides the user through each step, with screenshots to illustrate the Flickr interface. The goal is to help museums and cultural organizations utilize Flickr's features to engage audiences and share collections online.