Download as PDF, PPTX
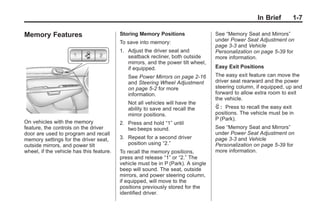

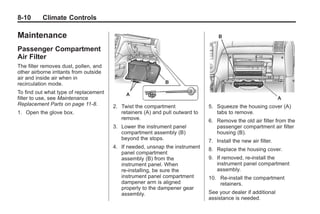
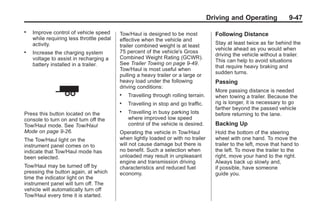
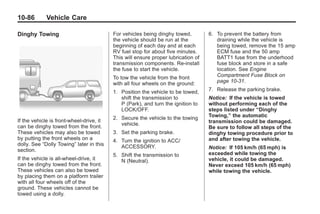
![Black plate (21,1)Buick Enclave Owner Manual - 2011
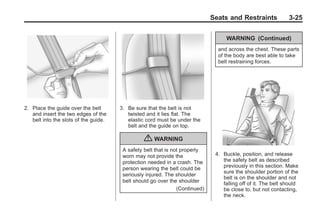
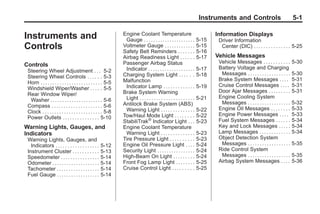
In Brief 1-21
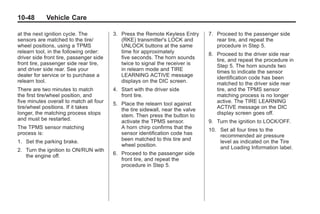
OnStar®
For vehicles with an active OnStar
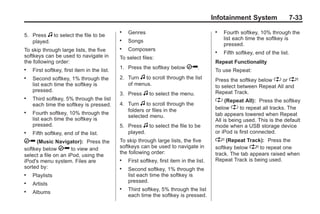
subscription, OnStar uses several
innovative technologies and live
Advisors to provide a wide range
of safety, security, navigation,
diagnostics, and calling services.
Automatic Crash Response
In a crash, built‐in sensors can
automatically alert an OnStar
Advisor who is immediately
connected to the vehicle to
see if you need help.
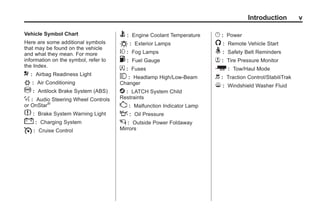
How OnStar Service Works
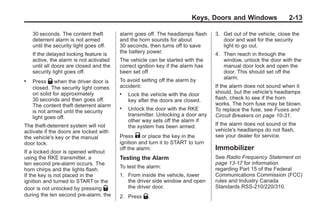
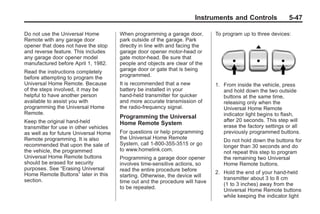
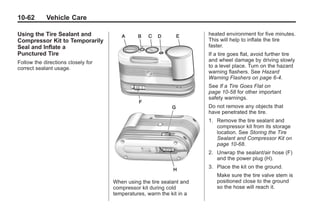
Q : Push this blue button to
connect to a specially trained
OnStar Advisor to verify your
account information and to
answer questions.
] : Push this red emergency
button to get priority help from
specially trained OnStar Emergency
Advisors.
X : Push this button for hands‐free,
voice‐activated calling and to give
voice commands for Hands‐Free
Calling and Turn‐by‐Turn
Navigation.
Automatic Crash Response,
Emergency Services, Crisis Assist,
Stolen Vehicle Assistance, Vehicle
Diagnostics, Remote Door Unlock,
Roadside Assistance, Turn‐by‐Turn
Navigation, and Hands‐Free Calling
are available on most vehicles. Not
all OnStar services are available on
all vehicles. For more information,
see the OnStar Owner's Guide;
visit www.onstar.com (U.S.) or
www.onstar.ca (Canada); contact
OnStar at 1-888-4-ONSTAR
(1‐888‐466‐7827) or TTY
1‐877‐248‐2080; or push the Q
button to speak with an OnStar
Advisor 24 hours a day, 7 days
a week.
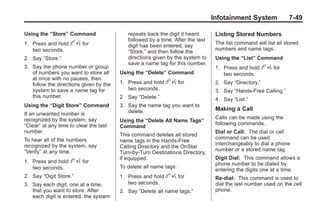
For a full description of OnStar
services and system limitations,
see the OnStar Owner's Guide in
the glove box.
OnStar service is subject to the
OnStar Terms and Conditions
included in the OnStar Glove
Box Kit.
OnStar service requires wireless
communication networks and the
Global Positioning System (GPS)
satellite network. Not all OnStar
services are available everywhere
or on all vehicles at all times.
OnStar service can’t work unless
the vehicle is in a place where
OnStar has an agreement with a
wireless service provider for service
in that area, and the wireless
service provider has coverage,
network capacity, reception, and
technology compatible with OnStar
service. Service involving location
information about the vehicle can’t
work unless GPS signals are
available, unobstructed, and
compatible with the OnStar](https://image.slidesharecdn.com/2011-buick-enclave-toledo-owners-101124132106-phpapp02/85/2011-Buick-Enclave-Toledo-Owners-Manual-27-320.jpg)


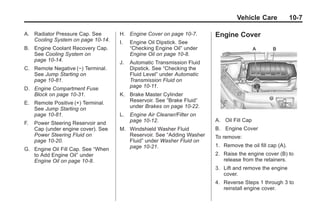
![Black plate (37,1)Buick Enclave Owner Manual - 2011
Driving and Operating 9-37
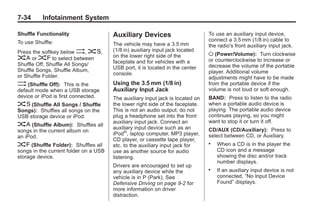
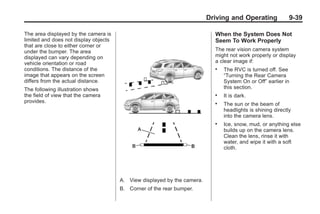
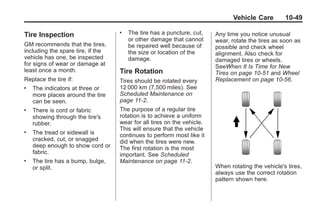
R (Reverse), the video image
automatically appears on the
navigation screen. Once the driver
shifts out of R (Reverse), the
navigation screen will go back to the
last screen that had been displayed,
after a delay.
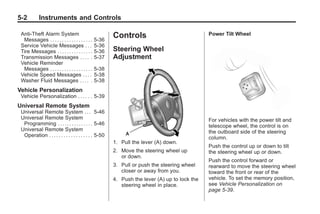
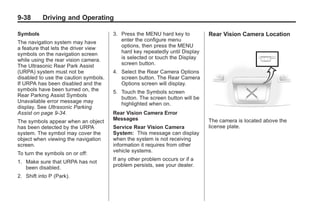
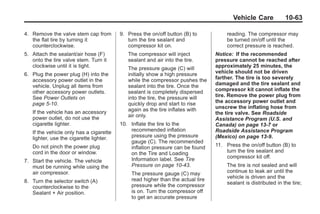
Turning the Rear Vision Camera
System On or Off
To turn the rear vision camera
system on or off:
1. Shift into P (Park).
2. Press the MENU button to enter
the configure menu options, then
press the MENU hard key to
select Display or touch the
Display screen button.
3. Select the Rear Camera Options
screen button. The Rear Camera
Options screen displays.
4. Select the Video screen button.
When the Video screen button is
highlighted the RVC system
is on.
The delay that is received after
shifting out of R (Reverse) is
approximately 10 seconds. The
delay can be cancelled by
performing one of the following:
. Pressing a hard key on the
navigation system.
. Shifting in to P (Park).
. Reach a vehicle speed of
8 km/h (5 mph).
There is a message on the rear
vision camera screen that states
“Check Surroundings for Safety”.
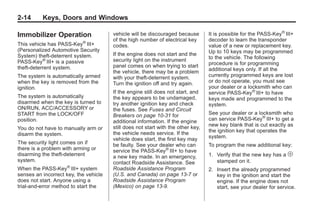
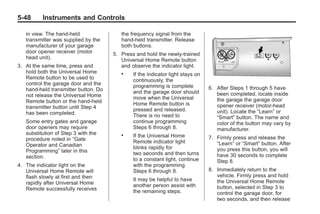
Adjusting the Brightness and
Contrast of the Screen
To adjust the brightness and
contrast of the screen, press the
MENU button while the rear vision
camera image is on the display. Any
adjustments made will only affect
the rear vision camera screen.
] (Brightness) : Touch the +
(plus) or – (minus) screen buttons to
increase or decrease the brightness
of the screen.
_ (Contrast) : Touch the + (plus)
or – (minus) screen buttons to
increase or decrease the contrast of
the screen.](https://image.slidesharecdn.com/2011-buick-enclave-toledo-owners-101124132106-phpapp02/85/2011-Buick-Enclave-Toledo-Owners-Manual-275-320.jpg)


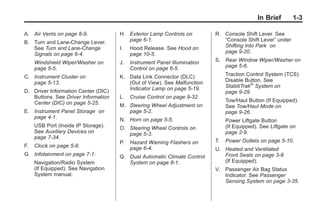
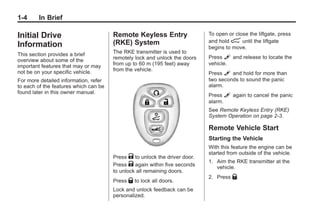
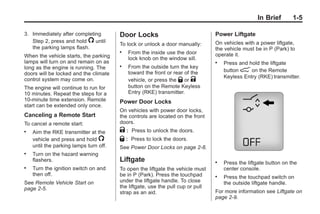
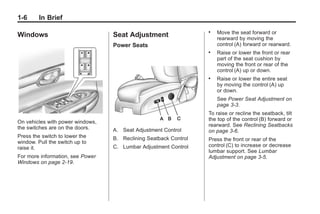
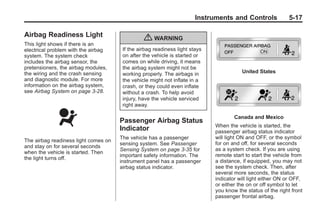
This document provides an overview of controls and features for a 2011 Buick Enclave owner's manual, describing the instrument panel, initial drive information such as remote keyless entry and door locks, vehicle features including audio systems and storage compartments, and notes on performance and maintenance like the StabiliTrak system and engine oil life system.


