quickgide surviveing your first night in minecraft
•Download as PPTX, PDF•
1 like•391 views

this is just a short ten slide presintation i put together to show you how to survive your first night in minecraft(edited). please watch and rate!! ******* THERE ARE A FEW MISPELLED WORDS i know, but if i change them i wont be able to uplode the slides

Recommended
More Related Content
Viewers also liked
Viewers also liked (12)
Similar to quickgide surviveing your first night in minecraft
Similar to quickgide surviveing your first night in minecraft (7)
quickgide surviveing your first night in minecraft
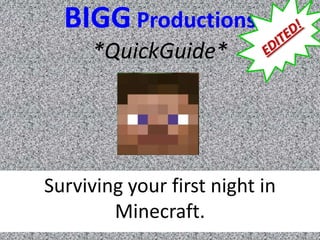
- 1. BIGG Productions *QuickGuide* Surviving your first night in Minecraft.
- 2. introduction Steve? • In minecraft your spawned in a random location and need to collect the bare nessesidys to survive. In order to do this you must collect wood, craft stuff, and create a shelter. • Steve?-=- steve? is the name of your charictor you start out with. Now I say that becouse you can change the skin on Steve? By downloading from the internet. Notch put the question mark by his name becouse he is not shure if that’s going to be his real name.
- 3. introduction TIPS ***tips*** • The day last 10 minutes • The night last 7minutes to 7 ½ minutes • NEVER dig strait down
- 4. Task #1 Collecting Wood • The first task needed to survive is... Collecting wood. Wood is important because it creates a crafting box (we’ll get to that later). To collect wood walk up to a tree and punch it (click and hold left button on mouse). A little piece of wood will fall from the tree walk over to the fallen piece and it will automatically pick it up. It will then show up on your “hot bar” down at the bottom of the screen and in your hand.
- 5. Task #2 creating planks • To create your wooden planks open your inventory and next to Steve? You will see 4 squares and one single block*fig.1*. So what you want to do is put all your blocks of wood in one square (blue arrow) and on the single block(green arrow) a new item will show up click on it until the wood is gone in the 4 square box and drag it to your hot bar.*tip* each block of wood is 4 planks. see I have here 21 regular wood and each block of wood makes 4 planks so I would have 84 planks of wood, that’s plenty more then we need.
- 6. Task #3 v creating a crafting table *A.K.A workbench* • After you gather your planks your next task is to create a workbench(fig.1). To create a work bench open your inventory and next to Steve? (fig.3)and in the same spot you made the planks put a plank in each block(except for the single one)and A new item will show up click on it and drag it to your hot bar. Then exit your inventory and scroll or click the crafting table on your hot bar and set it on the ground. when you click on it should look like (fig.4). (to remove from spot where you put it just click on it and destroy it then pick it up again. Fig. 3 Fig. 4 Fig. 1 Fig. 2
- 7. Task #4 creating sticks • After the crafting table is done you need to create a pickaxe- to create a hiding hole. now we need to create sticks for the handles so open your crafting table and follow the illistaton… and you just created sticks. Every two planks creates four sticks. ***warning- do NOT convert all of your planks to sticks, you will only need about 20 sticks.***
- 8. Task #5 creating a wooden pickaxe • Now in your crafting table create a pickaxe as illistration deminstrates(fig.2). (fig.1 is just a illistration of the wooden pickaxe)
- 9. Task #6 creating a stone pickaxe • So you crafted a wooden pickaxe you need something stronger. So now you need to to craft a stone pickaxe. To do this you must find a hillside or mountain with stone showing(or you could dig down a couple blocks). Stone should be the color of gray and look like fig.1 (red arrow) and be the color of gray. You will need 3 stone but it would be better to have more in case.
- 10. Task #6 creating a stone pickaxe(cont.) • After you have your stone and your near your crafting table you can create your stone pickaxe. All that you need to do is create a regular wooden pickaxe but out of stone. **the planks would be blocks of cobblestone**
- 11. Task #6 creating a hiding hole • Now with your pickaxe tear up your crafting box and pick it up then find a nice spot to build your house. Then build your house however you want but leave a 1 block wide by two block high for the door. After you built a house(it doesn’t have to be fancy 5 blocks by five blocks… but it must be at lest two blocks high or your charictor will not fit in it) you will create a door to do this (fig.1) then put it in the 1x2 hole you made it should look like fig.2. then your done with the house it will look simular to fig.3 it can be made out of cobblestone, wood, dirt and more but those are the most resorceful. Fig.2 Fig.3 Fig.1
- 12. Task #7 creating torches • Now that you have a house you need to find some coal to make torches coal looks like fig.1. it looks like stone but has black shadeing through it.
- 13. Task #7 creating torches (cont.) • Now that you have coal you can create torches just follow the demistration and craft. Each coal and stick creates 4 torches. This is coal
- 14. Task #8 waiting out the night • Now that you have a home you can go into it. You need to light up the inside so no monsters spawn inside your house so just place the torches on the wall. Remember the night lasts 7 minutes.
- 15. Task #6 celebrate • Congratulations you’ve made it your first night. Lets hope you will continue the same for many more! If you have anything to add to this slide presentation please comment me. Even if you’re a pro at minecraft please rate this as if you were a learner and trying to figure things out. And remember this is my first slide created in thee hours so it is kind of sloppy. Thanks for the support