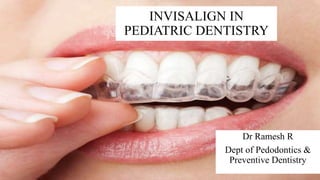
Invisalign in Pediatric Dentistry: A Guide
•
7 likes•1,132 views

Clear aligners are a revolutionary orthodontic treatment method that uses custom-made, removable, clear plastic aligners to gradually move teeth into the desired position. The treatment utilizes CAD/CAM technology to digitally plan and guide tooth movements through sequential aligner trays worn for two weeks each. Clear aligners are a viable treatment option for less complex malocclusions and offer advantages like aesthetics, comfort, and reduced treatment time compared to traditional braces. However, clear aligners also have limitations in the types of tooth movements that can be accurately achieved. Careful patient selection and use of ancillary devices may be needed to optimize clinical outcomes.

Recommended
More Related Content
What's hot
What's hot (20)
Similar to Invisalign in Pediatric Dentistry: A Guide
Similar to Invisalign in Pediatric Dentistry: A Guide (20)
More from Dr Ramesh R
More from Dr Ramesh R (19)
Recently uploaded
Recently uploaded (20)
Invisalign in Pediatric Dentistry: A Guide
- 1. INVISALIGN IN PEDIATRIC DENTISTRY Dr Ramesh R Dept of Pedodontics & Preventive Dentistry
- 2. REFERENCES 1. Mcdonald & Avery dentistry for child & adolescence 10th edition 2. Clear aligner technique, Sandra tai, 2018, quintessence publishing co, inc 3. Orthodontics current principles and techniques –Graber, Varnsdall,vig 4. Textbook of orthodontics- William R profitt 5. Pediatric dentistry infancy through adolescence, Cassamassimo, 5th edition 6. Pediatric dentistry A clinical approach, 2nd edition, Goran koch & Sven poulsen 7. Pediatric dentistry, Richard welbury & Monty duggal, 5th edition 8. The insiders guide to Invislign treatment- Barry J glasser 9. Drastic plastic: Enhancing the predictability of clear aligners- S. Jay bowman 10. Invisalign instruction manual –Mcgill university 11. Aligner Bio-mechanics - Orthodontic clinical education corp. 12. Web reference: www.Alignerinsider.Com
- 3. CONTENTS 1. Introduction 2. Definition 3. History of the orthodontic appliance 4. Indication 5. Contraindication 6. Advantages 7. Disadvantages 8. Biomechanics of clear aligners 9. Steps in clear aligner treatment 10. Case selection for clear aligner treatment 11. Clincheck software design 12. Digital workflow and monitoring treatment 13. Finishing, and retention 14. Resolution of crowding 15. Journals
- 4. INTRODUCTION 1. Clear aligner technique, Sandra tai, 2018, quintessence publishing co, inc 2. Orthodontics current principlesand techniques–Graber, Varnsdall,vig
- 5. DEFINITION Orthodontic treatment method based on the usage of custom made, removable, clear, semielastic polyurethane aligners that needs to be interchanged every two weeks for a period of six to eighteen months Introduced by Align Technology, Santa Clara, Calif. Invisalign takes the principals of kesling and raintree essix even further, using CAD CAM technology compared with laboratory techniques Meier B, Wiemer KB, Miethke RR. Invisalign: patient profiling— analysis of a prospective survey. J Orofac Orthop 2003;64(5):352-8
- 6. HISTORY • 1945, Peter kesling suggested moving of teeth without bands, brackets and wires using thermoplastic tooth positioners • 1964, Nahoum - vaccum formed dental contour appliance • 1971, Pontiz & 1985, Mcnamara wrote about types of overlay appliances such as invisible retainer • 1993 a technique developed by raintree essix, New orleans, la - minor tooth movements. Mcdonald & Avery dentistry for child & adolescence 10th edition
- 7. ESSIX RETAINER • This technique uses clear aligners formed on plaster models of teeth • The aligners are modified with “devots” by special heated pliers which produce forces to push on individual teeth, and windows to create space for the teeth to move. • This type of appliance can correct only mild discrepancies
- 8. Scheau et al proposed the first thermoforming machine to synthesize orthodontic appliances in 1966. Currently 2 types of thermoforming machines:- The Ministar and Biostar (Scheau Dental)
- 10. Kesley wirth and Zia chisti, two MBA students from Stanford university, founded Align Technology in April 1997. Today the company is based in Santa clara, California, employs over 800 employees and has subdivisions in Europe, Mexico and Costa rica
- 11. • In 1997, clear aligners from align technology made of a new tripolymer plastic and make use of optimized attachments used 3D computer imaging graphics to the field of orthodontics. • Clear aligner technology represents a revolutionary, transformational change in orthodontics that challenges the conventional thinking of how orthodontists move teeth. • Clear aligners have already evolved since they were released to the market in 1999. • At beginning these were considered for the treatment of class i cases with minor crowding, resolved primarily with interproximal reduction. • However, in this 21st century of digital technology, the clinician must now learn to apply principles of orthodontics to the field of clear aligner technique. Align Technology, Inc. http://www.aligntech.com/. Accessed 5 February 2018
- 12. • The teeth are moved according to sophisticated computer algorithms developed in the software program. • There are many clear aligner systems being developed all over the world, and it is evident that this will be the future of orthodontics. • It is important to understand that clear aligner treatment is a technique, not a product. • There is a common misconception that clear aligners are a “compromise” orthodontic appliance that is only capable of minor tooth movement. • • However, the clear aligner system of today is a comprehensive orthodontic appliance, capable of treating a wide range of malocclusions. Ali SA, Miethke HR. Invisalign, an innovative invisible orthodontic appliance to correct malocclusions: Advantages and limitations. Dent Update 2012;39:254– 256,258–260.
- 13. • Before a single tooth is moved, the correction of the malocclusion is visualized through a series of tooth movements made on a software program and the final occlusion designed into the treatment outcome. • This requires a paradigm shift in the thought process from being a reactive pediatric orthodontist to being a proactive pedodontists. 1. Li W, Wang S, Zhang Y. The effectiveness of the Invisalign appliance in extraction cases using the ABO model grading system: A multicenter randomized controlled trial. Int J Clin Exp Med 2015;8:8276–8282. 2. Djeu G, Shelton C, Maganzini A. Outcome assessment of Invisalign and traditional orthodontic treatment compared with the American Board of Orthodontics objective grading system. Am J Orthod Dentofacial Orthop 2005;128:292– 298.
- 14. INDICATION 1. Class I spacing with minor/moderate crowding and existing good buccal occlusion 2. Class II malocclusion with minor crowding 3. Class III with minimal overbite/overjet non-extraction cases 4. Skeletal & dental anterior open bite 5. Deep bite 6. Posterior cross bite 7. Highly placed canine/ palataly locked canine 8. Lower incisor extraction 9. Bimaxillary protrusion 10. Premolar extractions with minor crowding
- 16. CONTRAINDICATION High risk caries individual Lack of self motivation in wearing the appliance
- 17. ADVANTAGES • Esthetics • Comfort • Detachable • No bonding to enamel defects • No root resorption • Less pain and discomfort • Better hygiene • Can be used with any restoration or crown • Doesn't alter speech • Less chair time and armamentarium • Good vertical control • Precise control of each tooth • Controls bruxism • Bleaching during treatment
- 18. DISADVANTAGES • Inconsistency between computer prediction and actual tooth movement in Invisalign treatment always limits clinical judgment • Long terms studies including clinical controlled trials & RCTs are lacking evaluating the strength, performance and longevity of the appliance. • Very high cost • Inter proximal reduction • Need for clinical experience Tsai MH, Chen SS, Chen YJ, Yao JC. Treatment Efficacy of Invisalign: Literature Review Update. Taiwanese Journal of Orthodontics. 2020;32(2):1.
- 19. STEPS FOLLOWED: 1. Obtain impression /intraoral scan 2. Clin check software diagnosis & treatment planning 3. Evaluate staging of treatment 4. Delivery of set of trays 5. Monthly check up 6. Refinement 7. Retention
- 20. IMPRESSION ADDITION SILICONE 3 M TRIOS INTRAORAL SCANNER
- 21. BIO MECHANICS OF ALIGNERS • FORCE • ENGEGEMENT • ANCHORAGE • EXTRUSION • INTRUSION • TORQUE • ROOT INCLINATION
- 22. COMPARISON BETWEEN EDGEWISE APPLIANCES AND CLEAR ALIGNERS
- 23. FORCE, ENGAGEMENT, AND ANCHORAGE FORCE • Fixed appliance exert pull on teeth while clear aligners push on teeth.
- 24. FIXED APPLIANCE CLEAR ALIGNERS FORCE DEPENDS ON FLEXIBILTY OF ARCH WIRE & AMOUNT OF DEFLECTION ALIGNERS DEFORMS OVER THE TOOTH & ELASTICITY OF IT PUSHES TOOTH IN POSITION ELASTOMERIC CHAIN CONTRACTS & REBOUNDS – SPACE CLOSURE OPTIMIZED ATTACHMENTS PROVIDE AN ACTIVE, FLAT SURFACE THAT PUSH AGAINST TO EFFECT TOOTH MOVEMENTS Gomez JP, Peña FM, Martínez V, Giraldo DC, Cardona CI. Initial force systems during bodily tooth movement with plastic aligners and composite attachments: A three-dimensional finite element analysis. Angle Orthod 2015;85:454–460.
- 25. ENGAGEMENT
- 26. ENGAGEMENT FIXED APPLIANCE CLEAR ALIGNER Engage teeth via an archwire ligated into the bracket slot Engage teeth by having aligner material wrapped around teeth. Thicker and more rigid the archwire, the better the engagement More aligner material wrapped around a tooth, the better the engagement Archwire that approximates the size of the bracket slot, the tip, torque, and in-and-outs that are built into the bracket slot Long clinical crowns and larger surface area, there is better engagement and therefore better expression of tooth movement & vice versa Increase the engagement of the aligner onto teeth with small morphology—for example, peg-shaped lateral incisors—is to place an attachment on the tooth.
- 27. ANCHORAGE FIXED APPLIANCE CLEAR ALIGNER Reciprocal anchorage based on newton third law of motion Anchorage segment predetermined and change at each stage of treatment 1 segment of teeth act as anchorage unit for other Offer extremely good control of anchorage because the anchorage teeth made immovable at different stages of treatment. Premolar extraction case- root surface area of post teeth more than ant so ant segment retarct more than post. If post teeth move forward than ant-loss of anchorage In the staging of sequential distalization of the maxillary arch, only the second molars are distalized in the initial stages of treatment. In extraction cases this loss of anchorage taken into account by the clinician when treatment planning extraction cases to ensure that the buccal occlusion finishes in a cusp-to-fossa relationship in the final occlusion. The remaining teeth in the arch from first molar to first molar do not move in the initial stages and act as an anchorage segment to push the second molars distally for anteroposterior correction
- 28. • In this respect, clear aligners offer extremely good control of anchorage because the anchorage teeth may be made immovable at different stages of treatment. For example, (Fig 2-6)
- 29. • In the first premolar extraction protocol (Align Technology), for maximum anchorage, only the canines and posterior teeth move in the initial stages of treatment. • The incisors do not move, and they act as an anterior anchorage segment to distalize the canine into the extraction site for space closure. • At a certain stage in treatment, the second premolar and molars stop moving, and they become the posterior anchorage segment as the canines and incisors are retracted for the remainder of the extraction site closure
- 30. EXTRUSION, INTRUSION, TORQUE, AND ROOT INCLINATIONS
- 31. • Extrusion of a single tooth is a moderately difficult tooth movement for clear aligners. • Auxiliary treatment such as buttons and elastics have to be placed to assist with single-tooth extrusion. • Extrusion of groups of teeth can be performed successfully with clear aligners
- 32. INTRUSION • In clear aligner treatment, entire segments of teeth may be intruded successfully, or selective intrusion of individual teeth be programmed to correct an occlusal cant or level out gingival margins. • This may be performed without concurrent extrusion of the posterior segments if so desired. • As a result, clear aligners offer extremely good vertical control.
- 33. Anterior intrusion is programmed to level out the curve of spee in the mandibular arch to correct a deep bite
- 34. Posterior intrusion is programmed to create occlusal clearance after the posterior teeth have hypererupted.
- 35. TORQUE • Clear aligners very efficient in manging torque • power ridge feature for lingual root torque • Excessive torque undesirable in cases with mild incisor protrusion. (non extraction case) • Additional torque – extraction case Archambault A, Lacoursiere R, Badawi H, Major PW, Carey J, Flores-Mir C. Torque expression in stainless steel orthodontic brackets. A systematic review. Angle Orthod 2010;80:201–210.
- 36. ROOT INCLINATIONS • Long, vertical rectangular attachments will offer control of root inclinations as well. • In lower incisor or premolar extraction cases, virtual gable bends ensure careful management of root inclinations as the extraction spaces are closed
- 37. Optimized root control attachments offer control of root inclinations Cai Y, He B, Yang X, Yao J. Optimization of configuration of attachment in tooth translation with transparent tooth correction by appropriate moment-to-force ratios: Biomechanical analysis. Biomed Mater Eng 2015; 26(suppl 1):S507–S517.
- 38. INCISOR INCLINATION • Excellent control of incisor inclination. • • ClinCheck prescription form - no proclination is desired can be included • The labiolingual pre- and posttreatment positions of the maxillary and mandibular incisors will be monitored using the superimposition tool in the posttreatment occlusion Isaacson RJ, Lindauer SJ, Davidovitch M. On tooth movement. Angle Orthod 1993;63:305–309.
- 39. VERTICAL CONTROL • Excellent vertical control in cases with minimal overbite and overjet. • The occlusal coverage of the aligners on teeth as well as the ability to program intrusive mechanics into the treatment plan allow for leveling and alignment with excellent control of the vertical dimension.
- 40. MIDLINE CORRECTION • Midline correction with clear aligners is more predictable • Interproximal reduction(IPR) is commonly incorporated into the treatment plan to correct the dental midlines. Isaacson RJ, Lindauer SJ, Davidovitch M. On tooth movement. Angle Orthod 1993;63:305–309.
- 41. TOOTH SIZE DISCREPANCY • In clear aligner treatment, the treatment planning software accurately calculates the tooth size discrepancy and will resolve it according to the clinician’s preference • Either by leaving space around the lateral incisors • By including interproximal reduction in the opposing arch. • This is decided at the treatment- planning stage and built into the final occlusion
- 42. COMPARISON BETWEEN EDGEWISE APPLIANCES AND CLEAR ALIGNERS
- 43. CASE SELECTION FOR CLEAR ALIGNER TREATMENT 1. Arch Length Discrepancies 2. Vertical Discrepancies 3. Transverse Discrepancies 4. Anteroposterior Discrepancies 5. Indications for Clear Aligner Treatment
- 45. TREATMENT OPTIONS RANGE FROM SIMPLE TO COMPLEX WITH AN INCREASING LEVEL OF DIFFICULTY • Mild crowding may be simple to resolve • As the degree of crowding increases, the degree of difficulty in treating the case also increases. • Premolar extraction treatment is an advanced case with clear aligner treatment
- 48. 1. Pediatric dentistry infancy through adolescence, Cassamassimo, 5th edition 2. Pediatric dentistry A clinical approach, 2nd edition, Goran koch & Sven poulsen
- 49. CLEAR ALIGNER WITH HORSE JET APPLIANCE FOR DISTALIZATION
- 50. The Horseshoe Jet is a miniscrew-supported maxillary molar distalization appliance. Miniscrews, inserted in the palatal alveolus, provide anchorage for compressed coil springs to push molars posteriorly without any anchorage loss. After distalization is complete, the setscrews are tightened to stop further molar movement and the appliance now serves as a miniscrew-supported holding arch for subsequent retraction of the remaining teeth. BOWMAN et al, Adjuncts SA. Creative Adjuncts for Clear Aligners.
- 52. We can correct deep bites with the following: 1. Anterior intrusion 2. Posterior extrusion 3. A combination thereof Clincheck list for guidance on criteria to correct this
- 53. • INCISAL DISPLAY — intrusion of the upper anterior teeth would be indicated in deep- bite cases with super-eruption of the upper incisors, but would be contra-indicated in deep-bite cases with insufficient incisal display. • GINGIVAL DISPLAY — similar to incisal display, upper anterior intrusion may be beneficial in patients with vertical maxillary excess (VME) to reduce gummy smiles
- 54. • Gingival margins — intrusion or extrusion of key teeth improve the symmetry of gingival margins. In patients with incisal wear and super-eruption of the worn tooth, anterior intrusion would be indicated to level the gingival margins prior to restoration of the tooth • Smile arc — when working up Invisalign treatment plans, we endeavor to create pleasing smile arcs where the curvature of the upper anterior incisal edges follows the curvature of the lower lip. Anterior intrusion or extrusion is a primary consideration in these cases • Lower Curve of Spee — lower incisor intrusion and/or posterior extrusion are key components to correcting deep over bites. Some deep-bite cases requiring bite opening via posterior extrusion. For example, in patients with: Short lower facial heights Restorative cases with loss of vertical dimension Hypodivergent, skeletal deep bites CLII div.2 malocclusion
- 55. In cases where you deem deep overbite correction to have priority over premolar rotation, substitute 4mm-wide, occlusally- beveled rectangular attachments on the lower first and second premolars These attachments provide additional “grip” to prevent the aligners from lifting off posteriorly, and are very effective at supporting the intrusion of the lower incisors.
- 56. • In deep-bite cases requiring posterior extrusion precision bite ramps act like mini “bite plates” to disocclude the posterior teeth when wearing the aligners. • If there is over-jet >3mm bite ramps are not effective — the lower incisors will bite behind them Deep-bite cases requiring posterior extrusion 1. levelling the lower curve of spee 2. Class ii, division 2 cases 3. Bite plate effect — another place to use precision bite ramps is as a bite plate to facilitate correction of dental cross-bites. It may help to reduce the trauma to the tooth in cross-bite as it’s moving through the zone of heavy contact with the opposing dentition • High angle case/long facial height and an excessive gingival display upon smiling is not a candidate for precision bite ramps
- 57. OPEN BITE We can correct Open Bite with the following: 1. Extrude the anterior teeth 2. Intrude the posterior teeth, or 3. A combination of the two.
- 58. Incisal display anterior open-bite cases with insufficient incisal display may benefit esthetically from anterior extrusion, patients with normal incisal display benefit from closure of the open bite via posterior intrusion. Gingival display anterior open-bite cases with insufficient gingival display would benefit esthetically from upper anterior extrusion Gingival margins leveling gingival margins may be required in extrusion. Smile arc when an anterior open bite is related to a habit, the resultant reverse smile arc corrected with anterior extrusion.
- 60. RELATIVE EXTRUSION OR INTRUSION • These are predictable movements“invisalign free ride” • Don’t need any specific attachments or major clincheck plan modifications to achieve relative extrusion or intrusion. • Relative extrusion achieved it by simply tipping teeth lingually; same goes for relative intrusion Rossini G, Parrini S, Castroflorio T, Deregibus A, Debernardi CL. Efficacy of clear aligners in controlling orthodontic tooth movement: A systematic review. Angle Orthod 2015;85:881–889.
- 61. ABSOLUTE EXTRUSION/INTRUSION • More challenging movements with Invisalign treatment • Evaluate Clincheck plan and recognize teeth that are absolutely extruding or intruding. In certain cases, absolute extrusion requires specific: 1. Attachment substitutions 2. Auxiliaries
- 62. Modified 4mm-long, gingivally-beveled, rectangular attachment can be useful for extrusion Optimized extrusion attachment. ATTACHMENTS
- 63. Gingival - if we bevel attachments gingivally less chance to encounter failure mode. Incisal - more “grip” where there will be a 90° ledge at the gingival aspect that will engage the aligner.
- 64. AUXILIARIES • Miniscrews and elastics in a “sling” arrangement. • Miniscrews were placed into the maxillary dentoalveolus on both the buccal and palatal and elastics were worn across the aligners from one anchor to the other to generate posterior intrusion. • Miniscrews were also placed in the buccal alveolus in mandible and buttons were bonded on the lingual of the 1st molars. • Elastics were “slung” from the buttons to the miniscrews to assist with aligner-directed intrusion
- 66. CASE REPORT 1 • 12-year-old female in the late mixed dentition. • Class ii, division i malocclusion; • Deep bite; • Upper and lower crowding and • Severe lingual inclination of the upper and lower anterior teeth • Lower incisor crowding. • Her right and left lower incisors are blocked out to the lingual. The insiders guide to Invislign treatment- Barry J glasser
- 67. Within normal limits Mild hypodi- vergent skeletal pattern Upright upper and lower incisors
- 68. TREATMENT PLAN • Emma is a growing teen, and her Class II, Division I malocclusion was corrected with Class II elastics. • Her crowding resolved through a combination of posterior expansion and anterior proclination. • Transverse expansion was done resolve her crowding • Expansion in the transverse dimension to gained arch length to resolve her crowding, without the need to program any posterior buccal root torque. • The deep overbite correction was achieved via predictable relative intrusion
- 69. CLINCHECK TREATMENT PLAN • Precision-cut elastic hooks on lower 6’s, and 3mm wide rectangular occlusally beveled attachments on the lower 6’s for retention • The deep overbite was managed with predictable relative anterior intrusion achieved with proclination of the upper and lower anterior teeth. • The crowding was resolved through a combination of anterior proclination and posterior expansion • These movements are predictable tipping movements with invisalign clear aligners.
- 71. • Precision cut elastic hooks running off her upper 4’s because her upper 3’s were insufficiently erupted to place a precision cut. • It would have weakened the aligner so placed on the 4’s. • Class II elastics from upper 4 to lower 6 instead of upper 3 to lower 6 — it works just the same.
- 73. RESULTS • At the end of treatment, well-aligned arches and malocclusion corrected to Class I • The final panoramic radiograph is within normal limits and her cephalometric superimposition shows the planned proclination of the upper and lower incisors DISCUSSION • As ,mentioned by Janson et.al. in systematic review maxillary first molar tends to stay relatively the same antero-posteriorly as point A. • The superimposition shows the “headgear effect” which may be achieved with Class II elastics, growth of the mandible showing forward positioning of pogonion and reduction of facial convexity. • SUMMARY: Treatment time was 28 months, with two refinements and the use of 2 oz. Class 2 elastics
- 75. Case 2 • A patient 14 years old presented with a posterior dental cross bite on the upper-right side. • His arch was constricted with upper anterior cross bite Krishnan V. The insider's guide to Invisalign® Treatment (2017). Journal of the World Federation of Orthodontists. 2017 Sep 1;6(3):139-40.
- 76. ClinCheck plan • In cases anchor teeth there on either side of the cross bite that are not in cross bite • for example, the UR7 and the UR3, those teeth provide anchorage to move the collapsed portion of the arch.
- 77. DISCUSSION Skeletal cross bites are a big red flag, particularly in adults; they are unpredictable to treat orthodontically non-surgically, regardless of the appliance used. It is not recommended to correct a skeletal cross bite on an adult patient with invisalign. Transverse discrepancy is corrected before the patient enters into invisalign treatment In a prepubescent child pre-invisalign rapid palatal expansion (rpe) is quite predictable ie, before the onset of the pubertal growth spurt, conventional phase 1 treatment with rapid palatal expansion can pave way for a more predictable invisalign result.
- 78. • In this case cross elastics to helped with that movement. • The clincheck plan depicted might be a typical setup; here is a patient who has a posterior cross bite on the right side, • button cutouts on the lower surfaces of the LR6 and LR7, as well as on the palatal surfaces of the UR6 and UR7. • Bond buttons on those surfaces as well as the lower arch
- 79. For transverse dimension problems being treated with invisalign clear aligners is over- treatment is final consideration. Over-treatment of the expansion from mandibular constriction in the arch and additional expansion in the maxillary arch. A good rule of thumb in a case with a unilateral cross bite would be 3mm of additional expansion past ideal Patient is now set up for success for two reasons: 1. We use cross elastics to aid in the movement. 2. We have overtreated the clincheck plan to place additional forces on the teeth to achieve the desired result FINAL CLINCHECK STAGE
- 80. RESULT Shows very predictable movement and good correction of the dental cross bite on the upper-right side. When it comes to treating transverse problems with Invisalign clear aligners, that correction of dental cross bites is more predictable than skeletal cross bites. The use of cross elastics and 2mm of expansion over treatment will increase the predictability of correction of transverse dimension problems, reduce the number of case refinements, and help achieve excellent results.
- 82. 1. Distalization of the upper posterior teeth. 2. Class II Elastic Jump - ClinCheck plan to simulate the effects of elastics on growing teen patient. 3. Extraction of teeth, typically upper first premolars, to correct Class II Malocclusion. 4. IPR - performed in the upper buccal segments to create space for canine retraction into Class I coupling of the incisors when the patient presents with overjet
- 83. Class III CORRECTION • The non-surgical methods for CL III correction are elucidated on the SAGITTAL section of the ClinCheck list: CASE NO 3 Drastic plastic: Enhancing the predictability of clear aligners- S. Jay bowman
- 84. A 12-year-old female with Class III Malocclusion, moderate upper and lower crowding and traumatic occlusion to her lower anterior teeth with anterior cross bite. Her treatment plan revolves around treating her upper and lowers incisors to Steiner’s Acceptable Compromise, to compensate for the Class III skeletal pattern. additional proclination to the upper incisors and allowed for additional lingual tipping of the lower incisors to compensate for the Class III skeletal pattern, supported with CLIII elastics
- 85. Normal limits Class III skeletal pattern
- 86. CLINCHECK TREATMENT PLAN • Square arch form in the maxilla and a v- shaped arch form in the mandible. • The occlusal view of the final clincheck stage shows the coordination of the upper and lower arch forms. • Shows the anticipated improvement in the occlusion via arch form change only, without the need for a bite jump. • Virtual bite turbos on LR1 and LL1. Virtual bite turbos are conventional bite ramps built into the aligners that helped disocclude the anterior teeth to ease the jumping of the anterior cross bite
- 87. PROGRESS • After 8 months of treatment, her occlusion has greatly improved, • Significant improvement to her anterior relationship. • Upper incisors are still too upright • she is displaying a posterior open- bite because of heavy occlusal contact in the anterior. • No need to close the posterior open bite by running posterior vertical elastics —the reason she is manifesting a posterior open bite is because of heavy anterior contact.
- 88. REFINEMENT I Additional 30-degrees of palatal root torque on U2112 to relieve the heavy occlusal contact Precision-cut elastic hooks for cl iii elastics These two clincheck moves eliminate the heavy anterior contact and eliminate the posterior open bite
- 89. RESULTS • Occlusal change comes from retraction of her lower incisors into the leeway space and proclination of her upper incisors. • These movements were enhanced by light 2 oz. CL III elastics. • The final occlusion was solid class 1. • She also has nice tissue response on the lower incisors by removing the traumatic inclusion.
- 90. 1. Cephalometric superimposition shows 2. Proclination of the upper incisors 3. Lingual tipping of the lower incisors, which is consistent with her CL III skeletal pattern Three years into retention, there has been a small degree of asymmetrical mandibular growth to the left, but her occlusion is still holding up good
- 91. SUMMARY: • Total treatment time was 19 months, 1 refinement, and 2 oz. elastics LONG TERM FOLLOW UP: • Three years into retention, there has been a small degree of asymmetrical mandibular growth to the left, but her occlusion is good
- 92. INTERPROXIMAL REDUCTION • The practice of mechanically removing enamel from between the teeth to achieve orthodontic ends so as to correct crowding or reshape the contact area between the teeth • It is now widely accepted that 50% of the enamel is the maximum amount that can be stripped without any dental and periodontal injury. Pinheiro M, Martinho LR. Interproximal enamel reduction. World Journal of Orthodontics. 2002 Sep 1;3(3).
- 93. • Jhon Sheridan suggests that if 50% of inter-proximal enamel was removed • 6.4mm of space could be generated from 8 buccal posterior contacts (0.8mm/contact) • 2.5mm of space could be created from 5 anterior contacts (0.5mm/contact) • so the total space gained 8.9mm within the arch
- 94. • John Sheridan advocated air-rotor striping by use of 699L small tapered crosscut fissure carbide bur with an extended cutting area. • Finshing is done by polishing with carbide finshing burss,,finshing diamond, polshing disc of hand held finshing strips
- 95. • Steiner states that for each millimeter of protrusion, the discrepancy is reduced by 2 mm. • Torque enlargement without protrusion permits a gain of 1 mm per 5° of radicular palatal torque enlargement.
- 97. TYPES OF IPR AVAILABLE 1. Abrasive strips (Hudson et al) 1. Flex-view TM interproximal strips 2. Interproximal serrated strips: 2. Single/double sided diamond disc (Paskow et al) 3. Flex-view TM snap-on finishing discs 4. Single/double sided abrasive steel strip (peck & peck et al) 5. Flexible solid honeycomb 6. Flex-viewTM mesh discs 7. Flexible diamond disc (Zachirsson et al) 8. Air-rotor striping (john Sheridan) 1. Safe-tipped air-rotor stripping (STARSTM) burs 9. Tooth stripper kit : 10. Incremental thickness gauge 11. Sheridan interdental space measuring gauge 12. Contouring kit 13. Mini stripper 14. Cello stripper 15. Manual microcut
- 99. ARMAMENTARIUM • Hand proximal strips • Proximal slicing disc/ strips Strauss TR 11 EF/TC 26EF/CD 57 F • Guage • Polishing stripes • Fluoride gel
- 100. CLINCHECK SOFTWARE DESIGN • The Evolution of Software Design and Attachments • Attachments • ClinCheck Plan Review • Tips for Communication with the Technician • Staging Tooth Movements in the ClinCheck Software • Making Difficult Tooth Movements Clinically Predictable
- 101. EVOLUTION OF SOFTWARE DESIGN • Simulates the tooth movement sequence into the final occlusion. • Clear aligners, powerful digital treatment-planning tool utilize digital treatment planning in a software program before a single tooth is moved. • It requires a paradigm shift in the mindset of the clinician, who must now “begin with the end in mind.” • Digital treatment planning allows different treatment options to be set up in the software program (eg, extraction vs nonextraction, leaving space open vs closing space, surgical vs nonsurgical). • Each treatment option may be visualized in terms of length of treatment time, degree of difficulty of tooth movements, and treatment outcome. • Additionally, the ability to visualize the treatment outcome is invaluable in orthodontic- restorative treatment plans that require interdisciplinary management. • In the early days of clear aligner technology 20 years ago, most clinicians understood clear aligners to be capable of simple tooth movements that required interproximal reduction (ipr) to resolve crowding and align the dentition.
- 102. ATTACHMENTS The principle of aligner engagement is aligner material wrapped around teeth. If the tooth is fully registered on the digital scan or impression, then aligner material covering the occlusal, buccal, lingual, mesial, and distal aspects of the tooth will engage the tooth and cause it to move. Attachments may be classified into two categories: (1) Conventional attachments and (2) Optimized attachments
- 104. OPTIMIZED ATTACHMENTS • Automatically placed by the software when it detects certain thresholds of tooth movement to control the point of application of force, the direction of the force, and the amount of force applied, which is customized for each individual tooth. • Have an active surface that varies in geometry based on the unique morphology of each tooth. • Aligner is designed at a more acute angle than the active surface on the attachment in order to exert a force on the active surface to move the tooth in the desired direction.
- 105. • Therefore, the size of the attachment on the tooth will be different than the size of the space in the aligner for the attachment. • For this reason, if an optimized attachment needs to be replaced midway through treatment, the clinician will have to use the original attachment template or order a replacement attachment template to rebond the attachment as opposed to using the last aligner • Are customized individually for each tooth using the concept of biomechanics. • Are engineered for a variety of tooth movements, and they are placed automatically by the software. • It is important to note that they cannot be requested.
- 106. OPTIMIZED ROTATION ATTACHMENTS • Are optimized attachments for rotation of canines and premolars. • In case of a rotated maxillary canine, there is an optimized rotation attachment placed on the canine with the active surface of the attachment oriented to allow the aligner to place the correct force system to achieve correction of the rotation.
- 107. • The active surface is oriented in the proper direction so the aligner can place the appropriate forces on this tooth to achieve the desired movement, which in this case is distal-in rotation along with distal root tip • The aligner shape is activated, which means it changes at each stage to maintain the force system at the appropriate levels • Achieved effective rotation with the use of optimized rotation attachments.
- 108. OPTIMIZED EXTRUSION ATTACHMENTS. • In case of anterior open bite where absolute extrusion of the upper incisors needed. • The active surface of this attachment is oriented in such a way as to allow the force system of that aligner to be perpendicular to the active surface of the attachment to achieve extrusion of these teeth and closure of the open bite. • May be on single teeth or groups of teeth when multiple extrusions are required Web reference: www.Alignerinsider.Com
- 110. OPTIMIZED ATTACHMENT FOR ROOT CONTROL • OPG reveals congenitally missing the UL2. • The treatment plan revolves around distalizing the upper canine to prepare a space for an implant. • This movement is challenging, and have crown and root movement at the same time. • Will help put the appropriate force system on the ul3 to achieve bodily movement to prepare a space for a future implant.
- 111. • The force systems being applied to the UL3 are not a couple, meaning that the aligner is not placing equal and opposite forces on this attachment. • The forces are modulated to give the desired tooth movement. • the larger distal force is acting on the gingival attachment and a smaller mesial counter force is acting on the incisal attachment • These forces are adjusted automatically to achieve bodily movement or root movement depending on the case.
- 113. MULTIPLANE • Attachments on maxillary lateral incisors when root movement and extrusion are simultaneously required
- 114. SUPPORT Invisalign G5 introduced optimized deep-bite attachments for premolar teeth to support leveling of the lower curve of spee. Invisalign G7 introduced optimized maxillary lateral support attachments when absolute intrusion of either the maxillary central incisors or maxillary canines is required.
- 115. CONVENTIONALATTACHMENTS Passive attachments that increase the engagement of the aligner onto the tooth. Act as handles for the aligners to move teeth. Attachments may be placed on teeth by default through the software, by written request to the software technician, or by using the “drag and drop” feature on the 3D controls. TYPES 1. Ovoid, 2. Rectangular, 3. Beveled or non-beveled, and 4. Oriented horizontally or vertically. USES 1. Aligner retention and anchorage, 2. To support intrusion, 3. Extrusion or 4. Root torque control.
- 116. RECTANGULAR ATTACHMENTS are passive attachments and may be vertical or horizontal VERTICAL RECTANGULAR • Useful for root control • used in lieu of optimized root control attachments where the software is unable to place them due to conflicts in the software program. • By default, the software program does not place attachments on the mandibular incisors for root control, except in lower incisor extraction cases. • Significant root tip to correct root inclinations on the mandibular incisors HORIZONTAL RECTANGULAR • Used for root control, • Particularly in the buccolingual dimension to correct buccal root torque on molars. • Used where a short clinical crown or occlusal interference does not allow placement of a vertical rectangular attachment
- 117. BEVELED ATTACHMENTS • Both the vertical and horizontal attachments can be beveled. • The beveled surface is the active surface. • The bevel provides a flat surface for the aligner to push against to effect the desired tooth movement. • For extrusive tooth movements on posterior molars, a horizontal attachment that is beveled on the gingival will be effective. • For intrusion, use a horizontal attachment beveled on the occlusal
- 118. GINGIVALLY BEVELED RECTANGULAR The bevel is sloping toward the gingival aspect of the tooth.
- 119. OCCLUSALLY BEVELED The bevel is slanting toward the occlusal surface. 1. This type of attachment is used for aligner retention 2. To support leveling of the curve of spee 3. To support absolute extrusion on posterior teeth
- 120. VERTICAL ATTACHMENTS • Can be beveled either mesially or distally • Used for root control.
- 121. RECTANGULAR ATTACHMENTS • Can be placed vertically or horizontally. • These conventional attachments acted as “handles” • To increase aligner engagement to move teeth or control root inclinations
- 122. ELLIPSOID ATTACHMENTS • Only attachments available were ellipsoidal in shape • When the tooth surface area is limited • Labial surface of maxillary lateral incisors or the lingual surface of a lingually inclined mandibular second molar • Primarily for anchorage purposes.
- 123. CUSTOMIZED CONVENTIONALATTACHMENTS • Resized attachments by either 3, 4 or 5mm in length. • Change the orientation of the attachment either by rotating the attachment in any direction we want. • Push the attachment into the tooth by clicking on it • Grabbing the black line to push the attachment in or out of the tooth to change the orientation of the attachment through rotation.
- 124. RULES OF THUMB • Here are two important rules of thumb when placing conventional attachments on teeth: 1. Horizontal attachments for vertical movements - use these attachments when placing attachments for vertical tooth movements Drastic plastic: Enhancing the predictability of clear aligners- S. Jay bowman
- 125. 2. Vertical attachments for horizontal movements • These attachments will support the horizontal translation of the teeth. • When horizontal movement is desired, think vertical attachment
- 126. RETENTIVE ATTACHMENTS • For additional aligner retention • For example, when treating with class II elastics off precision-cut elastic hooks on the lower first molars • Placement of an occlusally beveled rectangular attachment on the mesial surface of the molar provides additional retention to prevent the aligner from dislodging as a result of the vertical vector of force from the class 2 elastic
- 129. CLINCHECK SOFTWARE PLAN REVIEW • The ClinCheck software plan is generated when the clinician evaluates the orthodontic records, makes a diagnosis of the malocclusion, and formulates a treatment plan. • The treatment plan for that individual patient is then communicated to the software technician by filling in a prescription form that prescribes the tooth movements and treatment objectives for that individual patient. • The software program then generates a simulation of the tooth movements into the final occlusion. • The clinician reviews the ClinCheck software plan, makes modifications to the plan, and then approves the final plan. Upon approval, the aligners are manufactured. The clinician then has to clinically execute the plan to treat the case to the planned final occlusion • The ClinCheck plan may be reviewed systematically in the following manner Aligner Bio-mechanics- Orthodontic clinical education corp.
- 130. • The software used by the orthodontist in the office is called clin check. • It allows the orthodontist to view the treatment in all the aspects as well as superimpose one stage of treatment over another to visualize individual tooth movements so as to gauge the probability of accomplishing the desired movement that will be biologically feasible.
- 133. powerful digital treatment-planning tool
- 140. DIGITAL WORKFLOW
- 141. MONITORING TREATMENT Checklist for the clear aligner adjustment appointment: 1. Patient compliance 2. Oral hygiene 3. Tooth tracking 4. Interproximal contacts 5. Actions required for this appointment 6. Fit of next aligner 7. Appointment conclusion Invisalign instructionmanual –Mcgill university
- 142. FINISHING TECHNIQUES • Clear aligner cases should be finished to the same standard of excellence as those treated with fixed edgewise appliances.
- 143. DIMPLE AND THERMAL PLIERS • Due to a lag in tooth movement result in a difference between the intraoral position of the tooth and the tooth position in the aligner. • The elasticity of the aligner material also sometimes leads to distortions in the aligner itself, resulting in less pressure on the tooth to move it into position in the final stages of treatment. • Align technology has a simple detailing plier that creates pressure points or dimples in the aligner that will nudge teeth into positions already built into the aligner
- 144. • Horizontal plier is an instrument designed to accent labial or lingual torque for individual teeth, and it can also be used to simply increase the retentiveness of clear aligners or retainers. • Horizontal plier is used to reduce “lag” by accenting extrusive or intrusive movement by applying contact points immediately adjacent to composite attachments
- 145. • In the last 3 stages of treatment, the clinician should be able to assess if treatment will be finished after aligner wear is completed or if the patient will require additional aligners • In certain cases, finishing bends in the last few aligners may finish the case without the need for additional aligners. • Therefore, it is recommended that patients be seen when they have approximately three aligners left in active treatment so that finishing bends may be made in these last few aligners, if necessary to complete treatment
- 146. • Raintree Essix also has a series of pliers that make various indentations into the aligner for tooth movement. • These pliers require preheating to 175°F to 200°F prior to use • • Hu-Friedy has a series of four pliers that enable the clinician to make precision-cut hooks, button cutouts, vertical indentations, and horizontal indentations in the aligner
- 147. VIRTUAL C-CHAINS • Virtual c-chains tighten anterior contacts from canine to canine only • Virtual c-chains set as a preference under Global Clinical Preferences in the ClinCheck software program, every patient receives 3 virtual c-chain aligners at the end of active treatment. • If there are open posterior contacts, particularly in extraction cases, then full-arch virtual c-chains ordered to tighten up these posterior contacts. • If the last aligner fits well, virtual c-chains can be ordered as additional aligners without taking a new digital scan or impression
- 148. RETENTION • If Vivera (Align Technology) is the retainer of choice, they may be ordered online without a new digital scan or impression if the last aligner fit well. Retainers may be fixed or removable. 1. Removable retainers include Hawley retainers, clear vacuum- formed retainers, and Vivera retainers. • Clear vacuum-formed retainers with full palatal coverage considered in cases where there has been maxillary arch expansion.
- 149. WEAR TIMING Carroll KM. Investigation into the significance of daily Invisalign tray wear duration (Doctoral dissertation, The Ohio State University). Decreasing wear time led to decreases in certain incisor movements. Wearing aligners for 22 h daily seems to be the best protocol to maximize achieving planned tooth movement.
- 150. 2. Fixed retainers are usually wires bonded on the lingual surfaces of the maxillary and/or mandibular anterior teeth A general guideline may be that the longer the treatment time, the greater the stability. • If the orthodontic treatment completed in short time - full-time retainer • If the orthodontic treatment was completed over several years - part- time retainer wear • The clinician should monitor to ascertain the individual patient’s potential for relapse and the stability of the final occlusion
- 151. INSTRUCTIONS TO PATIENT • Insert using finger pressure. • Bite all around with chewie or bite stick. • Massage gum lines all around to ensure no visual gap or saliva bubbles between Flexalign and teeth. • Remove aligner always from the back, preferably from tongue side. • Apply direct up or downward pulling force cautiously to remove the aligner. • Avoid twisting force.
- 152. • Wear Felxalign for minimum 22 hours /day • Remove Flexalign when eating or after sugary beverages • Clean or rinse teeth before wearing them • When Flexalign do not fit properly(visual gap or bubbles), even after wearing cycle has finished , wear for 1 more week • If Flexalign don’t fit properly come with last fitting aligner and next few aligners
- 153. ALTERNATIVES AVAILABLE IN INDIA 1. Clear path Dental 2. Clear bite aligners 3. Flexalign
- 154. USE OF CLEAR ALIGNERS IN OPEN BITE CASES: AN UNEXPECTED TREATMENT OPTION Giancotti et al JOURNAL OF ORTHODONTICS, 2017 http://dx.doi.org/10.1080/14653125.2017.131144 CASE NO 4
- 155. INTRODUCTION • In recent years, the introduction of temporary anchorage devices (tads) has expanded the possibilities of orthodontic treatment beyond traditional limitations of tooth movement and has made it possible to correct anterior open bites with orthodontic treatment alone • In this case report how, through a proper diagnosis and a good knowledge of biomechanics, it is possible to correct an anterior open bite by using aligners without surgery, tads, or fixed appliances.
- 156. • A 14-year-old female patient was referred with a chief complaint of anterior open bite. • She had been previously treated by orthodontic fixed appliance without achieving any satisfactory results in terms of open bite resolution. • The clinical examination showed bilateral molar and canine class ii relationship and an anterior open bite • Moreover, she presented with proclination of the upper incisors with increased overjet, slight excess of posterior dento- alveolar heights as well as downward and backward mandibular rotation • Upper and lower midlines were coincident.
- 157. Lat Ceph 1. The patient was diagnosed with a class II dento-skeletal malocclusion (a-n-pg 6°) 2. Skeletal open bite (SN/GO-GN 34°), 3. Excessive lower anterior facial height 4. Short upper anterior facial height. 5. Convex profile 6. Incompetent lips at rest 7. Mentalis and lip strain
- 158. TREATMENT OBJECTIVES 1. To close the anterior open bite by counter clockwise rotation of the mandible 2. To improve dental exposure by correcting upper incisor inclination 3. To reach a class I molar and canine relationship as well as a normal overjet 4. To balance the facial profile
- 159. • Given the mild skeletal discrepancy, a combination of orthodontic and orthognathic surgical treatment was not considered. • Another option could have been through intrusion of the posterior maxillary dentition using TADs as skeletal anchorage, allowing maxillary molar distalisation to correct the Class II malocclusion with fixed appliances. • The selected treatment involved the use of clear aligners combined with Class II mechanics. • Moreover, the patient was informed of the fact that her cooperation would be a critical factor to achieve success with the aligner treatment.
- 160. In order to reach a correct anterior relationship and to close the bite, the treatment plan was based on the following three pivotal points: 1. align and level both the arches; 2. maintain the vertical position of upper molars and promote the counter clockwise rotation of the mandible; 3. correct the Class II molar relationship by means of derotation of the upper molars and Class II elastic
- 161. • A series of 40 aligners for the upper arch and 18 for the lower one were planned • After initial alignment, • Correction of mesial rotation of the first and second upper molars to gain 2 mm of space. • Second planned step was the expansion of the maxillary arch to distalisation of the bicuspids and cuspids into Class I relationships, in addition to arch form coordination. • The third step was based on sequential distalisation by using the force of the aligners and mechanics of Class II inter- maxillary elastics, from the first lower molars to upper canines, to ‘push’ the molars, bicuspids and canines towards a Class I relationship. • A ‘relative’ extrusion of front teeth occurred during their retraction and favoured the overbite normalisation
- 162. • Class II correction in a growing patient is derived primarily from the interruption of dentoalveolar compensation (whether from headgear, elastics, functional appliances, or distalization) • Sequential molar distalization supported by elastics, as advocated by Daher, is a logical strategy that has proven successful with aligners Daher, S.: Dr. Sam Daher’s techniques for Class II correction with Invisalign and elastics, Align Technology, Santa Clara, CA, 2011 [cited July 1, 2013], s3.amazonaws.com/learninvisalign/docs/06840000000GHgmAAG.pdf
- 163. • The treatment was completed after 24 months. • The patient was seen every 6 weeks to check aligner fit, attachment stability and compliance. • The final result showed good alignment and occlusion • After 24 months of therapy, treatment objectives set in the pre-treatment plan were achieved. • The superimposition of the initial and final cephalometric tracing showed a counter clockwise rotation of the mandible responsible for the correction of anterior open bite and Class II malocclusion. • The pre/post cephalometric superimposition showed that treatment had maintained the vertical position of maxillary molars, thus favouring a counter clockwise rotation of the mandible, promoting the Class II and anterior open bite correction. • The skeletal Class II jaw base relationship changed to a Class I relationship, and the mandibular plane angle was maintained • After active treatment, the patient also featured a harmonious straight type profile a Class I molar relationship had been established.
- 164. DISCUSSION • Clinicians have always thought that aligners, for their biomechanical characteristics, are not the ideal tools for treating open bite. • Yet, this paper shows that it is possible to correct dental–skeletal open bite by using aligners with a proper diagnosis and treatment planning. • Aligners allow an optimal vertical control and can determine molar intrusion by bite-block effect of two layers of aligner material between the dentition for 22 hours/day for 18–24 months and thereby subsequent minimal autorotation of the mandible and improvement of skeletal open bite. • The maxillary superimposition shows the reduction of proclination and moderate extrusion of the incisors that were initially above the maxillary plane of occlusion
- 165. CONCLUSION • Orthodontic treatment in patients with open bite can be successfully treated by using clear aligners. • Some aspects inherent to the biomechanics of aligners, such as the vertical control and possible mandible counter clockwise rotation, have positive effects on the anterior open bite correction.
- 166. Correction of Class II Malocclusions in Growing Patients by Using the Invisalign® Technique: Rational Bases and Treatment Staging Giancotti* Journal of Orthodontics & Endodontics, 2017, Vol. 3, No. 4: 12 ISSN 2469-2980 Case 5
- 167. INTRODUCTION • In literature, a number of scientific articles including case reports show proper correction of Class II malocclusions by using aligners. • However, treatment protocols are not so clearly evidenced at times so as to allow for a standardization and simplification of such orthodontic treatments, which would implement success rate. • The aim of this case report is to show how it is possible to treat Class II malocclusions by means of aligners.
- 168. • A 13-year-old male patient came to the orthodontic clinic with a severe Class II div. 2, deep bite and mild crowding in both arches. • The radiographic and clinical examinations of the temporo- mandibular joints showed no alterations. • The patient was diagnosed with a dento-skeletal Class II div. 2 malocclusion, dental deep bite and a mandibular retrusion. • He reported bilateral molar and canine Class II, -5 mm of deep bite, no overjet, severe palatal inclination of the upper incisors and coincident midlines. • His facial features consisted of: concave profile for an evident retrusion of both maxilla and mandible.
- 169. TREATMENT OBJECTIVES: 1. to correct the Class II dento-skeletal relationship 2. to obtain an ideal overbite and overjet 3. to promote an anterior repositioning of the mandible. Additional treatment goals included:- 4. Leveling and aligning, 5. Optimizing the posterior occlusion, 6. To obtain class I molar and canine relationship, 7. Improving the facial profile and 8. Obtaining a natural lip position
- 170. TREATMENT PLAN: • The Invisalign® option was selected for comfort and aesthetic advantages. • Treatment started with the correction of any mesial rotation of upper 1st and 2nd molars and an expansion of both arches to allow coordination between arches and to favor bicuspids and canines into Class I relationships. • The attachments in the upper arch were programmed to perform the anchorage unit necessary to allow the torque correction of the upper incisors. • Furthermore, the attachments in both arches were designed to modify the tipping of bicuspids in order to improve the occlusion. • During the first phase of treatment, Class II elastics were tied from a hook in the upper aligner to the bonded metal button on the buccal surface of the lower first molars with 4 oz, 3/16 size elastics, to improve upper molars’ distal rotation. • Upon refinement phase, in order to allow the mandible’s anterior repositioning, Class II elastics were tied from a clear bonded button onto the surface of the upper canines to the metal button on the lower first molars.
- 172. TREATMENT PROGRESS: • Digital models were taken by ITERO® scanner and the case was submitted for Invisalign Full®. • The correction occurred by means of a first phase of 14 aligners and a finishing stage with 10 aligners. • In phase one, the initial correction was achieved by means of distal rotation of upper molars, expansion of both arches and upper incisors’ torque modification. • Upon the refinement phase, the upper arch expansion, together with the correction of the incisors’ torque, allowed the coordination of both arches and anterior mandibular repositioning, successfully correcting the Class II malocclusion.
- 173. TREATMENT RESULTS: • After 13 months of therapy, treatment objectives set in the pretreatment plan were achieved. • The Class II malocclusion had been completely corrected; proper overbite and overjet were achieved. • In particular, the overbite was reduced from 5 to 2 mm. • Moreover, this treatment enables us to observe how the virtual jump programmed in the ClinCheck® simulation with the aid of the Class II elastics was actually clinically achieved.
- 175. The pre and posttreatment cephalometric superimposition shows an evident change of the upper incisors’ torque confirming the effectiveness of Power Ridge® auxiliary in the aligners: the maxillary incisors’ inclination on the ANS-PNS plan changed from 104° to 115° and the mandibular incisors’ inclination on Go-Gn increased from 93° to 101°. The Interincisal Angle changed from 145° to 128°. Such dental movement resulted in a mandibular anterior repositioning, mainly responsible for the correction of the Class II malocclusion as the pre and post-cephalometric superimposition shows. The mandibular position SN/Pg changed from 78° to 82° and the NA/ Pg sagittal jaw relationship was modified from 4° to 1°. The facial growth was favorable and contributed to the correction of the malocclusion.
- 178. DISCUSSION • Orthodontic treatment with fixed appliances implies drawbacks including increased oral bacteria, dental and soft-tissue discomfort, and poor esthetics. • Adolescents particularly reluctant to undergoing fixed-appliance treatment for social reasons • Moreover, Invisalign® treatment provides some advantages over fixed appliances in specific cases. • In the presented cases, treatment duration (18 months) was highly satisfactory, because the Class II elastics were worn upon initial delivery. • By contrast, when using Class II elastics along with fixed appliances, it generally takes several months to be able to utilize wires that are of sufficient size and strength. • Also, when using Class II elastics along with fixed appliances, there can be canting of the occlusal plane because of the resulting vertical component of force. • Since the occlusal surfaces are completely covered, Invisalign® allows for the elimination or reduction of the typical “Class II elastic effect”
- 179. CONCLUSION • Orthodontic correction of Class II malocclusion by aligners, clinicians can achieve excellent results by adopting the same treatment protocol currently used with conventional fixed appliances. • At the beginning of the “digital era,” the majority of orthodontists thought that aligners were not the ideal tool for treating Class II malocclusions. • After 10 years of experience, this article intends to show how it can be performed in a simple and predictable way. • This treatment method is not merely limited to the re-alignment of malposed teeth, but successfully correct Class II occlusal relationships.
- 180. A comparison of treatment impacts between Invisalign aligner and fixed appliance therapy during the first week of treatment. Miller et al , Am J Orthod 2007 March • Aim of this study was to evaluate different life impacts between subjects • Invisalign group showed less impact in each quality of life –functional, psychosocial and pain
- 181. Ojima K, Dan C, Kumagai Y, Schupp W. Invisalign treatment accelerated by photobiomodulation. J. Clin. Orthod. 2016 May 1;50:309-17. Accelerated orthodontic treatment using photobiomodulation (PBM), a low-level light therapy that has been shown to accelerate bone and connectivetissue metabolism for wound healing in medicine. One commercially available pbm device, orthopulse,* uses light-emitting diodes (leds) that produce 850 nanometers of light (very near the infrared spectrum), offering a safer mode of treatment than with laser light Patient’s ability to change aligners every three days improved her compliance Originally planned for 92 weeks (46 sets of aligners) was completed in six month
- 182. Cytotoxic evaluation of directly 3D printed aligners and Invisalign S Fayyaz Ahmed et al European journal of molecular & clinical medicine, 2020, volume 7, issue 5, pages 1129-1140 Smarttrack invisalign material (polyurethane) was found to be more biocompatible, followed by directly printed aligner materials (polymethylmethacrylate). Cytotoxicity was found to be more on the first day for all materials and gradually decreases as day’s progress. The results indicate the increased leaching of material during the initial period of use though the level of cytotoxicity is slight.
- 183. Effect of 10% Carbamide Peroxide on Tooth Shade, Plaque Index and Gingival Index during Invisalign Treatment Dentistry Journal. 2021 May;9(5):48. Dalia Saleem 10% CP had significant change in tooth shade over the 2- and 4-weeks periods (p < 0.05) and significantly reduced plaque and gingival indices (p < 0.05), with minimal to no relapse after 2 weeks post-op. Thus, applying CP at 10% may be a useful application during Invisalign treatment in improving teeth shade and overall gingival health.
- 184. CONCLUSION All in all Invisalign is a great alternative to braces, owing to its comfort level and ease of use. Though its not very cost effective, newer technology and materials will make it more affordable. More research in the field of complex tooth movement is still needed, but apart from that, Invisalign has the potential to replace conventional orthodontic appliances
- 185. Thank you
Editor's Notes
- Clear aligners are future in pediatric orthodontic child care as an alternative to traditional braces and are designed to help guide teeth into their proper position. The aligners are made of a strong plastic material and are fabricated to fit each person's mouth. In this a series of aligners are made, each aligner moves the teeth a little bit more into place until the desired movement is completed. Aligners are made from a thin, transparent plastic that fits over the buccal, lingual/palatal and occlusal surfaces of the teeth. They conventionally are worn for a minimum of 20 hours per day and are changed sequentially every two weeks
- With the advent of clear aligner technology does not mean that 150 years of orthodontic principles are no longer valid. The time-tested principles and concepts of bone biology, biomechanics, anchorage, and occlusion still apply.
- Orthognathic surgery
- Great for special patients Its best for adults and teenagers who want to live life without brackets and wires.
- 3 M TRIO INTRA ORAL SCANNER
- Figure 2-1 shows that when an archwire is engaged onto a lingually erupted tooth, the elasticity in the archwire causes the archwire to return to its original arch form. As the archwire returns to its original shape, it pulls on the lingually erupted tooth to move it into the arch
- The archwire sequence starts with round, flexible archwires with a long working range and high elasticity and gradually moves toward rigid, rectangular stainless steel archwires.
- sequential distalization is planned, it is critical to register the distal surface of the distalmost tooth in the arch so that the aligner can fully engage that tooth to distalize
- Extrusion In fixed edgewise appliances, extrusion of a single tooth may be accomplished relatively easily. However, because all the teeth in the arch are connected by an archwire, there are reciprocal movements of the adjacent teeth. For example, in a case where a buccally erupted canine requires extrusion, as the canine extrudes, the adjacent lateral and central incisors and first PROLAR WILL INTRUDE
- depending on the amount of extrusion required
- In fixed edgewise appliances, dental arches are leveled through relative intrusion with reverse curves in the archwire (Fig 2-10). As the anterior teeth intrude, there is some concurrent extrusion of the posterior teeth. Alternatively, segmental intrusive base arches may be used with careful management of the posterior anchorage through transpalatal or lingual arches or high-pull headgear in the maxillary arch to manage any unwanted reciprocal extrusion of the posterior segments.
- Incisor torque predetermined depending on intial Maloccln, desired final occlusion & lip support just like with fixed appliances, there is an element of play between the aligner and the teeth, making the actual torque expressed clinically less than that prescribed
- In fixed edgewise appliances, tip is built into the bracket slot. If further adjustment to root inclinations is required, then root-tip bends may also be made in the archwire. Once again, there may be some play between the bracket slot and the archwire that precludes the full expression of the tip built into the bracket slot.
- In fixed appliance treatment, incisors tend to procline on alignment.
- In fixed appliance treatment, overbite and overjet tend to decrease as the incisors procline during alignment. This may be favorable where the initial malocclusion presents with a deep bite with increased overjet. However, it may be unfavorable if the initial malocclusion presents with minimal overbite and overjet.
- Intraoral anterior cross elastics are commonly worn with fixed appliances for midline correction. This is dependent on patient compliance and is often frustrating for the clinician when the midline fails to correct, as the anterior elastics are challenging to wear. If the midlines are corrected in the final occlusion seen on the software treatment plan, they are very likely to be corrected clinically.
- In fixed appliance treatment, an anterior Bolton tooth size discrepancy is usually calculated or adjusted for midway through treatment. Typically, this happens when the clinician has difficulty closing spaces in the maxillary arch or moving the canine into a solid Class I relationship. To resolve this discrepancy, a decision must be made between leaving space around the relatively smaller lateral incisors or compromising the buccal occlusion and leaving the canines in a mild Class II relationship.
- In this arrangement, the miniscrews are locked-into any framework and can be checked for integrity or replaced easily with making a new appliance.
- How does one make the decision in any given case to intrude the anterior teeth, extrude the posterior teeth, or both? In deep-bite cases requiring anterior intrusion, what criteria does the doctor consider in deciding to intrude the lower anterior teeth, upper anterior teeth, or both? Let’s look at the ClinCheck list for guidance:
- Gingival margins — intrusion or extrusion of key teeth may help to improve the symmetry of gingivalmargins. In patients with incisal wear and super-eruption of the worn tooth, anterior intrusion would be indicated to level the gingival margins prior to restoration of the tooth Smile arc — when working up Invisalign treatment plans, we endeavor to create pleasing smile arcs where the curvature of the upper anterior incisal edges follows the curvature of the lower lip. Anterior intrusion or extrusion is a primary consideration in these cases (images 5-1, 5-2). Lower Curve of Spee — lower incisor intrusion and/or posterior extrusion are key components to correcting deep over bites. Some deep-bite cases requiring bite opening via posterior extrusion. For example, in patients with: Short lower facial heights Restorative cases with loss of vertical dimension Hypodivergent, skeletal deep bites CLII div.2 malocclusion
- If deep-bite correction is via anterior intrusion only, precision bite ramps are not needed.
- anterior open-bite cases with excessive gingival display would not benefit esthetically from upper anterior extrusion,
- 2. Over treatment moves, and/or this doesn’t mean we can’t achieve it —
- ATTACHMENTS
- . A patient emma 13 year old who presented with constriction of the arches and palatal inclination
- Tipping movements are predictable and typically don’t require any ClinCheck modifications.
- Precision Cuts — may compromise aligner strength and dura- bility
- The crowding was resolved through a combination of proclination and posterior expansion the deep bite was corrected via relative extrusion gained during upper and lower proclination.
- Posterior cross bite — what about patients who require posterior expansion to resolve a posterior cross bite? dental cross bite or skeletal cross bite?
- “Developing an invisalign teen farm system.”
- SKELTAL C DENTAL APPLIANCE? FIXED OR ALIGNER CHILD/ADULT GROWTH STATUS Carefully consider- ing whether your ClinCheck treatment plan follows sound orthodontic principles that will help you achieve predictable cross-bite correction in the right cases, and avoid frustration in those patients where correction is less predictable.
- Allows for virtual diagnosis and treatment planning. This is a result of the lower incisors are being forced labially and the upper incisors being forced palatally. Seeing this change in the virtual setup gave me confidence that gabriella’s malocclusion could be corrected.
- 2TO 3MM THICKNESS OF ENAMEL 1.5MM MAXIMUN FOR A TOOTH
- In traditional fixed appliance therapy, adjustments in the appliance for tooth movement are made at every appointment toward the treatment goal. Each treatment decision made is based on the response to tooth movement achieved by modifying the appliance at the previous appointment. A series of adjustments are made at every appointment until the final occlusion is achieved.
- A common error is to assume that attachments function as brackets and aligners as the archwire and that every single tooth requires an attachment for the aligner to engage it. Teeth do not require attachments to move. However, attachments are required for various reasons. CERTAIN TOOTH MOVEMENT INTRUSION, ROTATION
- work great just the way they are without any major modification.
- work well for cases that don’t have significant vertical, sagittal or transverse problems. For example, simple Class I Crowded cases The active surface is what I call the “business end” of the attachment
- Conventional attachments can be requested or you can place them yourself using 3D Controls in ClinCheck Pro
- For clinicians transitioning from a “brackets and wires” practice to a clear aligner practice, there is sometimes some uncertainty as to what needs to be done at an adjustment appointment. After all, there are no elastomeric ties to remove and no archwires to bend for clear aligner patients.
- A variety of finishing pliers are available to allow the clinician to make finishing bends in the aligner. The shallow indentations are produced without heating the pliers, producing “contact points” to assist with rotational couples, including situations with composite “attachments”, enhancing molar distalization , or root paralleling
- If it is not set as a preference, virtual c-chains may still be requested for an individual patient where the treatment plan deems it necessary. If the anterior contacts are already tight at the completion of all active aligners, then virtual c-chains should not be dispensed, as they could cause crowding to recur or unwanted intrusion.
- However, if some settling movements have taken place through sectioning the aligner to allow posterior teeth to passively erupt, or if settling elastics have been worn, then a new digital scan or impression will be required. Vivera and clear vacuum-formed retainers may be fabricated over bonded lingual wires. In this case, the lingual wire should first be bonded and then a digital scan or impression taken for the retainers. There are many differing philosophies regarding orthodontic retention.
- CASE NO 4
- Camouflage treatment with fixed appliances and extraction of the maxillary first premolars was considered, but the patient refused, as she had previously been treated with fixed appliances and did not want to repeat the experience.
- The anterior open bite had been completely closed; a normal overbite and overjet had been corrected and analysis showed the amount of relative extrusion of anterior teeth needed for open bite closure. Moreover, the cephalometric changes included decreases in the ANPg and slight modification of skeletal vertical relations The open bite correction occurred by means of a first phase of 40 aligners and a finishing stage with 10 aligners. The clinical examination after 2 years of retention revealed that the orthodontic treatment provided good inter-cuspation of the teeth
- Upon comparing, the virtual and the real outcomes correspond in the final result.
- The extraoral records show a slight improvement of the profile
- In ClinCheck®’s digital environment, just as in conventional orthodontics, we shall program the same dental movements that are needed to make the two dental arches compatible. Then, the use of Class II elastics allows a mesial mandibular repositioning and, thanks to the compatibility of the dental arches, stabilization of the final result is possible. Nevertheless, according to Rossini et al. the accuracy of the bucco-lingual movements in the anterior segments is lower than in posterior segments, thus supporting the common practice of inserting 10° of additional torque at front teeth. Such measure can be strictly recommended in cases of Class II with deep bite in which reaching a proper incisor torque represents an elective treatment goal. Moreover, Invisalign® treatment provides some advantages over fixed appliances in specific cases. In the presented cases, treatment duration (18 months) was highly satisfactory, because the Class II elastics were worn upon initial delivery. By contrast, when using Class II elastics along with fixed appliances, it generally takes several months to be able to utilize wires that are of sufficient size and strength. Also, when using Class II elastics along with fixed appliances, there can be canting of the occlusal plane because of the resulting vertical component of force. Since the occlusal surfaces are completely covered, Invisalign® allows for the elimination or reduction of the typical “Class II elastic effect.” Although further research needs to be carried out, it appears that clear aligner treatment potentially causes less root resorption than conventional fixed appliances. This makes it an ideal choice for teeth that may be susceptible to root resorption.
- Moreover, in order to exploit the best effectiveness of aligners, thorough knowledge and experience in dental biomechanics are necessary. Correction of the malocclusion can be a crucial step to achieve the desired occlusal, functional and cosmetic result. However, a proper diagnosis and treatment planning are fundamental in order to correct dental-skeletal Class II by using aligners.