WhatsApp 9892124323 ✓Call Girls In Khar ( Mumbai ) secure service - Bandra F...
4b_Display_Cards.pdf
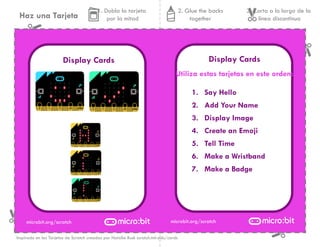
1. Haz una Tarjeta
1. Dobla la tarjeta
por la mitad
3. Corta a lo largo de la
línea discontinua
2. Glue the backs
together
microbit.org/scratch microbit.org/scratch
Inspirado en las Tarjetas de Scratch creadas por Natalie Rusk scratch.mit.edu/cards
Utiliza estas tarjetas en este orden:
Display Cards Display Cards
1. Say Hello
2. Add Your Name
3. Display Image
4. Create an Emoji
5. Tell Time
6. Make a Wristband
7. Make a Badge
2. microbit.org/scratch
microbit.org/scratch
Inspirado en las Tarjetas de Scratch creadas por Natalie Rusk scratch.mit.edu/cards
Haz una Tarjeta
1. Dobla la tarjeta
por la mitad
3. Corta a lo largo de la
línea discontinua
2. Glue the backs
together
Say Hello
Say Hello
PREPÁRATE
AGREGA ESTE CÓDIGO
PRUÉBALO
Make your micro:bit display a
greeting.
1
Move your micro:bit. Can you read the message?
CHALLENGE: What else can you make the
display say?
Connect your micro:bit to Scratch.
3. microbit.org/scratch
microbit.org/scratch
Inspirado en las Tarjetas de Scratch creadas por Natalie Rusk scratch.mit.edu/cards
Haz una Tarjeta
1. Dobla la tarjeta
por la mitad
3. Corta a lo largo de la
línea discontinua
2. Glue the backs
together
Add Your Name
Add Your Name
PREPÁRATE
AGREGA ESTE CÓDIGO
PRUÉBALO
Program the micro:bit to display
your name.
2
Use the Sensing blocks to interact with your
micro:bit.
Start the program and type your name.
What happens on your micro:bit?
Combine your
answer into a
phrase.
ANNA
4. microbit.org/scratch
microbit.org/scratch
Inspirado en las Tarjetas de Scratch creadas por Natalie Rusk scratch.mit.edu/cards
Haz una Tarjeta
1. Dobla la tarjeta
por la mitad
3. Corta a lo largo de la
línea discontinua
2. Glue the backs
together
Display Image
Display Image
AGREGA ESTE CÓDIGO
MAKE A DESIGN
PRUÉBALO
Depict an image on your
display.
3
Click the A button to display the
image on your micro:bit.
CHALLENGE: Can you make the lights
in your image blink on and off
repeatedly?
Use the 5x5 grid to
create your design.
Turn on/off each light
by clicking on the
desired blocks.
5. microbit.org/scratch
microbit.org/scratch
Inspirado en las Tarjetas de Scratch creadas por Natalie Rusk scratch.mit.edu/cards
Haz una Tarjeta
1. Dobla la tarjeta
por la mitad
3. Corta a lo largo de la
línea discontinua
2. Glue the backs
together
Create an Emoji
Create an Emoji
AGREGA ESTE CÓDIGO
MAKE A DESIGN
PRUÉBALO
Create your own emoji for the
display.
4
Click the A button to display the image
on your micro:bit.
CHALLENGE: What other emojis can
you create?
Click to turn all lights off/on.
Click the individual
blocks to turn them on in
your design.
6. microbit.org/scratch
microbit.org/scratch
Inspirado en las Tarjetas de Scratch creadas por Natalie Rusk scratch.mit.edu/cards
Haz una Tarjeta
1. Dobla la tarjeta
por la mitad
3. Corta a lo largo de la
línea discontinua
2. Glue the backs
together
Tell Time
Tell Time
PREPÁRATE
AGREGA ESTE CÓDIGO
PRUÉBALO
Display the correct time on your
micro:bit.
5
Join the current hour and minute together using these Operator blocks.
Click the A button to display the time
on your micro:bit.
CHALLENGE: What other information
can you make your micro:bit display?
Use the Sensing blocks to interact with your
micro:bit.
7. microbit.org/scratch
microbit.org/scratch
Inspirado en las Tarjetas de Scratch creadas por Natalie Rusk scratch.mit.edu/cards
Haz una Tarjeta
1. Dobla la tarjeta
por la mitad
3. Corta a lo largo de la
línea discontinua
2. Glue the backs
together
Make a Wristband
Wear your micro:bit on your wrist!
Make a Wristband
MATERIALS
PROCEDURE
PRUÉBALO
6
Heavy
paper
Duct tape
(2in)
Scissors Hot glue or
Glue Dots
Craft
materials
or Velcro
Use a small amount of hot glue or a
Glue Dot to secure your micro:bit to
the front of the wristband.
Attach the battery pack to the back.
***Hot glue placed on the back of the micro:bit
(avoiding the pins) will not cause harm.
9 in.
2 in.
Use heavy paper or folded Duct
tape to create the wristband.
Decorate with craft materials.
Front Back
Adhere Velcro fasteners.
Based on project from Microsoft workshop
8. microbit.org/scratch
microbit.org/scratch
Inspirado en las Tarjetas de Scratch creadas por Natalie Rusk scratch.mit.edu/cards
Haz una Tarjeta
1. Dobla la tarjeta
por la mitad
3. Corta a lo largo de la
línea discontinua
2. Glue the backs
together
Make a Badge
Wear your micro:bit on your shirt!
Make a Badge
MATERIALS
PROCEDURE
PRUÉBALO
7
Craft foam Scissors Hot glue or
Glue Dots
Craft
materials
Add a paperclip to the back of the battery pack to clip
the badge onto your shirt!
To wear your badge as a necklace, poke a hole at each
of the top corners and attach a string.
***Hot glue placed on the back of the micro:bit (avoiding the pins) will
not cause harm.
String Paper
clip
Use foam to design the shape of your badge. Decorate with craft supplies.
Attach your micro:bit with hot glue to the front of the badge. Connect the battery
pack to the back.
BACK