How to use prancer to detect and fix the azure sql resources which uses tls version less than 1.2
•
0 likes•19 views

This document provides steps to use Prancer to detect and automatically remediate Azure SQL resources that use TLS versions less than 1.2. It involves creating configuration files, uploading them to Prancer, running a crawler to fetch Azure resources, running compliance tests to detect issues, viewing reports of failures, and using Prancer's remediation to fix vulnerabilities by updating TLS versions.
!["json": {
"type": "azure",
"fileType": "structure",
"companyName": "Prancer",
// replace your tenant id
"tenant_id": "f997f2f9-a48f-****-****-************",
"autoRemediate": true,
"accounts": [
{
"department": "Network Security",
"subscription": [
{
"subscription_name": "whitekite",
"subscription_description": "whitekite",
// replace your subscription id
"subscription_id": "d34d6141-7a19-****-****-************",
"users": [
{
// subscription user name.
"name": "abc*****@gmail.com",
// replace your client id
"client_id": "db57053a-7bce-****-****-************"
}
]
}
]
}
]
}
}
• Master Snapshot Configuration file:
Master Snapshot configuration file is used to define resource type details which you want
to execute the compliance test on.
Create azure_snapshot.json file, based on the below sample configuration json file.
{
"container": "azure_remediation_demo",](data:image/gif;base64,R0lGODlhAQABAIAAAAAAAP///yH5BAEAAAAALAAAAAABAAEAAAIBRAA7)
Recommended
Recommended
More Related Content
What's hot
What's hot (19)
Similar to How to use prancer to detect and fix the azure sql resources which uses tls version less than 1.2
Similar to How to use prancer to detect and fix the azure sql resources which uses tls version less than 1.2 (20)
More from Prancer Io
More from Prancer Io (20)
Recently uploaded
Recently uploaded (20)
How to use prancer to detect and fix the azure sql resources which uses tls version less than 1.2
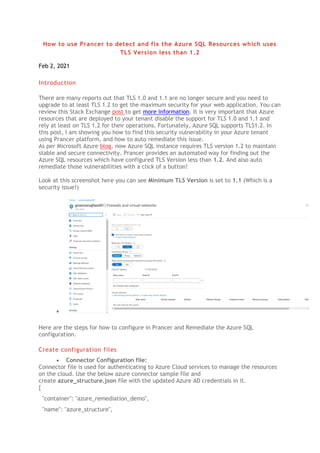
- 1. How to use Prancer to detect and fix the Azure SQL Resources which uses TLS Version less than 1.2 Feb 2, 2021 Introduction There are many reports out that TLS 1.0 and 1.1 are no longer secure and you need to upgrade to at least TLS 1.2 to get the maximum security for your web application. You can review this Stack Exchange post to get more information. It is very important that Azure resources that are deployed to your tenant disable the support for TLS 1.0 and 1.1 and rely at least on TLS 1.2 for their operations. Fortunately, Azure SQL supports TLS1.2. In this post, I am showing you how to find this security vulnerability in your Azure tenant using Prancer platform, and how to auto remediate this issue. As per Microsoft Azure blog, now Azure SQL instance requires TLS version 1.2 to maintain stable and secure connectivity. Prancer provides an automated way for finding out the Azure SQL resources which have configured TLS Version less than 1.2. And also auto remediate those vulnerabilities with a click of a button! Look at this screenshot here you can see Minimum TLS Version is set to 1.1 (Which is a security issue!) • Here are the steps for how to configure in Prancer and Remediate the Azure SQL configuration. Create configuration files • Connector Configuration file: Connector file is used for authenticating to Azure Cloud services to manage the resources on the cloud. Use the below azure connector sample file and create azure_structure.json file with the updated Azure AD credentials in it. { "container": "azure_remediation_demo", "name": "azure_structure",
- 2. "json": { "type": "azure", "fileType": "structure", "companyName": "Prancer", // replace your tenant id "tenant_id": "f997f2f9-a48f-****-****-************", "autoRemediate": true, "accounts": [ { "department": "Network Security", "subscription": [ { "subscription_name": "whitekite", "subscription_description": "whitekite", // replace your subscription id "subscription_id": "d34d6141-7a19-****-****-************", "users": [ { // subscription user name. "name": "abc*****@gmail.com", // replace your client id "client_id": "db57053a-7bce-****-****-************" } ] } ] } ] } } • Master Snapshot Configuration file: Master Snapshot configuration file is used to define resource type details which you want to execute the compliance test on. Create azure_snapshot.json file, based on the below sample configuration json file. { "container": "azure_remediation_demo",
- 3. "name": "azure_snapshot", "json": { "contentVersion": "1.0.0.0", "fileType": "masterSnapshot", "snapshots": [ { "source": "azure_structure", "type": "azure", // subscription user name, should be same as used in connector file "testUser": "abc*****@gmail.com", // subscription id, should be same as used in connector file "subscription_id": "d34d6141-7a19-****-****-************", "nodes": [ { "masterSnapshotId": "AZURE_SQL", "type": "Microsoft.Sql/servers", "collection": "Microsoft.Servers" } ] } ] } } • Master Compliance Configuration file: Master Compliance configuration file contains the list of testcases that will be run on fetched cloud resource json files. Create azure_test.json file, based on the below configuration json file. { "container": "azure_remediation_demo", "name": "azure_test", "json": { "contentVersion": "1.0.0.0", "fileType": "mastertest", "masterSnapshot": "azure_snapshot", "testSet": [ {
- 4. "masterTestName": "AZURE_TEST", "version": "0.1", "cases": [ { "masterTestId": "AZURE_SQL_TEST", "type": "rego", "rule": "file(azure_sql.rego)", "tags": [ { "cloud": "Azure", "compliance": [], "service": [ "Databases" ] } ], "evals": [ { "id": "sql_tls_version", "eval": "data.rule.tls_version", "message": "data.rule.tls_version_err", "remediationDescription": "Mannual Steps: n 1) Open Azure Portal. n 2) Open SQL Servers list n 3) Select the SQL Server for which you want to modify the Mimimal TLS Version. n 4) Click on `Firewalls and virtual networks` option under `Security` section. n 5) Update the Minimum TLS Version to `1.2` and click on save button.", "remediationFunction": "remediate_security_rule.py" } ], "title": "Azure SQL Database check minumum TLS version", "description": "This policy will find the Azure SQL Databases which are set the minumum TLS version lower then 1.2", "masterSnapshotId": [ "AZURE_SQL" ], "status": "enable" }
- 5. ] } ], "notification": [] } } • Rego file: Create the azure_sql.rego file which contains the rule checks which will be perform against cloud resource. Create azure_sql.rego file as below. package rule sql_database_issue["invalid_minimal_tls_version"] { lower(input.type) == "microsoft.sql/servers" input.properties.minimalTlsVersion != "1.2" } default tls_version = null tls_version = true { not sql_database_issue["invalid_minimal_tls_version"] } tls_version = false { sql_database_issue["invalid_minimal_tls_version"] } tls_version_err = "Azure SQL Database has set minumum TLS version lower then 1.2" { sql_database_issue["invalid_minimal_tls_version"] } Upload configuration files on Prancer • Create Collection: All the configuration files Connector configuration file, Snapshot configuration file, Compliance Configuration file, Rego files should be store in a collection. The name of the collection should be same as one which we defined in all configuration json files. Here we have set azure_remediation_demo value as container_name in all configuration json files. To create a new collection on Prancer:
- 6. 1. Open the collection screen from left side menu items. 2. Click on Add Collection button. 3. Enter the collection name and click on save button. • Upload Rego file Once collection is created, you can see the created collection in the collection list. Now we can upload the Rego file to that collection. To upload the Rego file, 1. Click on upload button 2. Drag and drop the azure_sql.rego file in file upload area. 3. Click on Upload button.
- 7. • Upload Connector file For upload a Connector Configuration file, 1. Open connector upload screen. 2. Drag and drop the azure_structure.json file in file upload area. 3. Click on Upload Connector button. • Upload Master Snapshot Configuration file For upload a Master Snapshot configuration file, 1. Open screen for upload new snapshot. 2. Drag and drop the azure_snapshot.json file in file upload area. 3. Select Master Resource Snapshot option as a Snapshot Type.
- 8. 4. Click on Submit button. • Upload Compliance Configuration file For upload a compliance file, 1. Open screen for upload new compliance. 2. Drag and drop the azure_test.json file in file upload area. 3. Select Master Compliance option as a Compliance Type. 4. Click on Submit button. Set client secret value in vault
- 9. • For security purpose we are storing the confidential data in azure vault. • In azure_structure.json file, we have set the Client Id db57053a-7bce-****-****- ************. Now require to add the Client Secret value of that client id into the vault. Run Crawler • Crawler is the process in which Prancer will connect to Azure cloud with your provided credentials and will get the list of cloud resources. It generates the Snapshot Configuration file which contains the list of cloud resources. To crawl the resources: 1. Open the Run Crawler screen. 2. Select the collection name azure_remediation_demo. 3. Click on Run Crawler button.
- 10. Verify generated snapshot files: Once the crawler is done then verify that the cloud resources are fetched correctly or not. • Open All Resource Configuration screen. • Select the Resource Configuration Tab • Search for your collection name. • It should show the generated snapshot in the list. ’ Click on the generated snapshot list item to verify that resources are fetched correctly.
- 11. Run compliance Once you verify that all the resources are fetched correctly, we can run the compliance on it. • Open the Run Compliance screen. • Select the collection name azure_remediation_demo • Click on Run Test button. Check Report Once the compliance process is completed then we can see the pass/fail reports in report page.
- 12. • Open the Report screen. • It will show the latest compliance report by default. • It takes sometime to show the latest report based on number of resources available. so if you did not see the report then after few seconds click on filter button for see the latest report. • In report you can see the list of resources and it’s status (pass/fail) • Click on the failed resource for view detail information of it. • You can see the path of the cloud resource and manual steps for fix the issue. • Click on Remediation button for fix the problem. It will run the process for fix the problem on cloud and will give the success message about Remediation done.
- 13. Verify Azure SQL on Portal