A Fall-Focused School Garden Guide
•
1 like•358 views

A Fall-Focused School Garden Guide ~ MA Ag in Classroom ` For more information, Please see websites below: ` Organic Edible Schoolyards & Gardening with Children http://scribd.com/doc/239851214 ` Double Food Production from your School Garden with Organic Tech http://scribd.com/doc/239851079 ` Free School Gardening Art Posters http://scribd.com/doc/239851159` ` Companion Planting Increases Food Production from School Gardens http://scribd.com/doc/239851159 ` Healthy Foods Dramatically Improves Student Academic Success http://scribd.com/doc/239851348 ` City Chickens for your Organic School Garden http://scribd.com/doc/239850440 ` Simple Square Foot Gardening for Schools - Teacher Guide http://scribd.com/doc/239851110

Recommended
Recommended
More Related Content
What's hot
What's hot (19)
Viewers also liked
Viewers also liked (12)
Similar to A Fall-Focused School Garden Guide
Similar to A Fall-Focused School Garden Guide (20)
More from School Vegetable Gardening - Victory Gardens
More from School Vegetable Gardening - Victory Gardens (20)
Recently uploaded
Recently uploaded (20)
A Fall-Focused School Garden Guide
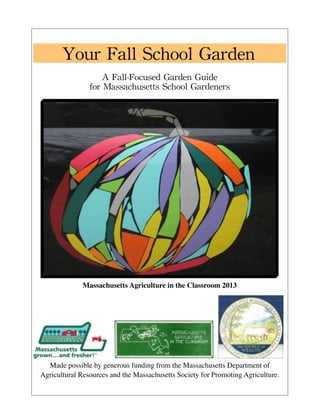
- 1. Your Fall School Garden A Fall-Focused Garden Guide for Massachusetts School Gardeners Massachusetts Agriculture in the Classroom 2013 Made possible by generous funding from the Massachusetts Department of Agricultural Resources and the Massachusetts Society for Promoting Agriculture.
- 2. It is possible to have beautiful, educational and productive gardens in Massachusetts in the months between September and June. School gardeners across the state are figuring out strategies that place less emphasis on the summer season. A garden full of cucumbers and tomatoes may not reach as many of the children at the school as one full of fall hardy greens, popcorn and pumpkins. Luckily Massachusetts farmers are coming up with new and innovative ways to farm the “off season,” many seed breeders are responding by offering more cold hardy crops. Our homesteading ancestors from around the world had many techniques we can re-learn for gardening today. We can use quick growing greens to sneak in a spring or a fall planting and harvest and keep slow maturing melons, squash, dry corn and beans alive over the summer for a fall harvest. We can protect tender plants, create micro-climates in our gardens to stretch hardiness zones, and turn our attention to reliably hardy perennials. Best of all, we can use these challenges to spark interest and problem solve with our students in the garden, so that they can come up with innovative and creative designs and ideas to address these challenges. This guide attempts to lay out techniques, strategies, timing and advice for Massachusetts specific educational gardens, using inexpensive and safe materials, in a helpful pull-out-a-page kind of way, useful as a booklet or as a single hand-out. The scope of this guide is to detail tasks you might do in your garden in the fall, although many of these techniques can be useful in the Spring also. So gather your hardy seeds, greenhouse plastic, straw mulch and hats, gloves and sweaters, and get outside! -Alice Posner for Mass. Ag. in the Classroom 2013. MAC Fall School Garden How-To Guide 2013 Digging- Edward Thomas, Collected Poems To-day I think Only with scents, - scents dead leaves yield, And bracken, and wild carrot's seed, And the square mustard field; Odours that rise When the spade wounds the root of tree, Rose, currant, raspberry, or goutweed, Rhubarb or celery; The smoke's smell, too, Flowing from where a bonfire burns The dead, the waste, the dangerous, And all to sweetness turns. It is enough To smell, to crumble the dark earth, While the robin sings over again Sad songs of Autumn mirth."
- 3. Your Fall School Garden A Guide for Massachusetts School Gardeners Alice Posner for Massachusetts Agriculture in the Classroom 2013 1. Calendar. Suggested tasks, week by week. 2. Strategies for successful fall focused gardens: 1. Short Season Annual Veggies 2. Tough Veggies 3. Indoor Gardening 4. Herbs 5. Raspberries 6. Garlic 7. Grains 8. Fruit Trees 9. Perennial Vegetables 10. Fall Flowers 11. Harvest and Curing 12. Finding Micro-Climates in the School Yard 13. Row-cover, Tents, Cloches, Low-tunnels, Cold-frames. 14. High-Tunnels and Greenhouses. 15. Food Storage and Preservation. 16. Other Uses of the Garden in the Fall and Winter. 3. Sources/ Resources 4. Plant Sources, Budget and Supplies MAC Fall School Garden How-To Guide 2013
- 4. Massachusetts Fall School Garden Calendar This is intended as a list of suggestions, a guide. Dates may vary in your area, and due to your micro-climates. Learning the clues (such as leaves dying on potatoes) and doing frequent garden walks for observation, and talking with other gardeners and farmers in your area is the best way to figure out when to do things. Follow this guide as it is helpful, and step number 5 is for you to fill in. Week What To Do- Suggestions September 1st Week 1.You are back! Assess the garden. What do you see? Make a to do list. 2. Pull out weeds before they set seed 3. Harvest potatoes if their tops have died back 4. Enjoy late summer harvests of peppers, tomatoes, melons etc 5. September 2nd Week 1. Plant more seeds! Plant radish, lettuce, ‘Asian’ greens, mache′ and arugula in a well prepared seed bed. Sow a separate bed of spinach to overwinter. 2. Plant flats of herbs to bring indoors for the winter, 3. Pull and cure onions in a dry warm place with their wrappers intact. 4. Revive your compost pile! Chop it up into small pieces and turn it. 5. September 3rd Week 1. Harvest pumpkins, sunflowers and winter squash as soon as they are ripe to avoid having the animals getting to them first! Cure pumpkins and winter squash indoors. 2. Harvest apples, pears, raspberries and grapes if you have them. 3. September 4th Week 1. Harvest ornamental gourds and bring inside to cure. 2. Harvest dry beans (when most of their pods have turned brown) 3. Put compost around rhubarb 4. Save seeds from heirloom plants! 5. October 1st Week 1. Pull up tomatoes before the frost. Do not compost diseased plants. 2. Chop up and turn under other crop remnants or add to compost pile 3. Plant spring flowering bulbs 4. Harvest herbs for drying in the classroom. 5. October 2nd Week 1. Use pumpkins and squash for decorations. Roast and eat the seeds. 2. Harvest popcorn, flour corn and ornamental corn and bring in to dry. 3. If you have not already done so, do a soil test! The lab is much less busy this time of year. 4. Harvest beets and celeriac and make a soup - yum! 5. MAC Fall School Garden How-To Guide 2013
- 5. Week What To Do- Suggestions October 3rd Week 1. Plant garlic 2. Mulch over plants you are leaving in the garden over the winter such as strawberries, asparagus, parsnips and leeks. Put row cover over your spring spinach 3. Cut the stalks on your fall bearing raspberries back to the ground. 4. Put low tunnels up over late greens. 5. October 4th Week 1. Harvest carrots, cabbage, brussel sprouts if you like, or leave them under mulch. 2. Make kale chips and collard greens; leave some in the garden for later. 3. Plant a rye cover crop or winter wheat to harvest next year. 4. Make sure you are gathering leaves for next year. Talk to parents and school custodians/grounds keepers. 5. November 1. Wash seed starting flats with soapy water 2. Brush off your tools with a wire brush and wipe with an oily rag to prevent rust 3. Try drying food such as apple slices 4. Get some local cranberries, and make cranberry sauce! 5. Notes:________________________________________________________________________ _______________________________________________________________________________ _______________________________________________________________________________ _______________________________________________________________________________ _______________________________________________________________________________ _______________________________________________________________________________ _______________________________________________________________________________ _______________________________________________________________________________ _______________________________________________________________________________ _______________________________________________________________________________ _______________________________________________________________________________ MAC Fall School Garden How-To Guide 2013
- 6. One way to have a fall garden is to plant short season annuals in the garden when you get back to school in September. By “short season” I mean plants that grow from seed to harvest in a short number of days. Some of these include radishes, lettuce, arugula and many other greens if grown to “baby” size (see table below.) Peas can also work, although they take slightly longer to mature. These plants are also cold-hardy, so you can harvest them into the fall even as the nights get colder.* To ensure your garden grows quickly, you need to prepare a fertile seed bed, water frequently as fall is a drier season than spring, and make sure your plants are not competing with weeds. Greens that might benefit from shade at other times of year will often do fine in a sunny spot in fall. As it gets colder, growth will slow down. The general rule of thumb is to add seven days to the “days from seeding to harvest” number. For example, salad mix that usually takes 28 days could take 35 in the shorter daylight weeks of late fall. If the vegetables you want to grow need a slightly longer stretch of days, organize a summer seeding or transplanting of those crops. This strategy can work well with gardens that have a higher level of help in the summers, as seeds or transplants require weeding and frequent watering to thrive. Start kale, collards, beets, broccoli, or even green beans this way. Plant seeds in the garden or have volunteers start transplants at home (it may be hard to find them at garden centers that time of year). Mulch transplants and seeds when they are tall enough. * (For more ideas on this see the page on cold frames) MAC Fall School Garden How-To Guide 2013 Short-Season Annual Vegetables Table of Short Season Crops Crop Days Notes Radish 26 Try ‘Easter egg’ Salad Mix 28 Buy a mix of lettuce seed, or mix your own. Spinach 39 Pinch off bigger leaves to keep the plants going. Cooking greens 25 Grow a mix of kale, collards, ‘Asian’ greens to small leaf size for cooking, or “braising” Salad Greens- “Cut and Come Again” To plant a salad-mix bed, prepare a seed bed free of rocks, weeds, roots or other plant matter with a fork, hoe and by hand picking. Incorporate finely sifted compost. Plant the lettuce mix in rows close together- about 2” apart. Water well, and keep the seedbed especially moist during the germination period - about 2 weeks. You will need a gentle mist attachment or spray bottle so that you do not wash the seeds away. After sprouts emerge, continue to water normally. When the greens are large enough to harvest, cut off the tops with scissors or a knife leaving about 1/2” or so of the plant. If it is warm enough, they will grow back! Resources and Curriculum Connections • Good resource on greens from Seeds of Solidarity, a long-time farm and garden education program in Orange MA. They also grow the most delicious salad greens at their farm; they know greens! seedsofsolidarity.files.wordpress.com/ 2012/03/4growing-salad-greens.pdf • (Do check out all of their extremely helpful resources also on their web site: http:// seedsofsolidarity.org/) • Johnny’s Seeds has good farm growing guides on their website, many of which are also helpful to gardeners. On growing greens: http:// www.johnnyseeds.com/Assets/Information/ SaladMixProduction.pdf Farm Connections On the farm this practice of staggering crops so that they will come in during the fall is often called “succession planting.” Farmers will seed plants in successions so that they have a longer window of market availability for each kind of crop. This practice also helps manage risk. If one round of a crop fails due to insects, weather or disease, another round will come along soon. Strategy 1.
- 7. Tough Winter Vegetables Some vegetables are tough enough to be left outside uncovered in the garden as the cold winter rolls in. In the case of collards and kale, frost converts some of their starches to natural sugars, so they become sweet to eat after a frost. These sugars are a natural anti-freeze for the plant, and also make them more palatable to a sweet tooth! I have harvested kale from my garden, without any kind of protection, well into February. Although the plants will stop growing in cold temperatures, their leaves will remain intact and available to eat, even with a coat of ice on them. Often the plants will stay alive right through the winter and will start growing in the spring. As kale and collards are both biennuals, as an added bonus the second year they will set seed, and you could harvest your own seed that second year. * Parsnips and leeks are two other vegetables that you can leave outside for the winter. You will not be able to dig out the parsnips once the ground freezes, so leave them in the ground until spring, when they will be very sweet. Leeks can also be harvested the following spring, or left in the garden until late in the fall. Carrots and other root vegetables can be left in the garden until the ground freezes with good success. Although tough enough to survive most weather, in unprotected areas all of these plants can benefit from hay or leaf mulch. Keep in mind that rabbits may also be excited to find vegetables in the garden in the middle of the winter and take necessary precautions! Table of Tough Vegetables Kale Try ‘Winterbor’ “Red Russian” Try crinkly rather than dinosaur varieties. Collards Champion’ is a good open pollinated variety. Needs warmer germination temps. Parsnip Try ‘Lancer’ or ‘Javelin’ Leeks Try ‘Lancelot’ or ‘Bandit’ Avoid early varieties. When to Plant In early spring, plant your parsnips from seed and start your leeks from slips or “sets.” Consider a mid-summer seeding of cabbage, collards or kale for your fall and winter crop. You could also start a pot or two at home, or as a project for your students, and set them out in early September. Direct seed spinach, radish, carrots and turnips when you get back to school. You may sow lettuce and cold hardy greens such as mache´ and arugula late into the fall if you intend to cover them for the winter. * See seed saving resources strategy #15 Resources and Curriculum Connections • Video about Kale and how to cook it http:// allrecipes.com/video/1106/all-about-kale/ detail.aspx • Great chart listing all the nutrients in Collard greens http://www.whfoods.com/genpage.php? tname=foodspice&dbid=138 • More information on Collards from Illinois Extension: http://urbanext.illinois.edu/veggies/ collards.cfm Make Kale Chips! 1. Wash a large bunch of kale, remove stems, and tear off chip-sized pieces of leaves. 2. Place them on a tray that’s been lightly coated with olive oil. 3. Sprinkle with salt (if you sprinkle with salt while the leaves are still wet, the salt just melts right into the leaves.) I like to use salt grinders with kids so they don’t go overboard... 4. Place in oven at 350 for about 10 mins (or toaster oven in your classroom!) until crispy. 5. Place on paper towels to cool. Eat! Strategy # 2 MAC Fall School Garden How-To Guide 2013
- 8. Garden in the Classroom Plants in the classroom can support the fall school garden, as well as student’s learning, in many ways. If you used a grow-light or sunny window to start seedlings for your garden in the spring, you already have an indoor set up for plants, and can continue this into the fall and winter. If your school has an atrium, or sky light build your indoor garden underneath it. Windowsill or box gardens can be a great way to start gardening without leaving the classroom. • Bring tender plants indoors before frost kills them. If you plants are potted up, you can bring them into the classroom to over-winter. • Start your spring garden plants indoors in the late winter. • Grow garden plants that you intend to keep indoors. If you have a good grow light set up or a sunny window, you can garden indoors with your students. Consider plants that stay small, and do well in containers, so that you can see more of the full life cycle of the plant. E.g. try lettuce or herbs, rather than beans or peas. • Keep houseplants in your classroom. This common practice can be a great start to gardening. Some house-plants, such as spider plants, can also be easily propagated, so your students can start “babies” to take home or give to other classes. • Set up a window box outside your classroom window. You can then take it home when you need to, for vacations etc. • Explore advanced set-ups such as hydroponics, fish cycling systems, grey water “living machines” - there are many more! Resources and Curriculum Connections • Grow Lab. http://www.kidsgardening.org/node/ 13178 The essential, wonderful resource from the National Science Foundation using growing in the classroom as a spring board for science learning. A great place to start, and to get other teachers excited about gardening without having to leave their classrooms. • The Plant and Grow Project Book, Ulla Dietl. Sterling Publishing. NY, NY 1995 • You don’t need to spend hundreds of dollars to buy a grow light! A shelving unit and some shop lights will do just as well. See this site for a simple plan: http://www.gardening.cornell.edu/factsheets/ growlite/index.html Farm Connections Only a small amount of space is needed to start a lot of plants inside. Think about how many tomato seedlings can fit in a small tray. Remarkable since they may grow five feet or more later! Many market gardeners are able to start a large garden from this kind of indoor set-up. You could also grow seedlings to sell, and learn about the nature of farm business. Strategy# 3 Some Great Indoor Growing Projects to Try MAC Fall School Garden How-To Guide 2013 Scarlet Runner Bean While they will not set beans, they can grow several times around the windowsill! Vegetable Top Sprouts. Cut the top off carrots, parsnips, celery, beet, set in a shallow dish and watch them grow! Avocado seeds A classic. prick with 3 toothpicks and set on top of a jar, so the seed is half under water. Lemon seeds! The easiest to sprout of citrus and you can’t grow lemons outside in the winter. Mimosa or “Sensitive Plant” The leaves curl up when touched. Quick to germinate from seed. “Pot” Herbs You can grow many windowsill culinary herbs that will always stay inside. Spider plants Great easy plant to propagate and send kids home with the “babies” for their own plant. Cactus The ultimate low maintenance plant!
- 9. School Perennial Herb Garden Many perennial herbs are great for a fall school garden. They will come up in the spring yet stay harvestable through the fall. Herbs are plants that are valued for their culinary, medicinal, dyeing ability or aromatic qualities. Herbs are full of histories. They are great ways to stimulate children’s senses and engage them in the garden. Some of the many uses of herbs in the school garden include smelling in the garden, making herbal tea, potpourri, insect repellant or attractant, making things like salve or lip balm, dried culinary herbs, and aromatic pillows. To add perennial herbs to your garden, visit your locally owned nursery as they will have healthy plants suited to your climate. You can also put out a request in the school community that you are looking for herbs. Many perennial herbs need to be divided every few years, so someone with a herb garden may be willing to give you some of their divisions. It is important to know the difference between a perennial and a tender perennial “Perennials are herbaceous plants that die back to the ground in the fall, re-emerging in the spring from the roots. Perennial herbs include beebalm, catmint, chives, lamb’s ear, lavender, lemon balm, marjoram, mint, oregano, sage, tarragon, thyme, winter savory and yarrow. Tender Perennials are plants that are hardy perennials in their native land, but can’t stand the cold temperatures of our climate. These plants must be brought indoors in the fall, usually before a frost. Some common ones are: bay, lemon grass, lemon verbena, pennyroyal, pineapple sage and rosemary... Great Herbs for the School Garden Herb Theme Garden Notes Oregano Pizza Garden Slow to grow Chamomile Calming tea Peppermint Scratch n Sniff Will spread! Anise Hyssop Scratch n Sniff smells like licorice! Lemon Balm Scratch n Sniff Will spread! Chives Salad Blossoms are edible Nasturtium Salad Edible flowers! Lavender Calming tea Protect in winter Sage Touch Great texture Lambs Ear Touch Favorite texture! Resources and Curriculum Connections • Herb Society of America (Ohio) Great resources for kids. Be sure to check them out!: http:// www.herbsociety.org/resources/t4k/thyme-4- kids.html, also they have a seed exchange. • New England branch: http://www.neuhsa.org/ • The MAC newsletter by Debi Hogan on Herbs: http://www.aginclassroom.org/Newsletter/ spring2001.html • Some state herb gardens, well worth a visit: • Old Sturbridge Village www.osv.org/ • Plimoth Plantation: http://www.plimoth.org/ • Herb society teaching garden in Wellesley, MA(see website above) • The “America the Beautiful fund” gives out free seeds, look them up! Farm Connections There are many wild herbs that are endangered or at risk of becoming endangered. The United Plant Savers is an organization that works to protect and restore these wild plants. Consider growing an endangered herb plant at your school and helping this effort! Visit their website for more information. http:// www.unitedplantsavers.org/ Strategy # 4 Bowe School Chicopee Chives, authors garden MAC Fall School Garden How-To Guide 2013
- 10. Red Raspberries and Grapes A raspberry patch or a grape arbor is a wonderful addition to a school garden, full of juicy sweet fruit that comes in the fall. They can also yield enough so that students and other visitors to the garden can graze on them without you being worried that there will not be enough for the students. A well managed raspberry planting or grape arbor can last for 15-20 years or more, and so can be a mainstay of your garden. I will describe here how to plant and manage fall bearing, primocane red raspberries. Since they are fall bearing, they do not need trellising, and are a good place to start with raspberries. Once you have raspberries, try grapes! Research how to grow Concord, Fox or other hardy grapes. 1. Prepare the location of the raspberry patch well in the early spring. Ideally, it should be in a sunny, well drained location. A moderate amount of shade is tolerable, but is not ideal. They cannot tolerate wet very well. Dig up the area to a depth of 6” or more, and make sure you remove all roots and perennial weeds. Add some compost to the soil and mix in. If you are able, a fall cover crop the previous year is a nice way to prepare the area. Consider adding a root barrier of heavy landscape cloth or bricks as raspberries will spread if left un-checked. 2. Dig a long trench, and place your plants 2’ apart, with the roots trailing to the side (see diagram below). The crowns should be about 1” below the soil. Press in well for good soil contact, and trim the tops, if tall to 6-8”. Water in well, and keep watered during establishment and fruiting. Mulch well with wood chips, hay or other sturdy mulch. 3. Harvest with careful picking, or with gloves, as some varieties are quite thorny! 4. Cut back to the ground in the late fall after they are dormant. This works well for these varieties, and means they will fruit only in the fall. It can also help with disease and insect problems. This management method also means you do not need to trellis. 5. Choose your cultivars carefully! One good variety suitable for the climate zones in Massachusetts is “Heritage.” This is a good, time-tested, hardy prolific heirloom variety. Another benefit is that this variety is not patented, so you can legally propagate it freely. You can dig up suckers from an existing fall-bearing red raspberry patch, but make sure they are disease free, and you like the way they taste! Buying plants from a locally owned farm or nursery is a good bet as their varieties will be suited for our area, and will not harbor disease from parts of the country with milder winters. 6. CAUTION! Raspberry plants will spread; you will have to dig up their new shoots. If you are especially worried about this, consider planting your raspberries in containers. Resources • UMass Extension Fact-Sheet on bramble fruit: https://extension.umass.edu/landscape/publications-resources/ home-garden-fact-sheets-small-fruit • Cornell University: www.fruit.cornell.edu/berry Raspberry facts Raspberries are a member of the rose family. In ancient Greek mythology, the berries were once white but when Zeus' nanny, Ida, pricked her finger on a thorn it stained the berries red and they have remained so ever since. Thus, their latin name is Rubus idaeus, literally, bramble bush of Ida. The leaves of red raspberry are considered a female health tonic. Strategy #5 MAC Fall School Garden How-To Guide 2013 Raspberry Planting 2 Feet 1 Inch Farm Connections In farm cultivation, raspberries are often called “brambles” or “small fruit.” Farmers in the North East are starting to grow raspberries under high-tunnels, or un-heated greenhouses to get an earlier, or later harvest to extend their seasons. Extending our season here means we can truck in less from warmer climates and eat Massachusetts grown fruit for more of the year. 6 inches There have been an increase in Farm vineyards in the state, growing many varieties of grapes, and making fruit wines. See our newsletter on grapes: http://www.aginclassroom.org/Newsletter/ fall2004.html
- 11. Garlic Strategy # 6 Garlic Glossary Garlic is a great fall planted crop and is also an easy way to start learning about saving seed. The Garlic Year Fall Choose your seed carefully: Garlic is propagated from bulbets, commonly known as cloves. Hard - neck varieties are well suited to our climate in Massachusetts. The best way to get seed is to order from a trusted seed company, and then save your own garlic for seed for future years. I have had good results using eating grade garlic from the grocery store or farmers market. If you choose this make sure you buy hard-neck garlic and from a local farm. Garlic shipped in may be treated so that it does not sprout. Most California garlics, both organically or conventionally grown, are soft-neck and not as well suited for our area. Planting your garlic: Planting timing is flexible, but generally when temperatures have dropped quite a bit but not frozen. Generally late October. Crack apart your cloves: Make sure to leave the outer wrappers intact. Prepare a seed bed: Make a well dug bed or area free of weeds and add compost. Plant your cloves: Pointy end up! About 3” deep. 5” apart in rows of 8” is a good standard for spacing. Mulch! Put your garlic to bed for the winter under a 2-4” layer of hay or leaves. Bulb: A swollen and rounded underground stem. “Scape”: A false seed stalk topped by an umbel enclosing small aerial bulbils. Cultivated garlic produces infertile seeds. Bulb wrapper: The thin dry outer scales that occur as several thin dry papery layers around a mature bulb. They are specialized portions of the leaf sheaves. Cysteine: The sulfur containing amino acid responsible for much of the pungency of garlic. Some popular garlic varieties Music Russian Red German Extra Hardy Your own saved variety! or tying together in bunches (garlic braids are tough with Resources and Curriculum Connections Garlic has been cultivated for many thousands of years. Nearly all experts agree that wild garlic originated in south-central Asia. It was domesticated and cultivated along what is currently the area where the south of Russia meets the borders of Afghanistan, Iran and China. Garlic is now used as food, as well as medicinally, around the world. Garlic is in the species Allium. There are two varieties of cultivated garlic: Sativum, or soft-neck, and Ophioscorodon, or hard-neck. (“Elephant” garlic is not a true garlic, but a leek.) Farm Connections Garlic is propagated from cloves, (not from seed) and many farms, which might not do other seed saving, save their best garlic cloves to plant the next year. This process of selection has been going on since the beginning of agriculture to improve crops to be better suited to our needs. The idea is, if you save the best cloves, you will start to grow a stronger garlic variety, which is specially adapted to your farm. You can try this in the garden! MAC Fall School Garden How-To Guide 2013 SPRING When temperatures warm up move the mulch from around your garlic to let the new sprouts grow. Scapes! Before school gets out for the summer, snap off the tall curly scapes. This helps put more energy into the bulb. You can use the scapes to make a tasty garlic scape pesto! Re-Mulch, weed, irrigate, fertilize: Care for your garlic by adding more mulch when it looks thin, pulling out any weeds and watering during droughts. You can also fertilize if you like by top dressing with compost, foliar feeding with compost tea or other fertilizer, but this is not vital. Harvest!: Harvest your garlic “green” before the end of the school year if you need to, and eat it fresh. Otherwise, wait until mid summer and when the leaf tips start to die. Pull up and hang your garlic to “cure” in a dark dry place such as a garage or back of classroom. Save Seed: Garlic is a great way to start trying your own plant propagation. Save aside the biggest bulbs for planting next year. (Only possible with cured, not “green” garlic) Eat!: Make garlic bread or roasted garlic in your classroom, or clean by gently rubbing with your hands and trimming the roots, cutting the stems
- 12. Fall Planted Grains Have your students grow their own wheat, grind it and make their own bread! Learn about these essential global crops through growing them first hand in the garden. Growing a bed of winter cereal grain is a good way to protect your garden soil for the winter as a cover crop. Cover crops stop winter erosion, add organic matter and improve soil texture. If you plant winter rye or wheat, you can also let these crops grow to maturity, and harvest the seed to make bread, crackers or pizza! Find Seed: Buy seed from a seed company or local farm, adapted to your area. Ensure it is as weed free as possible. Inspect your seed and pick out weed seeds. • RYE: Be sure to get cereal rye, (Secale cereale) not rye grass (Loliumperenne). • WHEAT: I recommend getting hard red winter wheat. This is traditionally a bread wheat, is hardy and planted in the fall (rather than the spring). Plant your cereal grain: In late October Prepare a seed bed: Prepare a bed free of weeds, debris or rocks. Add compost. Rake in and level the bed. Sow your seed: Scrape furrows a couple inches apart, about 1” deep. Drop your grain seed in 1-2” apart and then cover with compost. Make good soil contact by pressing down with your hands or positioning a plank on top of the soil and walking on it. Winnowing: Winnowing is cleaning the grain. On a breezy day, or in front of a fan, pour your grain/chaff mixture from one container to another. The chaff should blow away and your grain drop. Cooking!: You can then grind your grain into flour, cook it like rice or sprout it. If you store it for more than a few weeks, the refrigerator or freezer is best. Cereal Grain Background: People have been eating whole grains for thousands of years. In Guns, Germs, and Steel, Jared Diamond identifies eight crops as being among the earliest to be cultivated by humans. Included in this group are barley, flax, and einkorn and emmer wheat (the latter being one ancestor of durum wheat, common or bread wheat). These may have been grown as far back as 9000 B.C.E. in the “Fertile Crescent” of the Middle East. Cereal grains are grasses, members of the Monocot family, known as Gramineae. Farm Connections Most grain in the U.S. is grown in the Midwest, where farms can be as large as thousands of acres. On larger farms, grain is harvested by combine- a machine that “combines” the once separate tasks of harvesting, threshing and winnowing. Strategy # 7 Winter Wheat. Grain Glossary Straw: The grain stem and leaves, without any seeds. Hay: The full grain with seeds. Scythe: A curved blade on a short or long handle traditionally used for harvesting grain. Sheave: A bundle of grain, tied just beneath the seed heads. Shock: An upright pile of sheaves, traditionally used to dry grain. MAC Fall School Garden How-To Guide 2013 Harvest! If you choose to just use your grain solely as a cover crop, turn it under in early spring, chopping it up well with a spade. If you choose to harvest it as a grain, wait until early summer, just make sure the grains in the seed head are firm and crunchy. Grain goes through several stages: The milk stage- the seeds fill with a milky liquid. The dough stage- the milk hardens, the grain is easy to dent, and leaves start to turn. The mature stage- the seeds are hard. The leaves will be fully gold/ brown. You may have to cut down your grain in the summer and process with children in the fall, otherwise your grain may drop or be eaten by birds. Cut down the stalks: Near the base with scissors or a hand scythe. You can then bundle the grain in sheaves, by tying into small bundles, and then into a pile upright, in a shock until dry. This can be done indoors. You can also just snap off the seed heads and spread out to dry. Processing Your Grain Threshing: Threshing means separating the wheat from the seed heads and straw (chaff). Bash your grain heads with a stick inside a pillow case or on a tarp. Research traditional flails for doing this. See also our Cover Cropping Guide in our School Garden resources on the web.
- 13. Fall Bearing Fruit Trees Fall-bearing fruit trees can provide plentiful fruit in a small space for many years. Try replacing a summer blooming ornamental tree in your school yard or graft new edible varieties onto existing trees. Plan for annual maintenance and care, as well as close attention and watering until trees are established. Some trees that are hardy to Massachusetts that will bear fruit in the fall, as well as pretty blossoms in the spring include apples, pears, plums and beach plums. What to consider: For most trees you will need a fertile location, with well drained soil and at least six hours of sunlight every day. You may want to consider a semi-dwarf tree if you have some space limitations. If space is limited, or if you must plant in containers, try a semi-dwarf, dwarf or columnar cultivar. Keep in mind that they are much less hardy and will need to be protected in the winter. Siting the Tree: Fruit trees bloom early in the spring, so there is always a danger of a late spring frost killing the flower buds and future fruit. Protect the flowers and flower buds from a late frost by covering the tree with a sheet on any evening that frost is predicted. You can also site the tree so that it blooms less early. - see the page in this publication on microclimates. Trees will need wind protection and often do better on an eastern or northern slope to avoid frost damages. In general ask for later bearing varieties with disease resistance and if possible find a variety that you find tasty! Perhaps you could organize a field trip to a local orchard and take a vote! Young trees should be protected from wildlife and rodents with a fence or collar. Most young trees do well to be staked. Most fruit trees require two individuals of a similar variety for pollination. Some Good Schoolyard Fruit Trees Beach Plum (Prunus Maritima) Great for vitamin A, tolerant of salt and poor soils. Pears (Pyrus) Apples (Malus) Other fruiting trees hardy to our area such as persimmon, paw paw, hardy kiwi, mulberry! Planting Your Tree There are more nuances that go into tree planting than I am going to cover here, best to talk to your local nursery person or read over one of the guides I have listed to the right. The Basics: On a dry day, dig a hole 3x the diameter of your root ball and deeper. Plant your tree the same depth it was in the container or at the nursery. Fill in your hole with good soil - consider adding compost or recommended soil amendments. Stake, add a mesh collar, MULCH 3-4” around your tree but do not “volcano mulch” - leave a few inches of space around the trunk. Water water water as the tree gets established, and keep watered after that during dry periods. • On Beach Plums: www.beachplum.cornell.edu/ bpguide.pdf • Guide on planting apple trees.http:// www.orangepippintrees.co.uk/articles/fruit-tree-planting- instructions • Great Guide on Tree planting by St Lawrence Nurseries, who specialize in northern varieties of fruit trees.http://www.sln.potsdam.ny.us/pg.html • A good video on tree planting by Dave Wilson Trees: https://www.youtube.com/watch?v=Tttq3M739YA • Tower Hill Botanic Garden has a collection of antique apples and distributes scion wood for grafting in the spring. • Our newsletter on apples on our website. Farm Connections Resources Tree propagation is a fascinating topic and a great research project for older students. It is amazing to me how commercial orchards will graft one kind of apple onto another apples roots with all kinds of improbable methods. Look into scion wood, root stock, old varieties and see if your students can create a tree that bears four different kinds of apples, all from the same tree! Strategy # 8 MAC Fall School Garden How-To Guide 2013 Beach Plum. Authors garden. Columnar apple tree. Authors Garden.
- 14. Perennial Vegetables Some Perennial Vegetables to Grow. Name Latin Name Notes Jeruselum Artichoke (or Sunchoke) Helianthus tuberosus Wait until the first frost to harvest the tubers. Cook like potatoes - fried, roasted, boiled, in soups etc. Be careful and give it plenty of space or it will take over others! Sorrel Rumer spp. My students call sorrel garden “sour patch kids” Egyptian or “Walking” onion (see picture right) Allium Cepa This onion “walks” by growing a heavy bulbil cluster on top, which falls over, seeds in place, and then grows a new stem just a short distance from the parent plant. Sea Kale Crambe maritima Perennial kale! Sweet Cisely Myrrhis odorata Strong anise smelling plant. Use roots, stems, leaves in salads, soups and cooked with fruit. Good King Henry’ Chenopodium bonus hernricus Think of this like perennial spinach! Resources and Curriculum Connections Many of these perennial vegetables are related to our well known garden vegetables, but linked more closely to their wild ancestors. • Perennial Vegetables: From Artichokes to Zuiki Taro, A Gardener's Guide to Over 100 Delicious and Easy to Grow Edibles - Eric Toenesmeier • How to Grow Perennial Vegetables: Low- Maintenance, Low-Impact Vegetable Gardening by Martin Crawford and Hugh Fearnley- Whittingstall • The Origins of Fruit and Vegetables- Jonathan Roberts Farm Connections Perennial vegetables are becoming more popular in home gardens, as well as farms. Gardens provide an ideal testing ground for plants that farmers might find feasible to grow. Try these unusual vegetables out in your school garden, record how they do, and have your students present to your local farmers about which ones you like best and how they did. Strategy # 9 You may already know some fruits and vegetables that are perennials: rhubarb, strawberries, asparagus. We associate these with spring, because they come up year after year before many of our annual vegetables. There are also many great fall perennial vegetables that can last through the long hot summer. Below is a list of some perennial vegetables you might want to try. Many can be started from seed, just as you would your annual plants. Some are more complicated to start this way, and it would be better to buy the whole plant, or get some plant matter from someone else. MAC Fall School Garden How-To Guide 2013 Walking Onion, Authors Garden
- 15. Fall School Garden How-To Guide 2013 Fall Flowers Add some fall blooming flowers to your garden! Not only do they add beauty and color to your garden as it is winding down, but they also continue to provide food for for the bees and other pollinators so important to our vegetable crops. You could also give flowers to donors and volunteers as gifts, sell them as a fundraiser, or simply enjoy the calming effect of flowers. Listed below are some choice fall blooming perennials that you can find at your local farm or garden center. I have left out some fall blooming herbs like Anise Hyssop, as they are covered in the herb garden section. CAUTION: Monkshood, a popular fall flower is not listed here, as it is a poisonous plant and should definitely not be grown in the school yard. Table of Fall Flowers Flower Description Growing Conditions Asters Come in many colors and bloom through the fall. 1-5 ft tall. Full sun, well drained soil. Turtlehead Pink or white flowers that look like turtle heads! Part shade, moist rich soils. Mulch well. Toad Lilly Orchid like spotted flowers. Good for shady areas. Shade, moist rich soil. Butterfly Bush Blooms into the fall, attracts butterflies! Full sun, well drained soil. Russian Sage Blue flowers and silvery leaves. Tough. Smells great. Full sun, well drained soil. Fall Blooming Crocuses Fall varieties of the popular spring blooming crocuses. About 6” tall. Shade ok! Well drained soil. Helenium Lovely red, orange or yellow flowers. Full sun, well drained soil. Sedum 18” tall dense flower heads, often pink, bluish stems. Full sun, well drained soil. Can handle drought. Witch Hazel Great as a tree or shrub. There are fall and winter blooming varieties. Part shade or full sun ok. Echinacea Blooms can stay into the fall Full sun, well drained soil. Can handle drought. Black Eyed Susan Bright yellow flowers, through early fall. They may take over! Can handle bad soil, drought, full sun. With help from Warren Leach, Tranquil Lake Nursery. Resources and Curriculum Connections • See our Spring 2004 newsletter on Pollination on our website. • Massachusetts Beekeepers Association. massbee.org • Massachusetts Flower Growers Association. For information, and where to find your local garden center:massflowergrowers. com • USDA downloadable guide on native pollinators: plants.usda.gov/pollinators/ Native_Pollinators.pdf • US Forest service website. Farm Connections Fall flowers such as asters provide a good way for farmers to extend their seasonal income, and can be a great compliment to pumpkin sales. Support and learn from your local farm or nursery by stopping by to buy some asters for your school. Strategy # 10
- 16. Harvest and Curing - Gently brush off dirt with your hands, trim the tops of stems and roots if you like, but leave the papery skins intact for storage. - Hang in bunches, braids, or cut off the stems and dry on trays (e.g bakers trays) or screens. An attic is usually good, an unused greenhouse can work if it is airy, think where there might be a similar space. Flour Corn and Pop Corn - Popcorn must be left on the stalk until the stalk turns brown. The husks must be brittle, and the kernels rock hard. - Harvest the ears and husk them, - To cure, put the ears in a warm, dry, airy place (similar to garlic/onions) for 3 weeks or so. - To remove the kernels, rub the ears together inside a paper bag, and push them off with your thumbs. - Store in air tight glass jars in a cool place. - I love air poppers for home grown popcorn as they are better at popping half-cured corn. Dill, Coriander (Cilantro Seed): - To harvest these crops for eating or seed, place a paper bag around the plant seed head, and shake! You can also cut off the head directly into the bag. Potatoes - Ideally, harvest potatoes on a dry day. Store dirty but dry, somewhere dark, and in light-blocking paper bags. Inspect periodically to remove any showing signs of rot. Potatoes are ideally stored at about 45 degrees F, in an unheated entryway, or anywhere unheated but protected from frost can work if you don’t have a root cellar. Resources and Curriculum Connections • Week By Week Vegetable Gardeners Handbook- Ron and Jennifer Kujawski. Story, North Adams, 2010 • Did you know that these dry crops -beans, corn, winter squash, were often the traditional varieties used in corn, beans and squash. See http:// www.wampanoagtribe.net/Pages/ Wampanoag_Education/corn Strategy # 11 Here are some vegetables harvested in fall. You generally plant these directly in the garden in the spring when the soil has warmed up. Squash and Pumpkins: -Harvest when the rind is a uniform color, (e.g. orange) don’t leave too late or they will start to rot, or animals will get them before you do. - Leave at least a 2” handle for better storage. - Cure in a warm, airy spot, such as a windowsill, on layers of newspaper, and turn every week or so for even curing. - Store in a 55-65 degree f. airy dry place until you use them. Perhaps a gym shelf or hall closet? Ornamental Gourds: (e.g. bird house or snake neck gourd) - Harvest when the stem is brown and dry and the rind is hard - Wash in soapy water, rise then dry with a towel or paper towel. - Cure as you would squash or pumpkins - Wipe with a vinegar solution every month or so to prevent mould Dry Beans: - Pull up the whole plants when more than half of the pods have turned brown. Finish drying inside, if you leave them out they often go moldy. - When they are brittle, thresh and winnow (see the page on grains) Onions and Garlic: - Harvest on a dry day Farm Connections There are a lot of different kinds of pumpkins. Most pumpkins sold, while edible, are grown for decoration or carving. Grow or buy “sugar” or “pie” pumpkins to make great little jack-o-lanterns, and pies a few days later. MAC Fall School Garden How-To Guide 2013
- 17. School Yard Micro-Climates For simple season extension, take advantage of micro-climates at your school. Micro climates are small areas that exhibit distinctive climatic difference from the surrounding areas. For example, a sheltered courtyard will have a different climate than an open field. Hardiness zone or frost date maps are good places to start, but micro climates are the actual places we garden in! Some things that affect micro-climates are: • Paved surfaces: A garden walk way, sidewalk, or nearby parking lot will often retain and reflect a lot of heat. It can also moderate temperature, absorbing heat, which it then releases it as the air cools. If you are gardening on top of asphalt this heat reflection will be a major factor. • Buildings: Offer a lot of heat retention, absorbing it during the day and releasing it at night. A garden next to a building may be a lot warmer and less prone to early frosts than one in a field. Buildings can also act as wind blocks, or even sun blocks (if they are to the south!) This is also true to a lesser extent of fences, walls and even large rocks. • Balconies, roof-tops: Because they are off the ground they may escape some frosts that hit plants on the ground, but they also may be more prone to drying out or exposure to cold winds. These will be a major factor depending on location of the balcony or roof top and if there is wind protection. • Soil types: Are also a consideration. Heavy clay soils can act much like paved surfaces, moderating temperature. Lighter soils that have many air pockets can act as an insulating layer on top of warmer subsoils, trapping that heat below ground and are therefore more prone to frosts at ground level. • Raised Beds and Containers: Warm soil earlier in the spring. Strategies! • Keep in mind the winter sun rises and sets in the southern sky. Your sun and shadow areas will change and become a narrower part of your garden as the days get shorter. • Plant things next to south facing brick walls. • Trellis things against these walls. • Move pots, or pot up tender plants, and put them on sunny steps or on a warm pavement in the fall. • Plant or build wind-blocks to the North West, if you have no protection there. A heavy fence made out of wood or brick can also help retain heat. Or plant a hedge row - a dense planting of bushes and shrubs. On a balcony or roof-top this could be as simple as a hanging. • Plant trees like apples to the north or north east so that they are less susceptible to early warming that can trigger premature flowering that then can be killed by frosts. Resources and Curriculum Connections • http://www.gardening.cornell.edu/weather/ microcli.html • Our “Siting the School Garden” Guide. • Cold-Climate Gardening- How to Extend your Growing Season by at Least 30 Days. Lewis Hill. Storey, North Adams, 1987. (A classic) Strategy # 12 • Create your own micro-climates! Build a wall or fence, plant evergreens, build a pond! • This may seem obvious but make sure it is a sunny spot. We have heard too many tales of woe from a school gardener who was relegated to a north facing corner of the school courtyard under a shade tree! MAC Fall School Garden How-To Guide 2013 Farm Connections Gardeners have certain advantages over larger farmers. Although farmers put a lot of thought into where they site their farm, or certain crops, their micro climates are larger. If you have the choice for where to site a small garden, part way up a sunny south easterly facing hill side is usually ideal. This way the plants are partially protected from the winds from the northwest, and the cold air can slide down the slope into the valley in the morning.
- 18. Cloches, Row Cover, Tunnels & Cold Frames Strategy # 13 A cloche was traditionally a small glass dome placed over plants such as lettuces in French kitchen gardens. You can make one of your own out of a milk jug or other large plastic container. Be sure to anchor it down with a stake (see diagram). Another reliable old method is to make a small tent out of wax paper, place it over the plant and bury the edges. Both of these structures are placed over seedlings at night or during cold temperatures. Be sure to take them off as it warms up, or the environment might get too hot for the small plant. Build a Straw Bale Cold Frame The theory behind tents, cloches, low-tunnels and cold frames is that you are creating a micro-climate inside a small container, within which your plants will experience a more regulated environment than the outdoor wind, rain and harsh or fluctuating temperatures. If you are worried it might frost throw a blanket or sheet over your tender plants. Any old blanket will do, I like an old light synthetic comforter. Floating row cover, also called “Remay” or “all purpose garden fabric” can also work to protect against light frosts, and these have the benefit that you can leave them on during the day as sunlight passes through. They also conserve moisture, and protect against wind. Materials: - 6 bales of straw (usually 18ʺ″ wide X 14ʺ″high X 36” (you can use them for mulch later!) - 1 or more double walled panels of polycarbonate plastic sheeting to cover 6’ by 3’. (You can buy this from construction supply places/home centers/greenhouse supply) You could also staple greenhouse plastic onto an old (glassless) window frame) - 6-8 wooden stakes Instructions: - Set up the straw bales in a rectangle with the back (northern) bales on their taller long sides. - Stake around the bales to hold in place. - Put your plastic sheet on top, resting against the stakes at the bottom. It will be at a slant. You can stuff the side triangles with hay or leaves. - That’s it! Make sure to vent in warm weather, or even take the top off. I recommend doing this on any mildly warm day. Be sure to water well! Low-tunnels are similar small structures that stretch over raised or in-ground beds to create a micro climate in that bed. These can be made by bending PVC pipes or thick wire over a bed, and then covering it with greenhouse plastic (see photos). This effect can be achieved in many different ways, use your imagination! Building Cold Frames Cold frames are low boxes made out of wood or other solid material, with slanted tops made from plastic or glass. They are sturdier structures than low-tunnels, and have the added benefit of thermal mass on their sides for more heat retention at night. Building a cold frame need not be expensive, many reclaimed materials such as old (lead free!) windows can be used, or if you are concerned about glass, stiff plastic panels, hinged onto the box. Resources and Curriculum Connections • Mother Earth News: http://www.motherearthnews.com/ diy/build-a-cold-frame • A clear, easy to understand website that explains how to build a cold frame: http://www.greenfootsteps.com/cold-frame- design.html MAC Fall School Garden How-To Guide 2013
- 19. High Tunnels and Greenhouses Blessed with an existing greenhouse? Have a large budget or a knack for fundraising? Consider adding a high-tunnel or greenhouse for a wonderful way to extend your gardening season throughout the year. It will create a sunny, warm, outdoor/indoor classroom space. Greenhouses are, as the name suggests, permanent constructions like houses, made out of metal frames, concrete, glass or plastic. They are often electrically ventilated and heated. Plants are often grown on benches. High tunnels are essentially larger versions of low tunnels, or unheated, less constructed, less expensive versions of greenhouses. They are usually constructed with a metal tube or wooden frame, and covered with plastic, one or two layers thick. Sometimes they will have an insulated north side. Some will provide the option to roll up the sides in warmer weather. Plants are usually grown in the ground. Construction options: Many companies sell parts, or modular kits for greenhouses. You can buy the hoops, plastic and other materials to make a high tunnel from a farm supply company. You can also find flimsy “pop up” “instant greenhouses” especially from garden supply catalogues, which may sometimes be useful, but are often expensive versions of what a cold frame or low-tunnel can do much more cheaply. If you school has a voc-tech department, or you can pay local people, or have skilled volunteers, you could consider building your own. Keep in mind that these constructions are higher budget projects, and will need a level foundation in a well drained place, with water access and a site with southern exposure. Greenhouses attached to the school building are sometimes an option. Growing in a High Tunnel Growing in a greenhouse offers tremendous benefits in terms of climate control. With this benefit usually comes the necessity of more input from the gardener. In order to grow year round in a greenhouse you will need to create systems to regulate the temperature, pollinate fruiting plants, provide ventilation, do pest control and provide more irrigation. The joy of a high tunnel geared for fall and winter growing is that many of these factors are less important. Most cold-season crops such as salad mix are less maintenance and the high tunnel will heat up less and does not require as much monitoring. Choose cold season crops for fall/winter high tunnel growing such as lettuce mixes, asian greens, carrots and radishes, kale, broccoli, collards, spinach and mache. Keep in mind that off-season crops may take a week or more to mature than indicated by their “days to harvest” number on their seed packet. Sow these crops in September, October, and even November for winter salad! Read up, starting with the resources listed to the right, and visit local farms and greenhouses for ideas. Resources and Curriculum Connections • The Winter Harvest Handbook Eliot Coleman, Chelsea Green, White River Junction VT, 2009. • Greenhouse Gardeners Companion. Shane Smith. Fulcrum Publishing, Golden Colorado. 2000. • National Gardening Association guide on greenhouse gardening. (They are an invaluable resource on everything else too!) http://www.kidsgardening.org/ node/1004 Farm Connections Massachusetts farmers are extending the season in exciting ways, many of them by using“high tunnels” or long unheated greenhouses. Many farmers markets and farm stands are able to provide salad deep into the winter. Read more about this initiative here www.nrcs.usda.gov/wps/portal/nrcs/detailfull/national/ programs/?&cid=stelprdb1046250. Strategy # 14 MAC Fall School Garden How-To Guide 2013 North Grafton Community Farm
- 20. Crop Storage and Food Preservation One way to extend your gardening season is to preserve your garden produce. This can be as simple as using heavy mulch, or a carefully monitored process such as canning. The following strategies attempt to give you ideas for activities to do with your students to participate in the time-honored methods of preserving what you grow. Food preservation can be as easy as pulling up your tomato and pepper plants before a frost, and hanging them upside down to ripen indoors. In the garden, add a heavy layer of mulch of straw over your garden roots (carrots, potatoes etc) just before a frost, leaving them in place. This delays the freezing of the ground so you can harvest them later into the fall. Another short term strategy is to dig a trench, and fill it with your roots or even cabbages, then cover with a layer of mulch. This can be expanded to digging deeper holes, or burying containers such as a trash can, with a few inches above ground, covering the top with straw and filling it with hay and unwashed, unbruised crops. These strategies will not store crops all winter in our harsh Massachusetts winters, but you could keep them into the new year this way. For squashes, onions, dry beans and popcorn, see the page on harvest and curing. Consider investing in a chest freezer or using freezer space in your school kitchen. Wash and dry berries and other vegetables, then freeze on trays first, then in freezer bags for winter snaking. Make ice cubes full of blended up herbs. Dry flowers and herbs by hanging them in bunches on strings in the classroom away from direct light, or in paper bags. You can also string up thin slices of apple this way. Better yet, invest in a dehydrator and dry down fruit, many vegetables and herbs in a matter of hours. You can also make Vinegars from your fresh herbs. Yes you can! Canning food is rewarding and a great project for older students. Teachers are using their school cafeteria kitchens to preserve apple sauce and jams using the wonderful commercial sized hot water baths and stoves available in these kitchens. Be sure to read up on safe practices from a trusted source (see resources) and choose “low hazard” foods to preserve. Experiment with pickling an inexpensive method that can be as simple as pressing down vegetables like cabbage and adding salt. Finally, Root cellaring is an art worthy of research and requires many adjustments to do perfectly, (see resources) and making a school root cellar would be a wonderful project! Even on basement steps, simply, wooden boxes filled with sand or soil can be filled with layers of root crops and elevated off the floor on pallets etc can work really well. Keep them damp but not wet. Wrap apples and other firm fruits in dry newspaper and store on racks such Resources and Curriculum Connections • Root Cellaring - Mike and Nancy Bubel. Story, North Adams, 1991 (Especially see the section on “suburban” root cellaring for a great but large scale school/community project! • The National Center for Home Food Preservation. Where you can download a complete canning guide: http://nchfp.uga.edu/publications/ publications_usda.html • Article with more background behind different forms of food preservation: http:// science.howstuffworks.com/innovation/edible-innovations/ food-preservation.htm • Rhodale: http://www.rodale.com/root-cellars-and-food- preservation?page=0%2C1 Farm Connections Other traditional methods to look into studying include salting, smoking, rice bran pickles, lacto-fermentaion, sun drying and more. These are used on farms and in homes around the world throughout human history. Did you know cheese and yoghurt making are also traditional forms of food preservation! Strategy # 15 MAC Fall School Garden How-To Guide 2013 as bakery trays. Keep apples away from other crops as the ethylene they produce will speed up rotting in other food!
- 21. Other Uses of the Garden in Fall & Winter • Garden planning, dreaming and mapping can generate a whole list of activities without even leaving the classroom. Seed saving is a wonderful fall garden activity. You can save seed quite easily from many plants. Seed is produced when plants reach full maturity and go to seed (as so often happens with bolted lettuce!) Beans, lettuce and tomatoes are great ones to start with, as they are self-pollinated: their offspring will grow into the same plant as their parent. Remember to save seed from open pollinated parent plants. F1 or hybrid plants will not save seed true to type. • Lettuce: hold a bag over the bolted, mature heads and shake out the seeds. • Beans: let the pods dry on the plant, or pick at almost dry and spread out indoors, and then shell. • Heirloom Tomatoes require that you scoop out the seeds and pulp, let ferment a few days (to replicate the tomato falling and rotting!) and then spread the seeds out on paper to dry. See resources for much more to learn about seed saving, and a wealth of curriculum centered on it. “For man, autumn is a time of harvest, of gathering together. For nature, it is a time of sowing, of scattering abroad." - Edwin Way Teale - (20th Century American Naturalist, Author and Photographer.) Resources and Curriculum Connections • Nature’s Art Box Laura C. Martin. Or your book on crafts with natural objects. Find them in the garden! • Shelburne Farms, Project Seasons Deborah Parella. A great sourcebook for outdoor and farm/garden related activities. • Generation to Generation a seed saving curriculum related to FEDCO seeds seed fundraiser for schools. Free download!: http://www.growseed.org/ GenerationtoGenernation.pdf • Seed Savers Exchange: Curriculum and seed program: http://www.seedsavers.org/Education/ • Our newsletter on Seeds in “past newsletters” on the web. Farm Connections Farms can be busy places in the off season, with animal births, maple sugaring, and continued milk and egg production. In addition farmers subsidize their income from the spring summer and fall harvest with winter sales of holiday wreaths, frozen meat, preserves and other non-perishable foods. Diversify your school garden activities in this way to have activities all year round. Strategy # 16 Identifying other uses for your garden beyond “gardening” can help you have a more robust garden program, even if everything you plant in your garden “fails!” Other outdoor activities, cooking and arts and crafts can be great complimentary activities. Make your garden a cultural center, a source of inspiration, and a venue for broader learning about the natural world. Here are a few ideas: • Identification outside can be a useful activity for learning about your enviroment. Animal tracks are great to find around the garden in the snow, even if they are only pigeons and cats! School yard trees and wild birds can also be great exercises in identification. If you are lucky enough to have a sugar maple, or even a red maple or birch, you can even tap your trees to learn about maple syrup. • Building and painting projects for the garden have endless possibilities! Winter construction of beds, signs, bird houses, benches and more can be great ways to spend the winter. • Make winter wreaths from school yard or neighborhood evergreens. Take a coat hanger, bend it into a hoop and wrap small branches and berries with florists wire. Use glue to make hand-made ornaments from dried garden plants. • Make cards from flowers pressed from the garden, and dye fabric with saved and dried dye plants. • Cooking your stored or fresh garden produce can of course be done in your school kitchen, but also consider a crock pot, toaster oven, kettle or hot plate in your classroom. MAC Fall School Garden How-To Guide 2013
- 22. MAC Fall School Garden How-To Guide 2013 Sources/ Resources First things first. Where can I find my... Local Farm? Check out the Massachusetts Department of Agriculture “Mass Grown” Map at http://www.mass.gov/agr/massgrown/map.htm Local Garden Center? Try the Massachusetts Flower Growers Association: http://www.massflowergrowers.com/ or the member directory at the Massachusetts Nursery and Landscape association: http://www.mnla.com/member-directory/ Don’t forget your Local Lumber Yard/ Saw Mill, and Local Hardware Store! (The Yellow Pages, and Internet search engines can be good for these.) References to resources on our website can be found at: www.aginclassroom.org Home Gardeners Information – UMass Extension http://www.umassgreeninfo.org/homegarden/ Massachusetts Horticultural Society http://www.masshort.org/ Mass Dept. of Agricultural Resources MassGrown http://www.mass.gov/massgrown Massachusetts Nursery and Landscape Association http://www.mnla.com/ New England Wild Flower Society http://www.newfs.org/ Umass Extension Fact-Sheet on bramble fruit: https://extension.umass.edu/landscape/publications-resources/ home-garden-fact-sheets-small-fruit Cornell University: www.fruit.cornell.edu/berry www.Gardening.cornell.edu in general.
- 23. MAC Fall School Garden How-To Guide 2013 Washington State University: www.gardening.wsu.edu The Winter Harvest Handbook Eliot Coleman, Chelsea Green, White River Junction VT, 2009. www.kidsgardening.org The National Gardening Associations website on kids and gardening. An invaluable site! Look here especially for the “Grow Lab” curriculum. A clear, easy to understand website that explains how to build a cold frame: http://www.greenfootsteps.com/cold-frame-design.html from Mother Earth News: http://www.motherearthnews.com/diy/build-a-cold-frame Also, they have been around for ever, search them for anything! Week By Week Vegetable Gardeners Handbook- Ron and Jennifer Kujawski. Story, North Adams, 2010 Root Cellaring - Mike and Nancy Bubel. Storey, North Adams, 1991 (Especially see the section on “suburban” root cellaring for a large scale school/ community project!) Cold-Climate Gardening- How to Extend your Growing Season by at Least 30 Days. Lewis Hill. Storey, North Adams, 1987. (A classic, with lots on micro-climates etc.) Greenhouse Gardeners Companion. Shane Smith. Fulcrum Publishing, Golden Colorado. 2000. Nature’s Art Box Laura C. Martin. Or your book on crafts with natural objects. Find them in the garden! Shelburne Farms, Project Seasons Deborah Parella. A great sourcebook for outdoor and farm/garden related activities. Generation to Generation a seed saving curriculum related to FEDCO seeds seed fundraiser for schools. Free download!: http://www.growseed.org/ GenerationtoGenernation.pdf Native American Gardening:Stories, Projects and Recipes for Families Michael J. Caduto, Joseph Bruchac. Fulcrum Publishing. Golden, Colorado. 1996. Seeds of Solidarity, Farm and Educational non-proft information on salad greens. http://seedsofsolidarity.org/ Video about Kale and how to cook it http://allrecipes.com/video/1106/all-about-kale/detail.aspx Great chart listing all the nutrients in Collard greens http://www.whfoods.com/genpage.php?tname=foodspice&dbid=138
- 24. MAC Fall School Garden How-To Guide 2013 More information on Collards from Illinois Extension: http://urbanext.illinois.edu/veggies/collards.cfm Herb Society of America (Ohio) Resources for kids. Be sure to check them out!: http://www.herbsociety.org/resources/t4k/thyme-4-kids.html, also they have a seed exchange. New England branch: http://www.neuhsa.org/ On Beach Plums: www.beachplum.cornell.edu/bpguide.pdf Guide on planting apple trees .http://www.orangepippintrees.co.uk/articles/fruit-tree-planting-instructions Great guide on tree planting by St Lawrence Nurseries, who specialize in northern varieties of fruit trees.http://www.sln.potsdam.ny.us/pg.html A good video on tree planting by Dave Wilson Trees: https://www.youtube.com/watch?v=Tttq3M739YA NRCS and their high tunnel program for farmers: www.nrcs.usda.gov/wps/portal/nrcs/detailfull/national/programs/? &cid=stelprdb1046250. The National Center for Home Food Preservation. Where you can download a complete canning guide: http://nchfp.uga.edu/publications/publications_usda.html Article with more background behind different forms of food preservation: http://science.howstuffworks.com/innovation/edible-innovations/food-preservation.htm Photos and illustrations all by the author.