
Recommended
Recommended
More Related Content
Similar to Manage security levels and users
Similar to Manage security levels and users (20)
More from niraj57
More from niraj57 (20)
Recently uploaded
Recently uploaded (20)
Manage security levels and users
- 1. need help completing week 6 ilab.. i will upload what I currently have if you know the material please let me know. what the person to add on to what I currently have started. iLab 6 of 7: Login and Security Levels (30 Points) Submit your assignment to the Dropbox located on the silver tab at the top of this page. (See Syllabus "Due Dates for Assignments & Exams" for due dates.) i L A B O V E R V I E W Scenario/Summary In this week's lab, we will create a login form, validate a user based on their login name and password, and allow them to access the system or not. We will assign a session variable to determine the level of security the user has and allow certain functions to be displayed or not displayed in the existing frmPersonnel form depending on the assigned security level. (NOTE: In some cases the instructions for this lab will be less specific than in earlier labs, because you are expected to apply what you have learned in earlier weeks. Refer to the detailed instructions in previous weeks' labs if you need to do so.) Instructions for Week 6 iLab: Login and Security Levels Click on the link above to view the tutorial. Please watch this tutorial before beginning the iLab. The tutorial has audio. Deliverables When you try to log in, if you use User Name = Mickey and Password = Mouse, the frmMain form should open with all links visible. If you use User Name = Minnie and Password = Mouse, the frmMain form should open with only the Salary Calculator, View Personnel, and Search options should be available. You will have a new option called Manage Users that will allow you to add new users and remove or update existing users. Once you
- 2. have verified that it works, save your website, zip up all files, and submit in the Dropbox. Note on database connections: We are using a SQLDataSource control for the Edit employees feature we added. You should be using the connection string stored in the web.config file for your database connection for this control. Rather than creating a new connection each time, just use this connection. If you change the folder where your website is (e.g., you copy each week's work to a new location), you will need to update the web.config. The advantage of using the database connection in the web.config is that you only have to set the configuration in one location. Before starting this week's lab, make sure everything is working and that all database connections are properly configured. i L A B S T E P S STEP 1: Login Form (10 points) Open Microsoft Visual Studio.NET 2008. Click the ASP.NET website named PayrollSystem to open it. Create a new web form named frmLogin. Drop a login control onto the form. Set the properties of the login control as follows: PROPERTY VALUE DestinationPageUrl frmMain.aspx TitleText Please enter your UserName and Password in order to log into the system Add the Cool Biz Productions , Inc. logo to the frmLogin form. Do not hylerlink the logo.
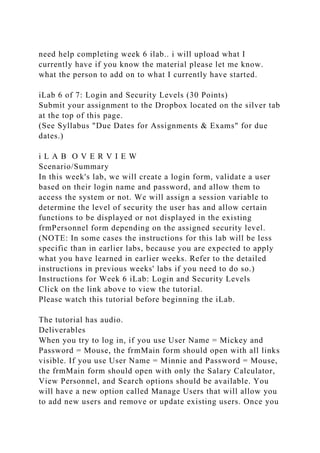
- 3. Highlight everything in the form, then click Format, Justify, Center. Save your work. Go to the Solution Explorer, right-click on frmLogin, and left-click on Set As Start Page. Then run the website to check if the web form appears correctly. Click on image to enlarge. Login Form In Browser Click here for text description of this image. STEP 2: Login Check (10 points) Create a new DataSet called dsUser. Use the table tblLogin as the database table for this dataset. Do this in the same way you added datasets in the previous labs. Open the clsDataLayer and add the following function: // This function verifies a user in the tblUser table public static dsUser VerifyUser( string Database,
- 4. string UserName, string UserPassword) { // Add your comments here dsUser DS; OleDbConnection sqlConn; OleDbDataAdapter sqlDA; // Add your comments here sqlConn = new OleDbConnection( "PROVIDER=Microsoft.Jet.OLEDB.4.0;" + "Data Source=" + Database); // Add your comments here sqlDA = new OleDbDataAdapter(
- 5. "Select SecurityLevel from tblUserLogin " + "where UserName like '" + UserName + "' " + "and UserPassword like '" + UserPassword + "'" , sqlConn); // Add your comments here DS = new dsUser(); // Add your comments here sqlDA.Fill(DS.tblUserLogin); // Add your comments here return DS; } Double-click on the login control you added. Add the following
- 6. code to the login control Authenticate event handler: // Add your comments here dsUser dsUserLogin; // Add your comments here string SecurityLevel; // Add your comments here dsUserLogin = clsDataLayer .VerifyUser(Server.MapPath( "PayrollSystem_DB.mdb" ), Login1.UserName, Login1.Password); // Add your comments here if (dsUserLogin.tblUserLogin.Count < 1) {
- 7. e.Authenticated = false ; return ; } // Add your comments here SecurityLevel = dsUserLogin.tblUserLogin[0].SecurityLevel.ToString(); // Add your comments here switch (SecurityLevel) { case "A" : // Add your comments here e.Authenticated =
- 8. true ; Session[ "SecurityLevel" ] = "A" ; break ; case "U" : // Add your comments here e.Authenticated = true ; Session[ "SecurityLevel" ] = "U" ;
- 9. break ; default : e.Authenticated = false ; STEP 3: Test and Submit (10 points) Open the frmPersonnel form and add the following code to its Page_Load() function: // Add your comments here if (Session["SecurityLevel"] == "A") { btnSubmit.Visible = true; //Add your comments here } else { btnSubmit.Visible = false; } Set the start page as frmLogin.aspx. Run the website. Try to log in with both User Name = Mickey and Password = Mouse and User Name = Minnie and Password = Mouse. Any other user ID and password should not allow you to log in. When the user logs in we want to restrict what they can see and
- 10. do based on their user role. The role is stored in the database table tblUserLogin. Mickey Mouse has all privileges whereas Minnie Mouse has read only privileges. We want to control the visibility of the links on the frmMain page. Initially we did not set the ID of any of the Link Button or Image Button controls that we used on frmMain. In order to make our code more maintainable we will change the IDs as follows: Option Link Button ID Image Button ID Annual Salary Calculator linkbtnCalculator imgbtnCalculator Add New Employee linkbtnNewEmployee imgbtnNewEmployee View User Activity linkbtnViewUserActivity imgbtnViewUserActivity View Personnel linkbtnViewPersonnel imgbtnViewPersonnel Search Personnel linkbtnSearch
- 11. imgbtnSearch Edit Employees linkbtnEditEmployees imgbtnEditEmployees Modify the main form so that the following options are turned off for nonadmin users: Add New Employee View User Activity Edit Employees You now have a web application that honors the role of the logged in user. We don't have a way of managing the user roles and users in the system. Add a new form called frmManageUsers that will allow the user to add new users. The user will also need to be able to view all users and modify or delete any of the users in the database. Add a main form option called Manage Users that is only accessible to admin users. Add the link and image buttons as we have done in the past. Add the CoolBiz logo that is hyperlinked as you did in previous assignments. For the security level of the user, use a dropdown list control to allow the user to select from A or U. Name the controls with names that make sense. Add code as appropriate to the code behind and clsDataLayer. Hints: Make sure you reestablish your database connection if you
- 12. copied the files from a previous lab. Update any DataSource controls you added with the new Payroll database location. You can turn a control on or off by setting it's Visible property. You can add a data entry form for new users and a grid displaying all users all on the same form. To force a gridView to refresh call its DataBind method. In order to use the Advanced SQL Generation option (allowing you to update/delete records) there must be a primary key defined on the table you are generating SQL for. tblUserLogin needs to have a primary key set on the UserID column. You can do this in Access. Test your application to make sure you are logging in with an invalid user id. Try to log in with both Minnie and Mickey and make sure the UI adjusts by the role properly. Make sure you can utilize the Manage Users functionality to add/modify/delete and view user information. Once you have verified that everything works, save your project, zip up all files, and submit in the Dropbox. NOTE: Make sure you include comments in the code provided where specified (where the " // Your comments here" is mentioned); also, any code you write needs to be properly commented, or else a five point deduction per item (form, class, function) will be made. Mickey Mouse (Admin)
- 13. Click on image to enlarge. frmMain After Mickey Login Click here for text description of this image. Minnie Mouse (User) Click on image to enlarge. frmMain After Minnie Login Click here for text description of this image. frmManageUsers Click on image to enlarge. frmManageUsers Click here for text description of this image.