
Recommended
More Related Content
Viewers also liked
Viewers also liked (9)
More from mrpassteach
Recently uploaded
Recently uploaded (20)
Mrpassrubiksbeginnerssolution
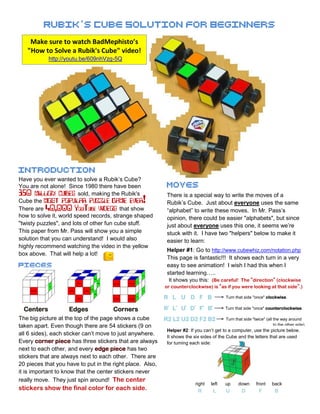
- 1. Rubikˈ s Cube Solution for Beginners Make sure to watch BadMephisto’s "How to Solve a Rubik's Cube" video! http://youtu.be/609nhVzg-5Q Introduction Have you ever wanted to solve a Rubik’s Cube? You are not alone! Since 1980 there have been Moves 350 million cubes sold, making the Rubik's There is a special way to write the moves of a Cube the most popular puzzle game ever! Rubik’s Cube. Just about everyone uses the same There are 40,000 YouTube videos that show “alphabet” to write these moves. In Mr. Pass’s how to solve it, world speed records, strange shaped opinion, there could be easier "alphabets", but since "twisty puzzles", and lots of other fun cube stuff. just about everyone uses this one, it seems we’re This paper from Mr. Pass will show you a simple stuck with it. I have two "helpers" below to make it solution that you can understand! I would also easier to learn: highly recommend watching the video in the yellow Helper #1: Go to http://www.cubewhiz.com/notation.php box above. That will help a lot! This page is fantastic!!! It shows each turn in a very Pieces easy to see animation! I wish I had this when I Center Edge Edge Edge Corner Corner Corner started learning….. Edge It shows you this: (Be careful! The "direction" (clockwise Edge Corner Corner Corner Edge Edge Corner Corner Center Edge or counterclockwise) is "as if you were looking at that side".) Center Edge Edge Corner Edge Edge Corner Corner Corner R L U D F B Turn that side "once" clockwise. Centers Edges Corners Rˈ Lˈ Uˈ Dˈ Fˈ Bˈ Turn that side "once" counterclockwise. The big picture at the top of the page shows a cube R2 L2 U2 D2 F2 B2 Turn that side "twice" (all the way around taken apart. Even though there are 54 stickers (9 on to the other side). Helper #2: If you can’t get to a computer, use the picture below. all 6 sides), each sticker can’t move to just anywhere. It shows the six sides of the Cube and the letters that are used Every corner piece has three stickers that are always for turning each side: next to each other, and every edge piece has two stickers that are always next to each other. There are 20 pieces that you have to put in the right place. Also, it is important to know that the center stickers never really move. They just spin around! The center right left up down front back stickers show the final color for each side. R L U D F B
- 2. STEP 1: FOUR WHITE EDGES STEP 2: FOUR WHITE CORNERS When the four white edges are fixed, they look like a Now put the white side with the cross on the bottom. It will + white " ". Speedcubers call this first step "the cross". stay there & yellow will be on top until you finish the cube. You can figure this out by yourself with a little practice, Each pattern of moves below moves a white corner from but the YouTube video below includes a couple of the top to the bottom (exactly below it) without messing up complete examples starting at the four-minute mark. the cross you made in Step 1. Make sure you put the corners between the right sides, like green and red below. http://youtu.be/609nhVzg-5Q R U R' F' U' F R U2 R' U' R U R' STEP 3: MIDDLE LAYER EDGES STEP 4: TURN THE TOP LAYER EDGES Now you're done with the first layer!!! Yay! After fixing SO THAT YELLOW IS FACING UP the four pieces in this step, you'll be done with the first Usually you will already have some edges yellow on top, two layers! Woohoo!!! but if there aren’t any, then use the pattern on the left and Put the edge piece on the right side touching the same then the pattern on the right. color below it. Then look at the two pictures below By the way, a lower case f turn is like an upper case F carefully. If the piece needs to move towards you (to turn, but you turn the middle slice and the front face. the front), then use the left pattern. If it needs to move away from you (to the back), then use the right pattern. F (R U R' U') F' f (R U R' U') f' R' U' R' U' R' U R U R R U R U R U' R' U' R' or U2 F (U R U' R') F' STEP 5: TURN THE TOP LAYER CORNERS SO THAT YELLOW IS FACING UP Pattern: R U R' U R U2 R' You might have to use this pattern 3 or 4 times, depending on what the corners look like after step 4. If ONE corner already has If TWO corners already have yellow facing up, If ZERO corners are yellow: move yellow facing up, then move it then move the top layer until a yellow sticker is the top layer until a yellow sticker to the left side, closer to you. on the left side, closer to you, facing front. is on the bottom left, facing left. Then use the pattern. Then use the pattern. Then use the pattern. ! ! OR (view from top) (view from top) STEP 6: TOTALLY FIX THE TOP CORNERS STEP 7: TOTALLY FIX THE TOP EDGES Two corners of the same color, like the two red stickers in Turn the top layer until the one fixed edge is in the back. the picture below, are called "headlights". Turn the top If you do not have one fixed edge, do the pattern once layer until these are in the back. If you do not have any and then you will! "headlights", do the pattern once and then you will! R' F R' B2 R F' R' B2 R2 (R U') (R U) (R U) (R U') R' U' R2