
Recommended
More Related Content
Similar to Presentation Retina.pptx
Similar to Presentation Retina.pptx (20)
More from mahendra singh
More from mahendra singh (17)
Recently uploaded
Recently uploaded (20)
Presentation Retina.pptx
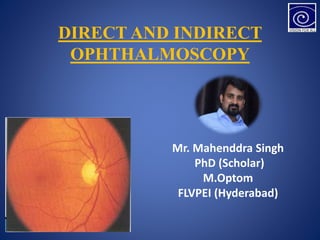
- 1. DIRECT AND INDIRECT OPHTHALMOSCOPY Mr. Mahenddra Singh PhD (Scholar) M.Optom FLVPEI (Hyderabad)
- 2. Introduction • Ophthalmoscopy is a clinical examination of the interior of the eye by means of an ophthalmoscope. • It is primarily done to assess the state of fundus and detect the opacities of ocular media. • The ophthalmoscope was invented by Von Helmholtz in 1850.
- 3. Structures of the retina Nasal Temporal
- 4. Optic disc • DISC: LOCATION –nasal to geometric axis • DIAMETER – 1.5mm [1 disc diameter] • COLOR – Pale pink • SHAPE – Circular • EDGES – Regular • Termination of all layers except NFL • CUP: C/D ratio – 0.3 to 0.5
- 5. Vessels RETINAL SYSTEM : CENTRAL RETINAL ARTERY AND CENTRAL RETINAL VEIN Arterioles,Venules,Capillaries CILIARY SYSTEM : POST.CILIARY ARTERIES Choriocapillaries
- 6. Macula • Specialised region of retina • Diameter – 5.5 mm • Location – 2 DD - temporal margin of disc • Color – Yellow; deep pigmented • 4 zones : Foveola -0.35 mm Fovea -1.50 mm Parafovea Perifovea • Retinal vessels • Cilioretinal artery
- 7. Continue… • Ophthalmoscopic methods of examination are- (1) Distant direct ophthalmoscopy (2) Direct ophthalmoscopy (3) Indirect ophthalmoscopy
- 8. Direct ophthalmoscope • Parts- • Light source • Eyepiece • Lens rack and power dial • Aperture selector • Filter selector • On/off and brightness control • Power handle
- 9. Method • For a good view of fundus the pupil should be dilated by instilling few drops of short acting mydriatic drug (e.g. combination of tropicamide and phenylephrine). • The subject should be examined in sitting or lying down position. • Examination room should be semidark. • keep the eye as still as possible.
- 10. Position of the examiner For examining right eye of the patient, • Examiner should stand on right side of the patient. • Hold the instrument in his right hand. • Use examiner’s right eye. • If examining left eye, stand on left side, hold instrument in left hand use left eye.
- 11. Conti.. • Viewing should begin about half meter away from the eye. • First see the “Red reflex” • Initially the lens power in the instrument should be set to zero, and if refractive error present in patient or examiner, e.g. if the patient is myopic then set the( - ve )lens, if the examiner or patient is hypermetropic then set the lens to (+ve) lens. If both patient & examiner have refractive error then sum together their powers.
- 12. Conti…. • Rotate the lens dial until the optic disc is focused clearly. (Red numbers/negative numbers in myopia or short- sighteness. Green numbers/positive numbers in hyperopia or far- sightedness. • Examine the optic disc for: Shape – normally round or slightly oval Clarity -of the outline-clear outline or rim Colour-pale pink contrast to rich red of rest of fundus.
- 13. Conti… • Examine the macula last. • To locate the macula, focus on the disc, then move 2 disc diameters temporally. The macula is darker in colour than the surrounding fundus, and devoid of blood vessels. • May also ask the patient to look at the light, this automatically puts the macula into full view.
- 14. Examiner right eye, hand, right patient eye
- 15. Distant direct ophthalmoscope • It should be performed routinely before the direct ophthalmoscope,as it gives a lot of useful information. • It can be performed with the help of a self- illuminated ophthalmoscope or a simple plain mirror with a hole at the centre. • Procedure- The light is thrown into patients eye sitting in a semi-darkroom, from a distance of 20-25 cm and the features of thred glow in the pupillary area are noted.
- 16. Application • To diagnose opacities in the refractive media- any opacity in the refractive media is seen as a black shadow in the red glow. • To differentiate between a mole and a hole of the iris- a small hole and mole on the iris appears as a black spot on oblique illumination • To recognise detached retina or a tumour arising from the fundus is seen as a greyish reflex.
- 17. Direct ophthalmoscopy • It is the most commonly practised method for routine fundus examination. • It works on the basic optical principle of glass plate ophthalmoscope introduced by von helmholtz. • A convergent beam of light is reflected into the patients pupil. The emergent rays from any point of the patients fundus reach the observers retina through the viewing hole in the ophthalmoscope.
- 18. Conti…. • The emergent rays from the patients eye are parallel and brought to focus on the retina of the emmetropic observer when accommodation is relaxed. • In hypermetropic patient,the emergent rays will be divergent and with the help of convex lens can be brought to focus on the observers retina. • In myopic patient,the rays will be convergent and use concave lens for focus on the observers retina.
- 20. Conti.. • The image is erect, virtual and about 15 times magnified in emmetropes. • Technique- should be performed in a semi-darkroom with the patient seated and looking straight ahead , while the observer standing or seated slightly over to the side of the eye to be examined by the observer with his or her right eye and left with the left.
- 21. Conti.. • The observer should reflect beam of light from the ophthalmoscope into patients pupil.Once the red reflex is seen the observer should move as close to the patients eye as possible. • Once the retina is focused the details should be examined systematically starting from disc, blood vessels, the four quadrant of the general background and the macula.
- 22. Monocular indirect ophthalmoscopy • It consists of- • Illumination rheostat at its base, • Focusing lever for image refinement, • Filter dial with red free and yellow filters, • Forehead rest for proper observer head positioning, and Iris diaphragm lever to adjust the illumination beam diameter.
- 23. Conti.. • Optics- an internal relay lens system re-inverts the initially inverted image to a real erect one, which is then magnified. This image is focusable using the focusing lever. • Indications are- • Need for an increased field of view • Small pupils • Uncooperative children • Patients intolerance of bright light of binocular indirect ophthalmoscope.
- 24. Conti.. • Extent of view- although vitreous base views are possible with monocular IO, its greatest effectiveness extends anteriorly to the peripheral equatorial region. • Advantage- field of view similar to IO and, • Erect real image similar to DO. • Disadvantage –are lack of stereopsis, • Limited illumination and, • Fixed magnification.
- 25. Indirect ophthalmoscopy • It is very popular method for examination of posterior segment introduced by Nagel in 1864. • PRINCIPLE- • To make the eye highly myopic by placing a strong convex lens in front of patients eye so that the emergent rays from an area of the fundus are brought to the focus as a real,inverted image between the lens and the observers eye.
- 27. Cont… • An inverted reverse real image • Magnification = 2 to 4 X • Field of view = 40 to 50 degrees • Optimal working distance = 40 to 50 cms • Good illumination & stereopsis • Ease of use with scleral indentor • Lenses from 14 to 30 D range
- 28. Conti.. • CHARACTERISTICS- Magnification of image depends upon the dioptric power of convex lens, position of the lens in relation of the eyeball and refractive state of eyeball. • About 5 times magnification is obtained with +13 D lens. • With a stronger lens,image will be smaller, but brighter and field of vision will be more.
- 29. Prerequisites (1) Dark room (2) source of light and concave mirror or self illuminated indirect ophthalmoscope (3) Convex lens (4) pupils of the patient should be dilated.
- 30. Technique • The patient is made to lie in the supine position, with one pillow on a bed or couch and instructed to keep both eyes open. • The examiner throws the light into patients eye from an arms distance. • In practise, Binocular ophthalmoscope with head band or that mounted on the spectacle frame is employed most frequently.
- 31. Conti.. • Keeping his or her eyes on the reflex, the examiner then interposes the condensing lens in the path of beam of light, close to the patient eye, and then slowly moves the lens away from eye until the image of retina is clearly seen.
- 32. Contin.. • The examiner moves around the head of the patient to examine different quadrants of the fundus. • He or she has to stand opposite to clock hour position to be examined. • By asking the patient to look in extreme gaze,and using of scleral indenter, the whole peripheral retina up to ora serrata can be examined.
- 33. Scleral indentation • Helps in making prominent the barely perceptible lesions, done with the depressor placed on patients lid. • Examiner should move the scleral depressor in a direction opposite to that in which he or she wishes the depression to appear. • Scleral depressor should be rolled gently and tangentially over the eye surface. • The temporal part of upper lid is sufficiently lax so depressor can be placed inferiorly in the horizontal meridian.
- 34. Fundus diagram
- 35. Disadvantage • Technique is difficult and can be mastered by hours of practice. • Magnification is less compare to DO. • It is impossible with very small pupil. • Patient is usually more uncomfortable with intense light of IO and with scleral ndentation. • Reflex sneezing can occur on exposure to bright light.
- 36. Advantage of indirect system • Image not affected by the patients refractive power • In eyes with nystagmus • Delivery of LASER • Binocular examination of fundus up-to the periphery • Large field of view allow for the panoramic view • Better Resolution • Use in operating room for cryo/scleral buckling • Better view in presence of media opacities • Increased illumination • Reduced distortion
- 37. Direct versus indirect ophthtlmoscopy