
Recommended
More Related Content
What's hot
What's hot (19)
Similar to Create Flip Animation in PowerPoint
Similar to Create Flip Animation in PowerPoint (20)
Create Flip Animation in PowerPoint
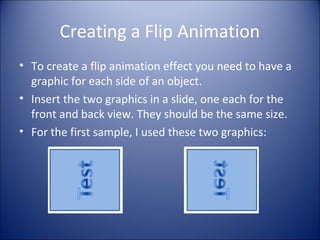
- 1. Creating a Flip Animation • To create a flip animation effect you need to have a graphic for each side of an object. • Insert the two graphics in a slide, one each for the front and back view. They should be the same size. • For the first sample, I used these two graphics:
- 2. Click to Flip • Give each graphic two custom animations: an exit of Collapse and an entrance of Stretch. Make sure that all animation directions are across and all speeds are the same. • Make the Collapse animation for each shape Start on click. Set the Stretch animations to Start after previous. • Order the animations as follows: Collapse for front graphic, Stretch for rear graphic, Collapse for rear graphic, and Stretch for front graphic. • Open your Custom animation task pane to review these settings.
- 3. Click to Flip • Position the front shape directly over the reverse shape (use Order, Send to Back or Bring to Front from the Shortcut Menu, if necessary). • In Slide show view, click to flip the graphic and click again to flip it back. • If you just want to flip it once, use only the first two animations – to flip more times, repeat the effects. • Go to the next slide for another (cooler) example.
- 4. North Carolina State Quarter
- 5. Trigger Flips • To flip ‘on demand’ add animation triggers. • Draw two shapes to use as triggers - I used arrows. • Go to effect options for the first Collapse animation. • On the Timing tab, click the Triggers button and choose Start effect on click of: Right Arrow. • Move the first Stretch animation below the collapse under Trigger: Right Arrow. • Go to effect options for the remaining collapse animation and set the trigger to Start effect on click of: Left Arrow • Move the remaining Stretch animation to below the Collapse under Trigger: Left Arrow. • Show the slide and click the arrows to flip when you want! Next Slide
- 6. More Stuff • I hope you found this helpful. • For more stuff visit www.maysstuff.com/ppt/ • Examples of stuff: – Text entrance animations – Layouts in 2007 – Gradients in 2007 – Working with Slide Masters – Tips for Presenters
- 7. More Stuff • I hope you found this helpful. • For more stuff visit www.maysstuff.com/ppt/ • Examples of stuff: – Text entrance animations – Layouts in 2007 – Gradients in 2007 – Working with Slide Masters – Tips for Presenters