SlideShare a Scribd company logo
1 of 28
Download to read offline
2003 PREDATOR
SERVICE MANUAL
Foreword
This manual is designed primarily for use by certified Polaris Master Service Dealer technicians in a properly
equipped shop and should be kept available for reference. All references to left and right side of the vehicle
are from the operator’s perspective when seated in a normal riding position.
Some procedures outlined in this manual require a sound knowledge of mechanical theory, tool use, and shop
procedures in order to perform the work safely and correctly. Technicians should read the text and be familiar
with service procedures before starting the work. Certain procedures require the use of special tools. Use
only the proper tools as specified.
This manual includes procedures for maintenance operations, component identification and unit repair, along
with service specifications for the 2003 Polaris Predator ATV. Comments or suggestions about this manual
may be directed to: Service Publications Dept. @ Polaris Sales Inc. 2100 Hwy 55 Medina Minnesota 55340.
2003 Polaris Predator ATV Service Manual (PN 9918062)
ECopyright 2002 Polaris Sales Inc. All information contained within this publication is based on the latest product information at the
time of publication. Due to constant improvement in the design and quality of production components, some minor descrepancies may
result between the actual vehicle and the information presented in this publication. Depictions and/or procedures in this publication are
intended for reference use only. No liability can be accepted for omissions or inaccuracies. Any reprinting or reuse of the depictions
and/or procedures contained within, whether whole or in part, is expressly prohibited. Printed in U.S.A.
UNDERSTANDING SAFETY LABELS AND INSTRUCTIONS
Throughout these instructions, important information is brought to your attention by the following symbols:
The Safety Alert Symbol means ATTENTION! BECOME ALERT! YOUR SAFETY IS INVOLVED!
DANGER
Failure to follow DANGER instructions will result in severe injury or death to the operator, bystander or person
inspecting or servicing the ATV.
WARNING
Failure to follow WARNING instructions could result in severe injury or death to the operator, bystander or
person inspecting or servicing the ATV.
CAUTION:
A CAUTION indicates special precautions that must be taken to avoid personal injury, or ATV or property
damage.
NOTE:
A NOTE provides key information to clarify instructions.
Trademarks
Polaris acknowledges the following products mentioned in this manual:
Loctite, Registered Trademark of the Loctite Corporation
FOX, Registered Trademark of Fox Shox
Fluke, Registered Trademark of John Fluke Mfg. Co.
Mity Vac, Registered Trademark of Neward Enterprises, Inc.
CHAPTER INDEX
CHAPTER 1 GENERAL
CHAPTER 2 MAINTENANCE
CHAPTER 3 ENGINE/TRANSMISSION
CHAPTER 4 FUEL SYSTEM
CHAPTER 5 BODY/SUSPENSION
CHAPTER 6 BRAKES
CHAPTER 7 ELECTRICAL
1
GENERAL INFORMATION
1.1
CHAPTER 1
GENERAL INFORMATION
Model Identification 1.2. . . . . . . . . . . . . . . . . . . . . . .
Serial Number Location 1.2. . . . . . . . . . . . . . . . . . .
Publication Numbers 1.3. . . . . . . . . . . . . . . . . . . . .
Replacement Keys 1.3. . . . . . . . . . . . . . . . . . . . . . .
Standard Torque Specifications 1.3. . . . . . . . . . . .
Predator Models 1.4. . . . . . . . . . . . . . . . . . . . . . . . .
Specifications 1.5-1.6. . . . . . . . . . . . . . . . . . . . . . . . . . . .
Tap Drill Charts 1.7. . . . . . . . . . . . . . . . . . . . . . . . . .
Decimal Equivalent Chart 1.7. . . . . . . . . . . . . . . . .
Unit of Measure Conversion Table 1.8. . . . . . . . . .
Glossary of Terms 1.9. . . . . . . . . . . . . . . . . . . . . . . .
GENERAL INFORMATION
1.2
MODEL IDENTIFICATION
The machine model number must be used with any correspondence regarding warranty or service.
Machine Model Number Identification
Year Designation Basic Chassis
Designation Engine Designation
A 0 3 G J 5 0 A A
Emissions &
Model Option
ENGINE DESIGNATION NUMBER
ES50PLE01 Single, Water Cooled, Electric Start, Manual 5--Speed, DOHC 4 Stroke. . . . . . . . . . . . . . . .
VIN IDENTIFICATION
1 2 3 4 5 6 7 8 9 10 11 12 13 14 15 16 17
4 X A G A 5 0 A * 3 P 0 0 0 0 0 0
Vehicle Descriptor Vehicle Identifier
Powertrain
Engine
Emissions Model
Year
Plant No.*
Individual Serial No.
Body Style
Check Digit*
World Mfg. ID
* This could be either
a number or a letter
UNIT MODEL NUMBER AND SERIAL NUMBER LOCATION
Whenever corresponding with Polaris about a
particular issue, the machine model number and
serial number are important for vehicle
identification. The machine serial number is
stamped on the lower left side of the frame
tube.(B)
ENGINE SERIAL NUMBER LOCATION
This information can be found on the clutch housing
on the left side of engine.(A)
ARH View
B LH View
31XX
Key Series
Number
GENERAL INFORMATION
1.3
PUBLICATION NUMBERS
Year Model Model No. Owner’s
Manual PN
Parts
Manual PN
Parts
Micro Fiche PN
2003 PREDATOR A03GJ50CA 9917574 9917576 99175772003 PREDATOR A03GJ50CA 9917574 9917576 9917577
NOTE: When ordering service parts be sure to use the correct parts manual.
REPLACEMENT KEYS
Replacement keys can be made from the original key. To identify which series the key is, take the first two digits
on the original key and refer to the chart to the right for the proper part number. Should both keys become lost,
replacement of the ignition switch assembly is necessary.
Series # Part Number
20 4010278
21 4010278
22 4010321
23 4010321
27 4010321
28 4010321
31 4110141
32 4110148
67 4010278
68 4010278
STANDARD TORQUE SPECIFICATIONS
The following torque specifications are to be used as a general guideline. FOR SPECIFIC TORQUE VALUES OF
FASTENERS Refer to exploded views in the appropriate section. There are exceptions in the steering,
suspension, and engine sections.
Bolt Size Threads/In Grade 2 Grade 5 Grade 8
Torque in. lbs. (Nm)
#10 - 24 27 (3.1) 43 (5.0) 60 (6.9). . . . . . . . . . . . . . . . . . . . . . . . . . . . . . . . . . . . . . . . . . . .
#10 - 32 31 (3.6) 49 (5.6) 68 (7.8). . . . . . . . . . . . . . . . . . . . . . . . . . . . . . . . . . . . . . . . . . . .
Torque ft. lbs. (Nm)*
1/4 - 20 5 (7) 8 (11) 12 (16). . . . . . . . . . . . . . . . . . . . . . . . . . . . . . . . . . . . . . . . . . . . . . . .
1/4 - 28 6 (8) 10 (14) 14 (19). . . . . . . . . . . . . . . . . . . . . . . . . . . . . . . . . . . . . . . . . . . . . .
5/16 - 18 11 (15) 17 (23) 25 (35). . . . . . . . . . . . . . . . . . . . . . . . . . . . . . . . . . . . . . . . . . . .
5/16 - 24 12 (16) 19 (26) 29 (40). . . . . . . . . . . . . . . . . . . . . . . . . . . . . . . . . . . . . . . . . . . .
3/8 - 16 20 (27) 30 (40) 45 (62). . . . . . . . . . . . . . . . . . . . . . . . . . . . . . . . . . . . . . . . . . . .
3/8 - 24 23 (32) 35 (48) 50 (69). . . . . . . . . . . . . . . . . . . . . . . . . . . . . . . . . . . . . . . . . . . .
7/16 - 14 30 (40) 50 (69) 70 (97). . . . . . . . . . . . . . . . . . . . . . . . . . . . . . . . . . . . . . . . . . . .
7/16 - 20 35 (48) 55 (76) 80 (110). . . . . . . . . . . . . . . . . . . . . . . . . . . . . . . . . . . . . . . . . . . .
1/2 - 13 50 (69) 75 (104) 110 (152). . . . . . . . . . . . . . . . . . . . . . . . . . . . . . . . . . . . . . . . . . .
1/2 - 20 55 (76) 90 (124) 120 (166). . . . . . . . . . . . . . . . . . . . . . . . . . . . . . . . . . . . . . . . . . .
Metric / Torque 6 x 1.0. 72-78 In. lbs. 8 x 1.25 14-18 ft. lbs 10 x 1.25 26-30 ft. lbs.
GENERAL INFORMATION
1.4
PREDATOR MODELS
PREDATOR 500
PREDATOR 500
TROY LEE LIMITED EDITION
GENERAL INFORMATION
1.5
MODEL: 2003 PREDATOR 500. . . . . . . . . .
MODEL NUMBER: A03GJ50AA.
ENGINE MODEL: ES50PLX. .
Catagory Dimension
Length 71.5 in./182 cm
Width 47.5 in./121 cm
Height 45 in./114 cm
Seat Height 32 in./81.28 cm
Wheel Base 51 in./130 cm
Ground Clearance 4.5 in./11 cm
Dry Weight 415 lbs./188 kg
Fuel Capacity 3.25 gal./12.3 ltr
Oil Capacity 2.25 qts./2.1 ltr
Coolant Capacity 2.25 qts./2.1 ltr
Dune Package Shown
GENERAL INFORMATION
1.6
MODEL: 2003 PREDATOR 500. . . . . . . . . .
MODEL NUMBER: A03GJ50AA.
ENGINE MODEL: ES50PLE01. .
Engine
Platform Fuji DOHC 4 stroke
Engine Model Number ES50PLE01
Engine Displacement 499cc
Number of Cylinders 1
Bore & Stroke (mm) 99.2 x 64.6 mm
Compression Ratio 10.8:1
Compression Pressure 130 psi
Engine Idle Speed 1600 Rpm
Cooling System Liquid
Thermostat Opening
Temperature
160 F (71 C)
Overheat Warning High Temp Light
Lubrication Pressurized Dry Sump
Oil Requirements PS--4 Synthetic
Exhaust System 2 to 1 canister style
Carburetion
Carburetor model Mikuni BSR 42mm
Main Jet 150
Pilot jet 45
Jet Needle 6CGY07-060-3
Needle Jet O-OM
Pilot Screw 2.5 Turns Out
Pilot Air Jet 110
Float Height 13--14 mm (0.51--0.55“)
Fuel Delivery Fuel Pump
Fuel Requirement 87 Octane (minimum)
Electrical
Alternator Output 200 w @ 3000 RPM
Voltage Regulator 3--Phase PN 4010654
Lghts : Main Headlights Dual Beam 35 watts / 35 watts
Tail 8.26 watts
Brake 26.9 watts
Neutral / Hot
Indicator lights
1 watt (ea.)
Ignition System DC/CDI Ignition
RPM Limit 9005
Ignition Timing 30 3 BTDC @ 3500 RPM
Spark plug / Gap NGK DCPR8E/ .035 in./ 0.9 mm
Battery / Model / Amp Hr Maintenance--Free
Yuasa YTX9 9 Amp Hr
Circuit Breakers Fan 10 amp / Harness 20 amp
Starting Electric -- Standard
Instrument Cluster N/A
Drivetrain
Transmission Type Manual 5 speed
Main Sprocket -- # Tooth 14
Rear Sprocket -- # Tooth 37
Axle Runout -- Maximum .020” (.51 mm)
Gear Ratio : 1st
2nd
3rd
4th
5th
Primary
2.615
1.765
1.350
1.091
0.958
2.792
Chain Size / Deflection 520 O--ring
Clutch Type Wet Multi Plate
Clutch Lever Freeplay 1/8 - 3/16 / 3.1 - 4.7 mm
Steering / Suspension
Front Suspension
Style / Shock
Dual A--arm / Fox Shock
Front Travel 10 in. / 25.4 cm
Rear Suspension
Style / Shock
Linkless Swing Arm / Fox Shock
w/ remote reservoir
Rear Travel 11 in. / 27.94 cm
Ground Clearance 4.5 in. / 11.43 cm
Shock Preload Adjustment
Front / Rear
Front -- Spring tension -- Std.
Rear -- Fox Dual Clicker -- Std.
Turning Radius 67 in. / 170.18 cm
Toe Out 0 -- 1/16 in / .0 -- .159 cm
Wheels / Brakes
Wheel Size -- Front 21x7--10 Aluminum
Wheel Size -- Rear 20x11--10 Aluminum
Front Tire
Make / Model / Size
Maxxis Razr 21x7--10
Rear Tire
Make / Model / Size
Maxxis Razr 20x11--10
Recommended Air Pressure
F / R
5 psi Front
5 psi Rear
Brake -- Front Dual Hydraulic Disc
Brake -- Rear Single Hydraulic Disc
JETTING CHART
Altitude
Meters
(Feet)
AMBIENT TEMPERATURE
0--1800
(0--6000)
above 1800
(above 6000)
Below 40 F
Below 5 C
+40 F to +80 F
+5 C to +28 C
155 150
147.5 142.5
GENERAL INFORMATION
1.7
SAE TAP DRILL SIZES
Thread Size/Drill Size Thread Size/Drill Size
#0-80 3/64
#1-64 53
#1-72 53
#2-56 51
#2-64 50
#3-48 5/64
#3-56 45
#4-40 43
#4-48 42
#5-40 38
#5-44 37
#6-32 36
#6-40 33
#8-32 29
#8-36 29
#10-24 24
#10-32 21
#12-24 17
#12-28 4.6mm
1/4-20 7
1/4-28 3
5/16-18 F
5/16-24 I
3/8-16 O
3/8-24 Q
7/16-14 U
7/16-20 25/64
1/2-13 27/64
1/2-20 29/64
9/16-12 31/64
9/16-18 33/64
5/8-11 17/32
5/8-18 37/64
3/4-10 21/32
3/4-16 11/16
7/8-9 49/64
7/8-14 13/16
1-8 7/8
1-12 59/64
1 1/8-7 63/64
1 1/8-12 1 3/64
1 1/4-7 1 7/64
1 1/4-12 1 11/64
1 1/2-6 1 11/32
1 1/2-12 1 27/64
1 3/4-5 1 9/16
1 3/4-12 1 43/64
2-4 1/2 1 25/32
2-12 1 59/64
2 1/4-4 1/2 2 1/32
2 1/2-4 2 1/4
2 3/4-4 2 1/2
3-4 2 3/4
METRIC TAP DRILL SIZES
Tap Size Drill Size Decimal
Equivalent
Nearest
Fraction
3 x .50
3 x .60
4 x .70
4 x .75
5 x .80
5 x .90
6 x 1.00
7 x 1.00
8 x 1.00
8 x 1.25
9 x 1.00
9 x 1.25
10 x 1.25
10 x 1.50
11 x 1.50
12 x 1.50
12 x 1.75
#39
3/32
#30
1/8
#19
#20
#9
16/64
J
17/64
5/16
5/16
11/32
R
3/8
13/32
13/32
0.0995
0.0937
0.1285
0.125
0.166
0.161
0.196
0.234
0.277
0.265
0.3125
0.3125
0.3437
0.339
0.375
0.406
0.406
3/32
3/32
1/8
1/8
11/64
5/32
13/64
15/64
9/32
17/64
5/16
5/16
11/32
11/32
3/8
13/32
13/32
DECIMAL EQUIVALENTS
1/64 .0156. . . . . . . . . . . . . . . .
1/32 .0312 1 mm = .0394. . . . . . . . . . . . . .
3/64 .0469. . . . . . . . . . . . . . . .
1/16 .0625. . . . . . . . . . .
5/64 .0781 2 mm = .0787. . . . . . . . . . . . . . . . . . .
3/32 .0938. . . . . . . . . . .
7/64 .1094 3 mm = .1181. . . . . . . . . . . . . . . . .
1/8. .1250. . .
9/64 .1406. . . . . . . . . . . . . . . .
5/32 .1563 4 mm = .1575. . . . . . . . . . . . . .
11/64 .1719. . . . . . . . . . . . . . .
3/16 .1875 5 mm = .1969. . . . . . . . . . . . . .
13/64 .2031. . . . . . . . . . . . . . .
7/32 .2188. . . . . . . . . . .
15/64 .2344 6 mm = .2362. . . . . . . . . . . . . . . . . .
1/4 .25. . . .
17/64 .2656 7 mm = .2756. . . . . . . . . . . . . . . . . .
9/32 .2813. . . . . . . . . . .
19/64 .2969. . . . . . . . . . . . . . .
5/16 .3125 8 mm = .3150. . . . . . . . . . . . . .
21/64 .3281. . . . . . . . . . . . . . .
11/32 .3438 9 mm = .3543. . . . . . . . . . . . .
23/64 .3594. . . . . . . . . . . . . . .
3/8 .375. . . .
25/64 .3906 10 mm = .3937. . . . . . . . . . . . . . . . . .
13/32 .4063. . . . . . . . .
27/64 .4219 11 mm = .4331. . . . . . . . . . . . . . . . . .
7/16 .4375. . . . . . . . . . .
29/64 .4531. . . . . . . . . . . . . . .
15/32 .4688 12 mm = .4724. . . . . . . . . . . .
31/64 .4844. . . . . . . . . . . . . . .
1/2 .5 13 mm = .5118. . . . . . . . . . . . . . . . . .
33/64 .5156. . . . . . . . . . . . . . .
17/32 .5313. . . . . . . . .
35/64 .5469 14 mm = .5512. . . . . . . . . . . . . . . . . .
9/16 .5625. . . . . . . . . . .
37/64 .5781 15 mm = .5906. . . . . . . . . . . . . . . . . .
19/32 .5938. . . . . . . . .
39/64 .6094. . . . . . . . . . . . . . .
5/8 .625 16 mm = .6299. . . . . . . . . . . . . . . .
41/64 .6406. . . . . . . . . . . . . . .
21/32 .6563 17 mm = .6693. . . . . . . . . . . .
43/64 .6719. . . . . . . . . . . . . .
11/16 .6875. . . . . . . . . .
45/64 .7031 18 mm = .7087. . . . . . . . . . . . . . . . . .
23/32 .7188. . . . . . . . .
47/64 .7344 19 mm = .7480. . . . . . . . . . . . . . . . . .
3/4 .75. . . .
49/64 .7656. . . . . . . . . . . . . . .
25/32 .7813 20 mm = .7874. . . . . . . . . . . .
51/64 .7969. . . . . . . . . . . . . . .
13/16 .8125 21 mm = .8268. . . . . . . . . . . .
53/64 .8281. . . . . . . . . . . . . . .
27/32 .8438. . . . . . . . .
55/64 .8594 22 mm = .8661. . . . . . . . . . . . . . . . . .
7/8 .875. . . .
57/64 .8906 23 mm = .9055. . . . . . . . . . . . . . . . . .
29/32 .9063. . . . . . . . .
59/64 .9219. . . . . . . . . . . . . .
15/16 .9375 24 mm = .9449. . . . . . . . . . . .
61/64 .9531. . . . . . . . . . . . . . .
31/32 .9688 25 mm = .9843. . . . . . . . . . . .
63/64 .9844. . . . . . . . . . . . . . .
1 1.0. . . . .
GENERAL INFORMATION
1.8
CONVERSION TABLE
Unit of Measure Multiplied by Converts to
ft. lbs. x 12 = in. lbs.
in. lbs. x .0833 = ft. lbs.
ft. lbs. x 1.356 = Nm
in. lbs. x .0115 = kg-m
Nm x .7376 = ft. lbs.
kg-m x 7.233 = ft. lbs.
kg-m x 86.796 = in. lbs.
kg-m x 9.807 = Nm
in. x 25.4 =mm
mm x .03937 = in.
in. x 2.54 = cm
mile (mi.) x 1.6 = km
km x .6214 = mile (mi.)
Ounces (oz) x 28.35 = Grams (g)
Fluid Ounces (fl. oz.) x 29.57 = Cubic Centimeters (cc)
Cubic Centimeters (cc) x .03381 = Fluid Ounces (fl. oz.)
Grams (g) x 0.035 = Ounces (oz)
lb. x .454 = kg
kg x 2.2046 = lb.
Cubic inches (cu in) x 16.387 = Cubic centimeters (cc)
Cubic centimeters (cc) x 0.061 = Cubic inches (cu in)
Imperial pints (Imp pt) x 0.568 = Liters (l)
Liters (l) x 1.76 = Imperial pints (Imp pt)
Imperial quarts (Imp qt) x 1.137 = Liters (l)
Liters (l) x 0.88 = Imperial quarts (Imp qt)
Imperial quarts (Imp qt) x 1.201 = US quarts (US qt)
US quarts (US qt) x 0.833 = Imperial quarts (Imp qt)
US quarts (US qt) x 0.946 = Liters (l)
Liters (l) x 1.057 = US quarts (US qt)
US gallons (US gal) x 3.785 =Liters (l)
Liters (l) x 0.264 = US gallons (US gal)
Pounds - force per square inch (psi) x 6.895 = Kilopascals (kPa)
Kilopascals (kPa) x 0.145 = Pounds - force per square inch (psi)
Kilopascals (kPa) x 0.01 = Kilograms - force per square cm
Kilograms - force per square cm x 98.1 = Kilopascals (kPa)
x R2 x H (height) = Cylinder Volume
C to F: 9 ( C + 40) 5 - 40 = F
F to C: 5 ( F + 40) 9 - 40 = C
GENERAL INFORMATION
1.9
GLOSSARY OF TERMS
ABDC: After bottom dead center.
ACV: Alternating current voltage.
Alternator: Electrical generator producing voltage alternating current.
ATDC: After top dead center.
BBDC: Before bottom dead center.
BDC: Bottom dead center.
BTDC: Before top dead center.
CC: Cubic centimeters.
Center Distance: Distance between center of crankshaft and center of driven clutch shaft.
Chain Pitch: Distance between chain link pins (No. 35 = 3/8 or 1 cm). Polaris measures chain length in number of pitches.
CI: Cubic inches.
Clutch Buttons: Plastic bushings which aid rotation of the movable sheave in the drive and driven clutch.
ClutchOffset: Drive anddriven clutches are offsetso thatdrive beltwill stay nearly straightas itmoves alongthe clutchface.
Clutch Weights: Three levers in the drive clutch which relative to their weight, profile and engine RPM cause the drive
clutch to close and grip the drive belt.
Crankshaft Run-Out: Run-out or “bend” of crankshaft measured with a dial indicator while crankshaft is supported
between centers on V blocks or resting in crankcase. Measure at various points especially at PTO.
DCV: Direct current voltage.
Dial Bore Gauge: A cylinder measuring instrument which uses a dial indicator. Good for showing taper and
out-of-round in the cylinder bore.
Electrical Open: Open circuit. An electrical circuit which isn’t complete.
Electrical Short: Short circuit. An electrical circuit which is completed before the current reaches the intended load.
(i.e. a bare wire touching the chassis).
End Seals: Rubber seals at each end of the crankshaft.
Engagement RPM: Engine RPM at which the drive clutch engages to make contact with the drive belt.
ft.: Foot/feet.
Foot Pound: Ft. lb. A force of one pound at the end of a lever one foot in length, applied in a rotational direction.
g: Gram. Unit of weight in the metric system.
gal.: Gallon.
ID: Inside diameter.
in.: Inch/inches.
Inch Pound: In. lb. 12 in. lbs. = 1 ft. lb.
kg/cm
2
: Kilograms per square centimeter.
kg-m: Kilogram meters.
Kilogram/meter: A force of one kilogram at the end of a lever one meter in length, applied in a rotational direction.
l or ltr: Liter.
lbs/in
2
: Pounds per square inch.
Left or Right Side: Always referred to based on normal operating position of the driver.
m: Meter/meters.
Mag: Magneto.
Magnetic Induction: As a conductor (coil) is moved through a magnetic field, a voltage will be generated in the
windings. Mechanical energy is converted to electrical energy in the stator.
mi.: Mile/miles.
mm: Millimeter. Unit of length in the metric system. 1mm = approximately .040 .
Nm: Newton meters.
OD: Outside diameter.
Ohm: The unit of electrical resistance opposing current flow.
oz.: Ounce/ounces.
Piston Clearance: Total distance between piston and cylinder wall.
psi.: Pounds per square inch.
PTO: Power take off.
PVT: Polaris Variable Transmission (Drive Clutch System)
qt.: Quart/quarts.
Regulator: Voltage regulator. Regulates battery charging system output at approx. 14.5 DCV as engine RPM increases.
Reservoir Tank: The fill tank in the liquid cooling system.
Resistance: In the mechanical sense, friction or load. In the electrical sense, ohms, resulting in energy conversion to heat.
RPM: Revolutions per minute.
Seized Piston: Galling of the sides of a piston. Usuallythere isa transferof aluminumfrom thepiston ontothe cylinderwall.
Possible causes: 1) improper lubrication; 2) excessive temperatures; 3) insufficient piston clearance; 4) stuck piston rings.
Stator Plate: The plate mounted under the flywheel supporting the battery charging coils.
TDC: Top dead center. Piston’s most outward travel from crankshaft.
Volt: The unit of measure for electrical pressure of electromotive force. Measured by a voltmeter in parallel with the circuit.
Watt: Unit of electrical power. Watts = amperes x volts.
WOT: Wide open throttle.
GENERAL INFORMATION
1.10
NOTES
2
MAINTENANCE
2.1
CHAPTER 2
MAINTENANCE
Periodic Maintenance Chart 2.2-2.3. . . . . . . . . . . . . . .
Pre-Ride Inspection 2.4. . . . . . . . . . . . . . . . . . . . . .
Lubricant and Maintenance Product Numbers 2.5
Special Tools 2.6. . . . . . . . . . . . . . . . . . . . . . . . . . . .
Lubrication Charts 2.7-2.8. . . . . . . . . . . . . . . . . . . . . . . .
Clutch Freeplay Adjustment 2.9. . . . . . . . . . . . . . .
Throttle Inspection 2.9. . . . . . . . . . . . . . . . . . . . . . .
Carburetor Adjustments 2.9-2.10. . . . . . . . . . . . . . . . . . .
Throttle Adjustment 2.10-2.11. . . . . . . . . . . . . . . . . . . . . . .
Fuel System 2.11-2.12. . . . . . . . . . . . . . . . . . . . . . . . . . . . .
Compression Test 2.12. . . . . . . . . . . . . . . . . . . . . . . .
Spark Plug Maintenance 2.13. . . . . . . . . . . . . . . . . .
Battery Maintenance 2.13--2.14. . . . . . . . . . . . . . . . . . . . . .
Electrical 2.14-2.15. . . . . . . . . . . . . . . . . . . . . . . . . . . . . . . .
Coolant System Maintenance 2.15-2.16. . . . . . . . . . . . . .
Radiator Screen Removal 2.17. . . . . . . . . . . . . . . . .
Air Filter Service 2.17. . . . . . . . . . . . . . . . . . . . . . . . .
Air Box Sediment Tube Service 2.17. . . . . . . . . . . .
Crankcase Breather Filter 2.18. . . . . . . . . . . . . . . . .
Oil Change/Filter 2.18. . . . . . . . . . . . . . . . . . . . . . . . .
Steering and Toe Alignment 2.19-2.20. . . . . . . . . . . . . . .
Exhaust System Maintenance 2.21. . . . . . . . . . . . .
Brake System Service 2.22-2.23. . . . . . . . . . . . . . . . . . . .
Suspension Adjustment 2.23-2.26. . . . . . . . . . . . . . . . . . .
Controls / Handlebar Adjustment 2.26. . . . . . . . . . .
Wheel Removal/Installation 2.26. . . . . . . . . . . . . . . .
Tire Inspection 2.27. . . . . . . . . . . . . . . . . . . . . . . . . . .
MAINTENANCE
2.2
PERIODIC MAINTENANCE CHART
Inspection, adjustment and lubrication intervals of important components are listed in the following chart.
Maintenance intervals are based upon average riding conditions and vehicle speed.
The following symbols denote potential items to be aware of during maintenance:
H= CAUTION: Due to the nature of these adjustments, it is recommended this service be performed
by an authorized Polaris dealer.
"= SEVERE USE ITEM ----If vehicle is subjected to severe use, decrease interval by 50% (Severe Use is defined
as frequent vehicle immersion in mud, water or sand, racing or race-style high rpm use, manual slipping of the clutch
prolonged low speed - heavy load operation or extended idle. More preventative maintenance is required under these
conditions. Fluid changes, cable, chain and chassis lubrication are required more frequently. For engine oil, short trip cold
weather riding also constitutes severe use. Pay special attention to oil level. A rising oil level in cold weather can indicate
contaminants collecting in the oil sump or crankcase. Change oil immediately and monitor level. If oil level begins to rise,
discontinue use and determine cause.
E= Emission Control System Service (California).
NOTE: Inspection may reveal the need for replacement parts. Always use genuine Polaris parts.
ENGINE / COOLING / CONTROLS
Item Maintenance Interval
(Whichever comes first)
Remarks
Hours Calendar Miles
(Km)
" E Engine Oil - Level/Change 10 hrs -- 100 (160) Check level pre--ride
Break--In service at 1 hour
" E Oil Filter 10 hrs -- 100 (160) Replace with oil change
" E Air Filter - Pre-Filter Daily Daily -- Inspect, clean more often
in dirty or wet conditions
" E Air Filter - Main Element Weekly Weekly -- Inspect - Replace if necessary
" Air Box Sediment Tube -- Daily -- Drain deposits whenever visible
" Engine Breather Filter 20 hrs Monthly 200 (320) Inspect and clean if necessary
E Idle Speed As required As required -- Adjust as required
H Throttle Cable / ETC Switch 50 hrs 6 months 500 (800) Inspect -Adjust, Lubricate, Replace if necessary
Choke (Enricher) Cable 50 hrs 6 months 500 (800) Inspect -Adjust, Lubricate, Replace if necessary
Carburetor Float Bowl 50 hrs 6 months 500 (800) Drain bowl periodically and prior to storage
Carburetor Air Intake Ducts/Flange 50 hrs 6 months 500 (800) Inspect all ducts for proper sealing/air leaks
H E Fuel System 100 hrs 12 months 1000 (1600) Check for leaks at tank cap, lines, fuel valve, filter,
pump & carburetor. Replace lines every 2 years.
Coolant/Level Inspection Daily Daily Replace engine coolant every 2 years
Coolant Strength /
System Pressure Test
100 hrs 6 months 1000 (1600) Inspect strength seasonally;
Pressure test system annually
" Radiator 100 hrs 12 months 1000 (1600) Inspect / Clean external surfaces
" Cooling and Oil System Hoses 100 hrs 12 months 1000 (1600) Pre--ride / Inspect for leaks
" Engine Mounts 100 hrs 12 months 1000 (1600) Pre--ride / Inspect
Exhaust Muffler / Pipe 100 hrs 12 months 1000 (1600) Pre--ride / Inspect
MAINTENANCE
2.3
PERIODIC MAINTENANCE CHART CONT’D
ELECTRICAL
Item Maintenance Interval
(Whichever comes first)
Remarks
E Spark Plug 100 hrs 12 months 1000 (1600) Inspect - Replace if necessary
" Wiring 100 hrs 12 months 1000 (1600) Inspect for abrasion, routing, security.
Apply Dielectric grease to connectors that are
subjected to water, mud, etc.
H Ignition Timing 100 hrs 12 months 1000 (1600) Inspect
" Battery 20 hrs Monthly 200 (320) Check terminals; Clean; Test
Headlight Aim As required As required -- Adjust as Necessary
Headlamp Inspection Daily Daily -- Check operation daily; Apply dielectric
grease whenever lamp is replaced
Tail Lamp Inspection Daily Daily -- Check operation daily; Apply dielectric
grease whenever lamp is replaced
CHASSIS / SUSPENSION / BRAKE
Item Maintenance Interval
(Whichever comes first)
Remarks
Hours Calendar Miles
(Km)
" General Lubrication 50 hrs 3 months 500 (800) Lubricate All Fittings, Pivots, Cables, Etc.
Drive Chain Pre--ride Pre--ride Pre--ride Clean and Inspect, Adjust, Lubricate
H Steering Pre--ride Pre--ride Pre--ride Inspect Daily, Lubricate
H Toe Adjustment As required As required -- Periodic Inspection, Adjust Whenever
Parts are Replaced
" Front Suspension Pre--ride Pre--ride Pre--ride Inspect - Lubricate
" Rear Suspension Pre--ride Pre--ride Pre--ride Inspect - Lubricate
Tires Pre-ride Pre-ride -- Inspect Daily, Pre-Ride Inspection Item
H Brake Fluid 200 hrs 24 months 2000 (3200) Change Every Two Years
" Brake Fluid Level Pre-ride Pre-ride -- Inspect Sight Glass Daily
Pre-Ride Inspection Item
" Brake Lever Travel Pre-ride Pre-ride -- Inspect Daily
Pre-Ride Inspection Item
" H Brake Pad Wear 10 hrs Monthly 100 (160) Inspect Periodically
Brake Adjustment As required As required -- Inspect Deflection Daily; Adjust
Brake System Pre-ride Pre-ride -- Pre-Ride Inspection Item
Wheels / Fasteners Pre-ride Pre-ride -- Pre-Ride Inspection Item
Frame Nuts, Bolts, Fasteners Pre-ride Pre-ride -- Pre-Ride Inspection Item
MAINTENANCE
2.4
PRE-RIDE / DAILY INSPECTION
Perform the following pre-ride inspection daily, and when servicing the vehicle at each scheduled maintenance.
G Tires - check condition and pressures
G Fuel and oil tanks - fill both tanks to their proper level; Do not overfill oil tank
G All brakes - check operation and adjustment (includes auxiliary brake)
G Throttle - check for free operation
G Headlight/Taillight/Brakelight - check operation of all indicator lights and switches
G Engine stop switch - check for proper function
G Wheels - check for loose wheel nuts and axle nuts; check to be sure axle nuts are secured by
cotter pins
G Air cleaner element - check for dirt or water; clean or replace
G Steering - check for free operation, noting any unusual looseness in any area
G Loose parts - visually inspect vehicle for any damaged or loose nuts, bolts or fasteners
G Engine coolant - check for proper level at the recovery bottle
RECOMMENDED PRE--RIDE FLUID
LEVEL CHECKS
Item Type Notes See
Pages
Engine Oil / Transmission Polaris PS 4
Synthetic
Add to proper level on dipstick. 2.18
Coolant / Level Polaris Premium 60/40
Pre-mixed Antifreeze/
Coolant or a 50/50 mixture
high quality antifreeze/
coolant and distilled water
Allow engine and cooling system to cool
completely and check level in radiator.
Fill to top of filler neck. If reservoir was
empty or extremely low, fill radiator be-
fore filling reservoir tank to full line.
2.15
Brake Fluid Polaris DOT 3 Brake Fluid Fill to indicated level inside reservoir.
Sight glass should appear dark when
installed, indicating proper fluid level.
2.22
NOTE: Quick Reference Lubricants and maintenance product part numbers are listed on page 2.5
MAINTENANCE
2.5
POLARIS LUBRICANTS,MAINTENANCE AND SERVICE PRODUCTS
Part No. Description
Engine Lubricant
2874414 Engine Oil (Quart) PS 4 Synthetic (4--Cycle)
2874415 Engine Oil (Gallon) PS 4 Synthetic (4--Cycle)
Grease / Specialized Lubricants
2871322 Premium All Season Grease (3 oz. cartridge)
2871423 Premium All Season Grease (14 oz. cartridge)
2871460 Starter Drive Grease
2871312 Grease Gun Kit
2871329 Dielectric Grease
2872073 Chain Lube (Aerosol)
Coolant
2871323 60/40 Coolant (Gallon)
2871534 60/40 Coolant (Quart)
Additives / Sealants / Thread Locking Agents / Misc.
2870791 Fogging Oil (12 oz. Aerosol)
2871326 Premium Carbon Clean (12 oz.)
2870652 Fuel Stabilizer (16 oz.)
2870585 Loctitet Primer N, Aerosol, 25 g
2870990 DOT3 Brake Fluid
2871956 Loctitet Thread Sealant 565 (50 ml.)
2871949 Loctitet Threadlock 242 (50 ml.)
2871950 Loctitet Threadlock 242 (6 ml.)
2871951 Loctitet Threadlock 262 (50 ml.)
2871952 Loctitet Threadlock 262 (6 ml.)
2871953 Loctitet Threadlock 271 (6 ml.)
2871954 Loctitet Threadlock 271 (36 ml.)
2870584 Loctitet RC 680-Retaining Compound (10 ml.)
2870587 Loctitet 518 Gasket Eliminator / Flange Sealant (50 ml.)
2872113 Disk Brake Quiet (12 oz.)
2872113 Disc Brake Quiet, Aerosol, (9 oz.)
2871957 Black RTV Silicone Sealer (3 oz. tube)
2871958 Black RTV Silicone Sealer (11 oz. cartridge)
8560054 Marine Grade Silicone Sealer (14 oz. cartridge)
2871557 Crankcase Sealant, 3-Bond 1215
2872893 Engine Degreaser
MAINTENANCE
2.6
SPECIAL TOOLS
PART NUMBER TOOL DESCRIPTION CHAPTER TOOL USED IN
8712100 or 8712500 Tachometer 2,7
2200634 Valve Seat Reconditioning Kit 3
PU--45257 Valve Spring Compressor 3
PA--46075 Flywheel Puller 3
PA--46087 Crankcase Separator 3
2870390 Piston Support Block 3
2872105 Water Pump Mechanical Seal Puller 3
PA--45958 Cam Chain Tensioner Assembly Tool 3
PA--46076 MAG End Crankshaft Nut Remover/Installer 3
PA--46077 MAG End Crankshaft Installer 3
2871283 Crankshaft/Water Pump Seal Install Kit 3
5131135 Water Pump Install Kit 3
PA--46502 Valve Spring Compressor 3
2870975 Mity Vact Pressure Test Tool 3, 4
2872314 Carburetor Float Adjustment Tool 4
2870623 Shock Absorber Spring Compression Tool 5
7052069 Charging Needle 5
2200421 Gas Shock Recharging Kit 5
2871352 Shock Rod Holding Tool 5
2871351 Foxt Shock IFP Depth Tool 5
2870386 Piston Pin Puller 6
PV--43568 Fluket77 Digital Multimeter 7
2870630 Timing Light 7
*Special Tools Can be ordered through a Polaris Dealer or SPX Corporation (1--800--328--6657).
MAINTENANCE
2.7
LUBRICATION
1. Engine Oil and Filter ¡
2. Brake Fluid ©
(Right hand and Foot
Brake Master Cylinder)
3. Rear Drive Chain
Ill.
#
Item Lube Rec. Method Frequency*
1. Engine Oil /
Transmission
Polaris PS--4
Synthetic
Check dipstick and add to
proper level.
Perform break-in oil/filter change at one
hour; change oil every 10hrs/100mi.¡
2. Brake Fluid Polaris
Dot 3 Brake Fluid
Fill master cylinder reservoir to in-
dicated level inside reservoir.
See Ch. 6.
As required. Change fluid every
2 years or 200 hours.©
3 Drive Chain Polaris Chain Lube Apply to chain link plates and rollers. As required*
* More often under severe use, such as operation in mud, water, sand or under severe loads.
¡ Every 10 hours of operation (refer to Maintenance Schedule for additional information) Change more
often in extremely dirty conditions (continuous operation in water, mud or sand), continuous hot, cold, or short
trip cold weather operation. NOTE: Excessive clutch plate residue will accelerate oil change intervals
© Every 24 months or 200 hours of operation (refer to Maintenance Schedule for additional information)
More often under severe conditions (continuous operation in water, mud or sand)
MAINTENANCE
2.8
LUBRICATION, CONT.
5. Upper Control Arm
6. Lower Control Arm
8. Upper Steering Post Bushing
7. Rear Axle Eccentric
Ill.
#
Item Lube Rec. Method Frequency*
5. Upper Control Arms Polaris All Season
Grease¢
Locate fittings and grease
(also grease after washing ATV)
Every 3 months ¡
6. Lower Control Arms Polaris All Season
Grease¢
Locate fittings and grease
(also grease after washing ATV)
Every 3 months ¡
7. Rear Axle Eccentric Polaris All Season
Grease¢
Locate and grease
(also grease after washing ATV)
Every 3 months ¡
8. Upper Steering Post Bushing Polaris All Season
Grease¢
Locate fittings and grease
(also grease after washing ATV)
Semi-annually ©
* More often under severe use, such as operation in water or under severe loads.
¡ Every 3 months or 50 hours of operation (refer to Maintenance Schedule for additional information)
More often under severe conditions (continuous operation in water, mud or sand)
© Every 6 months or 50 hours of operation (refer to Maintenance Schedule for additional information)
More often under severe conditions (continuous operation in water, mud or sand)
¢ Use grease conforming to NLGI No. 2, such as Polaris Premium All Season Grease.
MAINTENANCE
2.9
CLUTCH ADJUSTMENT
Clutch Lever Freeplay
1. Measure clutch lever freeplay between the perch
and the lever (A). This distance should be 1/8 -
3/16 (3.1 mm - 4.7 mm).
C
B A
2. If adjustment is required, slide the clutch perch
pivot boot down the clutch cable to access the
clutch adjustment screw (B) and lock ring (C).
3. Loosen the lock ring and turn the screw in
(clockwise) to increase lever travel. Turn the
screw out (counterclockwise) to decrease lever
travel. Tighten the lock ring.
4. Squeeze the lever fully and release. Slightly
squeeze the lever again until a slight resistance is
felt. Measure the freeplay again. If necessary,
repeat the adjustment procedure until proper
freeplay is attained.
5. Replace the clutch perch pivot boot over the
screw and lock ring.
THROTTLE INSPECTION
Check for smooth throttle opening and closing in all
handlebar positions. Throttle lever operation should
be smooth and lever must return freely without
binding.
1. Place the gear selector in neutral.
2. Set parking brake.
3. Start the engine and let it idle.
4. Turn handlebars from full right to full left. If idle
speed increases at any point in the turning range,
inspect throttle cable routing and condition.
Adjust cable tension as needed until lock--to--lock
turning can be accomplished with no rise in
engine rpm.
5. Replace the throttle cable if worn, kinked, or
damaged.
6. Inspect ETC cover seal and switch cavity by
removing the cover. Verify that no dirt, water or
mud is present.
To remove the ETC cover:
1. Use a medium flat blade screwdriver and insert
blade into the pocket of the cover starting on the
#1 position.
2. Twist screwdriver slightly while lifting on the cover
to release snap.
3. Repeat procedure at the other five locations as
shown.
NOTE: Do not attempt to remove cover until all
latch points are released.
1
2
3
45
6
5
6
ETC Cover
Removal SequenceIll. 1
CHOKE (ENRICHER)
ADJUSTMENT
If the choke knob does not stay out when pulled,
adjust the choke tension by tightening (clockwise) the
jam nut under the rubber boot between the choke
knob and nut. Firmly grasp the rubber boot and
tighten until the choke slides freely but stays out when
pulled.
Verify free play of 1/16--3/16” (1.6--4.76 mm) and
smooth operation of choke cable.
If smooth choke operation is not obtainable, inspect
choke cable for kinks or sharp bends in routing.
Choke
MAINTENANCE
2.10
CARBURETOR PILOT SCREW
ADJUSTMENT
Pilot Screw
FRONT
(Engine)
Ill.2
NOTE: Pilot screw is covered by a welsh plug. Plug
removal will be required to perform these procedures.
1. Start engine and warm it up to operating
temperature (about 10 minutes).
2. Turn pilot screw in (clockwise) until lightly seated.
Turn screw out the specified number of turns.
NOTE: Do not tighten the pilot screw forcefully
against the seat or the screw and/or seat will be
permanently damaged. (Ill. 2)
Pilot Screw Adjustment
Refer to Specifications in Chapter 1
3. Connect an accurate tachometer that will read in
increments of + or -- 50 RPM such as the PET
2100DX (PN 8712100DX) or the PET 2500 (PN
8712500).
4. Set idle speed to 1600 RPM. Always check
throttle cable freeplay after adjusting idle speed
and adjust if necessary.
5. Slowly turn mixture screw clockwise using the
pilot screw wrench until engine begins to miss.
6. Slowly turn mixture screw counterclockwise until
idle speed increases to maximum RPM.
Continue turning counterclockwise until idle RPM
begins to drop.
7. Center the pilot screw between the points in Step
5 and 6.
8. Re adjust idle speed to specification.
IDLE SPEED ADJUSTMENT
Idle Screw
BSR Carburetor
Ill.3
1. Start engine and warm it up thoroughly.
2. Adjust idle speed by turning the idle adjustment
screw in (clockwise) to increase or out
(counterclockwise) to decrease RPM. (Ill.3)
NOTE: Adjusting the idle speed affects throttle cable
freeplay and electronic throttle control (ETC)
adjustment. Always check throttle cable freeplay
after adjusting idle speed and adjust if necessary.
Idle Speed:
1600 +/-- 50 RPM
THROTTLE CABLE /
ELECTRONIC THROTTLE
CONTROL (ETC SWITCH)
ADJUSTMENT
1. Slide boot off throttle cable adjuster and jam nut.
2. Place shift selector in neutral and set parking
brake.
3. Start engine and set idle to 1600 RPM.
Boot Adjuster
Sleeve
Lock-
nut
Boot
Ill. 1
MAINTENANCE
2.11
NOTE: Be sure the engine is at operating
temperature. See Idle Speed Adjustment.
4. Loosen lock nut on in-line cable adjuster (Ill. 1).
5. Turn adjuster until 1/16 to 1/8 freeplay is
achieved at thumb lever. (Ill. 2). After making
adjustments, quickly actuate the thumb lever
several times and reverify freeplay.
1/16 - 1/8
Freeplay
Direction
of travel
Ill. 2
6. Tighten lock nut securely and slide boot
completely in place to ensure a water-tight seal.
7. Turn handlebars from left to right through the
entire turning range. If idle speed increases,
check for proper cable routing. If cable is routed
properly and in good condition, repeat adjustment
procedure.
FUEL SYSTEM
WARNING
Gasoline is extremely flammable and explosive
under certain conditions.
G Always stop the engine and refuel
outdoors or in a well ventilated area.
G Do not smoke or allow open flames
or sparks in or near the area where
refueling is performed or where
gasoline is stored.
G Do not overfill the tank. Do not fill the
tank neck.
G If you get gasoline in your eyes or if
you swallow gasoline, seek medical
attention immediately.
G If you spill gasoline on your skin or
clothing, immediately wash it off with
soap and water and change clothing.
G Never start the engine or let it run in
an enclosed area. Engine exhaust
fumes are poisonous and can result
loss of consciousness or death in a
short time.
G Never drain the float bowl when the
engine is hot. Severe burns may
result.
FUEL LINES
Fuel In
Fuel Pump
Ill.1
Pulse Line
Fuel Out
1. Check fuel lines for signs of wear, deterioration,
damage or leakage. Replace if necessary.
2. Be sure fuel lines are routed properly and secured
with cable ties. CAUTION: Make sure lines are
not kinked or pinched.
3. Replace all fuel lines every two years.
VENT LINES
Check engine, fuel tank, oil tank and carburetor vent
lines for signs of wear, deterioration, damage or
leakage. Replace every two years.
Be sure vent lines are routed properly and secured
with cable ties. CAUTION: Make sure lines are not
kinked or pinched.
FUEL VALVE
The Predator fuel system strains the fuel through
screens located in the fuel valve. There is no fuel filter
to service. To service the fuel valve:
1. Shut off fuel supply at fuel valve. Remove line
clamps and fuel lines from the tank.
2. Remove the tank and drain remainder of fuel into
a appropriate container.
3. Remove fuel valve by loosening the screws
holding the valve to the tank.
4. Inspect the valve for damage or debris. Replace
the valve if problems are found.
MAINTENANCE
2.12
5. Reverse the procedures to install the fuel valve.
6. Start engine and inspect for leaks.
CARBURETOR DRAINING
The carburetor float bowl should be drained
periodically to remove moisture or sediment from the
bowl, or before extended periods of storage.
NOTE: The bowl drain screw is located on the bottom
left side of the float bowl.
1. Turn fuel valve to the off position.
2. Place a clean container beneath the bowl drain
spigot or bowl drain hose.
3. Turn drain screw out two turns and allow fuel in
the float bowl and fuel line to drain completely.
4. Inspect the drained fuel for water or sediment.
5. Tighten drain screw.
6. Turn fuel valve to “ON”.
7. Start machine and check for leaks.
NOTE: All tubes attached to the carburetor must be
check for pinching or blockage, as this will effect
engine performance.
Drain Screw
Ill. 1
COMPRESSION TEST
NOTE: This engine has built--in decompression
components. Compression readings will vary in
proportion to cranking speed during the test. Average
compression (measured) is about 85--90 psi @ 400
RPM during a compression test.
A smooth idle generally indicates good compression.
Low engine compression is rarely a factor in running
condition problems above idle speed. Abnormally
high compression can be caused by carbon deposits
in the combustion chamber or worn, damaged
exhaust cam lobes. Inspect camshaft and
combustion chamber if compression is abnormally
high.
A cylinder leakdown test is the best indication of
engine condition. Follow manufacturer’s instructions
to perform a cylinder leakage test. (Never use high
pressure leakage testers, as crankshaft seals may
dislodge and leak).
Cylinder Leakdown
Service Limit 10 %
(Inspect for cause if leakage exceeds 10%)
Cylinder Compression
w/ decompression
Standard: 85--90 PSI @ 400 RPM
ENGINE MOUNTS
Inspect engine mounts and frame for cracks or
damage. (Ill.3)
Check engine fasteners and ensure they are tight.
Ill. 3
MAINTENANCE
2.13
SPARK PLUG INSPECTION
Spark Plug Removal and Replacement
1. Turn the fuel valve to OFF.
2. Remove the front cab.
3. Move the fuel valve hose clamp (1) forward and
gently remove the hose from the fuel valve fitting
on the gas tank.
1
2
3
4. Remove the vent hose (2) from the instrument
panel, taking note of the hose routing for
reinstallation.
5. Remove the tank mounting bolt (3) at the rear of
the gas tank.
6. Move the tank rearward and upward over the
engine. Slowly remove the tank, being careful not
to catch any hoses, wires or other components.
Place the tank on a stable surface or work bench
to protect the valve from contamination or
damage.
7. Remove spark plug high tension lead. Clean plug
area so no dirt and debris can fall into engine
when plug is removed.
8. Remove spark plug. and inspect electrodes for
wear and carbon buildup. The insulator tip should
be a light tan color, indicating good combustion.
Look for a sharp outer electrode edge with no
rounding or erosion.
9. If needed, clean spark plug with electrical contact
cleaner or a glass bead spark plug cleaner only.
CAUTION: Wire brushes or coated abrasives
should not be used.
10. Measure gap with a wire gauge. Refer to
specifications for proper spark plug type and gap.
Adjust gap if necessary by bending the side
electrode carefully.
11. If necessary, replace spark plug with proper type.
CAUTION: Severe engine damage may occur if
the incorrect spark plug is used.
12. Apply a small amount of anti-seize compound to
the spark plug threads.
13. Install spark plug and torque to specification.
Reverse steps as needed for reassembly.
Recommended Spark Plug:
NGK DCPR8E
Spark Plug Torque:
14 Ft. Lbs. (19 Nm)
.035 (0.9 mm)
Spark Plug Gap
IGNITION TIMING
Refer to Chapter 10 for ignition timing checks.
BATTERY MAINTENANCE
WARNING
Battery electrolyte is poisonous. It contains
sulfuric acid. Serious burns can result from con-
tact with skin, eyes or clothing. Antidote:
External: Flush with water.
Internal: Drink large quantities of water or milk.
Follow with milk of magnesia, beaten egg, or
vegetable oil. Call physician immediately.
Eyes: Flush with water for 15 minutes and get
prompt medical attention.
Batteries produce explosive gases. Keep
sparks, flame, cigarettes, etc. away. Ventilate
when charging or using in an enclosed space.
Always shield eyes when working near batter-
ies. KEEP OUT OF REACH OF CHILDREN.
The battery is located under the left rear fender.
NOTE: All Predator ATV batteries are
Maintenance--Free design and construction.
Before placing the battery into service, check the
battery condition and charge accordingly. Use of
Conventional Lead--Acid batteries is not
recommended.
MAINTENANCE
2.14
New Batteries: Batteries must be fully charged
before use or battery life will be reduced by
10-30% of full potential. Charge battery for 3--5
hours at a current equivalent of 1/10 of the
battery’s rated amp/hour capacity (i.e. 9 amp hr x
.10 = .9 amp charging). Do not use the alternator
to charge a new battery.
Maintenance--Free batteries are sealed at the
factory. The use of lead--calcium instead of
lead--antimony allows the battery acid to be fully
absorbed by the plates. Therefore, a
Maintenance--Free battery case is opaque and the
sealing caps are not removable, since there is no
need to check electrolyte level.
NEVER attempt to add electrolyte or water to a
Maintenance--Free battery. Doing so will damage
the case and shorten the life of the battery. Refer
to the Battery Maintenance Video (PN 9917987)
for proper instruction on servicing
Maintenance--Free batteries.
BATTERY
INSPECTION/REMOVAL
The battery is located under the left rear fender.
Battery
Location
To remove the battery:
1. Disconnect holder strap.
2. Disconnect battery negative (-) (black) cable first,
followed by the positive (+) (red) cable.
CAUTION
To reduce the chance of sparks: Whenever
removing the battery, disconnect the negative
(black) cable first. When reinstalling the battery,
install the negative cable last.
3. Remove the battery.
4. Clean battery cables and terminals with a stiff wire
brush. Corrosion can be removed using a solution
of one cup water and one tablespoon baking soda.
Rinse well with clean water and dry thoroughly. Test
battery for condition and charge accordingly.
5. Reinstall battery, attaching positive (+) (red) cable
first and then the negative (-) (black) cable.
6. Coat terminals and bolt threads with Dielectric
Grease (PN 2871329).
7. Reinstall battery cover and holder strap.
8. Reinstall the battery caps.
9. Charge battery at 1/10 of its amp/hour rating.
Example: 1/10 of 14 amp battery = 1.4 amp
10. Reinstall the battery after testing.
BATTERY TERMINALS/BOLTS
Use Polaris corrosion resistant Dielectric Grease (PN
2871329) on battery bolts.
OFF SEASON STORAGE
To prevent battery damage during extended periods
of non-use, the following basic battery maintenance
items must be performed:
G Remove the battery from the
machine and wash the case and
battery tray with a mild solution of
baking soda and water. Rinse with
lots of fresh water after cleaning.
NOTE: Do not get any of the baking
soda into the battery or the acid will
be neutralized.
G Using a wire brush or knife, remove
any corrosion from the cables and
terminals.
G Never add water to a sealed
maintenance free battery.
G Charge at a rate no greater than 1/10
of the battery’s amp/hr capacity until
the open circuit voltage is 12.9V or
greater.
G Store the battery either in the machine
with the cables disconnected, or store
in a cool place.
CHARGING PROCEDURE
1. Remove the battery from the ATV to prevent
damage from leaking or spilled acid during
charging.
2. Charge the battery with a charging output no
larger than 1/10 of the battery’s amp/hr rating.
Charge as needed to raise the battery open circuit
voltage to 12.9V or greater.
Thank you very much
for your reading.
Please Click Here
Then Get More
Information.

More Related Content

What's hot

[Kia] manual de_taller_kia_sorento
[Kia] manual de_taller_kia_sorento[Kia] manual de_taller_kia_sorento
[Kia] manual de_taller_kia_sorentoFrancisco Arvizu
 
MANUAL ENGINE 1/2KD-FTV TOYOTA SISTEMA COMNON RAIL
MANUAL ENGINE 1/2KD-FTV TOYOTA SISTEMA COMNON RAILMANUAL ENGINE 1/2KD-FTV TOYOTA SISTEMA COMNON RAIL
MANUAL ENGINE 1/2KD-FTV TOYOTA SISTEMA COMNON RAILInês Krug
 
Manual técnico correias automotivas goodyear e contitech 2
Manual técnico correias automotivas goodyear e contitech 2Manual técnico correias automotivas goodyear e contitech 2
Manual técnico correias automotivas goodyear e contitech 2Sergio Favaro
 
Presentation(Turbocharger)
Presentation(Turbocharger)Presentation(Turbocharger)
Presentation(Turbocharger)Syihab umam
 
Diesel fuel injection system
Diesel fuel injection systemDiesel fuel injection system
Diesel fuel injection systemINTAKHAB KHAN
 
Digital twin spark ignition
Digital twin spark ignitionDigital twin spark ignition
Digital twin spark ignitionYashwadhan Sahi
 
Bab iv. modul i mekanisme katup
Bab iv. modul i mekanisme katupBab iv. modul i mekanisme katup
Bab iv. modul i mekanisme katupFatkur Rohman
 
Clutches, rwd and fwd manual transmission
Clutches, rwd and fwd manual transmissionClutches, rwd and fwd manual transmission
Clutches, rwd and fwd manual transmissionCraig Kielb
 
Automobile engineering e book
Automobile engineering e bookAutomobile engineering e book
Automobile engineering e bookVivek Sharma
 
Unit 1--VEHICLE STRUCTURE AND ENGINES
Unit 1--VEHICLE STRUCTURE AND ENGINESUnit 1--VEHICLE STRUCTURE AND ENGINES
Unit 1--VEHICLE STRUCTURE AND ENGINESkarthi keyan
 
Catálogo Contitech 2014
Catálogo Contitech 2014Catálogo Contitech 2014
Catálogo Contitech 2014mapplemkt
 
Parts catalog beat_fi
Parts catalog beat_fiParts catalog beat_fi
Parts catalog beat_fifatha_
 
Fuel Injectors
Fuel InjectorsFuel Injectors
Fuel Injectorsmwrieck
 

What's hot (20)

[Kia] manual de_taller_kia_sorento
[Kia] manual de_taller_kia_sorento[Kia] manual de_taller_kia_sorento
[Kia] manual de_taller_kia_sorento
 
MANUAL ENGINE 1/2KD-FTV TOYOTA SISTEMA COMNON RAIL
MANUAL ENGINE 1/2KD-FTV TOYOTA SISTEMA COMNON RAILMANUAL ENGINE 1/2KD-FTV TOYOTA SISTEMA COMNON RAIL
MANUAL ENGINE 1/2KD-FTV TOYOTA SISTEMA COMNON RAIL
 
Manual técnico correias automotivas goodyear e contitech 2
Manual técnico correias automotivas goodyear e contitech 2Manual técnico correias automotivas goodyear e contitech 2
Manual técnico correias automotivas goodyear e contitech 2
 
Presentation(Turbocharger)
Presentation(Turbocharger)Presentation(Turbocharger)
Presentation(Turbocharger)
 
Diesel fuel injection system
Diesel fuel injection systemDiesel fuel injection system
Diesel fuel injection system
 
Digital twin spark ignition
Digital twin spark ignitionDigital twin spark ignition
Digital twin spark ignition
 
Transmission (1)
Transmission (1)Transmission (1)
Transmission (1)
 
Inyectores
Inyectores Inyectores
Inyectores
 
Tabela boia-combustivel
Tabela boia-combustivelTabela boia-combustivel
Tabela boia-combustivel
 
Bab iv. modul i mekanisme katup
Bab iv. modul i mekanisme katupBab iv. modul i mekanisme katup
Bab iv. modul i mekanisme katup
 
Clutches, rwd and fwd manual transmission
Clutches, rwd and fwd manual transmissionClutches, rwd and fwd manual transmission
Clutches, rwd and fwd manual transmission
 
70 c16 euro3
70 c16 euro370 c16 euro3
70 c16 euro3
 
Power Stearing
Power StearingPower Stearing
Power Stearing
 
Automobile engineering e book
Automobile engineering e bookAutomobile engineering e book
Automobile engineering e book
 
BCH Catalog
BCH CatalogBCH Catalog
BCH Catalog
 
Unit 1--VEHICLE STRUCTURE AND ENGINES
Unit 1--VEHICLE STRUCTURE AND ENGINESUnit 1--VEHICLE STRUCTURE AND ENGINES
Unit 1--VEHICLE STRUCTURE AND ENGINES
 
Catálogo Contitech 2014
Catálogo Contitech 2014Catálogo Contitech 2014
Catálogo Contitech 2014
 
Corsa reles
Corsa relesCorsa reles
Corsa reles
 
Parts catalog beat_fi
Parts catalog beat_fiParts catalog beat_fi
Parts catalog beat_fi
 
Fuel Injectors
Fuel InjectorsFuel Injectors
Fuel Injectors
 

Similar to 2003 Polaris Predator 500 Service Repair Manual

2009 Polaris Scrambler 500 2X4 International Service Repair Manual
2009 Polaris Scrambler 500 2X4 International Service Repair Manual2009 Polaris Scrambler 500 2X4 International Service Repair Manual
2009 Polaris Scrambler 500 2X4 International Service Repair Manualjkdmsmem
 
2009 Polaris Sportsman 300 2X4 Service Repair Manual.pdf
2009 Polaris Sportsman 300 2X4 Service Repair Manual.pdf2009 Polaris Sportsman 300 2X4 Service Repair Manual.pdf
2009 Polaris Sportsman 300 2X4 Service Repair Manual.pdfjjkdmsmmd
 
2009 Polaris Sportsman 300 4X4 Service Repair Manual.pdf
2009 Polaris Sportsman 300 4X4 Service Repair Manual.pdf2009 Polaris Sportsman 300 4X4 Service Repair Manual.pdf
2009 Polaris Sportsman 300 4X4 Service Repair Manual.pdfjjkdmsmmd
 
2009 Polaris Sportsman 400 4X4 HO Service Repair Manual.pdf
2009 Polaris Sportsman 400 4X4 HO Service Repair Manual.pdf2009 Polaris Sportsman 400 4X4 HO Service Repair Manual.pdf
2009 Polaris Sportsman 400 4X4 HO Service Repair Manual.pdfjjkdmsmmd
 
2009 POLARIS RANGER 4X4 500 EFI Service Repair Manual
2009 POLARIS RANGER 4X4 500 EFI Service Repair Manual2009 POLARIS RANGER 4X4 500 EFI Service Repair Manual
2009 POLARIS RANGER 4X4 500 EFI Service Repair Manualjksemd jksemm
 
2009 polaris sportsman xp 850 international service repair manual
2009 polaris sportsman xp 850 international service repair manual2009 polaris sportsman xp 850 international service repair manual
2009 polaris sportsman xp 850 international service repair manualdfjjkskeksmem
 
2009 polaris sportsman xp 850 service repair manual
2009 polaris sportsman xp 850 service repair manual2009 polaris sportsman xp 850 service repair manual
2009 polaris sportsman xp 850 service repair manualfjjsieskekfmmse
 
2009 polaris sportsman xp eps 850 service repair manual
2009 polaris sportsman xp eps 850 service repair manual2009 polaris sportsman xp eps 850 service repair manual
2009 polaris sportsman xp eps 850 service repair manualfkjsekksmem
 
2005 polaris 120 pro x snowmobile service repair manual
2005 polaris 120 pro x snowmobile service repair manual2005 polaris 120 pro x snowmobile service repair manual
2005 polaris 120 pro x snowmobile service repair manualfjjfyjsekdmme
 
2005 polaris 120 pro x euro snowmobile service repair manual
2005 polaris 120 pro x euro snowmobile service repair manual2005 polaris 120 pro x euro snowmobile service repair manual
2005 polaris 120 pro x euro snowmobile service repair manualfjjsekwsxkdmmem
 
2009 polaris sportsman touring 500 efi service repair manual
2009 polaris sportsman touring 500 efi service repair manual2009 polaris sportsman touring 500 efi service repair manual
2009 polaris sportsman touring 500 efi service repair manualfhsejkdkmem
 
2009 polaris sportsman touring 500 efi quadricycle service repair manual
2009 polaris sportsman touring 500 efi quadricycle service repair manual2009 polaris sportsman touring 500 efi quadricycle service repair manual
2009 polaris sportsman touring 500 efi quadricycle service repair manualfjjsekdmme
 
2009 polaris sportsman 500 efi tractor service repair manual
2009 polaris sportsman 500 efi tractor service repair manual2009 polaris sportsman 500 efi tractor service repair manual
2009 polaris sportsman 500 efi tractor service repair manualfjkskekxsdcmdmme
 
2009 polaris sportsman 500 ho service repair manual
2009 polaris sportsman 500 ho service repair manual2009 polaris sportsman 500 ho service repair manual
2009 polaris sportsman 500 ho service repair manualfjjskekmdmme
 
2009 Polaris Sportsman 500 EFI Service Repair Manual
2009 Polaris Sportsman 500 EFI Service Repair Manual2009 Polaris Sportsman 500 EFI Service Repair Manual
2009 Polaris Sportsman 500 EFI Service Repair Manualjkmsmd yedkmd
 
2009 polaris sportsman 500 ho service repair manual
2009 polaris sportsman 500 ho service repair manual2009 polaris sportsman 500 ho service repair manual
2009 polaris sportsman 500 ho service repair manualfjjskekmdmme
 

Similar to 2003 Polaris Predator 500 Service Repair Manual (16)

2009 Polaris Scrambler 500 2X4 International Service Repair Manual
2009 Polaris Scrambler 500 2X4 International Service Repair Manual2009 Polaris Scrambler 500 2X4 International Service Repair Manual
2009 Polaris Scrambler 500 2X4 International Service Repair Manual
 
2009 Polaris Sportsman 300 2X4 Service Repair Manual.pdf
2009 Polaris Sportsman 300 2X4 Service Repair Manual.pdf2009 Polaris Sportsman 300 2X4 Service Repair Manual.pdf
2009 Polaris Sportsman 300 2X4 Service Repair Manual.pdf
 
2009 Polaris Sportsman 300 4X4 Service Repair Manual.pdf
2009 Polaris Sportsman 300 4X4 Service Repair Manual.pdf2009 Polaris Sportsman 300 4X4 Service Repair Manual.pdf
2009 Polaris Sportsman 300 4X4 Service Repair Manual.pdf
 
2009 Polaris Sportsman 400 4X4 HO Service Repair Manual.pdf
2009 Polaris Sportsman 400 4X4 HO Service Repair Manual.pdf2009 Polaris Sportsman 400 4X4 HO Service Repair Manual.pdf
2009 Polaris Sportsman 400 4X4 HO Service Repair Manual.pdf
 
2009 POLARIS RANGER 4X4 500 EFI Service Repair Manual
2009 POLARIS RANGER 4X4 500 EFI Service Repair Manual2009 POLARIS RANGER 4X4 500 EFI Service Repair Manual
2009 POLARIS RANGER 4X4 500 EFI Service Repair Manual
 
2009 polaris sportsman xp 850 international service repair manual
2009 polaris sportsman xp 850 international service repair manual2009 polaris sportsman xp 850 international service repair manual
2009 polaris sportsman xp 850 international service repair manual
 
2009 polaris sportsman xp 850 service repair manual
2009 polaris sportsman xp 850 service repair manual2009 polaris sportsman xp 850 service repair manual
2009 polaris sportsman xp 850 service repair manual
 
2009 polaris sportsman xp eps 850 service repair manual
2009 polaris sportsman xp eps 850 service repair manual2009 polaris sportsman xp eps 850 service repair manual
2009 polaris sportsman xp eps 850 service repair manual
 
2005 polaris 120 pro x snowmobile service repair manual
2005 polaris 120 pro x snowmobile service repair manual2005 polaris 120 pro x snowmobile service repair manual
2005 polaris 120 pro x snowmobile service repair manual
 
2005 polaris 120 pro x euro snowmobile service repair manual
2005 polaris 120 pro x euro snowmobile service repair manual2005 polaris 120 pro x euro snowmobile service repair manual
2005 polaris 120 pro x euro snowmobile service repair manual
 
2009 polaris sportsman touring 500 efi service repair manual
2009 polaris sportsman touring 500 efi service repair manual2009 polaris sportsman touring 500 efi service repair manual
2009 polaris sportsman touring 500 efi service repair manual
 
2009 polaris sportsman touring 500 efi quadricycle service repair manual
2009 polaris sportsman touring 500 efi quadricycle service repair manual2009 polaris sportsman touring 500 efi quadricycle service repair manual
2009 polaris sportsman touring 500 efi quadricycle service repair manual
 
2009 polaris sportsman 500 efi tractor service repair manual
2009 polaris sportsman 500 efi tractor service repair manual2009 polaris sportsman 500 efi tractor service repair manual
2009 polaris sportsman 500 efi tractor service repair manual
 
2009 polaris sportsman 500 ho service repair manual
2009 polaris sportsman 500 ho service repair manual2009 polaris sportsman 500 ho service repair manual
2009 polaris sportsman 500 ho service repair manual
 
2009 Polaris Sportsman 500 EFI Service Repair Manual
2009 Polaris Sportsman 500 EFI Service Repair Manual2009 Polaris Sportsman 500 EFI Service Repair Manual
2009 Polaris Sportsman 500 EFI Service Repair Manual
 
2009 polaris sportsman 500 ho service repair manual
2009 polaris sportsman 500 ho service repair manual2009 polaris sportsman 500 ho service repair manual
2009 polaris sportsman 500 ho service repair manual
 

More from hskekdmmm

2011 Arctic Cat Prowler HDX Service Repair Manual
2011 Arctic Cat Prowler HDX Service Repair Manual2011 Arctic Cat Prowler HDX Service Repair Manual
2011 Arctic Cat Prowler HDX Service Repair Manualhskekdmmm
 
2008 Porsche Boxster 987 Service Repair Manual
2008 Porsche Boxster 987 Service Repair Manual2008 Porsche Boxster 987 Service Repair Manual
2008 Porsche Boxster 987 Service Repair Manualhskekdmmm
 
2007 Buick Rainier Service Repair Manual
2007 Buick Rainier Service Repair Manual2007 Buick Rainier Service Repair Manual
2007 Buick Rainier Service Repair Manualhskekdmmm
 
2006 Polaris 700 RMK 159 SNOWMOBILE Service Repair Manual
2006 Polaris 700 RMK 159 SNOWMOBILE Service Repair Manual2006 Polaris 700 RMK 159 SNOWMOBILE Service Repair Manual
2006 Polaris 700 RMK 159 SNOWMOBILE Service Repair Manualhskekdmmm
 
2004 Suzuki SQ416 SQ420 SQ625 Grand Vitara Service Repair Manual
2004 Suzuki SQ416 SQ420 SQ625 Grand Vitara Service Repair Manual2004 Suzuki SQ416 SQ420 SQ625 Grand Vitara Service Repair Manual
2004 Suzuki SQ416 SQ420 SQ625 Grand Vitara Service Repair Manualhskekdmmm
 
2003 Polaris Sportsman 700 Twin Service Repair Manual
2003 Polaris Sportsman 700 Twin Service Repair Manual2003 Polaris Sportsman 700 Twin Service Repair Manual
2003 Polaris Sportsman 700 Twin Service Repair Manualhskekdmmm
 
1982 Porsche 928 Service Repair Manual
1982 Porsche 928 Service Repair Manual1982 Porsche 928 Service Repair Manual
1982 Porsche 928 Service Repair Manualhskekdmmm
 
Bobcat S175 S185 Skid Steer Loader Parts Catalogue Manual S/N 5253 11001 & Above
Bobcat S175 S185 Skid Steer Loader Parts Catalogue Manual S/N 5253 11001 & AboveBobcat S175 S185 Skid Steer Loader Parts Catalogue Manual S/N 5253 11001 & Above
Bobcat S175 S185 Skid Steer Loader Parts Catalogue Manual S/N 5253 11001 & Abovehskekdmmm
 
2010 YAMAHA LF250CA 4-STROKE OUTBOARD Service Repair Manual SN:1000001 and up
2010 YAMAHA LF250CA 4-STROKE OUTBOARD Service Repair Manual SN:1000001 and up2010 YAMAHA LF250CA 4-STROKE OUTBOARD Service Repair Manual SN:1000001 and up
2010 YAMAHA LF250CA 4-STROKE OUTBOARD Service Repair Manual SN:1000001 and uphskekdmmm
 
2008 Nissan Altima Service Repair Manual
2008 Nissan Altima Service Repair Manual2008 Nissan Altima Service Repair Manual
2008 Nissan Altima Service Repair Manualhskekdmmm
 
2005 Arctic Cat 400 4x4 manual VP ATV Service Repair Manual
2005 Arctic Cat 400 4x4 manual VP ATV Service Repair Manual2005 Arctic Cat 400 4x4 manual VP ATV Service Repair Manual
2005 Arctic Cat 400 4x4 manual VP ATV Service Repair Manualhskekdmmm
 
2002 Polaris 800 XCR SNOWMOBILE Service Repair Manual
2002 Polaris 800 XCR SNOWMOBILE Service Repair Manual2002 Polaris 800 XCR SNOWMOBILE Service Repair Manual
2002 Polaris 800 XCR SNOWMOBILE Service Repair Manualhskekdmmm
 
1988 HARLEY DAVIDSON SOFTAIL Service Repair Manual
1988 HARLEY DAVIDSON SOFTAIL Service Repair Manual1988 HARLEY DAVIDSON SOFTAIL Service Repair Manual
1988 HARLEY DAVIDSON SOFTAIL Service Repair Manualhskekdmmm
 

More from hskekdmmm (13)

2011 Arctic Cat Prowler HDX Service Repair Manual
2011 Arctic Cat Prowler HDX Service Repair Manual2011 Arctic Cat Prowler HDX Service Repair Manual
2011 Arctic Cat Prowler HDX Service Repair Manual
 
2008 Porsche Boxster 987 Service Repair Manual
2008 Porsche Boxster 987 Service Repair Manual2008 Porsche Boxster 987 Service Repair Manual
2008 Porsche Boxster 987 Service Repair Manual
 
2007 Buick Rainier Service Repair Manual
2007 Buick Rainier Service Repair Manual2007 Buick Rainier Service Repair Manual
2007 Buick Rainier Service Repair Manual
 
2006 Polaris 700 RMK 159 SNOWMOBILE Service Repair Manual
2006 Polaris 700 RMK 159 SNOWMOBILE Service Repair Manual2006 Polaris 700 RMK 159 SNOWMOBILE Service Repair Manual
2006 Polaris 700 RMK 159 SNOWMOBILE Service Repair Manual
 
2004 Suzuki SQ416 SQ420 SQ625 Grand Vitara Service Repair Manual
2004 Suzuki SQ416 SQ420 SQ625 Grand Vitara Service Repair Manual2004 Suzuki SQ416 SQ420 SQ625 Grand Vitara Service Repair Manual
2004 Suzuki SQ416 SQ420 SQ625 Grand Vitara Service Repair Manual
 
2003 Polaris Sportsman 700 Twin Service Repair Manual
2003 Polaris Sportsman 700 Twin Service Repair Manual2003 Polaris Sportsman 700 Twin Service Repair Manual
2003 Polaris Sportsman 700 Twin Service Repair Manual
 
1982 Porsche 928 Service Repair Manual
1982 Porsche 928 Service Repair Manual1982 Porsche 928 Service Repair Manual
1982 Porsche 928 Service Repair Manual
 
Bobcat S175 S185 Skid Steer Loader Parts Catalogue Manual S/N 5253 11001 & Above
Bobcat S175 S185 Skid Steer Loader Parts Catalogue Manual S/N 5253 11001 & AboveBobcat S175 S185 Skid Steer Loader Parts Catalogue Manual S/N 5253 11001 & Above
Bobcat S175 S185 Skid Steer Loader Parts Catalogue Manual S/N 5253 11001 & Above
 
2010 YAMAHA LF250CA 4-STROKE OUTBOARD Service Repair Manual SN:1000001 and up
2010 YAMAHA LF250CA 4-STROKE OUTBOARD Service Repair Manual SN:1000001 and up2010 YAMAHA LF250CA 4-STROKE OUTBOARD Service Repair Manual SN:1000001 and up
2010 YAMAHA LF250CA 4-STROKE OUTBOARD Service Repair Manual SN:1000001 and up
 
2008 Nissan Altima Service Repair Manual
2008 Nissan Altima Service Repair Manual2008 Nissan Altima Service Repair Manual
2008 Nissan Altima Service Repair Manual
 
2005 Arctic Cat 400 4x4 manual VP ATV Service Repair Manual
2005 Arctic Cat 400 4x4 manual VP ATV Service Repair Manual2005 Arctic Cat 400 4x4 manual VP ATV Service Repair Manual
2005 Arctic Cat 400 4x4 manual VP ATV Service Repair Manual
 
2002 Polaris 800 XCR SNOWMOBILE Service Repair Manual
2002 Polaris 800 XCR SNOWMOBILE Service Repair Manual2002 Polaris 800 XCR SNOWMOBILE Service Repair Manual
2002 Polaris 800 XCR SNOWMOBILE Service Repair Manual
 
1988 HARLEY DAVIDSON SOFTAIL Service Repair Manual
1988 HARLEY DAVIDSON SOFTAIL Service Repair Manual1988 HARLEY DAVIDSON SOFTAIL Service Repair Manual
1988 HARLEY DAVIDSON SOFTAIL Service Repair Manual
 

Recently uploaded

GREEN VEHICLES the kids picture show 2024
GREEN VEHICLES the kids picture show 2024GREEN VEHICLES the kids picture show 2024
GREEN VEHICLES the kids picture show 2024AHOhOops1
 
办理埃默里大学毕业证Emory毕业证原版一比一
办理埃默里大学毕业证Emory毕业证原版一比一办理埃默里大学毕业证Emory毕业证原版一比一
办理埃默里大学毕业证Emory毕业证原版一比一mkfnjj
 
办理学位证(MLU文凭证书)哈勒 维滕贝格大学毕业证成绩单原版一模一样
办理学位证(MLU文凭证书)哈勒 维滕贝格大学毕业证成绩单原版一模一样办理学位证(MLU文凭证书)哈勒 维滕贝格大学毕业证成绩单原版一模一样
办理学位证(MLU文凭证书)哈勒 维滕贝格大学毕业证成绩单原版一模一样umasea
 
如何办理爱尔兰都柏林大学毕业证(UCD毕业证) 成绩单原版一比一
如何办理爱尔兰都柏林大学毕业证(UCD毕业证) 成绩单原版一比一如何办理爱尔兰都柏林大学毕业证(UCD毕业证) 成绩单原版一比一
如何办理爱尔兰都柏林大学毕业证(UCD毕业证) 成绩单原版一比一mjyguplun
 
VDA 6.3 Process Approach in Automotive Industries
VDA 6.3 Process Approach in Automotive IndustriesVDA 6.3 Process Approach in Automotive Industries
VDA 6.3 Process Approach in Automotive IndustriesKannanDN
 
UNIT-III-TRANSMISSION SYSTEMS REAR AXLES
UNIT-III-TRANSMISSION SYSTEMS REAR AXLESUNIT-III-TRANSMISSION SYSTEMS REAR AXLES
UNIT-III-TRANSMISSION SYSTEMS REAR AXLESDineshKumar4165
 
Innovating Manufacturing with CNC Technology
Innovating Manufacturing with CNC TechnologyInnovating Manufacturing with CNC Technology
Innovating Manufacturing with CNC Technologyquickpartslimitlessm
 
FULL ENJOY - 9953040155 Call Girls in Sector 61 | Noida
FULL ENJOY - 9953040155 Call Girls in Sector 61 | NoidaFULL ENJOY - 9953040155 Call Girls in Sector 61 | Noida
FULL ENJOY - 9953040155 Call Girls in Sector 61 | NoidaMalviyaNagarCallGirl
 
What Could Cause A VW Tiguan's Radiator Fan To Stop Working
What Could Cause A VW Tiguan's Radiator Fan To Stop WorkingWhat Could Cause A VW Tiguan's Radiator Fan To Stop Working
What Could Cause A VW Tiguan's Radiator Fan To Stop WorkingEscondido German Auto
 
BLUE VEHICLES the kids picture show 2024
BLUE VEHICLES the kids picture show 2024BLUE VEHICLES the kids picture show 2024
BLUE VEHICLES the kids picture show 2024AHOhOops1
 
定制昆士兰大学毕业证(本硕)UQ学位证书原版一比一
定制昆士兰大学毕业证(本硕)UQ学位证书原版一比一定制昆士兰大学毕业证(本硕)UQ学位证书原版一比一
定制昆士兰大学毕业证(本硕)UQ学位证书原版一比一fjjhfuubb
 
VIP Kolkata Call Girl Kasba 👉 8250192130 Available With Room
VIP Kolkata Call Girl Kasba 👉 8250192130  Available With RoomVIP Kolkata Call Girl Kasba 👉 8250192130  Available With Room
VIP Kolkata Call Girl Kasba 👉 8250192130 Available With Roomdivyansh0kumar0
 
( Best ) Genuine Call Girls In Mandi House =DELHI-| 8377087607
( Best ) Genuine Call Girls In Mandi House =DELHI-| 8377087607( Best ) Genuine Call Girls In Mandi House =DELHI-| 8377087607
( Best ) Genuine Call Girls In Mandi House =DELHI-| 8377087607dollysharma2066
 
2024 TOP 10 most fuel-efficient vehicles according to the US agency
2024 TOP 10 most fuel-efficient vehicles according to the US agency2024 TOP 10 most fuel-efficient vehicles according to the US agency
2024 TOP 10 most fuel-efficient vehicles according to the US agencyHyundai Motor Group
 
Russian Call Girls Delhi Indirapuram {9711199171} Aarvi Gupta ✌️Independent ...
Russian  Call Girls Delhi Indirapuram {9711199171} Aarvi Gupta ✌️Independent ...Russian  Call Girls Delhi Indirapuram {9711199171} Aarvi Gupta ✌️Independent ...
Russian Call Girls Delhi Indirapuram {9711199171} Aarvi Gupta ✌️Independent ...shivangimorya083
 
UNOSAFE ELEVATOR PRIVATE LTD BANGALORE BROUCHER
UNOSAFE ELEVATOR PRIVATE LTD BANGALORE BROUCHERUNOSAFE ELEVATOR PRIVATE LTD BANGALORE BROUCHER
UNOSAFE ELEVATOR PRIVATE LTD BANGALORE BROUCHERunosafeads
 
call girls in G.T.B. Nagar (DELHI) 🔝 >༒9953330565🔝 genuine Escort Service 🔝✔️✔️
call girls in  G.T.B. Nagar (DELHI) 🔝 >༒9953330565🔝 genuine Escort Service 🔝✔️✔️call girls in  G.T.B. Nagar (DELHI) 🔝 >༒9953330565🔝 genuine Escort Service 🔝✔️✔️
call girls in G.T.B. Nagar (DELHI) 🔝 >༒9953330565🔝 genuine Escort Service 🔝✔️✔️9953056974 Low Rate Call Girls In Saket, Delhi NCR
 
UNIT-IV-STEERING, BRAKES AND SUSPENSION SYSTEMS.pptx
UNIT-IV-STEERING, BRAKES AND SUSPENSION SYSTEMS.pptxUNIT-IV-STEERING, BRAKES AND SUSPENSION SYSTEMS.pptx
UNIT-IV-STEERING, BRAKES AND SUSPENSION SYSTEMS.pptxDineshKumar4165
 
Hauz Khas Call Girls ☎ 7042364481 independent Escorts Service in delhi
Hauz Khas Call Girls ☎ 7042364481 independent Escorts Service in delhiHauz Khas Call Girls ☎ 7042364481 independent Escorts Service in delhi
Hauz Khas Call Girls ☎ 7042364481 independent Escorts Service in delhiHot Call Girls In Sector 58 (Noida)
 

Recently uploaded (20)

GREEN VEHICLES the kids picture show 2024
GREEN VEHICLES the kids picture show 2024GREEN VEHICLES the kids picture show 2024
GREEN VEHICLES the kids picture show 2024
 
办理埃默里大学毕业证Emory毕业证原版一比一
办理埃默里大学毕业证Emory毕业证原版一比一办理埃默里大学毕业证Emory毕业证原版一比一
办理埃默里大学毕业证Emory毕业证原版一比一
 
办理学位证(MLU文凭证书)哈勒 维滕贝格大学毕业证成绩单原版一模一样
办理学位证(MLU文凭证书)哈勒 维滕贝格大学毕业证成绩单原版一模一样办理学位证(MLU文凭证书)哈勒 维滕贝格大学毕业证成绩单原版一模一样
办理学位证(MLU文凭证书)哈勒 维滕贝格大学毕业证成绩单原版一模一样
 
如何办理爱尔兰都柏林大学毕业证(UCD毕业证) 成绩单原版一比一
如何办理爱尔兰都柏林大学毕业证(UCD毕业证) 成绩单原版一比一如何办理爱尔兰都柏林大学毕业证(UCD毕业证) 成绩单原版一比一
如何办理爱尔兰都柏林大学毕业证(UCD毕业证) 成绩单原版一比一
 
VDA 6.3 Process Approach in Automotive Industries
VDA 6.3 Process Approach in Automotive IndustriesVDA 6.3 Process Approach in Automotive Industries
VDA 6.3 Process Approach in Automotive Industries
 
UNIT-III-TRANSMISSION SYSTEMS REAR AXLES
UNIT-III-TRANSMISSION SYSTEMS REAR AXLESUNIT-III-TRANSMISSION SYSTEMS REAR AXLES
UNIT-III-TRANSMISSION SYSTEMS REAR AXLES
 
Innovating Manufacturing with CNC Technology
Innovating Manufacturing with CNC TechnologyInnovating Manufacturing with CNC Technology
Innovating Manufacturing with CNC Technology
 
FULL ENJOY - 9953040155 Call Girls in Sector 61 | Noida
FULL ENJOY - 9953040155 Call Girls in Sector 61 | NoidaFULL ENJOY - 9953040155 Call Girls in Sector 61 | Noida
FULL ENJOY - 9953040155 Call Girls in Sector 61 | Noida
 
What Could Cause A VW Tiguan's Radiator Fan To Stop Working
What Could Cause A VW Tiguan's Radiator Fan To Stop WorkingWhat Could Cause A VW Tiguan's Radiator Fan To Stop Working
What Could Cause A VW Tiguan's Radiator Fan To Stop Working
 
BLUE VEHICLES the kids picture show 2024
BLUE VEHICLES the kids picture show 2024BLUE VEHICLES the kids picture show 2024
BLUE VEHICLES the kids picture show 2024
 
定制昆士兰大学毕业证(本硕)UQ学位证书原版一比一
定制昆士兰大学毕业证(本硕)UQ学位证书原版一比一定制昆士兰大学毕业证(本硕)UQ学位证书原版一比一
定制昆士兰大学毕业证(本硕)UQ学位证书原版一比一
 
VIP Kolkata Call Girl Kasba 👉 8250192130 Available With Room
VIP Kolkata Call Girl Kasba 👉 8250192130  Available With RoomVIP Kolkata Call Girl Kasba 👉 8250192130  Available With Room
VIP Kolkata Call Girl Kasba 👉 8250192130 Available With Room
 
( Best ) Genuine Call Girls In Mandi House =DELHI-| 8377087607
( Best ) Genuine Call Girls In Mandi House =DELHI-| 8377087607( Best ) Genuine Call Girls In Mandi House =DELHI-| 8377087607
( Best ) Genuine Call Girls In Mandi House =DELHI-| 8377087607
 
2024 TOP 10 most fuel-efficient vehicles according to the US agency
2024 TOP 10 most fuel-efficient vehicles according to the US agency2024 TOP 10 most fuel-efficient vehicles according to the US agency
2024 TOP 10 most fuel-efficient vehicles according to the US agency
 
Call Girls In Kirti Nagar 📱 9999965857 🤩 Delhi 🫦 HOT AND SEXY VVIP 🍎 SERVICE
Call Girls In Kirti Nagar 📱  9999965857  🤩 Delhi 🫦 HOT AND SEXY VVIP 🍎 SERVICECall Girls In Kirti Nagar 📱  9999965857  🤩 Delhi 🫦 HOT AND SEXY VVIP 🍎 SERVICE
Call Girls In Kirti Nagar 📱 9999965857 🤩 Delhi 🫦 HOT AND SEXY VVIP 🍎 SERVICE
 
Russian Call Girls Delhi Indirapuram {9711199171} Aarvi Gupta ✌️Independent ...
Russian  Call Girls Delhi Indirapuram {9711199171} Aarvi Gupta ✌️Independent ...Russian  Call Girls Delhi Indirapuram {9711199171} Aarvi Gupta ✌️Independent ...
Russian Call Girls Delhi Indirapuram {9711199171} Aarvi Gupta ✌️Independent ...
 
UNOSAFE ELEVATOR PRIVATE LTD BANGALORE BROUCHER
UNOSAFE ELEVATOR PRIVATE LTD BANGALORE BROUCHERUNOSAFE ELEVATOR PRIVATE LTD BANGALORE BROUCHER
UNOSAFE ELEVATOR PRIVATE LTD BANGALORE BROUCHER
 
call girls in G.T.B. Nagar (DELHI) 🔝 >༒9953330565🔝 genuine Escort Service 🔝✔️✔️
call girls in  G.T.B. Nagar (DELHI) 🔝 >༒9953330565🔝 genuine Escort Service 🔝✔️✔️call girls in  G.T.B. Nagar (DELHI) 🔝 >༒9953330565🔝 genuine Escort Service 🔝✔️✔️
call girls in G.T.B. Nagar (DELHI) 🔝 >༒9953330565🔝 genuine Escort Service 🔝✔️✔️
 
UNIT-IV-STEERING, BRAKES AND SUSPENSION SYSTEMS.pptx
UNIT-IV-STEERING, BRAKES AND SUSPENSION SYSTEMS.pptxUNIT-IV-STEERING, BRAKES AND SUSPENSION SYSTEMS.pptx
UNIT-IV-STEERING, BRAKES AND SUSPENSION SYSTEMS.pptx
 
Hauz Khas Call Girls ☎ 7042364481 independent Escorts Service in delhi
Hauz Khas Call Girls ☎ 7042364481 independent Escorts Service in delhiHauz Khas Call Girls ☎ 7042364481 independent Escorts Service in delhi
Hauz Khas Call Girls ☎ 7042364481 independent Escorts Service in delhi
 

2003 Polaris Predator 500 Service Repair Manual

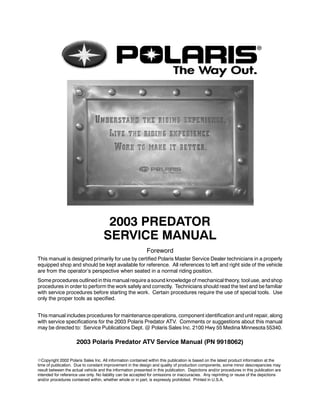
  • 1. 2003 PREDATOR SERVICE MANUAL Foreword This manual is designed primarily for use by certified Polaris Master Service Dealer technicians in a properly equipped shop and should be kept available for reference. All references to left and right side of the vehicle are from the operator’s perspective when seated in a normal riding position. Some procedures outlined in this manual require a sound knowledge of mechanical theory, tool use, and shop procedures in order to perform the work safely and correctly. Technicians should read the text and be familiar with service procedures before starting the work. Certain procedures require the use of special tools. Use only the proper tools as specified. This manual includes procedures for maintenance operations, component identification and unit repair, along with service specifications for the 2003 Polaris Predator ATV. Comments or suggestions about this manual may be directed to: Service Publications Dept. @ Polaris Sales Inc. 2100 Hwy 55 Medina Minnesota 55340. 2003 Polaris Predator ATV Service Manual (PN 9918062) ECopyright 2002 Polaris Sales Inc. All information contained within this publication is based on the latest product information at the time of publication. Due to constant improvement in the design and quality of production components, some minor descrepancies may result between the actual vehicle and the information presented in this publication. Depictions and/or procedures in this publication are intended for reference use only. No liability can be accepted for omissions or inaccuracies. Any reprinting or reuse of the depictions and/or procedures contained within, whether whole or in part, is expressly prohibited. Printed in U.S.A.
  • 2. UNDERSTANDING SAFETY LABELS AND INSTRUCTIONS Throughout these instructions, important information is brought to your attention by the following symbols: The Safety Alert Symbol means ATTENTION! BECOME ALERT! YOUR SAFETY IS INVOLVED! DANGER Failure to follow DANGER instructions will result in severe injury or death to the operator, bystander or person inspecting or servicing the ATV. WARNING Failure to follow WARNING instructions could result in severe injury or death to the operator, bystander or person inspecting or servicing the ATV. CAUTION: A CAUTION indicates special precautions that must be taken to avoid personal injury, or ATV or property damage. NOTE: A NOTE provides key information to clarify instructions. Trademarks Polaris acknowledges the following products mentioned in this manual: Loctite, Registered Trademark of the Loctite Corporation FOX, Registered Trademark of Fox Shox Fluke, Registered Trademark of John Fluke Mfg. Co. Mity Vac, Registered Trademark of Neward Enterprises, Inc.
  • 3. CHAPTER INDEX CHAPTER 1 GENERAL CHAPTER 2 MAINTENANCE CHAPTER 3 ENGINE/TRANSMISSION CHAPTER 4 FUEL SYSTEM CHAPTER 5 BODY/SUSPENSION CHAPTER 6 BRAKES CHAPTER 7 ELECTRICAL
  • 4. 1 GENERAL INFORMATION 1.1 CHAPTER 1 GENERAL INFORMATION Model Identification 1.2. . . . . . . . . . . . . . . . . . . . . . . Serial Number Location 1.2. . . . . . . . . . . . . . . . . . . Publication Numbers 1.3. . . . . . . . . . . . . . . . . . . . . Replacement Keys 1.3. . . . . . . . . . . . . . . . . . . . . . . Standard Torque Specifications 1.3. . . . . . . . . . . . Predator Models 1.4. . . . . . . . . . . . . . . . . . . . . . . . . Specifications 1.5-1.6. . . . . . . . . . . . . . . . . . . . . . . . . . . . Tap Drill Charts 1.7. . . . . . . . . . . . . . . . . . . . . . . . . . Decimal Equivalent Chart 1.7. . . . . . . . . . . . . . . . . Unit of Measure Conversion Table 1.8. . . . . . . . . . Glossary of Terms 1.9. . . . . . . . . . . . . . . . . . . . . . . .
  • 5. GENERAL INFORMATION 1.2 MODEL IDENTIFICATION The machine model number must be used with any correspondence regarding warranty or service. Machine Model Number Identification Year Designation Basic Chassis Designation Engine Designation A 0 3 G J 5 0 A A Emissions & Model Option ENGINE DESIGNATION NUMBER ES50PLE01 Single, Water Cooled, Electric Start, Manual 5--Speed, DOHC 4 Stroke. . . . . . . . . . . . . . . . VIN IDENTIFICATION 1 2 3 4 5 6 7 8 9 10 11 12 13 14 15 16 17 4 X A G A 5 0 A * 3 P 0 0 0 0 0 0 Vehicle Descriptor Vehicle Identifier Powertrain Engine Emissions Model Year Plant No.* Individual Serial No. Body Style Check Digit* World Mfg. ID * This could be either a number or a letter UNIT MODEL NUMBER AND SERIAL NUMBER LOCATION Whenever corresponding with Polaris about a particular issue, the machine model number and serial number are important for vehicle identification. The machine serial number is stamped on the lower left side of the frame tube.(B) ENGINE SERIAL NUMBER LOCATION This information can be found on the clutch housing on the left side of engine.(A) ARH View B LH View
  • 6. 31XX Key Series Number GENERAL INFORMATION 1.3 PUBLICATION NUMBERS Year Model Model No. Owner’s Manual PN Parts Manual PN Parts Micro Fiche PN 2003 PREDATOR A03GJ50CA 9917574 9917576 99175772003 PREDATOR A03GJ50CA 9917574 9917576 9917577 NOTE: When ordering service parts be sure to use the correct parts manual. REPLACEMENT KEYS Replacement keys can be made from the original key. To identify which series the key is, take the first two digits on the original key and refer to the chart to the right for the proper part number. Should both keys become lost, replacement of the ignition switch assembly is necessary. Series # Part Number 20 4010278 21 4010278 22 4010321 23 4010321 27 4010321 28 4010321 31 4110141 32 4110148 67 4010278 68 4010278 STANDARD TORQUE SPECIFICATIONS The following torque specifications are to be used as a general guideline. FOR SPECIFIC TORQUE VALUES OF FASTENERS Refer to exploded views in the appropriate section. There are exceptions in the steering, suspension, and engine sections. Bolt Size Threads/In Grade 2 Grade 5 Grade 8 Torque in. lbs. (Nm) #10 - 24 27 (3.1) 43 (5.0) 60 (6.9). . . . . . . . . . . . . . . . . . . . . . . . . . . . . . . . . . . . . . . . . . . . #10 - 32 31 (3.6) 49 (5.6) 68 (7.8). . . . . . . . . . . . . . . . . . . . . . . . . . . . . . . . . . . . . . . . . . . . Torque ft. lbs. (Nm)* 1/4 - 20 5 (7) 8 (11) 12 (16). . . . . . . . . . . . . . . . . . . . . . . . . . . . . . . . . . . . . . . . . . . . . . . . 1/4 - 28 6 (8) 10 (14) 14 (19). . . . . . . . . . . . . . . . . . . . . . . . . . . . . . . . . . . . . . . . . . . . . . 5/16 - 18 11 (15) 17 (23) 25 (35). . . . . . . . . . . . . . . . . . . . . . . . . . . . . . . . . . . . . . . . . . . . 5/16 - 24 12 (16) 19 (26) 29 (40). . . . . . . . . . . . . . . . . . . . . . . . . . . . . . . . . . . . . . . . . . . . 3/8 - 16 20 (27) 30 (40) 45 (62). . . . . . . . . . . . . . . . . . . . . . . . . . . . . . . . . . . . . . . . . . . . 3/8 - 24 23 (32) 35 (48) 50 (69). . . . . . . . . . . . . . . . . . . . . . . . . . . . . . . . . . . . . . . . . . . . 7/16 - 14 30 (40) 50 (69) 70 (97). . . . . . . . . . . . . . . . . . . . . . . . . . . . . . . . . . . . . . . . . . . . 7/16 - 20 35 (48) 55 (76) 80 (110). . . . . . . . . . . . . . . . . . . . . . . . . . . . . . . . . . . . . . . . . . . . 1/2 - 13 50 (69) 75 (104) 110 (152). . . . . . . . . . . . . . . . . . . . . . . . . . . . . . . . . . . . . . . . . . . 1/2 - 20 55 (76) 90 (124) 120 (166). . . . . . . . . . . . . . . . . . . . . . . . . . . . . . . . . . . . . . . . . . . Metric / Torque 6 x 1.0. 72-78 In. lbs. 8 x 1.25 14-18 ft. lbs 10 x 1.25 26-30 ft. lbs.
  • 7. GENERAL INFORMATION 1.4 PREDATOR MODELS PREDATOR 500 PREDATOR 500 TROY LEE LIMITED EDITION
  • 8. GENERAL INFORMATION 1.5 MODEL: 2003 PREDATOR 500. . . . . . . . . . MODEL NUMBER: A03GJ50AA. ENGINE MODEL: ES50PLX. . Catagory Dimension Length 71.5 in./182 cm Width 47.5 in./121 cm Height 45 in./114 cm Seat Height 32 in./81.28 cm Wheel Base 51 in./130 cm Ground Clearance 4.5 in./11 cm Dry Weight 415 lbs./188 kg Fuel Capacity 3.25 gal./12.3 ltr Oil Capacity 2.25 qts./2.1 ltr Coolant Capacity 2.25 qts./2.1 ltr Dune Package Shown
  • 9. GENERAL INFORMATION 1.6 MODEL: 2003 PREDATOR 500. . . . . . . . . . MODEL NUMBER: A03GJ50AA. ENGINE MODEL: ES50PLE01. . Engine Platform Fuji DOHC 4 stroke Engine Model Number ES50PLE01 Engine Displacement 499cc Number of Cylinders 1 Bore & Stroke (mm) 99.2 x 64.6 mm Compression Ratio 10.8:1 Compression Pressure 130 psi Engine Idle Speed 1600 Rpm Cooling System Liquid Thermostat Opening Temperature 160 F (71 C) Overheat Warning High Temp Light Lubrication Pressurized Dry Sump Oil Requirements PS--4 Synthetic Exhaust System 2 to 1 canister style Carburetion Carburetor model Mikuni BSR 42mm Main Jet 150 Pilot jet 45 Jet Needle 6CGY07-060-3 Needle Jet O-OM Pilot Screw 2.5 Turns Out Pilot Air Jet 110 Float Height 13--14 mm (0.51--0.55“) Fuel Delivery Fuel Pump Fuel Requirement 87 Octane (minimum) Electrical Alternator Output 200 w @ 3000 RPM Voltage Regulator 3--Phase PN 4010654 Lghts : Main Headlights Dual Beam 35 watts / 35 watts Tail 8.26 watts Brake 26.9 watts Neutral / Hot Indicator lights 1 watt (ea.) Ignition System DC/CDI Ignition RPM Limit 9005 Ignition Timing 30 3 BTDC @ 3500 RPM Spark plug / Gap NGK DCPR8E/ .035 in./ 0.9 mm Battery / Model / Amp Hr Maintenance--Free Yuasa YTX9 9 Amp Hr Circuit Breakers Fan 10 amp / Harness 20 amp Starting Electric -- Standard Instrument Cluster N/A Drivetrain Transmission Type Manual 5 speed Main Sprocket -- # Tooth 14 Rear Sprocket -- # Tooth 37 Axle Runout -- Maximum .020” (.51 mm) Gear Ratio : 1st 2nd 3rd 4th 5th Primary 2.615 1.765 1.350 1.091 0.958 2.792 Chain Size / Deflection 520 O--ring Clutch Type Wet Multi Plate Clutch Lever Freeplay 1/8 - 3/16 / 3.1 - 4.7 mm Steering / Suspension Front Suspension Style / Shock Dual A--arm / Fox Shock Front Travel 10 in. / 25.4 cm Rear Suspension Style / Shock Linkless Swing Arm / Fox Shock w/ remote reservoir Rear Travel 11 in. / 27.94 cm Ground Clearance 4.5 in. / 11.43 cm Shock Preload Adjustment Front / Rear Front -- Spring tension -- Std. Rear -- Fox Dual Clicker -- Std. Turning Radius 67 in. / 170.18 cm Toe Out 0 -- 1/16 in / .0 -- .159 cm Wheels / Brakes Wheel Size -- Front 21x7--10 Aluminum Wheel Size -- Rear 20x11--10 Aluminum Front Tire Make / Model / Size Maxxis Razr 21x7--10 Rear Tire Make / Model / Size Maxxis Razr 20x11--10 Recommended Air Pressure F / R 5 psi Front 5 psi Rear Brake -- Front Dual Hydraulic Disc Brake -- Rear Single Hydraulic Disc JETTING CHART Altitude Meters (Feet) AMBIENT TEMPERATURE 0--1800 (0--6000) above 1800 (above 6000) Below 40 F Below 5 C +40 F to +80 F +5 C to +28 C 155 150 147.5 142.5
  • 10. GENERAL INFORMATION 1.7 SAE TAP DRILL SIZES Thread Size/Drill Size Thread Size/Drill Size #0-80 3/64 #1-64 53 #1-72 53 #2-56 51 #2-64 50 #3-48 5/64 #3-56 45 #4-40 43 #4-48 42 #5-40 38 #5-44 37 #6-32 36 #6-40 33 #8-32 29 #8-36 29 #10-24 24 #10-32 21 #12-24 17 #12-28 4.6mm 1/4-20 7 1/4-28 3 5/16-18 F 5/16-24 I 3/8-16 O 3/8-24 Q 7/16-14 U 7/16-20 25/64 1/2-13 27/64 1/2-20 29/64 9/16-12 31/64 9/16-18 33/64 5/8-11 17/32 5/8-18 37/64 3/4-10 21/32 3/4-16 11/16 7/8-9 49/64 7/8-14 13/16 1-8 7/8 1-12 59/64 1 1/8-7 63/64 1 1/8-12 1 3/64 1 1/4-7 1 7/64 1 1/4-12 1 11/64 1 1/2-6 1 11/32 1 1/2-12 1 27/64 1 3/4-5 1 9/16 1 3/4-12 1 43/64 2-4 1/2 1 25/32 2-12 1 59/64 2 1/4-4 1/2 2 1/32 2 1/2-4 2 1/4 2 3/4-4 2 1/2 3-4 2 3/4 METRIC TAP DRILL SIZES Tap Size Drill Size Decimal Equivalent Nearest Fraction 3 x .50 3 x .60 4 x .70 4 x .75 5 x .80 5 x .90 6 x 1.00 7 x 1.00 8 x 1.00 8 x 1.25 9 x 1.00 9 x 1.25 10 x 1.25 10 x 1.50 11 x 1.50 12 x 1.50 12 x 1.75 #39 3/32 #30 1/8 #19 #20 #9 16/64 J 17/64 5/16 5/16 11/32 R 3/8 13/32 13/32 0.0995 0.0937 0.1285 0.125 0.166 0.161 0.196 0.234 0.277 0.265 0.3125 0.3125 0.3437 0.339 0.375 0.406 0.406 3/32 3/32 1/8 1/8 11/64 5/32 13/64 15/64 9/32 17/64 5/16 5/16 11/32 11/32 3/8 13/32 13/32 DECIMAL EQUIVALENTS 1/64 .0156. . . . . . . . . . . . . . . . 1/32 .0312 1 mm = .0394. . . . . . . . . . . . . . 3/64 .0469. . . . . . . . . . . . . . . . 1/16 .0625. . . . . . . . . . . 5/64 .0781 2 mm = .0787. . . . . . . . . . . . . . . . . . . 3/32 .0938. . . . . . . . . . . 7/64 .1094 3 mm = .1181. . . . . . . . . . . . . . . . . 1/8. .1250. . . 9/64 .1406. . . . . . . . . . . . . . . . 5/32 .1563 4 mm = .1575. . . . . . . . . . . . . . 11/64 .1719. . . . . . . . . . . . . . . 3/16 .1875 5 mm = .1969. . . . . . . . . . . . . . 13/64 .2031. . . . . . . . . . . . . . . 7/32 .2188. . . . . . . . . . . 15/64 .2344 6 mm = .2362. . . . . . . . . . . . . . . . . . 1/4 .25. . . . 17/64 .2656 7 mm = .2756. . . . . . . . . . . . . . . . . . 9/32 .2813. . . . . . . . . . . 19/64 .2969. . . . . . . . . . . . . . . 5/16 .3125 8 mm = .3150. . . . . . . . . . . . . . 21/64 .3281. . . . . . . . . . . . . . . 11/32 .3438 9 mm = .3543. . . . . . . . . . . . . 23/64 .3594. . . . . . . . . . . . . . . 3/8 .375. . . . 25/64 .3906 10 mm = .3937. . . . . . . . . . . . . . . . . . 13/32 .4063. . . . . . . . . 27/64 .4219 11 mm = .4331. . . . . . . . . . . . . . . . . . 7/16 .4375. . . . . . . . . . . 29/64 .4531. . . . . . . . . . . . . . . 15/32 .4688 12 mm = .4724. . . . . . . . . . . . 31/64 .4844. . . . . . . . . . . . . . . 1/2 .5 13 mm = .5118. . . . . . . . . . . . . . . . . . 33/64 .5156. . . . . . . . . . . . . . . 17/32 .5313. . . . . . . . . 35/64 .5469 14 mm = .5512. . . . . . . . . . . . . . . . . . 9/16 .5625. . . . . . . . . . . 37/64 .5781 15 mm = .5906. . . . . . . . . . . . . . . . . . 19/32 .5938. . . . . . . . . 39/64 .6094. . . . . . . . . . . . . . . 5/8 .625 16 mm = .6299. . . . . . . . . . . . . . . . 41/64 .6406. . . . . . . . . . . . . . . 21/32 .6563 17 mm = .6693. . . . . . . . . . . . 43/64 .6719. . . . . . . . . . . . . . 11/16 .6875. . . . . . . . . . 45/64 .7031 18 mm = .7087. . . . . . . . . . . . . . . . . . 23/32 .7188. . . . . . . . . 47/64 .7344 19 mm = .7480. . . . . . . . . . . . . . . . . . 3/4 .75. . . . 49/64 .7656. . . . . . . . . . . . . . . 25/32 .7813 20 mm = .7874. . . . . . . . . . . . 51/64 .7969. . . . . . . . . . . . . . . 13/16 .8125 21 mm = .8268. . . . . . . . . . . . 53/64 .8281. . . . . . . . . . . . . . . 27/32 .8438. . . . . . . . . 55/64 .8594 22 mm = .8661. . . . . . . . . . . . . . . . . . 7/8 .875. . . . 57/64 .8906 23 mm = .9055. . . . . . . . . . . . . . . . . . 29/32 .9063. . . . . . . . . 59/64 .9219. . . . . . . . . . . . . . 15/16 .9375 24 mm = .9449. . . . . . . . . . . . 61/64 .9531. . . . . . . . . . . . . . . 31/32 .9688 25 mm = .9843. . . . . . . . . . . . 63/64 .9844. . . . . . . . . . . . . . . 1 1.0. . . . .
  • 11. GENERAL INFORMATION 1.8 CONVERSION TABLE Unit of Measure Multiplied by Converts to ft. lbs. x 12 = in. lbs. in. lbs. x .0833 = ft. lbs. ft. lbs. x 1.356 = Nm in. lbs. x .0115 = kg-m Nm x .7376 = ft. lbs. kg-m x 7.233 = ft. lbs. kg-m x 86.796 = in. lbs. kg-m x 9.807 = Nm in. x 25.4 =mm mm x .03937 = in. in. x 2.54 = cm mile (mi.) x 1.6 = km km x .6214 = mile (mi.) Ounces (oz) x 28.35 = Grams (g) Fluid Ounces (fl. oz.) x 29.57 = Cubic Centimeters (cc) Cubic Centimeters (cc) x .03381 = Fluid Ounces (fl. oz.) Grams (g) x 0.035 = Ounces (oz) lb. x .454 = kg kg x 2.2046 = lb. Cubic inches (cu in) x 16.387 = Cubic centimeters (cc) Cubic centimeters (cc) x 0.061 = Cubic inches (cu in) Imperial pints (Imp pt) x 0.568 = Liters (l) Liters (l) x 1.76 = Imperial pints (Imp pt) Imperial quarts (Imp qt) x 1.137 = Liters (l) Liters (l) x 0.88 = Imperial quarts (Imp qt) Imperial quarts (Imp qt) x 1.201 = US quarts (US qt) US quarts (US qt) x 0.833 = Imperial quarts (Imp qt) US quarts (US qt) x 0.946 = Liters (l) Liters (l) x 1.057 = US quarts (US qt) US gallons (US gal) x 3.785 =Liters (l) Liters (l) x 0.264 = US gallons (US gal) Pounds - force per square inch (psi) x 6.895 = Kilopascals (kPa) Kilopascals (kPa) x 0.145 = Pounds - force per square inch (psi) Kilopascals (kPa) x 0.01 = Kilograms - force per square cm Kilograms - force per square cm x 98.1 = Kilopascals (kPa) x R2 x H (height) = Cylinder Volume C to F: 9 ( C + 40) 5 - 40 = F F to C: 5 ( F + 40) 9 - 40 = C
  • 12. GENERAL INFORMATION 1.9 GLOSSARY OF TERMS ABDC: After bottom dead center. ACV: Alternating current voltage. Alternator: Electrical generator producing voltage alternating current. ATDC: After top dead center. BBDC: Before bottom dead center. BDC: Bottom dead center. BTDC: Before top dead center. CC: Cubic centimeters. Center Distance: Distance between center of crankshaft and center of driven clutch shaft. Chain Pitch: Distance between chain link pins (No. 35 = 3/8 or 1 cm). Polaris measures chain length in number of pitches. CI: Cubic inches. Clutch Buttons: Plastic bushings which aid rotation of the movable sheave in the drive and driven clutch. ClutchOffset: Drive anddriven clutches are offsetso thatdrive beltwill stay nearly straightas itmoves alongthe clutchface. Clutch Weights: Three levers in the drive clutch which relative to their weight, profile and engine RPM cause the drive clutch to close and grip the drive belt. Crankshaft Run-Out: Run-out or “bend” of crankshaft measured with a dial indicator while crankshaft is supported between centers on V blocks or resting in crankcase. Measure at various points especially at PTO. DCV: Direct current voltage. Dial Bore Gauge: A cylinder measuring instrument which uses a dial indicator. Good for showing taper and out-of-round in the cylinder bore. Electrical Open: Open circuit. An electrical circuit which isn’t complete. Electrical Short: Short circuit. An electrical circuit which is completed before the current reaches the intended load. (i.e. a bare wire touching the chassis). End Seals: Rubber seals at each end of the crankshaft. Engagement RPM: Engine RPM at which the drive clutch engages to make contact with the drive belt. ft.: Foot/feet. Foot Pound: Ft. lb. A force of one pound at the end of a lever one foot in length, applied in a rotational direction. g: Gram. Unit of weight in the metric system. gal.: Gallon. ID: Inside diameter. in.: Inch/inches. Inch Pound: In. lb. 12 in. lbs. = 1 ft. lb. kg/cm 2 : Kilograms per square centimeter. kg-m: Kilogram meters. Kilogram/meter: A force of one kilogram at the end of a lever one meter in length, applied in a rotational direction. l or ltr: Liter. lbs/in 2 : Pounds per square inch. Left or Right Side: Always referred to based on normal operating position of the driver. m: Meter/meters. Mag: Magneto. Magnetic Induction: As a conductor (coil) is moved through a magnetic field, a voltage will be generated in the windings. Mechanical energy is converted to electrical energy in the stator. mi.: Mile/miles. mm: Millimeter. Unit of length in the metric system. 1mm = approximately .040 . Nm: Newton meters. OD: Outside diameter. Ohm: The unit of electrical resistance opposing current flow. oz.: Ounce/ounces. Piston Clearance: Total distance between piston and cylinder wall. psi.: Pounds per square inch. PTO: Power take off. PVT: Polaris Variable Transmission (Drive Clutch System) qt.: Quart/quarts. Regulator: Voltage regulator. Regulates battery charging system output at approx. 14.5 DCV as engine RPM increases. Reservoir Tank: The fill tank in the liquid cooling system. Resistance: In the mechanical sense, friction or load. In the electrical sense, ohms, resulting in energy conversion to heat. RPM: Revolutions per minute. Seized Piston: Galling of the sides of a piston. Usuallythere isa transferof aluminumfrom thepiston ontothe cylinderwall. Possible causes: 1) improper lubrication; 2) excessive temperatures; 3) insufficient piston clearance; 4) stuck piston rings. Stator Plate: The plate mounted under the flywheel supporting the battery charging coils. TDC: Top dead center. Piston’s most outward travel from crankshaft. Volt: The unit of measure for electrical pressure of electromotive force. Measured by a voltmeter in parallel with the circuit. Watt: Unit of electrical power. Watts = amperes x volts. WOT: Wide open throttle.
  • 14. 2 MAINTENANCE 2.1 CHAPTER 2 MAINTENANCE Periodic Maintenance Chart 2.2-2.3. . . . . . . . . . . . . . . Pre-Ride Inspection 2.4. . . . . . . . . . . . . . . . . . . . . . Lubricant and Maintenance Product Numbers 2.5 Special Tools 2.6. . . . . . . . . . . . . . . . . . . . . . . . . . . . Lubrication Charts 2.7-2.8. . . . . . . . . . . . . . . . . . . . . . . . Clutch Freeplay Adjustment 2.9. . . . . . . . . . . . . . . Throttle Inspection 2.9. . . . . . . . . . . . . . . . . . . . . . . Carburetor Adjustments 2.9-2.10. . . . . . . . . . . . . . . . . . . Throttle Adjustment 2.10-2.11. . . . . . . . . . . . . . . . . . . . . . . Fuel System 2.11-2.12. . . . . . . . . . . . . . . . . . . . . . . . . . . . . Compression Test 2.12. . . . . . . . . . . . . . . . . . . . . . . . Spark Plug Maintenance 2.13. . . . . . . . . . . . . . . . . . Battery Maintenance 2.13--2.14. . . . . . . . . . . . . . . . . . . . . . Electrical 2.14-2.15. . . . . . . . . . . . . . . . . . . . . . . . . . . . . . . . Coolant System Maintenance 2.15-2.16. . . . . . . . . . . . . . Radiator Screen Removal 2.17. . . . . . . . . . . . . . . . . Air Filter Service 2.17. . . . . . . . . . . . . . . . . . . . . . . . . Air Box Sediment Tube Service 2.17. . . . . . . . . . . . Crankcase Breather Filter 2.18. . . . . . . . . . . . . . . . . Oil Change/Filter 2.18. . . . . . . . . . . . . . . . . . . . . . . . . Steering and Toe Alignment 2.19-2.20. . . . . . . . . . . . . . . Exhaust System Maintenance 2.21. . . . . . . . . . . . . Brake System Service 2.22-2.23. . . . . . . . . . . . . . . . . . . . Suspension Adjustment 2.23-2.26. . . . . . . . . . . . . . . . . . . Controls / Handlebar Adjustment 2.26. . . . . . . . . . . Wheel Removal/Installation 2.26. . . . . . . . . . . . . . . . Tire Inspection 2.27. . . . . . . . . . . . . . . . . . . . . . . . . . .
  • 15. MAINTENANCE 2.2 PERIODIC MAINTENANCE CHART Inspection, adjustment and lubrication intervals of important components are listed in the following chart. Maintenance intervals are based upon average riding conditions and vehicle speed. The following symbols denote potential items to be aware of during maintenance: H= CAUTION: Due to the nature of these adjustments, it is recommended this service be performed by an authorized Polaris dealer. "= SEVERE USE ITEM ----If vehicle is subjected to severe use, decrease interval by 50% (Severe Use is defined as frequent vehicle immersion in mud, water or sand, racing or race-style high rpm use, manual slipping of the clutch prolonged low speed - heavy load operation or extended idle. More preventative maintenance is required under these conditions. Fluid changes, cable, chain and chassis lubrication are required more frequently. For engine oil, short trip cold weather riding also constitutes severe use. Pay special attention to oil level. A rising oil level in cold weather can indicate contaminants collecting in the oil sump or crankcase. Change oil immediately and monitor level. If oil level begins to rise, discontinue use and determine cause. E= Emission Control System Service (California). NOTE: Inspection may reveal the need for replacement parts. Always use genuine Polaris parts. ENGINE / COOLING / CONTROLS Item Maintenance Interval (Whichever comes first) Remarks Hours Calendar Miles (Km) " E Engine Oil - Level/Change 10 hrs -- 100 (160) Check level pre--ride Break--In service at 1 hour " E Oil Filter 10 hrs -- 100 (160) Replace with oil change " E Air Filter - Pre-Filter Daily Daily -- Inspect, clean more often in dirty or wet conditions " E Air Filter - Main Element Weekly Weekly -- Inspect - Replace if necessary " Air Box Sediment Tube -- Daily -- Drain deposits whenever visible " Engine Breather Filter 20 hrs Monthly 200 (320) Inspect and clean if necessary E Idle Speed As required As required -- Adjust as required H Throttle Cable / ETC Switch 50 hrs 6 months 500 (800) Inspect -Adjust, Lubricate, Replace if necessary Choke (Enricher) Cable 50 hrs 6 months 500 (800) Inspect -Adjust, Lubricate, Replace if necessary Carburetor Float Bowl 50 hrs 6 months 500 (800) Drain bowl periodically and prior to storage Carburetor Air Intake Ducts/Flange 50 hrs 6 months 500 (800) Inspect all ducts for proper sealing/air leaks H E Fuel System 100 hrs 12 months 1000 (1600) Check for leaks at tank cap, lines, fuel valve, filter, pump & carburetor. Replace lines every 2 years. Coolant/Level Inspection Daily Daily Replace engine coolant every 2 years Coolant Strength / System Pressure Test 100 hrs 6 months 1000 (1600) Inspect strength seasonally; Pressure test system annually " Radiator 100 hrs 12 months 1000 (1600) Inspect / Clean external surfaces " Cooling and Oil System Hoses 100 hrs 12 months 1000 (1600) Pre--ride / Inspect for leaks " Engine Mounts 100 hrs 12 months 1000 (1600) Pre--ride / Inspect Exhaust Muffler / Pipe 100 hrs 12 months 1000 (1600) Pre--ride / Inspect
  • 16. MAINTENANCE 2.3 PERIODIC MAINTENANCE CHART CONT’D ELECTRICAL Item Maintenance Interval (Whichever comes first) Remarks E Spark Plug 100 hrs 12 months 1000 (1600) Inspect - Replace if necessary " Wiring 100 hrs 12 months 1000 (1600) Inspect for abrasion, routing, security. Apply Dielectric grease to connectors that are subjected to water, mud, etc. H Ignition Timing 100 hrs 12 months 1000 (1600) Inspect " Battery 20 hrs Monthly 200 (320) Check terminals; Clean; Test Headlight Aim As required As required -- Adjust as Necessary Headlamp Inspection Daily Daily -- Check operation daily; Apply dielectric grease whenever lamp is replaced Tail Lamp Inspection Daily Daily -- Check operation daily; Apply dielectric grease whenever lamp is replaced CHASSIS / SUSPENSION / BRAKE Item Maintenance Interval (Whichever comes first) Remarks Hours Calendar Miles (Km) " General Lubrication 50 hrs 3 months 500 (800) Lubricate All Fittings, Pivots, Cables, Etc. Drive Chain Pre--ride Pre--ride Pre--ride Clean and Inspect, Adjust, Lubricate H Steering Pre--ride Pre--ride Pre--ride Inspect Daily, Lubricate H Toe Adjustment As required As required -- Periodic Inspection, Adjust Whenever Parts are Replaced " Front Suspension Pre--ride Pre--ride Pre--ride Inspect - Lubricate " Rear Suspension Pre--ride Pre--ride Pre--ride Inspect - Lubricate Tires Pre-ride Pre-ride -- Inspect Daily, Pre-Ride Inspection Item H Brake Fluid 200 hrs 24 months 2000 (3200) Change Every Two Years " Brake Fluid Level Pre-ride Pre-ride -- Inspect Sight Glass Daily Pre-Ride Inspection Item " Brake Lever Travel Pre-ride Pre-ride -- Inspect Daily Pre-Ride Inspection Item " H Brake Pad Wear 10 hrs Monthly 100 (160) Inspect Periodically Brake Adjustment As required As required -- Inspect Deflection Daily; Adjust Brake System Pre-ride Pre-ride -- Pre-Ride Inspection Item Wheels / Fasteners Pre-ride Pre-ride -- Pre-Ride Inspection Item Frame Nuts, Bolts, Fasteners Pre-ride Pre-ride -- Pre-Ride Inspection Item
  • 17. MAINTENANCE 2.4 PRE-RIDE / DAILY INSPECTION Perform the following pre-ride inspection daily, and when servicing the vehicle at each scheduled maintenance. G Tires - check condition and pressures G Fuel and oil tanks - fill both tanks to their proper level; Do not overfill oil tank G All brakes - check operation and adjustment (includes auxiliary brake) G Throttle - check for free operation G Headlight/Taillight/Brakelight - check operation of all indicator lights and switches G Engine stop switch - check for proper function G Wheels - check for loose wheel nuts and axle nuts; check to be sure axle nuts are secured by cotter pins G Air cleaner element - check for dirt or water; clean or replace G Steering - check for free operation, noting any unusual looseness in any area G Loose parts - visually inspect vehicle for any damaged or loose nuts, bolts or fasteners G Engine coolant - check for proper level at the recovery bottle RECOMMENDED PRE--RIDE FLUID LEVEL CHECKS Item Type Notes See Pages Engine Oil / Transmission Polaris PS 4 Synthetic Add to proper level on dipstick. 2.18 Coolant / Level Polaris Premium 60/40 Pre-mixed Antifreeze/ Coolant or a 50/50 mixture high quality antifreeze/ coolant and distilled water Allow engine and cooling system to cool completely and check level in radiator. Fill to top of filler neck. If reservoir was empty or extremely low, fill radiator be- fore filling reservoir tank to full line. 2.15 Brake Fluid Polaris DOT 3 Brake Fluid Fill to indicated level inside reservoir. Sight glass should appear dark when installed, indicating proper fluid level. 2.22 NOTE: Quick Reference Lubricants and maintenance product part numbers are listed on page 2.5
  • 18. MAINTENANCE 2.5 POLARIS LUBRICANTS,MAINTENANCE AND SERVICE PRODUCTS Part No. Description Engine Lubricant 2874414 Engine Oil (Quart) PS 4 Synthetic (4--Cycle) 2874415 Engine Oil (Gallon) PS 4 Synthetic (4--Cycle) Grease / Specialized Lubricants 2871322 Premium All Season Grease (3 oz. cartridge) 2871423 Premium All Season Grease (14 oz. cartridge) 2871460 Starter Drive Grease 2871312 Grease Gun Kit 2871329 Dielectric Grease 2872073 Chain Lube (Aerosol) Coolant 2871323 60/40 Coolant (Gallon) 2871534 60/40 Coolant (Quart) Additives / Sealants / Thread Locking Agents / Misc. 2870791 Fogging Oil (12 oz. Aerosol) 2871326 Premium Carbon Clean (12 oz.) 2870652 Fuel Stabilizer (16 oz.) 2870585 Loctitet Primer N, Aerosol, 25 g 2870990 DOT3 Brake Fluid 2871956 Loctitet Thread Sealant 565 (50 ml.) 2871949 Loctitet Threadlock 242 (50 ml.) 2871950 Loctitet Threadlock 242 (6 ml.) 2871951 Loctitet Threadlock 262 (50 ml.) 2871952 Loctitet Threadlock 262 (6 ml.) 2871953 Loctitet Threadlock 271 (6 ml.) 2871954 Loctitet Threadlock 271 (36 ml.) 2870584 Loctitet RC 680-Retaining Compound (10 ml.) 2870587 Loctitet 518 Gasket Eliminator / Flange Sealant (50 ml.) 2872113 Disk Brake Quiet (12 oz.) 2872113 Disc Brake Quiet, Aerosol, (9 oz.) 2871957 Black RTV Silicone Sealer (3 oz. tube) 2871958 Black RTV Silicone Sealer (11 oz. cartridge) 8560054 Marine Grade Silicone Sealer (14 oz. cartridge) 2871557 Crankcase Sealant, 3-Bond 1215 2872893 Engine Degreaser
  • 19. MAINTENANCE 2.6 SPECIAL TOOLS PART NUMBER TOOL DESCRIPTION CHAPTER TOOL USED IN 8712100 or 8712500 Tachometer 2,7 2200634 Valve Seat Reconditioning Kit 3 PU--45257 Valve Spring Compressor 3 PA--46075 Flywheel Puller 3 PA--46087 Crankcase Separator 3 2870390 Piston Support Block 3 2872105 Water Pump Mechanical Seal Puller 3 PA--45958 Cam Chain Tensioner Assembly Tool 3 PA--46076 MAG End Crankshaft Nut Remover/Installer 3 PA--46077 MAG End Crankshaft Installer 3 2871283 Crankshaft/Water Pump Seal Install Kit 3 5131135 Water Pump Install Kit 3 PA--46502 Valve Spring Compressor 3 2870975 Mity Vact Pressure Test Tool 3, 4 2872314 Carburetor Float Adjustment Tool 4 2870623 Shock Absorber Spring Compression Tool 5 7052069 Charging Needle 5 2200421 Gas Shock Recharging Kit 5 2871352 Shock Rod Holding Tool 5 2871351 Foxt Shock IFP Depth Tool 5 2870386 Piston Pin Puller 6 PV--43568 Fluket77 Digital Multimeter 7 2870630 Timing Light 7 *Special Tools Can be ordered through a Polaris Dealer or SPX Corporation (1--800--328--6657).
  • 20. MAINTENANCE 2.7 LUBRICATION 1. Engine Oil and Filter ¡ 2. Brake Fluid © (Right hand and Foot Brake Master Cylinder) 3. Rear Drive Chain Ill. # Item Lube Rec. Method Frequency* 1. Engine Oil / Transmission Polaris PS--4 Synthetic Check dipstick and add to proper level. Perform break-in oil/filter change at one hour; change oil every 10hrs/100mi.¡ 2. Brake Fluid Polaris Dot 3 Brake Fluid Fill master cylinder reservoir to in- dicated level inside reservoir. See Ch. 6. As required. Change fluid every 2 years or 200 hours.© 3 Drive Chain Polaris Chain Lube Apply to chain link plates and rollers. As required* * More often under severe use, such as operation in mud, water, sand or under severe loads. ¡ Every 10 hours of operation (refer to Maintenance Schedule for additional information) Change more often in extremely dirty conditions (continuous operation in water, mud or sand), continuous hot, cold, or short trip cold weather operation. NOTE: Excessive clutch plate residue will accelerate oil change intervals © Every 24 months or 200 hours of operation (refer to Maintenance Schedule for additional information) More often under severe conditions (continuous operation in water, mud or sand)
  • 21. MAINTENANCE 2.8 LUBRICATION, CONT. 5. Upper Control Arm 6. Lower Control Arm 8. Upper Steering Post Bushing 7. Rear Axle Eccentric Ill. # Item Lube Rec. Method Frequency* 5. Upper Control Arms Polaris All Season Grease¢ Locate fittings and grease (also grease after washing ATV) Every 3 months ¡ 6. Lower Control Arms Polaris All Season Grease¢ Locate fittings and grease (also grease after washing ATV) Every 3 months ¡ 7. Rear Axle Eccentric Polaris All Season Grease¢ Locate and grease (also grease after washing ATV) Every 3 months ¡ 8. Upper Steering Post Bushing Polaris All Season Grease¢ Locate fittings and grease (also grease after washing ATV) Semi-annually © * More often under severe use, such as operation in water or under severe loads. ¡ Every 3 months or 50 hours of operation (refer to Maintenance Schedule for additional information) More often under severe conditions (continuous operation in water, mud or sand) © Every 6 months or 50 hours of operation (refer to Maintenance Schedule for additional information) More often under severe conditions (continuous operation in water, mud or sand) ¢ Use grease conforming to NLGI No. 2, such as Polaris Premium All Season Grease.
  • 22. MAINTENANCE 2.9 CLUTCH ADJUSTMENT Clutch Lever Freeplay 1. Measure clutch lever freeplay between the perch and the lever (A). This distance should be 1/8 - 3/16 (3.1 mm - 4.7 mm). C B A 2. If adjustment is required, slide the clutch perch pivot boot down the clutch cable to access the clutch adjustment screw (B) and lock ring (C). 3. Loosen the lock ring and turn the screw in (clockwise) to increase lever travel. Turn the screw out (counterclockwise) to decrease lever travel. Tighten the lock ring. 4. Squeeze the lever fully and release. Slightly squeeze the lever again until a slight resistance is felt. Measure the freeplay again. If necessary, repeat the adjustment procedure until proper freeplay is attained. 5. Replace the clutch perch pivot boot over the screw and lock ring. THROTTLE INSPECTION Check for smooth throttle opening and closing in all handlebar positions. Throttle lever operation should be smooth and lever must return freely without binding. 1. Place the gear selector in neutral. 2. Set parking brake. 3. Start the engine and let it idle. 4. Turn handlebars from full right to full left. If idle speed increases at any point in the turning range, inspect throttle cable routing and condition. Adjust cable tension as needed until lock--to--lock turning can be accomplished with no rise in engine rpm. 5. Replace the throttle cable if worn, kinked, or damaged. 6. Inspect ETC cover seal and switch cavity by removing the cover. Verify that no dirt, water or mud is present. To remove the ETC cover: 1. Use a medium flat blade screwdriver and insert blade into the pocket of the cover starting on the #1 position. 2. Twist screwdriver slightly while lifting on the cover to release snap. 3. Repeat procedure at the other five locations as shown. NOTE: Do not attempt to remove cover until all latch points are released. 1 2 3 45 6 5 6 ETC Cover Removal SequenceIll. 1 CHOKE (ENRICHER) ADJUSTMENT If the choke knob does not stay out when pulled, adjust the choke tension by tightening (clockwise) the jam nut under the rubber boot between the choke knob and nut. Firmly grasp the rubber boot and tighten until the choke slides freely but stays out when pulled. Verify free play of 1/16--3/16” (1.6--4.76 mm) and smooth operation of choke cable. If smooth choke operation is not obtainable, inspect choke cable for kinks or sharp bends in routing. Choke
  • 23. MAINTENANCE 2.10 CARBURETOR PILOT SCREW ADJUSTMENT Pilot Screw FRONT (Engine) Ill.2 NOTE: Pilot screw is covered by a welsh plug. Plug removal will be required to perform these procedures. 1. Start engine and warm it up to operating temperature (about 10 minutes). 2. Turn pilot screw in (clockwise) until lightly seated. Turn screw out the specified number of turns. NOTE: Do not tighten the pilot screw forcefully against the seat or the screw and/or seat will be permanently damaged. (Ill. 2) Pilot Screw Adjustment Refer to Specifications in Chapter 1 3. Connect an accurate tachometer that will read in increments of + or -- 50 RPM such as the PET 2100DX (PN 8712100DX) or the PET 2500 (PN 8712500). 4. Set idle speed to 1600 RPM. Always check throttle cable freeplay after adjusting idle speed and adjust if necessary. 5. Slowly turn mixture screw clockwise using the pilot screw wrench until engine begins to miss. 6. Slowly turn mixture screw counterclockwise until idle speed increases to maximum RPM. Continue turning counterclockwise until idle RPM begins to drop. 7. Center the pilot screw between the points in Step 5 and 6. 8. Re adjust idle speed to specification. IDLE SPEED ADJUSTMENT Idle Screw BSR Carburetor Ill.3 1. Start engine and warm it up thoroughly. 2. Adjust idle speed by turning the idle adjustment screw in (clockwise) to increase or out (counterclockwise) to decrease RPM. (Ill.3) NOTE: Adjusting the idle speed affects throttle cable freeplay and electronic throttle control (ETC) adjustment. Always check throttle cable freeplay after adjusting idle speed and adjust if necessary. Idle Speed: 1600 +/-- 50 RPM THROTTLE CABLE / ELECTRONIC THROTTLE CONTROL (ETC SWITCH) ADJUSTMENT 1. Slide boot off throttle cable adjuster and jam nut. 2. Place shift selector in neutral and set parking brake. 3. Start engine and set idle to 1600 RPM. Boot Adjuster Sleeve Lock- nut Boot Ill. 1
  • 24. MAINTENANCE 2.11 NOTE: Be sure the engine is at operating temperature. See Idle Speed Adjustment. 4. Loosen lock nut on in-line cable adjuster (Ill. 1). 5. Turn adjuster until 1/16 to 1/8 freeplay is achieved at thumb lever. (Ill. 2). After making adjustments, quickly actuate the thumb lever several times and reverify freeplay. 1/16 - 1/8 Freeplay Direction of travel Ill. 2 6. Tighten lock nut securely and slide boot completely in place to ensure a water-tight seal. 7. Turn handlebars from left to right through the entire turning range. If idle speed increases, check for proper cable routing. If cable is routed properly and in good condition, repeat adjustment procedure. FUEL SYSTEM WARNING Gasoline is extremely flammable and explosive under certain conditions. G Always stop the engine and refuel outdoors or in a well ventilated area. G Do not smoke or allow open flames or sparks in or near the area where refueling is performed or where gasoline is stored. G Do not overfill the tank. Do not fill the tank neck. G If you get gasoline in your eyes or if you swallow gasoline, seek medical attention immediately. G If you spill gasoline on your skin or clothing, immediately wash it off with soap and water and change clothing. G Never start the engine or let it run in an enclosed area. Engine exhaust fumes are poisonous and can result loss of consciousness or death in a short time. G Never drain the float bowl when the engine is hot. Severe burns may result. FUEL LINES Fuel In Fuel Pump Ill.1 Pulse Line Fuel Out 1. Check fuel lines for signs of wear, deterioration, damage or leakage. Replace if necessary. 2. Be sure fuel lines are routed properly and secured with cable ties. CAUTION: Make sure lines are not kinked or pinched. 3. Replace all fuel lines every two years. VENT LINES Check engine, fuel tank, oil tank and carburetor vent lines for signs of wear, deterioration, damage or leakage. Replace every two years. Be sure vent lines are routed properly and secured with cable ties. CAUTION: Make sure lines are not kinked or pinched. FUEL VALVE The Predator fuel system strains the fuel through screens located in the fuel valve. There is no fuel filter to service. To service the fuel valve: 1. Shut off fuel supply at fuel valve. Remove line clamps and fuel lines from the tank. 2. Remove the tank and drain remainder of fuel into a appropriate container. 3. Remove fuel valve by loosening the screws holding the valve to the tank. 4. Inspect the valve for damage or debris. Replace the valve if problems are found.
  • 25. MAINTENANCE 2.12 5. Reverse the procedures to install the fuel valve. 6. Start engine and inspect for leaks. CARBURETOR DRAINING The carburetor float bowl should be drained periodically to remove moisture or sediment from the bowl, or before extended periods of storage. NOTE: The bowl drain screw is located on the bottom left side of the float bowl. 1. Turn fuel valve to the off position. 2. Place a clean container beneath the bowl drain spigot or bowl drain hose. 3. Turn drain screw out two turns and allow fuel in the float bowl and fuel line to drain completely. 4. Inspect the drained fuel for water or sediment. 5. Tighten drain screw. 6. Turn fuel valve to “ON”. 7. Start machine and check for leaks. NOTE: All tubes attached to the carburetor must be check for pinching or blockage, as this will effect engine performance. Drain Screw Ill. 1 COMPRESSION TEST NOTE: This engine has built--in decompression components. Compression readings will vary in proportion to cranking speed during the test. Average compression (measured) is about 85--90 psi @ 400 RPM during a compression test. A smooth idle generally indicates good compression. Low engine compression is rarely a factor in running condition problems above idle speed. Abnormally high compression can be caused by carbon deposits in the combustion chamber or worn, damaged exhaust cam lobes. Inspect camshaft and combustion chamber if compression is abnormally high. A cylinder leakdown test is the best indication of engine condition. Follow manufacturer’s instructions to perform a cylinder leakage test. (Never use high pressure leakage testers, as crankshaft seals may dislodge and leak). Cylinder Leakdown Service Limit 10 % (Inspect for cause if leakage exceeds 10%) Cylinder Compression w/ decompression Standard: 85--90 PSI @ 400 RPM ENGINE MOUNTS Inspect engine mounts and frame for cracks or damage. (Ill.3) Check engine fasteners and ensure they are tight. Ill. 3
  • 26. MAINTENANCE 2.13 SPARK PLUG INSPECTION Spark Plug Removal and Replacement 1. Turn the fuel valve to OFF. 2. Remove the front cab. 3. Move the fuel valve hose clamp (1) forward and gently remove the hose from the fuel valve fitting on the gas tank. 1 2 3 4. Remove the vent hose (2) from the instrument panel, taking note of the hose routing for reinstallation. 5. Remove the tank mounting bolt (3) at the rear of the gas tank. 6. Move the tank rearward and upward over the engine. Slowly remove the tank, being careful not to catch any hoses, wires or other components. Place the tank on a stable surface or work bench to protect the valve from contamination or damage. 7. Remove spark plug high tension lead. Clean plug area so no dirt and debris can fall into engine when plug is removed. 8. Remove spark plug. and inspect electrodes for wear and carbon buildup. The insulator tip should be a light tan color, indicating good combustion. Look for a sharp outer electrode edge with no rounding or erosion. 9. If needed, clean spark plug with electrical contact cleaner or a glass bead spark plug cleaner only. CAUTION: Wire brushes or coated abrasives should not be used. 10. Measure gap with a wire gauge. Refer to specifications for proper spark plug type and gap. Adjust gap if necessary by bending the side electrode carefully. 11. If necessary, replace spark plug with proper type. CAUTION: Severe engine damage may occur if the incorrect spark plug is used. 12. Apply a small amount of anti-seize compound to the spark plug threads. 13. Install spark plug and torque to specification. Reverse steps as needed for reassembly. Recommended Spark Plug: NGK DCPR8E Spark Plug Torque: 14 Ft. Lbs. (19 Nm) .035 (0.9 mm) Spark Plug Gap IGNITION TIMING Refer to Chapter 10 for ignition timing checks. BATTERY MAINTENANCE WARNING Battery electrolyte is poisonous. It contains sulfuric acid. Serious burns can result from con- tact with skin, eyes or clothing. Antidote: External: Flush with water. Internal: Drink large quantities of water or milk. Follow with milk of magnesia, beaten egg, or vegetable oil. Call physician immediately. Eyes: Flush with water for 15 minutes and get prompt medical attention. Batteries produce explosive gases. Keep sparks, flame, cigarettes, etc. away. Ventilate when charging or using in an enclosed space. Always shield eyes when working near batter- ies. KEEP OUT OF REACH OF CHILDREN. The battery is located under the left rear fender. NOTE: All Predator ATV batteries are Maintenance--Free design and construction. Before placing the battery into service, check the battery condition and charge accordingly. Use of Conventional Lead--Acid batteries is not recommended.
  • 27. MAINTENANCE 2.14 New Batteries: Batteries must be fully charged before use or battery life will be reduced by 10-30% of full potential. Charge battery for 3--5 hours at a current equivalent of 1/10 of the battery’s rated amp/hour capacity (i.e. 9 amp hr x .10 = .9 amp charging). Do not use the alternator to charge a new battery. Maintenance--Free batteries are sealed at the factory. The use of lead--calcium instead of lead--antimony allows the battery acid to be fully absorbed by the plates. Therefore, a Maintenance--Free battery case is opaque and the sealing caps are not removable, since there is no need to check electrolyte level. NEVER attempt to add electrolyte or water to a Maintenance--Free battery. Doing so will damage the case and shorten the life of the battery. Refer to the Battery Maintenance Video (PN 9917987) for proper instruction on servicing Maintenance--Free batteries. BATTERY INSPECTION/REMOVAL The battery is located under the left rear fender. Battery Location To remove the battery: 1. Disconnect holder strap. 2. Disconnect battery negative (-) (black) cable first, followed by the positive (+) (red) cable. CAUTION To reduce the chance of sparks: Whenever removing the battery, disconnect the negative (black) cable first. When reinstalling the battery, install the negative cable last. 3. Remove the battery. 4. Clean battery cables and terminals with a stiff wire brush. Corrosion can be removed using a solution of one cup water and one tablespoon baking soda. Rinse well with clean water and dry thoroughly. Test battery for condition and charge accordingly. 5. Reinstall battery, attaching positive (+) (red) cable first and then the negative (-) (black) cable. 6. Coat terminals and bolt threads with Dielectric Grease (PN 2871329). 7. Reinstall battery cover and holder strap. 8. Reinstall the battery caps. 9. Charge battery at 1/10 of its amp/hour rating. Example: 1/10 of 14 amp battery = 1.4 amp 10. Reinstall the battery after testing. BATTERY TERMINALS/BOLTS Use Polaris corrosion resistant Dielectric Grease (PN 2871329) on battery bolts. OFF SEASON STORAGE To prevent battery damage during extended periods of non-use, the following basic battery maintenance items must be performed: G Remove the battery from the machine and wash the case and battery tray with a mild solution of baking soda and water. Rinse with lots of fresh water after cleaning. NOTE: Do not get any of the baking soda into the battery or the acid will be neutralized. G Using a wire brush or knife, remove any corrosion from the cables and terminals. G Never add water to a sealed maintenance free battery. G Charge at a rate no greater than 1/10 of the battery’s amp/hr capacity until the open circuit voltage is 12.9V or greater. G Store the battery either in the machine with the cables disconnected, or store in a cool place. CHARGING PROCEDURE 1. Remove the battery from the ATV to prevent damage from leaking or spilled acid during charging. 2. Charge the battery with a charging output no larger than 1/10 of the battery’s amp/hr rating. Charge as needed to raise the battery open circuit voltage to 12.9V or greater.
  • 28. Thank you very much for your reading. Please Click Here Then Get More Information.