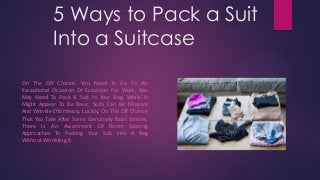
5 Ways to Pack a Suit Into a Suitcase
•
0 likes•192 views

On the off chance you need to go to an exceptional occasion or excursion for work, you may need to pack a suit in your bag.

Recommended
Recommended
More Related Content
Recently uploaded
Recently uploaded (8)
Featured
Featured (20)
5 Ways to Pack a Suit Into a Suitcase
- 1. 5 Ways to Pack a Suit Into a Suitcase On The Off Chance, You Need To Go To An Exceptional Occasion Or Excursion For Work, You May Need To Pack A Suit In Your Bag. While It Might Appear To Be Basic, Suits Can Be Massive And Wrinkle Effortlessly. Luckily, On The Off Chance That You Take After Some Genuinely Basic Strides, There Is An Assortment Of Room Sparing Approaches To Packing Your Suit Into A Bag Without Wrinkling It.
- 2. Method: 1 Completing a Traditional Fold: 1: Turn Your Suit Coat Over On A Level Surface. Turn Your Suit Coat Over With The Goal That The Posterior Is Confronting You. Position The Coat With The Goal That The Base Of The Coat Is Confronting You. 2: Crease The Left Half Of The Coat In Reverse. Take The Left Half Of The Suit Coat And Overlay It To The Correct With The Goal That The Arm Somewhat Covers The Focal Point Of The Suit And The Lapel Is Looking Up. Straighten Out The Arm With The Goal That It Doesn't Get Wrinkled When You Make Extra Creases Later. 3: Overlay The Correct Side Of The Coat In Reverse. Take The Correct Side Of The Coat And Overlap It To One Side Similarly That You Improved The Situation The Opposite Side Of The Suit Coat. The Arms Should Cover. Line The Two Lapels So They Run Parallel With Each Other. 4: Overlay the coat into equal parts the long way. Overlap the base of the coat and line it up to the highest point of the suit, close to the neckline. Place your hand under the suit, then flip it over. It should now be collapsed into a decent minimized square, with the lapel looking up.
- 3. Method 2 Popping One Shoulder Inside Out: 1: Lay your suit coat look down on a level surface. Turn your coat over, so its rear is looking up. When collapsing your coat you can utilize a level surface like a table or pressing board. 2: Overlay the left shoulder back. Overlap the left shoulder back towards the inside purpose of the suit with the goal that you can see the front lapel. Rectify the arm of the suit with the goal that it runs flush at the edge of the lapel.
- 4. 3: Turn The Correct Shoulder Back To Front. Crease The Correct Shoulder And Afterward Turn It Back To Front With The Goal That You See Within The Coat On The Posterior Of The Suit Coat. 4: Tuck The Left Shoulder Into The Correct Shoulder. Embed The Left Half Of The Coat Into The Back To The Front Part Of The Correct Shoulder. The Whole Length Of The Label Ought To Be Arranged. 5: Overlay The Base And Best Of The Coat. Overlay The Best Piece Of The Suit Coat To The Center Of The Suit And Afterward Overlap The Base Segment Of The Coat Over It. Your Suit Coat Should Now Be A Level 3D Square That Can Without Much Of A Stretch Fit In A Bag.
- 5. Method: 3 Playing out a Fold With a Dry Cleaning Bag: 1: Hang Your Coat On An Unbending Holder And Place It In A Laundry Pack. Slip The Coat Into The Laundry Sack And Draw The Highest Point Of The Holder Through The Opening At Best. The Snare Would Now Be Able To Go About As A Handle That You Can Use To Transport Your Suit. You Can Utilize A Modest Plastic Cleaning Pack Or A More Costly Fabric Cleaning Sack. 2: Overlay The Coat Into Equal Parts. Take The Base Of The Suit Coat And Overlay It Up So It Lines Up With The Neckline. You Would Prefer Not To Push Down On The Suit Since It Will Make A Wrinkle, Yet You Should Push Out The Greater Part Of The Abundance Air Within The Laundry Pack. 3: Place The Collapsed Coat Into Your Bag. After You've Collapsed The Suit Into Equal Parts, You Can Simply Place It In Your Bag. It's Best To Lay The Suit Over Your Different Garments With The Goal That It Doesn't Get Wrinkled Or Have A Wrinkle Down Its Center. This Technique Is Extraordinary In The Event That You Need To Surge And Don't Have Room Schedule-wise To Crease Your Suit Utilizing Another Strategy.
- 6. Method: 4 Moving Up Your Jacket: 1: Hold Your Coat Confronting Far From You. Hold Your Coat Out By The Shoulders So That The Back Of The Coat Is Confronting You. 2: Turn One Side Of The Coat Back To Front. Overlay One Side Of The Coat In Reverse And Back To Front. Within The Front Of The Coat Should Now Confront You. 3: Move Up A Shirt And Place It Into The Shoulder Of The Coat. Overlap The Two Sleeves Of A Shirt To The Focal Point Of The Shirt And Afterward Move It Up The Long Way. The Shirt Will Give You Extra Solidness When You Begin Moving Up The Suit And Will Counteract Wrinkles. When It's Moved Into A Tube, Stick It Within The Shoulder Of Your Coat.
- 7. Method: 5 Collapsing Pants: 1: Hold The Jeans Topsy-turvy And Locate The Normal Break. As You Hold The Jeans Topsy-turvy, You Ought To Have The Capacity To Feel How The Jeans Overlap Along Its Regular Wrinkle. 2: Press Your Jeans Level On Their Regular Wrinkle. Put The Jeans Down On A Level Surface Along Their Characteristic Wrinkle. Press Down On The Jeans With The Goal That One Leg Lays Level Over The Other Leg. Overlay The Jeans To The Abdomen. Overlap The Jeans Again And Line Up The Base Of The Jeans With The Midsection. In The Event That Done Effectively, Your Jeans Should Now Be A Little, Perfect Square, With The Suit Coat Wrapped Inside.
- 8. Custom Decorative Suitcase Storage Boxes: Suitcase Boxes Are About Outline, Shading And Printing That Is Found On Them Too. My Box Printing Gives Custom Decorative Suitcase Storage Boxes For more go here to Confines That Come To An Entire Host Of Hues And Have All The Plan Choices On Them Extending From The Most Moderate To The Most Astounding And All Around Designed Outlines That You Can Ever Envision. To Finish That Off, In The Event That You Are Searching For Suitcase Boxes That Have Extremely Quality Printing Done On Them In Any Required Organization Including Writings Or Realistic Portrayals, We Have The Most Developed Printing Gear And The Most Gifted Printing Specialists Also Who Will Ensure That All Your Printing Prerequisites Are Very Much Tended To.
- 9. Contact Us! h t t p s : / / w w w . m y b o x p r i n t i n g . c o m / E m a i l U s : s u p p o r t @ m y b o x p r i n t i n g . c o m