Configuring Router TP-LINK MR 3020 in Access Point (AP) mode
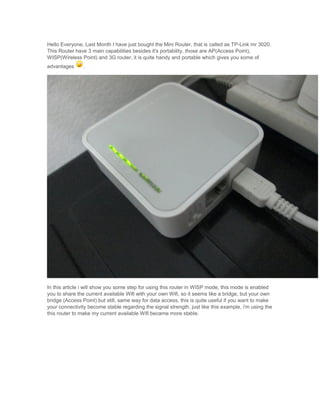
1. Hello Everyone, Last Month I have just bought the Mini Router, that is called as TP-Link mr 3020.
This Router have 3 main capabilities besides it's portability, those are AP(Access Point),
WISP(Wireless Point) and 3G router, it is quite handy and portable which gives you some of
advantages .
In this article i will show you some step for using this router in WISP mode, this mode is enabled
you to share the current available Wifi with your own Wifi, so it seems like a bridge, but your own
bridge (Access Point) but still, same way for data access, this is quite useful if you want to make
your connectivity become stable regarding the signal strength. just like this example, i'm using the
this router to make my current available Wifi became more stable.
2. in picture on
the right you can see that the main wifi, is called 'Reslee Mansion' only has 2 bar compared with
ssid "WN_D" that is my routers with full of signal(since i placed it next to my laptop) thus the
connection is became more stable than i'm using ssid ResleeMansion directly.
ok we are going to the point
1. first of all for first configuration you have to switch the hard trigger of router to Wisp mode
to activate this mode.
3. 2.
3. then make your ip became static to be able to enter the router configuration, with subnet
id is 192.168.0.xxx , you can change xxx with the value of yours within range 1 - 253 for
the ip configuration, for subnet mask using 255.255.255.0 and the getway is
192.168.0.254, then try to connect to the wifi (you may also using the LAN straight to the
router), for the first time the SSID of your local router may wil be TP_LINK_TL_MR3020
rather than "WN_D" in this case, but that's fine, we can configure it later.
4. 4.
5. After that, fire up your browser, enter the address of 192.168.0.254, you can entered the
router administration page, using predefined password, username : admin and
password : admin, straight go to the Quick setup.
6.
7. continue using the selection of the connection type, select ppoe if your router is
connected to the modem to configure it, but if the modem has been configured by it self,
you may using dynamic ip or static ip for bridging only, using dynamic mode if DHCP is
5. enabled on your modem, in this case i using the static ip because the DHCP in the main
router is sometimes is broken, so with using the static ip will somehow get rid of this.
8.
9. then assigning the needed parameter , such us ip address (you may ask about this to
network administrator or you can find out the idle ip with using ipconfig /all in window or
ifconfig in linux when connected to main router(in this case is reslee mension) then take a
note of it, then assign that ip to this parameter), this also same for subnet mask and
default gateway.
6. 10.
11. After you click next then time for bridging, using survey button, find out the available ssid,
then connect to it with providing the password and also key Type, in this stage you also
can change the local AP for this router, in this case i naming it WN_D
8. After rebotting done we have to configure the DHCP for our local AP and also the security, so
access again the router and go to the network -> LAN
1. One thing to be noted here that you have to set the subnet of local AP to be different with
the Main AP, in this case i choose 0 than 1 (you can select any number from 0 to 254 but
not 1 because it's owned by main AP), so the ip of the local AP will be 192.168.0.1 -
192.168.0.254 ,if you use 2, it will be like 192.168.2.1 - 192.168.2.254 . this is important
since there are many people face trouble because likely don't do this. so in this case i
using 0. and ip for router is 192.168.0.254.
2.
3. Then Continue to the security, moving up your browser to the Wireless -> Security, then
select your security type, in this case i using WPA personal because it is easy to be
configured.
9. 4.
5. After that done Klik Save then do restart of modem, in this case the DHCP should already
enabled, so you can change the ip configuration of your computer to be dynamic.
That's it :) , you may observe your router now have 3 lamp turned on, the most important is the
second one (from the left ) since it's the sign of internet connection whether off or on, you may
start to browse know :)
10. if you may want to do diagnostic, you may go to the system tools, the do pinging, simple step is
first try to ping your main router, in this case is 192.168.1.1, if it's up then connection of your local
router to your main router is working, then continue to ping outer web, say google.com, if it's
connected then congrat, if not, try to examine whether the internet conneciton of main router is up
or not since we are bridging it. and if you notice that your ip on local router is always started with
192.168.0.xxx , this is fine since this is the subnet of your local ip, to make the management
better and to make it work :).
11.
12. That's it maybe for this article, next time if possible i will also i have write about this router when
operating asAccess Point from the LAN. since there is something interesting to be examined :D.