SlideShare a Scribd company logo
1 of 184
Download to read offline
TurkHackTeam.Org/.Net/.Com.TR
The reason I wanted to show you how to use burp suite is to make you aware, to
prevent serious damages in cyber security area. This post intended to be used for
educational purposes. As Turkhackteam, we do not accept any legal or criminal
liability in any way and from any possible damages that you may suffer or cause
to harming to third parties by using, interpreting the information.
CONTENTS
A-WHAT IS BURP SUITE?
1- Why BURP SUITE?
1.1-What is Http?
1.2-What is Https?
1.3-What is SSL?
1.4-What is Proxy?
B-BURP SUITE SETUP
1-for Linux;
2-for Windows;
C-HTTPS SUPPORT
1-Proxy Configuration
1.1-for Edge (Windows 10);
1.2-for Firefox (Linux);
2-Disable to the SSL Warning;
2.1-for Windows;
2.1-for Linux;
D-THE TARGET SECTION
1-SiteMap Tab;
2-Scope Tab;
E-THE PROXY SECTION
1-Intercept Tab;
2-HTTP History Tab;
3-WebSocket History Tab;
4-Options Tab;
F-THE SCAN SECTION;
1-New Scan;
1.1-Details;
1.2-Audit Items;
1.3-Issue Activity;
1.4-Event Log;
G-THE INTRUDER SECTION
1-Target;
2-Positions;
2.1-Sniper;
2.2-Bettering Ram;
2.3-Pitchfork;
2.4-Cluster Bomb;
3-Payloads;
4-Options;
H-THE REPEATER SECTION
I-THE SEQUENCER SECTION
1-Live Capture Part;
1.1-Select Live Capture
1.2-Token L-o-c-a-t-i-o-n Within Response
1.3-Live Capture Options
2-Manuel Load Part;
3-Analysis Options Part;
3.1-Token Handling
3.2-Token Analysis
SUMMARY
J-THE DECODER SECTION
K-THE COMPARER SECTION
L-THE EXTENDER SECTION
1-Extensions Part;
2-BApp Store Part;
CO2
A-WHAT IS BURP SUITE?
Burp Suite is a proxy tool, written in java and developed by PortSwigger Security.
It enables web applications to establish a connection between the client and the
browser.
1-Why Burp Suite?
1) It has a dynamic structure in terms of functionality.
2) Hacking, i.e. It is perfect for penetration testing.
3) Does not require any other programs for pentest because It provides all the
tools in itself.
4) In addition to the tools that Burp Suite contains, personal tools can be
developed and added easily.
5) Professional version has a vulnerability scanning.
1.1-What is Http?
Hyper Text Transfer Protocol. It is the protocol that enables web pages to be
viewed over network.
1.2-What is Https?
It has the same function as Http protocol. But the only difference is, it has an
algorithm that encrypts messages in the server through SSL certificate.
1.3-What is SSL?
Secure Sockets Layer, for this system to work, you must have a key(password)
and a certificate on the server that provides server support. so you can take
advantage of this feature.
1.4-What is Proxy?
It is the structure that enables analysis of requests and responses, incoming and
outgoing requests over the Http/Https protocol. Shortly, It acts as an
intermediate server that allows us to examine traffic over the web because of
Proxy.
B-BURP SUITE SETUP
I will show how to install with details on Windows and Linux. But If you are using
the Parrot or Kali Linux, Burp Suite already comes preinstalled.
1-for Linux;
We need to install OpenJDK for Burp Suite.
Bu resim yeniden boyutlandırıldı, tam halini görmek için tıklayınız.
Firstly, We should find out If there is java:
Kod:
Java --version
If there isn't, write this code for install it:
Kod:
sudo apt-get install openjdk-11-jdk openjdk-11-jre
The latest version was 11, as you can see it looks like 11 on my Parrot. My advice
to you is to install the latest version.
Bu resim yeniden boyutlandırıldı, tam halini görmek için tıklayınız.
Then type "Burp Suite Download" in Google. We should click on the first link from
the results.
Bu resim yeniden boyutlandırıldı, tam halini görmek için tıklayınız.
We download it from the official website. Download the latest version
Bu resim yeniden boyutlandırıldı, tam halini görmek için tıklayınız.
Well, we will install the free version but If you want you can download the
professional version from the first part. In the second part, choose your system
and lastly, download the installation file.
Bu resim yeniden boyutlandırıldı, tam halini görmek için tıklayınız.
Go to the file that you've downloaded. We open Burp Suite with this code:
Kod:
sudo java -jar -Xmx2g burpsuite_file.jar
Click I Accept.
Bu resim yeniden boyutlandırıldı, tam halini görmek için tıklayınız.
Click Next.
Bu resim yeniden boyutlandırıldı, tam halini görmek için tıklayınız.
and click Start Burp.
Bu resim yeniden boyutlandırıldı, tam halini görmek için tıklayınız.
the installation has finished.
2-for Windows;
Bu resim yeniden boyutlandırıldı, tam halini görmek için tıklayınız.
type "Burp Suite Download" We should click on the first link from the results.
Bu resim yeniden boyutlandırıldı, tam halini görmek için tıklayınız.
We download it from the official website.
Bu resim yeniden boyutlandırıldı, tam halini görmek için tıklayınız.
We will install the free version but If you want you can download the professional
version from the first part. In the second part, choose your system and lastly,
download the installation file.
Bu resim yeniden boyutlandırıldı, tam halini görmek için tıklayınız.
If we want we can change the file name using the save button. After we clicked
the "save" button, installation process is starting.
run the .exe file as administrator, It will ask a question like "are you sure?" click
Yes.
Bu resim yeniden boyutlandırıldı, tam halini görmek için tıklayınız.
And click Next after the progress bar.
Bu resim yeniden boyutlandırıldı, tam halini görmek için tıklayınız.
select the folder where you would like Burp Suite Community Edition to be
installed, then click Next.
Bu resim yeniden boyutlandırıldı, tam halini görmek için tıklayınız.
If you want to create a start menu folder then select the start menu folder in
which you would like setup to create the program's shortcuts, then click next.
Bu resim yeniden boyutlandırıldı, tam halini görmek için tıklayınız.
Click Finish and open Burp Suite.
Bu resim yeniden boyutlandırıldı, tam halini görmek için tıklayınız.
Click I Accept
Bu resim yeniden boyutlandırıldı, tam halini görmek için tıklayınız.
To continue, click Next
Bu resim yeniden boyutlandırıldı, tam halini görmek için tıklayınız.
click Start Burp Suite.
Bu resim yeniden boyutlandırıldı, tam halini görmek için tıklayınız.
the installation has finished
C-HTTPS SUPPORT
As you know, since the fraud and malicious software over http have increased a
lot. So, a https ssl certified encryption algorithm has been developed as a solution
for this. It is not permitted to perform any improper activity with the software or
tool from the browser. It is possible to make transactions over http address while
we are using Burp Suite, It will give warning like "your connection is not secure
in https transactions!" That's why we produce certificates with Burp Suite and
introduce it to our browser, So we make sure that the requests and actions in this
certificate are completely safe.
1-Proxy Configuration
https://portswigger.net/support/conf...work-with-burp btw, I didn't see any
information about Edge, I need to show you with details
1.1-for Edge (Windows 10);
Bu resim yeniden boyutlandırıldı, tam halini görmek için tıklayınız.
Kod:
Proxy >Options > Edit > Binding > Loopback only > OK
Well, we dont need to do this because it is already default. In any way, I showed
in the screenshot about what happened. We should open our browser.
Bu resim yeniden boyutlandırıldı, tam halini görmek için tıklayınız.
Kod:
… > Options > Advanced > Intermediate Server Settings, open it.
Btw, use intermediate server option is closed to you. We should open it, fill the
required fields as you can see in the screenshot.
1.2-for Firefox (Linux);
Kod:
Firefox > Options > General > Network Proxy Settings
Bu resim yeniden boyutlandırıldı, tam halini görmek için tıklayınız.
We select Manual proxy configuration and click OK
2-Disable to the SSL Warning;
2.1-for
Windows;
Bu resim yeniden boyutlandırıldı, tam halini görmek için tıklayınız.
Kod:
Proxy >Options >import/export CA cert > Certificate in DER format > Next
Here, we are creating a new certificate.
Bu resim yeniden boyutlandırıldı, tam halini görmek için tıklayınız.
Kod:
Select file > Save > Next
We have determined where to save the certificate and it was successfully
exported.
Bu resim yeniden boyutlandırıldı, tam halini görmek için tıklayınız.
Done,Close it
Bu resim yeniden boyutlandırıldı, tam halini görmek için tıklayınız.
We are opening the certificate.
Kod:
Install Certificate >Choose Current User > Next
Bu resim yeniden boyutlandırıldı, tam halini görmek için tıklayınız.
Kod:
Place all certificates in the following storage area > browse > Trusted
certificate's root privileges
Bu resim yeniden boyutlandırıldı, tam halini görmek için tıklayınız.
Click Next.
Bu resim yeniden boyutlandırıldı, tam halini görmek için tıklayınız.
Click Finish.
Bu resim yeniden boyutlandırıldı, tam halini görmek için tıklayınız.
Click Yes.
Click
OK.
Bu resim yeniden boyutlandırıldı, tam halini görmek için tıklayınız.
And as you can see, we have entered the https address without any problems.
2.1-for Linux;
Same process, you can look at the above for create a certificate with burp suite.
Our
certificate is something like this
Bu resim yeniden boyutlandırıldı, tam halini görmek için tıklayınız.
Kod:
Firefox > Settings > Privacy and Security
Click View Certificates
Bu resim yeniden boyutlandırıldı, tam halini görmek için tıklayınız.
We should select our certificate
Bu resim yeniden boyutlandırıldı, tam halini görmek için tıklayınız.
D-THE TARGET SECTION
1-SiteMap Tab;
As its name signifies, it specifies the map of website. I mean, it provides us
comprehensive documênts about websites that we opened. Not only that, it can
show us errors too, that exist in website.
Bu resim yeniden boyutlandırıldı, tam halini görmek için tıklayınız.
Getting information about all websites is complex in functionality, but we can
target this complex construct for our purpose by filtering.
Bu resim yeniden boyutlandırıldı, tam halini görmek için tıklayınız.
Choices of filtering: by request type, by MIME type, by status code, by search
term, by file extension, by annotation.
2-Scope Tab;
It allows for researching on that target by telling Burp what's the current target.
Click right to the domain
and select "Add to Scope". By this way, we added our domain into Scope. Let's
check it out.
Bu resim yeniden boyutlandırıldı, tam halini görmek için tıklayınız.
E-THE PROXY SECTION
It's the section where we provide request and response between browser and
web server.
1-Intercept Tab;
It's used for displaying and editing HTTP and WebSocket messages between
browser and web server. It's a tab where we can catch our requests and
responses from browser to web server.
Bu resim yeniden boyutlandırıldı, tam halini görmek için tıklayınız.
Forward: We click on the "Forward" option to send this message to server or
browser after you looked over (and if it's necessary, changed it).
Drop: We use it when we want to stop sending message.
Intercept On/Off
On: Messages are captured or forwarded automatically, based on options
configured to block HTTP and WebSocket messages.
Off: All messages are forwarded automatically.
Action: Shows a menu of available actions that can be performed on the displayed
message.
2-HTTP History Tab;
You must be familiar with this from Sitemap tab of Target section. It's a tab
where we can get detailed documênts of website.
Bu resim yeniden boyutlandırıldı, tam halini görmek için tıklayınız.
3-WebSocket History Tab;
It's a tab where WebSocket history are searched.
WebSocket: A computer communications protocol, providing full-duplex
communication channels over a single TCP connection.
Bu resim yeniden boyutlandırıldı, tam halini görmek için tıklayınız.
4-Options Tab;
It's a tab where we get all options such as proxy configuration, message option,
server option
Bu resim yeniden boyutlandırıldı, tam halini görmek için tıklayınız.
F-THE SCAN SECTION;
It's my one of favourite Burp features. It's a combination of the Spider and
Scanner section in older versions. It both scans targeted website and gives
documênts of it, and scans vulnerabilities.
1-New Scan;
Bu resim yeniden boyutlandırıldı, tam halini görmek için tıklayınız.
As you can see, scanning of targeted website is started
Bu resim yeniden boyutlandırıldı, tam halini görmek için tıklayınız.
Click 'View Details' button to display details about scan.
1.1-Details;
Here is the details:
Bu resim yeniden boyutlandırıldı, tam halini görmek için tıklayınız.
1.2-Audit Items;
Bu resim yeniden boyutlandırıldı, tam halini görmek için tıklayınız.
Audit Items: It shows all of the website's consist documênt.
1.3-Issue Activity;
Bu resim yeniden boyutlandırıldı, tam halini görmek için tıklayınız.
Issue Activity: It shows high and low risk vulnerabilities of targeted website.
1.4-Event Log;
Bu resim yeniden boyutlandırıldı, tam halini görmek için tıklayınız.
It's a tab where all of the logs between server and us keep.
G-THE INTRUDER SECTION
It's variables being manipulated by masking methods. Masked variables are
shown with “$” symbol. Main usage purpose is brute force.
Bu resim yeniden boyutlandırıldı, tam halini görmek için tıklayınız.
Let's send values that belong to user and pass variable from login webpage we
caught earlier, to Intruder.
1-Target;
Bu resim yeniden boyutlandırıldı, tam halini görmek için tıklayınız.
Targeted website's infos automatically come here. If we want, we can input it
manually too.
2-Positions;
This is where caught login website request sent goes to.
Bu resim yeniden boyutlandırıldı, tam halini görmek için tıklayınız.
Firstly, as you can see, it masking automatically. 'Auto' button also does same
process. But i don't recommend you to do that because it's unreliable.
Bu resim yeniden boyutlandırıldı, tam halini görmek için tıklayınız.
So, first step will be selecting all and click 'Clear' button to clear all of masking.
Bu resim yeniden boyutlandırıldı, tam halini görmek için tıklayınız.
Choose the user admin pass admin part and click 'Add' to adding only this part to
masking.
Bu resim yeniden boyutlandırıldı, tam halini görmek için tıklayınız.
There are 4 types of attack. Payload can be differ, depends on this types.
2.1-Sniper;
It is the process of sending a single request. We choose the Sniper attack type
and go to the payloads section.
Bu resim yeniden boyutlandırıldı, tam halini görmek için tıklayınız.
Payloads Sets
Because it is a Sniper attack, it performs an attack through a variable. You can
also see it in Payloads set section.
Payloads Options
We can assign a value from the" Add " section ourselves. If we want, we can
include an existing list in the "Load" section. Or if you say that I want to copy
from ".. somewhere and throw here, thanks to add "Paste" button. Here you can
delete a value you do not want with the "Remove" button. Or all of them thanks
to the "Clear" button allows you to delete that all things.
Bu resim yeniden boyutlandırıldı, tam halini görmek için tıklayınız.
Here, it tells us that it will make four attempts by assigning us to only one
variable via "user" or "pass", considering of two possibilities.
Bu resim yeniden boyutlandırıldı, tam halini görmek için tıklayınız.
I tried to show it above, it only conducted four attempts on a variable "user" or
"pass" depending on the list we created. The value in the other variable has
already been assigned to the existing value.
It's returned us 200 now, so from here we're seeing that the entry attempt failed.
But if the try out had been successful, it would have returned 302 in the "Status"
section.
2.2-Bettering Ram;
Although it looks the same as sniper attack, there is a difference. It assigns the
same value to the two variables whose lists are "user" and "pass". We're
choosing the Bettering Ram attack from positions. We're going to Payloads.
Bu resim yeniden boyutlandırıldı, tam halini görmek için tıklayınız.
Here, it tells us that it will give us two trial by assigning the same value to 2
variables, given the possibility of two possibilities. So it says it'll try with our
"user" and "pass" variables by assigning the same value. As you can see, if we
look at the "Status" section again, we'll see that 200 returns. So we understand
that our attempt failed. If our transaction were successful, it would have
returned 302 in the "Status" section.
2.3-Pitchfork;
It is an attack type that creates two lists and allows the first list to try out on the
"user" variable, allowing the second list to try out on the "pass" variable. We
select the Pitchfork attack type from "Positions" section. Then we go to the
Payloads Section.
Bu resim yeniden boyutlandırıldı, tam halini görmek için tıklayınız.
As you can see, we've created two lists. Our first list also experimented with the
"user" variable. Our second variable also allowed the "pass" variable to
experiment.
2.4-Cluster Bomb;
Even though it looks the same as a pitchfork attack, there's a difference, and it
assigns value to variables as diagonals of the two lists we create.
Bu resim yeniden boyutlandırıldı, tam halini görmek için tıklayınız.
We've created our lists, and accordingly, it's determined the number of attempts.
We're going to say "Start Attack" and start our attack.
Bu resim yeniden boyutlandırıldı, tam halini görmek için tıklayınız.
As I tried to show above, the cross-diagonal method and the values in our first
list were matched to the values in our second list and allowed experiments. As we
saw in the "Status" section, the entry failed.
Bu resim yeniden boyutlandırıldı, tam halini görmek için tıklayınız.
It is also worth examining the image above so that you can see it in more detail.
3-Payloads;
Payloads Sets
Payload set;Shows the number of lists we create.
Payload Type; to determine the type of attack.
So it's on the list? Or by brute force? Using letters or numbers only? We can
choose to attack.
Payloads Options
If we want, we can assign a value from the "Add" section ourselves. We can
include a list in "Load" if we want.
Or if you say that if you say you want to copy it from somewhere and throw it
here, you can add it through the "Paste" button.Here you can delete a value you
don't want with the "Remove" button. Or it's all through the "Clear" button,
allowing you to clean up what's up.
The "Add from list" button we can also use lists already available within the
program.
Payloads Processing
When carrying out the attack, we throw out the rules we want to comply with.
Add; add rules that need to be followed when processing lists.
Edit; Edit rules that must be followed when processing lists.
Remove; Delete the rule that must be followed when processing lists.
Up; It has to be followed, in the order of the rules, it tops what we want.
Down; It has to be followed in the order of the rules to lower what we want to
the lower level.
Payloads Encoding
This setting can be used to code the characters selected in the last load as urls for
secure transmission within HTTP requests.
4-Options;
Request Headers
These settings control whether the attacker will update the configured request
headers during attacks.
Request Engine
These settings control the engine used for making HTTP requests in the Intruder
attack. In other words, we make the settings such as how long we will send
requests to the server and how long it will be reconnected after disconnection.
Attack Results
These settings control what information is captured in the attack results. It
enables to show whether requests, responses and rejected feedbacks between us
and the server are displayed.
Grep - Match
These settings can be used to flag the result items containing specified
expressions in the response. It can still paste the word as usual. And it can install
from another locâtions. It can delete existing word and we can clear the whole
list. And determines case sensitive. If we want the http header to be included in
this search or not, we can set up the necessary options.
Grep - Extract
These settings can be used to extract useful information from responses into the
attack results table. We can add, edit, delete the item to extract information that
doesn't benefit us from the returned results. And we can pull it on top/bottom in
order of importance. We can clear the whole list and we can specify the length of
the item and get clearer results.
Grep – Payloads
These settings can be used to flag result items containing reflections of the
submitted payload. We can exclude http headers and make them case sensitive.
It can match with results that caught earlier. We can cofigure search responses
for strings.
Redirections
These settings control how Burp handles redirections when performing attacks.
H-THE REPEATER SECTION
It provides the opportunity to perform the processes that we make in order to
catch the requests on the Login page in Proxy section. We send the request that
we captured on the login page to the "Repeater" section.
Bu resim yeniden boyutlandırıldı, tam halini görmek için tıklayınız.
Change the "user", "pass" and click Go button, we can see the response given by
the server on the right side. So, replacing the required fields repeatedly is a more
functional tool for practicality.
I-THE SEQUENCER SECTION
It is the tool used to analyze the foreseeability quality of tokens in data items.
You can use it to test session tokens, anti-CSRF tokens, password reset tokens or
other undpredictable data items of an application. It is important because the
cookies could be taken with this method.
Bu resim yeniden boyutlandırıldı, tam halini görmek için tıklayınız.
We send the token (phid value etc.) that we want to analyze to the Sequencer
section.
1-Live Capture Part;
Bu resim yeniden boyutlandırıldı, tam halini görmek için tıklayınız.
Kod:
For this, we should go the Sequencer section > Live Capture part.
1.1-Select Live Capture
It shows that you send from Burp tools. Select the request that returns the token
or other item that you want to resolve. So, we select the data we will analyze and
click Start button.
1.2-Token L-o-c-a-t-i-o-n Within Response
It allows us to select a token that can be resolved by defining responses returned
to the server.
the following options:
Cookie: If the response sets any cookie, this option will allow you to choose a
cookie to be parsed. This is the most common method for get over the session
tokens.
Form field: If the response contains any HTML form fields, this option will allow
you to choose a form field. This method is often used to send anti-CSRF tokens
and other tokens to clients.
Custom Locâtion: You can use this option to specify a specific locâtion within the
response that contains the data that you want to analyze.
1.3-Live Capture Options
These settings control the engine used for making HTTP requests and harvesting
tokens when performing the live capture.
Number of threads: This option controls the number of concurrent requests the
live capture is able to make.
Throttle between requests: Optionally, the live capture can wait a specified delay
(in milliseconds) before every request.
Ignore token whose length deviates by X characters: You can optionally configure
the live capture to ignore tokens whose length deviates by a given threshold from
the average token length.
2-Manuel Load Part;
Live Capture section automatically captured the live request and sent the token.
In this section, the information in the text file that we captured is transferred to
this section. To do this we go to Sequence section > Manual Load section. This
function allows you to load Sequencer with a sample of tokens that you have
already obtained, and then perform the statistical analysis on the sample.
Bu resim yeniden boyutlandırıldı, tam halini görmek için tıklayınız.
Use the Paste button to paste the tokens from the clipboard, or the Load button
to load them from file. When our process is finished, it offers the opportunity to
clean the screen with the help of the Clear button.
3-Analysis Options Part;
The "Analysis options" tab lets you configure how tokens are handled, and which
types of tests are performed during the analysis.
Kod:
for this, go to Sequencer section > Analysis Options part.
Bu resim yeniden boyutlandırıldı, tam halini görmek için tıklayınız.
3.1-Token Handling
These settings control how tokens are handled during analysis.
3.2-Token Analysis
These options control the types of analyses that are performed. You can
individually enable or disable each type of character-level and bit-level test.
Sometimes, after performing an initial analysis with all tests enabled, you may
want to disable certain tests to reflect your better understanding of the tokens'
characteristics, or to isolate the effects of any unusual characteristics manifested
by your sample. In the results window, after modifying any of the analysis
options you can click the "Redo analysis" button to re-perform the analysis with
your new settings, and update the results.
SUMMARY
The "summer" locâtion of each section tells us the summary of the analysis. It is
enough to look at these places and examine them. We can achieve certain results.
J-THE DECODER SECTION
On sites, the WAF (firewall) system encrypts personal information. Thus, all
transactions are encrypted and provide a secure infrastructure. But of course, I
will show you that we can simply capture and decode this encryption on a site
with SQL Injection vulnerability
Bu resim yeniden boyutlandırıldı, tam halini görmek için tıklayınız.
.
We always listened to our site before we searched for this process, we caught it
before returning the request, and the encrypted request from there was right
click on the mouse and say> “Send Decoder”.
Bu resim yeniden boyutlandırıldı, tam halini görmek için tıklayınız.
The "‘ "sign in the URL address is encrypted as" 27% ". We call it" Decoder as
"and we do the analysis according to what kind of encryption is done. We click on
the "URL" button.
Bu resim yeniden boyutlandırıldı, tam halini görmek için tıklayınız.
We broke the password and showed us the normal URL section. But we don't just
decrypt it. If we want, we can encrypt the address we want, any structure with
an encryption algorithm that we want.
Kod:
“Encode as” > “URL” Well, I should select the URL because because I encrypted
the URL.
Our transaction is over. This time i encrypted the entire URL.
K-THE COMPARER SECTION
It is a tool for us to compare words and bytes. Sometimes we want to see the
answers given to us from the server, different reactions at the same time. This
means looking at it from a distance like a third person and sometimes it helps.
Bu resim yeniden boyutlandırıldı, tam halini görmek için tıklayınız.
Now it has come to compare the data we sent. We go to the "Comparer" section.
We can compare it as "Words" or "Bytes".
Bu resim yeniden boyutlandırıldı, tam halini görmek için tıklayınız.
We got some results. A word and byte based result has returned as above. The
values in orange show the changing values in comparison. Deleted values appear
in blue. The values added later are considered yellow.
L-THE EXTENDER SECTION
Thanks to this tool, it is possible to add the software coded by the developers and
the software coded by yourself to the burp suite program
1-Extensions Part;
Bu resim yeniden boyutlandırıldı, tam halini görmek için tıklayınız.
We come from Extender section to Extensions section. Here, we can add a
software we developed to the burp suite, while we can delete a software that we
added or change its order.
2-BApp Store Part;
Bu resim yeniden boyutlandırıldı, tam halini görmek için tıklayınız.
From the Extender section, we enter the> BApp Store section. It is possible to
find the software of other developers here.
I want to talk about the most popular "C02" software.
CO2
Using SQLMap, we can exploit a site with SQL injection vulnerability.
Bu resim yeniden boyutlandırıldı, tam halini görmek için tıklayınız.
To use this feature, sqlmap application must be python. We choose where they
are located. Thus, the application can run when we make the necessary options.
Bu resim yeniden boyutlandırıldı, tam halini görmek için tıklayınız.
As a result, we can scan by using sqlmap written in python and take advantage of
openness. The only good part of being useful is that it is automatic, but my
personal opinion is that i do not recommend it.
Bu resim yeniden boyutlandırıldı, tam halini görmek için tıklayınız.
User Generator - Displays the name and surname or username of a name on the
most commonly used historical basis.
Bu resim yeniden boyutlandırıldı, tam halini görmek için tıklayınız.
Name Mangler - Manages them to create a list of potential usernames that can be
left to the intruder to test valid entries.
Bu resim yeniden boyutlandırıldı, tam halini görmek için tıklayınız.
CeWLer - Can be used to extract a word list from HTML files.
Bu resim yeniden boyutlandırıldı, tam halini görmek için tıklayınız.
Masher - Starts with combining words from the list provided, then adds and
modifies characters to create new passwords.
Bu resim yeniden boyutlandırıldı, tam halini görmek için tıklayınız.
BasicAuther - When given a list of usernames and passwords, they extract the
appropriate BasicAuth strings that can later be left to intruders.
TurkHackTeam.Org/.Net/.Com.TR

More Related Content

What's hot

Step by step_linux_guide
Step by step_linux_guideStep by step_linux_guide
Step by step_linux_guide
vinod31dec
 
12849144 how-to-install-a-cccam-server-on-windows
12849144 how-to-install-a-cccam-server-on-windows12849144 how-to-install-a-cccam-server-on-windows
12849144 how-to-install-a-cccam-server-on-windows
rajuy2r
 
Build your own secure mail server on the cloud using Amazon Web Services
Build your own secure mail server on the cloud using Amazon Web ServicesBuild your own secure mail server on the cloud using Amazon Web Services
Build your own secure mail server on the cloud using Amazon Web Services
ponukumatla joel nishanth
 
Apache installation and configurations
Apache installation and configurationsApache installation and configurations
Apache installation and configurations
Nikhil Jain
 
Dhcp Server Linux Server
Dhcp Server Linux ServerDhcp Server Linux Server
Dhcp Server Linux Server
muh kemal
 

What's hot (18)

Using aphace-as-proxy-server
Using aphace-as-proxy-serverUsing aphace-as-proxy-server
Using aphace-as-proxy-server
 
Cisco asa firewall command line technical guide
Cisco asa firewall command line technical guideCisco asa firewall command line technical guide
Cisco asa firewall command line technical guide
 
Udp socket programming(Florian)
Udp socket programming(Florian)Udp socket programming(Florian)
Udp socket programming(Florian)
 
Restrict an ip
Restrict an ipRestrict an ip
Restrict an ip
 
Step by step_linux_guide
Step by step_linux_guideStep by step_linux_guide
Step by step_linux_guide
 
dokumen.tips_cara-setting-mikrotik-pppoe.doc
dokumen.tips_cara-setting-mikrotik-pppoe.docdokumen.tips_cara-setting-mikrotik-pppoe.doc
dokumen.tips_cara-setting-mikrotik-pppoe.doc
 
Ansible
AnsibleAnsible
Ansible
 
12849144 how-to-install-a-cccam-server-on-windows
12849144 how-to-install-a-cccam-server-on-windows12849144 how-to-install-a-cccam-server-on-windows
12849144 how-to-install-a-cccam-server-on-windows
 
Createlistener
CreatelistenerCreatelistener
Createlistener
 
cara menginstall router
cara menginstall routercara menginstall router
cara menginstall router
 
Build your own secure mail server on the cloud using Amazon Web Services
Build your own secure mail server on the cloud using Amazon Web ServicesBuild your own secure mail server on the cloud using Amazon Web Services
Build your own secure mail server on the cloud using Amazon Web Services
 
Changes
ChangesChanges
Changes
 
Apache installation and configurations
Apache installation and configurationsApache installation and configurations
Apache installation and configurations
 
Networking & Socket Programming In Java
Networking & Socket Programming In JavaNetworking & Socket Programming In Java
Networking & Socket Programming In Java
 
Java sockets
Java socketsJava sockets
Java sockets
 
Dhcp Server Linux Server
Dhcp Server Linux ServerDhcp Server Linux Server
Dhcp Server Linux Server
 
Radius
RadiusRadius
Radius
 
Basic socket programming
Basic socket programmingBasic socket programming
Basic socket programming
 

Similar to From A to Z | Burp Suite Tutorial

Step by-step guide-to_getting_started_with_hyper-v
Step by-step guide-to_getting_started_with_hyper-vStep by-step guide-to_getting_started_with_hyper-v
Step by-step guide-to_getting_started_with_hyper-v
PSD Solutions .....
 
Troubleshooting guide
Troubleshooting guideTroubleshooting guide
Troubleshooting guide
jameszzzz
 
Troubleshooting guide
Troubleshooting guideTroubleshooting guide
Troubleshooting guide
jameszzzzz
 
NHL Troubleshooting Tool
NHL Troubleshooting ToolNHL Troubleshooting Tool
NHL Troubleshooting Tool
ntufts
 
Troubleshooting Tool
Troubleshooting ToolTroubleshooting Tool
Troubleshooting Tool
ntufts
 

Similar to From A to Z | Burp Suite Tutorial (20)

Pampabilis
PampabilisPampabilis
Pampabilis
 
manual vvtk camera_st7501
manual vvtk camera_st7501manual vvtk camera_st7501
manual vvtk camera_st7501
 
Burp suite
Burp suiteBurp suite
Burp suite
 
Install notes!
Install notes!Install notes!
Install notes!
 
Read me
Read meRead me
Read me
 
How To Install CentOS 7
How To Install CentOS 7How To Install CentOS 7
How To Install CentOS 7
 
Magento Offer on Leaving Extension
Magento Offer on Leaving ExtensionMagento Offer on Leaving Extension
Magento Offer on Leaving Extension
 
Step by-step guide-to_getting_started_with_hyper-v
Step by-step guide-to_getting_started_with_hyper-vStep by-step guide-to_getting_started_with_hyper-v
Step by-step guide-to_getting_started_with_hyper-v
 
Girl Gets Ring
Girl Gets RingGirl Gets Ring
Girl Gets Ring
 
Troubleshooting guide
Troubleshooting guideTroubleshooting guide
Troubleshooting guide
 
Troubleshooting guide
Troubleshooting guideTroubleshooting guide
Troubleshooting guide
 
Esm rel notes_6.0cp1
Esm rel notes_6.0cp1Esm rel notes_6.0cp1
Esm rel notes_6.0cp1
 
Bugzilla
BugzillaBugzilla
Bugzilla
 
Setting Up a Cloud Server - Part 1 - Transcript.pdf
Setting Up a Cloud Server - Part 1 - Transcript.pdfSetting Up a Cloud Server - Part 1 - Transcript.pdf
Setting Up a Cloud Server - Part 1 - Transcript.pdf
 
Willing Webcam manual
Willing Webcam manualWilling Webcam manual
Willing Webcam manual
 
Docker all the way
Docker all the wayDocker all the way
Docker all the way
 
NHL Troubleshooting Tool
NHL Troubleshooting ToolNHL Troubleshooting Tool
NHL Troubleshooting Tool
 
Troubleshooting Tool
Troubleshooting ToolTroubleshooting Tool
Troubleshooting Tool
 
Front end workflow with yeoman
Front end workflow with yeomanFront end workflow with yeoman
Front end workflow with yeoman
 
Manual of functions step by step microsoft word 2007
Manual of functions step by step microsoft word 2007Manual of functions step by step microsoft word 2007
Manual of functions step by step microsoft word 2007
 

Recently uploaded

+971565801893>>SAFE AND ORIGINAL ABORTION PILLS FOR SALE IN DUBAI AND ABUDHAB...
+971565801893>>SAFE AND ORIGINAL ABORTION PILLS FOR SALE IN DUBAI AND ABUDHAB...+971565801893>>SAFE AND ORIGINAL ABORTION PILLS FOR SALE IN DUBAI AND ABUDHAB...
+971565801893>>SAFE AND ORIGINAL ABORTION PILLS FOR SALE IN DUBAI AND ABUDHAB...
Health
 
AI Mastery 201: Elevating Your Workflow with Advanced LLM Techniques
AI Mastery 201: Elevating Your Workflow with Advanced LLM TechniquesAI Mastery 201: Elevating Your Workflow with Advanced LLM Techniques
AI Mastery 201: Elevating Your Workflow with Advanced LLM Techniques
VictorSzoltysek
 
CHEAP Call Girls in Pushp Vihar (-DELHI )🔝 9953056974🔝(=)/CALL GIRLS SERVICE
CHEAP Call Girls in Pushp Vihar (-DELHI )🔝 9953056974🔝(=)/CALL GIRLS SERVICECHEAP Call Girls in Pushp Vihar (-DELHI )🔝 9953056974🔝(=)/CALL GIRLS SERVICE
CHEAP Call Girls in Pushp Vihar (-DELHI )🔝 9953056974🔝(=)/CALL GIRLS SERVICE
9953056974 Low Rate Call Girls In Saket, Delhi NCR
 
TECUNIQUE: Success Stories: IT Service provider
TECUNIQUE: Success Stories: IT Service providerTECUNIQUE: Success Stories: IT Service provider
TECUNIQUE: Success Stories: IT Service provider
mohitmore19
 

Recently uploaded (20)

%in ivory park+277-882-255-28 abortion pills for sale in ivory park
%in ivory park+277-882-255-28 abortion pills for sale in ivory park %in ivory park+277-882-255-28 abortion pills for sale in ivory park
%in ivory park+277-882-255-28 abortion pills for sale in ivory park
 
AI & Machine Learning Presentation Template
AI & Machine Learning Presentation TemplateAI & Machine Learning Presentation Template
AI & Machine Learning Presentation Template
 
How To Troubleshoot Collaboration Apps for the Modern Connected Worker
How To Troubleshoot Collaboration Apps for the Modern Connected WorkerHow To Troubleshoot Collaboration Apps for the Modern Connected Worker
How To Troubleshoot Collaboration Apps for the Modern Connected Worker
 
Payment Gateway Testing Simplified_ A Step-by-Step Guide for Beginners.pdf
Payment Gateway Testing Simplified_ A Step-by-Step Guide for Beginners.pdfPayment Gateway Testing Simplified_ A Step-by-Step Guide for Beginners.pdf
Payment Gateway Testing Simplified_ A Step-by-Step Guide for Beginners.pdf
 
VTU technical seminar 8Th Sem on Scikit-learn
VTU technical seminar 8Th Sem on Scikit-learnVTU technical seminar 8Th Sem on Scikit-learn
VTU technical seminar 8Th Sem on Scikit-learn
 
LEVEL 5 - SESSION 1 2023 (1).pptx - PDF 123456
LEVEL 5   - SESSION 1 2023 (1).pptx - PDF 123456LEVEL 5   - SESSION 1 2023 (1).pptx - PDF 123456
LEVEL 5 - SESSION 1 2023 (1).pptx - PDF 123456
 
+971565801893>>SAFE AND ORIGINAL ABORTION PILLS FOR SALE IN DUBAI AND ABUDHAB...
+971565801893>>SAFE AND ORIGINAL ABORTION PILLS FOR SALE IN DUBAI AND ABUDHAB...+971565801893>>SAFE AND ORIGINAL ABORTION PILLS FOR SALE IN DUBAI AND ABUDHAB...
+971565801893>>SAFE AND ORIGINAL ABORTION PILLS FOR SALE IN DUBAI AND ABUDHAB...
 
AI Mastery 201: Elevating Your Workflow with Advanced LLM Techniques
AI Mastery 201: Elevating Your Workflow with Advanced LLM TechniquesAI Mastery 201: Elevating Your Workflow with Advanced LLM Techniques
AI Mastery 201: Elevating Your Workflow with Advanced LLM Techniques
 
OpenChain - The Ramifications of ISO/IEC 5230 and ISO/IEC 18974 for Legal Pro...
OpenChain - The Ramifications of ISO/IEC 5230 and ISO/IEC 18974 for Legal Pro...OpenChain - The Ramifications of ISO/IEC 5230 and ISO/IEC 18974 for Legal Pro...
OpenChain - The Ramifications of ISO/IEC 5230 and ISO/IEC 18974 for Legal Pro...
 
Define the academic and professional writing..pdf
Define the academic and professional writing..pdfDefine the academic and professional writing..pdf
Define the academic and professional writing..pdf
 
The Ultimate Test Automation Guide_ Best Practices and Tips.pdf
The Ultimate Test Automation Guide_ Best Practices and Tips.pdfThe Ultimate Test Automation Guide_ Best Practices and Tips.pdf
The Ultimate Test Automation Guide_ Best Practices and Tips.pdf
 
Learn the Fundamentals of XCUITest Framework_ A Beginner's Guide.pdf
Learn the Fundamentals of XCUITest Framework_ A Beginner's Guide.pdfLearn the Fundamentals of XCUITest Framework_ A Beginner's Guide.pdf
Learn the Fundamentals of XCUITest Framework_ A Beginner's Guide.pdf
 
call girls in Vaishali (Ghaziabad) 🔝 >༒8448380779 🔝 genuine Escort Service 🔝✔️✔️
call girls in Vaishali (Ghaziabad) 🔝 >༒8448380779 🔝 genuine Escort Service 🔝✔️✔️call girls in Vaishali (Ghaziabad) 🔝 >༒8448380779 🔝 genuine Escort Service 🔝✔️✔️
call girls in Vaishali (Ghaziabad) 🔝 >༒8448380779 🔝 genuine Escort Service 🔝✔️✔️
 
BUS PASS MANGEMENT SYSTEM USING PHP.pptx
BUS PASS MANGEMENT SYSTEM USING PHP.pptxBUS PASS MANGEMENT SYSTEM USING PHP.pptx
BUS PASS MANGEMENT SYSTEM USING PHP.pptx
 
HR Software Buyers Guide in 2024 - HRSoftware.com
HR Software Buyers Guide in 2024 - HRSoftware.comHR Software Buyers Guide in 2024 - HRSoftware.com
HR Software Buyers Guide in 2024 - HRSoftware.com
 
ManageIQ - Sprint 236 Review - Slide Deck
ManageIQ - Sprint 236 Review - Slide DeckManageIQ - Sprint 236 Review - Slide Deck
ManageIQ - Sprint 236 Review - Slide Deck
 
CHEAP Call Girls in Pushp Vihar (-DELHI )🔝 9953056974🔝(=)/CALL GIRLS SERVICE
CHEAP Call Girls in Pushp Vihar (-DELHI )🔝 9953056974🔝(=)/CALL GIRLS SERVICECHEAP Call Girls in Pushp Vihar (-DELHI )🔝 9953056974🔝(=)/CALL GIRLS SERVICE
CHEAP Call Girls in Pushp Vihar (-DELHI )🔝 9953056974🔝(=)/CALL GIRLS SERVICE
 
Sector 18, Noida Call girls :8448380779 Model Escorts | 100% verified
Sector 18, Noida Call girls :8448380779 Model Escorts | 100% verifiedSector 18, Noida Call girls :8448380779 Model Escorts | 100% verified
Sector 18, Noida Call girls :8448380779 Model Escorts | 100% verified
 
TECUNIQUE: Success Stories: IT Service provider
TECUNIQUE: Success Stories: IT Service providerTECUNIQUE: Success Stories: IT Service provider
TECUNIQUE: Success Stories: IT Service provider
 
Chinsurah Escorts ☎️8617697112 Starting From 5K to 15K High Profile Escorts ...
Chinsurah Escorts ☎️8617697112  Starting From 5K to 15K High Profile Escorts ...Chinsurah Escorts ☎️8617697112  Starting From 5K to 15K High Profile Escorts ...
Chinsurah Escorts ☎️8617697112 Starting From 5K to 15K High Profile Escorts ...
 

From A to Z | Burp Suite Tutorial

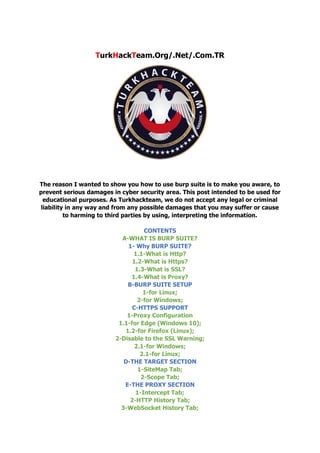
  • 1. TurkHackTeam.Org/.Net/.Com.TR The reason I wanted to show you how to use burp suite is to make you aware, to prevent serious damages in cyber security area. This post intended to be used for educational purposes. As Turkhackteam, we do not accept any legal or criminal liability in any way and from any possible damages that you may suffer or cause to harming to third parties by using, interpreting the information. CONTENTS A-WHAT IS BURP SUITE? 1- Why BURP SUITE? 1.1-What is Http? 1.2-What is Https? 1.3-What is SSL? 1.4-What is Proxy? B-BURP SUITE SETUP 1-for Linux; 2-for Windows; C-HTTPS SUPPORT 1-Proxy Configuration 1.1-for Edge (Windows 10); 1.2-for Firefox (Linux); 2-Disable to the SSL Warning; 2.1-for Windows; 2.1-for Linux; D-THE TARGET SECTION 1-SiteMap Tab; 2-Scope Tab; E-THE PROXY SECTION 1-Intercept Tab; 2-HTTP History Tab; 3-WebSocket History Tab;
  • 2. 4-Options Tab; F-THE SCAN SECTION; 1-New Scan; 1.1-Details; 1.2-Audit Items; 1.3-Issue Activity; 1.4-Event Log; G-THE INTRUDER SECTION 1-Target; 2-Positions; 2.1-Sniper; 2.2-Bettering Ram; 2.3-Pitchfork; 2.4-Cluster Bomb; 3-Payloads; 4-Options; H-THE REPEATER SECTION I-THE SEQUENCER SECTION 1-Live Capture Part; 1.1-Select Live Capture 1.2-Token L-o-c-a-t-i-o-n Within Response 1.3-Live Capture Options 2-Manuel Load Part; 3-Analysis Options Part; 3.1-Token Handling 3.2-Token Analysis SUMMARY J-THE DECODER SECTION K-THE COMPARER SECTION L-THE EXTENDER SECTION 1-Extensions Part; 2-BApp Store Part; CO2 A-WHAT IS BURP SUITE? Burp Suite is a proxy tool, written in java and developed by PortSwigger Security. It enables web applications to establish a connection between the client and the browser. 1-Why Burp Suite? 1) It has a dynamic structure in terms of functionality. 2) Hacking, i.e. It is perfect for penetration testing. 3) Does not require any other programs for pentest because It provides all the tools in itself. 4) In addition to the tools that Burp Suite contains, personal tools can be developed and added easily.
  • 3. 5) Professional version has a vulnerability scanning. 1.1-What is Http? Hyper Text Transfer Protocol. It is the protocol that enables web pages to be viewed over network. 1.2-What is Https? It has the same function as Http protocol. But the only difference is, it has an algorithm that encrypts messages in the server through SSL certificate. 1.3-What is SSL? Secure Sockets Layer, for this system to work, you must have a key(password) and a certificate on the server that provides server support. so you can take advantage of this feature. 1.4-What is Proxy? It is the structure that enables analysis of requests and responses, incoming and outgoing requests over the Http/Https protocol. Shortly, It acts as an intermediate server that allows us to examine traffic over the web because of Proxy. B-BURP SUITE SETUP I will show how to install with details on Windows and Linux. But If you are using the Parrot or Kali Linux, Burp Suite already comes preinstalled. 1-for Linux; We need to install OpenJDK for Burp Suite. Bu resim yeniden boyutlandırıldı, tam halini görmek için tıklayınız.
  • 4. Firstly, We should find out If there is java: Kod: Java --version If there isn't, write this code for install it: Kod: sudo apt-get install openjdk-11-jdk openjdk-11-jre The latest version was 11, as you can see it looks like 11 on my Parrot. My advice to you is to install the latest version. Bu resim yeniden boyutlandırıldı, tam halini görmek için tıklayınız.
  • 5.
  • 6.
  • 7. Then type "Burp Suite Download" in Google. We should click on the first link from the results. Bu resim yeniden boyutlandırıldı, tam halini görmek için tıklayınız.
  • 8. We download it from the official website. Download the latest version
  • 9. Bu resim yeniden boyutlandırıldı, tam halini görmek için tıklayınız.
  • 10. Well, we will install the free version but If you want you can download the professional version from the first part. In the second part, choose your system and lastly, download the installation file. Bu resim yeniden boyutlandırıldı, tam halini görmek için tıklayınız.
  • 11. Go to the file that you've downloaded. We open Burp Suite with this code: Kod: sudo java -jar -Xmx2g burpsuite_file.jar
  • 12.
  • 13. Click I Accept. Bu resim yeniden boyutlandırıldı, tam halini görmek için tıklayınız.
  • 14.
  • 15. Click Next. Bu resim yeniden boyutlandırıldı, tam halini görmek için tıklayınız.
  • 16.
  • 17. and click Start Burp. Bu resim yeniden boyutlandırıldı, tam halini görmek için tıklayınız.
  • 18.
  • 19. the installation has finished. 2-for Windows; Bu resim yeniden boyutlandırıldı, tam halini görmek için tıklayınız.
  • 20.
  • 21.
  • 22. type "Burp Suite Download" We should click on the first link from the results. Bu resim yeniden boyutlandırıldı, tam halini görmek için tıklayınız.
  • 23. We download it from the official website.
  • 24. Bu resim yeniden boyutlandırıldı, tam halini görmek için tıklayınız.
  • 25. We will install the free version but If you want you can download the professional version from the first part. In the second part, choose your system and lastly, download the installation file. Bu resim yeniden boyutlandırıldı, tam halini görmek için tıklayınız.
  • 26.
  • 27. If we want we can change the file name using the save button. After we clicked the "save" button, installation process is starting.
  • 28.
  • 29.
  • 30.
  • 31.
  • 32. run the .exe file as administrator, It will ask a question like "are you sure?" click Yes.
  • 33. Bu resim yeniden boyutlandırıldı, tam halini görmek için tıklayınız.
  • 34.
  • 35. And click Next after the progress bar. Bu resim yeniden boyutlandırıldı, tam halini görmek için tıklayınız.
  • 36.
  • 37. select the folder where you would like Burp Suite Community Edition to be installed, then click Next. Bu resim yeniden boyutlandırıldı, tam halini görmek için tıklayınız.
  • 38.
  • 39. If you want to create a start menu folder then select the start menu folder in which you would like setup to create the program's shortcuts, then click next. Bu resim yeniden boyutlandırıldı, tam halini görmek için tıklayınız.
  • 40.
  • 41. Click Finish and open Burp Suite. Bu resim yeniden boyutlandırıldı, tam halini görmek için tıklayınız.
  • 42.
  • 43. Click I Accept Bu resim yeniden boyutlandırıldı, tam halini görmek için tıklayınız.
  • 44.
  • 45. To continue, click Next Bu resim yeniden boyutlandırıldı, tam halini görmek için tıklayınız.
  • 46.
  • 47. click Start Burp Suite. Bu resim yeniden boyutlandırıldı, tam halini görmek için tıklayınız.
  • 48.
  • 49. the installation has finished C-HTTPS SUPPORT As you know, since the fraud and malicious software over http have increased a lot. So, a https ssl certified encryption algorithm has been developed as a solution for this. It is not permitted to perform any improper activity with the software or tool from the browser. It is possible to make transactions over http address while we are using Burp Suite, It will give warning like "your connection is not secure in https transactions!" That's why we produce certificates with Burp Suite and introduce it to our browser, So we make sure that the requests and actions in this certificate are completely safe. 1-Proxy Configuration https://portswigger.net/support/conf...work-with-burp btw, I didn't see any information about Edge, I need to show you with details 1.1-for Edge (Windows 10); Bu resim yeniden boyutlandırıldı, tam halini görmek için tıklayınız.
  • 50. Kod: Proxy >Options > Edit > Binding > Loopback only > OK Well, we dont need to do this because it is already default. In any way, I showed in the screenshot about what happened. We should open our browser.
  • 51. Bu resim yeniden boyutlandırıldı, tam halini görmek için tıklayınız. Kod: … > Options > Advanced > Intermediate Server Settings, open it. Btw, use intermediate server option is closed to you. We should open it, fill the required fields as you can see in the screenshot. 1.2-for Firefox (Linux); Kod: Firefox > Options > General > Network Proxy Settings Bu resim yeniden boyutlandırıldı, tam halini görmek için tıklayınız.
  • 52.
  • 53.
  • 54. We select Manual proxy configuration and click OK 2-Disable to the SSL Warning;
  • 55.
  • 56.
  • 57. 2.1-for Windows; Bu resim yeniden boyutlandırıldı, tam halini görmek için tıklayınız.
  • 58. Kod: Proxy >Options >import/export CA cert > Certificate in DER format > Next Here, we are creating a new certificate. Bu resim yeniden boyutlandırıldı, tam halini görmek için tıklayınız.
  • 59. Kod: Select file > Save > Next We have determined where to save the certificate and it was successfully exported. Bu resim yeniden boyutlandırıldı, tam halini görmek için tıklayınız.
  • 60.
  • 61. Done,Close it Bu resim yeniden boyutlandırıldı, tam halini görmek için tıklayınız.
  • 62.
  • 63. We are opening the certificate. Kod: Install Certificate >Choose Current User > Next Bu resim yeniden boyutlandırıldı, tam halini görmek için tıklayınız.
  • 64. Kod: Place all certificates in the following storage area > browse > Trusted certificate's root privileges Bu resim yeniden boyutlandırıldı, tam halini görmek için tıklayınız.
  • 65.
  • 66. Click Next. Bu resim yeniden boyutlandırıldı, tam halini görmek için tıklayınız.
  • 67.
  • 68. Click Finish. Bu resim yeniden boyutlandırıldı, tam halini görmek için tıklayınız.
  • 69.
  • 71.
  • 72.
  • 73. Click OK. Bu resim yeniden boyutlandırıldı, tam halini görmek için tıklayınız.
  • 74.
  • 75. And as you can see, we have entered the https address without any problems. 2.1-for Linux; Same process, you can look at the above for create a certificate with burp suite.
  • 77. Bu resim yeniden boyutlandırıldı, tam halini görmek için tıklayınız. Kod: Firefox > Settings > Privacy and Security Click View Certificates Bu resim yeniden boyutlandırıldı, tam halini görmek için tıklayınız.
  • 78.
  • 79.
  • 80. We should select our certificate Bu resim yeniden boyutlandırıldı, tam halini görmek için tıklayınız.
  • 81.
  • 82.
  • 83. D-THE TARGET SECTION 1-SiteMap Tab; As its name signifies, it specifies the map of website. I mean, it provides us comprehensive documênts about websites that we opened. Not only that, it can show us errors too, that exist in website. Bu resim yeniden boyutlandırıldı, tam halini görmek için tıklayınız.
  • 84.
  • 85. Getting information about all websites is complex in functionality, but we can target this complex construct for our purpose by filtering. Bu resim yeniden boyutlandırıldı, tam halini görmek için tıklayınız.
  • 86.
  • 87. Choices of filtering: by request type, by MIME type, by status code, by search term, by file extension, by annotation. 2-Scope Tab; It allows for researching on that target by telling Burp what's the current target.
  • 88.
  • 89.
  • 90. Click right to the domain and select "Add to Scope". By this way, we added our domain into Scope. Let's check it out. Bu resim yeniden boyutlandırıldı, tam halini görmek için tıklayınız.
  • 92. It's the section where we provide request and response between browser and web server. 1-Intercept Tab; It's used for displaying and editing HTTP and WebSocket messages between browser and web server. It's a tab where we can catch our requests and responses from browser to web server. Bu resim yeniden boyutlandırıldı, tam halini görmek için tıklayınız. Forward: We click on the "Forward" option to send this message to server or browser after you looked over (and if it's necessary, changed it). Drop: We use it when we want to stop sending message. Intercept On/Off On: Messages are captured or forwarded automatically, based on options configured to block HTTP and WebSocket messages. Off: All messages are forwarded automatically. Action: Shows a menu of available actions that can be performed on the displayed message. 2-HTTP History Tab; You must be familiar with this from Sitemap tab of Target section. It's a tab where we can get detailed documênts of website. Bu resim yeniden boyutlandırıldı, tam halini görmek için tıklayınız.
  • 93. 3-WebSocket History Tab; It's a tab where WebSocket history are searched. WebSocket: A computer communications protocol, providing full-duplex communication channels over a single TCP connection. Bu resim yeniden boyutlandırıldı, tam halini görmek için tıklayınız.
  • 94. 4-Options Tab; It's a tab where we get all options such as proxy configuration, message option, server option Bu resim yeniden boyutlandırıldı, tam halini görmek için tıklayınız.
  • 95.
  • 96. F-THE SCAN SECTION; It's my one of favourite Burp features. It's a combination of the Spider and Scanner section in older versions. It both scans targeted website and gives documênts of it, and scans vulnerabilities. 1-New Scan; Bu resim yeniden boyutlandırıldı, tam halini görmek için tıklayınız.
  • 97.
  • 98. As you can see, scanning of targeted website is started Bu resim yeniden boyutlandırıldı, tam halini görmek için tıklayınız.
  • 99. Click 'View Details' button to display details about scan. 1.1-Details; Here is the details:
  • 100. Bu resim yeniden boyutlandırıldı, tam halini görmek için tıklayınız.
  • 101. 1.2-Audit Items; Bu resim yeniden boyutlandırıldı, tam halini görmek için tıklayınız.
  • 102.
  • 103. Audit Items: It shows all of the website's consist documênt. 1.3-Issue Activity; Bu resim yeniden boyutlandırıldı, tam halini görmek için tıklayınız.
  • 104.
  • 105. Issue Activity: It shows high and low risk vulnerabilities of targeted website. 1.4-Event Log; Bu resim yeniden boyutlandırıldı, tam halini görmek için tıklayınız. It's a tab where all of the logs between server and us keep. G-THE INTRUDER SECTION It's variables being manipulated by masking methods. Masked variables are shown with “$” symbol. Main usage purpose is brute force. Bu resim yeniden boyutlandırıldı, tam halini görmek için tıklayınız.
  • 106. Let's send values that belong to user and pass variable from login webpage we caught earlier, to Intruder. 1-Target; Bu resim yeniden boyutlandırıldı, tam halini görmek için tıklayınız.
  • 107.
  • 108. Targeted website's infos automatically come here. If we want, we can input it manually too. 2-Positions; This is where caught login website request sent goes to. Bu resim yeniden boyutlandırıldı, tam halini görmek için tıklayınız.
  • 109.
  • 110. Firstly, as you can see, it masking automatically. 'Auto' button also does same process. But i don't recommend you to do that because it's unreliable. Bu resim yeniden boyutlandırıldı, tam halini görmek için tıklayınız.
  • 111.
  • 112. So, first step will be selecting all and click 'Clear' button to clear all of masking. Bu resim yeniden boyutlandırıldı, tam halini görmek için tıklayınız.
  • 113.
  • 114. Choose the user admin pass admin part and click 'Add' to adding only this part to masking. Bu resim yeniden boyutlandırıldı, tam halini görmek için tıklayınız.
  • 115.
  • 116. There are 4 types of attack. Payload can be differ, depends on this types. 2.1-Sniper; It is the process of sending a single request. We choose the Sniper attack type and go to the payloads section. Bu resim yeniden boyutlandırıldı, tam halini görmek için tıklayınız.
  • 117.
  • 118. Payloads Sets Because it is a Sniper attack, it performs an attack through a variable. You can also see it in Payloads set section. Payloads Options We can assign a value from the" Add " section ourselves. If we want, we can include an existing list in the "Load" section. Or if you say that I want to copy from ".. somewhere and throw here, thanks to add "Paste" button. Here you can delete a value you do not want with the "Remove" button. Or all of them thanks to the "Clear" button allows you to delete that all things. Bu resim yeniden boyutlandırıldı, tam halini görmek için tıklayınız.
  • 119.
  • 120. Here, it tells us that it will make four attempts by assigning us to only one variable via "user" or "pass", considering of two possibilities. Bu resim yeniden boyutlandırıldı, tam halini görmek için tıklayınız.
  • 121.
  • 122. I tried to show it above, it only conducted four attempts on a variable "user" or "pass" depending on the list we created. The value in the other variable has already been assigned to the existing value. It's returned us 200 now, so from here we're seeing that the entry attempt failed. But if the try out had been successful, it would have returned 302 in the "Status" section. 2.2-Bettering Ram; Although it looks the same as sniper attack, there is a difference. It assigns the same value to the two variables whose lists are "user" and "pass". We're choosing the Bettering Ram attack from positions. We're going to Payloads. Bu resim yeniden boyutlandırıldı, tam halini görmek için tıklayınız.
  • 123.
  • 124. Here, it tells us that it will give us two trial by assigning the same value to 2 variables, given the possibility of two possibilities. So it says it'll try with our "user" and "pass" variables by assigning the same value. As you can see, if we look at the "Status" section again, we'll see that 200 returns. So we understand that our attempt failed. If our transaction were successful, it would have returned 302 in the "Status" section. 2.3-Pitchfork; It is an attack type that creates two lists and allows the first list to try out on the "user" variable, allowing the second list to try out on the "pass" variable. We select the Pitchfork attack type from "Positions" section. Then we go to the Payloads Section. Bu resim yeniden boyutlandırıldı, tam halini görmek için tıklayınız.
  • 125.
  • 126. Bu resim yeniden boyutlandırıldı, tam halini görmek için tıklayınız.
  • 127. As you can see, we've created two lists. Our first list also experimented with the "user" variable. Our second variable also allowed the "pass" variable to experiment. 2.4-Cluster Bomb; Even though it looks the same as a pitchfork attack, there's a difference, and it assigns value to variables as diagonals of the two lists we create. Bu resim yeniden boyutlandırıldı, tam halini görmek için tıklayınız.
  • 128.
  • 129. Bu resim yeniden boyutlandırıldı, tam halini görmek için tıklayınız.
  • 130.
  • 131. We've created our lists, and accordingly, it's determined the number of attempts. We're going to say "Start Attack" and start our attack. Bu resim yeniden boyutlandırıldı, tam halini görmek için tıklayınız.
  • 132. As I tried to show above, the cross-diagonal method and the values in our first list were matched to the values in our second list and allowed experiments. As we saw in the "Status" section, the entry failed.
  • 133. Bu resim yeniden boyutlandırıldı, tam halini görmek için tıklayınız.
  • 134.
  • 135.
  • 136. It is also worth examining the image above so that you can see it in more detail. 3-Payloads;
  • 137.
  • 138.
  • 139. Payloads Sets Payload set;Shows the number of lists we create. Payload Type; to determine the type of attack. So it's on the list? Or by brute force? Using letters or numbers only? We can choose to attack. Payloads Options If we want, we can assign a value from the "Add" section ourselves. We can include a list in "Load" if we want. Or if you say that if you say you want to copy it from somewhere and throw it here, you can add it through the "Paste" button.Here you can delete a value you don't want with the "Remove" button. Or it's all through the "Clear" button, allowing you to clean up what's up. The "Add from list" button we can also use lists already available within the program. Payloads Processing
  • 140. When carrying out the attack, we throw out the rules we want to comply with. Add; add rules that need to be followed when processing lists. Edit; Edit rules that must be followed when processing lists. Remove; Delete the rule that must be followed when processing lists. Up; It has to be followed, in the order of the rules, it tops what we want. Down; It has to be followed in the order of the rules to lower what we want to the lower level. Payloads Encoding This setting can be used to code the characters selected in the last load as urls for secure transmission within HTTP requests. 4-Options;
  • 141. Request Headers These settings control whether the attacker will update the configured request headers during attacks. Request Engine These settings control the engine used for making HTTP requests in the Intruder attack. In other words, we make the settings such as how long we will send requests to the server and how long it will be reconnected after disconnection. Attack Results These settings control what information is captured in the attack results. It enables to show whether requests, responses and rejected feedbacks between us and the server are displayed. Grep - Match These settings can be used to flag the result items containing specified expressions in the response. It can still paste the word as usual. And it can install from another locâtions. It can delete existing word and we can clear the whole
  • 142. list. And determines case sensitive. If we want the http header to be included in this search or not, we can set up the necessary options. Grep - Extract These settings can be used to extract useful information from responses into the attack results table. We can add, edit, delete the item to extract information that doesn't benefit us from the returned results. And we can pull it on top/bottom in order of importance. We can clear the whole list and we can specify the length of the item and get clearer results. Grep – Payloads These settings can be used to flag result items containing reflections of the submitted payload. We can exclude http headers and make them case sensitive. It can match with results that caught earlier. We can cofigure search responses for strings. Redirections These settings control how Burp handles redirections when performing attacks. H-THE REPEATER SECTION It provides the opportunity to perform the processes that we make in order to catch the requests on the Login page in Proxy section. We send the request that we captured on the login page to the "Repeater" section. Bu resim yeniden boyutlandırıldı, tam halini görmek için tıklayınız.
  • 143.
  • 144. Bu resim yeniden boyutlandırıldı, tam halini görmek için tıklayınız.
  • 145.
  • 146. Change the "user", "pass" and click Go button, we can see the response given by the server on the right side. So, replacing the required fields repeatedly is a more functional tool for practicality. I-THE SEQUENCER SECTION It is the tool used to analyze the foreseeability quality of tokens in data items. You can use it to test session tokens, anti-CSRF tokens, password reset tokens or other undpredictable data items of an application. It is important because the cookies could be taken with this method. Bu resim yeniden boyutlandırıldı, tam halini görmek için tıklayınız.
  • 147.
  • 148. We send the token (phid value etc.) that we want to analyze to the Sequencer section. 1-Live Capture Part; Bu resim yeniden boyutlandırıldı, tam halini görmek için tıklayınız.
  • 149. Kod: For this, we should go the Sequencer section > Live Capture part. 1.1-Select Live Capture It shows that you send from Burp tools. Select the request that returns the token or other item that you want to resolve. So, we select the data we will analyze and click Start button.
  • 150. 1.2-Token L-o-c-a-t-i-o-n Within Response It allows us to select a token that can be resolved by defining responses returned to the server. the following options: Cookie: If the response sets any cookie, this option will allow you to choose a cookie to be parsed. This is the most common method for get over the session tokens. Form field: If the response contains any HTML form fields, this option will allow you to choose a form field. This method is often used to send anti-CSRF tokens and other tokens to clients. Custom Locâtion: You can use this option to specify a specific locâtion within the response that contains the data that you want to analyze. 1.3-Live Capture Options These settings control the engine used for making HTTP requests and harvesting tokens when performing the live capture. Number of threads: This option controls the number of concurrent requests the live capture is able to make. Throttle between requests: Optionally, the live capture can wait a specified delay (in milliseconds) before every request. Ignore token whose length deviates by X characters: You can optionally configure the live capture to ignore tokens whose length deviates by a given threshold from the average token length. 2-Manuel Load Part; Live Capture section automatically captured the live request and sent the token. In this section, the information in the text file that we captured is transferred to this section. To do this we go to Sequence section > Manual Load section. This function allows you to load Sequencer with a sample of tokens that you have already obtained, and then perform the statistical analysis on the sample. Bu resim yeniden boyutlandırıldı, tam halini görmek için tıklayınız.
  • 151.
  • 152. Use the Paste button to paste the tokens from the clipboard, or the Load button to load them from file. When our process is finished, it offers the opportunity to clean the screen with the help of the Clear button. 3-Analysis Options Part; The "Analysis options" tab lets you configure how tokens are handled, and which types of tests are performed during the analysis. Kod: for this, go to Sequencer section > Analysis Options part. Bu resim yeniden boyutlandırıldı, tam halini görmek için tıklayınız.
  • 153.
  • 154. 3.1-Token Handling These settings control how tokens are handled during analysis. 3.2-Token Analysis These options control the types of analyses that are performed. You can individually enable or disable each type of character-level and bit-level test. Sometimes, after performing an initial analysis with all tests enabled, you may want to disable certain tests to reflect your better understanding of the tokens' characteristics, or to isolate the effects of any unusual characteristics manifested by your sample. In the results window, after modifying any of the analysis options you can click the "Redo analysis" button to re-perform the analysis with your new settings, and update the results. SUMMARY The "summer" locâtion of each section tells us the summary of the analysis. It is enough to look at these places and examine them. We can achieve certain results.
  • 155.
  • 156.
  • 157. J-THE DECODER SECTION On sites, the WAF (firewall) system encrypts personal information. Thus, all transactions are encrypted and provide a secure infrastructure. But of course, I will show you that we can simply capture and decode this encryption on a site with SQL Injection vulnerability Bu resim yeniden boyutlandırıldı, tam halini görmek için tıklayınız.
  • 158. . We always listened to our site before we searched for this process, we caught it before returning the request, and the encrypted request from there was right click on the mouse and say> “Send Decoder”. Bu resim yeniden boyutlandırıldı, tam halini görmek için tıklayınız.
  • 159.
  • 160. Bu resim yeniden boyutlandırıldı, tam halini görmek için tıklayınız. The "‘ "sign in the URL address is encrypted as" 27% ". We call it" Decoder as "and we do the analysis according to what kind of encryption is done. We click on the "URL" button. Bu resim yeniden boyutlandırıldı, tam halini görmek için tıklayınız.
  • 161. We broke the password and showed us the normal URL section. But we don't just decrypt it. If we want, we can encrypt the address we want, any structure with an encryption algorithm that we want. Kod: “Encode as” > “URL” Well, I should select the URL because because I encrypted the URL. Our transaction is over. This time i encrypted the entire URL. K-THE COMPARER SECTION It is a tool for us to compare words and bytes. Sometimes we want to see the answers given to us from the server, different reactions at the same time. This means looking at it from a distance like a third person and sometimes it helps. Bu resim yeniden boyutlandırıldı, tam halini görmek için tıklayınız.
  • 162.
  • 163. Now it has come to compare the data we sent. We go to the "Comparer" section. We can compare it as "Words" or "Bytes". Bu resim yeniden boyutlandırıldı, tam halini görmek için tıklayınız.
  • 164. Bu resim yeniden boyutlandırıldı, tam halini görmek için tıklayınız.
  • 165. We got some results. A word and byte based result has returned as above. The values in orange show the changing values in comparison. Deleted values appear in blue. The values added later are considered yellow. L-THE EXTENDER SECTION Thanks to this tool, it is possible to add the software coded by the developers and the software coded by yourself to the burp suite program 1-Extensions Part; Bu resim yeniden boyutlandırıldı, tam halini görmek için tıklayınız.
  • 166.
  • 167. We come from Extender section to Extensions section. Here, we can add a software we developed to the burp suite, while we can delete a software that we added or change its order. 2-BApp Store Part; Bu resim yeniden boyutlandırıldı, tam halini görmek için tıklayınız.
  • 168.
  • 169. From the Extender section, we enter the> BApp Store section. It is possible to find the software of other developers here. I want to talk about the most popular "C02" software. CO2 Using SQLMap, we can exploit a site with SQL injection vulnerability. Bu resim yeniden boyutlandırıldı, tam halini görmek için tıklayınız.
  • 170.
  • 171. To use this feature, sqlmap application must be python. We choose where they are located. Thus, the application can run when we make the necessary options. Bu resim yeniden boyutlandırıldı, tam halini görmek için tıklayınız.
  • 172.
  • 173. Bu resim yeniden boyutlandırıldı, tam halini görmek için tıklayınız.
  • 174. As a result, we can scan by using sqlmap written in python and take advantage of openness. The only good part of being useful is that it is automatic, but my personal opinion is that i do not recommend it. Bu resim yeniden boyutlandırıldı, tam halini görmek için tıklayınız.
  • 175.
  • 176. User Generator - Displays the name and surname or username of a name on the most commonly used historical basis. Bu resim yeniden boyutlandırıldı, tam halini görmek için tıklayınız.
  • 177.
  • 178. Name Mangler - Manages them to create a list of potential usernames that can be left to the intruder to test valid entries. Bu resim yeniden boyutlandırıldı, tam halini görmek için tıklayınız.
  • 179.
  • 180. CeWLer - Can be used to extract a word list from HTML files. Bu resim yeniden boyutlandırıldı, tam halini görmek için tıklayınız.
  • 181.
  • 182. Masher - Starts with combining words from the list provided, then adds and modifies characters to create new passwords. Bu resim yeniden boyutlandırıldı, tam halini görmek için tıklayınız.
  • 183.
  • 184. BasicAuther - When given a list of usernames and passwords, they extract the appropriate BasicAuth strings that can later be left to intruders. TurkHackTeam.Org/.Net/.Com.TR