SlideShare a Scribd company logo
1 of 128
Download to read offline
L I F E S T Y L E
®
6 5 0
HOME ENTERTAINMENT SYSTEM
OWNER’S GUIDE • G UÍA DEL USUA R IO • N OTICE D ' UTIL ISATION
2 - E N G L I S H
I M P O R TA N T S A F E T Y I N S T R U C T I O N S
Please read and keep all safety and use instructions.
Important Safety Instructions
1.	 Read these instructions.
2.	 Keep these instructions.
3.	 Heed all warnings.
4.	 Follow all instructions.
5.	 Do not use this apparatus near water.
6.	 Clean only with a dry cloth.
7.	 Do not block any ventilation openings. Install in accordance with the manufacturer’s instructions.
8.	 Do not install near any heat sources such as radiators, heat registers, stoves, or other apparatus (including ­amplifiers) that produce
heat.
9.	 Protect the power cord from being walked on or pinched particularly at plugs, convenience receptacles, and the point where they
exit from the apparatus.
10.	 Only use attachments/accessories specified by the manufacturer.
11.	 Unplug this apparatus during lightning storms or when unused for long periods of time.
12.	 Refer all servicing to qualified personnel. Servicing is required when the apparatus has been damaged in any way, such as
power-supply cord or plug is damaged, liquid has been spilled or objects have fallen into the ­apparatus, the apparatus has been
exposed to rain or moisture, does not operate normally, or has been dropped.
This symbol on the product means there is uninsulated, dangerous voltage within the product enclosure that may present a risk
of electrical shock.
This symbol means there are important operating and maintenance instructions in this guide.
Contains small parts which may be a choking hazard. Not suitable for children under age 3.
This product contains magnetic material. Consult your physician on whether this might affect your implantable medical device.
This product contains a tempered glass surface. Use caution to avoid impact. In the event of breakage, use care in handling
broken glass.
•	 To reduce the risk of fire or electrical shock, do NOT expose this product to rain, liquids or moisture.
•	 Do NOT expose this product to dripping or splashing, and do not place objects filled with liquids, such as vases, on or near the product.
•	 Keep the product away from fire and heat sources. Do NOT place naked flame sources, such as lighted candles, on or near the product.
•	 Do NOT make unauthorized alterations to this product.
•	 Do NOT use a power inverter with this product.
•	 Do NOT use in vehicles or boats.
•	 The speaker wire and interconnect cables included with this system are not approved for in-wall installation. Please check your local
building codes for the correct type of wire and cable required for in-wall installation.
•	 Use this product only with the power supply provided.
•	 Where the mains plug or an appliance coupler is used as the disconnect device, the disconnect device shall remain readily operable.
仅适用于 2000m 以下地区安全使用
Use at altitude less than 2000 meters only.
•	 Due to ventilation requirements, Bose does not recommend placing the product in a confined space such as in a wall cavity or in an
enclosed cabinet.
•	 Do not place or install the bracket or product near any heat sources, such as fireplaces, radiators, heat registers or other apparatus
(including amplifiers) that produce heat.
•	 The product label is located on the bottom of the console.
E N G L I S H - 3
R E G U L ATO R Y I N F O R M AT I O N
NOTE: This equipment has been tested and found to comply with the limits for a Class B digital device, pursuant to Part 15 of the FCC
Rules. These limits are designed to provide reasonable protection against harmful interference in a residential installation. This equipment
generates, uses, and can radiate radio frequency energy and, if not installed and used in accordance with the instructions, may cause
harmful interference to radio communications. However, there is no guarantee that interference will not occur in a particular installation.
If this equipment does cause harmful interference to radio or television reception, which can be determined by turning the equipment off
and on, the user is encouraged to try to correct the interference by one or more of the following measures:
•	 Reorient or relocate the receiving antenna.
•	 Increase the separation between the equipment and receiver.
•	 Connect the equipment into an outlet on a circuit different from that to which the receiver is connected.
•	 Consult the dealer or an experienced radio/TV technician for help.
Changes or modifications not expressly approved by Bose Corporation could void the user’s authority to operate this equipment.
This device complies with part 15 of the FCC Rules and with Industry Canada license-exempt RSS standard(s). Operation is subject to the
following two conditions: (1) This device may not cause harmful interference, and (2) this device must accept any interference received,
including interference that may cause undesired operation.
This device for operation in the 5150 - 5250 MHz is only for indoor use to reduce the potential for harmful interference to co-channel
mobile satellite systems.
W52/W53 for Indoor Use Only.
This device complies with FCC and Industry Canada radiation exposure limits set forth for general population.
This equipment should be installed and operated with a minimum distance of 20 cm between radiator and your body.
This transmitter must not be co-located or operating in conjunction with any other antenna or transmitter.
Management Regulation for Low-power Radio-frequency Devices
Article XII
According to “Management Regulation for Low-power Radio-frequency Devices” without permission granted by the NCC, any company,
enterprise, or user is not allowed to change frequency, enhance transmitting power or alter original characteristic as well as performance
to an approved low power radio-frequency devices.
Article XIV
The low power radio-frequency devices shall not influence aircraft security and interfere legal communications; If found, the user shall
cease operating immediately until no interference is achieved. The said legal communications means radio communications operated in
compliance with the Telecommunications Act.
The low power radio-frequency devices must be susceptible with the interference from legal communications or ISM radio wave radiated
devices.
Bose Corporation hereby declares that this product is in compliance with the essential requirements and other relevant
provisions of Directive 1999/5/EC and all other EU directive requirements. The complete declaration of conformity can be found
at: www.Bose.com/compliance
This symbol means the product must not be discarded as household waste, and should be delivered to an appropriate collection
facility for recycling. Proper disposal and recycling helps protect natural resources, human health and the environment. For more
information on disposal and recycling of this product, contact your local municipality, disposal service, or the shop where you
bought this product.
Names and Contents of Toxic or Hazardous Substances or Elements
Toxic or Hazardous Substances and Elements
Part Name
Lead
(Pb)
Mercury
(Hg)
Cadmium
(Cd)
Hexavalent
(CR(VI))
Polybrominated
Biphenyl
(PBB)
Polybrominated
diphenylether
(PBDE)
PCBs X O O O O O
Metal Parts X O O O O O
Plastic Parts O O O O O O
Speakers X O O O O O
Cables X O O O O O
This table is prepared in accordance with the provisions of SJ/T 11364.
O: Indicates that this toxic or hazardous substance contained in all of the ­homogeneous materials for this part is below the limit
requirement of GB/T 26572.
X: Indicates that this toxic or hazardous substance contained in at least one of the homogeneous materials used for this part is
above the limit requirement of GB/T 26572.
4 - E N G L I S H
R E G U L ATO R Y I N F O R M AT I O N
Please complete and retain for your records
The serial and model numbers are located on the side of the carton.
Serial number: ___________________________________________________________________________________
Model number: ___________________________________________________________________________________
Please keep your receipt with your owner’s guide. Now is a good time to register your Bose product.
You can easily do this by going to http://global.Bose.com/register
Date of Manufacture: The first bolded digit in the serial number indicates the year of manufacture; “6” is 2006 or 2016.
China Importer: Bose Electronics (Shanghai) Company Limited, Part C, Plan 9, No. 353 North ­Riying Road, China (Shanghai) Pilot Free
Trade Zone.
EU Importer: Bose GP, Castleblayney Road, Carrickmacross, County Monaghan, Ireland
Mexico Importer: Bose de México, S. de R.L. de C.V. , Paseo de las Palmas 405-204, Lomas de Chapultepec, 11000 México, D.F.
Phone number: 001 800 900 2673.
Taiwan Importer: Bose Taiwan Branch, 9F-A1, No.10, Section 3, Minsheng East Road, Taipei City 104, Taiwan.
Phone number: 886 2 2514 7977.
Apple and the Apple logo are trademarks of Apple Inc., registered in the U.S. and other countries. App Store is a service mark of
Apple Inc.
Android, Google Play, and the Google Play logo are ­trademarks of Google Inc.
©2013 CSR plc and its group of companies. The aptX® mark and the aptX logo are trademarks of CSR plc or one of its group companies
and may be registered in one or more jurisdictions.
The Bluetooth® word mark and logos are registered trademarks owned by Bluetooth SIG, Inc. and any use of such marks by Bose
­Corporation is under license.
Dolby, Dolby Audio and the double-D symbol are trademarks of Dolby Laboratories.
For DTS patents, see http://patents.DTS.com. Manufactured under license from Digital Theater Systems, Inc. DTS, the
Symbol  DTS and the Symbol together are registered trademarks, and DTS Digital Surround is a trademark of DTS, Inc.
©DTS, Inc. All Rights Reserved.
The terms HDMI and HDMI High-Definition Multimedia Interface, and the HDMI logo are trademarks or registered
trademarks of HDMI Licensing LLC in the United States and other countries.
iHeartRadio is a registered trademark of iHeartMedia, Inc.
Deezer is a registered trademark of Blogmusik SAS.
This product is protected by certain intellectual property rights of Microsoft. Use or distribution of such technology outside of this product
is prohibited without a license from Microsoft.
The N-Mark is a trademark or registered trademark of NFC Forum, Inc. in the United States and in other countries.
Pandora, the Pandora logo, and the Pandora trade dress are trademarks or registered trademarks of Pandora Media, Inc. used with
permission.
SiriusXM Internet Radio subscription sold separately and available only to those at least 18 years of age residing in the U.S. and Puerto
Rico. To subscribe to SiriusXM Internet Radio in the U.S., U.S. customers should visit www.sirius.com or call 1-888-539-7474.
SiriusXM and all related marks and logos are trademarks of Sirius XM Radio Inc. and its subsidiaries. All rights reserved.
SoundTouch and the wireless note design are registered trademarks of Bose Corporation in the U.S. and other countries.
This product incorporates Spotify software which is subject to 3rd party licenses found here:
www.spotify.com/connect/third-party-licenses
Spotify is a registered trademark of Spotify AB.
Designed with UEI Technology™
. Under License from Universal Electronics, Inc. © UEI 2000-2016
Wi-Fi is a registered trademark of Wi-Fi Alliance®
.
Windows is a registered trademark of Microsoft Corporation in the United States and other countries.
©2016 Bose Corporation. No part of this work may be reproduced, modified, distributed or ­otherwise used without prior written
­permission.
E N G L I S H - 5
C O N T E N T S
Getting Started
Unpacking..............................................................................................................................	8
Layer 1.............................................................................................................................	9
Layer 2............................................................................................................................	9
Layer 3 ...........................................................................................................................	9
Layer 4............................................................................................................................	10
Placement guidelines...........................................................................................................	11
Sample system placement..................................................................................................	12
Setting Up the System
UNIFY® system overview.....................................................................................................	13
UNIFY® setup.........................................................................................................................	14
Using the Remote Control
Remote control overview....................................................................................................	15
Using the SOURCE button..................................................................................................	16
Function buttons...................................................................................................................	16
Adjusting volume..................................................................................................................	16
Power saver mode................................................................................................................	16
Using the MORE button.......................................................................................................	16
The OPTIONS menu.............................................................................................................	17
Setting Up SoundTouch®
Setting up SoundTouch® on your system.........................................................................	18
Download and install the SoundTouch® app....................................................................	18
Connect the system to your Wi-Fi® network...........................................................	18
Adding the system to an existing ­SoundTouch® account..............................................	19
Connecting the system to a new network........................................................................	19
Using the SoundTouch®
App
Getting help...........................................................................................................................	20
In-app help.............................................................................................................................	20
Controlling the system from another smartphone or tablet.........................................	20
Personalizing Your Presets
How Presets work.................................................................................................................	21
Setting a Preset.....................................................................................................................	21
Playing a Preset.....................................................................................................................	21
Setting a Preset using your remote control.....................................................................	21
Selecting a Preset using ­your remote ­control.................................................................	21
6 - E N G L I S H
C O N T E N T S
Bluetooth®
Technology
Pairing a device.....................................................................................................................	22
Pairing a device with NFC...................................................................................................	23
Controlling your connected mobile device from the remote control..........................	23
Connecting to a paired device...........................................................................................	24
Disconnecting a device........................................................................................................	24
Reconnecting a device.........................................................................................................	24
Clearing the console's pairing list......................................................................................	24
Using the SoundTouch® app.......................................................................................	24
Advanced Features
Disabling Wi-Fi® capability..................................................................................................	25
Re-enabling Wi-Fi® capability.............................................................................................	25
Updating the system software...........................................................................................	25
Getting System Information
System status indicators......................................................................................................	26
Console LED indicator.................................................................................................	26
Acoustimass® wireless bass module LED indicator................................................	27
Wireless receiver LED indicator.................................................................................	27
Care and Maintenance
Cleaning..................................................................................................................................	28
Customer service..................................................................................................................	28
Limited warranty...................................................................................................................	28
Technical information...........................................................................................................	28
SERVICE connector..............................................................................................................	28
Troubleshooting
Common solutions................................................................................................................	29
Setting up your IR emitter...................................................................................................	32
Unable to pair the Acoustimass® wireless bass module with the console..................	33
Checking for sound..............................................................................................................	33
E N G L I S H - 7
C O N T E N T S
Appendix A: Installation Reference
Front console panel..............................................................................................................	34
Front Headphones/AUX input....................................................................................	34
Front HDMI™ input........................................................................................................	34
Back console panel...............................................................................................................	34
Connecting an OmniJewel™ base......................................................................................	35
Installing the front speakers................................................................................................	36
Connecting the front speakers to the console................................................................	37
Attaching the rubber feet to your center speaker..........................................................	37
Connecting the center speaker to the console...............................................................	38
Installing the rear speakers.................................................................................................	39
Identifying switch settings on wireless ­receivers............................................................	40
Connecting the rear speakers.............................................................................................	40
Connecting the rear speakers to power...........................................................................	41
Making a wired connection to the rear speakers............................................................	41
Mounting your speakers......................................................................................................	41
Appendix B: System Maintenance
Replacing the remote control’s batteries.........................................................................	42
8 - E N G L I S H
G E T T I N G S TA R T E D
Unpacking
The parts of your new Lifestyle® Home Entertainment System are packaged in four
­layers, some of which ­contain ­multiple boxes of components. Each box is marked by
icons to indicate its contents.
Notes:	
•	 When prompted by UNIFY® setup, carefully unpack your system according to the
icons ­referenced in the on-screen steps.
•	 If part of the system is damaged or the glass on your console or Acoustimass®
­wireless bass module is broken, do not use it. Contact your authorized Bose® dealer or
Bose customer service.
Refer to the contact sheet in box .
Layer 1
Layer 2
Layer 3
Layer 4
E N G L I S H - 9
G E T T I N G S TA R T E D
Layer 1
From box :
Console (1) HDMI™ cable (1) Universal remote
control (1)
AA batteries (4)
Layer 2
From box : From box :
Console power supply (1) Power cords (4) Owner’s guide (1)
May ship with multiple power cords. Use the power cord for your region.
Layer 3
From box :
OmniJewel™
­speakers (4)
OmniJewel™ bases (4) Front speaker cable (1) Rear speaker cables (2)
1 0 - E N G L I S H
G E T T I N G S TA R T E D
From box :
OmniJewel™ center speaker (1) Center speaker cable (1) Adhesive feet (4)
From box : From box :
Wireless receivers (2) ADAPTiQ® headset (1) Screwdriver (1) IR emitter (1)
Layer 4
From box :
Acoustimass® wireless bass module (1)
E N G L I S H - 1 1
G E T T I N G S TA R T E D
Placement guidelines
To avoid interference, keep other wireless equipment 1 – 3 ft. (0.3 – 0.9 m) away from
the system. Place your system outside of and away from metal objects and away from
other audio/video components and direct heat sources.
Component Recommended placement
Console •	 Place the console near your components. The recommended ­placement
is near your TV.
•	 Do NOT place the TV or any other ­components on top of your console.
•	 Place your console in a well-ventilated area.
•	 Make sure there is an AC (mains) outlet nearby.
Note: Until your system is completely installed, keep the control console
positioned for easy access to its rear connector panel.
Acoustimass®
­wireless bass
module
•	 Stand the bass module on its rubber feet along the same wall as your
TV, or along any other wall in the front third of the room.
•	 Choose a stable and level surface. Vibration can cause the bass module
to move, particularly on smooth surfaces like marble, glass or highly
polished wood.
•	 Keep the front side of the bass module at least 3 in. (8 cm) from any
other surface. Blocking the port on the bottom of this side can affect
acoustic performance.
•	 Make sure there is an AC (mains) outlet nearby.
Front speakers •	 Place one speaker to the left and one speaker to the right of the TV.
•	 If placing the speakers in an enclosed bookcase shelf, position them at
the front edge of the shelf.
Center speaker •	 Place the center speaker on its rubber feet on a stable and level surface
directly above or below your TV.
•	 For information on attaching rubber feet, see page 41.
Rear speakers/
wireless receivers
•	 For the best quality sound, place the rear ­satellites so that they are
above and behind the seated listeners and are as widely spaced as your
room allows.
•	 Confirm that the switch on one wireless receiver is set to L (left).
•	 Confirm that the switch on the other wireless receiver is set to R (right).
•	 Facing the TV, place the speaker and L wireless receiver on the left side
of the room.
•	 Facing the TV, place the speaker and R wireless receiver on the right
side of the room.
•	 Make sure there is an AC (mains) outlet near each wireless receiver.
1 2 - E N G L I S H
G E T T I N G S TA R T E D
Sample system placement
E N G L I S H - 1 3
S E T T I N G U P T H E SYS T E M
UNIFY® system overview
The UNIFY intelligent integration system guides you through the initial process of
­setting up and configuring your system. It helps you choose the correct cables and
inputs and programs the Bose® remote control to operate your connected devices.
Note:	 Before you begin, make sure you have one hour set aside for system setup.
Menu item What you can do
Language Change the language of the on-screen display.
ADAPTiQ® Start the ADAPTiQ audio calibration process. Once completed, this
menu option disables or enables ADAPTiQ.
TV setup After your TV is connected to the console:
•	 Program the remote control to use your TV.
•	 Connect a new TV to the console.
•	 Add, change or remove the TV audio connection.
Source setup For sources connected to HDMI™ inputs 1 – 5 of the control console:
•	 Rename the device.
•	 Program the remote control to access the device.
•	 Remove the device.
•	 Add or change the type of audio/video connection.
Add a new device Add another device or accessory to your system.
Network setup Connect your system to your home network.
Update Perform a system software update.
Exit UNIFY Close the UNIFY menu.
1 4 - E N G L I S H
S E T T I N G U P T H E SYS T E M
UNIFY® setup
The following steps are part of the initial UNIFY setup process:
Step Objective
Pair the remote control Connect the system's remote control to the console.
Choose language Select your language from the on-screen list.
Connect to network Select and connect to your home Wi-Fi network.
Software update Update system software to provide the most current functionality.
Wired speakers Connect the front speakers to the console.
Wireless speakers Connect the rear speakers and Acoustimass® wireless bass module to
the ­console.
TV remote Set up the system's remote control to control your TV.
Adding devices Connect your additional sources.
ADAPTiQ® setup Customizes the sound of the system to the acoustics of your listening
area.
Tutorial A series of optional procedures to help guide you through the rest
of your system’s features, such as ­SoundTouch® and Bluetooth®
­operation.
After completing the initial setup, you can access UNIFY menu at any time to change
your system setup and configuration. Press the button on the front of your
­console or the remote control to start UNIFY setup.
E N G L I S H - 1 5
U S I N G T H E R E M OT E C O N T R O L
Remote control overview
The Bose® advanced RF (radio frequency) remote control works from anywhere in your
room without requiring you to aim the remote control at the console.
The remote control's display is an essential part of your Lifestyle® experience. It guides
you through your sources and system settings.
Note:	 The Bose remote control does not control functions specific to devices that are
connected to the front HDMI™ input.
Provides access to
­connected sources
Powers on/off your
Bose® system
Display
Powers on/off your TV
Displays additional
­device-specific
content
Previous channel,
Preset, chapter or track
Changes TV's input
Numeric keypad.
Numbers 1 - 6 can play
SoundTouch® presets.
Navigation pad
Playback controls
Function buttons
(see page 16)
Teletext mode
Launches the UNIFY®
setup menu
Opens SoundTouch®
Home button
Controls the DVR
functionality of
your cable box
1 6 - E N G L I S H
U S I N G T H E R E M OT E C O N T R O L
Using the SOURCE button
The button is used to switch between connected sources. Access sources using
the navigation pad on your remote control.
Function buttons
The red, green, yellow and blue buttons on the remote control correspond with the
color-coded function buttons on your cable/satellite box or teletext functions.
•	 Cable/satellite box functions: refer to your cable/satellite box owner’s guide.
•	 Teletext functions: correspond with color-coded page numbers, headings or
­shortcuts on a teletext display.
Adjusting volume
To see your volume level, refer to your remote control's display.
•	 Press + to increase the volume.
•	 Press – to decrease the volume.
•	 Press to mute or unmute the audio.
Note:	 If you still hear audio from your TV’s speakers after setting up your system,
­disable the speakers through your TV’s settings menu.
Power saver mode
Power saver mode conserves battery life by dimming the brightness of your ­remote
control’s display and adjusting the duration that the display remains actively lit.
To access power saver mode, press the button on your remote control.
Using the MORE button
The MORE button on your remote displays additional selections on your remote
­control’s display that are applicable to your currently selected source.
1.	 Press .
2.	 Press or to select a function on your remote control's display.
3.	 Press OK.
E N G L I S H - 1 7
U S I N G T H E R E M OT E C O N T R O L
The OPTIONS menu
The OPTIONS menu displays a list of functions that let you adjust certain system
­settings. The number of items that appear in the OPTIONS menu depends on which
source is currently selected. Regardless of the source, you have access to the
OPTIONS menu.
Note:	 The OPTIONS menu is only accessible through your system’s remote control
after pressing the MORE button .
To activate the OPTIONS menu:
1.	 Press on your remote control.
2.	 Highlight the OPTIONS button.
3.	 Press the OK button to display the OPTIONS menu for the current source.
4.	 Press or to highlight the option you want to change.
5.	 Press OK to select the setting.
6.	 Press EXIT when done.
1 8 - E N G L I S H
S E T T I N G U P S O U N DTO U C H ®
The SoundTouch® app lets you set up and control SoundTouch® from your ­smartphone
or tablet. Using the app, your smart device acts as a remote for your system.
From the app, you can manage your SoundTouch® settings, add music services, explore
local and global Internet radio stations, set and change Presets, and stream music. New
features are added periodically.
Setting up SoundTouch® on your system
After you connect the system to power, download and install the ­SoundTouch® app onto
a smartphone or tablet that is connected to your network.
The app guides you through setting up SoundTouch® on your system.
Note:	 If you have already set up SoundTouch® for another system, see “Adding the
system to an existing ­SoundTouch® account” on page 19.
Download and install the SoundTouch® app
On your smartphone or tablet, download the Bose® SoundTouch® controller app.
•	 Apple users: download from the App Store
•	 Android™ users: download on the Google Play™ store
•	 Amazon Kindle Fire users: download from the Amazon Appstore for Android
Connect the system to your Wi-Fi® network
After you download and install the app, connect your system to your network:
1.	 On your smartphone or tablet, select the SoundTouch® icon to open the app.
2.	 Follow the instructions in the app to complete setup, including creating a
­S­oundTouch® account, adding a music library and music services.
E N G L I S H - 1 9
S E T T I N G U P S O U N DTO U C H ®
Adding the system to an existing
­SoundTouch® account
If you have already set up SoundTouch® on another system, you do not need to
­download the SoundTouch® app again.
1.	 On your smartphone or tablet, select the SoundTouch® icon to open the app.
2.	 Select EXPLORE  SETTINGS  Add or reconnect system.
The app guides you through setup.
Connecting the system to a new network
If your network information changes, add your system to your new network. You can do
this by putting the system into setup mode.
1.	 On your smartphone or tablet, select the SoundTouch® icon to open the app.
2.	 Select EXPLORE  SETTINGS  System settings and select your ­system.
3.	 Select CONNECT SYSTEM.
The app guides you through setup.
2 0 - E N G L I S H
U S I N G T H E S O U N DTO U C H ® A P P
After you set up the SoundTouch® app, you are ready to stream music and ­personalize
your Presets.
Getting help
global.Bose.com/Support/LS650
This website provides access to the owner support center, which includes: owner’s
manuals, articles, tips, tutorials, a video library and the owner community where you can
post questions and answers.
In-app help
The In-app help provides information on using SoundTouch®.
1.	 On your mobile device, select the SoundTouch® icon to open the app.
2.	 Select EXPLORE  HELP.
Controlling the system from another
smartphone or tablet
Once you set up the SoundTouch® system on your home Wi-Fi® network, you can control
the system from any smartphone or tablet on the same network.
1.	 Connect the device to the same network as your system.
2.	 On the device, download and install the SoundTouch® app (see page 18).
E N G L I S H - 2 1
P E R S O N A L I Z I N G YO U R P R E S E T S
How Presets work
You can personalize six Presets to your favorite streaming music services, stations,
­playlists, artists, albums or songs from your music library. You can access your ­music,
at any time, with a simple touch of a button using the SoundTouch® app on your
­smartphone or tablet.
What you need to know
•	 You can set Presets from the app and your remote control.
•	 You cannot set Presets to a Bluetooth® stream.
Setting a Preset
1.	 Stream music to the system using the app.
2.	 While the music is playing, press and hold a Preset in the app.
Note:	 For information on using the SoundTouch® app to set and change your
­Presets, refer to the in-app help.
Playing a Preset
Once you personalize your Presets, press a Preset in the app to play it.
Setting a Preset using your remote control
1.	 Press the on your remote control to access the SoundTouch source.
2.	 Press and hold a number (from 1 – 6) on the numeric keypad to assign a new Preset.
A tone notifies you that a new Preset has been set.
Selecting a Preset using ­your remote
­control
1.	 Assign your favorite stations as Presets within the app.
2.	 Press the SoundTouch® button on your remote control to switch to the
SoundTouch source.
3.	 Select a Preset by pressing a number (from 1 – 6) on the numeric keypad.
The buttons are ­highlighted blue on your remote control for reference.
2 2 - E N G L I S H
B LU E T O OT H ® T E C H N O LO GY
Bluetooth® wireless technology lets you stream music from mobile devices, such as
smartphones, tablets and laptops. Before you can stream music from a mobile device,
you must pair the mobile device with the console.
Choosing your pairing method
You can pair your mobile device with the console using Bluetooth wireless ­technology
or Near Field Communication (NFC).
What is NFC?
NFC is a technology that enables devices to establish wireless communication with each
other by simply tapping the devices together. Refer to your device owner’s guide to see
if your model supports NFC.
If your device does not support NFC or if
you are unsure:
Follow the instructions for “Pairing a device.”
If your device supports NFC: Follow the instructions for “Pairing a device with
NFC” on page 23.
Note:	 If your device supports Bluetooth pairing via NFC, you can use either pairing
method.
Pairing a device
1.	 Press the button on your remote control and select Bluetooth® from the
­on-screen menu.
2.	 Follow the on-screen instructions to place your console in pairing mode.
3.	 On your device, turn on the Bluetooth feature.
Tip:	 The Bluetooth feature is usually found in the Settings menu.
4.	 Select your system from the device list.
Once connected, your system’s name appears connected in the device list.
E N G L I S H - 2 3
B LU E T O OT H ® T E C H N O LO GY
Pairing a device with NFC
1.	 With your system powered on, unlock your device and turn on the ­Bluetooth® and
NFC features. Refer to your device owner’s guide to learn more about these features.
2.	 Gently tap the NFC touchpoint on your mobile device to the area above the Bose®
logo on the top of your Lifestyle® console.
Your mobile device may prompt you to accept pairing.
Controlling your connected mobile device
from the remote control
Once paired, you can use the remote control to access your connected mobile ­devices.
Select Bluetooth from the menu. To pair a device, see page 22.
You can use the remote to control the following subset of Bluetooth features on
your system:
•	 Pair and connect devices.
•	 View available artist information in the NOW PLAYING panel.
•	 Control playback (play, pause, stop, skip to the next track, etc.).
•	 Clear the pairing list.
2 4 - E N G L I S H
B LU E T O OT H ® T E C H N O LO GY
Connecting to a paired device
You can stream audio from a device to your console.
1.	 Turn on the Bluetooth® feature on your device.
2.	 On your remote control, choose the Bluetooth source through the menu.
The console connects to the last device that streamed music to the system.
3.	 On the device, play music.
If you can’t stream audio from a paired device
The system may have lost the connection to the device. If the paired device is out of
range of the system, move the device within range.
Disconnecting a device
•	 Turn off the Bluetooth feature on your device.
•	 If your device supports NFC, tap the NFC touchpoint on your ­device to the top of the
console above the Bose® logo.
Reconnecting a device
•	 When powered on, the console tries to reconnect with the most ­recently
connected device.
Note:	 The device must be within range and powered on.
•	 If your device supports NFC, gently tap the NFC touchpoint on your mobile device to
the area above the Bose® logo on the top of your console.
Clearing the console's pairing list
You can store up to eight paired devices in the console's pairing list.
1.	 On your remote control, choose the Bluetooth source through the menu.
2.	 In the Bluetooth source, press the MORE button on your remote.
3.	 Select CLEAR LIST.
All devices are cleared.
Using the SoundTouch® app
You can also clear the pairing list using the app.
1.	 On your mobile device, select the SoundTouch® icon to open the app.
2.	 Select EXPLORE  SETTINGS  System settings and select your ­system.
3.	 Open the Bluetooth® menu item and clear the pairing list.
E N G L I S H - 2 5
A DVA N C E D F E AT U R E S
Disabling Wi-Fi® capability
Disabling Wi-Fi® also disables the Bluetooth® feature.
1.	 Press and hold your console's button until the system status
indicator blinks.
2.	 Release the button.
Re-enabling Wi-Fi® capability
Re-enabling Wi-Fi® also re-enables the Bluetooth® feature.
Your system's Wi-Fi® automatically re-enables upon restarting the system.
Updating the system software
If your system is connected to your home network, it checks for software ­updates every
time the system is used. If an update is available, it begins downloading ­automatically.
If an update was fully downloaded, on-screen text prompts you when ­powering down
the console that it is ready to be installed. Your system shuts down ­automatically after
­installation.­
2 6 - E N G L I S H
G E T T I N G SYS T E M I N F O R M AT I O N
System status indicators
The front of the console has an LED indicator that shows system status. The LED glows
according to system state.
Console LED indicator
Indicator activity System state
Off System is off
Blinking white System is powering on
Solid white System powered on
Blinking amber Downloading system software update
Blinking amber
(five seconds on, one second off)
In standby
Blinking red
(five seconds on, one second off)
Remote control battery low
Solid red Firmware error - contact Bose® customer service
E N G L I S H - 2 7
G E T T I N G SYS T E M I N F O R M AT I O N
Acoustimass® wireless bass module LED indicator
Indicator activity System state
Blinking amber Ready to pair
Solid white Connected to the console
Solid amber (dim) Disconnected from the console
Blinking white Downloading system software update
Blinking red Firmware error - contact Bose® customer service
Wireless receiver LED indicator
Indicator activity System state
Blinking amber Ready to pair
Solid white Connected to the console
Solid amber (dim) Disconnected from the console
Blinking white Downloading system software update
Blinking red Firmware error - contact Bose® customer service
2 8 - E N G L I S H
C A R E A N D M A I N T E N A N C E
Cleaning
Do not allow liquids to spill onto the system or into any openings.
•	 Clean the exterior of the system with the provided cleaning cloth or another soft,
dry cloth.
•	 Do not use any sprays near the system.
•	 Do not use any solvents, chemicals or ­cleaning solutions containing alcohol, ammonia
or abrasives.
•	 Do not allow ­objects to drop into any ­openings.
Customer service
For additional help using the system:
•	 Visit global.Bose.com/Support/LS650
•	 Contact Bose® customer service. Refer to the contact sheet in box for
­additional information.
Limited warranty
Your system is covered by a limited warranty. Details of the limited ­warranty are
­provided on the product registration card that is in the carton. Please refer to the
card for instructions on how to register. Failure to do so will not affect your limited
warranty rights.
The warranty information provided with this product does not apply in
Australia and New Zealand. See our website at www.bose.com.au/warranty or
www.bose.co.nz/warranty for details of the Australia and New Zealand warranty.
Technical information
U.S.A./Canada/International:
•	 Console: 10VDC 3.3A, 44VDC 1.25A
•	 Wireless receivers: 100–240V 50/60 Hz, 30W
•	 Acoustimass® wireless bass module: 100–240V 50/60 Hz, 180W
SERVICE connector
The SERVICE connector is for service use only. Do not insert any cables into this
­connector.
E N G L I S H - 2 9
T R O U B L E S H O OT I N G
If you experience problems with your home entertainment system:
•	 Make sure that all system components are connected to an AC (mains) outlet.
•	 Secure all cables.
•	 Check the state of system status indicators (see page 26).
•	 Move the system away from possible interference ­(wireless routers, cordless phones,
televisions, microwaves, etc.).
•	 Verify the system is within the recommended range of wireless router or mobile
device for proper operation.
If you continue to experience problems, see “Common solutions” before ­contacting
Bose® customer service. This table is designed to help you identify and correct problems
that may occur with your Bose product.
Common solutions
The following table lists symptoms and possible solutions to common problems.
Symptom Solution
The system is not
­responding to initial
­operation of remote
control
•	 Power on the control console manually from the front of the unit by
pressing the Power button .
•	 Press any button on your remote control. The system status
­indicator on the ­control ­console should blink with each press.
•	 Make sure the remote control's batteries are installed correctly and
do not need replacement (see page 42).
•	 Unplug the power cord for the console, wait 30 seconds and plug it
firmly into a live AC (mains) outlet.
The remote does not
control a device added
­during initial setup
Connect your IR emitter (see page 32).
The TV is still ­playing
sound
Disable your TV speakers through your TV's settings menu.
Poor video ­connection
from a source
Press the button on the control console and select your
­device’s setup options. Follow the on-screen instructions to change a
video ­connection.
System does not respond •	 Select a connected device from the menu.
•	 Press and hold on the front of the console to cycle your
­system's power.
•	 Unplug the power cord for the console, wait 30 seconds and plug it
firmly into a live AC (mains) outlet.
3 0 - E N G L I S H
T R O U B L E S H O OT I N G
Symptom Solution
No sound from the
system
•	 Increase the volume.
•	 Press the Mute button on the remote control to make sure the
system is not muted.
•	 Make sure you have selected the correct source.
•	 Cycle through and test different sources.
•	 Make sure that the HDMI™ cable is inserted into a connector on
your TV labeled ARC or Audio Return Channel. If your TV does
not have an HDMI ARC connector, use a secondary audio cable in
addition to the HDMI cable.
•	 If using a secondary audio cable, insert the cable into a connector
on your TV labeled Output or OUT.
•	 Press and hold the Power button on the front of the console to
cycle your ­system's power.
•	 Unplug the power cord for the console, wait 30 seconds and plug it
firmly into a live AC (mains) outlet.
Cannot complete
­network setup
•	 Select the correct network name and enter password
(case sensitive).
•	 Restart your modem and router.
•	 Connect to the network using an Ethernet cable.
Cannot complete
­SoundTouch® setup
•	 Connect the mobile device and the system to the same ­
Wi-Fi® network.
•	 Enable Wi-Fi on the mobile device you are ­using for setup.
•	 Test your internet connection.
•	 Restart your mobile device.
•	 Restart your modem and router.
•	 Uninstall the app, reinstall the app, reset the system and restart
setup.
Acoustimass® wireless
bass ­module status LED
is a solid amber (dim)
•	 Follow the on-screen troubleshooting prompts.
•	 Press the button on the control console or your remote and
rerun the ­UNIFY® setup (see page 14).
•	 Connect the bass module using a 3.5 mm stereo c­able (see page
33). If you don’t have a 3.5 mm stereo cable, contact Bose®
customer ­service. Refer to the contact sheet in the carton.
•	 Unplug the power cord for the Acoustimass, wait 30 seconds and
plug it firmly into a live AC (mains) outlet.
Bass is too heavy or low •	 Adjust the bass setting of the system (see page 17).
•	 Run ADAPTiQ® audio calibration (see page 14).
•	 Move the bass module away from nearby walls and corners.
E N G L I S H - 3 1
T R O U B L E S H O OT I N G
Symptom Solution
The wireless ­receiver
status LEDs are solid
amber (dim)
•	 Follow the on-screen troubleshooting prompts.
•	 Press the button on the control console or your remote and
rerun the ­UNIFY® setup (see page 14).
•	 Unplug the power cords for the receivers, wait 30 seconds and
plug them firmly into a live AC (mains) outlet.
•	 Make a wired connection to your rear speakers. Contact Bose®
­customer ­service. Refer to the contact sheet in the carton.
Sound is distorted •	 Cycle through and test different sources.
•	 Reduce the volume output level from any devices ­connected to the
control console.
•	 Make sure the audio input cable from your source device is
­connected and not damaged.
•	 If you have not previously run ADAPTiQ®, select ADAPTiQ® from
the UNIFY® menu (see page 13).
•	 Unplug the power cord for the console, wait 30 seconds and plug it
firmly into a live AC (mains) outlet.
No sound from a
connected device
•	 Power on the device.
•	 Cycle through and test different sources.
•	 Refer to the device owner’s manual.
No TV picture, but audio
is heard
Make sure the TV video input selection is correct for the video source.
A connected ­device
is not responding
­consistently to remote
commands
•	 Try setting up the device again. Press the button on the
control console. Select the device options and follow the ­on-screen
instructions to set up the device again.
•	 Replace your remote’s batteries (see page 42).
•	 Set up your IR emitter (see page 32).
Intermittent audio
­dropouts heard on
­coaxial digital audio
devices
•	 Confirm that the audio cable is properly connected to the console
and the coaxial digital audio device.
•	 Cycle through and test different sources.
•	 Try setting up the device again. Press the button on the
control console. Select the coaxial digital audio device options and
follow the ­on-screen instructions to set up the device again.
•	 Unplug the power cord for the console, wait 30 seconds and plug it
firmly into a live AC (mains) outlet.
Connecting to a new
network or ­different
network
•	 If your network information has changed or to connect your ­system
to another network, refer to the SoundTouch® in-app help.
•	 If having problems connecting wirelessly, connect to the network
using an Ethernet cable.
3 2 - E N G L I S H
T R O U B L E S H O OT I N G
Symptom Solution
Cannot play ­Bluetooth®
audio
On your system:
•	 Pair a mobile device using the Bluetooth SOURCE screen.
•	 Clear the system’s pairing list using the SoundTouch® app:
-- In the Bluetooth source, press the MORE button on
your remote.
-- Select CLEAR LIST.
•	 Try pairing a different mobile device.
On your mobile device:
•	 Disable and re-enable the Bluetooth feature.
•	 Remove the system from the Bluetooth menu. Pair again.
•	 Refer to your device’s documentation.
•	 See “No sound from the system” on page 30.
Setting up your IR emitter
If you are having issues with the responsiveness of your remote and your ­connected
devices, Bose® recommends using the provided IR emitter.
Note:	 Use the IR emitters only if you are having remote control issues from a third
party device.
1.	 Remove the IR emitter from box .
2.	 Insert the emitter into the IR connector on the back of the console.
3.	 Remove three adhesive pads from the plastic sheet included with the emitter and
place them on the flat bottoms of the three emitter beads.
Emitter bead
4.	 Remove the plastic backing from the adhesive pads.
E N G L I S H - 3 3
T R O U B L E S H O OT I N G
5.	 Place the three IR beads into the cabinet housing your device or directly in front of
the device itself.
6.	 Test the responsiveness of your remote. If problems still exist, reposition the IR
beads and test again.
Unable to pair the Acoustimass® wireless
bass module with the console
If you are unable to pair the bass module with the console, you can also connect the
­module to the soundbar using a 3.5 mm stereo cable (not provided).
Use this method only if you are having issues wirelessly connecting your bass module to
your console.
Note:	 If you don’t have a 3.5 mm stereo cable (commonly used for headphones and
mobile devices), contact Bose® customer service to receive this part.
Refer to the contact sheet in box .
1.	 Connect one end of a 3.5 mm stereo cable to the ACOUSTIMASS IN connector on
the back of the bass module.
2.	 Connect the other end of the cable to the ACOUSTIMASS connector on the back of
your console.
3.	 Turn on your system and check for sound.
Checking for sound
1.	 Power on your TV.
2.	 If you are using a cable/satellite box or other secondary source:
•	 Power on this source.
•	 If your secondary source is connected to your TV, select the appropriate TV ­input.
3.	 Power on your console.
You should hear sound coming from the bass module.
Note:	 If you do not hear sound from the bass module, see “Troubleshooting” on
page 30.
3 4 - E N G L I S H
A P P E N D I X A : I N S TA L L AT I O N R E F E R E N C E
Front console panel
The front of the console has the following inputs:
•	 Headphones
•	 HDMI™
input
These inputs ­appear in the menu as AUX (Front) and HDMI (Front) when a
device is connected. They can be used to connect digital cameras, video cameras, media
players and your preferred mobile device.
Front Headphones/AUX input
You can use this 3.5 mm input with your headphones, or as a quick plug-and-play audio
option with your favorite mobile device. The headphone is the default option.
If you'd like to use this input as an AUX IN, press the button on your remote
control and select Settings in the on-screen display.
Front HDMI™ input
You can use this input for devices that have an HDMI output.
Note:	 The Bose remote control does not control functions specific to devices that are
connected to the front HDMI™ input.
Back console panel
HDMI™ Ethernet Service
Speaker
connectors
Optical Coaxial Analog
HDMI™ (ARC)
Power Troubleshooting
E N G L I S H - 3 5
A P P E N D I X A : I N S TA L L AT I O N R E F E R E N C E
Connecting an OmniJewel™ base
1.	 Using the screwdriver, turn the screws to the left (counterclockwise) to loosen the
wire terminals on the bases.
2.	 Insert the bare ends of the four-pin cable into the OmniJewel™ base by placing the
red wire marked L+ or R+ into the red terminal ( + ) and the plain wire into the plain
silver terminal ( – ).
3.	 Use the Phillips head screwdriver to secure the wires into the terminals by turning
the screws on top of the base to the right (clockwise).
4.	 While holding the OmniJewel™ speaker, place the base into the bottom.
The base should fit flush into your speaker, with the wire­­terminals facing the back.
5.	 Attach the base to the speaker by pushing the Phillips head screwdriver through the
circular opening and turning the screw to the right (clockwise) until fully seated.
3 6 - E N G L I S H
A P P E N D I X A : I N S TA L L AT I O N R E F E R E N C E
Installing the front speakers
UNIFY® guides you through the initial installation of your front speakers during the
“Wired speakers” step (see page 14).
If you are moving your system but have already completed setup, refer to the following
instructions in order to reassemble the rear portion of your home entertainment system.
CAUTION:	 Do not connect your speakers while your console is connected to an
AC (mains) adapter.
What you need:
From box : From box :
OmniJewel™
speakers (2)
OmniJewel™ bases (2) Front speaker cable (1) Screwdriver (1)
From box :
OmniJewel™ center speaker (1) Center speaker cable (1) Adhesive feet (4)
E N G L I S H - 3 7
Connecting the front speakers to
the console
1.	 Place your speakers according to the “Placement guidelines” on page 11.
2.	 Connect and attach the OmniJewel™ bases to the OmniJewel™ speakers
(see page 35).
3.	 Insert the molded plug of the four-pin cable into the four-pin FRONT SPEAKERS
connector on the back of your console.
Attaching the rubber feet to your
center speaker
1.	 Remove the rubber feet from box .
2.	 Place the center speaker upside down on a soft, protected surface.
3.	 Remove the protective film from the feet.
4.	 Attach the rubber feet to the bottom of the center speaker at both ends.
A P P E N D I X A : I N S TA L L AT I O N R E F E R E N C E
3 8 - E N G L I S H
A P P E N D I X A : I N S TA L L AT I O N R E F E R E N C E
Connecting the center speaker to
the console
1.	 Remove the center speaker cable from box .
2.	 Place the center speaker according to “Placement guidelines” on page 11.
3.	 Insert the center speaker cable into the back of your center speaker.
4.	 Insert the molded plug of the six-pin cable into the six-pin FRONT SPEAKERS
­connector on the back of your console.
E N G L I S H - 3 9
A P P E N D I X A : I N S TA L L AT I O N R E F E R E N C E
Installing the rear speakers
UNIFY® guides you through the initial installation of your rear speakers during the
­“Wireless speakers” step (see page 14).
If you are moving your system but have already completed setup, refer to the following
instructions in order to reassemble the rear portion of your home entertainment system.
What you need:
From box :
OmniJewel™ speakers (2) OmniJewel™ bases (2) Rear speaker cables (2)
From box : From box : From box :
Wireless receivers (2) Power cords (2) Screwdriver (1)
4 0 - E N G L I S H
A P P E N D I X A : I N S TA L L AT I O N R E F E R E N C E
Identifying switch settings on wireless
­receivers
Your rear speakers connect to wireless receivers to communicate with the console. The
receivers come preset to a left and right channel out of the box. You can use the switch
on the front of the receiver to adjust the channel settings.
1.	 Confirm that the switch on one wireless receiver is set to L (left).
2.	 Confirm that the switch on the other wireless receiver is set to R (right).
Note:	 Make sure that one wireless receiver is always set to L (left) and the other is set
to R (right).
Connecting the rear speakers
1.	 Place your speaker according to the “Placement guidelines” on page 11.
2.	 Connect and attach an OmniJewel™ base to an OmniJewel™ speaker (see page 35).
3.	 Insert the other end of the two-pin cable into your wireless receiver.
You hear or feel a click.
4.	 Repeat steps 1 - 3 connect your other speaker.
E N G L I S H - 4 1
A P P E N D I X A : I N S TA L L AT I O N R E F E R E N C E
Connecting the rear speakers to power
1.	 Connect one end of the power cord into your wireless receiver.
2.	 Plug the other end of the power cord into an AC (mains) outlet.
3.	 Repeat steps 1 and 2 to set up your other speaker.
Making a wired connection to the
rear speakers
You can also hard wire your rear speakers through the use of an adapter kit
(sold separately).
To purchase the kit, contact your local Bose® dealer or visit www.Bose.com
CAUTION:	 Do not use any unauthorized wiring to connect the speakers to your Bose
system. Using unauthorized wires may damage your Bose system and its
components.
Mounting your speakers
You can mount the speakers on wall brackets, floor stands or table stands. To purchase
these accessories, contact your local Bose® dealer or visit www.Bose.com
CAUTIONS: 
•	 Only use Bose hardware to mount the speakers. Using unauthorized mounts may
­damage your Bose system and its components.
•	 The speaker wire and interconnect cables included with this system are not approved
for in-wall installation. Please check your local building codes for the correct type of
wire and cable required for in-wall installation.
4 2 - E N G L I S H
A P P E N D I X B : SYS T E M M A I N T E N A N C E
Replacing the remote control’s batteries
Replace all four batteries when there is a noticeable decrease in range or when you
see the console LED indicator blink red (see page 26).
1.	 Slide open the battery compartment cover on the back of the remote control.
2.	 Install four AA (IEC LR6) 1.5V batteries. Match the + and – symbols on the ­batteries
with the + and – markings inside the compartment.
3.	 Slide the battery compartment cover back into place.
E N G L I S H - 4 3
2 - E S PA Ñ O L
I N S T R U C C I O N E S I M P O R TA N T E S D E S E G U R I DA D
Lea y conserve todas las instrucciones de uso y seguridad.
Instrucciones importantes de seguridad
1.	 Lea estas instrucciones.
2.	 Conserve estas instrucciones.
3.	 Tenga en cuenta las advertencias.
4.	 Siga todas las instrucciones.
5.	 No use este aparato cerca del agua.
6.	 Límpielo solamente con un paño seco.
7.	 No bloquee ninguna abertura de ventilación. Realice la instalación conforme a las instrucciones del fabricante.
8.	 No lo coloque cerca de ninguna fuente de calor, como radiadores, rejillas de calefacción, estufas u otros aparatos (incluidos los
amplificadores) que produzcan calor.
9.	 Proteja el cable de corriente para evitar que lo pisen o pellizquen, especialmente en enchufes, receptáculos de las tomas y en
el punto donde salen del dispositivo.
10.	 Use solamente los accesorios especificados por el fabricante.
11.	 Desenchufe este aparato durante tormentas eléctricas o cuando no lo utilice durante períodos de tiempo prolongados.
12.	 Derive todas las tareas de servicio a personal calificado. Se requieren tareas de servicio si el aparato se daña de alguna manera,
por ejemplo si se dañó el enchufe o cable de alimentación, si se derramó líquido o cayeron objetos dentro del aparato, si el aparato
estuvo expuesto a la lluvia o la humedad, si no funciona normalmente, o si se cayó.
Este símbolo en el producto significa que existe tensión peligrosa, sin aislamiento dentro de la carcasa del producto que puede
presentar un riesgo de descarga eléctrica.
Este símbolo significa que existen instrucciones de funcionamiento y mantenimiento importantes en esta guía.
Contiene piezas pequeñas que pueden representar un riesgo de asfixia. No es indicado para niños de menos de tres años de edad.
Este producto contiene material magnético. Consulte con su médico si esto podría afectar un dispositivo médico implantable.
Este producto contiene una superficie de vidrio templado. Tenga cuidado para evitar impactos. En caso de que se rompa,
manipule los trozos de vidrio con cuidado.
•	 Para reducir el riesgo de incendio o descarga eléctrica, NO exponga este producto a la lluvia, a líquidos ni a la humedad.
•	 NO exponga este producto a goteos o salpicaduras, no coloque encima, ni cerca del producto, objetos llenos con líquido como jarrones.
•	 Mantenga el producto lejos del fuego y de fuentes de calor. NO coloque sobre el producto, o en su proximidad, fuentes de llamas al
descubierto, como velas encendidas.
•	 NO realice alteraciones no autorizadas a este producto.
•	 NO use un convertidor de corriente con este producto.
•	 NO lo use en vehículos o embarcaciones.
•	 El cable del altavoz y los cables de interconexión que se incluyen con este sistema no están aprobados para instalaciones en la pared.
Consulte en los códigos de edificación local el tipo correcto de cables que se necesitan para las instalaciones en pared.
•	 Use este producto solamente con la fuente de alimentación suministrada.
•	 Si se utiliza la clavija de conexión de red o el acoplador del artefacto como el dispositivo de desconexión, el dispositivo de desconexión
deberá permanecer listo para funcionar.
仅适用于 2000m 以下地区安全使用
Use este producto solamente a una altura inferior a 2000 metros.
•	 Debido a los requisitos de ventilación, Bose no recomienda colocar el producto en un espacio reducido como una cavidad en la pared o
un gabinete cerrado.
•	 No coloque o instale el soporte o producto cerca de fuentes de calor, como chimeneas, radiadores, registradores de calor u otros
dispositivos (incluidos amplificadores) que producen calor.
•	 La etiqueta del producto se encuentra en la parte inferior de la consola.
E S PA Ñ O L - 3
I N F O R M AC I Ó N R E G U L ATO R I A
NOTA: Este equipo ha sido sometido a prueba y se ha comprobado que cumple con los límites de un dispositivo digital Clase B,
conforme a la Parte 15 de las reglas de la FCC. Estos límites están diseñados para ofrecer una protección razonable contra la interferencia
perjudicial en una instalación domiciliaria. Este equipo genera, usa y puede irradiar energía de radiofrecuencia y, si no se instala y se usa
conforme a las instrucciones, puede causar una interferencia perjudicial a las comunicaciones de radio. Sin embargo, no se garantiza que
la interferencia no se produzca en una instalación en particular. Si este equipo causa interferencias perjudiciales en la recepción de radio o
televisión, que se puede determinar al apagar y encender el equipo, se aconseja al usuario intentar corregir la interferencia mediante una
o más de las siguientes medidas:
•	 Reoriente o reubique la antena receptora.
•	 Aumente la separación entre el equipo y el receptor.
•	 Conecte el equipo a una salida eléctrica en un circuito diferente al que está conectado el receptor.
•	 Consulte con el distribuidor o con un técnico en radio o televisión experimentado para obtener ayuda.
Los cambios o las modificaciones no aprobadas expresamente por Bose Corporation podrían invalidar la autoridad del usuario para
operar el equipo.
Este dispositivo cumple con la parte 15 de las reglas de la FCC y con las normas RSS sin licencia de la industria canadiense.
El funcionamiento está sujeto a las siguientes dos condiciones: (1) Este dispositivo no debe provocar interferencias dañinas y
(2) Este dispositivo debe aceptar cualquier interferencia recibida, incluida la interferencia que puede causar un funcionamiento
no deseado.
Este dispositivo que funciona de 5150 a 5250 MHz es solo para uso en interiores para reducir la interferencia potencialmente dañina con
los sistemas de satélite móvil que comparten el mismo canal.
W52/W53 solo para uso en interiores.
Este dispositivo cumple con los límites de exposición a la radiación de la FCC y de la Industry Canada establecidos para la población en general.
Este equipo debe instalarse y operarse a una distancia mínima de 20 cm entre el radiador y su cuerpo.
Este transmisor no se debe ubicar ni operar conjuntamente con ninguna otra antena o transmisor.
Normas de gestión para dispositivos de radiofrecuencia de baja potencia
Artículo XII
Según la “Regulación de administración para dispositivos de radiofrecuencia de bajo consumo” sin el permiso concedido por la NCC,
cualquier empresa, compañía o usuario no puede cambiar la frecuencia, mejorar la potencia de transmisión ni alterar las características
originales así como el desempeño de los dispositivos de radiofrecuencia de bajo consumo.
Artículo XIV
Los dispositivos de radiofrecuencia de baja potencia no deberían afectar la seguridad del avión ni interferir con las comunicaciones
legales; si se determinara una interferencia, el usuario deberá dejar de operar de inmediato hasta que no se perciba interferencia.
Dichas comunicaciones legales significan comunicaciones de radio operadas conforme con la Ley de telecomunicaciones.
Los dispositivos de radiofrecuencia de baja potencia deben ser susceptibles a la interferencia de las comunicaciones legales o de los
dispositivos de ondas de radio ISM.
Por la presente, Bose Corporation declara que este producto cumple con los requisitos esenciales y con otras cláusulas
relevantes de la Directiva 1999/5/EC y con todos los demás requisitos de directivas de la UE. La declaración de conformidad
completa se puede encontrar en: www.Bose.com/compliance
Este símbolo significa que el producto no debe desecharse como residuo doméstico y debe entregarse a un centro de
recolección apropiado para reciclado. La eliminación y el reciclado adecuados ayudan a proteger los recursos naturales, la salud
de las personas y el medioambiente. Para obtener más información sobre la eliminación y el reciclado de este producto, póngase
en contacto con su municipio, el servicio de gestión de residuos o el comercio donde haya comprado este producto.
Nombres y contenidos de las sustancias o elementos tóxicos o peligrosos
Sustancias y elementos tóxicos o peligrosos
Nombre de parte
Plomo
(pb)
Mercurio
(Hg)
Cadmio (Cd) Hexavalente
Bifenilo polibromado
(PBB)
Difeniléter
polibromado
(PBDE)
PCB X O O O O O
Partes metálicas X O O O O O
Partes plásticas O O O O O O
Altavoces X O O O O O
Cables X O O O O O
Esta tabla se preparó conforme a las cláusulas de SJ/T 11364.
O: Indica que esta sustancia tóxica o peligrosa contenida en todos los materiales homogéneos para esta parte es inferior al
requisito de límite de GB/T 26572.
X: Indica que esta sustancia tóxica o peligrosa que está presente en al menos uno de los materiales homogéneos utilizados para
esta parte se encuentra por encima del requisito de límite de GB/T 26572.
4 - E S PA Ñ O L
I N F O R M AC I Ó N R E G U L ATO R I A
Complete y conserve para su registro
Los números de serie y de modelo se encuentran en el costado de la caja.
Número de serie: _________________________________________________________________________________
Número de modelo: _______________________________________________________________________________
Guarde el recibo con la guía del usuario. Ahora es un buen momento para registrar su producto Bose.
Puede hacerlo fácilmente visitando http://global.Bose.com/register
Fecha de fabricación: El primer dígito en negritas del número de serie indica el año de fabricación; “6” es 2006 ó 2016.
Importador en China: Bose Electronics (Shanghai) Company Limited, Part C, Plan 9, No. 353 North Riying Road, China (Shanghai)
Pilot Free Trade Zone.
Importador en UE: Bose GP, Castleblayney Road, Carrickmacross, County Monaghan, Irlanda
Importador en México: Bose de México, S. de R.L. de C.V., Paseo de las Palmas 405-204, Lomas de Chapultepec, 11000 México, D.F.
Número de teléfono: 001 800 900 2673.
Importador en Taiwán: Bose Taiwan Branch, 9F-A1, No.10, Section 3, Minsheng East Road, Taipei City 104, Taiwán.
Número de teléfono: 886 2 2514 7977.
Apple y el logotipo de Apple son marcas registradas de Apple Inc., registradas en los Estados Unidos y en otros países. App Store es una
marca de servicio de Apple Inc.
Android, Google Play y el logotipo de Google Play son marcas registradas de Google Inc.
©2013 CSR plc y su grupo de compañías. La marca aptX® y el logotipo de aptX son marcas comerciales de CSR plc o de una de las
compañías de su grupo y pueden estar registrados en una o más jurisdicciones.
La marca y los logotipos de Bluetooth® son marcas comerciales registradas propiedad de Bluetooth SIG Inc. y cualquier uso de dichas
marcas por parte de Bose Corporation se encuentra bajo licencia.
Dolby, Dolby Audio y el símbolo de las dos D son marcas comerciales de Dolby Laboratories.	
Para las patentes DTS, vea http://patents.DTS.com. Fabricado bajo licencia de Digital Theater Systems, Inc. DTS,
el símbolo y DTS y el símbolo en conjunto son marcas comerciales registradas, y DTS Digital Surround es una marca
comercial de DTS, Inc. © DTS, Inc. Reservados todos los derechos.
Los términos HDMI y HDMI High-Definition Multimedia Interface y el logotipo HDMI son marcas comerciales o marcas
comerciales registradas de HDMI Licensing LLC en los Estados Unidos y otros países.
iHeartRadio es una marca comercial registrada de iHeartMedia, Inc.
Deezer es una marca registrada de Blogmusik SAS.
Este producto está protegido bajo ciertos derechos de propiedad intelectual de Microsoft. Se prohíbe el uso o la distribución de dicha
tecnología fuera de este producto sin licencia de Microsoft.
La marca N-Mark es una marca comercial o marca comercial registrada de NFC Forum, Inc. en los Estados Unidos de América y en otros países.
Pandora, el logotipo de Pandora y la imagen comercial de Pandora son marcas comerciales o marcas comerciales registradas de Pandora
Media, Inc., y se utilizan con permiso.
La subscripción de radio por Internet SiriusXM se vende por separado y solo está disponible para mayores de 18 años que residan en
EE. UU. y Puerto Rico. Para suscribirse al servicio de radio por Internet SiriusXM en los EE. UU., los clientes de EE. UU. deben visitar
www.sirius.com o llamar al 1-888-539-7474.
SiriusXM y todas las marcas y logos relacionados son marcas comerciales de Sirius XM Radio Inc. y sus subsidiarias. Todos los derechos
reservados.
SoundTouch y el diseño de la nota inalámbrica son marcas comerciales registradas de Bose Corporation en los EE. UU. y otros países.
Este producto incorpora software de Spotify que está sujeto a licencias de otras empresas que se listan en:
www.spotify.com/connect/third-party-licenses
Spotify es una marca comercial registrada de Spotify AB.
Diseñado con UEI Technology™
. Bajo licencia de Universal Electronics, Inc. © UEI 2000-2016
Wi-Fi es una marca comercial registrada de Wi-Fi Alliance®
.
Windows es una marca comercial registrada de Microsoft Corporation en Estados Unidos y en otros países.
©2016 Bose Corporation. No se puede reproducir, modificar, distribuir, o usar de otra manera ninguna parte de este trabajo sin previo
consentimiento por escrito.
E S PA Ñ O L - 5
C O N T E N I D O
Introducción
Desembalar............................................................................................................................................	8
Sección 1.........................................................................................................................................	9
Sección 2........................................................................................................................................	9
Sección 3 ......................................................................................................................................	9
Sección 4.......................................................................................................................................	10
Pautas de colocación.........................................................................................................................	11
Ejemplo de ubicación del sistema.................................................................................................	12
Instalación del sistema
Información general del sistema UNIFY®....................................................................................	13
Configuración de UNIFY®..................................................................................................................	14
Uso del control remoto
Descripción general del control remoto.....................................................................................	15
Uso del botón SOURCE.....................................................................................................................	16
Botones de funciones........................................................................................................................	16
Ajustar el volumen...............................................................................................................................	16
Modo de ahorro de energía.............................................................................................................	16
Uso del botón MORE..........................................................................................................................	16
El menú OPCIONES............................................................................................................................	17
Configuración de SoundTouch®
Configuración de SoundTouch® en el sistema..........................................................................	18
Descargar e instalar la aplicación SoundTouch®......................................................................	18
Conectar el sistema a la red Wi-Fi®.....................................................................................	18
Agregar el sistema a una cuenta SoundTouch® existente....................................................	19
Conexión del sistema a una nueva red........................................................................................	19
Uso de la aplicación SoundTouch®
Obtener ayuda......................................................................................................................................	20
Ayuda de la aplicación.......................................................................................................................	20
Control del sistema desde otro teléfono inteligente o tableta..........................................	20
Personalización de sus ajustes predefinidos
Cómo funcionan los ajustes predefinidos..................................................................................	21
Configuración de un ajuste predefinido.....................................................................................	21
Reproducción de un ajuste predefinido......................................................................................	21
Configuración de un ajuste predefinido usando el control remoto.................................	21
Selección de un ajuste predefinido usando el control remoto..........................................	21
6 - E S PA Ñ O L
C O N T E N I D O
Tecnología Bluetooth®
Emparejar un dispositivo..................................................................................................................	22
Emparejar un dispositivo con NFC...............................................................................................	23
Controlar el dispositivo móvil conectado desde el control remoto................................	23
Conexión a un dispositivo emparejado.......................................................................................	24
Desconectar un dispositivo.............................................................................................................	24
Reconectar un dispositivo................................................................................................................	24
Borrar la lista de emparejamiento de la consola.....................................................................	24
Uso de la aplicación SoundTouch®.......................................................................................	24
Funciones avanzadas
Desactivación de la función Wi-Fi®...............................................................................................	25
Reactivación de la función Wi-Fi®.................................................................................................	25
Actualizar el software del sistema................................................................................................	25
Obtención de información del sistema
Indicadores de estado del sistema...............................................................................................	26
Indicador LED de la consola..................................................................................................	26
Indicador LED del módulo de bajos inalámbrico Acoustimass®..............................	27
Indicador LED del receptor inalámbrico...........................................................................	27
Cuidado y mantenimiento
Limpieza..................................................................................................................................................	28
Servicio de atención al cliente........................................................................................................	28
Garantía limitada..................................................................................................................................	28
Información técnica............................................................................................................................	28
Conector SERVICE..............................................................................................................................	28
Solución de problemas
Soluciones comunes...........................................................................................................................	29
Configuración del emisor IR............................................................................................................	32
Error al emparejar el módulo de bajos inalámbrico Acoustimass® con la consola....	33
Verificación de sonido.......................................................................................................................	33
E S PA Ñ O L - 7
C O N T E N I D O
Apéndice A: referencia de instalación
Panel delantero de la consola.........................................................................................................	34
Entrada frontal Auriculares/AUX..........................................................................................	34
Entrada frontal HDMI™..............................................................................................................	34
Panel posterior de la consola..........................................................................................................	34
Conexión de una base de OmniJewel™.......................................................................................	35
Conexión de los altavoces delanteros.........................................................................................	36
Conexión de los altavoces delanteros a la consola................................................................	37
Colocación de los pies de goma en el altavoz central..........................................................	37
Conexión del altavoz central a la consola..................................................................................	38
Conexión de los altavoces posteriores........................................................................................	39
Identificación de la configuración del interruptor en los receptores inalámbricos...	40
Conexión de los altavoces posteriores........................................................................................	40
Conexión de los altavoces posteriores a la fuente de alimentación................................	41
Conexión con cables a los altavoces posteriores....................................................................	41
Montar los altavoces...........................................................................................................................	41
Apéndice B: Mantenimiento del sistema
Reemplazar las baterías del control remoto.............................................................................	42
8 - E S PA Ñ O L
I N T R O D U C C I Ó N
Desembalar
Las partes del nuevo sistema de entretenimiento para el hogar Lifestyle® están
empaquetadas en cuatro secciones, algunas de los cuales contienen múltiples cajas de
componentes. Cada caja está marcada con iconos que indican el contenido.
Notas:	
•	 Cuando la configuración de UNIFY® se lo indique, desembale cuidadosamente
el sistema según los iconos que aparecen en los pasos en la pantalla.
•	 Si parte del sistema está dañado o si el vidrio de la consola o módulo de bajos
inalámbrico de Acoustimass® está roto, no lo use. Comuníquese con un representante
autorizado de Bose® o al Servicio de atención al cliente de Bose.
Remítase a la hoja de contacto en la caja .
Sección 1
Sección 2
Sección 3
Sección 4
E S PA Ñ O L - 9
I N T R O D U C C I Ó N
Sección 1
En la caja :
Consola (1) Cable HDMI™ (1) Control remoto
universal (1)
Baterías AA (4)
Sección 2
En la caja : En la caja :
Fuente de alimentación de la consola (1) Cables de corriente (4) Guía del usuario (1)
Puede entregarse con múltiples cables de corriente. Use el cable de corriente
correspondiente a su región.
Sección 3
En la caja :
Altavoces
OmniJewel™ (4)
Bases de OmniJewel™
(4)
Cable de altavoces
delanteros (1)
Cables de altavoces
posteriores (2)
1 0 - E S PA Ñ O L
I N T R O D U C C I Ó N
En la caja :
Altavoz central OmniJewel™ (1) Cable de altavoz central (1) Pies adhesivos (4)
En la caja : En la caja :
Receptores inalámbricos (2) Auriculares ADAPTiQ®
(1)
Destornillador (1) Emisor de
infrarrojos (1)
Sección 4
En la caja :
Módulo de bajos inalámbrico
Acoustimass® (1)
E S PA Ñ O L - 1 1
I N T R O D U C C I Ó N
Pautas de colocación
Para evitar interferencia, mantenga otros equipos inalámbricos a 0,3 - 0,9 m de
distancia del sistema. Coloque el sistema fuera y alejado de objetos metálicos, alejado
de otros componentes de audio/video y de fuentes de calor directo.
Componente Ubicación recomendada
Consola •	 Coloque la consola cerca de los componentes. La ubicación
recomendada es cerca de la TV.
•	 NO coloque la TV ni ningún otro componente encima de la consola.
•	 Coloque la consola en un área bien ventilada.
•	 Asegúrese de que haya una salida eléctrica de CA (red eléctrica) cerca.
Nota:	 Coloque la ­consola de control en una posición de fácil acceso
al panel de conectores posterior hasta que haya terminado la
configuración del sistema.
Módulo de bajos
inalámbrico
Acoustimass®
•	 Apoye el módulo de bajos sobre los pies de goma junto a la misma
pared que la TV o alguna pared en la parte delantera de la habitación.
•	 Elija una superficie estable y nivelada. La vibración puede hacer que
el módulo de bajos se mueva, especialmente sobre superficies lisas
como mármol, vidrio o madera altamente lustrada.
•	 Mantenga la parte anterior del módulo de bajos al menos a una
distancia de 8 cm de cualquier otra superficie. Si se obstruye el puerto
en la parte inferior de este lado puede afectar el rendimiento acústico.
•	 Asegúrese de que haya una salida eléctrica de CA (red eléctrica) cerca.
Altavoces
anteriores
•	 Coloque un altavoz a la izquierda y un altavoz a la derecha de la TV.
•	 Si coloca los altavoces en un estante de una biblioteca cerrada,
colóquelos en el borde delantero del estante.
Altavoz central •	 Pegue los pies de goma en el altavoz central y coloque el altavoz sobre
una superficie estable y nivelada directamente por encima o por debajo
de la TV.
•	 Para más información sobre cómo colocar los pies de goma, vea la
página 41.
Receptores
posteriores
inalámbricos/
altavoces
•	 Para obtener la mejor calidad de sonido, coloque los satélites
posteriores para que estén a la altura por arriba y detrás de los
oyentes sentados y estén dispuestos lo más espaciados posible por la
habitación.
•	 Confirme que el interruptor de un receptor inalámbrico se encuentre en
la posición L (izquierda).
•	 Confirme que el interruptor en el otro receptor inalámbrico se encuentre
en la posición R (derecha).
•	 Mirando hacia la TV, coloque el altavoz y el receptor inalámbrico L del
lado izquierdo de la habitación.
•	 Mirando hacia la TV, coloque el altavoz y el receptor inalámbrico R del
lado derecho de la habitación.
•	 Asegúrese de que haya una salida de alimentación de CA (red eléctrica)
cerca de cada receptor inalámbrico.
1 2 - E S PA Ñ O L
I N T R O D U C C I Ó N
Ejemplo de ubicación del sistema
E S PA Ñ O L - 1 3
I N S TA L AC I Ó N D E L S I S T E M A
Información general del sistema UNIFY®
El sistema de integración inteligente UNIFY lo guía durante el proceso inicial de
instalación y configuración del sistema. Lo ayuda a elegir los cables y las entradas
correctas y a programar el control remoto Bose® para usar los dispositivos conectados.
Nota:	 Antes de comenzar, tenga en cuenta que necesitará una hora para la
configuración del sistema.
Elemento del
menú
Opciones disponibles
Idioma Cambiar el idioma de la pantalla.
ADAPTiQ® Iniciar el proceso de calibración de audio ADAPTiQ Una vez completado,
esta opción de menú desactiva o activa ADAPTiQ.
Configurar la TV Después de conectar la TV a la consola:
•	 Programe el control remoto para usar la TV.
•	 Conecte una nueva TV a la consola.
•	 Agregar, cambiar o quitar la conexión de audio de la TV.
Configurar la fuente Para las fuentes conectadas a las entradas HDMI™ 1 – 5 de la consola
de control:
•	 Volver a nombrar el dispositivo.
•	 Programar el control remoto para acceder al dispositivo.
•	 Quitar el dispositivo.
•	 Agregar o cambiar el tipo de conexión de audio/video.
Agregar un nuevo
dispositivo
Agregar otro dispositivo o accesorio al sistema.
Configurar la red Conexión del sistema a la red doméstica.
Actualizar Realizar una actualización del software del sistema.
Salir de UNIFY Cerrar el menú UNIFY.
1 4 - E S PA Ñ O L
I N S TA L AC I Ó N D E L S I S T E M A
Configuración de UNIFY®
Los siguientes pasos forman parte del proceso inicial de la configuración de UNIFY:
Paso Objetivo
Emparejar el
control remoto
Conecte el control remoto del sistema a la consola.
Elegir el idioma Seleccione el idioma en la lista de la pantalla.
Conectarse a una red Seleccione y conéctese a la red Wi-Fi del hogar.
Actualizar software Actualice el software del sistema para brindar la funcionalidad más actual.
Altavoces con cable Conecte los altavoces delanteros a la consola.
Altavoces inalámbricos Conecte los altavoces posteriores y el módulo de bajos inalámbrico
Acoustimass® a la consola.
Control remoto de la TV Configure el control remoto del sistema para controlar la TV.
Agregar dispositivos Conecte las fuentes adicionales.
Configuración de
ADAPTiQ®
Personaliza el sonido del sistema a la acústica del área de escucha.
Tutorial Una serie de procedimientos opcionales para guiarlo por el resto de
las funciones del sistema, como el funcionamiento de SoundTouch® y
Bluetooth®.
Después de completar la configuración inicial, puede acceder al menú UNIFY en
cualquier momento para cambiar la instalación y la configuración del sistema. Presione
el botón en la parte anterior de la consola del control remoto para comenzar la
configuración de UNIFY.
E S PA Ñ O L - 1 5
U S O D E L C O N T R O L R E M OTO
Descripción general del control remoto
El control remoto de radio frecuencia avanzado de Bose® funciona desde cualquier
parte de la habitación sin que tenga que apuntar el control remoto a la consola.
La pantalla del control remoto es una parte esencial de la experiencia de Lifestyle®.
Lo guía por las configuración de las fuentes y del sistema.
Nota:	 El control remoto de Bose no controla funciones específicas a los dispositivos
que están conectados a la entrada delantera HDMI™.
Ofrece acceso a las fuentes
conectadas
Enciende/apaga el
sistema Bose®
Pantalla
Enciende/apaga la TV
Muestra contenido
adicional específico al
dispositivo
Canal, ajuste predefinido,
capítulo o pista anterior
Cambia la entrada de TV
Teclado numérico.
Los números 1 6
pueden reproducir los
ajustes predefinidos de
SoundTouch®.
Panel de navegación
Controles de reproducción
Botones de funciones
(consulte página 16)
Modo Teletexto
Inicia el menú
Configuración de UNIFY®
Abre SoundTouch®
Botón Home
Controla la
funcionalidad de
DVR del receptor
de cable
1 6 - E S PA Ñ O L
U S O D E L C O N T R O L R E M OTO
Uso del botón SOURCE
El botón se usa para cambiar entre las fuentes conectadas. Acceda a las
fuentes usando el panel de navegación en el control remoto.
Botones de funciones
Los botones rojo, verde, amarillo y azul en el control remoto corresponden a los botones
de función de colores de las funciones del sistema de cable/satélite o teletexto.
•	 Funciones del sistema de cable/satélite: Consulte la guía del usuario de su sistema
de cable/satélite.
•	 Funciones de teletexto: Corresponden a los números de página, titulares o accesos
directos codificados por color en una pantalla de teletexto.
Ajustar el volumen
Para ver el nivel de volumen, vea la pantalla del control remoto.
•	 Presione + para aumentar el volumen.
•	 Presione – para disminuir el volumen.
•	 Presione para silenciar o restaurar el audio.
Nota:	 Si todavía oye audio de los altavoces de la TV después de configurar el sistema,
desactive los altavoces usando el menú de configuración de la TV.
Modo de ahorro de energía
El modo de ahorro de energía conserva la carga de la batería al atenuar la iluminación
de la pantalla del control remoto y ajustar la duración durante la cual la pantalla
permanece iluminada.
Para acceder al modo de ahorro de energía, presione el botón en el control remoto.
Uso del botón MORE
El botón MORE en el control remoto muestra selecciones adicionales en la pantalla
del control remoto que corresponden a la fuente actualmente seleccionada.
1.	 Presione .
2.	 Presione o para seleccionar una función en la pantalla del control remoto.
3.	 Presione OK.
E S PA Ñ O L - 1 7
U S O D E L C O N T R O L R E M OTO
El menú OPCIONES
El menú OPCIONES muestra una lista de funciones que permiten ajustar ciertos
parámetros del sistema. El número de opciones que aparecen en el menú OPCIONES
depende de la fuente actualmente seleccionada. Independientemente de la fuente,
tiene acceso al menú OPCIONES.
Nota:	 El menú OPCIONES solo se puede acceder a través del control remoto del
sistema después de presionar el botón MORE .
Para activar el menú OPCIONES:
1.	 Presione en el control remoto.
2.	 Resalte el botón OPTIONS.
3.	 Presione el botón OK para mostrar el Menú OPCIONES de la fuente actual.
4.	 Presione o para resaltar la opción que desea cambiar.
5.	 Presione OK para seleccionar la configuración.
6.	 Presione EXIT cuando haya terminado.
1 8 - E S PA Ñ O L
C O N F I G U R AC I Ó N D E S O U N DTO U C H ®
La aplicación SoundTouch® permite configurar y controlar el sistema SoundTouch®
desde el teléfono inteligente o tableta. Al usar la aplicación, el dispositivo inteligente
actúa como un control remoto para el sistema.
Desde la aplicación, puede controlar la configuración de SoundTouch®, agregar servicios
de música, explorar emisoras de radio por Internet locales y globales, definir y cambiar
Ajustes predefinidos y transmitir música. Se agregan nuevas funciones periódicamente.
Configuración de SoundTouch®
en el sistema
Luego de conectar el sistema a la fuente de alimentación, descargue e instale la
aplicación SoundTouch® en un teléfono inteligente o tableta que esté conectada a la red.
La aplicación lo guía por la configuración de SoundTouch® en el sistema.
Nota:	 Si ya ha configurado SoundTouch® para otro sistema, vea “Agregar el sistema a
una cuenta SoundTouch® existente” en la página 19
Descargar e instalar la
aplicación SoundTouch®
En el teléfono inteligente o la tableta, descargue la aplicación del controlador
Bose® SoundTouch®.
•	 Usuarios de Apple: Descargar desde App Store
•	 Usuarios de Android™: Descargar de la tienda de Google Play™
•	 Usuarios de Amazon Kindle Fire: Descargar de Amazon Appstore para Android
Conectar el sistema a la red Wi-Fi®
Después de descargar e instalar la aplicación, conecte el sistema a la red:
1.	 En el teléfono inteligente o la tableta, seleccione el icono SoundTouch® para
iniciar la aplicación.
2.	 Siga las instrucciones en la aplicación para completar la configuración, incluida
la creación de una cuenta de SoundTouch®, al agregar una biblioteca de música y
servicios de música.
E S PA Ñ O L - 1 9
C O N F I G U R AC I Ó N D E S O U N DTO U C H ®
Agregar el sistema a una cuenta
SoundTouch® existente
Si ya configuró SoundTouch® para otro sistema, no es necesario que vuelva a descargar
la aplicación SoundTouch®.
1.	 En el teléfono inteligente o la tableta, seleccione el icono SoundTouch® para
abrir la aplicación.
2.	 Seleccione EXPLORAR  CONFIGURACIÓN  Agregar o reconectar el sistema.
La aplicación lo guía durante la configuración.
Conexión del sistema a una nueva red
Si la información de la red cambia, agregue el sistema a la nueva red. Puede hacerlo
definiendo el sistema al modo de configuración.
1.	 En el teléfono inteligente o la tableta, seleccione el icono SoundTouch® para
iniciar la aplicación.
2.	 Seleccione EXPLORAR  CONFIGURACIÓN Configuración del sistema y
seleccione el sistema.
3.	 Seleccione CONECTAR SISTEMA.
La aplicación lo guía durante la configuración.
2 0 - E S PA Ñ O L
U S O D E L A A P L I C AC I Ó N S O U N DTO U C H ®
Después de configurar la aplicación SoundTouch®, está listo para transmitir música y
personalizar sus ajustes predefinidos.
Obtener ayuda
global.Bose.com/Support/LS650
Este sitio Web proporciona acceso al centro de asistencia del usuario, que incluye:
Manuales del usuario, artículos, sugerencias, tutoriales, una biblioteca de videos y la
comunidad de usuarios donde puede publicar preguntas y respuestas.
Ayuda de la aplicación
La ayuda de la aplicación proporciona información sobre el uso de SoundTouch®.
1.	 En el dispositivo móvil, seleccione el icono SoundTouch® para iniciar la
aplicación.
2.	 Seleccione EXPLORAR  AYUDA.
Control del sistema desde otro
teléfono inteligente o tableta
Una vez que haya configurado el sistema SoundTouch® en su red Wi-Fi® doméstica,
puede controlar el sistema desde cualquier teléfono inteligente o tableta en la misma red.
1.	 Conecte el dispositivo a la misma red que su sistema.
2.	 En el dispositivo, descargue e instale la aplicación SoundTouch® (vea la página 18).
E S PA Ñ O L - 2 1
PERSONALIZACIÓN DE SUS AJUSTES PREDEFINIDOS
Cómo funcionan los ajustes predefinidos
Puede personalizar seis ajustes predefinidos de sus servicios favoritos de transmisión de
música; estaciones, listas de reproducción, artistas, álbumes o canciones de su biblioteca
de música. Puede acceder a su música en cualquier momento con solo presionar un
botón usando la aplicación SoundTouch® en el teléfono inteligente o tableta.
Lo que debe saber
•	 Puede definir los ajustes predefinidos desde la aplicación y del control remoto.
•	 No puede definir los ajustes predefinidos a una transmisión Bluetooth®.
Configuración de un ajuste predefinido
1.	 Transmita música al sistema con la aplicación.
2.	 Mientras se reproduce música, mantenga presionado un ajuste predefinido en la
aplicación.
Nota:	 Para obtener información sobre el uso de la aplicación SoundTouch® para
ajustar y cambiar los ajustes predefinidos, consulte la ayuda de la aplicación.
Reproducción de un ajuste predefinido
Una vez que personalice los ajustes predefinidos, presione un ajuste predefinido en la
aplicación para reproducirlo.
Configuración de un ajuste predefinido
usando el control remoto
1.	 Presione en el control remoto para acceder a la fuente SoundTouch.
2.	 Mantenga presionado un número (de 1 – 6) en el teclado numérico para asignar un
nuevo ajuste predefinido.
Un sonido le notifica que se ha configurado el nuevo ajuste predefinido.
Selección de un ajuste predefinido
usando el control remoto
1.	 Asigne sus emisoras favoritas como ajustes predefinidos en la aplicación.
2.	 Presione el botón SoundTouch® en el control remoto para cambiar a la fuente
SoundTouch.
3.	 Seleccione un ajuste predefinido presionando un número (de 1 – 6)
en el teclado numérico.
Los botones se resaltan de color azul en el control remoto como referencia.
2 2 - E S PA Ñ O L
T E C N O LO G Í A B LU E T O OT H ®
La Tecnología inalámbrica Bluetooth® permite transmitir música desde dispositivos
móviles, como teléfonos inteligentes, tabletas y portátiles. Antes de transmitir música
desde un dispositivo móvil, debe emparejar el dispositivo móvil con la consola.
Selección del método de emparejamiento
Puede emparejar su dispositivo móvil con la consola usando la tecnología inalámbrica
Bluetooth o Near Field Communication (NFC).
¿Qué es NFC?
NFC es una tecnología que permite a los dispositivos establecer una comunicación
inalámbrica entre sí simplemente tocando cada dispositivo. Consulte la guía del usuario
del dispositivo para ver si su modelo funciona con NFC.
Si su dispositivo no admite NFC o si no
está seguro:
Siga las instrucciones para “Emparejar un
dispositivo.”
Si el dispositivo es compatible con NFC: Siga las instrucciones para “Emparejar un
dispositivo con NFC” en la página 23
Nota:	 Si su dispositivo es compatible con el emparejamiento Bluetooth a través de
NFC, puede usar cualquiera de los dos métodos de emparejamiento.
Emparejar un dispositivo
1.	 Presione el botón en el control remoto y seleccione Bluetooth® del menú
en pantalla.
2.	 Siga las instrucciones en pantalla para colocar la consola en el modo de
emparejamiento.
3.	 En el dispositivo, active la función Bluetooth.
Sugerencia:	 Generalmente, la función Bluetooth se encuentra en el menú
Configuración.
4.	 Seleccione el sistema de la lista de dispositivos.
Una vez conectado, el nombre de su sistema aparece conectado en la lista de
dispositivos.
Lifestyle 650 Owner's Guide

More Related Content

Viewers also liked

Viewers also liked (17)

GTI Research-UBA9Months 2015 Report
GTI Research-UBA9Months  2015 ReportGTI Research-UBA9Months  2015 Report
GTI Research-UBA9Months 2015 Report
 
Gia ve may bay tu tphcm di da nang
Gia ve may bay tu tphcm di da nangGia ve may bay tu tphcm di da nang
Gia ve may bay tu tphcm di da nang
 
AMELENDEZ-APRREV-RESUME-2015
AMELENDEZ-APRREV-RESUME-2015AMELENDEZ-APRREV-RESUME-2015
AMELENDEZ-APRREV-RESUME-2015
 
Yourprezi
YourpreziYourprezi
Yourprezi
 
Prisms
PrismsPrisms
Prisms
 
Synchronous Session 2 PowerPoint
Synchronous Session 2 PowerPointSynchronous Session 2 PowerPoint
Synchronous Session 2 PowerPoint
 
Packets, routers and ip addresses
Packets, routers and ip addressesPackets, routers and ip addresses
Packets, routers and ip addresses
 
Imnci
ImnciImnci
Imnci
 
193282220 rpt-pendidikan-seni-visual-tahun-4(3)
193282220 rpt-pendidikan-seni-visual-tahun-4(3)193282220 rpt-pendidikan-seni-visual-tahun-4(3)
193282220 rpt-pendidikan-seni-visual-tahun-4(3)
 
Feliz navidad john
Feliz navidad johnFeliz navidad john
Feliz navidad john
 
Lifestyle 600 Owner's Guide
Lifestyle 600 Owner's GuideLifestyle 600 Owner's Guide
Lifestyle 600 Owner's Guide
 
CV Rev(4)
CV Rev(4)CV Rev(4)
CV Rev(4)
 
DSE-Wire quality test instrument catalog
DSE-Wire quality test instrument catalog  DSE-Wire quality test instrument catalog
DSE-Wire quality test instrument catalog
 
AS MEDIA
AS MEDIAAS MEDIA
AS MEDIA
 
Guide fait-religieux
Guide fait-religieuxGuide fait-religieux
Guide fait-religieux
 
Gia ve may bay tu ha noi di da nang
Gia ve may bay tu ha noi di da nangGia ve may bay tu ha noi di da nang
Gia ve may bay tu ha noi di da nang
 
Catalogo copropeca
Catalogo copropecaCatalogo copropeca
Catalogo copropeca
 

Similar to Lifestyle 650 Owner's Guide

Cocoon Sleepbuds - Manuel d'utilisateur
Cocoon Sleepbuds - Manuel d'utilisateurCocoon Sleepbuds - Manuel d'utilisateur
Cocoon Sleepbuds - Manuel d'utilisateurSandroZito2
 
DEH-X8500BS_OwnersManual100212.pdf
DEH-X8500BS_OwnersManual100212.pdfDEH-X8500BS_OwnersManual100212.pdf
DEH-X8500BS_OwnersManual100212.pdfJuanPerezCano1
 
Audifonos inalambricos
Audifonos inalambricosAudifonos inalambricos
Audifonos inalambricosJFM2612
 
Sharp aquos pn l702 b user guide
Sharp aquos pn l702 b user guideSharp aquos pn l702 b user guide
Sharp aquos pn l702 b user guideDukaneAVMarketing
 
Manual de usuario Horno Oster - TSSTTVDAF1.pdf
Manual de usuario Horno Oster - TSSTTVDAF1.pdfManual de usuario Horno Oster - TSSTTVDAF1.pdf
Manual de usuario Horno Oster - TSSTTVDAF1.pdfanalauradt1
 
Manual.pdf
Manual.pdfManual.pdf
Manual.pdfRbrtCd
 
3 cft minitile - Servicio Tecnico Fagor
3 cft minitile - Servicio Tecnico Fagor3 cft minitile - Servicio Tecnico Fagor
3 cft minitile - Servicio Tecnico Fagorserviciotecnicofagor
 
MANUAL CARGADOR BATERIA noko. genuissspdf
MANUAL CARGADOR BATERIA noko. genuissspdfMANUAL CARGADOR BATERIA noko. genuissspdf
MANUAL CARGADOR BATERIA noko. genuissspdfFreddyChimbo4
 
Datavideo PD-2 High Power 1U power distribution system
Datavideo PD-2 High Power 1U power distribution systemDatavideo PD-2 High Power 1U power distribution system
Datavideo PD-2 High Power 1U power distribution systemAV ProfShop
 
gen_series_na_user_guide_10.12.2022b_1.pdf
gen_series_na_user_guide_10.12.2022b_1.pdfgen_series_na_user_guide_10.12.2022b_1.pdf
gen_series_na_user_guide_10.12.2022b_1.pdfzabrinablanco1
 
Bushnell Micro Reflex Sight Instruction Manual
Bushnell Micro Reflex Sight Instruction ManualBushnell Micro Reflex Sight Instruction Manual
Bushnell Micro Reflex Sight Instruction ManualOptics-Trade
 
Notice - BEAM ALLIANCE
Notice - BEAM ALLIANCENotice - BEAM ALLIANCE
Notice - BEAM ALLIANCEHomexity
 
Especificaciones tecnicas parlante 300 x b
Especificaciones tecnicas parlante 300 x   bEspecificaciones tecnicas parlante 300 x   b
Especificaciones tecnicas parlante 300 x bjmmateo47
 
Ecosense Slim Cove INT Installation Guide
Ecosense Slim Cove INT Installation GuideEcosense Slim Cove INT Installation Guide
Ecosense Slim Cove INT Installation Guidevalorlighting
 
Notice essentielb light up
Notice essentielb light upNotice essentielb light up
Notice essentielb light upBusy_T
 
Airles Titan 440 2417772a_impact440_service_1.pdf
Airles Titan 440 2417772a_impact440_service_1.pdfAirles Titan 440 2417772a_impact440_service_1.pdf
Airles Titan 440 2417772a_impact440_service_1.pdfgerencia52
 

Similar to Lifestyle 650 Owner's Guide (20)

Cocoon Sleepbuds - Manuel d'utilisateur
Cocoon Sleepbuds - Manuel d'utilisateurCocoon Sleepbuds - Manuel d'utilisateur
Cocoon Sleepbuds - Manuel d'utilisateur
 
Toshiba canvio aero_cast_wireless_hard_dr
Toshiba canvio aero_cast_wireless_hard_drToshiba canvio aero_cast_wireless_hard_dr
Toshiba canvio aero_cast_wireless_hard_dr
 
Manual Dscrx100
Manual Dscrx100Manual Dscrx100
Manual Dscrx100
 
DEH-X8500BS_OwnersManual100212.pdf
DEH-X8500BS_OwnersManual100212.pdfDEH-X8500BS_OwnersManual100212.pdf
DEH-X8500BS_OwnersManual100212.pdf
 
Audifonos inalambricos
Audifonos inalambricosAudifonos inalambricos
Audifonos inalambricos
 
Sharp aquos pn l702 b user guide
Sharp aquos pn l702 b user guideSharp aquos pn l702 b user guide
Sharp aquos pn l702 b user guide
 
Manual de usuario Horno Oster - TSSTTVDAF1.pdf
Manual de usuario Horno Oster - TSSTTVDAF1.pdfManual de usuario Horno Oster - TSSTTVDAF1.pdf
Manual de usuario Horno Oster - TSSTTVDAF1.pdf
 
Vive
ViveVive
Vive
 
Manual.pdf
Manual.pdfManual.pdf
Manual.pdf
 
3 cft minitile - Servicio Tecnico Fagor
3 cft minitile - Servicio Tecnico Fagor3 cft minitile - Servicio Tecnico Fagor
3 cft minitile - Servicio Tecnico Fagor
 
MANUAL CARGADOR BATERIA noko. genuissspdf
MANUAL CARGADOR BATERIA noko. genuissspdfMANUAL CARGADOR BATERIA noko. genuissspdf
MANUAL CARGADOR BATERIA noko. genuissspdf
 
Datavideo PD-2 High Power 1U power distribution system
Datavideo PD-2 High Power 1U power distribution systemDatavideo PD-2 High Power 1U power distribution system
Datavideo PD-2 High Power 1U power distribution system
 
gen_series_na_user_guide_10.12.2022b_1.pdf
gen_series_na_user_guide_10.12.2022b_1.pdfgen_series_na_user_guide_10.12.2022b_1.pdf
gen_series_na_user_guide_10.12.2022b_1.pdf
 
Bushnell Micro Reflex Sight Instruction Manual
Bushnell Micro Reflex Sight Instruction ManualBushnell Micro Reflex Sight Instruction Manual
Bushnell Micro Reflex Sight Instruction Manual
 
Notice - BEAM ALLIANCE
Notice - BEAM ALLIANCENotice - BEAM ALLIANCE
Notice - BEAM ALLIANCE
 
Especificaciones tecnicas parlante 300 x b
Especificaciones tecnicas parlante 300 x   bEspecificaciones tecnicas parlante 300 x   b
Especificaciones tecnicas parlante 300 x b
 
Ecosense Slim Cove INT Installation Guide
Ecosense Slim Cove INT Installation GuideEcosense Slim Cove INT Installation Guide
Ecosense Slim Cove INT Installation Guide
 
Notice essentielb light up
Notice essentielb light upNotice essentielb light up
Notice essentielb light up
 
Airles Titan 440 2417772a_impact440_service_1.pdf
Airles Titan 440 2417772a_impact440_service_1.pdfAirles Titan 440 2417772a_impact440_service_1.pdf
Airles Titan 440 2417772a_impact440_service_1.pdf
 
Spirit powerstation 6001200_ug
Spirit powerstation 6001200_ugSpirit powerstation 6001200_ug
Spirit powerstation 6001200_ug
 

More from Tom Hodgson

2015 Holiday Gift Guide
2015 Holiday Gift Guide2015 Holiday Gift Guide
2015 Holiday Gift GuideTom Hodgson
 
Holiday Gift Guide 2010 - Newport Mercury
Holiday Gift Guide 2010 - Newport MercuryHoliday Gift Guide 2010 - Newport Mercury
Holiday Gift Guide 2010 - Newport MercuryTom Hodgson
 
Will Video Games Spoon With Me
Will Video Games Spoon With MeWill Video Games Spoon With Me
Will Video Games Spoon With MeTom Hodgson
 
Newport Mercury - 2012 Holiday Gift Guide
Newport Mercury - 2012 Holiday Gift GuideNewport Mercury - 2012 Holiday Gift Guide
Newport Mercury - 2012 Holiday Gift GuideTom Hodgson
 

More from Tom Hodgson (6)

QSG_NEW_600
QSG_NEW_600QSG_NEW_600
QSG_NEW_600
 
QSG_NEW_650
QSG_NEW_650QSG_NEW_650
QSG_NEW_650
 
2015 Holiday Gift Guide
2015 Holiday Gift Guide2015 Holiday Gift Guide
2015 Holiday Gift Guide
 
Holiday Gift Guide 2010 - Newport Mercury
Holiday Gift Guide 2010 - Newport MercuryHoliday Gift Guide 2010 - Newport Mercury
Holiday Gift Guide 2010 - Newport Mercury
 
Will Video Games Spoon With Me
Will Video Games Spoon With MeWill Video Games Spoon With Me
Will Video Games Spoon With Me
 
Newport Mercury - 2012 Holiday Gift Guide
Newport Mercury - 2012 Holiday Gift GuideNewport Mercury - 2012 Holiday Gift Guide
Newport Mercury - 2012 Holiday Gift Guide
 

Lifestyle 650 Owner's Guide

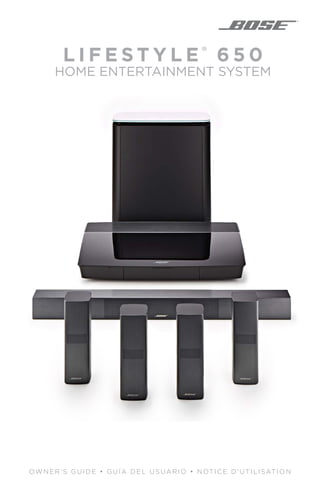
  • 1. L I F E S T Y L E ® 6 5 0 HOME ENTERTAINMENT SYSTEM OWNER’S GUIDE • G UÍA DEL USUA R IO • N OTICE D ' UTIL ISATION
  • 2. 2 - E N G L I S H I M P O R TA N T S A F E T Y I N S T R U C T I O N S Please read and keep all safety and use instructions. Important Safety Instructions 1. Read these instructions. 2. Keep these instructions. 3. Heed all warnings. 4. Follow all instructions. 5. Do not use this apparatus near water. 6. Clean only with a dry cloth. 7. Do not block any ventilation openings. Install in accordance with the manufacturer’s instructions. 8. Do not install near any heat sources such as radiators, heat registers, stoves, or other apparatus (including ­amplifiers) that produce heat. 9. Protect the power cord from being walked on or pinched particularly at plugs, convenience receptacles, and the point where they exit from the apparatus. 10. Only use attachments/accessories specified by the manufacturer. 11. Unplug this apparatus during lightning storms or when unused for long periods of time. 12. Refer all servicing to qualified personnel. Servicing is required when the apparatus has been damaged in any way, such as power-supply cord or plug is damaged, liquid has been spilled or objects have fallen into the ­apparatus, the apparatus has been exposed to rain or moisture, does not operate normally, or has been dropped. This symbol on the product means there is uninsulated, dangerous voltage within the product enclosure that may present a risk of electrical shock. This symbol means there are important operating and maintenance instructions in this guide. Contains small parts which may be a choking hazard. Not suitable for children under age 3. This product contains magnetic material. Consult your physician on whether this might affect your implantable medical device. This product contains a tempered glass surface. Use caution to avoid impact. In the event of breakage, use care in handling broken glass. • To reduce the risk of fire or electrical shock, do NOT expose this product to rain, liquids or moisture. • Do NOT expose this product to dripping or splashing, and do not place objects filled with liquids, such as vases, on or near the product. • Keep the product away from fire and heat sources. Do NOT place naked flame sources, such as lighted candles, on or near the product. • Do NOT make unauthorized alterations to this product. • Do NOT use a power inverter with this product. • Do NOT use in vehicles or boats. • The speaker wire and interconnect cables included with this system are not approved for in-wall installation. Please check your local building codes for the correct type of wire and cable required for in-wall installation. • Use this product only with the power supply provided. • Where the mains plug or an appliance coupler is used as the disconnect device, the disconnect device shall remain readily operable. 仅适用于 2000m 以下地区安全使用 Use at altitude less than 2000 meters only. • Due to ventilation requirements, Bose does not recommend placing the product in a confined space such as in a wall cavity or in an enclosed cabinet. • Do not place or install the bracket or product near any heat sources, such as fireplaces, radiators, heat registers or other apparatus (including amplifiers) that produce heat. • The product label is located on the bottom of the console.
  • 3. E N G L I S H - 3 R E G U L ATO R Y I N F O R M AT I O N NOTE: This equipment has been tested and found to comply with the limits for a Class B digital device, pursuant to Part 15 of the FCC Rules. These limits are designed to provide reasonable protection against harmful interference in a residential installation. This equipment generates, uses, and can radiate radio frequency energy and, if not installed and used in accordance with the instructions, may cause harmful interference to radio communications. However, there is no guarantee that interference will not occur in a particular installation. If this equipment does cause harmful interference to radio or television reception, which can be determined by turning the equipment off and on, the user is encouraged to try to correct the interference by one or more of the following measures: • Reorient or relocate the receiving antenna. • Increase the separation between the equipment and receiver. • Connect the equipment into an outlet on a circuit different from that to which the receiver is connected. • Consult the dealer or an experienced radio/TV technician for help. Changes or modifications not expressly approved by Bose Corporation could void the user’s authority to operate this equipment. This device complies with part 15 of the FCC Rules and with Industry Canada license-exempt RSS standard(s). Operation is subject to the following two conditions: (1) This device may not cause harmful interference, and (2) this device must accept any interference received, including interference that may cause undesired operation. This device for operation in the 5150 - 5250 MHz is only for indoor use to reduce the potential for harmful interference to co-channel mobile satellite systems. W52/W53 for Indoor Use Only. This device complies with FCC and Industry Canada radiation exposure limits set forth for general population. This equipment should be installed and operated with a minimum distance of 20 cm between radiator and your body. This transmitter must not be co-located or operating in conjunction with any other antenna or transmitter. Management Regulation for Low-power Radio-frequency Devices Article XII According to “Management Regulation for Low-power Radio-frequency Devices” without permission granted by the NCC, any company, enterprise, or user is not allowed to change frequency, enhance transmitting power or alter original characteristic as well as performance to an approved low power radio-frequency devices. Article XIV The low power radio-frequency devices shall not influence aircraft security and interfere legal communications; If found, the user shall cease operating immediately until no interference is achieved. The said legal communications means radio communications operated in compliance with the Telecommunications Act. The low power radio-frequency devices must be susceptible with the interference from legal communications or ISM radio wave radiated devices. Bose Corporation hereby declares that this product is in compliance with the essential requirements and other relevant provisions of Directive 1999/5/EC and all other EU directive requirements. The complete declaration of conformity can be found at: www.Bose.com/compliance This symbol means the product must not be discarded as household waste, and should be delivered to an appropriate collection facility for recycling. Proper disposal and recycling helps protect natural resources, human health and the environment. For more information on disposal and recycling of this product, contact your local municipality, disposal service, or the shop where you bought this product. Names and Contents of Toxic or Hazardous Substances or Elements Toxic or Hazardous Substances and Elements Part Name Lead (Pb) Mercury (Hg) Cadmium (Cd) Hexavalent (CR(VI)) Polybrominated Biphenyl (PBB) Polybrominated diphenylether (PBDE) PCBs X O O O O O Metal Parts X O O O O O Plastic Parts O O O O O O Speakers X O O O O O Cables X O O O O O This table is prepared in accordance with the provisions of SJ/T 11364. O: Indicates that this toxic or hazardous substance contained in all of the ­homogeneous materials for this part is below the limit requirement of GB/T 26572. X: Indicates that this toxic or hazardous substance contained in at least one of the homogeneous materials used for this part is above the limit requirement of GB/T 26572.
  • 4. 4 - E N G L I S H R E G U L ATO R Y I N F O R M AT I O N Please complete and retain for your records The serial and model numbers are located on the side of the carton. Serial number: ___________________________________________________________________________________ Model number: ___________________________________________________________________________________ Please keep your receipt with your owner’s guide. Now is a good time to register your Bose product. You can easily do this by going to http://global.Bose.com/register Date of Manufacture: The first bolded digit in the serial number indicates the year of manufacture; “6” is 2006 or 2016. China Importer: Bose Electronics (Shanghai) Company Limited, Part C, Plan 9, No. 353 North ­Riying Road, China (Shanghai) Pilot Free Trade Zone. EU Importer: Bose GP, Castleblayney Road, Carrickmacross, County Monaghan, Ireland Mexico Importer: Bose de México, S. de R.L. de C.V. , Paseo de las Palmas 405-204, Lomas de Chapultepec, 11000 México, D.F. Phone number: 001 800 900 2673. Taiwan Importer: Bose Taiwan Branch, 9F-A1, No.10, Section 3, Minsheng East Road, Taipei City 104, Taiwan. Phone number: 886 2 2514 7977. Apple and the Apple logo are trademarks of Apple Inc., registered in the U.S. and other countries. App Store is a service mark of Apple Inc. Android, Google Play, and the Google Play logo are ­trademarks of Google Inc. ©2013 CSR plc and its group of companies. The aptX® mark and the aptX logo are trademarks of CSR plc or one of its group companies and may be registered in one or more jurisdictions. The Bluetooth® word mark and logos are registered trademarks owned by Bluetooth SIG, Inc. and any use of such marks by Bose ­Corporation is under license. Dolby, Dolby Audio and the double-D symbol are trademarks of Dolby Laboratories. For DTS patents, see http://patents.DTS.com. Manufactured under license from Digital Theater Systems, Inc. DTS, the Symbol DTS and the Symbol together are registered trademarks, and DTS Digital Surround is a trademark of DTS, Inc. ©DTS, Inc. All Rights Reserved. The terms HDMI and HDMI High-Definition Multimedia Interface, and the HDMI logo are trademarks or registered trademarks of HDMI Licensing LLC in the United States and other countries. iHeartRadio is a registered trademark of iHeartMedia, Inc. Deezer is a registered trademark of Blogmusik SAS. This product is protected by certain intellectual property rights of Microsoft. Use or distribution of such technology outside of this product is prohibited without a license from Microsoft. The N-Mark is a trademark or registered trademark of NFC Forum, Inc. in the United States and in other countries. Pandora, the Pandora logo, and the Pandora trade dress are trademarks or registered trademarks of Pandora Media, Inc. used with permission. SiriusXM Internet Radio subscription sold separately and available only to those at least 18 years of age residing in the U.S. and Puerto Rico. To subscribe to SiriusXM Internet Radio in the U.S., U.S. customers should visit www.sirius.com or call 1-888-539-7474. SiriusXM and all related marks and logos are trademarks of Sirius XM Radio Inc. and its subsidiaries. All rights reserved. SoundTouch and the wireless note design are registered trademarks of Bose Corporation in the U.S. and other countries. This product incorporates Spotify software which is subject to 3rd party licenses found here: www.spotify.com/connect/third-party-licenses Spotify is a registered trademark of Spotify AB. Designed with UEI Technology™ . Under License from Universal Electronics, Inc. © UEI 2000-2016 Wi-Fi is a registered trademark of Wi-Fi Alliance® . Windows is a registered trademark of Microsoft Corporation in the United States and other countries. ©2016 Bose Corporation. No part of this work may be reproduced, modified, distributed or ­otherwise used without prior written ­permission.
  • 5. E N G L I S H - 5 C O N T E N T S Getting Started Unpacking.............................................................................................................................. 8 Layer 1............................................................................................................................. 9 Layer 2............................................................................................................................ 9 Layer 3 ........................................................................................................................... 9 Layer 4............................................................................................................................ 10 Placement guidelines........................................................................................................... 11 Sample system placement.................................................................................................. 12 Setting Up the System UNIFY® system overview..................................................................................................... 13 UNIFY® setup......................................................................................................................... 14 Using the Remote Control Remote control overview.................................................................................................... 15 Using the SOURCE button.................................................................................................. 16 Function buttons................................................................................................................... 16 Adjusting volume.................................................................................................................. 16 Power saver mode................................................................................................................ 16 Using the MORE button....................................................................................................... 16 The OPTIONS menu............................................................................................................. 17 Setting Up SoundTouch® Setting up SoundTouch® on your system......................................................................... 18 Download and install the SoundTouch® app.................................................................... 18 Connect the system to your Wi-Fi® network........................................................... 18 Adding the system to an existing ­SoundTouch® account.............................................. 19 Connecting the system to a new network........................................................................ 19 Using the SoundTouch® App Getting help........................................................................................................................... 20 In-app help............................................................................................................................. 20 Controlling the system from another smartphone or tablet......................................... 20 Personalizing Your Presets How Presets work................................................................................................................. 21 Setting a Preset..................................................................................................................... 21 Playing a Preset..................................................................................................................... 21 Setting a Preset using your remote control..................................................................... 21 Selecting a Preset using ­your remote ­control................................................................. 21
  • 6. 6 - E N G L I S H C O N T E N T S Bluetooth® Technology Pairing a device..................................................................................................................... 22 Pairing a device with NFC................................................................................................... 23 Controlling your connected mobile device from the remote control.......................... 23 Connecting to a paired device........................................................................................... 24 Disconnecting a device........................................................................................................ 24 Reconnecting a device......................................................................................................... 24 Clearing the console's pairing list...................................................................................... 24 Using the SoundTouch® app....................................................................................... 24 Advanced Features Disabling Wi-Fi® capability.................................................................................................. 25 Re-enabling Wi-Fi® capability............................................................................................. 25 Updating the system software........................................................................................... 25 Getting System Information System status indicators...................................................................................................... 26 Console LED indicator................................................................................................. 26 Acoustimass® wireless bass module LED indicator................................................ 27 Wireless receiver LED indicator................................................................................. 27 Care and Maintenance Cleaning.................................................................................................................................. 28 Customer service.................................................................................................................. 28 Limited warranty................................................................................................................... 28 Technical information........................................................................................................... 28 SERVICE connector.............................................................................................................. 28 Troubleshooting Common solutions................................................................................................................ 29 Setting up your IR emitter................................................................................................... 32 Unable to pair the Acoustimass® wireless bass module with the console.................. 33 Checking for sound.............................................................................................................. 33
  • 7. E N G L I S H - 7 C O N T E N T S Appendix A: Installation Reference Front console panel.............................................................................................................. 34 Front Headphones/AUX input.................................................................................... 34 Front HDMI™ input........................................................................................................ 34 Back console panel............................................................................................................... 34 Connecting an OmniJewel™ base...................................................................................... 35 Installing the front speakers................................................................................................ 36 Connecting the front speakers to the console................................................................ 37 Attaching the rubber feet to your center speaker.......................................................... 37 Connecting the center speaker to the console............................................................... 38 Installing the rear speakers................................................................................................. 39 Identifying switch settings on wireless ­receivers............................................................ 40 Connecting the rear speakers............................................................................................. 40 Connecting the rear speakers to power........................................................................... 41 Making a wired connection to the rear speakers............................................................ 41 Mounting your speakers...................................................................................................... 41 Appendix B: System Maintenance Replacing the remote control’s batteries......................................................................... 42
  • 8. 8 - E N G L I S H G E T T I N G S TA R T E D Unpacking The parts of your new Lifestyle® Home Entertainment System are packaged in four ­layers, some of which ­contain ­multiple boxes of components. Each box is marked by icons to indicate its contents. Notes: • When prompted by UNIFY® setup, carefully unpack your system according to the icons ­referenced in the on-screen steps. • If part of the system is damaged or the glass on your console or Acoustimass® ­wireless bass module is broken, do not use it. Contact your authorized Bose® dealer or Bose customer service. Refer to the contact sheet in box . Layer 1 Layer 2 Layer 3 Layer 4
  • 9. E N G L I S H - 9 G E T T I N G S TA R T E D Layer 1 From box : Console (1) HDMI™ cable (1) Universal remote control (1) AA batteries (4) Layer 2 From box : From box : Console power supply (1) Power cords (4) Owner’s guide (1) May ship with multiple power cords. Use the power cord for your region. Layer 3 From box : OmniJewel™ ­speakers (4) OmniJewel™ bases (4) Front speaker cable (1) Rear speaker cables (2)
  • 10. 1 0 - E N G L I S H G E T T I N G S TA R T E D From box : OmniJewel™ center speaker (1) Center speaker cable (1) Adhesive feet (4) From box : From box : Wireless receivers (2) ADAPTiQ® headset (1) Screwdriver (1) IR emitter (1) Layer 4 From box : Acoustimass® wireless bass module (1)
  • 11. E N G L I S H - 1 1 G E T T I N G S TA R T E D Placement guidelines To avoid interference, keep other wireless equipment 1 – 3 ft. (0.3 – 0.9 m) away from the system. Place your system outside of and away from metal objects and away from other audio/video components and direct heat sources. Component Recommended placement Console • Place the console near your components. The recommended ­placement is near your TV. • Do NOT place the TV or any other ­components on top of your console. • Place your console in a well-ventilated area. • Make sure there is an AC (mains) outlet nearby. Note: Until your system is completely installed, keep the control console positioned for easy access to its rear connector panel. Acoustimass® ­wireless bass module • Stand the bass module on its rubber feet along the same wall as your TV, or along any other wall in the front third of the room. • Choose a stable and level surface. Vibration can cause the bass module to move, particularly on smooth surfaces like marble, glass or highly polished wood. • Keep the front side of the bass module at least 3 in. (8 cm) from any other surface. Blocking the port on the bottom of this side can affect acoustic performance. • Make sure there is an AC (mains) outlet nearby. Front speakers • Place one speaker to the left and one speaker to the right of the TV. • If placing the speakers in an enclosed bookcase shelf, position them at the front edge of the shelf. Center speaker • Place the center speaker on its rubber feet on a stable and level surface directly above or below your TV. • For information on attaching rubber feet, see page 41. Rear speakers/ wireless receivers • For the best quality sound, place the rear ­satellites so that they are above and behind the seated listeners and are as widely spaced as your room allows. • Confirm that the switch on one wireless receiver is set to L (left). • Confirm that the switch on the other wireless receiver is set to R (right). • Facing the TV, place the speaker and L wireless receiver on the left side of the room. • Facing the TV, place the speaker and R wireless receiver on the right side of the room. • Make sure there is an AC (mains) outlet near each wireless receiver.
  • 12. 1 2 - E N G L I S H G E T T I N G S TA R T E D Sample system placement
  • 13. E N G L I S H - 1 3 S E T T I N G U P T H E SYS T E M UNIFY® system overview The UNIFY intelligent integration system guides you through the initial process of ­setting up and configuring your system. It helps you choose the correct cables and inputs and programs the Bose® remote control to operate your connected devices. Note: Before you begin, make sure you have one hour set aside for system setup. Menu item What you can do Language Change the language of the on-screen display. ADAPTiQ® Start the ADAPTiQ audio calibration process. Once completed, this menu option disables or enables ADAPTiQ. TV setup After your TV is connected to the console: • Program the remote control to use your TV. • Connect a new TV to the console. • Add, change or remove the TV audio connection. Source setup For sources connected to HDMI™ inputs 1 – 5 of the control console: • Rename the device. • Program the remote control to access the device. • Remove the device. • Add or change the type of audio/video connection. Add a new device Add another device or accessory to your system. Network setup Connect your system to your home network. Update Perform a system software update. Exit UNIFY Close the UNIFY menu.
  • 14. 1 4 - E N G L I S H S E T T I N G U P T H E SYS T E M UNIFY® setup The following steps are part of the initial UNIFY setup process: Step Objective Pair the remote control Connect the system's remote control to the console. Choose language Select your language from the on-screen list. Connect to network Select and connect to your home Wi-Fi network. Software update Update system software to provide the most current functionality. Wired speakers Connect the front speakers to the console. Wireless speakers Connect the rear speakers and Acoustimass® wireless bass module to the ­console. TV remote Set up the system's remote control to control your TV. Adding devices Connect your additional sources. ADAPTiQ® setup Customizes the sound of the system to the acoustics of your listening area. Tutorial A series of optional procedures to help guide you through the rest of your system’s features, such as ­SoundTouch® and Bluetooth® ­operation. After completing the initial setup, you can access UNIFY menu at any time to change your system setup and configuration. Press the button on the front of your ­console or the remote control to start UNIFY setup.
  • 15. E N G L I S H - 1 5 U S I N G T H E R E M OT E C O N T R O L Remote control overview The Bose® advanced RF (radio frequency) remote control works from anywhere in your room without requiring you to aim the remote control at the console. The remote control's display is an essential part of your Lifestyle® experience. It guides you through your sources and system settings. Note: The Bose remote control does not control functions specific to devices that are connected to the front HDMI™ input. Provides access to ­connected sources Powers on/off your Bose® system Display Powers on/off your TV Displays additional ­device-specific content Previous channel, Preset, chapter or track Changes TV's input Numeric keypad. Numbers 1 - 6 can play SoundTouch® presets. Navigation pad Playback controls Function buttons (see page 16) Teletext mode Launches the UNIFY® setup menu Opens SoundTouch® Home button Controls the DVR functionality of your cable box
  • 16. 1 6 - E N G L I S H U S I N G T H E R E M OT E C O N T R O L Using the SOURCE button The button is used to switch between connected sources. Access sources using the navigation pad on your remote control. Function buttons The red, green, yellow and blue buttons on the remote control correspond with the color-coded function buttons on your cable/satellite box or teletext functions. • Cable/satellite box functions: refer to your cable/satellite box owner’s guide. • Teletext functions: correspond with color-coded page numbers, headings or ­shortcuts on a teletext display. Adjusting volume To see your volume level, refer to your remote control's display. • Press + to increase the volume. • Press – to decrease the volume. • Press to mute or unmute the audio. Note: If you still hear audio from your TV’s speakers after setting up your system, ­disable the speakers through your TV’s settings menu. Power saver mode Power saver mode conserves battery life by dimming the brightness of your ­remote control’s display and adjusting the duration that the display remains actively lit. To access power saver mode, press the button on your remote control. Using the MORE button The MORE button on your remote displays additional selections on your remote ­control’s display that are applicable to your currently selected source. 1. Press . 2. Press or to select a function on your remote control's display. 3. Press OK.
  • 17. E N G L I S H - 1 7 U S I N G T H E R E M OT E C O N T R O L The OPTIONS menu The OPTIONS menu displays a list of functions that let you adjust certain system ­settings. The number of items that appear in the OPTIONS menu depends on which source is currently selected. Regardless of the source, you have access to the OPTIONS menu. Note: The OPTIONS menu is only accessible through your system’s remote control after pressing the MORE button . To activate the OPTIONS menu: 1. Press on your remote control. 2. Highlight the OPTIONS button. 3. Press the OK button to display the OPTIONS menu for the current source. 4. Press or to highlight the option you want to change. 5. Press OK to select the setting. 6. Press EXIT when done.
  • 18. 1 8 - E N G L I S H S E T T I N G U P S O U N DTO U C H ® The SoundTouch® app lets you set up and control SoundTouch® from your ­smartphone or tablet. Using the app, your smart device acts as a remote for your system. From the app, you can manage your SoundTouch® settings, add music services, explore local and global Internet radio stations, set and change Presets, and stream music. New features are added periodically. Setting up SoundTouch® on your system After you connect the system to power, download and install the ­SoundTouch® app onto a smartphone or tablet that is connected to your network. The app guides you through setting up SoundTouch® on your system. Note: If you have already set up SoundTouch® for another system, see “Adding the system to an existing ­SoundTouch® account” on page 19. Download and install the SoundTouch® app On your smartphone or tablet, download the Bose® SoundTouch® controller app. • Apple users: download from the App Store • Android™ users: download on the Google Play™ store • Amazon Kindle Fire users: download from the Amazon Appstore for Android Connect the system to your Wi-Fi® network After you download and install the app, connect your system to your network: 1. On your smartphone or tablet, select the SoundTouch® icon to open the app. 2. Follow the instructions in the app to complete setup, including creating a ­S­oundTouch® account, adding a music library and music services.
  • 19. E N G L I S H - 1 9 S E T T I N G U P S O U N DTO U C H ® Adding the system to an existing ­SoundTouch® account If you have already set up SoundTouch® on another system, you do not need to ­download the SoundTouch® app again. 1. On your smartphone or tablet, select the SoundTouch® icon to open the app. 2. Select EXPLORE SETTINGS Add or reconnect system. The app guides you through setup. Connecting the system to a new network If your network information changes, add your system to your new network. You can do this by putting the system into setup mode. 1. On your smartphone or tablet, select the SoundTouch® icon to open the app. 2. Select EXPLORE SETTINGS System settings and select your ­system. 3. Select CONNECT SYSTEM. The app guides you through setup.
  • 20. 2 0 - E N G L I S H U S I N G T H E S O U N DTO U C H ® A P P After you set up the SoundTouch® app, you are ready to stream music and ­personalize your Presets. Getting help global.Bose.com/Support/LS650 This website provides access to the owner support center, which includes: owner’s manuals, articles, tips, tutorials, a video library and the owner community where you can post questions and answers. In-app help The In-app help provides information on using SoundTouch®. 1. On your mobile device, select the SoundTouch® icon to open the app. 2. Select EXPLORE HELP. Controlling the system from another smartphone or tablet Once you set up the SoundTouch® system on your home Wi-Fi® network, you can control the system from any smartphone or tablet on the same network. 1. Connect the device to the same network as your system. 2. On the device, download and install the SoundTouch® app (see page 18).
  • 21. E N G L I S H - 2 1 P E R S O N A L I Z I N G YO U R P R E S E T S How Presets work You can personalize six Presets to your favorite streaming music services, stations, ­playlists, artists, albums or songs from your music library. You can access your ­music, at any time, with a simple touch of a button using the SoundTouch® app on your ­smartphone or tablet. What you need to know • You can set Presets from the app and your remote control. • You cannot set Presets to a Bluetooth® stream. Setting a Preset 1. Stream music to the system using the app. 2. While the music is playing, press and hold a Preset in the app. Note: For information on using the SoundTouch® app to set and change your ­Presets, refer to the in-app help. Playing a Preset Once you personalize your Presets, press a Preset in the app to play it. Setting a Preset using your remote control 1. Press the on your remote control to access the SoundTouch source. 2. Press and hold a number (from 1 – 6) on the numeric keypad to assign a new Preset. A tone notifies you that a new Preset has been set. Selecting a Preset using ­your remote ­control 1. Assign your favorite stations as Presets within the app. 2. Press the SoundTouch® button on your remote control to switch to the SoundTouch source. 3. Select a Preset by pressing a number (from 1 – 6) on the numeric keypad. The buttons are ­highlighted blue on your remote control for reference.
  • 22. 2 2 - E N G L I S H B LU E T O OT H ® T E C H N O LO GY Bluetooth® wireless technology lets you stream music from mobile devices, such as smartphones, tablets and laptops. Before you can stream music from a mobile device, you must pair the mobile device with the console. Choosing your pairing method You can pair your mobile device with the console using Bluetooth wireless ­technology or Near Field Communication (NFC). What is NFC? NFC is a technology that enables devices to establish wireless communication with each other by simply tapping the devices together. Refer to your device owner’s guide to see if your model supports NFC. If your device does not support NFC or if you are unsure: Follow the instructions for “Pairing a device.” If your device supports NFC: Follow the instructions for “Pairing a device with NFC” on page 23. Note: If your device supports Bluetooth pairing via NFC, you can use either pairing method. Pairing a device 1. Press the button on your remote control and select Bluetooth® from the ­on-screen menu. 2. Follow the on-screen instructions to place your console in pairing mode. 3. On your device, turn on the Bluetooth feature. Tip: The Bluetooth feature is usually found in the Settings menu. 4. Select your system from the device list. Once connected, your system’s name appears connected in the device list.
  • 23. E N G L I S H - 2 3 B LU E T O OT H ® T E C H N O LO GY Pairing a device with NFC 1. With your system powered on, unlock your device and turn on the ­Bluetooth® and NFC features. Refer to your device owner’s guide to learn more about these features. 2. Gently tap the NFC touchpoint on your mobile device to the area above the Bose® logo on the top of your Lifestyle® console. Your mobile device may prompt you to accept pairing. Controlling your connected mobile device from the remote control Once paired, you can use the remote control to access your connected mobile ­devices. Select Bluetooth from the menu. To pair a device, see page 22. You can use the remote to control the following subset of Bluetooth features on your system: • Pair and connect devices. • View available artist information in the NOW PLAYING panel. • Control playback (play, pause, stop, skip to the next track, etc.). • Clear the pairing list.
  • 24. 2 4 - E N G L I S H B LU E T O OT H ® T E C H N O LO GY Connecting to a paired device You can stream audio from a device to your console. 1. Turn on the Bluetooth® feature on your device. 2. On your remote control, choose the Bluetooth source through the menu. The console connects to the last device that streamed music to the system. 3. On the device, play music. If you can’t stream audio from a paired device The system may have lost the connection to the device. If the paired device is out of range of the system, move the device within range. Disconnecting a device • Turn off the Bluetooth feature on your device. • If your device supports NFC, tap the NFC touchpoint on your ­device to the top of the console above the Bose® logo. Reconnecting a device • When powered on, the console tries to reconnect with the most ­recently connected device. Note: The device must be within range and powered on. • If your device supports NFC, gently tap the NFC touchpoint on your mobile device to the area above the Bose® logo on the top of your console. Clearing the console's pairing list You can store up to eight paired devices in the console's pairing list. 1. On your remote control, choose the Bluetooth source through the menu. 2. In the Bluetooth source, press the MORE button on your remote. 3. Select CLEAR LIST. All devices are cleared. Using the SoundTouch® app You can also clear the pairing list using the app. 1. On your mobile device, select the SoundTouch® icon to open the app. 2. Select EXPLORE SETTINGS System settings and select your ­system. 3. Open the Bluetooth® menu item and clear the pairing list.
  • 25. E N G L I S H - 2 5 A DVA N C E D F E AT U R E S Disabling Wi-Fi® capability Disabling Wi-Fi® also disables the Bluetooth® feature. 1. Press and hold your console's button until the system status indicator blinks. 2. Release the button. Re-enabling Wi-Fi® capability Re-enabling Wi-Fi® also re-enables the Bluetooth® feature. Your system's Wi-Fi® automatically re-enables upon restarting the system. Updating the system software If your system is connected to your home network, it checks for software ­updates every time the system is used. If an update is available, it begins downloading ­automatically. If an update was fully downloaded, on-screen text prompts you when ­powering down the console that it is ready to be installed. Your system shuts down ­automatically after ­installation.­
  • 26. 2 6 - E N G L I S H G E T T I N G SYS T E M I N F O R M AT I O N System status indicators The front of the console has an LED indicator that shows system status. The LED glows according to system state. Console LED indicator Indicator activity System state Off System is off Blinking white System is powering on Solid white System powered on Blinking amber Downloading system software update Blinking amber (five seconds on, one second off) In standby Blinking red (five seconds on, one second off) Remote control battery low Solid red Firmware error - contact Bose® customer service
  • 27. E N G L I S H - 2 7 G E T T I N G SYS T E M I N F O R M AT I O N Acoustimass® wireless bass module LED indicator Indicator activity System state Blinking amber Ready to pair Solid white Connected to the console Solid amber (dim) Disconnected from the console Blinking white Downloading system software update Blinking red Firmware error - contact Bose® customer service Wireless receiver LED indicator Indicator activity System state Blinking amber Ready to pair Solid white Connected to the console Solid amber (dim) Disconnected from the console Blinking white Downloading system software update Blinking red Firmware error - contact Bose® customer service
  • 28. 2 8 - E N G L I S H C A R E A N D M A I N T E N A N C E Cleaning Do not allow liquids to spill onto the system or into any openings. • Clean the exterior of the system with the provided cleaning cloth or another soft, dry cloth. • Do not use any sprays near the system. • Do not use any solvents, chemicals or ­cleaning solutions containing alcohol, ammonia or abrasives. • Do not allow ­objects to drop into any ­openings. Customer service For additional help using the system: • Visit global.Bose.com/Support/LS650 • Contact Bose® customer service. Refer to the contact sheet in box for ­additional information. Limited warranty Your system is covered by a limited warranty. Details of the limited ­warranty are ­provided on the product registration card that is in the carton. Please refer to the card for instructions on how to register. Failure to do so will not affect your limited warranty rights. The warranty information provided with this product does not apply in Australia and New Zealand. See our website at www.bose.com.au/warranty or www.bose.co.nz/warranty for details of the Australia and New Zealand warranty. Technical information U.S.A./Canada/International: • Console: 10VDC 3.3A, 44VDC 1.25A • Wireless receivers: 100–240V 50/60 Hz, 30W • Acoustimass® wireless bass module: 100–240V 50/60 Hz, 180W SERVICE connector The SERVICE connector is for service use only. Do not insert any cables into this ­connector.
  • 29. E N G L I S H - 2 9 T R O U B L E S H O OT I N G If you experience problems with your home entertainment system: • Make sure that all system components are connected to an AC (mains) outlet. • Secure all cables. • Check the state of system status indicators (see page 26). • Move the system away from possible interference ­(wireless routers, cordless phones, televisions, microwaves, etc.). • Verify the system is within the recommended range of wireless router or mobile device for proper operation. If you continue to experience problems, see “Common solutions” before ­contacting Bose® customer service. This table is designed to help you identify and correct problems that may occur with your Bose product. Common solutions The following table lists symptoms and possible solutions to common problems. Symptom Solution The system is not ­responding to initial ­operation of remote control • Power on the control console manually from the front of the unit by pressing the Power button . • Press any button on your remote control. The system status ­indicator on the ­control ­console should blink with each press. • Make sure the remote control's batteries are installed correctly and do not need replacement (see page 42). • Unplug the power cord for the console, wait 30 seconds and plug it firmly into a live AC (mains) outlet. The remote does not control a device added ­during initial setup Connect your IR emitter (see page 32). The TV is still ­playing sound Disable your TV speakers through your TV's settings menu. Poor video ­connection from a source Press the button on the control console and select your ­device’s setup options. Follow the on-screen instructions to change a video ­connection. System does not respond • Select a connected device from the menu. • Press and hold on the front of the console to cycle your ­system's power. • Unplug the power cord for the console, wait 30 seconds and plug it firmly into a live AC (mains) outlet.
  • 30. 3 0 - E N G L I S H T R O U B L E S H O OT I N G Symptom Solution No sound from the system • Increase the volume. • Press the Mute button on the remote control to make sure the system is not muted. • Make sure you have selected the correct source. • Cycle through and test different sources. • Make sure that the HDMI™ cable is inserted into a connector on your TV labeled ARC or Audio Return Channel. If your TV does not have an HDMI ARC connector, use a secondary audio cable in addition to the HDMI cable. • If using a secondary audio cable, insert the cable into a connector on your TV labeled Output or OUT. • Press and hold the Power button on the front of the console to cycle your ­system's power. • Unplug the power cord for the console, wait 30 seconds and plug it firmly into a live AC (mains) outlet. Cannot complete ­network setup • Select the correct network name and enter password (case sensitive). • Restart your modem and router. • Connect to the network using an Ethernet cable. Cannot complete ­SoundTouch® setup • Connect the mobile device and the system to the same ­ Wi-Fi® network. • Enable Wi-Fi on the mobile device you are ­using for setup. • Test your internet connection. • Restart your mobile device. • Restart your modem and router. • Uninstall the app, reinstall the app, reset the system and restart setup. Acoustimass® wireless bass ­module status LED is a solid amber (dim) • Follow the on-screen troubleshooting prompts. • Press the button on the control console or your remote and rerun the ­UNIFY® setup (see page 14). • Connect the bass module using a 3.5 mm stereo c­able (see page 33). If you don’t have a 3.5 mm stereo cable, contact Bose® customer ­service. Refer to the contact sheet in the carton. • Unplug the power cord for the Acoustimass, wait 30 seconds and plug it firmly into a live AC (mains) outlet. Bass is too heavy or low • Adjust the bass setting of the system (see page 17). • Run ADAPTiQ® audio calibration (see page 14). • Move the bass module away from nearby walls and corners.
  • 31. E N G L I S H - 3 1 T R O U B L E S H O OT I N G Symptom Solution The wireless ­receiver status LEDs are solid amber (dim) • Follow the on-screen troubleshooting prompts. • Press the button on the control console or your remote and rerun the ­UNIFY® setup (see page 14). • Unplug the power cords for the receivers, wait 30 seconds and plug them firmly into a live AC (mains) outlet. • Make a wired connection to your rear speakers. Contact Bose® ­customer ­service. Refer to the contact sheet in the carton. Sound is distorted • Cycle through and test different sources. • Reduce the volume output level from any devices ­connected to the control console. • Make sure the audio input cable from your source device is ­connected and not damaged. • If you have not previously run ADAPTiQ®, select ADAPTiQ® from the UNIFY® menu (see page 13). • Unplug the power cord for the console, wait 30 seconds and plug it firmly into a live AC (mains) outlet. No sound from a connected device • Power on the device. • Cycle through and test different sources. • Refer to the device owner’s manual. No TV picture, but audio is heard Make sure the TV video input selection is correct for the video source. A connected ­device is not responding ­consistently to remote commands • Try setting up the device again. Press the button on the control console. Select the device options and follow the ­on-screen instructions to set up the device again. • Replace your remote’s batteries (see page 42). • Set up your IR emitter (see page 32). Intermittent audio ­dropouts heard on ­coaxial digital audio devices • Confirm that the audio cable is properly connected to the console and the coaxial digital audio device. • Cycle through and test different sources. • Try setting up the device again. Press the button on the control console. Select the coaxial digital audio device options and follow the ­on-screen instructions to set up the device again. • Unplug the power cord for the console, wait 30 seconds and plug it firmly into a live AC (mains) outlet. Connecting to a new network or ­different network • If your network information has changed or to connect your ­system to another network, refer to the SoundTouch® in-app help. • If having problems connecting wirelessly, connect to the network using an Ethernet cable.
  • 32. 3 2 - E N G L I S H T R O U B L E S H O OT I N G Symptom Solution Cannot play ­Bluetooth® audio On your system: • Pair a mobile device using the Bluetooth SOURCE screen. • Clear the system’s pairing list using the SoundTouch® app: -- In the Bluetooth source, press the MORE button on your remote. -- Select CLEAR LIST. • Try pairing a different mobile device. On your mobile device: • Disable and re-enable the Bluetooth feature. • Remove the system from the Bluetooth menu. Pair again. • Refer to your device’s documentation. • See “No sound from the system” on page 30. Setting up your IR emitter If you are having issues with the responsiveness of your remote and your ­connected devices, Bose® recommends using the provided IR emitter. Note: Use the IR emitters only if you are having remote control issues from a third party device. 1. Remove the IR emitter from box . 2. Insert the emitter into the IR connector on the back of the console. 3. Remove three adhesive pads from the plastic sheet included with the emitter and place them on the flat bottoms of the three emitter beads. Emitter bead 4. Remove the plastic backing from the adhesive pads.
  • 33. E N G L I S H - 3 3 T R O U B L E S H O OT I N G 5. Place the three IR beads into the cabinet housing your device or directly in front of the device itself. 6. Test the responsiveness of your remote. If problems still exist, reposition the IR beads and test again. Unable to pair the Acoustimass® wireless bass module with the console If you are unable to pair the bass module with the console, you can also connect the ­module to the soundbar using a 3.5 mm stereo cable (not provided). Use this method only if you are having issues wirelessly connecting your bass module to your console. Note: If you don’t have a 3.5 mm stereo cable (commonly used for headphones and mobile devices), contact Bose® customer service to receive this part. Refer to the contact sheet in box . 1. Connect one end of a 3.5 mm stereo cable to the ACOUSTIMASS IN connector on the back of the bass module. 2. Connect the other end of the cable to the ACOUSTIMASS connector on the back of your console. 3. Turn on your system and check for sound. Checking for sound 1. Power on your TV. 2. If you are using a cable/satellite box or other secondary source: • Power on this source. • If your secondary source is connected to your TV, select the appropriate TV ­input. 3. Power on your console. You should hear sound coming from the bass module. Note: If you do not hear sound from the bass module, see “Troubleshooting” on page 30.
  • 34. 3 4 - E N G L I S H A P P E N D I X A : I N S TA L L AT I O N R E F E R E N C E Front console panel The front of the console has the following inputs: • Headphones • HDMI™ input These inputs ­appear in the menu as AUX (Front) and HDMI (Front) when a device is connected. They can be used to connect digital cameras, video cameras, media players and your preferred mobile device. Front Headphones/AUX input You can use this 3.5 mm input with your headphones, or as a quick plug-and-play audio option with your favorite mobile device. The headphone is the default option. If you'd like to use this input as an AUX IN, press the button on your remote control and select Settings in the on-screen display. Front HDMI™ input You can use this input for devices that have an HDMI output. Note: The Bose remote control does not control functions specific to devices that are connected to the front HDMI™ input. Back console panel HDMI™ Ethernet Service Speaker connectors Optical Coaxial Analog HDMI™ (ARC) Power Troubleshooting
  • 35. E N G L I S H - 3 5 A P P E N D I X A : I N S TA L L AT I O N R E F E R E N C E Connecting an OmniJewel™ base 1. Using the screwdriver, turn the screws to the left (counterclockwise) to loosen the wire terminals on the bases. 2. Insert the bare ends of the four-pin cable into the OmniJewel™ base by placing the red wire marked L+ or R+ into the red terminal ( + ) and the plain wire into the plain silver terminal ( – ). 3. Use the Phillips head screwdriver to secure the wires into the terminals by turning the screws on top of the base to the right (clockwise). 4. While holding the OmniJewel™ speaker, place the base into the bottom. The base should fit flush into your speaker, with the wire­­terminals facing the back. 5. Attach the base to the speaker by pushing the Phillips head screwdriver through the circular opening and turning the screw to the right (clockwise) until fully seated.
  • 36. 3 6 - E N G L I S H A P P E N D I X A : I N S TA L L AT I O N R E F E R E N C E Installing the front speakers UNIFY® guides you through the initial installation of your front speakers during the “Wired speakers” step (see page 14). If you are moving your system but have already completed setup, refer to the following instructions in order to reassemble the rear portion of your home entertainment system. CAUTION: Do not connect your speakers while your console is connected to an AC (mains) adapter. What you need: From box : From box : OmniJewel™ speakers (2) OmniJewel™ bases (2) Front speaker cable (1) Screwdriver (1) From box : OmniJewel™ center speaker (1) Center speaker cable (1) Adhesive feet (4)
  • 37. E N G L I S H - 3 7 Connecting the front speakers to the console 1. Place your speakers according to the “Placement guidelines” on page 11. 2. Connect and attach the OmniJewel™ bases to the OmniJewel™ speakers (see page 35). 3. Insert the molded plug of the four-pin cable into the four-pin FRONT SPEAKERS connector on the back of your console. Attaching the rubber feet to your center speaker 1. Remove the rubber feet from box . 2. Place the center speaker upside down on a soft, protected surface. 3. Remove the protective film from the feet. 4. Attach the rubber feet to the bottom of the center speaker at both ends. A P P E N D I X A : I N S TA L L AT I O N R E F E R E N C E
  • 38. 3 8 - E N G L I S H A P P E N D I X A : I N S TA L L AT I O N R E F E R E N C E Connecting the center speaker to the console 1. Remove the center speaker cable from box . 2. Place the center speaker according to “Placement guidelines” on page 11. 3. Insert the center speaker cable into the back of your center speaker. 4. Insert the molded plug of the six-pin cable into the six-pin FRONT SPEAKERS ­connector on the back of your console.
  • 39. E N G L I S H - 3 9 A P P E N D I X A : I N S TA L L AT I O N R E F E R E N C E Installing the rear speakers UNIFY® guides you through the initial installation of your rear speakers during the ­“Wireless speakers” step (see page 14). If you are moving your system but have already completed setup, refer to the following instructions in order to reassemble the rear portion of your home entertainment system. What you need: From box : OmniJewel™ speakers (2) OmniJewel™ bases (2) Rear speaker cables (2) From box : From box : From box : Wireless receivers (2) Power cords (2) Screwdriver (1)
  • 40. 4 0 - E N G L I S H A P P E N D I X A : I N S TA L L AT I O N R E F E R E N C E Identifying switch settings on wireless ­receivers Your rear speakers connect to wireless receivers to communicate with the console. The receivers come preset to a left and right channel out of the box. You can use the switch on the front of the receiver to adjust the channel settings. 1. Confirm that the switch on one wireless receiver is set to L (left). 2. Confirm that the switch on the other wireless receiver is set to R (right). Note: Make sure that one wireless receiver is always set to L (left) and the other is set to R (right). Connecting the rear speakers 1. Place your speaker according to the “Placement guidelines” on page 11. 2. Connect and attach an OmniJewel™ base to an OmniJewel™ speaker (see page 35). 3. Insert the other end of the two-pin cable into your wireless receiver. You hear or feel a click. 4. Repeat steps 1 - 3 connect your other speaker.
  • 41. E N G L I S H - 4 1 A P P E N D I X A : I N S TA L L AT I O N R E F E R E N C E Connecting the rear speakers to power 1. Connect one end of the power cord into your wireless receiver. 2. Plug the other end of the power cord into an AC (mains) outlet. 3. Repeat steps 1 and 2 to set up your other speaker. Making a wired connection to the rear speakers You can also hard wire your rear speakers through the use of an adapter kit (sold separately). To purchase the kit, contact your local Bose® dealer or visit www.Bose.com CAUTION: Do not use any unauthorized wiring to connect the speakers to your Bose system. Using unauthorized wires may damage your Bose system and its components. Mounting your speakers You can mount the speakers on wall brackets, floor stands or table stands. To purchase these accessories, contact your local Bose® dealer or visit www.Bose.com CAUTIONS:  • Only use Bose hardware to mount the speakers. Using unauthorized mounts may ­damage your Bose system and its components. • The speaker wire and interconnect cables included with this system are not approved for in-wall installation. Please check your local building codes for the correct type of wire and cable required for in-wall installation.
  • 42. 4 2 - E N G L I S H A P P E N D I X B : SYS T E M M A I N T E N A N C E Replacing the remote control’s batteries Replace all four batteries when there is a noticeable decrease in range or when you see the console LED indicator blink red (see page 26). 1. Slide open the battery compartment cover on the back of the remote control. 2. Install four AA (IEC LR6) 1.5V batteries. Match the + and – symbols on the ­batteries with the + and – markings inside the compartment. 3. Slide the battery compartment cover back into place.
  • 43. E N G L I S H - 4 3
  • 44. 2 - E S PA Ñ O L I N S T R U C C I O N E S I M P O R TA N T E S D E S E G U R I DA D Lea y conserve todas las instrucciones de uso y seguridad. Instrucciones importantes de seguridad 1. Lea estas instrucciones. 2. Conserve estas instrucciones. 3. Tenga en cuenta las advertencias. 4. Siga todas las instrucciones. 5. No use este aparato cerca del agua. 6. Límpielo solamente con un paño seco. 7. No bloquee ninguna abertura de ventilación. Realice la instalación conforme a las instrucciones del fabricante. 8. No lo coloque cerca de ninguna fuente de calor, como radiadores, rejillas de calefacción, estufas u otros aparatos (incluidos los amplificadores) que produzcan calor. 9. Proteja el cable de corriente para evitar que lo pisen o pellizquen, especialmente en enchufes, receptáculos de las tomas y en el punto donde salen del dispositivo. 10. Use solamente los accesorios especificados por el fabricante. 11. Desenchufe este aparato durante tormentas eléctricas o cuando no lo utilice durante períodos de tiempo prolongados. 12. Derive todas las tareas de servicio a personal calificado. Se requieren tareas de servicio si el aparato se daña de alguna manera, por ejemplo si se dañó el enchufe o cable de alimentación, si se derramó líquido o cayeron objetos dentro del aparato, si el aparato estuvo expuesto a la lluvia o la humedad, si no funciona normalmente, o si se cayó. Este símbolo en el producto significa que existe tensión peligrosa, sin aislamiento dentro de la carcasa del producto que puede presentar un riesgo de descarga eléctrica. Este símbolo significa que existen instrucciones de funcionamiento y mantenimiento importantes en esta guía. Contiene piezas pequeñas que pueden representar un riesgo de asfixia. No es indicado para niños de menos de tres años de edad. Este producto contiene material magnético. Consulte con su médico si esto podría afectar un dispositivo médico implantable. Este producto contiene una superficie de vidrio templado. Tenga cuidado para evitar impactos. En caso de que se rompa, manipule los trozos de vidrio con cuidado. • Para reducir el riesgo de incendio o descarga eléctrica, NO exponga este producto a la lluvia, a líquidos ni a la humedad. • NO exponga este producto a goteos o salpicaduras, no coloque encima, ni cerca del producto, objetos llenos con líquido como jarrones. • Mantenga el producto lejos del fuego y de fuentes de calor. NO coloque sobre el producto, o en su proximidad, fuentes de llamas al descubierto, como velas encendidas. • NO realice alteraciones no autorizadas a este producto. • NO use un convertidor de corriente con este producto. • NO lo use en vehículos o embarcaciones. • El cable del altavoz y los cables de interconexión que se incluyen con este sistema no están aprobados para instalaciones en la pared. Consulte en los códigos de edificación local el tipo correcto de cables que se necesitan para las instalaciones en pared. • Use este producto solamente con la fuente de alimentación suministrada. • Si se utiliza la clavija de conexión de red o el acoplador del artefacto como el dispositivo de desconexión, el dispositivo de desconexión deberá permanecer listo para funcionar. 仅适用于 2000m 以下地区安全使用 Use este producto solamente a una altura inferior a 2000 metros. • Debido a los requisitos de ventilación, Bose no recomienda colocar el producto en un espacio reducido como una cavidad en la pared o un gabinete cerrado. • No coloque o instale el soporte o producto cerca de fuentes de calor, como chimeneas, radiadores, registradores de calor u otros dispositivos (incluidos amplificadores) que producen calor. • La etiqueta del producto se encuentra en la parte inferior de la consola.
  • 45. E S PA Ñ O L - 3 I N F O R M AC I Ó N R E G U L ATO R I A NOTA: Este equipo ha sido sometido a prueba y se ha comprobado que cumple con los límites de un dispositivo digital Clase B, conforme a la Parte 15 de las reglas de la FCC. Estos límites están diseñados para ofrecer una protección razonable contra la interferencia perjudicial en una instalación domiciliaria. Este equipo genera, usa y puede irradiar energía de radiofrecuencia y, si no se instala y se usa conforme a las instrucciones, puede causar una interferencia perjudicial a las comunicaciones de radio. Sin embargo, no se garantiza que la interferencia no se produzca en una instalación en particular. Si este equipo causa interferencias perjudiciales en la recepción de radio o televisión, que se puede determinar al apagar y encender el equipo, se aconseja al usuario intentar corregir la interferencia mediante una o más de las siguientes medidas: • Reoriente o reubique la antena receptora. • Aumente la separación entre el equipo y el receptor. • Conecte el equipo a una salida eléctrica en un circuito diferente al que está conectado el receptor. • Consulte con el distribuidor o con un técnico en radio o televisión experimentado para obtener ayuda. Los cambios o las modificaciones no aprobadas expresamente por Bose Corporation podrían invalidar la autoridad del usuario para operar el equipo. Este dispositivo cumple con la parte 15 de las reglas de la FCC y con las normas RSS sin licencia de la industria canadiense. El funcionamiento está sujeto a las siguientes dos condiciones: (1) Este dispositivo no debe provocar interferencias dañinas y (2) Este dispositivo debe aceptar cualquier interferencia recibida, incluida la interferencia que puede causar un funcionamiento no deseado. Este dispositivo que funciona de 5150 a 5250 MHz es solo para uso en interiores para reducir la interferencia potencialmente dañina con los sistemas de satélite móvil que comparten el mismo canal. W52/W53 solo para uso en interiores. Este dispositivo cumple con los límites de exposición a la radiación de la FCC y de la Industry Canada establecidos para la población en general. Este equipo debe instalarse y operarse a una distancia mínima de 20 cm entre el radiador y su cuerpo. Este transmisor no se debe ubicar ni operar conjuntamente con ninguna otra antena o transmisor. Normas de gestión para dispositivos de radiofrecuencia de baja potencia Artículo XII Según la “Regulación de administración para dispositivos de radiofrecuencia de bajo consumo” sin el permiso concedido por la NCC, cualquier empresa, compañía o usuario no puede cambiar la frecuencia, mejorar la potencia de transmisión ni alterar las características originales así como el desempeño de los dispositivos de radiofrecuencia de bajo consumo. Artículo XIV Los dispositivos de radiofrecuencia de baja potencia no deberían afectar la seguridad del avión ni interferir con las comunicaciones legales; si se determinara una interferencia, el usuario deberá dejar de operar de inmediato hasta que no se perciba interferencia. Dichas comunicaciones legales significan comunicaciones de radio operadas conforme con la Ley de telecomunicaciones. Los dispositivos de radiofrecuencia de baja potencia deben ser susceptibles a la interferencia de las comunicaciones legales o de los dispositivos de ondas de radio ISM. Por la presente, Bose Corporation declara que este producto cumple con los requisitos esenciales y con otras cláusulas relevantes de la Directiva 1999/5/EC y con todos los demás requisitos de directivas de la UE. La declaración de conformidad completa se puede encontrar en: www.Bose.com/compliance Este símbolo significa que el producto no debe desecharse como residuo doméstico y debe entregarse a un centro de recolección apropiado para reciclado. La eliminación y el reciclado adecuados ayudan a proteger los recursos naturales, la salud de las personas y el medioambiente. Para obtener más información sobre la eliminación y el reciclado de este producto, póngase en contacto con su municipio, el servicio de gestión de residuos o el comercio donde haya comprado este producto. Nombres y contenidos de las sustancias o elementos tóxicos o peligrosos Sustancias y elementos tóxicos o peligrosos Nombre de parte Plomo (pb) Mercurio (Hg) Cadmio (Cd) Hexavalente Bifenilo polibromado (PBB) Difeniléter polibromado (PBDE) PCB X O O O O O Partes metálicas X O O O O O Partes plásticas O O O O O O Altavoces X O O O O O Cables X O O O O O Esta tabla se preparó conforme a las cláusulas de SJ/T 11364. O: Indica que esta sustancia tóxica o peligrosa contenida en todos los materiales homogéneos para esta parte es inferior al requisito de límite de GB/T 26572. X: Indica que esta sustancia tóxica o peligrosa que está presente en al menos uno de los materiales homogéneos utilizados para esta parte se encuentra por encima del requisito de límite de GB/T 26572.
  • 46. 4 - E S PA Ñ O L I N F O R M AC I Ó N R E G U L ATO R I A Complete y conserve para su registro Los números de serie y de modelo se encuentran en el costado de la caja. Número de serie: _________________________________________________________________________________ Número de modelo: _______________________________________________________________________________ Guarde el recibo con la guía del usuario. Ahora es un buen momento para registrar su producto Bose. Puede hacerlo fácilmente visitando http://global.Bose.com/register Fecha de fabricación: El primer dígito en negritas del número de serie indica el año de fabricación; “6” es 2006 ó 2016. Importador en China: Bose Electronics (Shanghai) Company Limited, Part C, Plan 9, No. 353 North Riying Road, China (Shanghai) Pilot Free Trade Zone. Importador en UE: Bose GP, Castleblayney Road, Carrickmacross, County Monaghan, Irlanda Importador en México: Bose de México, S. de R.L. de C.V., Paseo de las Palmas 405-204, Lomas de Chapultepec, 11000 México, D.F. Número de teléfono: 001 800 900 2673. Importador en Taiwán: Bose Taiwan Branch, 9F-A1, No.10, Section 3, Minsheng East Road, Taipei City 104, Taiwán. Número de teléfono: 886 2 2514 7977. Apple y el logotipo de Apple son marcas registradas de Apple Inc., registradas en los Estados Unidos y en otros países. App Store es una marca de servicio de Apple Inc. Android, Google Play y el logotipo de Google Play son marcas registradas de Google Inc. ©2013 CSR plc y su grupo de compañías. La marca aptX® y el logotipo de aptX son marcas comerciales de CSR plc o de una de las compañías de su grupo y pueden estar registrados en una o más jurisdicciones. La marca y los logotipos de Bluetooth® son marcas comerciales registradas propiedad de Bluetooth SIG Inc. y cualquier uso de dichas marcas por parte de Bose Corporation se encuentra bajo licencia. Dolby, Dolby Audio y el símbolo de las dos D son marcas comerciales de Dolby Laboratories. Para las patentes DTS, vea http://patents.DTS.com. Fabricado bajo licencia de Digital Theater Systems, Inc. DTS, el símbolo y DTS y el símbolo en conjunto son marcas comerciales registradas, y DTS Digital Surround es una marca comercial de DTS, Inc. © DTS, Inc. Reservados todos los derechos. Los términos HDMI y HDMI High-Definition Multimedia Interface y el logotipo HDMI son marcas comerciales o marcas comerciales registradas de HDMI Licensing LLC en los Estados Unidos y otros países. iHeartRadio es una marca comercial registrada de iHeartMedia, Inc. Deezer es una marca registrada de Blogmusik SAS. Este producto está protegido bajo ciertos derechos de propiedad intelectual de Microsoft. Se prohíbe el uso o la distribución de dicha tecnología fuera de este producto sin licencia de Microsoft. La marca N-Mark es una marca comercial o marca comercial registrada de NFC Forum, Inc. en los Estados Unidos de América y en otros países. Pandora, el logotipo de Pandora y la imagen comercial de Pandora son marcas comerciales o marcas comerciales registradas de Pandora Media, Inc., y se utilizan con permiso. La subscripción de radio por Internet SiriusXM se vende por separado y solo está disponible para mayores de 18 años que residan en EE. UU. y Puerto Rico. Para suscribirse al servicio de radio por Internet SiriusXM en los EE. UU., los clientes de EE. UU. deben visitar www.sirius.com o llamar al 1-888-539-7474. SiriusXM y todas las marcas y logos relacionados son marcas comerciales de Sirius XM Radio Inc. y sus subsidiarias. Todos los derechos reservados. SoundTouch y el diseño de la nota inalámbrica son marcas comerciales registradas de Bose Corporation en los EE. UU. y otros países. Este producto incorpora software de Spotify que está sujeto a licencias de otras empresas que se listan en: www.spotify.com/connect/third-party-licenses Spotify es una marca comercial registrada de Spotify AB. Diseñado con UEI Technology™ . Bajo licencia de Universal Electronics, Inc. © UEI 2000-2016 Wi-Fi es una marca comercial registrada de Wi-Fi Alliance® . Windows es una marca comercial registrada de Microsoft Corporation en Estados Unidos y en otros países. ©2016 Bose Corporation. No se puede reproducir, modificar, distribuir, o usar de otra manera ninguna parte de este trabajo sin previo consentimiento por escrito.
  • 47. E S PA Ñ O L - 5 C O N T E N I D O Introducción Desembalar............................................................................................................................................ 8 Sección 1......................................................................................................................................... 9 Sección 2........................................................................................................................................ 9 Sección 3 ...................................................................................................................................... 9 Sección 4....................................................................................................................................... 10 Pautas de colocación......................................................................................................................... 11 Ejemplo de ubicación del sistema................................................................................................. 12 Instalación del sistema Información general del sistema UNIFY®.................................................................................... 13 Configuración de UNIFY®.................................................................................................................. 14 Uso del control remoto Descripción general del control remoto..................................................................................... 15 Uso del botón SOURCE..................................................................................................................... 16 Botones de funciones........................................................................................................................ 16 Ajustar el volumen............................................................................................................................... 16 Modo de ahorro de energía............................................................................................................. 16 Uso del botón MORE.......................................................................................................................... 16 El menú OPCIONES............................................................................................................................ 17 Configuración de SoundTouch® Configuración de SoundTouch® en el sistema.......................................................................... 18 Descargar e instalar la aplicación SoundTouch®...................................................................... 18 Conectar el sistema a la red Wi-Fi®..................................................................................... 18 Agregar el sistema a una cuenta SoundTouch® existente.................................................... 19 Conexión del sistema a una nueva red........................................................................................ 19 Uso de la aplicación SoundTouch® Obtener ayuda...................................................................................................................................... 20 Ayuda de la aplicación....................................................................................................................... 20 Control del sistema desde otro teléfono inteligente o tableta.......................................... 20 Personalización de sus ajustes predefinidos Cómo funcionan los ajustes predefinidos.................................................................................. 21 Configuración de un ajuste predefinido..................................................................................... 21 Reproducción de un ajuste predefinido...................................................................................... 21 Configuración de un ajuste predefinido usando el control remoto................................. 21 Selección de un ajuste predefinido usando el control remoto.......................................... 21
  • 48. 6 - E S PA Ñ O L C O N T E N I D O Tecnología Bluetooth® Emparejar un dispositivo.................................................................................................................. 22 Emparejar un dispositivo con NFC............................................................................................... 23 Controlar el dispositivo móvil conectado desde el control remoto................................ 23 Conexión a un dispositivo emparejado....................................................................................... 24 Desconectar un dispositivo............................................................................................................. 24 Reconectar un dispositivo................................................................................................................ 24 Borrar la lista de emparejamiento de la consola..................................................................... 24 Uso de la aplicación SoundTouch®....................................................................................... 24 Funciones avanzadas Desactivación de la función Wi-Fi®............................................................................................... 25 Reactivación de la función Wi-Fi®................................................................................................. 25 Actualizar el software del sistema................................................................................................ 25 Obtención de información del sistema Indicadores de estado del sistema............................................................................................... 26 Indicador LED de la consola.................................................................................................. 26 Indicador LED del módulo de bajos inalámbrico Acoustimass®.............................. 27 Indicador LED del receptor inalámbrico........................................................................... 27 Cuidado y mantenimiento Limpieza.................................................................................................................................................. 28 Servicio de atención al cliente........................................................................................................ 28 Garantía limitada.................................................................................................................................. 28 Información técnica............................................................................................................................ 28 Conector SERVICE.............................................................................................................................. 28 Solución de problemas Soluciones comunes........................................................................................................................... 29 Configuración del emisor IR............................................................................................................ 32 Error al emparejar el módulo de bajos inalámbrico Acoustimass® con la consola.... 33 Verificación de sonido....................................................................................................................... 33
  • 49. E S PA Ñ O L - 7 C O N T E N I D O Apéndice A: referencia de instalación Panel delantero de la consola......................................................................................................... 34 Entrada frontal Auriculares/AUX.......................................................................................... 34 Entrada frontal HDMI™.............................................................................................................. 34 Panel posterior de la consola.......................................................................................................... 34 Conexión de una base de OmniJewel™....................................................................................... 35 Conexión de los altavoces delanteros......................................................................................... 36 Conexión de los altavoces delanteros a la consola................................................................ 37 Colocación de los pies de goma en el altavoz central.......................................................... 37 Conexión del altavoz central a la consola.................................................................................. 38 Conexión de los altavoces posteriores........................................................................................ 39 Identificación de la configuración del interruptor en los receptores inalámbricos... 40 Conexión de los altavoces posteriores........................................................................................ 40 Conexión de los altavoces posteriores a la fuente de alimentación................................ 41 Conexión con cables a los altavoces posteriores.................................................................... 41 Montar los altavoces........................................................................................................................... 41 Apéndice B: Mantenimiento del sistema Reemplazar las baterías del control remoto............................................................................. 42
  • 50. 8 - E S PA Ñ O L I N T R O D U C C I Ó N Desembalar Las partes del nuevo sistema de entretenimiento para el hogar Lifestyle® están empaquetadas en cuatro secciones, algunas de los cuales contienen múltiples cajas de componentes. Cada caja está marcada con iconos que indican el contenido. Notas: • Cuando la configuración de UNIFY® se lo indique, desembale cuidadosamente el sistema según los iconos que aparecen en los pasos en la pantalla. • Si parte del sistema está dañado o si el vidrio de la consola o módulo de bajos inalámbrico de Acoustimass® está roto, no lo use. Comuníquese con un representante autorizado de Bose® o al Servicio de atención al cliente de Bose. Remítase a la hoja de contacto en la caja . Sección 1 Sección 2 Sección 3 Sección 4
  • 51. E S PA Ñ O L - 9 I N T R O D U C C I Ó N Sección 1 En la caja : Consola (1) Cable HDMI™ (1) Control remoto universal (1) Baterías AA (4) Sección 2 En la caja : En la caja : Fuente de alimentación de la consola (1) Cables de corriente (4) Guía del usuario (1) Puede entregarse con múltiples cables de corriente. Use el cable de corriente correspondiente a su región. Sección 3 En la caja : Altavoces OmniJewel™ (4) Bases de OmniJewel™ (4) Cable de altavoces delanteros (1) Cables de altavoces posteriores (2)
  • 52. 1 0 - E S PA Ñ O L I N T R O D U C C I Ó N En la caja : Altavoz central OmniJewel™ (1) Cable de altavoz central (1) Pies adhesivos (4) En la caja : En la caja : Receptores inalámbricos (2) Auriculares ADAPTiQ® (1) Destornillador (1) Emisor de infrarrojos (1) Sección 4 En la caja : Módulo de bajos inalámbrico Acoustimass® (1)
  • 53. E S PA Ñ O L - 1 1 I N T R O D U C C I Ó N Pautas de colocación Para evitar interferencia, mantenga otros equipos inalámbricos a 0,3 - 0,9 m de distancia del sistema. Coloque el sistema fuera y alejado de objetos metálicos, alejado de otros componentes de audio/video y de fuentes de calor directo. Componente Ubicación recomendada Consola • Coloque la consola cerca de los componentes. La ubicación recomendada es cerca de la TV. • NO coloque la TV ni ningún otro componente encima de la consola. • Coloque la consola en un área bien ventilada. • Asegúrese de que haya una salida eléctrica de CA (red eléctrica) cerca. Nota: Coloque la ­consola de control en una posición de fácil acceso al panel de conectores posterior hasta que haya terminado la configuración del sistema. Módulo de bajos inalámbrico Acoustimass® • Apoye el módulo de bajos sobre los pies de goma junto a la misma pared que la TV o alguna pared en la parte delantera de la habitación. • Elija una superficie estable y nivelada. La vibración puede hacer que el módulo de bajos se mueva, especialmente sobre superficies lisas como mármol, vidrio o madera altamente lustrada. • Mantenga la parte anterior del módulo de bajos al menos a una distancia de 8 cm de cualquier otra superficie. Si se obstruye el puerto en la parte inferior de este lado puede afectar el rendimiento acústico. • Asegúrese de que haya una salida eléctrica de CA (red eléctrica) cerca. Altavoces anteriores • Coloque un altavoz a la izquierda y un altavoz a la derecha de la TV. • Si coloca los altavoces en un estante de una biblioteca cerrada, colóquelos en el borde delantero del estante. Altavoz central • Pegue los pies de goma en el altavoz central y coloque el altavoz sobre una superficie estable y nivelada directamente por encima o por debajo de la TV. • Para más información sobre cómo colocar los pies de goma, vea la página 41. Receptores posteriores inalámbricos/ altavoces • Para obtener la mejor calidad de sonido, coloque los satélites posteriores para que estén a la altura por arriba y detrás de los oyentes sentados y estén dispuestos lo más espaciados posible por la habitación. • Confirme que el interruptor de un receptor inalámbrico se encuentre en la posición L (izquierda). • Confirme que el interruptor en el otro receptor inalámbrico se encuentre en la posición R (derecha). • Mirando hacia la TV, coloque el altavoz y el receptor inalámbrico L del lado izquierdo de la habitación. • Mirando hacia la TV, coloque el altavoz y el receptor inalámbrico R del lado derecho de la habitación. • Asegúrese de que haya una salida de alimentación de CA (red eléctrica) cerca de cada receptor inalámbrico.
  • 54. 1 2 - E S PA Ñ O L I N T R O D U C C I Ó N Ejemplo de ubicación del sistema
  • 55. E S PA Ñ O L - 1 3 I N S TA L AC I Ó N D E L S I S T E M A Información general del sistema UNIFY® El sistema de integración inteligente UNIFY lo guía durante el proceso inicial de instalación y configuración del sistema. Lo ayuda a elegir los cables y las entradas correctas y a programar el control remoto Bose® para usar los dispositivos conectados. Nota: Antes de comenzar, tenga en cuenta que necesitará una hora para la configuración del sistema. Elemento del menú Opciones disponibles Idioma Cambiar el idioma de la pantalla. ADAPTiQ® Iniciar el proceso de calibración de audio ADAPTiQ Una vez completado, esta opción de menú desactiva o activa ADAPTiQ. Configurar la TV Después de conectar la TV a la consola: • Programe el control remoto para usar la TV. • Conecte una nueva TV a la consola. • Agregar, cambiar o quitar la conexión de audio de la TV. Configurar la fuente Para las fuentes conectadas a las entradas HDMI™ 1 – 5 de la consola de control: • Volver a nombrar el dispositivo. • Programar el control remoto para acceder al dispositivo. • Quitar el dispositivo. • Agregar o cambiar el tipo de conexión de audio/video. Agregar un nuevo dispositivo Agregar otro dispositivo o accesorio al sistema. Configurar la red Conexión del sistema a la red doméstica. Actualizar Realizar una actualización del software del sistema. Salir de UNIFY Cerrar el menú UNIFY.
  • 56. 1 4 - E S PA Ñ O L I N S TA L AC I Ó N D E L S I S T E M A Configuración de UNIFY® Los siguientes pasos forman parte del proceso inicial de la configuración de UNIFY: Paso Objetivo Emparejar el control remoto Conecte el control remoto del sistema a la consola. Elegir el idioma Seleccione el idioma en la lista de la pantalla. Conectarse a una red Seleccione y conéctese a la red Wi-Fi del hogar. Actualizar software Actualice el software del sistema para brindar la funcionalidad más actual. Altavoces con cable Conecte los altavoces delanteros a la consola. Altavoces inalámbricos Conecte los altavoces posteriores y el módulo de bajos inalámbrico Acoustimass® a la consola. Control remoto de la TV Configure el control remoto del sistema para controlar la TV. Agregar dispositivos Conecte las fuentes adicionales. Configuración de ADAPTiQ® Personaliza el sonido del sistema a la acústica del área de escucha. Tutorial Una serie de procedimientos opcionales para guiarlo por el resto de las funciones del sistema, como el funcionamiento de SoundTouch® y Bluetooth®. Después de completar la configuración inicial, puede acceder al menú UNIFY en cualquier momento para cambiar la instalación y la configuración del sistema. Presione el botón en la parte anterior de la consola del control remoto para comenzar la configuración de UNIFY.
  • 57. E S PA Ñ O L - 1 5 U S O D E L C O N T R O L R E M OTO Descripción general del control remoto El control remoto de radio frecuencia avanzado de Bose® funciona desde cualquier parte de la habitación sin que tenga que apuntar el control remoto a la consola. La pantalla del control remoto es una parte esencial de la experiencia de Lifestyle®. Lo guía por las configuración de las fuentes y del sistema. Nota: El control remoto de Bose no controla funciones específicas a los dispositivos que están conectados a la entrada delantera HDMI™. Ofrece acceso a las fuentes conectadas Enciende/apaga el sistema Bose® Pantalla Enciende/apaga la TV Muestra contenido adicional específico al dispositivo Canal, ajuste predefinido, capítulo o pista anterior Cambia la entrada de TV Teclado numérico. Los números 1 6 pueden reproducir los ajustes predefinidos de SoundTouch®. Panel de navegación Controles de reproducción Botones de funciones (consulte página 16) Modo Teletexto Inicia el menú Configuración de UNIFY® Abre SoundTouch® Botón Home Controla la funcionalidad de DVR del receptor de cable
  • 58. 1 6 - E S PA Ñ O L U S O D E L C O N T R O L R E M OTO Uso del botón SOURCE El botón se usa para cambiar entre las fuentes conectadas. Acceda a las fuentes usando el panel de navegación en el control remoto. Botones de funciones Los botones rojo, verde, amarillo y azul en el control remoto corresponden a los botones de función de colores de las funciones del sistema de cable/satélite o teletexto. • Funciones del sistema de cable/satélite: Consulte la guía del usuario de su sistema de cable/satélite. • Funciones de teletexto: Corresponden a los números de página, titulares o accesos directos codificados por color en una pantalla de teletexto. Ajustar el volumen Para ver el nivel de volumen, vea la pantalla del control remoto. • Presione + para aumentar el volumen. • Presione – para disminuir el volumen. • Presione para silenciar o restaurar el audio. Nota: Si todavía oye audio de los altavoces de la TV después de configurar el sistema, desactive los altavoces usando el menú de configuración de la TV. Modo de ahorro de energía El modo de ahorro de energía conserva la carga de la batería al atenuar la iluminación de la pantalla del control remoto y ajustar la duración durante la cual la pantalla permanece iluminada. Para acceder al modo de ahorro de energía, presione el botón en el control remoto. Uso del botón MORE El botón MORE en el control remoto muestra selecciones adicionales en la pantalla del control remoto que corresponden a la fuente actualmente seleccionada. 1. Presione . 2. Presione o para seleccionar una función en la pantalla del control remoto. 3. Presione OK.
  • 59. E S PA Ñ O L - 1 7 U S O D E L C O N T R O L R E M OTO El menú OPCIONES El menú OPCIONES muestra una lista de funciones que permiten ajustar ciertos parámetros del sistema. El número de opciones que aparecen en el menú OPCIONES depende de la fuente actualmente seleccionada. Independientemente de la fuente, tiene acceso al menú OPCIONES. Nota: El menú OPCIONES solo se puede acceder a través del control remoto del sistema después de presionar el botón MORE . Para activar el menú OPCIONES: 1. Presione en el control remoto. 2. Resalte el botón OPTIONS. 3. Presione el botón OK para mostrar el Menú OPCIONES de la fuente actual. 4. Presione o para resaltar la opción que desea cambiar. 5. Presione OK para seleccionar la configuración. 6. Presione EXIT cuando haya terminado.
  • 60. 1 8 - E S PA Ñ O L C O N F I G U R AC I Ó N D E S O U N DTO U C H ® La aplicación SoundTouch® permite configurar y controlar el sistema SoundTouch® desde el teléfono inteligente o tableta. Al usar la aplicación, el dispositivo inteligente actúa como un control remoto para el sistema. Desde la aplicación, puede controlar la configuración de SoundTouch®, agregar servicios de música, explorar emisoras de radio por Internet locales y globales, definir y cambiar Ajustes predefinidos y transmitir música. Se agregan nuevas funciones periódicamente. Configuración de SoundTouch® en el sistema Luego de conectar el sistema a la fuente de alimentación, descargue e instale la aplicación SoundTouch® en un teléfono inteligente o tableta que esté conectada a la red. La aplicación lo guía por la configuración de SoundTouch® en el sistema. Nota: Si ya ha configurado SoundTouch® para otro sistema, vea “Agregar el sistema a una cuenta SoundTouch® existente” en la página 19 Descargar e instalar la aplicación SoundTouch® En el teléfono inteligente o la tableta, descargue la aplicación del controlador Bose® SoundTouch®. • Usuarios de Apple: Descargar desde App Store • Usuarios de Android™: Descargar de la tienda de Google Play™ • Usuarios de Amazon Kindle Fire: Descargar de Amazon Appstore para Android Conectar el sistema a la red Wi-Fi® Después de descargar e instalar la aplicación, conecte el sistema a la red: 1. En el teléfono inteligente o la tableta, seleccione el icono SoundTouch® para iniciar la aplicación. 2. Siga las instrucciones en la aplicación para completar la configuración, incluida la creación de una cuenta de SoundTouch®, al agregar una biblioteca de música y servicios de música.
  • 61. E S PA Ñ O L - 1 9 C O N F I G U R AC I Ó N D E S O U N DTO U C H ® Agregar el sistema a una cuenta SoundTouch® existente Si ya configuró SoundTouch® para otro sistema, no es necesario que vuelva a descargar la aplicación SoundTouch®. 1. En el teléfono inteligente o la tableta, seleccione el icono SoundTouch® para abrir la aplicación. 2. Seleccione EXPLORAR CONFIGURACIÓN Agregar o reconectar el sistema. La aplicación lo guía durante la configuración. Conexión del sistema a una nueva red Si la información de la red cambia, agregue el sistema a la nueva red. Puede hacerlo definiendo el sistema al modo de configuración. 1. En el teléfono inteligente o la tableta, seleccione el icono SoundTouch® para iniciar la aplicación. 2. Seleccione EXPLORAR CONFIGURACIÓN Configuración del sistema y seleccione el sistema. 3. Seleccione CONECTAR SISTEMA. La aplicación lo guía durante la configuración.
  • 62. 2 0 - E S PA Ñ O L U S O D E L A A P L I C AC I Ó N S O U N DTO U C H ® Después de configurar la aplicación SoundTouch®, está listo para transmitir música y personalizar sus ajustes predefinidos. Obtener ayuda global.Bose.com/Support/LS650 Este sitio Web proporciona acceso al centro de asistencia del usuario, que incluye: Manuales del usuario, artículos, sugerencias, tutoriales, una biblioteca de videos y la comunidad de usuarios donde puede publicar preguntas y respuestas. Ayuda de la aplicación La ayuda de la aplicación proporciona información sobre el uso de SoundTouch®. 1. En el dispositivo móvil, seleccione el icono SoundTouch® para iniciar la aplicación. 2. Seleccione EXPLORAR AYUDA. Control del sistema desde otro teléfono inteligente o tableta Una vez que haya configurado el sistema SoundTouch® en su red Wi-Fi® doméstica, puede controlar el sistema desde cualquier teléfono inteligente o tableta en la misma red. 1. Conecte el dispositivo a la misma red que su sistema. 2. En el dispositivo, descargue e instale la aplicación SoundTouch® (vea la página 18).
  • 63. E S PA Ñ O L - 2 1 PERSONALIZACIÓN DE SUS AJUSTES PREDEFINIDOS Cómo funcionan los ajustes predefinidos Puede personalizar seis ajustes predefinidos de sus servicios favoritos de transmisión de música; estaciones, listas de reproducción, artistas, álbumes o canciones de su biblioteca de música. Puede acceder a su música en cualquier momento con solo presionar un botón usando la aplicación SoundTouch® en el teléfono inteligente o tableta. Lo que debe saber • Puede definir los ajustes predefinidos desde la aplicación y del control remoto. • No puede definir los ajustes predefinidos a una transmisión Bluetooth®. Configuración de un ajuste predefinido 1. Transmita música al sistema con la aplicación. 2. Mientras se reproduce música, mantenga presionado un ajuste predefinido en la aplicación. Nota: Para obtener información sobre el uso de la aplicación SoundTouch® para ajustar y cambiar los ajustes predefinidos, consulte la ayuda de la aplicación. Reproducción de un ajuste predefinido Una vez que personalice los ajustes predefinidos, presione un ajuste predefinido en la aplicación para reproducirlo. Configuración de un ajuste predefinido usando el control remoto 1. Presione en el control remoto para acceder a la fuente SoundTouch. 2. Mantenga presionado un número (de 1 – 6) en el teclado numérico para asignar un nuevo ajuste predefinido. Un sonido le notifica que se ha configurado el nuevo ajuste predefinido. Selección de un ajuste predefinido usando el control remoto 1. Asigne sus emisoras favoritas como ajustes predefinidos en la aplicación. 2. Presione el botón SoundTouch® en el control remoto para cambiar a la fuente SoundTouch. 3. Seleccione un ajuste predefinido presionando un número (de 1 – 6) en el teclado numérico. Los botones se resaltan de color azul en el control remoto como referencia.
  • 64. 2 2 - E S PA Ñ O L T E C N O LO G Í A B LU E T O OT H ® La Tecnología inalámbrica Bluetooth® permite transmitir música desde dispositivos móviles, como teléfonos inteligentes, tabletas y portátiles. Antes de transmitir música desde un dispositivo móvil, debe emparejar el dispositivo móvil con la consola. Selección del método de emparejamiento Puede emparejar su dispositivo móvil con la consola usando la tecnología inalámbrica Bluetooth o Near Field Communication (NFC). ¿Qué es NFC? NFC es una tecnología que permite a los dispositivos establecer una comunicación inalámbrica entre sí simplemente tocando cada dispositivo. Consulte la guía del usuario del dispositivo para ver si su modelo funciona con NFC. Si su dispositivo no admite NFC o si no está seguro: Siga las instrucciones para “Emparejar un dispositivo.” Si el dispositivo es compatible con NFC: Siga las instrucciones para “Emparejar un dispositivo con NFC” en la página 23 Nota: Si su dispositivo es compatible con el emparejamiento Bluetooth a través de NFC, puede usar cualquiera de los dos métodos de emparejamiento. Emparejar un dispositivo 1. Presione el botón en el control remoto y seleccione Bluetooth® del menú en pantalla. 2. Siga las instrucciones en pantalla para colocar la consola en el modo de emparejamiento. 3. En el dispositivo, active la función Bluetooth. Sugerencia: Generalmente, la función Bluetooth se encuentra en el menú Configuración. 4. Seleccione el sistema de la lista de dispositivos. Una vez conectado, el nombre de su sistema aparece conectado en la lista de dispositivos.