SlideShare a Scribd company logo
1 of 18
Download to read offline
   
 
Wrapping	a	
Present	
 
 
Instructor’s	
Guide
Wrapping a Present Instructor’s Guide
 
ii
 
 
Wrapping	a	Present	


Copyright ©2013, Sherri’s Training Samples. All rights reserved. 
Document Number:  IG‐1.0.0‐02.01.2013 


No part of this book may be reproduced, stored in a retrieval system, or transmitted in any form, or by any means, 
electronic, mechanical, photocopying, recording, scanning, or otherwise, except as permitted under Section 107 or 
108 of the 1976 United States Copyright Act, without prior written permission of Sherri’s Training Samples. 
 
Trademarked names may appear in this book. Rather than use a trademark symbol with every occurrence of the 
trademarked name, we use the name only in an editorial fashion and to the benefit of the trademark owner, with 
no intention of infringement of the trademark. 
 
The information in this book is distributed on an “as is” basis, without warranty. Although every precaution has 
been taken in the preparation of this work, neither the authors nor Sherri’s Training Samples shall have any liability 
to any person or entity with respect to any loss or damage caused or alleged to be caused directly or indirectly by 
the information contained in this book. 


  iii 
 
 
Contents	
	
Wrapping a Present ...................................................................................................................... i 
Preparation .................................................................................................................................... 1 
Purpose and Outcomes .......................................................................................................... 1 
Target Audience ....................................................................................................................... 1 
Structure .................................................................................................................................... 1 
About the Instructor .................................................................................................................. 2 
Materials You Will Need .......................................................................................................... 2 
Before the Workshop ............................................................................................................... 3 
During the Workshop ............................................................................................................... 4 
After the Workshop .................................................................................................................. 4 
Lesson 1 ........................................................................................................................................ 5 
Lesson 2 ........................................................................................................................................ 7 
Lesson 3 ........................................................................................................................................ 9 
Lesson 4 ...................................................................................................................................... 13 
 
 
Wrapping a Present Instructor’s Guide
 
iv
 
[This page intentionally left blank.]
 
 
  1 
 
Preparation	
 
Purpose and Outcomes
Wrapping a Present provides participants with the skills to define the materials 
needed to wrap a present and provides step‐by‐step instructions to wrap a 
present. 
Target Audience
The target audience for this course and the characteristics are as follows: 
 Speaks and reads English at an 8th grade level or higher 
 Reads and understands most commercial magazines 
 Has a solid work surface on which to wrap the gift 
Structure
This course is available as an instructor‐led course and e‐learning in order to 
train the novice to wrap a present.   
 The structure of the course requires a maximum of 35 minutes. 
 Hands‐on activities and discussion groups throughout the course 
encourage interactive learning. 
 An Instructor’s Guide supports classroom activities and includes a 
PowerPoint presentation, activity instructions, instructor’s notes, and a 
quick reference job aid. 
The maximum number of participants for the instructor‐led course is ten, with a 
minimum of one. The discussion groups allow opportunities for participants to 
get to know one another and provide ample time for everyone to express his/her 
thoughts and questions. 
The course is organized into the following lessons: 
Wrapping a Present Instructor’s Guide
 
2
Lesson 
Number 
Lesson Title and Description  Estimated Time 
1  Introduction and Course Overview  10 minutes 
2  Defining the Needed Materials  5 minutes 
3  Performing the Wrapping Steps  10 minutes 
4  Wrap‐Up / Q & A 
Course Review & Assessment 
10 minutes 
About the Instructor
The instructor should be experienced in facilitating participants at the eighth 
grade level. The instructor’s role is to create an environment that is conducive to 
interactive learning and to engage participants in accomplishing the task of 
successfully wrapping a present. 
Materials You Will Need
The Instructor will require the following materials: 
 Meeting space to accommodate the number of participants 
 Instructor’s Guide 
 PowerPoint presentation (with the ability to project the PowerPoint 
slides) 
 Copies of the laminated Quick Reference Job Aid (one for each 
participant) 
 Wrapping materials 
 Participant Sign‐in Form 
 Tent cards for each participant’s name 
 Black magic markers (one marker for every two participants) 
 Course evaluation forms 
 
 
  3 
 
Before the Workshop
Before the actual workshop, perform the following: 
 Review the PowerPoint presentation and Instructor’s Guide 
 Test the equipment 
 Familiarize yourself with the Quick Reference Job Aids  
 Ensure each participant has a Quick Reference Job Aid at his work station 
 Ensure each participant has the necessary materials (wrapping paper, 
ribbon, bow, gift box, scissors, and tape) 
 Provide a tent card for each participant with a black magic marker. 
 Prepare the Agenda on a flip chart 
 Cover the agenda with the flip chart pad's cover or a blank flip chart 
page, and leave it covered until you review it during the training 
event, then post it on the wall so it is visible during the entire event. 
 
A 
G 
E 
N 
D 
A 
Lesson 
Number 
Lesson Title and Description 
1  Introduction and Course Overview 
2  Defining the Needed Materials 
3  Performing the Wrapping Steps 
4  Wrap‐Up / Q & A 
Course Review & Assessment 
 Prepare the Ground Rules on a flip chart. 
 Cover the ground rules and leave them covered until you review it 
during the training event. Then post it on the wall so it is visible 
during the entire event. If time permits, solicit the ground rules from 
the participants and write them in class. 
Wrapping a Present Instructor’s Guide
 
4
GROUND RULES 
 Participate 
 Be on time 
 Stay on task 
 Share responsibility for training 
 Listen when others talk 
 Respect the opinions and attitudes of others 
 Turn off cell phones and pagers  
 Use flip chart parking lot 
During the Workshop
During the Workshop, perform the following: 
 Arrive early. Give yourself plenty of time to get organized. 
 Circulate the Attendance Sign‐in Sheet. 
 Start on time and stay on track.   
 Mentor participants during the activities. Walk among groups in class and 
on‐site as they work on their activities, and answer questions and offer 
guidance as appropriate. Ensure participants are on track as they work. 
Give constructive feedback during the presentations and discussions. 
 Review Questions:  Review the content of each lesson throughout the 
course to reinforce the learning outcomes for that lesson and to connect 
to upcoming material.   
 Lesson Outcomes:  At the beginning of each lesson, review that lesson's 
outcomes. Make sure participants are fully aware of the topics to be 
addressed in the lesson. At the end of each lesson, review the outcomes 
once again using review questions or an activity/exercise to ensure the 
outcomes were met. 
After the Workshop
Have participants complete Learning Assessments and Course Evaluations. 
Collect the assessments and evaluations so that you can send them to 
management.  
5
 
Lesson	1	
 
Total Time:      10 Minutes 
Lesson Summary:    Introduction to Wrapping a Present 
 
Introduction	to	Wrapping	a	
Present	
Introduction, Purpose,
Outcomes
(10 minutes) 
Welcome, Introduction, Agenda and Ground 
Rules 
Purpose and Outcomes 
Slide Presentation
Instructor’s Notes 
Purpose and Outcomes:    Wrapping a 
Present provides participants with the skills 
to define the materials needed to wrap a 
Wrapping	a	PresentWrapping	a	Present
Course	Objectives
• The objectives for this course are to be able to:
• Define the materials needed in order to wrap a present.
• Learn how to wrap a present step‐by‐step.
Course	Objectives
• The objectives for this course are to be able to:
• Define the materials needed in order to wrap a present.
• Learn how to wrap a present step‐by‐step.
Wrapping a Present Instructor’s Guide
 
6
present and provides step‐by‐step instructions to wrap a present.  
The course will provide them: 
 An opportunity to interact with, and learn from others. 
 The knowledge of defining the necessary tools needed to wrap a present. 
 The skill of successfully wrapping a present after completing the course.   
The agenda is as follows: 


The ground rules are as follows: 
GROUND RULES 
 Participate 
 Be on time 
 Stay on task 
 Share responsibility for training 
 Listen when others talk 
 Respect the opinions and attitudes of others 
 Turn off cell phones and pagers  
 Use flip chart parking lot 
  	
Lesson	1:		Course	Overview
• To accomplish the objectives, we will cover the material in the 
following lessons with a hands‐on workshop:
• Lesson 2:  Needed Materials
• Lesson 3:  Wrapping Steps
• Lesson 4:  Wrap up
Lesson	1:		Course	Overview
• To accomplish the objectives, we will cover the material in the 
following lessons with a hands‐on workshop:
• Lesson 2:  Needed Materials
• Lesson 3:  Wrapping Steps
• Lesson 4:  Wrap up
 
 
  7 
 
Lesson	2	
 
Total Time:      10 Minutes 
Lesson Summary:    Materials needed to wrap a Present 
 
Materials	Needed	
(5 minutes) 
Materials per Participant
Slide Presentation
Instructor’s Notes
Each participant should have the following 
items on their work surface: 
 Wrapping Paper 
 Ribbon and Bow (optional) 
 Scissors 
 Tape 
 Empty Box 
The simple method of wrapping will be performed. Other techniques of 
wrapping can be located on the internet. These are provided on the slide at the 
end of the presentation. 
   
Lesson	2:		Materials	Needed
• It is assumed you have a table or desk to work on.
• Necessary Materials
• Wrapping paper
• Ribbon and bow (optional)
• Scissors
• Scotch tape
• Present
Lesson	2:		Materials	Needed
• It is assumed you have a table or desk to work on.
• Necessary Materials
• Wrapping paper
• Ribbon and bow (optional)
• Scissors
• Scotch tape
• Present
Wrapping a Present Instructor’s Guide
 
8
 [This page intentionally left blank.] 


  9 
 
Lesson	3	
 
Total Time:      10 Minutes 
Lesson Summary:    Steps to wrap a Present 
 
Performing	the	Wrapping	Steps	
(10 minutes) 
Step-By-Step Instructions
Video Presentation
The slide contains a humorous video.  
Instructor’s Notes
The video will start automatically upon 
displaying the slide.   
At the end of the video, ask the class participants the following questions (show 
of hands): 
 If they have wrapped a present before. 
 Ask how many have received a gift that has been poorly wrapped.   
 Ask how many have given a poorly 
wrapped gift. 
Advance the slide to begin Step 1 and 2. 
 Organize your materials. 
 Roll out the wrapping paper. 
Lesson	3:		Steps
• Step 1
• Organize your 
necessary materials 
neatly on work surface
• Step 2
• Roll out the wrapping 
paper with the wrong 
side facing up.
• Position the box in the 
center of the paper 
with the top of the 
box on the bottom. 
Lesson	3:		Steps
• Step 1
• Organize your 
necessary materials 
neatly on work surface
• Step 2
• Roll out the wrapping 
paper with the wrong 
side facing up.
• Position the box in the 
center of the paper 
with the top of the 
box on the bottom. 
Lesson	3:		Wrapping	StepsLesson	3:		Wrapping	Steps
Wrapping a Present Instructor’s Guide
 
10
Mention the following as tips: 
 Removal of price tags 
 Placing items in a box to make the gift easier to wrap 
 If your box comes apart easily (like a shirt‐box), be sure to use a little 
bit of tape to keep it from opening during the wrapping process. Use 
only as much as necessary to keep it from coming apart, not so much 
that the person will need a machete to open it. 
 
Advance the slide to Step 3. 
Demonstrate how to measure the box 
utilizing the box. 


Advance the slide to Step 4. 
Demonstrate how to fold the paper and use 
it as a line to cut the paper. 


Advance the slide to Step 5. 
Point out the importance of positioning the 
box in the middle of the paper. 
 
 
Lesson	3:		Steps
• Step 3
• Place the gift  in the 
center of the wrapping 
paper
• Measure how much 
paper is needed. Make 
sure you have enough 
paper to go around 
the box once and the 
width leaves extra on 
each side so the 
wrapping paper 
overlaps.
Lesson	3:		Steps
• Step 3
• Place the gift  in the 
center of the wrapping 
paper
• Measure how much 
paper is needed. Make 
sure you have enough 
paper to go around 
the box once and the 
width leaves extra on 
each side so the 
wrapping paper 
overlaps.
Lesson	3:		Steps
• Step 4
• Mark your cut lines. If 
cutting in straight lines 
is difficult for you, you 
can fold a line in the 
paper that you will use 
to cut along, unfold, 
and cut along the fold. 
• Put the rest of the roll 
aside.
Lesson	3:		Steps
• Step 4
• Mark your cut lines. If 
cutting in straight lines 
is difficult for you, you 
can fold a line in the 
paper that you will use 
to cut along, unfold, 
and cut along the fold. 
• Put the rest of the roll 
aside.
Lesson	3:		Steps
• Step 5
• Place the gift box 
upside down in the 
middle of your paper. 
This will make sure 
that the recipient of 
the gift, when opening 
it, will land on the top 
of the box instead of 
the bottom.
Lesson	3:		Steps
• Step 5
• Place the gift box 
upside down in the 
middle of your paper. 
This will make sure 
that the recipient of 
the gift, when opening 
it, will land on the top 
of the box instead of 
the bottom.
 
 
  11 
 
   
Advance the slide to Step 6.  
Demonstrate pulling the long ends of the 
paper together. 
Fold the edge to make a crease 
Affix the tape. If paper is slippery, suggest 
affixing tape directly to the box as well as on 
the paper. 
Advance the slide to Step 7. 
Demonstrate the folding of the ends in 
toward the box and how creasing the paper 
may help make a neater edge. 
Repeat this process to the other end. 
 
 
Advance the slide to Step 8. 
Demonstrate how to put the ribbon on the 
box.  


Advance the slide to the next slide. 
Roll the mouse on top of the slide’s title to play 
an audio clip (people clapping). 
 
Lesson	3:		Steps
• Step 6
• Fold the paper around the 
gift. On the horizontal side 
of the paper, take one side 
and fold it over to the 
bottom of your gift. Then 
take the other side, folding 
it over, too. 
• Take the longer side and 
fold it under so that you 
have a nice smooth crease 
instead of jagged cutting.
• Put it on top of the other 
end and pull it tight. Then 
tape together.
Lesson	3:		Steps
• Step 7
• Fold one side of the box at 
a time. 
• On one end of your 
package, fold the corners 
in so you have kind of like a 
triangle. 
• If you want to, add a crease 
to the triangle flap by 
folding the straight side 
over on itself.
• Fold the straight end over, 
then pull it to the top of 
your package. Tape. 
• Repeat on the other side.
Lesson	3:		Steps
• Step 8
• Add ribbon. Make sure 
your ribbon is long 
enough and can go 
around the gift in 
whatever pattern you 
decide. 
• For the "classic" look of 
a cross on top and 
bottom, the amount of 
ribbon you will need will 
be twice the length, plus 
twice the width, plus 
twice the height, plus 
enough to tie it and 
make the bow.
Lesson	3:		Steps
You have successfully 
completed your task.
Lesson	3:		Steps
You have successfully 
completed your task.
Wrapping a Present Instructor’s Guide
 
12
 
 
Advance the slide to the next slide. 
Point out the sites used to create the 
presentation as well as additional internet 
information regarding wrapping a present. 


Additional	Information
• Video and audio clips were extracted from YouTube and 
Microsoft Sites.
• Internet Sites for wrapping steps
• http://www.realsimple.com/holidays‐
entertaining/gifts/wrapping/holiday‐wrapping‐paper‐
00100000070425/index.html
• http://www.realsimple.com/holidays‐
entertaining/gifts/wrapping/easy‐holiday‐gift‐wrapping‐ideas‐
00000000024959/index.html
• http://www.realsimple.com/holidays‐
entertaining/gifts/wrapping/creative‐gift‐wrapping‐ideas‐
00000000014208/index.html
 
 
  13 
 
Lesson	4	
 
Total Time:      10 Minutes 
Lesson Summary:    Wrap‐up Session 
 
Wrapping	it	Up	
(10 minutes) 
Question/Answer Session
Suggestions
Course Review/Assessment Forms
 
Instructor’s Notes
Ask if there are any questions. 
Ask if there are any suggestions for improvements. 
Distribute Course Review/Assessment Forms and 
indicate where they can drop them off. 
 
 
Lesson	4:	Wrap‐Up
• Questions
• Suggestions
• Course Review/Assessment
Thank you for attending!
Lesson	4:	Wrap‐Up
• Questions
• Suggestions
• Course Review/Assessment
Thank you for attending!
Wrapping a Present Instructor’s Guide
 
14
[This page intentionally left blank.] 

More Related Content

What's hot

Setting Godly Goals
Setting Godly GoalsSetting Godly Goals
Setting Godly Goalscarlocecilio
 
Basic sewing diagrams
Basic sewing diagramsBasic sewing diagrams
Basic sewing diagramsSue Stinson
 
Evaluating and controlling hazards and risks
Evaluating and controlling hazards and risksEvaluating and controlling hazards and risks
Evaluating and controlling hazards and risksBernadeth Ouano
 
COOKERY- CG GRADE 7-10.pdf
COOKERY- CG GRADE 7-10.pdfCOOKERY- CG GRADE 7-10.pdf
COOKERY- CG GRADE 7-10.pdfJohn Febb Vidal
 
Principles and Elements of Design, Color Schemes and Methods in Transferring ...
Principles and Elements of Design, Color Schemes and Methods in Transferring ...Principles and Elements of Design, Color Schemes and Methods in Transferring ...
Principles and Elements of Design, Color Schemes and Methods in Transferring ...LOS BANOS NATIONAL HS-BATONG MALAKE
 
HANDICRAFTS 7-8 1. EMBROIDERY TOOLS AND MATERIALS [Autosaved].pptx
HANDICRAFTS 7-8 1. EMBROIDERY TOOLS AND MATERIALS [Autosaved].pptxHANDICRAFTS 7-8 1. EMBROIDERY TOOLS AND MATERIALS [Autosaved].pptx
HANDICRAFTS 7-8 1. EMBROIDERY TOOLS AND MATERIALS [Autosaved].pptxZoilaEscalona2
 
Kinds of packaging materials
Kinds of packaging materialsKinds of packaging materials
Kinds of packaging materialsKenzie Ancheta
 
Handicraft production lm
Handicraft production lmHandicraft production lm
Handicraft production lmDjam Gallardo
 
Sewing Tools 3rd Quarter.pptx
Sewing Tools 3rd Quarter.pptxSewing Tools 3rd Quarter.pptx
Sewing Tools 3rd Quarter.pptxJESSICACAMET1
 
8. fruit of the spirit meekness
8. fruit of the spirit meekness8. fruit of the spirit meekness
8. fruit of the spirit meeknessCarlos Oliveira
 
K to 12 TLE Curriculum Guide for Commercial Cooking
K to 12 TLE Curriculum Guide for Commercial CookingK to 12 TLE Curriculum Guide for Commercial Cooking
K to 12 TLE Curriculum Guide for Commercial CookingDr. Joy Kenneth Sala Biasong
 
K to 12 commercial cooking techer's guide
K to 12 commercial cooking techer's guideK to 12 commercial cooking techer's guide
K to 12 commercial cooking techer's guideNoel Tan
 

What's hot (20)

GIFT WRAPPING.pptx
GIFT WRAPPING.pptxGIFT WRAPPING.pptx
GIFT WRAPPING.pptx
 
K to 12 dressmaking and tailoring teacher's guide
K to 12 dressmaking and tailoring teacher's guideK to 12 dressmaking and tailoring teacher's guide
K to 12 dressmaking and tailoring teacher's guide
 
Setting Godly Goals
Setting Godly GoalsSetting Godly Goals
Setting Godly Goals
 
Gift wrapping
Gift wrappingGift wrapping
Gift wrapping
 
Basic sewing diagrams
Basic sewing diagramsBasic sewing diagrams
Basic sewing diagrams
 
HANDICRAFT.pptx
HANDICRAFT.pptxHANDICRAFT.pptx
HANDICRAFT.pptx
 
Evaluating and controlling hazards and risks
Evaluating and controlling hazards and risksEvaluating and controlling hazards and risks
Evaluating and controlling hazards and risks
 
COOKERY- CG GRADE 7-10.pdf
COOKERY- CG GRADE 7-10.pdfCOOKERY- CG GRADE 7-10.pdf
COOKERY- CG GRADE 7-10.pdf
 
Principles and Elements of Design, Color Schemes and Methods in Transferring ...
Principles and Elements of Design, Color Schemes and Methods in Transferring ...Principles and Elements of Design, Color Schemes and Methods in Transferring ...
Principles and Elements of Design, Color Schemes and Methods in Transferring ...
 
HANDICRAFTS 7-8 1. EMBROIDERY TOOLS AND MATERIALS [Autosaved].pptx
HANDICRAFTS 7-8 1. EMBROIDERY TOOLS AND MATERIALS [Autosaved].pptxHANDICRAFTS 7-8 1. EMBROIDERY TOOLS AND MATERIALS [Autosaved].pptx
HANDICRAFTS 7-8 1. EMBROIDERY TOOLS AND MATERIALS [Autosaved].pptx
 
TLE/HE Handicraft Curriculum Guide
TLE/HE  Handicraft Curriculum GuideTLE/HE  Handicraft Curriculum Guide
TLE/HE Handicraft Curriculum Guide
 
Kinds of packaging materials
Kinds of packaging materialsKinds of packaging materials
Kinds of packaging materials
 
Handicraft production lm
Handicraft production lmHandicraft production lm
Handicraft production lm
 
Sewing Tools 3rd Quarter.pptx
Sewing Tools 3rd Quarter.pptxSewing Tools 3rd Quarter.pptx
Sewing Tools 3rd Quarter.pptx
 
Cookery 3
Cookery 3Cookery 3
Cookery 3
 
8. fruit of the spirit meekness
8. fruit of the spirit meekness8. fruit of the spirit meekness
8. fruit of the spirit meekness
 
Basic stitches
Basic stitchesBasic stitches
Basic stitches
 
K to 12 TLE Curriculum Guide for Commercial Cooking
K to 12 TLE Curriculum Guide for Commercial CookingK to 12 TLE Curriculum Guide for Commercial Cooking
K to 12 TLE Curriculum Guide for Commercial Cooking
 
K to 12 commercial cooking techer's guide
K to 12 commercial cooking techer's guideK to 12 commercial cooking techer's guide
K to 12 commercial cooking techer's guide
 
TRANSFERRING DESIGNS.pptx
TRANSFERRING DESIGNS.pptxTRANSFERRING DESIGNS.pptx
TRANSFERRING DESIGNS.pptx
 

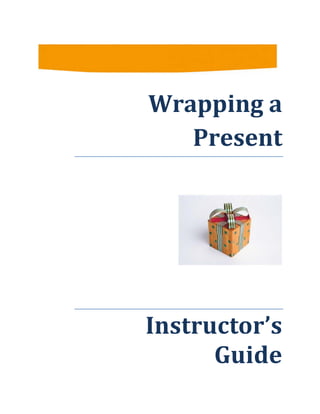
Instructor's Guide - Wrapping a Present

  • 2. Wrapping a Present Instructor’s Guide   ii     Wrapping a Present             Copyright ©2013, Sherri’s Training Samples. All rights reserved.  Document Number:  IG‐1.0.0‐02.01.2013        No part of this book may be reproduced, stored in a retrieval system, or transmitted in any form, or by any means,  electronic, mechanical, photocopying, recording, scanning, or otherwise, except as permitted under Section 107 or  108 of the 1976 United States Copyright Act, without prior written permission of Sherri’s Training Samples.    Trademarked names may appear in this book. Rather than use a trademark symbol with every occurrence of the  trademarked name, we use the name only in an editorial fashion and to the benefit of the trademark owner, with  no intention of infringement of the trademark.    The information in this book is distributed on an “as is” basis, without warranty. Although every precaution has  been taken in the preparation of this work, neither the authors nor Sherri’s Training Samples shall have any liability  to any person or entity with respect to any loss or damage caused or alleged to be caused directly or indirectly by  the information contained in this book.       
  • 3.       iii      Contents Wrapping a Present ...................................................................................................................... i  Preparation .................................................................................................................................... 1  Purpose and Outcomes .......................................................................................................... 1  Target Audience ....................................................................................................................... 1  Structure .................................................................................................................................... 1  About the Instructor .................................................................................................................. 2  Materials You Will Need .......................................................................................................... 2  Before the Workshop ............................................................................................................... 3  During the Workshop ............................................................................................................... 4  After the Workshop .................................................................................................................. 4  Lesson 1 ........................................................................................................................................ 5  Lesson 2 ........................................................................................................................................ 7  Lesson 3 ........................................................................................................................................ 9  Lesson 4 ...................................................................................................................................... 13     
  • 4. Wrapping a Present Instructor’s Guide   iv   [This page intentionally left blank.]
  • 5.       1    Preparation   Purpose and Outcomes Wrapping a Present provides participants with the skills to define the materials  needed to wrap a present and provides step‐by‐step instructions to wrap a  present.  Target Audience The target audience for this course and the characteristics are as follows:   Speaks and reads English at an 8th grade level or higher   Reads and understands most commercial magazines   Has a solid work surface on which to wrap the gift  Structure This course is available as an instructor‐led course and e‐learning in order to  train the novice to wrap a present.     The structure of the course requires a maximum of 35 minutes.   Hands‐on activities and discussion groups throughout the course  encourage interactive learning.   An Instructor’s Guide supports classroom activities and includes a  PowerPoint presentation, activity instructions, instructor’s notes, and a  quick reference job aid.  The maximum number of participants for the instructor‐led course is ten, with a  minimum of one. The discussion groups allow opportunities for participants to  get to know one another and provide ample time for everyone to express his/her  thoughts and questions.  The course is organized into the following lessons: 
  • 6. Wrapping a Present Instructor’s Guide   2 Lesson  Number  Lesson Title and Description  Estimated Time  1  Introduction and Course Overview  10 minutes  2  Defining the Needed Materials  5 minutes  3  Performing the Wrapping Steps  10 minutes  4  Wrap‐Up / Q & A  Course Review & Assessment  10 minutes  About the Instructor The instructor should be experienced in facilitating participants at the eighth  grade level. The instructor’s role is to create an environment that is conducive to  interactive learning and to engage participants in accomplishing the task of  successfully wrapping a present.  Materials You Will Need The Instructor will require the following materials:   Meeting space to accommodate the number of participants   Instructor’s Guide   PowerPoint presentation (with the ability to project the PowerPoint  slides)   Copies of the laminated Quick Reference Job Aid (one for each  participant)   Wrapping materials   Participant Sign‐in Form   Tent cards for each participant’s name   Black magic markers (one marker for every two participants)   Course evaluation forms 
  • 7.       3    Before the Workshop Before the actual workshop, perform the following:   Review the PowerPoint presentation and Instructor’s Guide   Test the equipment   Familiarize yourself with the Quick Reference Job Aids    Ensure each participant has a Quick Reference Job Aid at his work station   Ensure each participant has the necessary materials (wrapping paper,  ribbon, bow, gift box, scissors, and tape)   Provide a tent card for each participant with a black magic marker.   Prepare the Agenda on a flip chart   Cover the agenda with the flip chart pad's cover or a blank flip chart  page, and leave it covered until you review it during the training  event, then post it on the wall so it is visible during the entire event.    A  G  E  N  D  A  Lesson  Number  Lesson Title and Description  1  Introduction and Course Overview  2  Defining the Needed Materials  3  Performing the Wrapping Steps  4  Wrap‐Up / Q & A  Course Review & Assessment   Prepare the Ground Rules on a flip chart.   Cover the ground rules and leave them covered until you review it  during the training event. Then post it on the wall so it is visible  during the entire event. If time permits, solicit the ground rules from  the participants and write them in class. 
  • 8. Wrapping a Present Instructor’s Guide   4 GROUND RULES   Participate   Be on time   Stay on task   Share responsibility for training   Listen when others talk   Respect the opinions and attitudes of others   Turn off cell phones and pagers    Use flip chart parking lot  During the Workshop During the Workshop, perform the following:   Arrive early. Give yourself plenty of time to get organized.   Circulate the Attendance Sign‐in Sheet.   Start on time and stay on track.     Mentor participants during the activities. Walk among groups in class and  on‐site as they work on their activities, and answer questions and offer  guidance as appropriate. Ensure participants are on track as they work.  Give constructive feedback during the presentations and discussions.   Review Questions:  Review the content of each lesson throughout the  course to reinforce the learning outcomes for that lesson and to connect  to upcoming material.     Lesson Outcomes:  At the beginning of each lesson, review that lesson's  outcomes. Make sure participants are fully aware of the topics to be  addressed in the lesson. At the end of each lesson, review the outcomes  once again using review questions or an activity/exercise to ensure the  outcomes were met.  After the Workshop Have participants complete Learning Assessments and Course Evaluations.  Collect the assessments and evaluations so that you can send them to  management.  
  • 9. 5   Lesson 1   Total Time:      10 Minutes  Lesson Summary:    Introduction to Wrapping a Present    Introduction to Wrapping a Present Introduction, Purpose, Outcomes (10 minutes)  Welcome, Introduction, Agenda and Ground  Rules  Purpose and Outcomes  Slide Presentation Instructor’s Notes  Purpose and Outcomes:    Wrapping a  Present provides participants with the skills  to define the materials needed to wrap a  Wrapping a PresentWrapping a Present Course Objectives • The objectives for this course are to be able to: • Define the materials needed in order to wrap a present. • Learn how to wrap a present step‐by‐step. Course Objectives • The objectives for this course are to be able to: • Define the materials needed in order to wrap a present. • Learn how to wrap a present step‐by‐step.
  • 10. Wrapping a Present Instructor’s Guide   6 present and provides step‐by‐step instructions to wrap a present.   The course will provide them:   An opportunity to interact with, and learn from others.   The knowledge of defining the necessary tools needed to wrap a present.   The skill of successfully wrapping a present after completing the course.    The agenda is as follows:          The ground rules are as follows:  GROUND RULES   Participate   Be on time   Stay on task   Share responsibility for training   Listen when others talk   Respect the opinions and attitudes of others   Turn off cell phones and pagers    Use flip chart parking lot    Lesson 1: Course Overview • To accomplish the objectives, we will cover the material in the  following lessons with a hands‐on workshop: • Lesson 2:  Needed Materials • Lesson 3:  Wrapping Steps • Lesson 4:  Wrap up Lesson 1: Course Overview • To accomplish the objectives, we will cover the material in the  following lessons with a hands‐on workshop: • Lesson 2:  Needed Materials • Lesson 3:  Wrapping Steps • Lesson 4:  Wrap up
  • 11.       7    Lesson 2   Total Time:      10 Minutes  Lesson Summary:    Materials needed to wrap a Present    Materials Needed (5 minutes)  Materials per Participant Slide Presentation Instructor’s Notes Each participant should have the following  items on their work surface:   Wrapping Paper   Ribbon and Bow (optional)   Scissors   Tape   Empty Box  The simple method of wrapping will be performed. Other techniques of  wrapping can be located on the internet. These are provided on the slide at the  end of the presentation.      Lesson 2: Materials Needed • It is assumed you have a table or desk to work on. • Necessary Materials • Wrapping paper • Ribbon and bow (optional) • Scissors • Scotch tape • Present Lesson 2: Materials Needed • It is assumed you have a table or desk to work on. • Necessary Materials • Wrapping paper • Ribbon and bow (optional) • Scissors • Scotch tape • Present
  • 12. Wrapping a Present Instructor’s Guide   8  [This page intentionally left blank.]       
  • 13.       9    Lesson 3   Total Time:      10 Minutes  Lesson Summary:    Steps to wrap a Present    Performing the Wrapping Steps (10 minutes)  Step-By-Step Instructions Video Presentation The slide contains a humorous video.   Instructor’s Notes The video will start automatically upon  displaying the slide.    At the end of the video, ask the class participants the following questions (show  of hands):   If they have wrapped a present before.   Ask how many have received a gift that has been poorly wrapped.     Ask how many have given a poorly  wrapped gift.  Advance the slide to begin Step 1 and 2.   Organize your materials.   Roll out the wrapping paper.  Lesson 3: Steps • Step 1 • Organize your  necessary materials  neatly on work surface • Step 2 • Roll out the wrapping  paper with the wrong  side facing up. • Position the box in the  center of the paper  with the top of the  box on the bottom.  Lesson 3: Steps • Step 1 • Organize your  necessary materials  neatly on work surface • Step 2 • Roll out the wrapping  paper with the wrong  side facing up. • Position the box in the  center of the paper  with the top of the  box on the bottom.  Lesson 3: Wrapping StepsLesson 3: Wrapping Steps
  • 14. Wrapping a Present Instructor’s Guide   10 Mention the following as tips:   Removal of price tags   Placing items in a box to make the gift easier to wrap   If your box comes apart easily (like a shirt‐box), be sure to use a little  bit of tape to keep it from opening during the wrapping process. Use  only as much as necessary to keep it from coming apart, not so much  that the person will need a machete to open it.    Advance the slide to Step 3.  Demonstrate how to measure the box  utilizing the box.        Advance the slide to Step 4.  Demonstrate how to fold the paper and use  it as a line to cut the paper.        Advance the slide to Step 5.  Point out the importance of positioning the  box in the middle of the paper.      Lesson 3: Steps • Step 3 • Place the gift  in the  center of the wrapping  paper • Measure how much  paper is needed. Make  sure you have enough  paper to go around  the box once and the  width leaves extra on  each side so the  wrapping paper  overlaps. Lesson 3: Steps • Step 3 • Place the gift  in the  center of the wrapping  paper • Measure how much  paper is needed. Make  sure you have enough  paper to go around  the box once and the  width leaves extra on  each side so the  wrapping paper  overlaps. Lesson 3: Steps • Step 4 • Mark your cut lines. If  cutting in straight lines  is difficult for you, you  can fold a line in the  paper that you will use  to cut along, unfold,  and cut along the fold.  • Put the rest of the roll  aside. Lesson 3: Steps • Step 4 • Mark your cut lines. If  cutting in straight lines  is difficult for you, you  can fold a line in the  paper that you will use  to cut along, unfold,  and cut along the fold.  • Put the rest of the roll  aside. Lesson 3: Steps • Step 5 • Place the gift box  upside down in the  middle of your paper.  This will make sure  that the recipient of  the gift, when opening  it, will land on the top  of the box instead of  the bottom. Lesson 3: Steps • Step 5 • Place the gift box  upside down in the  middle of your paper.  This will make sure  that the recipient of  the gift, when opening  it, will land on the top  of the box instead of  the bottom.
  • 15.       11        Advance the slide to Step 6.   Demonstrate pulling the long ends of the  paper together.  Fold the edge to make a crease  Affix the tape. If paper is slippery, suggest  affixing tape directly to the box as well as on  the paper.  Advance the slide to Step 7.  Demonstrate the folding of the ends in  toward the box and how creasing the paper  may help make a neater edge.  Repeat this process to the other end.      Advance the slide to Step 8.  Demonstrate how to put the ribbon on the  box.         Advance the slide to the next slide.  Roll the mouse on top of the slide’s title to play  an audio clip (people clapping).    Lesson 3: Steps • Step 6 • Fold the paper around the  gift. On the horizontal side  of the paper, take one side  and fold it over to the  bottom of your gift. Then  take the other side, folding  it over, too.  • Take the longer side and  fold it under so that you  have a nice smooth crease  instead of jagged cutting. • Put it on top of the other  end and pull it tight. Then  tape together. Lesson 3: Steps • Step 6 • Fold the paper around the  gift. On the horizontal side  of the paper, take one side  and fold it over to the  bottom of your gift. Then  take the other side, folding  it over, too.  • Take the longer side and  fold it under so that you  have a nice smooth crease  instead of jagged cutting. • Put it on top of the other  end and pull it tight. Then  tape together. Lesson 3: Steps • Step 7 • Fold one side of the box at  a time.  • On one end of your  package, fold the corners  in so you have kind of like a  triangle.  • If you want to, add a crease  to the triangle flap by  folding the straight side  over on itself. • Fold the straight end over,  then pull it to the top of  your package. Tape.  • Repeat on the other side. Lesson 3: Steps • Step 7 • Fold one side of the box at  a time.  • On one end of your  package, fold the corners  in so you have kind of like a  triangle.  • If you want to, add a crease  to the triangle flap by  folding the straight side  over on itself. • Fold the straight end over,  then pull it to the top of  your package. Tape.  • Repeat on the other side. Lesson 3: Steps • Step 8 • Add ribbon. Make sure  your ribbon is long  enough and can go  around the gift in  whatever pattern you  decide.  • For the "classic" look of  a cross on top and  bottom, the amount of  ribbon you will need will  be twice the length, plus  twice the width, plus  twice the height, plus  enough to tie it and  make the bow. Lesson 3: Steps • Step 8 • Add ribbon. Make sure  your ribbon is long  enough and can go  around the gift in  whatever pattern you  decide.  • For the "classic" look of  a cross on top and  bottom, the amount of  ribbon you will need will  be twice the length, plus  twice the width, plus  twice the height, plus  enough to tie it and  make the bow. Lesson 3: Steps You have successfully  completed your task. Lesson 3: Steps You have successfully  completed your task.
  • 16. Wrapping a Present Instructor’s Guide   12     Advance the slide to the next slide.  Point out the sites used to create the  presentation as well as additional internet  information regarding wrapping a present.          Additional Information • Video and audio clips were extracted from YouTube and  Microsoft Sites. • Internet Sites for wrapping steps • http://www.realsimple.com/holidays‐ entertaining/gifts/wrapping/holiday‐wrapping‐paper‐ 00100000070425/index.html • http://www.realsimple.com/holidays‐ entertaining/gifts/wrapping/easy‐holiday‐gift‐wrapping‐ideas‐ 00000000024959/index.html • http://www.realsimple.com/holidays‐ entertaining/gifts/wrapping/creative‐gift‐wrapping‐ideas‐ 00000000014208/index.html Additional Information • Video and audio clips were extracted from YouTube and  Microsoft Sites. • Internet Sites for wrapping steps • http://www.realsimple.com/holidays‐ entertaining/gifts/wrapping/holiday‐wrapping‐paper‐ 00100000070425/index.html • http://www.realsimple.com/holidays‐ entertaining/gifts/wrapping/easy‐holiday‐gift‐wrapping‐ideas‐ 00000000024959/index.html • http://www.realsimple.com/holidays‐ entertaining/gifts/wrapping/creative‐gift‐wrapping‐ideas‐ 00000000014208/index.html
  • 17.       13    Lesson 4   Total Time:      10 Minutes  Lesson Summary:    Wrap‐up Session    Wrapping it Up (10 minutes)  Question/Answer Session Suggestions Course Review/Assessment Forms   Instructor’s Notes Ask if there are any questions.  Ask if there are any suggestions for improvements.  Distribute Course Review/Assessment Forms and  indicate where they can drop them off.      Lesson 4: Wrap‐Up • Questions • Suggestions • Course Review/Assessment Thank you for attending! Lesson 4: Wrap‐Up • Questions • Suggestions • Course Review/Assessment Thank you for attending!
  • 18. Wrapping a Present Instructor’s Guide   14 [This page intentionally left blank.]