SlideShare a Scribd company logo
1 of 26
Download to read offline
Creating an Uber Clone - Part XXIII
Finally after all the buildup lets draw the path on the map form
private void enterNavigationMode(final Container pinLayer, Container navigationToolbar,
final Container layer, List<Coord> path, String from, String to, int duration) {
pinLayer.removeAll();
navigationToolbar.setY(-navigationToolbar.getHeight());
layer.getComponentAt(1).setY(getDisplayHeight());
navigationToolbar.getParent().animateUnlayout(200, 120, () -> {
if(inNavigationMode) {
return;
}
inNavigationMode = true;
callSerially(() -> {
layer.removeAll();
Coord[] pathCoords = new Coord[path.size()];
path.toArray(pathCoords);
MapContainer.MapObject pathObject = mc.addPath(pathCoords);
BoundingBox bb = BoundingBox.create(pathCoords).
extend(new BoundingBox(pathCoords[0], 0.01, 0.01)).
extend(new BoundingBox(pathCoords[pathCoords.length - 1],0.01,0.01));
mc.fitBounds(bb);
Component fromComponent = createNavigationTag(
trimmedString(from), duration / 60);
Component toComponent = createNavigationTag(trimmedString(to), -1);
MapLayout.setHorizontalAlignment(fromComponent,
enterNavigationMode
We've had quite a bit of code and it brought us to the point where the navigation UI should function as expected. This is implemented in the enterNavigationMode
method which I mentioned before. As you might recall it's invoked when clicking an entry in the search results.

This method is invoked from a callback on navigation, we have the coordinates of the path to display on the map as the arguments to the method. As you may recall
these coordinate are returned by the directions method
private void enterNavigationMode(final Container pinLayer, Container navigationToolbar,
final Container layer, List<Coord> path, String from, String to, int duration) {
pinLayer.removeAll();
navigationToolbar.setY(-navigationToolbar.getHeight());
layer.getComponentAt(1).setY(getDisplayHeight());
navigationToolbar.getParent().animateUnlayout(200, 120, () -> {
if(inNavigationMode) {
return;
}
inNavigationMode = true;
callSerially(() -> {
layer.removeAll();
Coord[] pathCoords = new Coord[path.size()];
path.toArray(pathCoords);
MapContainer.MapObject pathObject = mc.addPath(pathCoords);
BoundingBox bb = BoundingBox.create(pathCoords).
extend(new BoundingBox(pathCoords[0], 0.01, 0.01)).
extend(new BoundingBox(pathCoords[pathCoords.length - 1],0.01,0.01));
mc.fitBounds(bb);
Component fromComponent = createNavigationTag(
trimmedString(from), duration / 60);
Component toComponent = createNavigationTag(trimmedString(to), -1);
MapLayout.setHorizontalAlignment(fromComponent,
enterNavigationMode
The first thing we do is remove the existing search UI from the form and animate it out
private void enterNavigationMode(final Container pinLayer, Container navigationToolbar,
final Container layer, List<Coord> path, String from, String to, int duration) {
pinLayer.removeAll();
navigationToolbar.setY(-navigationToolbar.getHeight());
layer.getComponentAt(1).setY(getDisplayHeight());
navigationToolbar.getParent().animateUnlayout(200, 120, () -> {
if(inNavigationMode) {
return;
}
inNavigationMode = true;
callSerially(() -> {
layer.removeAll();
Coord[] pathCoords = new Coord[path.size()];
path.toArray(pathCoords);
MapContainer.MapObject pathObject = mc.addPath(pathCoords);
BoundingBox bb = BoundingBox.create(pathCoords).
extend(new BoundingBox(pathCoords[0], 0.01, 0.01)).
extend(new BoundingBox(pathCoords[pathCoords.length - 1],0.01,0.01));
mc.fitBounds(bb);
Component fromComponent = createNavigationTag(
trimmedString(from), duration / 60);
Component toComponent = createNavigationTag(trimmedString(to), -1);
MapLayout.setHorizontalAlignment(fromComponent,
enterNavigationMode
Due to the way events are chained this method can be invoked more than once in some unique cases. This works around that behavior
private void enterNavigationMode(final Container pinLayer, Container navigationToolbar,
final Container layer, List<Coord> path, String from, String to, int duration) {
pinLayer.removeAll();
navigationToolbar.setY(-navigationToolbar.getHeight());
layer.getComponentAt(1).setY(getDisplayHeight());
navigationToolbar.getParent().animateUnlayout(200, 120, () -> {
if(inNavigationMode) {
return;
}
inNavigationMode = true;
callSerially(() -> {
layer.removeAll();
Coord[] pathCoords = new Coord[path.size()];
path.toArray(pathCoords);
MapContainer.MapObject pathObject = mc.addPath(pathCoords);
BoundingBox bb = BoundingBox.create(pathCoords).
extend(new BoundingBox(pathCoords[0], 0.01, 0.01)).
extend(new BoundingBox(pathCoords[pathCoords.length - 1],0.01,0.01));
mc.fitBounds(bb);
Component fromComponent = createNavigationTag(
trimmedString(from), duration / 60);
Component toComponent = createNavigationTag(trimmedString(to), -1);
MapLayout.setHorizontalAlignment(fromComponent,
enterNavigationMode
We convert the path to an array and add it to the map, this uses native path plotting for these coordinates. I could have used a painter or something similar and might still
use it later on
private void enterNavigationMode(final Container pinLayer, Container navigationToolbar,
final Container layer, List<Coord> path, String from, String to, int duration) {
pinLayer.removeAll();
navigationToolbar.setY(-navigationToolbar.getHeight());
layer.getComponentAt(1).setY(getDisplayHeight());
navigationToolbar.getParent().animateUnlayout(200, 120, () -> {
if(inNavigationMode) {
return;
}
inNavigationMode = true;
callSerially(() -> {
layer.removeAll();
Coord[] pathCoords = new Coord[path.size()];
path.toArray(pathCoords);
MapContainer.MapObject pathObject = mc.addPath(pathCoords);
BoundingBox bb = BoundingBox.create(pathCoords).
extend(new BoundingBox(pathCoords[0], 0.01, 0.01)).
extend(new BoundingBox(pathCoords[pathCoords.length - 1],0.01,0.01));
mc.fitBounds(bb);
Component fromComponent = createNavigationTag(
trimmedString(from), duration / 60);
Component toComponent = createNavigationTag(trimmedString(to), -1);
MapLayout.setHorizontalAlignment(fromComponent,
enterNavigationMode
I move the camera to show the entire path within the Form
Component fromComponent = createNavigationTag(
trimmedString(from), duration / 60);
Component toComponent = createNavigationTag(trimmedString(to), -1);
MapLayout.setHorizontalAlignment(fromComponent, MapLayout.HALIGN.RIGHT);
mapLayer.add(pathCoords[0], fromComponent);
mapLayer.add(pathCoords[pathCoords.length - 1], toComponent);
whereTo.setVisible(false);
getToolbar().setVisible(false);
Button back = new Button("", "TitleCommand");
FontImage.setMaterialIcon(back, FontImage.MATERIAL_ARROW_BACK);
layer.add(NORTH, back);
back.addActionListener(e ->
exitNavigationMode(layer, fromComponent, toComponent, pathObject));
Label ride = new Label("Ride", "RideTitle");
Label taxi = new Label("Taxi", Resources.getGlobalResources().
getImage("ride.png"), "RideTitle");
taxi.setTextPosition(BOTTOM);
Label separator = new Label("", "MarginSeparator");
separator.setShowEvenIfBlank(true);
Button blackButton = new Button("Confirm", "BlackButton");
Container cnt = BoxLayout.encloseY(ride, taxi, separator, blackButton);
cnt.setUIID("Form");
layer.add(SOUTH, cnt);
enterNavigationMode
I create the two tags and add them to the UI. Notice that the from tag has a right alignment. Also notice I used the trimmedString method to limit the string length. I'll
cover that method soon
Component fromComponent = createNavigationTag(
trimmedString(from), duration / 60);
Component toComponent = createNavigationTag(trimmedString(to), -1);
MapLayout.setHorizontalAlignment(fromComponent, MapLayout.HALIGN.RIGHT);
mapLayer.add(pathCoords[0], fromComponent);
mapLayer.add(pathCoords[pathCoords.length - 1], toComponent);
whereTo.setVisible(false);
getToolbar().setVisible(false);
Button back = new Button("", "TitleCommand");
FontImage.setMaterialIcon(back, FontImage.MATERIAL_ARROW_BACK);
layer.add(NORTH, back);
back.addActionListener(e ->
exitNavigationMode(layer, fromComponent, toComponent, pathObject));
Label ride = new Label("Ride", "RideTitle");
Label taxi = new Label("Taxi", Resources.getGlobalResources().
getImage("ride.png"), "RideTitle");
taxi.setTextPosition(BOTTOM);
Label separator = new Label("", "MarginSeparator");
separator.setShowEvenIfBlank(true);
Button blackButton = new Button("Confirm", "BlackButton");
Container cnt = BoxLayout.encloseY(ride, taxi, separator, blackButton);
cnt.setUIID("Form");
layer.add(SOUTH, cnt);
enterNavigationMode
The back behavior is just a Button styled to look like a command it invokes the exitNavigationMode method which we will get to shortly
Component fromComponent = createNavigationTag(
trimmedString(from), duration / 60);
Component toComponent = createNavigationTag(trimmedString(to), -1);
MapLayout.setHorizontalAlignment(fromComponent, MapLayout.HALIGN.RIGHT);
mapLayer.add(pathCoords[0], fromComponent);
mapLayer.add(pathCoords[pathCoords.length - 1], toComponent);
whereTo.setVisible(false);
getToolbar().setVisible(false);
Button back = new Button("", "TitleCommand");
FontImage.setMaterialIcon(back, FontImage.MATERIAL_ARROW_BACK);
layer.add(NORTH, back);
back.addActionListener(e ->
exitNavigationMode(layer, fromComponent, toComponent, pathObject));
Label ride = new Label("Ride", "RideTitle");
Label taxi = new Label("Taxi", Resources.getGlobalResources().
getImage("ride.png"), "RideTitle");
taxi.setTextPosition(BOTTOM);
Label separator = new Label("", "MarginSeparator");
separator.setShowEvenIfBlank(true);
Button blackButton = new Button("Confirm", "BlackButton");
Container cnt = BoxLayout.encloseY(ride, taxi, separator, blackButton);
cnt.setUIID("Form");
layer.add(SOUTH, cnt);
enterNavigationMode
This is the UI to approve the Taxi we are ordering. I used a white Container with the Form UIID on the SOUTH portion of the form as a layer
private String trimmedString(String str) {
int p = str.indexOf(',');
if(p > -1) {
str = str.substring(0, p);
}
if(str.length() > 15) {
str = str.substring(0, 15);
}
return str;
}
trimmedString
Before I continue I also used the trimmedString method in the code before to trim the tag components. 

There isn't much to say about this method, we rely on the fact that addresses usually have a comma after them. If the string is missing that or is too long we have special
cases for those. This guarantees a string of decent length for the tag elements.
private void exitNavigationMode(final Container layer,
Component fromComponent, Component toComponent,
MapContainer.MapObject pathObject) {
layer.removeAll();
fromComponent.remove();
toComponent.remove();
mc.removeMapObject(pathObject);
getToolbar().setVisible(true);
whereTo.setVisible(true);
revalidate();
inNavigationMode = false;
}
exitNavigationMode
The one last missing piece of code is the exitNavigationMode call which just removes all elements and sets the invisible pieces back to visible. It's pretty trivial…
RideTitle
© Codename One 2017 all rights reserved
We also have a few UIID's of note mentioned in the code. The first is RideTitle which is the title area for the ride UI. It's pretty much a Label so it has black over
transparent colors
RideTitle
© Codename One 2017 all rights reserved
But its centered
RideTitle
© Codename One 2017 all rights reserved
It has the same padding as label
RideTitle
© Codename One 2017 all rights reserved
Zero margin
RideTitle
© Codename One 2017 all rights reserved
And same font
MarginSeparator
© Codename One 2017 all rights reserved
MarginSeparator is a separator that has margins on the sides which we use in the ride dialog. Other separators in the app reach the edge of their parent container
MarginSeparator
© Codename One 2017 all rights reserved
It has a couple of pixels of padding in the bottom to leave room for the separator
MarginSeparator
© Codename One 2017 all rights reserved
It has the margins to keep it away from the edges of the parent container
MarginSeparator
© Codename One 2017 all rights reserved
And it features a standard underline border
BlackButton
© Codename One 2017 all rights reserved
The black button is just a standard white over black button
BlackButton
© Codename One 2017 all rights reserved
With center text alignment as is common with buttons
BlackButton
© Codename One 2017 all rights reserved
It’s got some padding but not too much so it won’t look huge
BlackButton
© Codename One 2017 all rights reserved
It’s got some margin so it won’t literally touch the things next to it and to compensate over the smaller padding
BlackButton
© Codename One 2017 all rights reserved
It uses a subtle round rect effect that’s just barely noticeable at 0.2 millimeters
BlackButton
© Codename One 2017 all rights reserved
And its got a slightly larger regular font instead of the typical smaller light font. Once all of this is done we can just see navigation work and appear on the map as
expected!

More Related Content

Similar to Creating an Uber Clone - Part XXIII - Transcript.pdf

Creating an Uber Clone - Part XXI.pdf
Creating an Uber Clone - Part XXI.pdfCreating an Uber Clone - Part XXI.pdf
Creating an Uber Clone - Part XXI.pdfShaiAlmog1
 
Creating an Uber Clone - Part XXIV.pdf
Creating an Uber Clone - Part XXIV.pdfCreating an Uber Clone - Part XXIV.pdf
Creating an Uber Clone - Part XXIV.pdfShaiAlmog1
 
Maps - Part 3 - Transcript.pdf
Maps - Part 3 - Transcript.pdfMaps - Part 3 - Transcript.pdf
Maps - Part 3 - Transcript.pdfShaiAlmog1
 
Mashup caravan android-talks
Mashup caravan android-talksMashup caravan android-talks
Mashup caravan android-talkshonjo2
 
Creating an Uber Clone - Part IX.pdf
Creating an Uber Clone - Part IX.pdfCreating an Uber Clone - Part IX.pdf
Creating an Uber Clone - Part IX.pdfShaiAlmog1
 
openFrameworks 007 - 3D
openFrameworks 007 - 3DopenFrameworks 007 - 3D
openFrameworks 007 - 3Droxlu
 
Creating an Uber Clone - Part VII - Transcript.pdf
Creating an Uber Clone - Part VII - Transcript.pdfCreating an Uber Clone - Part VII - Transcript.pdf
Creating an Uber Clone - Part VII - Transcript.pdfShaiAlmog1
 
The Ring programming language version 1.6 book - Part 86 of 189
The Ring programming language version 1.6 book - Part 86 of 189The Ring programming language version 1.6 book - Part 86 of 189
The Ring programming language version 1.6 book - Part 86 of 189Mahmoud Samir Fayed
 
UI Design From Scratch - Part 5.pdf
UI Design From Scratch - Part 5.pdfUI Design From Scratch - Part 5.pdf
UI Design From Scratch - Part 5.pdfShaiAlmog1
 
HTML5 Canvas (Wall Clock).pptx
HTML5 Canvas (Wall Clock).pptxHTML5 Canvas (Wall Clock).pptx
HTML5 Canvas (Wall Clock).pptxAhmadAbba6
 
Creating an Uber Clone - Part XXII - Transcript.pdf
Creating an Uber Clone - Part XXII - Transcript.pdfCreating an Uber Clone - Part XXII - Transcript.pdf
Creating an Uber Clone - Part XXII - Transcript.pdfShaiAlmog1
 
OpenLayers Feature Frenzy
OpenLayers Feature FrenzyOpenLayers Feature Frenzy
OpenLayers Feature FrenzyAndreas Hocevar
 
Creating an Uber Clone - Part XXII.pdf
Creating an Uber Clone - Part XXII.pdfCreating an Uber Clone - Part XXII.pdf
Creating an Uber Clone - Part XXII.pdfShaiAlmog1
 
Kotlin Mullets
Kotlin MulletsKotlin Mullets
Kotlin MulletsJames Ward
 
I need to create a page looks like a picture. But it looks different.pdf
I need to create a page looks like a picture. But it looks different.pdfI need to create a page looks like a picture. But it looks different.pdf
I need to create a page looks like a picture. But it looks different.pdfallurafashions98
 
Creating an Uber Clone - Part VIII - Transcript.pdf
Creating an Uber Clone - Part VIII - Transcript.pdfCreating an Uber Clone - Part VIII - Transcript.pdf
Creating an Uber Clone - Part VIII - Transcript.pdfShaiAlmog1
 
Initial UI Mockup - Part 3.pdf
Initial UI Mockup - Part 3.pdfInitial UI Mockup - Part 3.pdf
Initial UI Mockup - Part 3.pdfShaiAlmog1
 

Similar to Creating an Uber Clone - Part XXIII - Transcript.pdf (20)

Creating an Uber Clone - Part XXI.pdf
Creating an Uber Clone - Part XXI.pdfCreating an Uber Clone - Part XXI.pdf
Creating an Uber Clone - Part XXI.pdf
 
Creating an Uber Clone - Part XXIV.pdf
Creating an Uber Clone - Part XXIV.pdfCreating an Uber Clone - Part XXIV.pdf
Creating an Uber Clone - Part XXIV.pdf
 
Maps - Part 3 - Transcript.pdf
Maps - Part 3 - Transcript.pdfMaps - Part 3 - Transcript.pdf
Maps - Part 3 - Transcript.pdf
 
Mashup caravan android-talks
Mashup caravan android-talksMashup caravan android-talks
Mashup caravan android-talks
 
Qt Animation
Qt AnimationQt Animation
Qt Animation
 
Creating an Uber Clone - Part IX.pdf
Creating an Uber Clone - Part IX.pdfCreating an Uber Clone - Part IX.pdf
Creating an Uber Clone - Part IX.pdf
 
openFrameworks 007 - 3D
openFrameworks 007 - 3DopenFrameworks 007 - 3D
openFrameworks 007 - 3D
 
Creating an Uber Clone - Part VII - Transcript.pdf
Creating an Uber Clone - Part VII - Transcript.pdfCreating an Uber Clone - Part VII - Transcript.pdf
Creating an Uber Clone - Part VII - Transcript.pdf
 
Css5 canvas
Css5 canvasCss5 canvas
Css5 canvas
 
The Ring programming language version 1.6 book - Part 86 of 189
The Ring programming language version 1.6 book - Part 86 of 189The Ring programming language version 1.6 book - Part 86 of 189
The Ring programming language version 1.6 book - Part 86 of 189
 
UI Design From Scratch - Part 5.pdf
UI Design From Scratch - Part 5.pdfUI Design From Scratch - Part 5.pdf
UI Design From Scratch - Part 5.pdf
 
HTML5 Canvas (Wall Clock).pptx
HTML5 Canvas (Wall Clock).pptxHTML5 Canvas (Wall Clock).pptx
HTML5 Canvas (Wall Clock).pptx
 
Creating an Uber Clone - Part XXII - Transcript.pdf
Creating an Uber Clone - Part XXII - Transcript.pdfCreating an Uber Clone - Part XXII - Transcript.pdf
Creating an Uber Clone - Part XXII - Transcript.pdf
 
OpenLayers Feature Frenzy
OpenLayers Feature FrenzyOpenLayers Feature Frenzy
OpenLayers Feature Frenzy
 
Map kit light
Map kit lightMap kit light
Map kit light
 
Creating an Uber Clone - Part XXII.pdf
Creating an Uber Clone - Part XXII.pdfCreating an Uber Clone - Part XXII.pdf
Creating an Uber Clone - Part XXII.pdf
 
Kotlin Mullets
Kotlin MulletsKotlin Mullets
Kotlin Mullets
 
I need to create a page looks like a picture. But it looks different.pdf
I need to create a page looks like a picture. But it looks different.pdfI need to create a page looks like a picture. But it looks different.pdf
I need to create a page looks like a picture. But it looks different.pdf
 
Creating an Uber Clone - Part VIII - Transcript.pdf
Creating an Uber Clone - Part VIII - Transcript.pdfCreating an Uber Clone - Part VIII - Transcript.pdf
Creating an Uber Clone - Part VIII - Transcript.pdf
 
Initial UI Mockup - Part 3.pdf
Initial UI Mockup - Part 3.pdfInitial UI Mockup - Part 3.pdf
Initial UI Mockup - Part 3.pdf
 

More from ShaiAlmog1

The Duck Teaches Learn to debug from the masters. Local to production- kill ...
The Duck Teaches  Learn to debug from the masters. Local to production- kill ...The Duck Teaches  Learn to debug from the masters. Local to production- kill ...
The Duck Teaches Learn to debug from the masters. Local to production- kill ...ShaiAlmog1
 
create-netflix-clone-06-client-ui.pdf
create-netflix-clone-06-client-ui.pdfcreate-netflix-clone-06-client-ui.pdf
create-netflix-clone-06-client-ui.pdfShaiAlmog1
 
create-netflix-clone-01-introduction_transcript.pdf
create-netflix-clone-01-introduction_transcript.pdfcreate-netflix-clone-01-introduction_transcript.pdf
create-netflix-clone-01-introduction_transcript.pdfShaiAlmog1
 
create-netflix-clone-02-server_transcript.pdf
create-netflix-clone-02-server_transcript.pdfcreate-netflix-clone-02-server_transcript.pdf
create-netflix-clone-02-server_transcript.pdfShaiAlmog1
 
create-netflix-clone-04-server-continued_transcript.pdf
create-netflix-clone-04-server-continued_transcript.pdfcreate-netflix-clone-04-server-continued_transcript.pdf
create-netflix-clone-04-server-continued_transcript.pdfShaiAlmog1
 
create-netflix-clone-01-introduction.pdf
create-netflix-clone-01-introduction.pdfcreate-netflix-clone-01-introduction.pdf
create-netflix-clone-01-introduction.pdfShaiAlmog1
 
create-netflix-clone-06-client-ui_transcript.pdf
create-netflix-clone-06-client-ui_transcript.pdfcreate-netflix-clone-06-client-ui_transcript.pdf
create-netflix-clone-06-client-ui_transcript.pdfShaiAlmog1
 
create-netflix-clone-03-server.pdf
create-netflix-clone-03-server.pdfcreate-netflix-clone-03-server.pdf
create-netflix-clone-03-server.pdfShaiAlmog1
 
create-netflix-clone-04-server-continued.pdf
create-netflix-clone-04-server-continued.pdfcreate-netflix-clone-04-server-continued.pdf
create-netflix-clone-04-server-continued.pdfShaiAlmog1
 
create-netflix-clone-05-client-model_transcript.pdf
create-netflix-clone-05-client-model_transcript.pdfcreate-netflix-clone-05-client-model_transcript.pdf
create-netflix-clone-05-client-model_transcript.pdfShaiAlmog1
 
create-netflix-clone-03-server_transcript.pdf
create-netflix-clone-03-server_transcript.pdfcreate-netflix-clone-03-server_transcript.pdf
create-netflix-clone-03-server_transcript.pdfShaiAlmog1
 
create-netflix-clone-02-server.pdf
create-netflix-clone-02-server.pdfcreate-netflix-clone-02-server.pdf
create-netflix-clone-02-server.pdfShaiAlmog1
 
create-netflix-clone-05-client-model.pdf
create-netflix-clone-05-client-model.pdfcreate-netflix-clone-05-client-model.pdf
create-netflix-clone-05-client-model.pdfShaiAlmog1
 
Creating a Whatsapp Clone - Part II.pdf
Creating a Whatsapp Clone - Part II.pdfCreating a Whatsapp Clone - Part II.pdf
Creating a Whatsapp Clone - Part II.pdfShaiAlmog1
 
Creating a Whatsapp Clone - Part IX - Transcript.pdf
Creating a Whatsapp Clone - Part IX - Transcript.pdfCreating a Whatsapp Clone - Part IX - Transcript.pdf
Creating a Whatsapp Clone - Part IX - Transcript.pdfShaiAlmog1
 
Creating a Whatsapp Clone - Part II - Transcript.pdf
Creating a Whatsapp Clone - Part II - Transcript.pdfCreating a Whatsapp Clone - Part II - Transcript.pdf
Creating a Whatsapp Clone - Part II - Transcript.pdfShaiAlmog1
 
Creating a Whatsapp Clone - Part V - Transcript.pdf
Creating a Whatsapp Clone - Part V - Transcript.pdfCreating a Whatsapp Clone - Part V - Transcript.pdf
Creating a Whatsapp Clone - Part V - Transcript.pdfShaiAlmog1
 
Creating a Whatsapp Clone - Part IV - Transcript.pdf
Creating a Whatsapp Clone - Part IV - Transcript.pdfCreating a Whatsapp Clone - Part IV - Transcript.pdf
Creating a Whatsapp Clone - Part IV - Transcript.pdfShaiAlmog1
 
Creating a Whatsapp Clone - Part IV.pdf
Creating a Whatsapp Clone - Part IV.pdfCreating a Whatsapp Clone - Part IV.pdf
Creating a Whatsapp Clone - Part IV.pdfShaiAlmog1
 
Creating a Whatsapp Clone - Part I - Transcript.pdf
Creating a Whatsapp Clone - Part I - Transcript.pdfCreating a Whatsapp Clone - Part I - Transcript.pdf
Creating a Whatsapp Clone - Part I - Transcript.pdfShaiAlmog1
 

More from ShaiAlmog1 (20)

The Duck Teaches Learn to debug from the masters. Local to production- kill ...
The Duck Teaches  Learn to debug from the masters. Local to production- kill ...The Duck Teaches  Learn to debug from the masters. Local to production- kill ...
The Duck Teaches Learn to debug from the masters. Local to production- kill ...
 
create-netflix-clone-06-client-ui.pdf
create-netflix-clone-06-client-ui.pdfcreate-netflix-clone-06-client-ui.pdf
create-netflix-clone-06-client-ui.pdf
 
create-netflix-clone-01-introduction_transcript.pdf
create-netflix-clone-01-introduction_transcript.pdfcreate-netflix-clone-01-introduction_transcript.pdf
create-netflix-clone-01-introduction_transcript.pdf
 
create-netflix-clone-02-server_transcript.pdf
create-netflix-clone-02-server_transcript.pdfcreate-netflix-clone-02-server_transcript.pdf
create-netflix-clone-02-server_transcript.pdf
 
create-netflix-clone-04-server-continued_transcript.pdf
create-netflix-clone-04-server-continued_transcript.pdfcreate-netflix-clone-04-server-continued_transcript.pdf
create-netflix-clone-04-server-continued_transcript.pdf
 
create-netflix-clone-01-introduction.pdf
create-netflix-clone-01-introduction.pdfcreate-netflix-clone-01-introduction.pdf
create-netflix-clone-01-introduction.pdf
 
create-netflix-clone-06-client-ui_transcript.pdf
create-netflix-clone-06-client-ui_transcript.pdfcreate-netflix-clone-06-client-ui_transcript.pdf
create-netflix-clone-06-client-ui_transcript.pdf
 
create-netflix-clone-03-server.pdf
create-netflix-clone-03-server.pdfcreate-netflix-clone-03-server.pdf
create-netflix-clone-03-server.pdf
 
create-netflix-clone-04-server-continued.pdf
create-netflix-clone-04-server-continued.pdfcreate-netflix-clone-04-server-continued.pdf
create-netflix-clone-04-server-continued.pdf
 
create-netflix-clone-05-client-model_transcript.pdf
create-netflix-clone-05-client-model_transcript.pdfcreate-netflix-clone-05-client-model_transcript.pdf
create-netflix-clone-05-client-model_transcript.pdf
 
create-netflix-clone-03-server_transcript.pdf
create-netflix-clone-03-server_transcript.pdfcreate-netflix-clone-03-server_transcript.pdf
create-netflix-clone-03-server_transcript.pdf
 
create-netflix-clone-02-server.pdf
create-netflix-clone-02-server.pdfcreate-netflix-clone-02-server.pdf
create-netflix-clone-02-server.pdf
 
create-netflix-clone-05-client-model.pdf
create-netflix-clone-05-client-model.pdfcreate-netflix-clone-05-client-model.pdf
create-netflix-clone-05-client-model.pdf
 
Creating a Whatsapp Clone - Part II.pdf
Creating a Whatsapp Clone - Part II.pdfCreating a Whatsapp Clone - Part II.pdf
Creating a Whatsapp Clone - Part II.pdf
 
Creating a Whatsapp Clone - Part IX - Transcript.pdf
Creating a Whatsapp Clone - Part IX - Transcript.pdfCreating a Whatsapp Clone - Part IX - Transcript.pdf
Creating a Whatsapp Clone - Part IX - Transcript.pdf
 
Creating a Whatsapp Clone - Part II - Transcript.pdf
Creating a Whatsapp Clone - Part II - Transcript.pdfCreating a Whatsapp Clone - Part II - Transcript.pdf
Creating a Whatsapp Clone - Part II - Transcript.pdf
 
Creating a Whatsapp Clone - Part V - Transcript.pdf
Creating a Whatsapp Clone - Part V - Transcript.pdfCreating a Whatsapp Clone - Part V - Transcript.pdf
Creating a Whatsapp Clone - Part V - Transcript.pdf
 
Creating a Whatsapp Clone - Part IV - Transcript.pdf
Creating a Whatsapp Clone - Part IV - Transcript.pdfCreating a Whatsapp Clone - Part IV - Transcript.pdf
Creating a Whatsapp Clone - Part IV - Transcript.pdf
 
Creating a Whatsapp Clone - Part IV.pdf
Creating a Whatsapp Clone - Part IV.pdfCreating a Whatsapp Clone - Part IV.pdf
Creating a Whatsapp Clone - Part IV.pdf
 
Creating a Whatsapp Clone - Part I - Transcript.pdf
Creating a Whatsapp Clone - Part I - Transcript.pdfCreating a Whatsapp Clone - Part I - Transcript.pdf
Creating a Whatsapp Clone - Part I - Transcript.pdf
 

Recently uploaded

How to Troubleshoot Apps for the Modern Connected Worker
How to Troubleshoot Apps for the Modern Connected WorkerHow to Troubleshoot Apps for the Modern Connected Worker
How to Troubleshoot Apps for the Modern Connected WorkerThousandEyes
 
presentation ICT roal in 21st century education
presentation ICT roal in 21st century educationpresentation ICT roal in 21st century education
presentation ICT roal in 21st century educationjfdjdjcjdnsjd
 
Apidays New York 2024 - Passkeys: Developing APIs to enable passwordless auth...
Apidays New York 2024 - Passkeys: Developing APIs to enable passwordless auth...Apidays New York 2024 - Passkeys: Developing APIs to enable passwordless auth...
Apidays New York 2024 - Passkeys: Developing APIs to enable passwordless auth...apidays
 
Polkadot JAM Slides - Token2049 - By Dr. Gavin Wood
Polkadot JAM Slides - Token2049 - By Dr. Gavin WoodPolkadot JAM Slides - Token2049 - By Dr. Gavin Wood
Polkadot JAM Slides - Token2049 - By Dr. Gavin WoodJuan lago vázquez
 
AWS Community Day CPH - Three problems of Terraform
AWS Community Day CPH - Three problems of TerraformAWS Community Day CPH - Three problems of Terraform
AWS Community Day CPH - Three problems of TerraformAndrey Devyatkin
 
EMPOWERMENT TECHNOLOGY GRADE 11 QUARTER 2 REVIEWER
EMPOWERMENT TECHNOLOGY GRADE 11 QUARTER 2 REVIEWEREMPOWERMENT TECHNOLOGY GRADE 11 QUARTER 2 REVIEWER
EMPOWERMENT TECHNOLOGY GRADE 11 QUARTER 2 REVIEWERMadyBayot
 
Artificial Intelligence Chap.5 : Uncertainty
Artificial Intelligence Chap.5 : UncertaintyArtificial Intelligence Chap.5 : Uncertainty
Artificial Intelligence Chap.5 : UncertaintyKhushali Kathiriya
 
Corporate and higher education May webinar.pptx
Corporate and higher education May webinar.pptxCorporate and higher education May webinar.pptx
Corporate and higher education May webinar.pptxRustici Software
 
Strategies for Landing an Oracle DBA Job as a Fresher
Strategies for Landing an Oracle DBA Job as a FresherStrategies for Landing an Oracle DBA Job as a Fresher
Strategies for Landing an Oracle DBA Job as a FresherRemote DBA Services
 
DBX First Quarter 2024 Investor Presentation
DBX First Quarter 2024 Investor PresentationDBX First Quarter 2024 Investor Presentation
DBX First Quarter 2024 Investor PresentationDropbox
 
Cloud Frontiers: A Deep Dive into Serverless Spatial Data and FME
Cloud Frontiers:  A Deep Dive into Serverless Spatial Data and FMECloud Frontiers:  A Deep Dive into Serverless Spatial Data and FME
Cloud Frontiers: A Deep Dive into Serverless Spatial Data and FMESafe Software
 
Six Myths about Ontologies: The Basics of Formal Ontology
Six Myths about Ontologies: The Basics of Formal OntologySix Myths about Ontologies: The Basics of Formal Ontology
Six Myths about Ontologies: The Basics of Formal Ontologyjohnbeverley2021
 
Modular Monolith - a Practical Alternative to Microservices @ Devoxx UK 2024
Modular Monolith - a Practical Alternative to Microservices @ Devoxx UK 2024Modular Monolith - a Practical Alternative to Microservices @ Devoxx UK 2024
Modular Monolith - a Practical Alternative to Microservices @ Devoxx UK 2024Victor Rentea
 
ICT role in 21st century education and its challenges
ICT role in 21st century education and its challengesICT role in 21st century education and its challenges
ICT role in 21st century education and its challengesrafiqahmad00786416
 
Cloud Frontiers: A Deep Dive into Serverless Spatial Data and FME
Cloud Frontiers:  A Deep Dive into Serverless Spatial Data and FMECloud Frontiers:  A Deep Dive into Serverless Spatial Data and FME
Cloud Frontiers: A Deep Dive into Serverless Spatial Data and FMESafe Software
 
Repurposing LNG terminals for Hydrogen Ammonia: Feasibility and Cost Saving
Repurposing LNG terminals for Hydrogen Ammonia: Feasibility and Cost SavingRepurposing LNG terminals for Hydrogen Ammonia: Feasibility and Cost Saving
Repurposing LNG terminals for Hydrogen Ammonia: Feasibility and Cost SavingEdi Saputra
 
FWD Group - Insurer Innovation Award 2024
FWD Group - Insurer Innovation Award 2024FWD Group - Insurer Innovation Award 2024
FWD Group - Insurer Innovation Award 2024The Digital Insurer
 
Apidays New York 2024 - The Good, the Bad and the Governed by David O'Neill, ...
Apidays New York 2024 - The Good, the Bad and the Governed by David O'Neill, ...Apidays New York 2024 - The Good, the Bad and the Governed by David O'Neill, ...
Apidays New York 2024 - The Good, the Bad and the Governed by David O'Neill, ...apidays
 
"I see eyes in my soup": How Delivery Hero implemented the safety system for ...
"I see eyes in my soup": How Delivery Hero implemented the safety system for ..."I see eyes in my soup": How Delivery Hero implemented the safety system for ...
"I see eyes in my soup": How Delivery Hero implemented the safety system for ...Zilliz
 

Recently uploaded (20)

How to Troubleshoot Apps for the Modern Connected Worker
How to Troubleshoot Apps for the Modern Connected WorkerHow to Troubleshoot Apps for the Modern Connected Worker
How to Troubleshoot Apps for the Modern Connected Worker
 
presentation ICT roal in 21st century education
presentation ICT roal in 21st century educationpresentation ICT roal in 21st century education
presentation ICT roal in 21st century education
 
Apidays New York 2024 - Passkeys: Developing APIs to enable passwordless auth...
Apidays New York 2024 - Passkeys: Developing APIs to enable passwordless auth...Apidays New York 2024 - Passkeys: Developing APIs to enable passwordless auth...
Apidays New York 2024 - Passkeys: Developing APIs to enable passwordless auth...
 
Polkadot JAM Slides - Token2049 - By Dr. Gavin Wood
Polkadot JAM Slides - Token2049 - By Dr. Gavin WoodPolkadot JAM Slides - Token2049 - By Dr. Gavin Wood
Polkadot JAM Slides - Token2049 - By Dr. Gavin Wood
 
AWS Community Day CPH - Three problems of Terraform
AWS Community Day CPH - Three problems of TerraformAWS Community Day CPH - Three problems of Terraform
AWS Community Day CPH - Three problems of Terraform
 
EMPOWERMENT TECHNOLOGY GRADE 11 QUARTER 2 REVIEWER
EMPOWERMENT TECHNOLOGY GRADE 11 QUARTER 2 REVIEWEREMPOWERMENT TECHNOLOGY GRADE 11 QUARTER 2 REVIEWER
EMPOWERMENT TECHNOLOGY GRADE 11 QUARTER 2 REVIEWER
 
Artificial Intelligence Chap.5 : Uncertainty
Artificial Intelligence Chap.5 : UncertaintyArtificial Intelligence Chap.5 : Uncertainty
Artificial Intelligence Chap.5 : Uncertainty
 
Corporate and higher education May webinar.pptx
Corporate and higher education May webinar.pptxCorporate and higher education May webinar.pptx
Corporate and higher education May webinar.pptx
 
Strategies for Landing an Oracle DBA Job as a Fresher
Strategies for Landing an Oracle DBA Job as a FresherStrategies for Landing an Oracle DBA Job as a Fresher
Strategies for Landing an Oracle DBA Job as a Fresher
 
DBX First Quarter 2024 Investor Presentation
DBX First Quarter 2024 Investor PresentationDBX First Quarter 2024 Investor Presentation
DBX First Quarter 2024 Investor Presentation
 
Cloud Frontiers: A Deep Dive into Serverless Spatial Data and FME
Cloud Frontiers:  A Deep Dive into Serverless Spatial Data and FMECloud Frontiers:  A Deep Dive into Serverless Spatial Data and FME
Cloud Frontiers: A Deep Dive into Serverless Spatial Data and FME
 
Six Myths about Ontologies: The Basics of Formal Ontology
Six Myths about Ontologies: The Basics of Formal OntologySix Myths about Ontologies: The Basics of Formal Ontology
Six Myths about Ontologies: The Basics of Formal Ontology
 
Modular Monolith - a Practical Alternative to Microservices @ Devoxx UK 2024
Modular Monolith - a Practical Alternative to Microservices @ Devoxx UK 2024Modular Monolith - a Practical Alternative to Microservices @ Devoxx UK 2024
Modular Monolith - a Practical Alternative to Microservices @ Devoxx UK 2024
 
ICT role in 21st century education and its challenges
ICT role in 21st century education and its challengesICT role in 21st century education and its challenges
ICT role in 21st century education and its challenges
 
+971581248768>> SAFE AND ORIGINAL ABORTION PILLS FOR SALE IN DUBAI AND ABUDHA...
+971581248768>> SAFE AND ORIGINAL ABORTION PILLS FOR SALE IN DUBAI AND ABUDHA...+971581248768>> SAFE AND ORIGINAL ABORTION PILLS FOR SALE IN DUBAI AND ABUDHA...
+971581248768>> SAFE AND ORIGINAL ABORTION PILLS FOR SALE IN DUBAI AND ABUDHA...
 
Cloud Frontiers: A Deep Dive into Serverless Spatial Data and FME
Cloud Frontiers:  A Deep Dive into Serverless Spatial Data and FMECloud Frontiers:  A Deep Dive into Serverless Spatial Data and FME
Cloud Frontiers: A Deep Dive into Serverless Spatial Data and FME
 
Repurposing LNG terminals for Hydrogen Ammonia: Feasibility and Cost Saving
Repurposing LNG terminals for Hydrogen Ammonia: Feasibility and Cost SavingRepurposing LNG terminals for Hydrogen Ammonia: Feasibility and Cost Saving
Repurposing LNG terminals for Hydrogen Ammonia: Feasibility and Cost Saving
 
FWD Group - Insurer Innovation Award 2024
FWD Group - Insurer Innovation Award 2024FWD Group - Insurer Innovation Award 2024
FWD Group - Insurer Innovation Award 2024
 
Apidays New York 2024 - The Good, the Bad and the Governed by David O'Neill, ...
Apidays New York 2024 - The Good, the Bad and the Governed by David O'Neill, ...Apidays New York 2024 - The Good, the Bad and the Governed by David O'Neill, ...
Apidays New York 2024 - The Good, the Bad and the Governed by David O'Neill, ...
 
"I see eyes in my soup": How Delivery Hero implemented the safety system for ...
"I see eyes in my soup": How Delivery Hero implemented the safety system for ..."I see eyes in my soup": How Delivery Hero implemented the safety system for ...
"I see eyes in my soup": How Delivery Hero implemented the safety system for ...
 

Creating an Uber Clone - Part XXIII - Transcript.pdf

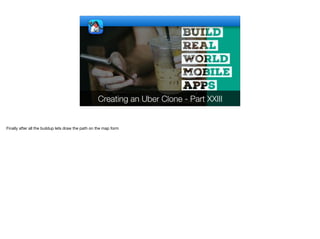
  • 1. Creating an Uber Clone - Part XXIII Finally after all the buildup lets draw the path on the map form
  • 2. private void enterNavigationMode(final Container pinLayer, Container navigationToolbar, final Container layer, List<Coord> path, String from, String to, int duration) { pinLayer.removeAll(); navigationToolbar.setY(-navigationToolbar.getHeight()); layer.getComponentAt(1).setY(getDisplayHeight()); navigationToolbar.getParent().animateUnlayout(200, 120, () -> { if(inNavigationMode) { return; } inNavigationMode = true; callSerially(() -> { layer.removeAll(); Coord[] pathCoords = new Coord[path.size()]; path.toArray(pathCoords); MapContainer.MapObject pathObject = mc.addPath(pathCoords); BoundingBox bb = BoundingBox.create(pathCoords). extend(new BoundingBox(pathCoords[0], 0.01, 0.01)). extend(new BoundingBox(pathCoords[pathCoords.length - 1],0.01,0.01)); mc.fitBounds(bb); Component fromComponent = createNavigationTag( trimmedString(from), duration / 60); Component toComponent = createNavigationTag(trimmedString(to), -1); MapLayout.setHorizontalAlignment(fromComponent, enterNavigationMode We've had quite a bit of code and it brought us to the point where the navigation UI should function as expected. This is implemented in the enterNavigationMode method which I mentioned before. As you might recall it's invoked when clicking an entry in the search results. This method is invoked from a callback on navigation, we have the coordinates of the path to display on the map as the arguments to the method. As you may recall these coordinate are returned by the directions method
  • 3. private void enterNavigationMode(final Container pinLayer, Container navigationToolbar, final Container layer, List<Coord> path, String from, String to, int duration) { pinLayer.removeAll(); navigationToolbar.setY(-navigationToolbar.getHeight()); layer.getComponentAt(1).setY(getDisplayHeight()); navigationToolbar.getParent().animateUnlayout(200, 120, () -> { if(inNavigationMode) { return; } inNavigationMode = true; callSerially(() -> { layer.removeAll(); Coord[] pathCoords = new Coord[path.size()]; path.toArray(pathCoords); MapContainer.MapObject pathObject = mc.addPath(pathCoords); BoundingBox bb = BoundingBox.create(pathCoords). extend(new BoundingBox(pathCoords[0], 0.01, 0.01)). extend(new BoundingBox(pathCoords[pathCoords.length - 1],0.01,0.01)); mc.fitBounds(bb); Component fromComponent = createNavigationTag( trimmedString(from), duration / 60); Component toComponent = createNavigationTag(trimmedString(to), -1); MapLayout.setHorizontalAlignment(fromComponent, enterNavigationMode The first thing we do is remove the existing search UI from the form and animate it out
  • 4. private void enterNavigationMode(final Container pinLayer, Container navigationToolbar, final Container layer, List<Coord> path, String from, String to, int duration) { pinLayer.removeAll(); navigationToolbar.setY(-navigationToolbar.getHeight()); layer.getComponentAt(1).setY(getDisplayHeight()); navigationToolbar.getParent().animateUnlayout(200, 120, () -> { if(inNavigationMode) { return; } inNavigationMode = true; callSerially(() -> { layer.removeAll(); Coord[] pathCoords = new Coord[path.size()]; path.toArray(pathCoords); MapContainer.MapObject pathObject = mc.addPath(pathCoords); BoundingBox bb = BoundingBox.create(pathCoords). extend(new BoundingBox(pathCoords[0], 0.01, 0.01)). extend(new BoundingBox(pathCoords[pathCoords.length - 1],0.01,0.01)); mc.fitBounds(bb); Component fromComponent = createNavigationTag( trimmedString(from), duration / 60); Component toComponent = createNavigationTag(trimmedString(to), -1); MapLayout.setHorizontalAlignment(fromComponent, enterNavigationMode Due to the way events are chained this method can be invoked more than once in some unique cases. This works around that behavior
  • 5. private void enterNavigationMode(final Container pinLayer, Container navigationToolbar, final Container layer, List<Coord> path, String from, String to, int duration) { pinLayer.removeAll(); navigationToolbar.setY(-navigationToolbar.getHeight()); layer.getComponentAt(1).setY(getDisplayHeight()); navigationToolbar.getParent().animateUnlayout(200, 120, () -> { if(inNavigationMode) { return; } inNavigationMode = true; callSerially(() -> { layer.removeAll(); Coord[] pathCoords = new Coord[path.size()]; path.toArray(pathCoords); MapContainer.MapObject pathObject = mc.addPath(pathCoords); BoundingBox bb = BoundingBox.create(pathCoords). extend(new BoundingBox(pathCoords[0], 0.01, 0.01)). extend(new BoundingBox(pathCoords[pathCoords.length - 1],0.01,0.01)); mc.fitBounds(bb); Component fromComponent = createNavigationTag( trimmedString(from), duration / 60); Component toComponent = createNavigationTag(trimmedString(to), -1); MapLayout.setHorizontalAlignment(fromComponent, enterNavigationMode We convert the path to an array and add it to the map, this uses native path plotting for these coordinates. I could have used a painter or something similar and might still use it later on
  • 6. private void enterNavigationMode(final Container pinLayer, Container navigationToolbar, final Container layer, List<Coord> path, String from, String to, int duration) { pinLayer.removeAll(); navigationToolbar.setY(-navigationToolbar.getHeight()); layer.getComponentAt(1).setY(getDisplayHeight()); navigationToolbar.getParent().animateUnlayout(200, 120, () -> { if(inNavigationMode) { return; } inNavigationMode = true; callSerially(() -> { layer.removeAll(); Coord[] pathCoords = new Coord[path.size()]; path.toArray(pathCoords); MapContainer.MapObject pathObject = mc.addPath(pathCoords); BoundingBox bb = BoundingBox.create(pathCoords). extend(new BoundingBox(pathCoords[0], 0.01, 0.01)). extend(new BoundingBox(pathCoords[pathCoords.length - 1],0.01,0.01)); mc.fitBounds(bb); Component fromComponent = createNavigationTag( trimmedString(from), duration / 60); Component toComponent = createNavigationTag(trimmedString(to), -1); MapLayout.setHorizontalAlignment(fromComponent, enterNavigationMode I move the camera to show the entire path within the Form
  • 7. Component fromComponent = createNavigationTag( trimmedString(from), duration / 60); Component toComponent = createNavigationTag(trimmedString(to), -1); MapLayout.setHorizontalAlignment(fromComponent, MapLayout.HALIGN.RIGHT); mapLayer.add(pathCoords[0], fromComponent); mapLayer.add(pathCoords[pathCoords.length - 1], toComponent); whereTo.setVisible(false); getToolbar().setVisible(false); Button back = new Button("", "TitleCommand"); FontImage.setMaterialIcon(back, FontImage.MATERIAL_ARROW_BACK); layer.add(NORTH, back); back.addActionListener(e -> exitNavigationMode(layer, fromComponent, toComponent, pathObject)); Label ride = new Label("Ride", "RideTitle"); Label taxi = new Label("Taxi", Resources.getGlobalResources(). getImage("ride.png"), "RideTitle"); taxi.setTextPosition(BOTTOM); Label separator = new Label("", "MarginSeparator"); separator.setShowEvenIfBlank(true); Button blackButton = new Button("Confirm", "BlackButton"); Container cnt = BoxLayout.encloseY(ride, taxi, separator, blackButton); cnt.setUIID("Form"); layer.add(SOUTH, cnt); enterNavigationMode I create the two tags and add them to the UI. Notice that the from tag has a right alignment. Also notice I used the trimmedString method to limit the string length. I'll cover that method soon
  • 8. Component fromComponent = createNavigationTag( trimmedString(from), duration / 60); Component toComponent = createNavigationTag(trimmedString(to), -1); MapLayout.setHorizontalAlignment(fromComponent, MapLayout.HALIGN.RIGHT); mapLayer.add(pathCoords[0], fromComponent); mapLayer.add(pathCoords[pathCoords.length - 1], toComponent); whereTo.setVisible(false); getToolbar().setVisible(false); Button back = new Button("", "TitleCommand"); FontImage.setMaterialIcon(back, FontImage.MATERIAL_ARROW_BACK); layer.add(NORTH, back); back.addActionListener(e -> exitNavigationMode(layer, fromComponent, toComponent, pathObject)); Label ride = new Label("Ride", "RideTitle"); Label taxi = new Label("Taxi", Resources.getGlobalResources(). getImage("ride.png"), "RideTitle"); taxi.setTextPosition(BOTTOM); Label separator = new Label("", "MarginSeparator"); separator.setShowEvenIfBlank(true); Button blackButton = new Button("Confirm", "BlackButton"); Container cnt = BoxLayout.encloseY(ride, taxi, separator, blackButton); cnt.setUIID("Form"); layer.add(SOUTH, cnt); enterNavigationMode The back behavior is just a Button styled to look like a command it invokes the exitNavigationMode method which we will get to shortly
  • 9. Component fromComponent = createNavigationTag( trimmedString(from), duration / 60); Component toComponent = createNavigationTag(trimmedString(to), -1); MapLayout.setHorizontalAlignment(fromComponent, MapLayout.HALIGN.RIGHT); mapLayer.add(pathCoords[0], fromComponent); mapLayer.add(pathCoords[pathCoords.length - 1], toComponent); whereTo.setVisible(false); getToolbar().setVisible(false); Button back = new Button("", "TitleCommand"); FontImage.setMaterialIcon(back, FontImage.MATERIAL_ARROW_BACK); layer.add(NORTH, back); back.addActionListener(e -> exitNavigationMode(layer, fromComponent, toComponent, pathObject)); Label ride = new Label("Ride", "RideTitle"); Label taxi = new Label("Taxi", Resources.getGlobalResources(). getImage("ride.png"), "RideTitle"); taxi.setTextPosition(BOTTOM); Label separator = new Label("", "MarginSeparator"); separator.setShowEvenIfBlank(true); Button blackButton = new Button("Confirm", "BlackButton"); Container cnt = BoxLayout.encloseY(ride, taxi, separator, blackButton); cnt.setUIID("Form"); layer.add(SOUTH, cnt); enterNavigationMode This is the UI to approve the Taxi we are ordering. I used a white Container with the Form UIID on the SOUTH portion of the form as a layer
  • 10. private String trimmedString(String str) { int p = str.indexOf(','); if(p > -1) { str = str.substring(0, p); } if(str.length() > 15) { str = str.substring(0, 15); } return str; } trimmedString Before I continue I also used the trimmedString method in the code before to trim the tag components. There isn't much to say about this method, we rely on the fact that addresses usually have a comma after them. If the string is missing that or is too long we have special cases for those. This guarantees a string of decent length for the tag elements.
  • 11. private void exitNavigationMode(final Container layer, Component fromComponent, Component toComponent, MapContainer.MapObject pathObject) { layer.removeAll(); fromComponent.remove(); toComponent.remove(); mc.removeMapObject(pathObject); getToolbar().setVisible(true); whereTo.setVisible(true); revalidate(); inNavigationMode = false; } exitNavigationMode The one last missing piece of code is the exitNavigationMode call which just removes all elements and sets the invisible pieces back to visible. It's pretty trivial…
  • 12. RideTitle © Codename One 2017 all rights reserved We also have a few UIID's of note mentioned in the code. The first is RideTitle which is the title area for the ride UI. It's pretty much a Label so it has black over transparent colors
  • 13. RideTitle © Codename One 2017 all rights reserved But its centered
  • 14. RideTitle © Codename One 2017 all rights reserved It has the same padding as label
  • 15. RideTitle © Codename One 2017 all rights reserved Zero margin
  • 16. RideTitle © Codename One 2017 all rights reserved And same font
  • 17. MarginSeparator © Codename One 2017 all rights reserved MarginSeparator is a separator that has margins on the sides which we use in the ride dialog. Other separators in the app reach the edge of their parent container
  • 18. MarginSeparator © Codename One 2017 all rights reserved It has a couple of pixels of padding in the bottom to leave room for the separator
  • 19. MarginSeparator © Codename One 2017 all rights reserved It has the margins to keep it away from the edges of the parent container
  • 20. MarginSeparator © Codename One 2017 all rights reserved And it features a standard underline border
  • 21. BlackButton © Codename One 2017 all rights reserved The black button is just a standard white over black button
  • 22. BlackButton © Codename One 2017 all rights reserved With center text alignment as is common with buttons
  • 23. BlackButton © Codename One 2017 all rights reserved It’s got some padding but not too much so it won’t look huge
  • 24. BlackButton © Codename One 2017 all rights reserved It’s got some margin so it won’t literally touch the things next to it and to compensate over the smaller padding
  • 25. BlackButton © Codename One 2017 all rights reserved It uses a subtle round rect effect that’s just barely noticeable at 0.2 millimeters
  • 26. BlackButton © Codename One 2017 all rights reserved And its got a slightly larger regular font instead of the typical smaller light font. Once all of this is done we can just see navigation work and appear on the map as expected!