Learn how to step by step assemble scuba diving equipment
•
0 likes•10 views

It is the basic skill to assemble different pieces of scuba diving and getting them ready for actual diving. Check the step-by-step guide to perfectly assemble your scuba diving gear. It is useful whether you learn scuba diving in India or any other part of the world. Visit our official webpage for more information.

Recommended
Recommended
More Related Content
More from Seahawks Scuba
More from Seahawks Scuba (20)
Recently uploaded
Recently uploaded (20)
Learn how to step by step assemble scuba diving equipment
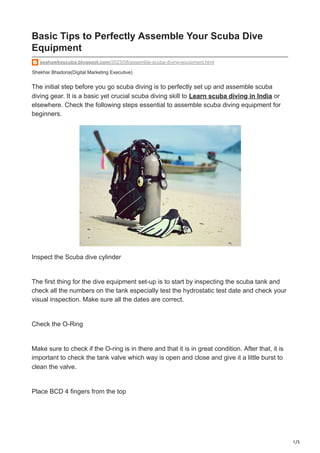
- 1. 1/3 Shekhar Bhadoria(Digital Marketing Executive) Basic Tips to Perfectly Assemble Your Scuba Dive Equipment seahawksscuba.blogspot.com/2023/08/assemble-scuba-diving-equipment.html The initial step before you go scuba diving is to perfectly set up and assemble scuba diving gear. It is a basic yet crucial scuba diving skill to Learn scuba diving in India or elsewhere. Check the following steps essential to assemble scuba diving equipment for beginners. Inspect the Scuba dive cylinder The first thing for the dive equipment set-up is to start by inspecting the scuba tank and check all the numbers on the tank especially test the hydrostatic test date and check your visual inspection. Make sure all the dates are correct. Check the O-Ring Make sure to check if the O-ring is in there and that it is in great condition. After that, it is important to check the tank valve which way is open and close and give it a little burst to clean the valve. Place BCD 4 fingers from the top
- 2. 2/3 Once the O-ring setup is done, grab the BCD at the BCD handle and put the safety strap away and correctly place the BCD over your scuba tank. Make sure that it is at least 4 fingers from the top. After that close the buckle and double-check that everything is completely attached. It is important to note that the tank valve must be parallel to the BCD handle. Attach the safety strap Place and tighten the safety strap and double-check that the BCD handle is parallel to your tank valve. You have to make sure that the tank is not too high or too low by placing your hand and fingers at the top of your valve and BCD to make sure everything is attached correctly. Grab your tank or the handle of the BCD and then give it a little wiggle just make sure you be careful of your back. Grab your regulator and unscrew the dust cap from the first stage and make sure that the two breathing hoses are on the right side or on the right shoulder of your BCD. Place the first stage over the valve and then gently screw until it's closed, now it's very important do not do this too tight so only three fingers tight. It's all ok if your regulator moves a little bit before we open up the tank. Attach the inflator hose to the BCD Now attach the low-pressure inflator hose by pulling back the top of the low-pressure inflator hose and connecting it to the inflator hose of the BCD. Make sure afterward that you streamline it. Attach the alternate air source Once it's all streamlined and looks in order grab your alternate air source and attach it at the right spot on your BCD. Make sure the yellow is shining onward. Now if everything looks good before opening up turn the SPG away from you so the glass, in the unlikely event that it damages it cannot hurt anybody. Hold down the inflator button of the BCD and slowly open up the tank instantly releasing the inflator button of the BCD. All the way open up the tank until the end. Now do a full check of your dive equipment by fully inflating the BCD first and letting air escape from the BCD then wait for a second.
- 3. 3/3 Make sure there are no leaks squeeze it a little bit so now we have checked that air goes in and that there are no leaks. Then deflate the BCD by releasing all the air, then check if it also works orally by putting a bit of air in there- a couple of breaths are enough. Make sure you press down the deflator button when you breathe in. Once that is all okay then deflate the BCD again. Then grab your stage in your right hand and your SPG in your left hand. Clean your second stage by purging a little bit then smelling it making sure that the air is not contaminated and then put your second stage in your mouth and breathe in slowly and deeply a few times while looking at your air gauge. Your air gauge needle should stay still if it moves then there is a problem. If it is all ok then put your second stage down again take out your alternate air source and repeat the process. Gently breathe in and out making sure that everything is ok. Replace the alternate air source and make sure that everything is streamlined again. Then after it is all streamlined gently place your equipment on its side and make a nice little package out of it as compact as possible.