SlideShare a Scribd company logo
1 of 10
NetApp Update Center User’s Guide
First complete all steps outlined in the Install Guide, located in the root directory.
At this point you should have already
● Installed and setup your local version of Ruby
● Installed and setup the Ruby Development Kit
● Cloned or Forked a copy of the NetApp Update Center codebase from Github
● Made the required gem file edit outlined in the install guide
● Ran bundle install command to download, install and configure all needed Ruby Gems
rake routes
Navigate to the root folder named SC-UpdateCenter. Open a command prompt window there and run the rake routes
command
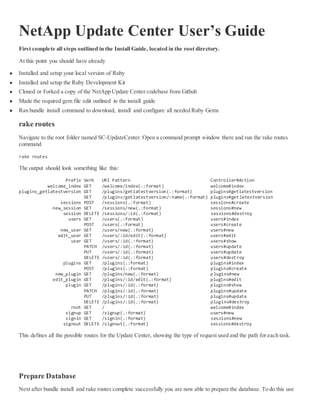
rake routes
The output should look something like this:
Prefix Verb URI Pattern Controller#Action
welcome_index GET /welcome/index(.:format) welcome#index
plugins_getlatestversion GET /plugins/getlatestversion(.:format) plugins#getlatestversion
GET /plugins/getlatestversion/:name(.:format) plugins#getlatestversion
sessions POST /sessions(.:format) sessions#create
new_session GET /sessions/new(.:format) sessions#new
session DELETE /sessions/:id(.:format) sessions#destroy
users GET /users(.:format) users#index
POST /users(.:format) users#create
new_user GET /users/new(.:format) users#new
edit_user GET /users/:id/edit(.:format) users#edit
user GET /users/:id(.:format) users#show
PATCH /users/:id(.:format) users#update
PUT /users/:id(.:format) users#update
DELETE /users/:id(.:format) users#destroy
plugins GET /plugins(.:format) plugins#index
POST /plugins(.:format) plugins#create
new_plugin GET /plugins/new(.:format) plugins#new
edit_plugin GET /plugins/:id/edit(.:format) plugins#edit
plugin GET /plugins/:id(.:format) plugins#show
PATCH /plugins/:id(.:format) plugins#update
PUT /plugins/:id(.:format) plugins#update
DELETE /plugins/:id(.:format) plugins#destroy
root GET / welcome#index
signup GET /signup(.:format) users#new
signin GET /signin(.:format) sessions#new
signout DELETE /signout(.:format) sessions#destroy
This defines all the possible routes for the Update Center, showing the type of request used and the path for each task.
Prepare Database
Next after bundle install and rake routes complete successfully you are now able to prepare the database. To do this use
the following rake command:
rake db:migrate
The command above “rake db:migrate” runs any pending migrations on the database and updates db/schema.rb file. Now
that the database is setup you must now start the server.
Rails Server
Open a new command window on the Update Center root directory. Then type the command:
rails s
This command is a shortcut for stating the server you can alternately run command:
rails server
They will both start the Update Center web server,you should see the output below after running the “rails s” or “rails
server” command
=> Booting WEBrick
=> Rails 4.0.0 application starting in development on http://0.0.0.0:3000
=> Run `rails server -h` for more startup options
=> Ctrl-C to shutdown server
[2013-10-18 03:08:44] INFO WEBrick 1.3.1
[2013-10-18 03:08:44] INFO ruby 2.0.0 (2013-06-27) [i386-mingw32]
[2013-10-18 03:08:44] INFO WEBrick::HTTPServer#start: pid=13340 port=3000
Note - You can stop the server by typing Ctrl-C in the command window running the server.
After this information is printed in the command window you are ready to start using the NetApp Snap Creator Update
Center.
Update Center Sign Up Page
You can access the Update Center by opening any web browser and navigating to the address
localhost:3000/users/new
The screenshot below is the Sign Up page for Update Center Users. This page may be restricted for some users,as only
approved users will be able to sign up to use the Update Center. The Sign Up page is shown below.
To signup youmust enter
● your name (mustbe presentatleast4 charactersand lessthan40 characters)
● your email address(mustbe present,invalidformat ex:someone@valid.edu,lessthan40 characters,and
unique ( thisaddressmustalsoNOT currentlybe inuse byanotheruserof Update Center)
● your password(mustbe presentandatleast6 characters andlessthan40 characters)
● your passwordconfirmation(mustmatchexactlythe contentsinthe passwordfield)
If you attemptto Signupfor the Update Centeranddo notmeetthese criteria,thenyouwill be metwillanerrorscreen
as all the above fieldsare validatedbefore saving.
Example errorscreen:
In the above example,the use name wastooshort,the email wasinan invalidform, the passwordconfirmationdidn’t
match the passwordandthe passwordwasalsotoo small.Whenall fieldsare filledinwithcorrectvaluesthe usergeta
successmessage anditautomatically signedin.The useristhentakentothe pluginsscreen.
Example screenshotbelow.
Once the user hascreatedan account, theyare able tosignin usingthe address
http://localhost:3000/signin
Users shouldsigninusingthe email andpasswordforthe Update Center.The signinpage is displayedbelow
Afterclickingsigninthe userwill see the same page thatwasdisplayedafterasuccessful signup.Thatpage listsplugins
alongwitha SignedInmessage ingreen.Example screenshotbelow
From thispage the usercan use the linklabeledPluginstosee the PluginsTable.There currentlyare NOTanypluginsto
viewsothe page is prettyempty.Itlookslike this:
To create an entryin the plugintable clickonthe buttonlabeledNew Plugin.Thiswill take youtothe Create Plugin
Page.Example shownbelow:
From thispage a usercan add Pluginstothe PluginsDatabase of Update Center.A validpluginentrymusthave
● a name (at least4 charactersand a maximumof 40 characters)
● a Major Versionnumber(thismustbe anintegeronly,andmustbe greaterthan or equal to0 )
● a Minor Versionnumber(thismustbe anintegeronly,andmustbe greaterthanor equal to 0 )
● a RevisionNumber(thismustbe anintegeronly,andmustbe greaterthan or equal to0 )
● a Buildnumber(thismustbe an integeronly,andmustbe greaterthanor equal to 0 )
If any of these fieldshave incorrectvalues(i.e.negative,fractionsorotherincorrectvalues) Update Centerwill not
accept the pluginentryandwill showanerrorpage like below
The above error page showsmultiple errorsandalsolistseachof them inred.The errorsabove are
● the Name “Coo” istoo short
● the major version(-1) mustbe greaterthanor equal to 0
● the minorversion(.4) mustbe an integer
● the revisionnumbermustbe greaterthanor equal to0
Aftercorrectingthe errorsabove and enteringinvalidvalueswe are able tocreate a pluginentrytothe database.Click
on the ShowPlugin,Agent,orServerCompatibilitiesbuttonstoview adropdownlistof all available componentsand
checkwhichcomponentsare compatible withthisnew plugin.Afterclickingthe Create Pluginbuttonapage loadsthat
showsyouthe entrythat you justaddedalongwithitsversioninformation.Itisshowninthe below screenshot:
Nowclickeitherthe backlinkor the Pluginslinkabove will bringyoubacktothe pluginspage,youcansee itnow listthe
pluginyoujustcreated.
Nowthat a pluginhasbeencreated,note the optionsthatexistforthe plugin.Theyare shownaslinksatthe endof each
line thatlista plugin.Onthe above page youcan see the links“Show”,“Edit”and “Delete”.Clickingonone of these links
allowsyoutocomplete the specifiedaction. Forexample if youclickthe linkforedityouwill be able toeditthe plugin
informationusingapage like the one below
Once you have made the needededitstothe plugininformation,clickthe Update PluginButtontoupdate the database
entryfor that plugin. Youwill receive aPluginUpdatedconfirmationmessage andbe shownapage like the one below:
Use the pluginpage toadd all pluginsandtheirversioninformation.

More Related Content

What's hot

Configuring Anypoint Studio MQ connector
Configuring Anypoint Studio MQ connectorConfiguring Anypoint Studio MQ connector
Configuring Anypoint Studio MQ connectorShanky Gupta
 
Setting up a debugging environment for Drupal
Setting up a debugging environment for DrupalSetting up a debugging environment for Drupal
Setting up a debugging environment for Drupaljonlee554
 
Python/Flask Presentation
Python/Flask PresentationPython/Flask Presentation
Python/Flask PresentationParag Mujumdar
 
Installation of Drupal on Windows XP with XAMPP
Installation of Drupal on Windows XP with XAMPPInstallation of Drupal on Windows XP with XAMPP
Installation of Drupal on Windows XP with XAMPPRupesh Kumar
 
Bugzilla Installation Process
Bugzilla Installation ProcessBugzilla Installation Process
Bugzilla Installation ProcessVino Harikrishnan
 
Laravel Beginners Tutorial 2
Laravel Beginners Tutorial 2Laravel Beginners Tutorial 2
Laravel Beginners Tutorial 2Vikas Chauhan
 
Installation instruction of Testlink
Installation instruction of TestlinkInstallation instruction of Testlink
Installation instruction of Testlinkusha kannappan
 
Laravel Forge: Hello World to Hello Production
Laravel Forge: Hello World to Hello ProductionLaravel Forge: Hello World to Hello Production
Laravel Forge: Hello World to Hello ProductionJoe Ferguson
 
Android.AntiSpam Lab
Android.AntiSpam LabAndroid.AntiSpam Lab
Android.AntiSpam LabLeo Nguyen
 
Philip Arthur Moore: Best Practices — On Breaking and Fixing WordPress Themes
Philip Arthur Moore: Best Practices — On Breaking and Fixing WordPress ThemesPhilip Arthur Moore: Best Practices — On Breaking and Fixing WordPress Themes
Philip Arthur Moore: Best Practices — On Breaking and Fixing WordPress ThemesPhilip Arthur Moore
 
Sergii Shymko: Magento 2: Composer for Extensions Distribution
Sergii Shymko: Magento 2: Composer for Extensions DistributionSergii Shymko: Magento 2: Composer for Extensions Distribution
Sergii Shymko: Magento 2: Composer for Extensions DistributionMeet Magento Italy
 
Laravel and artisan cli
Laravel and artisan cliLaravel and artisan cli
Laravel and artisan cliSayed Ahmed
 
Wordpress development: A Modern Approach
Wordpress development:  A Modern ApproachWordpress development:  A Modern Approach
Wordpress development: A Modern ApproachAlessandro Fiore
 
Build website in_django
Build website in_django Build website in_django
Build website in_django swee meng ng
 
Send, pass, get variables with php, form, html & java script code
Send, pass, get variables with php, form, html & java script codeSend, pass, get variables with php, form, html & java script code
Send, pass, get variables with php, form, html & java script codeNoushadur Shoukhin
 

What's hot (20)

Configuring Anypoint Studio MQ connector
Configuring Anypoint Studio MQ connectorConfiguring Anypoint Studio MQ connector
Configuring Anypoint Studio MQ connector
 
Setting up a debugging environment for Drupal
Setting up a debugging environment for DrupalSetting up a debugging environment for Drupal
Setting up a debugging environment for Drupal
 
Laravel 101
Laravel 101Laravel 101
Laravel 101
 
Python/Flask Presentation
Python/Flask PresentationPython/Flask Presentation
Python/Flask Presentation
 
Installation of Drupal on Windows XP with XAMPP
Installation of Drupal on Windows XP with XAMPPInstallation of Drupal on Windows XP with XAMPP
Installation of Drupal on Windows XP with XAMPP
 
Bugzilla Installation Process
Bugzilla Installation ProcessBugzilla Installation Process
Bugzilla Installation Process
 
Flask
FlaskFlask
Flask
 
ADF in action 1.2
ADF in action 1.2ADF in action 1.2
ADF in action 1.2
 
Laravel Beginners Tutorial 2
Laravel Beginners Tutorial 2Laravel Beginners Tutorial 2
Laravel Beginners Tutorial 2
 
Installation instruction of Testlink
Installation instruction of TestlinkInstallation instruction of Testlink
Installation instruction of Testlink
 
Laravel Forge: Hello World to Hello Production
Laravel Forge: Hello World to Hello ProductionLaravel Forge: Hello World to Hello Production
Laravel Forge: Hello World to Hello Production
 
Git setuplinux
Git setuplinuxGit setuplinux
Git setuplinux
 
Android.AntiSpam Lab
Android.AntiSpam LabAndroid.AntiSpam Lab
Android.AntiSpam Lab
 
Philip Arthur Moore: Best Practices — On Breaking and Fixing WordPress Themes
Philip Arthur Moore: Best Practices — On Breaking and Fixing WordPress ThemesPhilip Arthur Moore: Best Practices — On Breaking and Fixing WordPress Themes
Philip Arthur Moore: Best Practices — On Breaking and Fixing WordPress Themes
 
Sergii Shymko: Magento 2: Composer for Extensions Distribution
Sergii Shymko: Magento 2: Composer for Extensions DistributionSergii Shymko: Magento 2: Composer for Extensions Distribution
Sergii Shymko: Magento 2: Composer for Extensions Distribution
 
Laravel and artisan cli
Laravel and artisan cliLaravel and artisan cli
Laravel and artisan cli
 
Presentation laravel 5 4
Presentation laravel 5 4Presentation laravel 5 4
Presentation laravel 5 4
 
Wordpress development: A Modern Approach
Wordpress development:  A Modern ApproachWordpress development:  A Modern Approach
Wordpress development: A Modern Approach
 
Build website in_django
Build website in_django Build website in_django
Build website in_django
 
Send, pass, get variables with php, form, html & java script code
Send, pass, get variables with php, form, html & java script codeSend, pass, get variables with php, form, html & java script code
Send, pass, get variables with php, form, html & java script code
 

Similar to NetApp Update Center User's Guide

130297267 transformations
130297267 transformations130297267 transformations
130297267 transformationsSunil Pandey
 
M365 global developer bootcamp 2019 PA
M365 global developer bootcamp 2019  PAM365 global developer bootcamp 2019  PA
M365 global developer bootcamp 2019 PAThomas Daly
 
SuiteCRM Customer Portal
SuiteCRM Customer PortalSuiteCRM Customer Portal
SuiteCRM Customer PortalAppJetty
 
Setting up the hyperledger composer in ubuntu
Setting up the hyperledger composer in ubuntuSetting up the hyperledger composer in ubuntu
Setting up the hyperledger composer in ubuntukesavan N B
 
Mantis Installation for Windows Box
Mantis Installation for Windows BoxMantis Installation for Windows Box
Mantis Installation for Windows BoxJayanta Dash
 
( 16 ) Office 2007 Create An Extranet Site With Forms Authentication
( 16 ) Office 2007   Create An Extranet Site With Forms Authentication( 16 ) Office 2007   Create An Extranet Site With Forms Authentication
( 16 ) Office 2007 Create An Extranet Site With Forms AuthenticationLiquidHub
 
M365 global developer bootcamp 2019 Intro to SPFx Version
M365 global developer bootcamp 2019 Intro to SPFx VersionM365 global developer bootcamp 2019 Intro to SPFx Version
M365 global developer bootcamp 2019 Intro to SPFx VersionThomas Daly
 
How to install Vertica in a single node.
How to install Vertica in a single node.How to install Vertica in a single node.
How to install Vertica in a single node.Anil Maharjan
 
How to build twitter bot using golang from scratch
How to build twitter bot using golang from scratchHow to build twitter bot using golang from scratch
How to build twitter bot using golang from scratchKaty Slemon
 
installation and configuration of informatica server
installation and configuration of informatica serverinstallation and configuration of informatica server
installation and configuration of informatica serverketulp
 
M365 global developer bootcamp 2019
M365 global developer bootcamp 2019M365 global developer bootcamp 2019
M365 global developer bootcamp 2019Thomas Daly
 
Writing simple web services in java using eclipse editor
Writing simple web services in java using eclipse editorWriting simple web services in java using eclipse editor
Writing simple web services in java using eclipse editorSantosh Kumar Kar
 
WordPress Plugin Development 201
WordPress Plugin Development 201WordPress Plugin Development 201
WordPress Plugin Development 201ylefebvre
 
Data Warehousing (Practical Questions Paper) [CBSGS - 75:25 Pattern] {2015 Ma...
Data Warehousing (Practical Questions Paper) [CBSGS - 75:25 Pattern] {2015 Ma...Data Warehousing (Practical Questions Paper) [CBSGS - 75:25 Pattern] {2015 Ma...
Data Warehousing (Practical Questions Paper) [CBSGS - 75:25 Pattern] {2015 Ma...Mumbai B.Sc.IT Study
 
How to Install Magento on WAMP Server
How to Install Magento on WAMP ServerHow to Install Magento on WAMP Server
How to Install Magento on WAMP ServerAPPSeCONNECT
 
Install laravel on openshift
Install laravel on openshiftInstall laravel on openshift
Install laravel on openshiftSamy Saad
 

Similar to NetApp Update Center User's Guide (20)

130297267 transformations
130297267 transformations130297267 transformations
130297267 transformations
 
M365 global developer bootcamp 2019 PA
M365 global developer bootcamp 2019  PAM365 global developer bootcamp 2019  PA
M365 global developer bootcamp 2019 PA
 
SuiteCRM Customer Portal
SuiteCRM Customer PortalSuiteCRM Customer Portal
SuiteCRM Customer Portal
 
Setting up the hyperledger composer in ubuntu
Setting up the hyperledger composer in ubuntuSetting up the hyperledger composer in ubuntu
Setting up the hyperledger composer in ubuntu
 
Mantis Installation for Windows Box
Mantis Installation for Windows BoxMantis Installation for Windows Box
Mantis Installation for Windows Box
 
( 16 ) Office 2007 Create An Extranet Site With Forms Authentication
( 16 ) Office 2007   Create An Extranet Site With Forms Authentication( 16 ) Office 2007   Create An Extranet Site With Forms Authentication
( 16 ) Office 2007 Create An Extranet Site With Forms Authentication
 
Solace Integration with Mulesoft
Solace Integration with MulesoftSolace Integration with Mulesoft
Solace Integration with Mulesoft
 
M365 global developer bootcamp 2019 Intro to SPFx Version
M365 global developer bootcamp 2019 Intro to SPFx VersionM365 global developer bootcamp 2019 Intro to SPFx Version
M365 global developer bootcamp 2019 Intro to SPFx Version
 
How to install Vertica in a single node.
How to install Vertica in a single node.How to install Vertica in a single node.
How to install Vertica in a single node.
 
How to build twitter bot using golang from scratch
How to build twitter bot using golang from scratchHow to build twitter bot using golang from scratch
How to build twitter bot using golang from scratch
 
installation and configuration of informatica server
installation and configuration of informatica serverinstallation and configuration of informatica server
installation and configuration of informatica server
 
Microsoft Lync Server 2010 Installation
Microsoft Lync Server 2010 InstallationMicrosoft Lync Server 2010 Installation
Microsoft Lync Server 2010 Installation
 
M365 global developer bootcamp 2019
M365 global developer bootcamp 2019M365 global developer bootcamp 2019
M365 global developer bootcamp 2019
 
Web hosting Free Hosting
Web hosting Free HostingWeb hosting Free Hosting
Web hosting Free Hosting
 
Web hosting get start online
Web hosting get start onlineWeb hosting get start online
Web hosting get start online
 
Writing simple web services in java using eclipse editor
Writing simple web services in java using eclipse editorWriting simple web services in java using eclipse editor
Writing simple web services in java using eclipse editor
 
WordPress Plugin Development 201
WordPress Plugin Development 201WordPress Plugin Development 201
WordPress Plugin Development 201
 
Data Warehousing (Practical Questions Paper) [CBSGS - 75:25 Pattern] {2015 Ma...
Data Warehousing (Practical Questions Paper) [CBSGS - 75:25 Pattern] {2015 Ma...Data Warehousing (Practical Questions Paper) [CBSGS - 75:25 Pattern] {2015 Ma...
Data Warehousing (Practical Questions Paper) [CBSGS - 75:25 Pattern] {2015 Ma...
 
How to Install Magento on WAMP Server
How to Install Magento on WAMP ServerHow to Install Magento on WAMP Server
How to Install Magento on WAMP Server
 
Install laravel on openshift
Install laravel on openshiftInstall laravel on openshift
Install laravel on openshift
 

NetApp Update Center User's Guide

  • 1. NetApp Update Center User’s Guide First complete all steps outlined in the Install Guide, located in the root directory. At this point you should have already ● Installed and setup your local version of Ruby ● Installed and setup the Ruby Development Kit ● Cloned or Forked a copy of the NetApp Update Center codebase from Github ● Made the required gem file edit outlined in the install guide ● Ran bundle install command to download, install and configure all needed Ruby Gems rake routes Navigate to the root folder named SC-UpdateCenter. Open a command prompt window there and run the rake routes command rake routes The output should look something like this: Prefix Verb URI Pattern Controller#Action welcome_index GET /welcome/index(.:format) welcome#index plugins_getlatestversion GET /plugins/getlatestversion(.:format) plugins#getlatestversion GET /plugins/getlatestversion/:name(.:format) plugins#getlatestversion sessions POST /sessions(.:format) sessions#create new_session GET /sessions/new(.:format) sessions#new session DELETE /sessions/:id(.:format) sessions#destroy users GET /users(.:format) users#index POST /users(.:format) users#create new_user GET /users/new(.:format) users#new edit_user GET /users/:id/edit(.:format) users#edit user GET /users/:id(.:format) users#show PATCH /users/:id(.:format) users#update PUT /users/:id(.:format) users#update DELETE /users/:id(.:format) users#destroy plugins GET /plugins(.:format) plugins#index POST /plugins(.:format) plugins#create new_plugin GET /plugins/new(.:format) plugins#new edit_plugin GET /plugins/:id/edit(.:format) plugins#edit plugin GET /plugins/:id(.:format) plugins#show PATCH /plugins/:id(.:format) plugins#update PUT /plugins/:id(.:format) plugins#update DELETE /plugins/:id(.:format) plugins#destroy root GET / welcome#index signup GET /signup(.:format) users#new signin GET /signin(.:format) sessions#new signout DELETE /signout(.:format) sessions#destroy This defines all the possible routes for the Update Center, showing the type of request used and the path for each task. Prepare Database Next after bundle install and rake routes complete successfully you are now able to prepare the database. To do this use
  • 2. the following rake command: rake db:migrate The command above “rake db:migrate” runs any pending migrations on the database and updates db/schema.rb file. Now that the database is setup you must now start the server. Rails Server Open a new command window on the Update Center root directory. Then type the command: rails s This command is a shortcut for stating the server you can alternately run command: rails server They will both start the Update Center web server,you should see the output below after running the “rails s” or “rails server” command => Booting WEBrick => Rails 4.0.0 application starting in development on http://0.0.0.0:3000 => Run `rails server -h` for more startup options => Ctrl-C to shutdown server [2013-10-18 03:08:44] INFO WEBrick 1.3.1 [2013-10-18 03:08:44] INFO ruby 2.0.0 (2013-06-27) [i386-mingw32] [2013-10-18 03:08:44] INFO WEBrick::HTTPServer#start: pid=13340 port=3000 Note - You can stop the server by typing Ctrl-C in the command window running the server. After this information is printed in the command window you are ready to start using the NetApp Snap Creator Update Center. Update Center Sign Up Page You can access the Update Center by opening any web browser and navigating to the address localhost:3000/users/new The screenshot below is the Sign Up page for Update Center Users. This page may be restricted for some users,as only approved users will be able to sign up to use the Update Center. The Sign Up page is shown below.
  • 3. To signup youmust enter ● your name (mustbe presentatleast4 charactersand lessthan40 characters) ● your email address(mustbe present,invalidformat ex:someone@valid.edu,lessthan40 characters,and unique ( thisaddressmustalsoNOT currentlybe inuse byanotheruserof Update Center) ● your password(mustbe presentandatleast6 characters andlessthan40 characters) ● your passwordconfirmation(mustmatchexactlythe contentsinthe passwordfield) If you attemptto Signupfor the Update Centeranddo notmeetthese criteria,thenyouwill be metwillanerrorscreen as all the above fieldsare validatedbefore saving. Example errorscreen:
  • 4. In the above example,the use name wastooshort,the email wasinan invalidform, the passwordconfirmationdidn’t match the passwordandthe passwordwasalsotoo small.Whenall fieldsare filledinwithcorrectvaluesthe usergeta successmessage anditautomatically signedin.The useristhentakentothe pluginsscreen. Example screenshotbelow.
  • 5. Once the user hascreatedan account, theyare able tosignin usingthe address http://localhost:3000/signin Users shouldsigninusingthe email andpasswordforthe Update Center.The signinpage is displayedbelow
  • 6. Afterclickingsigninthe userwill see the same page thatwasdisplayedafterasuccessful signup.Thatpage listsplugins alongwitha SignedInmessage ingreen.Example screenshotbelow From thispage the usercan use the linklabeledPluginstosee the PluginsTable.There currentlyare NOTanypluginsto viewsothe page is prettyempty.Itlookslike this: To create an entryin the plugintable clickonthe buttonlabeledNew Plugin.Thiswill take youtothe Create Plugin Page.Example shownbelow:
  • 7. From thispage a usercan add Pluginstothe PluginsDatabase of Update Center.A validpluginentrymusthave ● a name (at least4 charactersand a maximumof 40 characters) ● a Major Versionnumber(thismustbe anintegeronly,andmustbe greaterthan or equal to0 ) ● a Minor Versionnumber(thismustbe anintegeronly,andmustbe greaterthanor equal to 0 ) ● a RevisionNumber(thismustbe anintegeronly,andmustbe greaterthan or equal to0 ) ● a Buildnumber(thismustbe an integeronly,andmustbe greaterthanor equal to 0 ) If any of these fieldshave incorrectvalues(i.e.negative,fractionsorotherincorrectvalues) Update Centerwill not accept the pluginentryandwill showanerrorpage like below
  • 8. The above error page showsmultiple errorsandalsolistseachof them inred.The errorsabove are ● the Name “Coo” istoo short ● the major version(-1) mustbe greaterthanor equal to 0 ● the minorversion(.4) mustbe an integer ● the revisionnumbermustbe greaterthanor equal to0 Aftercorrectingthe errorsabove and enteringinvalidvalueswe are able tocreate a pluginentrytothe database.Click on the ShowPlugin,Agent,orServerCompatibilitiesbuttonstoview adropdownlistof all available componentsand checkwhichcomponentsare compatible withthisnew plugin.Afterclickingthe Create Pluginbuttonapage loadsthat showsyouthe entrythat you justaddedalongwithitsversioninformation.Itisshowninthe below screenshot: Nowclickeitherthe backlinkor the Pluginslinkabove will bringyoubacktothe pluginspage,youcansee itnow listthe pluginyoujustcreated.
  • 9. Nowthat a pluginhasbeencreated,note the optionsthatexistforthe plugin.Theyare shownaslinksatthe endof each line thatlista plugin.Onthe above page youcan see the links“Show”,“Edit”and “Delete”.Clickingonone of these links allowsyoutocomplete the specifiedaction. Forexample if youclickthe linkforedityouwill be able toeditthe plugin informationusingapage like the one below
  • 10. Once you have made the needededitstothe plugininformation,clickthe Update PluginButtontoupdate the database entryfor that plugin. Youwill receive aPluginUpdatedconfirmationmessage andbe shownapage like the one below: Use the pluginpage toadd all pluginsandtheirversioninformation.