SlideShare a Scribd company logo
1 of 30
Download to read offline
How to Bake:
The Basics of Butter Cakes
By Jennifer Rao - Around the World in 80 Cakes
To my husband, soulmate and best friend Rohit Rao. The day I met you was
the best day of my life.
Text copyright Š 2014 Jennifer Rao
All Rights Reserved
Start an Amazing and Delicious Baking Cakes with
No Expensive Tools at Home!!
GrabNow
TABLE OF CONTENTS
PREFACE..................................................................................................................................................................4
EQUIPMENT PREP......................................................................................................................................................5
THE OVEN......................................................................................................................................6
THE PANS......................................................................................................................................7
INGREDIENT PREP (AKA MISE EN PLACE)....................................................................................................................9
BRINGING INGREDIENTS TO ROOM TEMPERATURE.............................................................................10
MEASURING OUT FLOUR................................................................................................................13
BAKING POWDER AND BAKING SODA...............................................................................................15
SUGAR.........................................................................................................................................15
SIFTING YOUR DRY INGREDIENTS....................................................................................................16
MIXING UP THE BATTER............................................................................................................................................17
CREAMING THE BUTTER.................................................................................................................18
ADDING THE EGGS........................................................................................................................19
ADDING THE DRY AND WET INGREDIENTS........................................................................................20
BAKING THE CAKE...................................................................................................................................................21
FILLING THE PANS.........................................................................................................................22
BAKING THE CAKE.........................................................................................................................23
RECIPES.................................................................................................................................................................24
CLASSIC YELLOW CAKE RECIPE......................................................................................................25
VANILLA BUTTERCREAM RECIPE......................................................................................................26
REFERENCES AND RECOMMENDATIONS......................................................................................................................27
REFERENCES................................................................................................................................28
BAKING EQUIPMENT RECOMMENDATIONS.........................................................................................29
ABOUT THE AUTHOR......................................................................................................................30
OTHER PUBLICATIONS:.........................................................................................................................30
CONNECT WITH ME:............................................................................................................................30
I have a passion for baking that is matched only by my love
of science. As a small child, I would often switch between my
Easy-Bake oven and my chemistry set (both produced many
weird and wonderful things). Yet, as I got older and started
baking “for real” I started to find the idea of baking a cake
from scratch somewhat daunting. That was until I realized that
baking is just chemistry (delicious, delicious chemistry). I now
treat each recipe I make like an experiment. My experience as
a scientist and engineer has made me realize that when baking
a cake, just like any other experiment, you will have a higher
likelihood of success if you have a clear set of instructions and
follow them closely.
In this book I walk through the steps I follow for every
cake “experiment” I make. If you are nervous, as I once was, I
hope that it will help you become more comfortable with the
basics of baking a cake from scratch. If you already have a few
cakes under your belt (figuratively and literally), you might still
come across a few tips and tricks that help you achieve more
consistent results.
If you ever have any baking questions I’m always happy to
help. You can contact me at Jen@80cakes.com or visit my
website, www.80cakes.com, for more baking tips and recipes.
Also check out my eBook series, Cakes without Borders, for
more unique recipes inspired by flavors from around the world.
Preface
The first step in just about every
baking recipe has you first preheat
your oven and prepare any pans or
other equipment you will be using.
Let’s talk a little bit about why these
steps are important, and how best to
approach them.
Chapter 1
Equipment Prep
The Oven
Preheating your oven is the first thing that should happen
when you decide you are going to bake something (yes, even
before you start getting out your ingredients). Most ovens
take a long time to come to the proper temperature. Even if
the oven says it's done preheating in only 10 minutes, you
should really preheat for at least 20. I always start mine
before I do anything else. Even if it takes me 30 minutes to
mix up my batter, it's better to have the oven on a bit longer
and know it's at the right temperature than putting your cake
into a cold or unevenly heated oven. Also, make sure the oven
rack is in the center of the oven before you begin to preheat.
Moving a hot rack adds an unnecessary element of danger.
Get an oven thermometer! Even in a brand new oven I
have found that the temperature isn't always accurate and I
have to increase (or decrease) the set temperature by a few
degrees to get it where it needs to be.
Make sure your oven is level. If you don't have a level at
home you can often find an App for your smart phone that will
do the trick. I learned the hard way that mine wasn't level
when my brand new oven produced a leaning tower of cake! I
now have little pieces of cardboard under the front feet to
keep it level.
Step Inside in this door of Baking
I always prep my cake pans before even touching any of
my ingredients. I start off by cutting out circles of parchment
paper to line the pans with. You’ll need your pans handy to
use as your outline, some good parchment paper (I like to use
natural unbleached parchment), scissors and a pencil.
I trace the outline of the pan with a pencil and then cut
out the shape along the inside of the pencil mark so that all
I’m left with is a circle (or square) of parchment paper. Once
I'm done cutting I'll often take the scrap pieces of paper and
cut them into small squares to use when I make royal icing
flowers or other decorations that need to dry on a non-stick
surface (topics for another day).
Next, I spray the pan with non-stick baking spray. This is
any non-stick spray that contains flour in it (like Bakers Joy,
Pam with Flour, or even a generic store brand). I prefer using
baking spray over the old "grease and flour" method and I've
never had a problem with my cake sticking to the pan. Spray
the pan and use a pastry brush to spread the spray around the
The Pans
bottom and sides. Next, put your piece of parchment paper in
the bottom, spray the top of it, and use the pastry brush to
spread it evenly once again. The use of the parchment paper
along with the baking spray almost guarantees your cakes will
unmold perfectly every time.
If you have ever wondered how to get your cake to bake
up without that infamous dome on top then I have two words
for you: cake strips. Cake strips are special strips of fabric
that are oven safe. They come in a number of different sizes to
fit just about every pan on the market. For very large cake
pans I'll even connect multiple strips together.
To use a cake strip, you first soak it in water until it is
completely wet. Ring it out and then wrap it around your pan,
using the pins it comes with to secure it. The reason cakes
bake with a dome is because the sides of the cake bake (and
set) faster since they are in contact with the hot metal of the
pan. Meanwhile, the center doesn't bake as fast and continues
to rise. The cake strips even things out by cooling down the
sides of the pan so that the sides of the cake bake at the same
speed as the center, giving you a nice level cake.
Chapter 2
Ingredient Prep (AKA Mise En Place)
Mise En Place is a French term
that means "putting in place". It is
often used in cooking and baking to
refer to the gathering of all your
ingredients before you start a recipe.
Mise En Place is a French term that means "putting in
place". It is often used in cooking and baking to refer to the
gathering of all your ingredients before you start a recipe.
Now, I may not speak French but I do believe in this practice
100%. In my early years as a baker I was stung one too many
times where I was half way through mixing a recipe and then
realized I was missing an ingredient. Mise En Place will not
only ensure that you have everything you need, but it will also
help prevent mistakes. Before you start to mix up any recipe,
go through the list of ingredients and measure/weigh them all
out first.
Depending on the recipe you are working with, it may say
something about having your ingredients at room temperature,
or at least that your butter should be softened. Softened
butter is required when the recipe has a step called "creaming
the butter" where you beat the butter at high speed using a
mixer, usually for about 3-5 minutes, until it has become light
and fluffy.
What this step is effectively doing is incorporating lots of
tiny air bubbles into the butter. These air bubbles will act as a
leavening agent during the baking process causing the batter
to rise when they expand. If your butter is too cold it will be
too stiff for air to incorporate into it, and if it's too soft then
the air bubbles won't stay. That is why having the butter at
the right temperature (usually between 65-70°F) is so
important, because if this step isn't done correctly your cake
will not rise properly.
Much like your softened butter, your other ingredients
should be at room temperature as well. If you add very cold
eggs and milk to room temperature butter, you run the risk of
hardening the butter at which point your ingredients will not
mix together properly.
Before the invention of the wonderful microwave, the
best way of getting your cold ingredients to room temperature
was to leave them out on the counter for a few hours. Many
people still use this method, but that doesn't always work if
you are short on time, or it's the middle of winter and your
house is cold. That is why I like to use my microwave, and
other modern conveniences, as much as possible to prep my
ingredients.
Let’s break it down ingredient by ingredient…
Bringing Ingredients to Room Temperature
EGGS
To get my eggs to room temperature I don't use a
microwave. Instead I put them (still in their shells) in a
bowl and cover them with warm tap water. I'll usually do
this first when I'm starting to gather my ingredients. This
will slowly warm them and they should be at the perfect
temperature by the time you are ready to add them to your
cake batter. When they've warmed up, empty the water
from the bowl, wipe it dry and break the eggs right into the
same bowl. Breaking the eggs into this bowl rather than
over your final mixing bowl will help avoid getting egg
shells in your batter. If you do spot a piece of shell, wet
your finger with water before you go in after it. It makes it
much easier to get to.
BUTTER
I usually measure out my butter into a microwave safe
bowl and then microwave it at HALF POWER for 15-20
second intervals. In between each zap I'll press a spatula
(or finger) into the butter to see if it is soft enough yet. You
want it to be soft but still hold its shape.
Using half power is very important; otherwise you will
end up with a pool of melted butter before you know it.
Keep the microwave times short, butter can go from solid
to liquid very quickly. If you do end up melting the butter
just put it in the fridge for a bit until it starts to become a
solid again.
MILK AND OTHER COLD INGREDIENTS
Milk and other cold ingredients (like sour cream,
yogurt and cream cheese) should also be brought to room
temperature (like the butter and eggs) to ensure an evenly
mixed batter. Measure the milk out in a microwave safe
measuring cup. Microwave it at full power for about 20-30
seconds which is enough to bring a cup of milk pretty close
to room temperature.
HOT INGREDIENTS
The other thing to consider when prepping your
ingredients are any that might start out warm. Imagine a
recipe that calls for the addition of coffee. Now imagine
adding that coffee to your batter while it's still piping hot.
It will most likely melt the butter causing you to lose all
those nice air bubbles you incorporated during the
creaming stage, which we’ll talk about in a bit, and
ultimately ruin your batter.
To avoid scenarios like this, you want to make sure
any hot ingredients have had plenty of time to cool down to
room temperature before adding them to your batter. You
can always put them in the refrigerator or freezer to speed
up the cooling process.
You can find more information about bringing
ingredients to room temperature (including a detailed
video) on my website, www.80cakes.com.
Flour is the backbone of just about every cake recipe out
there, so making sure you have the right amount of it is
essential. Most recipes tell you how much flour you need but
don't always mention how it should be measured out. The
problem with this ambiguity is that you could end up with very
different results depending on how you fill the measuring cup.
In the images below I show the difference in the weight of one
cup of flour measured using the dip and sweep method versus
the spoon into a cup method. As the name suggests, the dip
and sweep method is when you dip the measuring cup into the
flour container and then use a straight edge to sweep off the
excess. For spoon into a cup you lightly spoon the flour into
your measuring cup, making sure not to accidentally tap the
flour down, and then level off with a straight edge.
As you can see from the images below the dip and sweep
method gets you a higher weight of flour (4.8 ounces per cup)
versus the spoon into a cup method (4.3 ounces per cup). So
which one do you go with? If the recipe you are making is from
a book, check the Methods section (if there is one) to see if
the author specifies which method they use. If the recipe is
from the Internet or elsewhere, the best thing to do is
experiment. Bake it once using the dip and sweep method and
see how it comes out. If it feels dry or tastes like it has too
much flour then try using the spoon into a cup method the next
time.
Measuring Out Flour
Dip and Sweep Method Spoon Into a Cup Method
Irrespective of how you get your flour (dip and sweep or
spoon into a cup), the best method for actually measuring it is
to weigh it. Even if the recipe you are using doesn't give
weights, use your kitchen scale (a very handy baking tool if you
don't already have one) to weight out how much flour you are
adding each time you bake it (like it were an experiment). That
way, once you find a version you are happy with you can
reproduce the recipe perfectly every single time. The example
to the right shows how having even the slightest bit of extra
flour can change the appearance of a cupcake (each was made
with the same amount of batter).
Besides measuring it accurately (correctly) and precisely
(consistently), another very important detail that you need to
follow is the type of flour the recipe calls for since different
types of flour have different protein contents. During the
baking process the protein of the flour turns into gluten, which
is what gives a cake much of its structure. Bread flour for
example has 11.5-13.5% protein while cake flour only has 6-8%
protein. That is why breads are typically dense and chewy
while cakes are light and fluffy. Even plain all-purpose flour
can range from 9.5-11.5% protein.
I learned the hard way how big a role protein plays when
baking a cake. I once picked up a different brand of all-
purpose flour (assuming they were all fairly similar) and
started to notice that all of my cakes were coming out much
denser and with a coarser texture. I happened to read the
ingredient label on the bag and noticed that it had 11.7%
protein! The brand I typically used only had 10% protein. Even
that small difference in the amount of protein had a huge
impact on the quality of my cakes.
CAKE FLOUR SUBSTITUTION
If your recipe calls for cake flour but you don't have any
or just can't find it, here is a simple substitution: for every
one cup of cake flour you need, replace it with (1 cup minus 2
tablespoons of all-purpose flour) + 2 tablespoons of
cornstarch. You are basically replacing 2 tablespoons of flour
with 2 tablespoons of cornstarch for every cup of flour used.
This lowers the percentage of protein by volume, bringing it
closer to that of cake flour. You can mix up a large batch of
this "substitute cake flour" so that it can easily be measured
out when a recipe calls for it. Just be sure to mix it up well
before using it.
Just about every cake recipe out there calls for leavening of some kind. The most common are either baking powder or
baking soda. Baking soda, also known as sodium bicarbonate, is what is referred to as an alkaline. That means it has the
capability to neutralize an acid. When it does so it release gas bubbles, and those bubble are what flow through the cake batter
causing it to rise. You will find that when a recipe calls for baking soda it also contains some sort of acidic ingredient that the
baking soda will react with. Some common ones are vinegar, cocoa, buttermilk, etc.
When a recipe does not contain a strong acid in the ingredient list then you will see that it usually calls for baking powder.
Baking powder is a mixture of baking soda and some kind of acid, such as cream of tartar. Since they are both dry they do not
react until they are moistened by the liquid in the cake batter. They are then able to react and form the gas needed to make the
cake rise.
Baking Powder and Baking Soda
Sugar
If you are making a butter cake, the recipe will most likely tell you to add your sugar after creaming your butter. Other
recipes may have you mix it in with your other dry ingredients. In either case you want to make sure you are measuring properly.
Once again, if a weight is given in the recipe the best method is to weigh out your sugar. Otherwise using the dip and sweep
method for granulated sugar is probably the most common.
For brown sugar most recipes will say "firmly packed into a cup". Once again depending on how much you pack it in you could
end up with very different weights so if you aren't using a scale try to be as consistent as possible with how much you pack the
sugar in so that you can reproduce your recipe successfully every time.
Many recipes start off by asking you to sift your dry
ingredients. I usually get all my cold ingredients ready (see
the previous section) before moving on to this very important
step. Sifting your dry ingredients (like flour, cocoa, baking
powder and baking soda) helps break up any lumps and lets
the ingredients breathe. Some recipes will even ask you to sift
the flour before you measure it out. This is also true of cocoa
since it has a tendency to clump up. If you don't sift them, you
run the risk of getting clumps of flour and cocoa in your batter
that haven't properly mixed in.
To sift your ingredients you don't need to have a fancy
sifter. A simple wire mesh strainer set over a bowl will do the
trick. Just add your dry ingredient to the strainer and tap it
against the palm of your hand to work the ingredient through.
If I have a lot to sift, I'll even use my whisk to stir the
ingredients in the strainer to help speed up the process.
Once all your dry ingredients are sifted into a bowl, use a
wire whisk to stir them all together until they are very well
combined. This will help with cases where small amounts of
certain ingredients (like salt and baking soda/powder) are
added. If they are not adequately distributed throughout your
batter, it could lead to an uneven rise in your cake.
Sifting Your Dry Ingredients
Chapter 3
Mixing up the Batter
Consider the following outline to
be more of a guide as to what each
step does and why it is important.
Once you have a full understanding of
how a cake batter comes together
you can start to experiment more
with recipes and develop some
interesting ones of your own.
Now that your oven is preheated, your pans are prepped
and all your ingredients are measured out, you are ready to mix
your batter. As previously mentioned, making a butter cake
usually starts with creaming together butter and sugar followed
by the addition of eggs. Finally the wet and dry ingredients are
added in an alternating pattern. These are the steps typically
followed for a traditional butter cake but you may come across
recipes that follow a different order of steps. In case of doubt,
just follow the recipe as long as you know it to be tried, tested
and true.
To me this is probably the most important step in making a
butter cake. So what is "creaming"? It is the process by which
fat (usually butter) is mixed or beaten with a dry ingredient
(typically sugar) in order to incorporate tiny air bubbles. These
air bubbles remain in the batter until it is baked. At that point,
the gases begin to expand causing the batter to rise. Having
the butter at the optimal temperature is vital for this step. If
it's too soft the air bubbles will not stay embedded in the
batter, and if the butter is too hard no air will be
incorporated.
Using a hand mixer, or a stand mixer, beat the butter and
sugar together for about 3 minutes. You will know that the
butter has been properly "creamed" when you see it become
light and fluffy and paler in color.
Creaming the Butter
Adding the Eggs
Now that your butter has been properly creamed, the
next step is to add the eggs. Your eggs should be at room
temperature before you add them to your butter so that they
don't cause the soft butter to firm up.
Break each of your eggs into a separate bowl before
adding to your butter. This is recommended for a few reasons.
First, if you accidentally get any eggshell pieces in your
broken egg you can pull them out so that someone eating your
yummy cake doesn't find them for you. The best way to remove
an eggshell piece is to wet your finger before trying to get it
out of the bowl. The moisture on your finger makes it easier to
grab.
Another reason to break the egg into a separate bowl is
in case there is something wrong with it. You may get an egg
with a double yolk, blood spots, or one that just smells funky.
In any of those cases I recommend throwing the egg out and
getting a new one.
When adding eggs to the butter you want to first scrape
down the sides of the mixing bowl with a rubber spatula. The
creamed butter/sugar mixture tends to really stick to the
bowl and if you don't loosen it by scraping the bowl your
batter won't mix evenly. Add each egg one at a time, mixing
for about 30-60 seconds in between additions. You should also
scrape down the sides of the bowl often, at least after every
other egg, to ensure that they are mixing into the butter
evenly.
The final step of a typical butter cake recipe involves
adding the dry ingredients (flour, leavening and salt) which
you have already sifted together, alternating with the wet
ingredients (milk, yogurt, sour cream, etc.). Most recipes will
recommend you do this in about 3-4 batches, rather than
adding all of the flour and liquid at once, to ensure even
mixing. As the flour hydrates, the batter becomes thicker
making it harder for the liquid to freely move throughout,
which could then lead to large clumps of flour that are not
hydrated. By adding the flour in 3-4 batches alternating with
the liquid, it ensures even distribution in the batter as well as
even hydration of the flour.
Add about a quarter to a third of the flour mixture to
your batter followed by a quarter to a third of the liquid. Mix
slowly at first so that the flour does not go flying out of the
bowl (which I'm pretty sure every baker has learned the hard
way). Mix for about 30-60 seconds until all the flour has been
incorporated. Scrape down the sides of the bowl (just like
when adding the eggs to the butter) and add your next batch
of flour/liquid. Repeat this process until all the flour and
liquid has been added. I recommend scraping down the sides
of the bowl and mixing for a final 30 seconds to make sure
everything is fully mixed in and even. Now your batter is done
and you can fill your pans.
Adding The Dry And Wet Ingredients
Adding the Flour Final Cake Batter
Now that your batter is ready,
it's time to fill your pans and bake
your cake. But first you have to
make sure your pans are ready.
Preparing your cake pans is such an
important yet often overlooked
step. After all, you don’t want all
that hard work you did perfectly
mixing the batter to go to waste
because you cake doesn’t come out
of the pan.
Chapter 4
Baking the Cake
When filling cake pans you want them to be only about
half full. You can reference the chart to the right for the
approximate number of cups of batter each pan should have.
Depending on how dense your cake batter is you may need
slightly more or less than the number stated. If, for example,
your recipe says that it is enough to make a two layer, 8 inch
round cake, but you find you have batter left over after
measuring out 3.5 cups in each pan, you should probably use
the remaining batter as well.
The best way to fill the pans evenly is to weigh out the
batter to make sure you have equal weights in each pan. Once
the pans are filled, smooth the batter so that it is level and
apply your wet cake strips, if you are using them.
Lastly bang the pan on the counter a few times (firmly but
not too hard). You can put a towel underneath it so that it has
some padding and doesn't make too much noise. Besides helping
to even out the batter, this eliminates any big air pockets that
might have formed in the batter while filling the pans. This
step is especially helpful if using an ornate Bundt pan because
it helps the batter get into all the little crevices.
In addition to the steps outlined above I’ve also created a
quick tutorial video on my website where I go into more detail
on how to perfectly prep you cake pans.
Filling the Pans
Place the filled cake pans in the center of your preheated
oven and bake. Consult your recipe for specific baking times,
but start checking for "doneness" about 5 minutes before the
time stated. Then check every 5 minutes after that until a
toothpick inserted into the center of the cake comes out clean.
Once the cakes are done place the pans on a cooling rack and
allow to cool for 10 minutes.
As soon as 10 minutes are up, un-mold the cakes from the
pan. You may need to run a knife or a metal spatula along the
edges to help loosen if it from the pan a bit. Place a cooling
rack on top of the cake pan and then carefully flip the whole
thing over while keeping the rack and pan in contact. The
cake should release easily onto the rack. Remove the pan and
the parchment paper and allow the cakes to cool for at least
an hour.
Once the cakes are cool wrap them individually in plastic
wrap. Place them in the refrigerator overnight, if possible, or
for at least three hours before filling and frosting.
Baking the Cake
These are my classic yellow
cake and vanilla butter cream
recipes. I’ve spent years perfecting
them because they are extremely
versatile. I use them as a base for
many other recipe creations. Just
by swapping out the milk for some
other liquid (like coffee, wine, tea,
etc) or the vanilla for a different
extract (lemon, almond, coconut)
you can create a whole new recipe.
Chapter 5
Recipes
INGREDIENTS
● 2 ½ cups (12 ounces) unbleached all-purpose flour (dip and
sweep)
● 1 Tablespoon baking powder
● ½ teaspoon salt
● 16 Tablespoons (8 ounces) unsalted butter, softened
● 1 ½ cups (10.8 ounces) granulated sugar
● 2 ½ teaspoons pure vanilla extract
● 4 large eggs
● 1 cup (8.3 ounces) milk, at room temperature
DIRECTIONS
1. Preheat the oven to 350°F with a rack positioned in the
center.
2. Spray two 8 inch round cake pans with non-stick baking spray
(Bakers Joy or Pam with Flour). Line pans with parchment
paper, spray again then use a pastry brush to spread evenly.
3. Place the unbroken eggs in a bowl of warm water to bring
them to room temperature. Set aside.
4. Sift the all-purpose flour and baking powder into a mixing
bowl. Add the salt then whisk well to combine. Set aside.
5. In a large mixing bowl, cream the softened butter on medium
speed for 2 minutes. Scrape down the sides of the bowl.
6. Gradually add sugar to the butter. Once incorporated, add
the vanilla and beat on medium high for 3 minutes (high speed
if using a hand-held mixer) in order to thoroughly cream the
butter.
7. Scrape down the sides of the bowl. Add the eggs one at a time
and mix on low speed after each addition until well
incorporated. Be sure to scrape the bowl in between
additions
8. Add the flour mixture in 3-4 batches, alternating with the
milk. Scrape down the sides and mix well after each addition.
9. Divide the batter evenly between the two pans and then tap
the pans on the counter a few times to eliminate any air
bubbles.
10. Bake at 350°F for 30-35 (40-45 if using cake strips) minutes
or until a wooden toothpick comes out clean. For cupcakes
bake for 20-22 minutes.
11. Let the cakes cool in the pan for 10 minutes, then invert
onto a cooling rack. Allow to cool for about an hour, then
wrap in plastic wrap and refrigerate overnight, or until cold
enough to handle easily (about 3-4 hours).
12. Watch my video on how to fill a frost a cake.
Classic Yellow Cake Recipe
INGREDIENTS
● 16 Tablespoons (8 ounces) shortening (preferably organic),
softened
● 8 Tablespoons (4 ounces) unsalted butter, softened
● 2 Tablespoons heavy cream (or water)
● 1 teaspoon pure vanilla extract
● 4 cups (16 ounces) powdered sugar
DIRECTIONS
1. In a large mixing bowl, beat the shortening until smooth, about 1-2 minutes.
2. Add the softened butter, heavy cream/water and vanilla extract to the shortening. Beat for another 1-2 minutes
3. Sift half the powdered sugar into the shortening/butter mixture and mix on low until incorporated, then beat on medium-high for
five minutes.
4. Sift in the remaining powdered sugar, mix on low speed until incorporated then beat on medium-high for an additional five
minutes.
5. Store in an airtight container. Lasts 2-3 days at room temperature or up to a week refrigerated.
6. Watch my video on how to fill a frost a cake.
Vanilla Buttercream Recipe
The books and equipment
referenced in this chapter are all
products I have been using for many
years and would highly recommend
to any baker. All the links will take
you to an online retailer where you
can find the item, but most items
can also be found at local big box
stores.
Chapter 6
References and Recommendations
Beranbaum, Rose Levy. The Cake Bible. William Morrow Cookbooks, 1988.
Beranbaum, Rose Levy. Real Baking With Rose. http://www.realbakingwithrose.com/
Figoni, Paula I. How Baking Works: Exploring the Fundamentals of Baking Science. Wiley, 2010.
West Eckhardt, Linda. Cakes from Scratch in Half the Time: Recipes That Will Change the Way You Bake Cakes Forever. Chronical
Books, 2005.
References
Baking Equipment Recommendations
●Wilton Aluminum Performance Pans - I love Wilton pans for baking layer cakes. They are sturdy, dependable, and bake evenly.
●Magi-Cake Set of 2 Cake Pan Strips, Small - These cake strips come in a variety of sizes to match whatever size pan you are using.
I use cake strips whenever I bake a layer cake and my cakes always come out nice and level.
●If You Care FSC Certified Parchment Baking Paper - I recommend lining your pans with parchment paper in order to have your
cakes unmold cleanly every time. I like to use this eco-friendly parchment since it's unbleached and recycled.
●Non-Contact Infrared (IR) Thermometer - Ensuring your ingredients are at the right temperature is much easier with this handy
thermometer. It instantly tells you the temperature using a laser so you don't have to stick it in the food. I use one whenever I
bake.
●OXO Good Grips Mesh Strainer - I love Oxo products for their ergonomic handles. This is the strainer I use whenever I am sifting
my dry ingredients.
●Silicone Spatula Set - Rubber spatulas are a bakers best friend. They are great for scraping every last bit of batter out of the
bowl.
●Escali Large Volume Measuring Scale - As I've stressed throughout the book, weighing your ingredients is so important and to do so
you need a reliable scale. I've been using this particular Escali scale for years, but they have a full line of wonderful products.
●KitchenAid Professional 600 Series 6-Quart Stand Mixer - I LOVE my KitchenAid mixer. It has been used heavily for almost 10 years
and is still going strong. I highly recommend investing in the 6Qt version if you are going to buy one, that way you can make both
large and small batches.
About the Author
Jennifer Rao is the owner of Around the World in 80 Cakes, a cake decorating and baking blog. Jennifer has been baking for
over 20 years, previously ran a cake decorating business making wedding and celebration cakes, and also spent a year as a Wilton
Method Instructor. In addition to her passion for all things cake, she holds a bachelor's degree in Chemical Engineering, a Master’s
degree in Environmental Engineering, and currently works in higher education.
Other publications:
Cakes without Borders Volume 1: The Maiden Voyage
Connect with Me:
Follow me on Twitter: http://twiter.com/80cakes
Like me on Facebook: http://facebook.com/80cakes
See my Pins: https://www.pinterest.com/80cakesllc/
Read about my other books http://www.cakeswithoutborders.com
Subscribe to my blog: http://www.80cakes.com

More Related Content

Similar to Bake Butter Cakes at Home with Basic Tools

How to make chocolate chip cookies
How to make chocolate chip cookiesHow to make chocolate chip cookies
How to make chocolate chip cookiesmgfusion333
 
How to make chocolate chip cookies
How to make chocolate chip cookiesHow to make chocolate chip cookies
How to make chocolate chip cookiesmgfusion333
 
How to kent
How to kentHow to kent
How to kentfred111998
 
How to kent
How to kentHow to kent
How to kentkentlesper
 
Word Type Hunt
Word Type HuntWord Type Hunt
Word Type HuntSharestar
 
it's a piece of cake to bake a pretty cake
it's a piece of cake to bake a pretty cakeit's a piece of cake to bake a pretty cake
it's a piece of cake to bake a pretty cakemarmaladekiller
 
Crepe maker
Crepe makerCrepe maker
Crepe makerkitchenkit
 
Crepe maker
Crepe makerCrepe maker
Crepe makerkitchenkit
 
The motor planning training ladder hot cross buns
The motor planning training ladder hot cross bunsThe motor planning training ladder hot cross buns
The motor planning training ladder hot cross bunsm55mick
 
How to make a homemade cheesecake english
How to make a homemade cheesecake  englishHow to make a homemade cheesecake  english
How to make a homemade cheesecake englishShayraEnid
 
Grill Baked Zucchini Bread Cake: With a Pinch of Lime & Coconut
Grill Baked Zucchini Bread Cake: With a Pinch of Lime & Coconut  Grill Baked Zucchini Bread Cake: With a Pinch of Lime & Coconut
Grill Baked Zucchini Bread Cake: With a Pinch of Lime & Coconut SMOKINLICIOUS CULINARY WOOD PRODUCTS
 
Baking artisan bread 10 expert formulas for baking better bread at home (gn...
Baking artisan bread   10 expert formulas for baking better bread at home (gn...Baking artisan bread   10 expert formulas for baking better bread at home (gn...
Baking artisan bread 10 expert formulas for baking better bread at home (gn...Google
 
Baking Bread
Baking BreadBaking Bread
Baking Breadschriltz
 
Bakingtoolsandequipment
BakingtoolsandequipmentBakingtoolsandequipment
BakingtoolsandequipmentMrjojo25
 
Keto cinnamon rolls (1)
Keto cinnamon rolls (1)Keto cinnamon rolls (1)
Keto cinnamon rolls (1)Priya Dogra
 
Cooking Step by Step
Cooking Step by StepCooking Step by Step
Cooking Step by StepReading Seed
 

Similar to Bake Butter Cakes at Home with Basic Tools (20)

How to make chocolate chip cookies
How to make chocolate chip cookiesHow to make chocolate chip cookies
How to make chocolate chip cookies
 
How to make chocolate chip cookies
How to make chocolate chip cookiesHow to make chocolate chip cookies
How to make chocolate chip cookies
 
How to kent
How to kentHow to kent
How to kent
 
How to kent
How to kentHow to kent
How to kent
 
Bachour the-baker-e book-retail
Bachour the-baker-e book-retailBachour the-baker-e book-retail
Bachour the-baker-e book-retail
 
Word Type Hunt
Word Type HuntWord Type Hunt
Word Type Hunt
 
Nice berry pie
Nice berry pieNice berry pie
Nice berry pie
 
it's a piece of cake to bake a pretty cake
it's a piece of cake to bake a pretty cakeit's a piece of cake to bake a pretty cake
it's a piece of cake to bake a pretty cake
 
Crepe maker
Crepe makerCrepe maker
Crepe maker
 
Crepe maker
Crepe makerCrepe maker
Crepe maker
 
The motor planning training ladder hot cross buns
The motor planning training ladder hot cross bunsThe motor planning training ladder hot cross buns
The motor planning training ladder hot cross buns
 
How to make a homemade cheesecake english
How to make a homemade cheesecake  englishHow to make a homemade cheesecake  english
How to make a homemade cheesecake english
 
Blueberry pie
Blueberry pieBlueberry pie
Blueberry pie
 
Grill Baked Zucchini Bread Cake: With a Pinch of Lime & Coconut
Grill Baked Zucchini Bread Cake: With a Pinch of Lime & Coconut  Grill Baked Zucchini Bread Cake: With a Pinch of Lime & Coconut
Grill Baked Zucchini Bread Cake: With a Pinch of Lime & Coconut
 
Baking artisan bread 10 expert formulas for baking better bread at home (gn...
Baking artisan bread   10 expert formulas for baking better bread at home (gn...Baking artisan bread   10 expert formulas for baking better bread at home (gn...
Baking artisan bread 10 expert formulas for baking better bread at home (gn...
 
Baking Bread
Baking BreadBaking Bread
Baking Bread
 
Bakingtoolsandequipment
BakingtoolsandequipmentBakingtoolsandequipment
Bakingtoolsandequipment
 
Keto cinnamon rolls (1)
Keto cinnamon rolls (1)Keto cinnamon rolls (1)
Keto cinnamon rolls (1)
 
Smoked Ricotta Cheese Pastry
Smoked Ricotta Cheese PastrySmoked Ricotta Cheese Pastry
Smoked Ricotta Cheese Pastry
 
Cooking Step by Step
Cooking Step by StepCooking Step by Step
Cooking Step by Step
 

Recently uploaded

Call Girls in Ghitorni Delhi 💯Call Us 🔝8264348440🔝
Call Girls in Ghitorni Delhi 💯Call Us 🔝8264348440🔝Call Girls in Ghitorni Delhi 💯Call Us 🔝8264348440🔝
Call Girls in Ghitorni Delhi 💯Call Us 🔝8264348440🔝soniya singh
 
The Billo Photo Gallery - Cultivated Cuisine T1
The Billo Photo Gallery - Cultivated Cuisine T1The Billo Photo Gallery - Cultivated Cuisine T1
The Billo Photo Gallery - Cultivated Cuisine T1davew9
 
Call Girls In Ramesh Nagar꧁❤ 🔝 9953056974🔝❤꧂ Escort ServiCe
Call Girls In Ramesh Nagar꧁❤ 🔝 9953056974🔝❤꧂ Escort ServiCeCall Girls In Ramesh Nagar꧁❤ 🔝 9953056974🔝❤꧂ Escort ServiCe
Call Girls In Ramesh Nagar꧁❤ 🔝 9953056974🔝❤꧂ Escort ServiCe9953056974 Low Rate Call Girls In Saket, Delhi NCR
 
VIP Kolkata Call Girl Jadavpur 👉 8250192130 Available With Room
VIP Kolkata Call Girl Jadavpur 👉 8250192130  Available With RoomVIP Kolkata Call Girl Jadavpur 👉 8250192130  Available With Room
VIP Kolkata Call Girl Jadavpur 👉 8250192130 Available With Roomdivyansh0kumar0
 
Ho Sexy Call Girl in Mira Road Bhayandar | ₹,7500 With Free Delivery, Kashimi...
Ho Sexy Call Girl in Mira Road Bhayandar | ₹,7500 With Free Delivery, Kashimi...Ho Sexy Call Girl in Mira Road Bhayandar | ₹,7500 With Free Delivery, Kashimi...
Ho Sexy Call Girl in Mira Road Bhayandar | ₹,7500 With Free Delivery, Kashimi...Pooja Nehwal
 
Food & Nutrition Strategy Baseline (FNS.pdf)
Food & Nutrition Strategy Baseline (FNS.pdf)Food & Nutrition Strategy Baseline (FNS.pdf)
Food & Nutrition Strategy Baseline (FNS.pdf)Mohamed Miyir
 
thanksgiving dinner and more information
thanksgiving dinner and more informationthanksgiving dinner and more information
thanksgiving dinner and more informationlialiaskou00
 
Grade Eight Quarter 4_Week 6_Cookery.pptx
Grade Eight Quarter 4_Week 6_Cookery.pptxGrade Eight Quarter 4_Week 6_Cookery.pptx
Grade Eight Quarter 4_Week 6_Cookery.pptxKurtGardy
 
(MAYA) Baner Call Girls Just Call 7001035870 [ Cash on Delivery ] Pune Escorts
(MAYA) Baner Call Girls Just Call 7001035870 [ Cash on Delivery ] Pune Escorts(MAYA) Baner Call Girls Just Call 7001035870 [ Cash on Delivery ] Pune Escorts
(MAYA) Baner Call Girls Just Call 7001035870 [ Cash on Delivery ] Pune Escortsranjana rawat
 
VIP Russian Call Girls in Cuttack Deepika 8250192130 Independent Escort Servi...
VIP Russian Call Girls in Cuttack Deepika 8250192130 Independent Escort Servi...VIP Russian Call Girls in Cuttack Deepika 8250192130 Independent Escort Servi...
VIP Russian Call Girls in Cuttack Deepika 8250192130 Independent Escort Servi...Suhani Kapoor
 
VVIP Pune Call Girls Sinhagad Road (7001035870) Pune Escorts Nearby with Comp...
VVIP Pune Call Girls Sinhagad Road (7001035870) Pune Escorts Nearby with Comp...VVIP Pune Call Girls Sinhagad Road (7001035870) Pune Escorts Nearby with Comp...
VVIP Pune Call Girls Sinhagad Road (7001035870) Pune Escorts Nearby with Comp...Call Girls in Nagpur High Profile
 
VIP Russian Call Girls Gorakhpur Chhaya 8250192130 Independent Escort Service...
VIP Russian Call Girls Gorakhpur Chhaya 8250192130 Independent Escort Service...VIP Russian Call Girls Gorakhpur Chhaya 8250192130 Independent Escort Service...
VIP Russian Call Girls Gorakhpur Chhaya 8250192130 Independent Escort Service...Suhani Kapoor
 
Jp Nagar Call Girls Bangalore WhatsApp 8250192130 High Profile Service
Jp Nagar Call Girls Bangalore WhatsApp 8250192130 High Profile ServiceJp Nagar Call Girls Bangalore WhatsApp 8250192130 High Profile Service
Jp Nagar Call Girls Bangalore WhatsApp 8250192130 High Profile ServiceHigh Profile Call Girls
 
High Class Call Girls Nashik Priya 7001305949 Independent Escort Service Nashik
High Class Call Girls Nashik Priya 7001305949 Independent Escort Service NashikHigh Class Call Girls Nashik Priya 7001305949 Independent Escort Service Nashik
High Class Call Girls Nashik Priya 7001305949 Independent Escort Service Nashikranjana rawat
 
Let Me Relax Dubai Russian Call girls O56338O268 Dubai Call girls AgenCy
Let Me Relax Dubai Russian Call girls O56338O268 Dubai Call girls AgenCyLet Me Relax Dubai Russian Call girls O56338O268 Dubai Call girls AgenCy
Let Me Relax Dubai Russian Call girls O56338O268 Dubai Call girls AgenCystephieert
 
Call Girls In Tilak Nagar꧁❤ 🔝 9953056974🔝❤꧂ Escort ServiCe
Call Girls In  Tilak Nagar꧁❤ 🔝 9953056974🔝❤꧂ Escort ServiCeCall Girls In  Tilak Nagar꧁❤ 🔝 9953056974🔝❤꧂ Escort ServiCe
Call Girls In Tilak Nagar꧁❤ 🔝 9953056974🔝❤꧂ Escort ServiCe9953056974 Low Rate Call Girls In Saket, Delhi NCR
 
The Most Attractive Pune Call Girls Shikrapur 8250192130 Will You Miss This C...
The Most Attractive Pune Call Girls Shikrapur 8250192130 Will You Miss This C...The Most Attractive Pune Call Girls Shikrapur 8250192130 Will You Miss This C...
The Most Attractive Pune Call Girls Shikrapur 8250192130 Will You Miss This C...ranjana rawat
 
(PRIYANKA) Katraj Call Girls Just Call 7001035870 [ Cash on Delivery ] Pune E...
(PRIYANKA) Katraj Call Girls Just Call 7001035870 [ Cash on Delivery ] Pune E...(PRIYANKA) Katraj Call Girls Just Call 7001035870 [ Cash on Delivery ] Pune E...
(PRIYANKA) Katraj Call Girls Just Call 7001035870 [ Cash on Delivery ] Pune E...ranjana rawat
 
THE ARTISANAL SALT OF SAN VICENTE, ILOCOS SUR: A CASE STUDY
THE ARTISANAL SALT OF SAN VICENTE, ILOCOS SUR: A CASE STUDYTHE ARTISANAL SALT OF SAN VICENTE, ILOCOS SUR: A CASE STUDY
THE ARTISANAL SALT OF SAN VICENTE, ILOCOS SUR: A CASE STUDYHumphrey A BeĂąa
 
NO1 Trending kala jadu karne wale ka contact number kala jadu karne wale baba...
NO1 Trending kala jadu karne wale ka contact number kala jadu karne wale baba...NO1 Trending kala jadu karne wale ka contact number kala jadu karne wale baba...
NO1 Trending kala jadu karne wale ka contact number kala jadu karne wale baba...Amil baba
 

Recently uploaded (20)

Call Girls in Ghitorni Delhi 💯Call Us 🔝8264348440🔝
Call Girls in Ghitorni Delhi 💯Call Us 🔝8264348440🔝Call Girls in Ghitorni Delhi 💯Call Us 🔝8264348440🔝
Call Girls in Ghitorni Delhi 💯Call Us 🔝8264348440🔝
 
The Billo Photo Gallery - Cultivated Cuisine T1
The Billo Photo Gallery - Cultivated Cuisine T1The Billo Photo Gallery - Cultivated Cuisine T1
The Billo Photo Gallery - Cultivated Cuisine T1
 
Call Girls In Ramesh Nagar꧁❤ 🔝 9953056974🔝❤꧂ Escort ServiCe
Call Girls In Ramesh Nagar꧁❤ 🔝 9953056974🔝❤꧂ Escort ServiCeCall Girls In Ramesh Nagar꧁❤ 🔝 9953056974🔝❤꧂ Escort ServiCe
Call Girls In Ramesh Nagar꧁❤ 🔝 9953056974🔝❤꧂ Escort ServiCe
 
VIP Kolkata Call Girl Jadavpur 👉 8250192130 Available With Room
VIP Kolkata Call Girl Jadavpur 👉 8250192130  Available With RoomVIP Kolkata Call Girl Jadavpur 👉 8250192130  Available With Room
VIP Kolkata Call Girl Jadavpur 👉 8250192130 Available With Room
 
Ho Sexy Call Girl in Mira Road Bhayandar | ₹,7500 With Free Delivery, Kashimi...
Ho Sexy Call Girl in Mira Road Bhayandar | ₹,7500 With Free Delivery, Kashimi...Ho Sexy Call Girl in Mira Road Bhayandar | ₹,7500 With Free Delivery, Kashimi...
Ho Sexy Call Girl in Mira Road Bhayandar | ₹,7500 With Free Delivery, Kashimi...
 
Food & Nutrition Strategy Baseline (FNS.pdf)
Food & Nutrition Strategy Baseline (FNS.pdf)Food & Nutrition Strategy Baseline (FNS.pdf)
Food & Nutrition Strategy Baseline (FNS.pdf)
 
thanksgiving dinner and more information
thanksgiving dinner and more informationthanksgiving dinner and more information
thanksgiving dinner and more information
 
Grade Eight Quarter 4_Week 6_Cookery.pptx
Grade Eight Quarter 4_Week 6_Cookery.pptxGrade Eight Quarter 4_Week 6_Cookery.pptx
Grade Eight Quarter 4_Week 6_Cookery.pptx
 
(MAYA) Baner Call Girls Just Call 7001035870 [ Cash on Delivery ] Pune Escorts
(MAYA) Baner Call Girls Just Call 7001035870 [ Cash on Delivery ] Pune Escorts(MAYA) Baner Call Girls Just Call 7001035870 [ Cash on Delivery ] Pune Escorts
(MAYA) Baner Call Girls Just Call 7001035870 [ Cash on Delivery ] Pune Escorts
 
VIP Russian Call Girls in Cuttack Deepika 8250192130 Independent Escort Servi...
VIP Russian Call Girls in Cuttack Deepika 8250192130 Independent Escort Servi...VIP Russian Call Girls in Cuttack Deepika 8250192130 Independent Escort Servi...
VIP Russian Call Girls in Cuttack Deepika 8250192130 Independent Escort Servi...
 
VVIP Pune Call Girls Sinhagad Road (7001035870) Pune Escorts Nearby with Comp...
VVIP Pune Call Girls Sinhagad Road (7001035870) Pune Escorts Nearby with Comp...VVIP Pune Call Girls Sinhagad Road (7001035870) Pune Escorts Nearby with Comp...
VVIP Pune Call Girls Sinhagad Road (7001035870) Pune Escorts Nearby with Comp...
 
VIP Russian Call Girls Gorakhpur Chhaya 8250192130 Independent Escort Service...
VIP Russian Call Girls Gorakhpur Chhaya 8250192130 Independent Escort Service...VIP Russian Call Girls Gorakhpur Chhaya 8250192130 Independent Escort Service...
VIP Russian Call Girls Gorakhpur Chhaya 8250192130 Independent Escort Service...
 
Jp Nagar Call Girls Bangalore WhatsApp 8250192130 High Profile Service
Jp Nagar Call Girls Bangalore WhatsApp 8250192130 High Profile ServiceJp Nagar Call Girls Bangalore WhatsApp 8250192130 High Profile Service
Jp Nagar Call Girls Bangalore WhatsApp 8250192130 High Profile Service
 
High Class Call Girls Nashik Priya 7001305949 Independent Escort Service Nashik
High Class Call Girls Nashik Priya 7001305949 Independent Escort Service NashikHigh Class Call Girls Nashik Priya 7001305949 Independent Escort Service Nashik
High Class Call Girls Nashik Priya 7001305949 Independent Escort Service Nashik
 
Let Me Relax Dubai Russian Call girls O56338O268 Dubai Call girls AgenCy
Let Me Relax Dubai Russian Call girls O56338O268 Dubai Call girls AgenCyLet Me Relax Dubai Russian Call girls O56338O268 Dubai Call girls AgenCy
Let Me Relax Dubai Russian Call girls O56338O268 Dubai Call girls AgenCy
 
Call Girls In Tilak Nagar꧁❤ 🔝 9953056974🔝❤꧂ Escort ServiCe
Call Girls In  Tilak Nagar꧁❤ 🔝 9953056974🔝❤꧂ Escort ServiCeCall Girls In  Tilak Nagar꧁❤ 🔝 9953056974🔝❤꧂ Escort ServiCe
Call Girls In Tilak Nagar꧁❤ 🔝 9953056974🔝❤꧂ Escort ServiCe
 
The Most Attractive Pune Call Girls Shikrapur 8250192130 Will You Miss This C...
The Most Attractive Pune Call Girls Shikrapur 8250192130 Will You Miss This C...The Most Attractive Pune Call Girls Shikrapur 8250192130 Will You Miss This C...
The Most Attractive Pune Call Girls Shikrapur 8250192130 Will You Miss This C...
 
(PRIYANKA) Katraj Call Girls Just Call 7001035870 [ Cash on Delivery ] Pune E...
(PRIYANKA) Katraj Call Girls Just Call 7001035870 [ Cash on Delivery ] Pune E...(PRIYANKA) Katraj Call Girls Just Call 7001035870 [ Cash on Delivery ] Pune E...
(PRIYANKA) Katraj Call Girls Just Call 7001035870 [ Cash on Delivery ] Pune E...
 
THE ARTISANAL SALT OF SAN VICENTE, ILOCOS SUR: A CASE STUDY
THE ARTISANAL SALT OF SAN VICENTE, ILOCOS SUR: A CASE STUDYTHE ARTISANAL SALT OF SAN VICENTE, ILOCOS SUR: A CASE STUDY
THE ARTISANAL SALT OF SAN VICENTE, ILOCOS SUR: A CASE STUDY
 
NO1 Trending kala jadu karne wale ka contact number kala jadu karne wale baba...
NO1 Trending kala jadu karne wale ka contact number kala jadu karne wale baba...NO1 Trending kala jadu karne wale ka contact number kala jadu karne wale baba...
NO1 Trending kala jadu karne wale ka contact number kala jadu karne wale baba...
 

Bake Butter Cakes at Home with Basic Tools

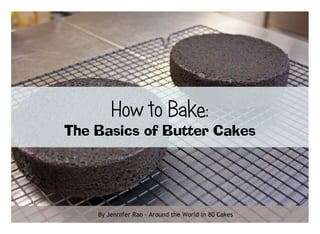
  • 1. How to Bake: The Basics of Butter Cakes By Jennifer Rao - Around the World in 80 Cakes
  • 2. To my husband, soulmate and best friend Rohit Rao. The day I met you was the best day of my life. Text copyright Š 2014 Jennifer Rao All Rights Reserved Start an Amazing and Delicious Baking Cakes with No Expensive Tools at Home!! GrabNow
  • 3. TABLE OF CONTENTS PREFACE..................................................................................................................................................................4 EQUIPMENT PREP......................................................................................................................................................5 THE OVEN......................................................................................................................................6 THE PANS......................................................................................................................................7 INGREDIENT PREP (AKA MISE EN PLACE)....................................................................................................................9 BRINGING INGREDIENTS TO ROOM TEMPERATURE.............................................................................10 MEASURING OUT FLOUR................................................................................................................13 BAKING POWDER AND BAKING SODA...............................................................................................15 SUGAR.........................................................................................................................................15 SIFTING YOUR DRY INGREDIENTS....................................................................................................16 MIXING UP THE BATTER............................................................................................................................................17 CREAMING THE BUTTER.................................................................................................................18 ADDING THE EGGS........................................................................................................................19 ADDING THE DRY AND WET INGREDIENTS........................................................................................20 BAKING THE CAKE...................................................................................................................................................21 FILLING THE PANS.........................................................................................................................22 BAKING THE CAKE.........................................................................................................................23 RECIPES.................................................................................................................................................................24 CLASSIC YELLOW CAKE RECIPE......................................................................................................25 VANILLA BUTTERCREAM RECIPE......................................................................................................26 REFERENCES AND RECOMMENDATIONS......................................................................................................................27 REFERENCES................................................................................................................................28 BAKING EQUIPMENT RECOMMENDATIONS.........................................................................................29 ABOUT THE AUTHOR......................................................................................................................30 OTHER PUBLICATIONS:.........................................................................................................................30 CONNECT WITH ME:............................................................................................................................30
  • 4. I have a passion for baking that is matched only by my love of science. As a small child, I would often switch between my Easy-Bake oven and my chemistry set (both produced many weird and wonderful things). Yet, as I got older and started baking “for real” I started to find the idea of baking a cake from scratch somewhat daunting. That was until I realized that baking is just chemistry (delicious, delicious chemistry). I now treat each recipe I make like an experiment. My experience as a scientist and engineer has made me realize that when baking a cake, just like any other experiment, you will have a higher likelihood of success if you have a clear set of instructions and follow them closely. In this book I walk through the steps I follow for every cake “experiment” I make. If you are nervous, as I once was, I hope that it will help you become more comfortable with the basics of baking a cake from scratch. If you already have a few cakes under your belt (figuratively and literally), you might still come across a few tips and tricks that help you achieve more consistent results. If you ever have any baking questions I’m always happy to help. You can contact me at Jen@80cakes.com or visit my website, www.80cakes.com, for more baking tips and recipes. Also check out my eBook series, Cakes without Borders, for more unique recipes inspired by flavors from around the world. Preface
  • 5. The first step in just about every baking recipe has you first preheat your oven and prepare any pans or other equipment you will be using. Let’s talk a little bit about why these steps are important, and how best to approach them. Chapter 1 Equipment Prep
  • 6. The Oven Preheating your oven is the first thing that should happen when you decide you are going to bake something (yes, even before you start getting out your ingredients). Most ovens take a long time to come to the proper temperature. Even if the oven says it's done preheating in only 10 minutes, you should really preheat for at least 20. I always start mine before I do anything else. Even if it takes me 30 minutes to mix up my batter, it's better to have the oven on a bit longer and know it's at the right temperature than putting your cake into a cold or unevenly heated oven. Also, make sure the oven rack is in the center of the oven before you begin to preheat. Moving a hot rack adds an unnecessary element of danger. Get an oven thermometer! Even in a brand new oven I have found that the temperature isn't always accurate and I have to increase (or decrease) the set temperature by a few degrees to get it where it needs to be. Make sure your oven is level. If you don't have a level at home you can often find an App for your smart phone that will do the trick. I learned the hard way that mine wasn't level when my brand new oven produced a leaning tower of cake! I now have little pieces of cardboard under the front feet to keep it level. Step Inside in this door of Baking
  • 7. I always prep my cake pans before even touching any of my ingredients. I start off by cutting out circles of parchment paper to line the pans with. You’ll need your pans handy to use as your outline, some good parchment paper (I like to use natural unbleached parchment), scissors and a pencil. I trace the outline of the pan with a pencil and then cut out the shape along the inside of the pencil mark so that all I’m left with is a circle (or square) of parchment paper. Once I'm done cutting I'll often take the scrap pieces of paper and cut them into small squares to use when I make royal icing flowers or other decorations that need to dry on a non-stick surface (topics for another day). Next, I spray the pan with non-stick baking spray. This is any non-stick spray that contains flour in it (like Bakers Joy, Pam with Flour, or even a generic store brand). I prefer using baking spray over the old "grease and flour" method and I've never had a problem with my cake sticking to the pan. Spray the pan and use a pastry brush to spread the spray around the The Pans
  • 8. bottom and sides. Next, put your piece of parchment paper in the bottom, spray the top of it, and use the pastry brush to spread it evenly once again. The use of the parchment paper along with the baking spray almost guarantees your cakes will unmold perfectly every time. If you have ever wondered how to get your cake to bake up without that infamous dome on top then I have two words for you: cake strips. Cake strips are special strips of fabric that are oven safe. They come in a number of different sizes to fit just about every pan on the market. For very large cake pans I'll even connect multiple strips together. To use a cake strip, you first soak it in water until it is completely wet. Ring it out and then wrap it around your pan, using the pins it comes with to secure it. The reason cakes bake with a dome is because the sides of the cake bake (and set) faster since they are in contact with the hot metal of the pan. Meanwhile, the center doesn't bake as fast and continues to rise. The cake strips even things out by cooling down the sides of the pan so that the sides of the cake bake at the same speed as the center, giving you a nice level cake.
  • 9. Chapter 2 Ingredient Prep (AKA Mise En Place) Mise En Place is a French term that means "putting in place". It is often used in cooking and baking to refer to the gathering of all your ingredients before you start a recipe.
  • 10. Mise En Place is a French term that means "putting in place". It is often used in cooking and baking to refer to the gathering of all your ingredients before you start a recipe. Now, I may not speak French but I do believe in this practice 100%. In my early years as a baker I was stung one too many times where I was half way through mixing a recipe and then realized I was missing an ingredient. Mise En Place will not only ensure that you have everything you need, but it will also help prevent mistakes. Before you start to mix up any recipe, go through the list of ingredients and measure/weigh them all out first. Depending on the recipe you are working with, it may say something about having your ingredients at room temperature, or at least that your butter should be softened. Softened butter is required when the recipe has a step called "creaming the butter" where you beat the butter at high speed using a mixer, usually for about 3-5 minutes, until it has become light and fluffy. What this step is effectively doing is incorporating lots of tiny air bubbles into the butter. These air bubbles will act as a leavening agent during the baking process causing the batter to rise when they expand. If your butter is too cold it will be too stiff for air to incorporate into it, and if it's too soft then the air bubbles won't stay. That is why having the butter at the right temperature (usually between 65-70°F) is so important, because if this step isn't done correctly your cake will not rise properly. Much like your softened butter, your other ingredients should be at room temperature as well. If you add very cold eggs and milk to room temperature butter, you run the risk of hardening the butter at which point your ingredients will not mix together properly. Before the invention of the wonderful microwave, the best way of getting your cold ingredients to room temperature was to leave them out on the counter for a few hours. Many people still use this method, but that doesn't always work if you are short on time, or it's the middle of winter and your house is cold. That is why I like to use my microwave, and other modern conveniences, as much as possible to prep my ingredients. Let’s break it down ingredient by ingredient… Bringing Ingredients to Room Temperature
  • 11. EGGS To get my eggs to room temperature I don't use a microwave. Instead I put them (still in their shells) in a bowl and cover them with warm tap water. I'll usually do this first when I'm starting to gather my ingredients. This will slowly warm them and they should be at the perfect temperature by the time you are ready to add them to your cake batter. When they've warmed up, empty the water from the bowl, wipe it dry and break the eggs right into the same bowl. Breaking the eggs into this bowl rather than over your final mixing bowl will help avoid getting egg shells in your batter. If you do spot a piece of shell, wet your finger with water before you go in after it. It makes it much easier to get to. BUTTER I usually measure out my butter into a microwave safe bowl and then microwave it at HALF POWER for 15-20 second intervals. In between each zap I'll press a spatula (or finger) into the butter to see if it is soft enough yet. You want it to be soft but still hold its shape. Using half power is very important; otherwise you will end up with a pool of melted butter before you know it. Keep the microwave times short, butter can go from solid to liquid very quickly. If you do end up melting the butter just put it in the fridge for a bit until it starts to become a solid again.
  • 12. MILK AND OTHER COLD INGREDIENTS Milk and other cold ingredients (like sour cream, yogurt and cream cheese) should also be brought to room temperature (like the butter and eggs) to ensure an evenly mixed batter. Measure the milk out in a microwave safe measuring cup. Microwave it at full power for about 20-30 seconds which is enough to bring a cup of milk pretty close to room temperature. HOT INGREDIENTS The other thing to consider when prepping your ingredients are any that might start out warm. Imagine a recipe that calls for the addition of coffee. Now imagine adding that coffee to your batter while it's still piping hot. It will most likely melt the butter causing you to lose all those nice air bubbles you incorporated during the creaming stage, which we’ll talk about in a bit, and ultimately ruin your batter. To avoid scenarios like this, you want to make sure any hot ingredients have had plenty of time to cool down to room temperature before adding them to your batter. You can always put them in the refrigerator or freezer to speed up the cooling process. You can find more information about bringing ingredients to room temperature (including a detailed video) on my website, www.80cakes.com.
  • 13. Flour is the backbone of just about every cake recipe out there, so making sure you have the right amount of it is essential. Most recipes tell you how much flour you need but don't always mention how it should be measured out. The problem with this ambiguity is that you could end up with very different results depending on how you fill the measuring cup. In the images below I show the difference in the weight of one cup of flour measured using the dip and sweep method versus the spoon into a cup method. As the name suggests, the dip and sweep method is when you dip the measuring cup into the flour container and then use a straight edge to sweep off the excess. For spoon into a cup you lightly spoon the flour into your measuring cup, making sure not to accidentally tap the flour down, and then level off with a straight edge. As you can see from the images below the dip and sweep method gets you a higher weight of flour (4.8 ounces per cup) versus the spoon into a cup method (4.3 ounces per cup). So which one do you go with? If the recipe you are making is from a book, check the Methods section (if there is one) to see if the author specifies which method they use. If the recipe is from the Internet or elsewhere, the best thing to do is experiment. Bake it once using the dip and sweep method and see how it comes out. If it feels dry or tastes like it has too much flour then try using the spoon into a cup method the next time. Measuring Out Flour Dip and Sweep Method Spoon Into a Cup Method
  • 14. Irrespective of how you get your flour (dip and sweep or spoon into a cup), the best method for actually measuring it is to weigh it. Even if the recipe you are using doesn't give weights, use your kitchen scale (a very handy baking tool if you don't already have one) to weight out how much flour you are adding each time you bake it (like it were an experiment). That way, once you find a version you are happy with you can reproduce the recipe perfectly every single time. The example to the right shows how having even the slightest bit of extra flour can change the appearance of a cupcake (each was made with the same amount of batter). Besides measuring it accurately (correctly) and precisely (consistently), another very important detail that you need to follow is the type of flour the recipe calls for since different types of flour have different protein contents. During the baking process the protein of the flour turns into gluten, which is what gives a cake much of its structure. Bread flour for example has 11.5-13.5% protein while cake flour only has 6-8% protein. That is why breads are typically dense and chewy while cakes are light and fluffy. Even plain all-purpose flour can range from 9.5-11.5% protein. I learned the hard way how big a role protein plays when baking a cake. I once picked up a different brand of all- purpose flour (assuming they were all fairly similar) and started to notice that all of my cakes were coming out much denser and with a coarser texture. I happened to read the ingredient label on the bag and noticed that it had 11.7% protein! The brand I typically used only had 10% protein. Even that small difference in the amount of protein had a huge impact on the quality of my cakes. CAKE FLOUR SUBSTITUTION If your recipe calls for cake flour but you don't have any or just can't find it, here is a simple substitution: for every one cup of cake flour you need, replace it with (1 cup minus 2 tablespoons of all-purpose flour) + 2 tablespoons of cornstarch. You are basically replacing 2 tablespoons of flour with 2 tablespoons of cornstarch for every cup of flour used. This lowers the percentage of protein by volume, bringing it closer to that of cake flour. You can mix up a large batch of this "substitute cake flour" so that it can easily be measured out when a recipe calls for it. Just be sure to mix it up well before using it.
  • 15. Just about every cake recipe out there calls for leavening of some kind. The most common are either baking powder or baking soda. Baking soda, also known as sodium bicarbonate, is what is referred to as an alkaline. That means it has the capability to neutralize an acid. When it does so it release gas bubbles, and those bubble are what flow through the cake batter causing it to rise. You will find that when a recipe calls for baking soda it also contains some sort of acidic ingredient that the baking soda will react with. Some common ones are vinegar, cocoa, buttermilk, etc. When a recipe does not contain a strong acid in the ingredient list then you will see that it usually calls for baking powder. Baking powder is a mixture of baking soda and some kind of acid, such as cream of tartar. Since they are both dry they do not react until they are moistened by the liquid in the cake batter. They are then able to react and form the gas needed to make the cake rise. Baking Powder and Baking Soda Sugar If you are making a butter cake, the recipe will most likely tell you to add your sugar after creaming your butter. Other recipes may have you mix it in with your other dry ingredients. In either case you want to make sure you are measuring properly. Once again, if a weight is given in the recipe the best method is to weigh out your sugar. Otherwise using the dip and sweep method for granulated sugar is probably the most common. For brown sugar most recipes will say "firmly packed into a cup". Once again depending on how much you pack it in you could end up with very different weights so if you aren't using a scale try to be as consistent as possible with how much you pack the sugar in so that you can reproduce your recipe successfully every time.
  • 16. Many recipes start off by asking you to sift your dry ingredients. I usually get all my cold ingredients ready (see the previous section) before moving on to this very important step. Sifting your dry ingredients (like flour, cocoa, baking powder and baking soda) helps break up any lumps and lets the ingredients breathe. Some recipes will even ask you to sift the flour before you measure it out. This is also true of cocoa since it has a tendency to clump up. If you don't sift them, you run the risk of getting clumps of flour and cocoa in your batter that haven't properly mixed in. To sift your ingredients you don't need to have a fancy sifter. A simple wire mesh strainer set over a bowl will do the trick. Just add your dry ingredient to the strainer and tap it against the palm of your hand to work the ingredient through. If I have a lot to sift, I'll even use my whisk to stir the ingredients in the strainer to help speed up the process. Once all your dry ingredients are sifted into a bowl, use a wire whisk to stir them all together until they are very well combined. This will help with cases where small amounts of certain ingredients (like salt and baking soda/powder) are added. If they are not adequately distributed throughout your batter, it could lead to an uneven rise in your cake. Sifting Your Dry Ingredients
  • 17. Chapter 3 Mixing up the Batter Consider the following outline to be more of a guide as to what each step does and why it is important. Once you have a full understanding of how a cake batter comes together you can start to experiment more with recipes and develop some interesting ones of your own.
  • 18. Now that your oven is preheated, your pans are prepped and all your ingredients are measured out, you are ready to mix your batter. As previously mentioned, making a butter cake usually starts with creaming together butter and sugar followed by the addition of eggs. Finally the wet and dry ingredients are added in an alternating pattern. These are the steps typically followed for a traditional butter cake but you may come across recipes that follow a different order of steps. In case of doubt, just follow the recipe as long as you know it to be tried, tested and true. To me this is probably the most important step in making a butter cake. So what is "creaming"? It is the process by which fat (usually butter) is mixed or beaten with a dry ingredient (typically sugar) in order to incorporate tiny air bubbles. These air bubbles remain in the batter until it is baked. At that point, the gases begin to expand causing the batter to rise. Having the butter at the optimal temperature is vital for this step. If it's too soft the air bubbles will not stay embedded in the batter, and if the butter is too hard no air will be incorporated. Using a hand mixer, or a stand mixer, beat the butter and sugar together for about 3 minutes. You will know that the butter has been properly "creamed" when you see it become light and fluffy and paler in color. Creaming the Butter
  • 19. Adding the Eggs Now that your butter has been properly creamed, the next step is to add the eggs. Your eggs should be at room temperature before you add them to your butter so that they don't cause the soft butter to firm up. Break each of your eggs into a separate bowl before adding to your butter. This is recommended for a few reasons. First, if you accidentally get any eggshell pieces in your broken egg you can pull them out so that someone eating your yummy cake doesn't find them for you. The best way to remove an eggshell piece is to wet your finger before trying to get it out of the bowl. The moisture on your finger makes it easier to grab. Another reason to break the egg into a separate bowl is in case there is something wrong with it. You may get an egg with a double yolk, blood spots, or one that just smells funky. In any of those cases I recommend throwing the egg out and getting a new one. When adding eggs to the butter you want to first scrape down the sides of the mixing bowl with a rubber spatula. The creamed butter/sugar mixture tends to really stick to the bowl and if you don't loosen it by scraping the bowl your batter won't mix evenly. Add each egg one at a time, mixing for about 30-60 seconds in between additions. You should also scrape down the sides of the bowl often, at least after every other egg, to ensure that they are mixing into the butter evenly.
  • 20. The final step of a typical butter cake recipe involves adding the dry ingredients (flour, leavening and salt) which you have already sifted together, alternating with the wet ingredients (milk, yogurt, sour cream, etc.). Most recipes will recommend you do this in about 3-4 batches, rather than adding all of the flour and liquid at once, to ensure even mixing. As the flour hydrates, the batter becomes thicker making it harder for the liquid to freely move throughout, which could then lead to large clumps of flour that are not hydrated. By adding the flour in 3-4 batches alternating with the liquid, it ensures even distribution in the batter as well as even hydration of the flour. Add about a quarter to a third of the flour mixture to your batter followed by a quarter to a third of the liquid. Mix slowly at first so that the flour does not go flying out of the bowl (which I'm pretty sure every baker has learned the hard way). Mix for about 30-60 seconds until all the flour has been incorporated. Scrape down the sides of the bowl (just like when adding the eggs to the butter) and add your next batch of flour/liquid. Repeat this process until all the flour and liquid has been added. I recommend scraping down the sides of the bowl and mixing for a final 30 seconds to make sure everything is fully mixed in and even. Now your batter is done and you can fill your pans. Adding The Dry And Wet Ingredients Adding the Flour Final Cake Batter
  • 21. Now that your batter is ready, it's time to fill your pans and bake your cake. But first you have to make sure your pans are ready. Preparing your cake pans is such an important yet often overlooked step. After all, you don’t want all that hard work you did perfectly mixing the batter to go to waste because you cake doesn’t come out of the pan. Chapter 4 Baking the Cake
  • 22. When filling cake pans you want them to be only about half full. You can reference the chart to the right for the approximate number of cups of batter each pan should have. Depending on how dense your cake batter is you may need slightly more or less than the number stated. If, for example, your recipe says that it is enough to make a two layer, 8 inch round cake, but you find you have batter left over after measuring out 3.5 cups in each pan, you should probably use the remaining batter as well. The best way to fill the pans evenly is to weigh out the batter to make sure you have equal weights in each pan. Once the pans are filled, smooth the batter so that it is level and apply your wet cake strips, if you are using them. Lastly bang the pan on the counter a few times (firmly but not too hard). You can put a towel underneath it so that it has some padding and doesn't make too much noise. Besides helping to even out the batter, this eliminates any big air pockets that might have formed in the batter while filling the pans. This step is especially helpful if using an ornate Bundt pan because it helps the batter get into all the little crevices. In addition to the steps outlined above I’ve also created a quick tutorial video on my website where I go into more detail on how to perfectly prep you cake pans. Filling the Pans
  • 23. Place the filled cake pans in the center of your preheated oven and bake. Consult your recipe for specific baking times, but start checking for "doneness" about 5 minutes before the time stated. Then check every 5 minutes after that until a toothpick inserted into the center of the cake comes out clean. Once the cakes are done place the pans on a cooling rack and allow to cool for 10 minutes. As soon as 10 minutes are up, un-mold the cakes from the pan. You may need to run a knife or a metal spatula along the edges to help loosen if it from the pan a bit. Place a cooling rack on top of the cake pan and then carefully flip the whole thing over while keeping the rack and pan in contact. The cake should release easily onto the rack. Remove the pan and the parchment paper and allow the cakes to cool for at least an hour. Once the cakes are cool wrap them individually in plastic wrap. Place them in the refrigerator overnight, if possible, or for at least three hours before filling and frosting. Baking the Cake
  • 24. These are my classic yellow cake and vanilla butter cream recipes. I’ve spent years perfecting them because they are extremely versatile. I use them as a base for many other recipe creations. Just by swapping out the milk for some other liquid (like coffee, wine, tea, etc) or the vanilla for a different extract (lemon, almond, coconut) you can create a whole new recipe. Chapter 5 Recipes
  • 25. INGREDIENTS ● 2 ½ cups (12 ounces) unbleached all-purpose flour (dip and sweep) ● 1 Tablespoon baking powder ● ½ teaspoon salt ● 16 Tablespoons (8 ounces) unsalted butter, softened ● 1 ½ cups (10.8 ounces) granulated sugar ● 2 ½ teaspoons pure vanilla extract ● 4 large eggs ● 1 cup (8.3 ounces) milk, at room temperature DIRECTIONS 1. Preheat the oven to 350°F with a rack positioned in the center. 2. Spray two 8 inch round cake pans with non-stick baking spray (Bakers Joy or Pam with Flour). Line pans with parchment paper, spray again then use a pastry brush to spread evenly. 3. Place the unbroken eggs in a bowl of warm water to bring them to room temperature. Set aside. 4. Sift the all-purpose flour and baking powder into a mixing bowl. Add the salt then whisk well to combine. Set aside. 5. In a large mixing bowl, cream the softened butter on medium speed for 2 minutes. Scrape down the sides of the bowl. 6. Gradually add sugar to the butter. Once incorporated, add the vanilla and beat on medium high for 3 minutes (high speed if using a hand-held mixer) in order to thoroughly cream the butter. 7. Scrape down the sides of the bowl. Add the eggs one at a time and mix on low speed after each addition until well incorporated. Be sure to scrape the bowl in between additions 8. Add the flour mixture in 3-4 batches, alternating with the milk. Scrape down the sides and mix well after each addition. 9. Divide the batter evenly between the two pans and then tap the pans on the counter a few times to eliminate any air bubbles. 10. Bake at 350°F for 30-35 (40-45 if using cake strips) minutes or until a wooden toothpick comes out clean. For cupcakes bake for 20-22 minutes. 11. Let the cakes cool in the pan for 10 minutes, then invert onto a cooling rack. Allow to cool for about an hour, then wrap in plastic wrap and refrigerate overnight, or until cold enough to handle easily (about 3-4 hours). 12. Watch my video on how to fill a frost a cake. Classic Yellow Cake Recipe
  • 26. INGREDIENTS ● 16 Tablespoons (8 ounces) shortening (preferably organic), softened ● 8 Tablespoons (4 ounces) unsalted butter, softened ● 2 Tablespoons heavy cream (or water) ● 1 teaspoon pure vanilla extract ● 4 cups (16 ounces) powdered sugar DIRECTIONS 1. In a large mixing bowl, beat the shortening until smooth, about 1-2 minutes. 2. Add the softened butter, heavy cream/water and vanilla extract to the shortening. Beat for another 1-2 minutes 3. Sift half the powdered sugar into the shortening/butter mixture and mix on low until incorporated, then beat on medium-high for five minutes. 4. Sift in the remaining powdered sugar, mix on low speed until incorporated then beat on medium-high for an additional five minutes. 5. Store in an airtight container. Lasts 2-3 days at room temperature or up to a week refrigerated. 6. Watch my video on how to fill a frost a cake. Vanilla Buttercream Recipe
  • 27. The books and equipment referenced in this chapter are all products I have been using for many years and would highly recommend to any baker. All the links will take you to an online retailer where you can find the item, but most items can also be found at local big box stores. Chapter 6 References and Recommendations
  • 28. Beranbaum, Rose Levy. The Cake Bible. William Morrow Cookbooks, 1988. Beranbaum, Rose Levy. Real Baking With Rose. http://www.realbakingwithrose.com/ Figoni, Paula I. How Baking Works: Exploring the Fundamentals of Baking Science. Wiley, 2010. West Eckhardt, Linda. Cakes from Scratch in Half the Time: Recipes That Will Change the Way You Bake Cakes Forever. Chronical Books, 2005. References
  • 29. Baking Equipment Recommendations ●Wilton Aluminum Performance Pans - I love Wilton pans for baking layer cakes. They are sturdy, dependable, and bake evenly. ●Magi-Cake Set of 2 Cake Pan Strips, Small - These cake strips come in a variety of sizes to match whatever size pan you are using. I use cake strips whenever I bake a layer cake and my cakes always come out nice and level. ●If You Care FSC Certified Parchment Baking Paper - I recommend lining your pans with parchment paper in order to have your cakes unmold cleanly every time. I like to use this eco-friendly parchment since it's unbleached and recycled. ●Non-Contact Infrared (IR) Thermometer - Ensuring your ingredients are at the right temperature is much easier with this handy thermometer. It instantly tells you the temperature using a laser so you don't have to stick it in the food. I use one whenever I bake. ●OXO Good Grips Mesh Strainer - I love Oxo products for their ergonomic handles. This is the strainer I use whenever I am sifting my dry ingredients. ●Silicone Spatula Set - Rubber spatulas are a bakers best friend. They are great for scraping every last bit of batter out of the bowl. ●Escali Large Volume Measuring Scale - As I've stressed throughout the book, weighing your ingredients is so important and to do so you need a reliable scale. I've been using this particular Escali scale for years, but they have a full line of wonderful products. ●KitchenAid Professional 600 Series 6-Quart Stand Mixer - I LOVE my KitchenAid mixer. It has been used heavily for almost 10 years and is still going strong. I highly recommend investing in the 6Qt version if you are going to buy one, that way you can make both large and small batches.
  • 30. About the Author Jennifer Rao is the owner of Around the World in 80 Cakes, a cake decorating and baking blog. Jennifer has been baking for over 20 years, previously ran a cake decorating business making wedding and celebration cakes, and also spent a year as a Wilton Method Instructor. In addition to her passion for all things cake, she holds a bachelor's degree in Chemical Engineering, a Master’s degree in Environmental Engineering, and currently works in higher education. Other publications: Cakes without Borders Volume 1: The Maiden Voyage Connect with Me: Follow me on Twitter: http://twiter.com/80cakes Like me on Facebook: http://facebook.com/80cakes See my Pins: https://www.pinterest.com/80cakesllc/ Read about my other books http://www.cakeswithoutborders.com Subscribe to my blog: http://www.80cakes.com