SlideShare a Scribd company logo
1 of 57
Women Who Code
@WomenWhoCodeTO
PyLadies, @pyladiestoronto
Get Your Bot On!, @getyourboton
Python on the Raspberry Pi 2
© 2015 - 2016 Get Your Bot On!
Agenda
15 mins - intro to RPI and GPIO etc
15 mins - basic hardware set up, software installation etc
20 mins - try it: boot up, software etc, make something work (light)
35 mins - Intro to Python - focus on interaction with the GPIO
30 mins - try it: load sample code, make it work, change something
20 mins - Intro to Connecting a motor
30 mins - try it: connect 2nd motor, change the code
© 2015 - 2016 Get Your Bot On!
GPIO Library and Python
Let’s make something!
Photo Credits: https://openclipart.org/detail/225947/Robot
© 2015 - 2016 Get Your Bot On!
Open the Terminal
© 2015 - 2016 Get Your Bot On!
Let’s find our files
Type ls to list all files and folders
We need to find the “Documents” folder
which holds all our code
If you see Documents listed in the
terminal, type:
cd Documents
Type in ls again to list files and folders.
© 2015 - 2016 Get Your Bot On!
Linux Command Line
Folders and files are in tree structures
You have to open folders to access other folders.
Imagine you’re peeling an onion!
Photo Credits:https://openclipart.org/detail/175418/cut-onion
© 2015 - 2016 Get Your Bot On!
Linux Command Line
“cd” __name of a folder__ tells the command line to
navigate to the folder name listed
(Open a layer of the onion)
Use “ls” to check the layer for the file or folder
you’re looking for
If you go into a layer and want to get out of it,
type in “cd ..” (two dots)
© 2015 - 2016 Get Your Bot On!
Run Marley’s LED
Once you have found the Documents folder and code
files type the following into the terminal:
sudo python blink.py
Ask a mentor for help
if you can’t find the code!
© 2015 - 2016 Get Your Bot On!
Marley’s Servo Motor
Let’s make this servo motor move!
Run the following command in the terminal
window:
sudo python servo.py
© 2015 - 2016 Get Your Bot On!
Marley’s Ultrasonic
Sensor
You can read distance data from the Ultrasonic
sensor on the Raspberry Pi. It will output distance
between the sensor and the object in front of it in
centimetres.
● Open the program file called “sensor.py”
Run the following command in the terminal window:
sudo python sensor.py
© 2015 - 2016 Get Your Bot On!
Let’s Customize Marley!
We’ve tested out the
hardware, now let’s make it
even better!
Photo Credits: https://openclipart.org/detail/191072/blue-robot
© 2015 - 2016 Get Your Bot On!
Challenge: Add an LED to
the circuit
Now that you have seen how
some of the hardware pieces
work on Marley, let’s re-wire
and reprogram the hardware!
Photo Credits: https://openclipart.org/detail/227532/red-led
© 2015 - 2016 Get Your Bot On!
BUT FIRST! Mapping
GPIO to the Pins
Layout on the board vs
Pin Number reference
© 2015 - 2016 Get Your Bot On!
What is the Pi GPIO?
● General Purpose Input/Output
● Digital input and output
● Not buffered so be careful
© 2015 - 2016 Get Your Bot On!
Challenge: Reprogram
an LED
The LED has a positive and a
negative side.
You are going to match the
cathode with
the negative side (ground)
on the breadboard.
Photos Credits to https://en.wikipedia.org/wiki/LED_circuit#/media/File:%2B-_of_LED_2.svg
© 2015 - 2016 Get Your Bot On!
Breadboard: Terminal Strips
Photo Credits: http://computers.tutsplus.com/tutorials/how-to-use-a-breadboard-and-build-a-led-circuit--mac-54746
© 2015 - 2016 Get Your Bot On!
Breadboard: Power Rails
The power rails give you lots of
easy access to power wherever
you need it in your circuit.
Usually they will be labeled with a
‘+’ and a ‘-’ and have a red and
blue or black stripe, to indicate
the positive and negative side.
Pick one vertical strip for a
GROUND and another for POWER
© 2015 - 2016 Get Your Bot On!
Resistors
● A resistor implements electrical resistance to
reduce current flow, and, at the same time, act to
lower voltage levels within circuits.
● The electrical resistance of a resistor is measured
in ohms.
● We are using resistors in our LED circuit so that
the LED doesn’t blow a fuse.
● For this workshop we are using a 220K Resistor
for each LED
Photo Credits: https://openclipart.org/detail/8281/resistors
© 2015 - 2016 Get Your Bot On!
Okay Time to Wire it Up!
Photo Credits: https://openclipart.org/detail/191072/blue-robot
Ask a mentor
for help if
you’re
stuck!
© 2015 - 2016 Get Your Bot On!
Let’s get programing! But
wait, Why Python?
● It’s readable
● Quick to setup
● It’s great for beginners
● It’s ranked 5th most popular language
based on the TIOBE index
● Lots of python community support
Photo Credits: Python Foundation https://www.python.org/static/community_logos/python-logo-master-v3-TM.png
© 2015 - 2016 Get Your Bot On!
Write the new_blink.py program
Go to Menu-> Accessories->Text editor
File-> open new_blink.py
At the top of the code file below the #comment type
in:
#import the libraries <- This is a comment
import RPi.GPIO as GPIO
import time
© 2015 - 2016 Get Your Bot On!
Let’s Create a Function
● We are going to create a function that’s going
to control the GPIO pin we just rewired.
● Functions "take in" data, process it, and "return"
a result.
● Functions are useful! Once a function is
written, it can be used over and over again
© 2015 - 2016 Get Your Bot On!
Declare a Function
‘def’ keyword defines the function
new_blink is the name of your function
(pin) ‘pin’ is the value (parameters) you are
passing into the function
: to finish your function declaration
[def] [function name] [(parameters)] [:]
Type in the following to start your function:
def new_blink(pin):
© 2015 - 2016 Get Your Bot On!
Indents, Spaces & Commenting
def blink(pin):
#turn LED on
[indent] Start writing code here
#turn LED off
[indent]Writing more code here
● Indents and spacing matter in python, so
when you declare a function, indent code
after the declaration so it knows it’s part of
the function
● Everything written after the “#” symbol is
called a comment, it does not affect the code
© 2015 - 2016 Get Your Bot On!
blink function
def blink(pin):
#turn LED on
GPIO.output(pin,GPIO.HIGH)
time.sleep(1)
#turn LED off
GPIO.output(pin,GPIO.LOW)
time.sleep(1)
return
GPIO.output(pin, GPIO.HIGH) tells the pi to
light up the LED
time.sleep(1) tells it how long to light up the
LED
© 2015 - 2016 Get Your Bot On!
blink function
def blink(pin):
#turn LED on
GPIO.output(pin,GPIO.HIGH)
time.sleep(1)
#turn LED off
GPIO.output(pin,GPIO.LOW)
time.sleep(1)
return
GPIO.out ( pin, GPIO.LOW) tells the pi to turn
off the LED
time.sleep(1) tells it how long to turn off the
LED
© 2015 - 2016 Get Your Bot On!
Return Statement
def blink(pin):
#turn LED on
GPIO.output(pin,GPIO.HIGH)
time.sleep(1)
#turn LED off
GPIO.output(pin,GPIO.LOW)
time.sleep(1)
return
The return statement, terminates the execution of a
function and returns control to the calling function
© 2015 - 2016 Get Your Bot On!
#Set up the GPIO pins
GPIO.setmode(GPIO.BOARD)
#Set up GPIO output
GPIO.setup(15, GPIO.OUT)
Set the GPIO pins
Tell GPIO which pin we are using (pin #15)
GPIO Pin Setup
© 2015 - 2016 Get Your Bot On!
# Make the LED blink 2 times
for i in range(0,2):
blink(15)
For Loop
We are using a FOR LOOP to program the
LED to blink 2 times (Or a number of your
choice)
© 2015 - 2016 Get Your Bot On!
For Loop
# Make the LED blink ___# of times
for i in range(0, 2):
blink(15)
for i in range( a , b ):
means
for every element in this range of numbers,
starting from a, ending in b
do something
Customize the number and change the 2! (or another
number)
© 2015 - 2016 Get Your Bot On!
For Loop & Function Call
# Make the LED blink ___# of times
for i in range(0, 2):
blink(15)
The blink function we just wrote is “called”
into the for loop.
We are telling the program that we want to turn
on/turn off an LED at pin 15 for as many times as
described in the for loop.
© 2015 - 2016 Get Your Bot On!
Exit the program
#Tell the program to exit
GPIO.cleanup()
Now you’re ready to test your code!
© 2015 - 2016 Get Your Bot On!
Run your new program!
Navigate to the terminal window
Type in “ls” to list all files
Do you see new_blink.py?
If you see new_blink.py type in:
sudo python new_blink.py
**If you need help ask a mentor! **
© 2015 - 2016 Get Your Bot On!
More challenge Ideas
Can you make the ultrasonic sensor
output different messages based on
distance?
Can you make the servo output a message
every time it turns a direction?
© 2015 - 2016 Get Your Bot On!
Challenge Idea:
Making The Sensor Talk
© 2015 - 2016 Get Your Bot On!
Let’s talk in Python
Open the new_sensor.py and scroll down to find the
following code.
Can you make python print out a message based on
these distance values?
#if distance is less than 10
if distance < 10:
#if distance is less than 20
elif distance < 20:
#if distance is less than 30
elif distance < 30:
#else print the distance is over 30 cms
else:
© 2015 - 2016 Get Your Bot On!
Printing
print “The distance is less than 10 cms”
The print function outputs values onto the screen
Type the word print followed by what you would like
to print surrounded in quotes.
© 2015 - 2016 Get Your Bot On!
If , Elif, Else
If, Elif and Else are known as conditional logic
If, Elif and Else statements are used to execute different
sets of instructions based on specific information
Think of each as a Truth test, if the statement is True
then it will run the indented piece of code underneath it
if distance < 10:
[indent]print “The distance is less than 10cms”
elif distance < 20:
[indent ]print “The distance is less than 20cms”
© 2015 - 2016 Get Your Bot On!
Else
If none of the If and Elif statements are True then the
Else will run as a default.
(Think of Else as the safety net that grabs all the cases that don’t pass
the if and elif truth tests.)
#if distance is less than 10
if distance < 10:
print "The distance is less than 10 cms"
#if distance is less than 20
elif distance < 20:
print “The distance is less than 20cms”
#else print the distance is over 30 cms
else:
print “The distance is over 30cms”
© 2015 - 2016 Get Your Bot On!
Can you make the servo
talk back now?
Modify sensor_new.py
© 2015 - 2016 Get Your Bot On!
Setting up the Ultrasonic
Sensor and Servo
Wiring and circuit details
© 2015 - 2016 Get Your Bot On!
Sensor Pins
You have 4 pins
which you will
connect
to your circuit
VCC - POWER
TRIG
ECHO
GRD - GROUND
© 2015 - 2016 Get Your Bot On!
VCC + GRD
● Connect a jumper wire to the VCC pin which
connects to PIN 2 on the Raspberry Pi
● PIN 2 on the Raspberry Pi sends a current of
5V through the sensor, which will power it
● Lastly, connect a jumper wire to GRD which
is also connected to the GROUND(negative)
power rail on the breadboard
(Diagram in next slide)
© 2015 - 2016 Get Your Bot On!
TRIG + ECHO
● Connect TRIG to PIN 12
● Connect ECHO to Terminal strip on the
breadboard, you will need two 330k resistors
and another jumper wire to wire the rest.
(Diagram in the next slide)
© 2015 - 2016 Get Your Bot On!
TRIG + ECHO
The Yellow wire is
connected to ECHO
pin and the Green
wire is connected
to GPIO PIN 22
One 330K resistors
connect the
terminal strips. The
other connects the
terminal strip with
GRD on the Power
Rail
© 2015 - 2016 Get Your Bot On!
Common Types of Motors
DC Motor: Apply voltage and it turns,
requires a DC power supply. Used in toys
and home appliances.
Stepper Motor: Rotation of the motor is
divided into equal “steps”, apply AC power
and the motor converts the pulse into steps.
Used in printers and CD Drives.
Servo Motor: DC Motor + position or speed
and direction sensors. Used in robots and
RC cars.
© 2015 - 2016 Get Your Bot On!
Types of Servos
Positional Rotation: Rotates only 180
degrees. You can control position.
Continuous Rotation: Rotates indefinitely
in either direction. You can control speed
and direction.
Linear: Rack and Pinion gear added for
linear motion.
© 2015 - 2016 Get Your Bot On!
Servo PINS
There are 3 PINS
ORANGE - Signal
RED - (VCC) POWER
BROWN - GROUND
© 2015 - 2016 Get Your Bot On!
Connecting it all
● Connect the Signal to PIN 11 on the
Raspberry Pi
● Connect the GRD to Ground (Negative) on
the BreadBoard Power Rails
● To power the Servo you need to connect a
jumper wire to PIN 4 and connect it back to
the Breadboard on the Positive Power Rail
● Then you need to connect a jumper wire to
VCC on the Servo and pin it to the same
Power Rail vertically.
(Diagram in next slide)
© 2015 - 2016 Get Your Bot On!
Servo Wiring

More Related Content

Similar to Python and the Raspberry Pi

Introduction to pic
Introduction to picIntroduction to pic
Introduction to picPRADEEP
 
Ch_2_8,9,10.pptx
Ch_2_8,9,10.pptxCh_2_8,9,10.pptx
Ch_2_8,9,10.pptxyosikit826
 
Running Cognos on Hadoop
Running Cognos on HadoopRunning Cognos on Hadoop
Running Cognos on HadoopSenturus
 
How To make your own Robot And control it using labview
How To make your own Robot And control it using labviewHow To make your own Robot And control it using labview
How To make your own Robot And control it using labviewAymen Lachkhem
 
pcDuino Presentation at SparkFun
pcDuino Presentation at SparkFunpcDuino Presentation at SparkFun
pcDuino Presentation at SparkFunJingfeng Liu
 
Presentation IOT Robot
Presentation IOT RobotPresentation IOT Robot
Presentation IOT RobotVatsal N Shah
 
Ardx eg-spar-web-rev10
Ardx eg-spar-web-rev10Ardx eg-spar-web-rev10
Ardx eg-spar-web-rev10stemplar
 
A developers' journey into building automated tests for IT from the ground up
A developers' journey into building automated tests for IT from the ground upA developers' journey into building automated tests for IT from the ground up
A developers' journey into building automated tests for IT from the ground upstefanorago
 
IoT Development from Software Developer Perspective
IoT Development from Software Developer PerspectiveIoT Development from Software Developer Perspective
IoT Development from Software Developer PerspectiveAndri Yadi
 
ONLINE FOOD ORDERS THROUGH WHATSAPP AUTOMATION BOT
ONLINE FOOD ORDERS THROUGH WHATSAPP AUTOMATION BOTONLINE FOOD ORDERS THROUGH WHATSAPP AUTOMATION BOT
ONLINE FOOD ORDERS THROUGH WHATSAPP AUTOMATION BOTIRJET Journal
 
Maximize the power of OSGi in AEM
Maximize the power of OSGi in AEM Maximize the power of OSGi in AEM
Maximize the power of OSGi in AEM ICF CIRCUIT
 
Twilio Signal 2016 Keynote
Twilio Signal 2016 Keynote Twilio Signal 2016 Keynote
Twilio Signal 2016 Keynote Twilio Inc
 
Introduction to Arduino Microcontroller
Introduction to Arduino MicrocontrollerIntroduction to Arduino Microcontroller
Introduction to Arduino MicrocontrollerMujahid Hussain
 
Hacking Soldering Robot with TERES-I DIY laptop
Hacking Soldering Robot with TERES-I DIY laptopHacking Soldering Robot with TERES-I DIY laptop
Hacking Soldering Robot with TERES-I DIY laptopOlimex Bulgaria
 
RMOUG QEW Family Coding Event- Raspberry PI
RMOUG QEW Family Coding Event-  Raspberry PIRMOUG QEW Family Coding Event-  Raspberry PI
RMOUG QEW Family Coding Event- Raspberry PIKellyn Pot'Vin-Gorman
 
Arduino اردوينو
Arduino اردوينوArduino اردوينو
Arduino اردوينوsalih mahmod
 

Similar to Python and the Raspberry Pi (20)

#Make01
#Make01#Make01
#Make01
 
Introduction to pic
Introduction to picIntroduction to pic
Introduction to pic
 
First fare 2013 basic-labview
First fare 2013   basic-labviewFirst fare 2013   basic-labview
First fare 2013 basic-labview
 
Ch_2_8,9,10.pptx
Ch_2_8,9,10.pptxCh_2_8,9,10.pptx
Ch_2_8,9,10.pptx
 
Running Cognos on Hadoop
Running Cognos on HadoopRunning Cognos on Hadoop
Running Cognos on Hadoop
 
Python Programming Course in janak puri, New Delhi
Python Programming Course in janak puri, New DelhiPython Programming Course in janak puri, New Delhi
Python Programming Course in janak puri, New Delhi
 
How To make your own Robot And control it using labview
How To make your own Robot And control it using labviewHow To make your own Robot And control it using labview
How To make your own Robot And control it using labview
 
pcDuino Presentation at SparkFun
pcDuino Presentation at SparkFunpcDuino Presentation at SparkFun
pcDuino Presentation at SparkFun
 
Presentation IOT Robot
Presentation IOT RobotPresentation IOT Robot
Presentation IOT Robot
 
Spark core intro
Spark core introSpark core intro
Spark core intro
 
Ardx eg-spar-web-rev10
Ardx eg-spar-web-rev10Ardx eg-spar-web-rev10
Ardx eg-spar-web-rev10
 
A developers' journey into building automated tests for IT from the ground up
A developers' journey into building automated tests for IT from the ground upA developers' journey into building automated tests for IT from the ground up
A developers' journey into building automated tests for IT from the ground up
 
IoT Development from Software Developer Perspective
IoT Development from Software Developer PerspectiveIoT Development from Software Developer Perspective
IoT Development from Software Developer Perspective
 
ONLINE FOOD ORDERS THROUGH WHATSAPP AUTOMATION BOT
ONLINE FOOD ORDERS THROUGH WHATSAPP AUTOMATION BOTONLINE FOOD ORDERS THROUGH WHATSAPP AUTOMATION BOT
ONLINE FOOD ORDERS THROUGH WHATSAPP AUTOMATION BOT
 
Maximize the power of OSGi in AEM
Maximize the power of OSGi in AEM Maximize the power of OSGi in AEM
Maximize the power of OSGi in AEM
 
Twilio Signal 2016 Keynote
Twilio Signal 2016 Keynote Twilio Signal 2016 Keynote
Twilio Signal 2016 Keynote
 
Introduction to Arduino Microcontroller
Introduction to Arduino MicrocontrollerIntroduction to Arduino Microcontroller
Introduction to Arduino Microcontroller
 
Hacking Soldering Robot with TERES-I DIY laptop
Hacking Soldering Robot with TERES-I DIY laptopHacking Soldering Robot with TERES-I DIY laptop
Hacking Soldering Robot with TERES-I DIY laptop
 
RMOUG QEW Family Coding Event- Raspberry PI
RMOUG QEW Family Coding Event-  Raspberry PIRMOUG QEW Family Coding Event-  Raspberry PI
RMOUG QEW Family Coding Event- Raspberry PI
 
Arduino اردوينو
Arduino اردوينوArduino اردوينو
Arduino اردوينو
 

Recently uploaded

ProductAnonymous-April2024-WinProductDiscovery-MelissaKlemke
ProductAnonymous-April2024-WinProductDiscovery-MelissaKlemkeProductAnonymous-April2024-WinProductDiscovery-MelissaKlemke
ProductAnonymous-April2024-WinProductDiscovery-MelissaKlemkeProduct Anonymous
 
Strategize a Smooth Tenant-to-tenant Migration and Copilot Takeoff
Strategize a Smooth Tenant-to-tenant Migration and Copilot TakeoffStrategize a Smooth Tenant-to-tenant Migration and Copilot Takeoff
Strategize a Smooth Tenant-to-tenant Migration and Copilot Takeoffsammart93
 
Data Cloud, More than a CDP by Matt Robison
Data Cloud, More than a CDP by Matt RobisonData Cloud, More than a CDP by Matt Robison
Data Cloud, More than a CDP by Matt RobisonAnna Loughnan Colquhoun
 
How to Troubleshoot Apps for the Modern Connected Worker
How to Troubleshoot Apps for the Modern Connected WorkerHow to Troubleshoot Apps for the Modern Connected Worker
How to Troubleshoot Apps for the Modern Connected WorkerThousandEyes
 
Partners Life - Insurer Innovation Award 2024
Partners Life - Insurer Innovation Award 2024Partners Life - Insurer Innovation Award 2024
Partners Life - Insurer Innovation Award 2024The Digital Insurer
 
Mastering MySQL Database Architecture: Deep Dive into MySQL Shell and MySQL R...
Mastering MySQL Database Architecture: Deep Dive into MySQL Shell and MySQL R...Mastering MySQL Database Architecture: Deep Dive into MySQL Shell and MySQL R...
Mastering MySQL Database Architecture: Deep Dive into MySQL Shell and MySQL R...Miguel Araújo
 
Apidays New York 2024 - Scaling API-first by Ian Reasor and Radu Cotescu, Adobe
Apidays New York 2024 - Scaling API-first by Ian Reasor and Radu Cotescu, AdobeApidays New York 2024 - Scaling API-first by Ian Reasor and Radu Cotescu, Adobe
Apidays New York 2024 - Scaling API-first by Ian Reasor and Radu Cotescu, Adobeapidays
 
What Are The Drone Anti-jamming Systems Technology?
What Are The Drone Anti-jamming Systems Technology?What Are The Drone Anti-jamming Systems Technology?
What Are The Drone Anti-jamming Systems Technology?Antenna Manufacturer Coco
 
Bajaj Allianz Life Insurance Company - Insurer Innovation Award 2024
Bajaj Allianz Life Insurance Company - Insurer Innovation Award 2024Bajaj Allianz Life Insurance Company - Insurer Innovation Award 2024
Bajaj Allianz Life Insurance Company - Insurer Innovation Award 2024The Digital Insurer
 
A Year of the Servo Reboot: Where Are We Now?
A Year of the Servo Reboot: Where Are We Now?A Year of the Servo Reboot: Where Are We Now?
A Year of the Servo Reboot: Where Are We Now?Igalia
 
TrustArc Webinar - Stay Ahead of US State Data Privacy Law Developments
TrustArc Webinar - Stay Ahead of US State Data Privacy Law DevelopmentsTrustArc Webinar - Stay Ahead of US State Data Privacy Law Developments
TrustArc Webinar - Stay Ahead of US State Data Privacy Law DevelopmentsTrustArc
 
Exploring the Future Potential of AI-Enabled Smartphone Processors
Exploring the Future Potential of AI-Enabled Smartphone ProcessorsExploring the Future Potential of AI-Enabled Smartphone Processors
Exploring the Future Potential of AI-Enabled Smartphone Processorsdebabhi2
 
Automating Google Workspace (GWS) & more with Apps Script
Automating Google Workspace (GWS) & more with Apps ScriptAutomating Google Workspace (GWS) & more with Apps Script
Automating Google Workspace (GWS) & more with Apps Scriptwesley chun
 
Workshop - Best of Both Worlds_ Combine KG and Vector search for enhanced R...
Workshop - Best of Both Worlds_ Combine  KG and Vector search for  enhanced R...Workshop - Best of Both Worlds_ Combine  KG and Vector search for  enhanced R...
Workshop - Best of Both Worlds_ Combine KG and Vector search for enhanced R...Neo4j
 
Tata AIG General Insurance Company - Insurer Innovation Award 2024
Tata AIG General Insurance Company - Insurer Innovation Award 2024Tata AIG General Insurance Company - Insurer Innovation Award 2024
Tata AIG General Insurance Company - Insurer Innovation Award 2024The Digital Insurer
 
Advantages of Hiring UIUX Design Service Providers for Your Business
Advantages of Hiring UIUX Design Service Providers for Your BusinessAdvantages of Hiring UIUX Design Service Providers for Your Business
Advantages of Hiring UIUX Design Service Providers for Your BusinessPixlogix Infotech
 
Artificial Intelligence: Facts and Myths
Artificial Intelligence: Facts and MythsArtificial Intelligence: Facts and Myths
Artificial Intelligence: Facts and MythsJoaquim Jorge
 
Powerful Google developer tools for immediate impact! (2023-24 C)
Powerful Google developer tools for immediate impact! (2023-24 C)Powerful Google developer tools for immediate impact! (2023-24 C)
Powerful Google developer tools for immediate impact! (2023-24 C)wesley chun
 
Apidays Singapore 2024 - Building Digital Trust in a Digital Economy by Veron...
Apidays Singapore 2024 - Building Digital Trust in a Digital Economy by Veron...Apidays Singapore 2024 - Building Digital Trust in a Digital Economy by Veron...
Apidays Singapore 2024 - Building Digital Trust in a Digital Economy by Veron...apidays
 
Strategies for Landing an Oracle DBA Job as a Fresher
Strategies for Landing an Oracle DBA Job as a FresherStrategies for Landing an Oracle DBA Job as a Fresher
Strategies for Landing an Oracle DBA Job as a FresherRemote DBA Services
 

Recently uploaded (20)

ProductAnonymous-April2024-WinProductDiscovery-MelissaKlemke
ProductAnonymous-April2024-WinProductDiscovery-MelissaKlemkeProductAnonymous-April2024-WinProductDiscovery-MelissaKlemke
ProductAnonymous-April2024-WinProductDiscovery-MelissaKlemke
 
Strategize a Smooth Tenant-to-tenant Migration and Copilot Takeoff
Strategize a Smooth Tenant-to-tenant Migration and Copilot TakeoffStrategize a Smooth Tenant-to-tenant Migration and Copilot Takeoff
Strategize a Smooth Tenant-to-tenant Migration and Copilot Takeoff
 
Data Cloud, More than a CDP by Matt Robison
Data Cloud, More than a CDP by Matt RobisonData Cloud, More than a CDP by Matt Robison
Data Cloud, More than a CDP by Matt Robison
 
How to Troubleshoot Apps for the Modern Connected Worker
How to Troubleshoot Apps for the Modern Connected WorkerHow to Troubleshoot Apps for the Modern Connected Worker
How to Troubleshoot Apps for the Modern Connected Worker
 
Partners Life - Insurer Innovation Award 2024
Partners Life - Insurer Innovation Award 2024Partners Life - Insurer Innovation Award 2024
Partners Life - Insurer Innovation Award 2024
 
Mastering MySQL Database Architecture: Deep Dive into MySQL Shell and MySQL R...
Mastering MySQL Database Architecture: Deep Dive into MySQL Shell and MySQL R...Mastering MySQL Database Architecture: Deep Dive into MySQL Shell and MySQL R...
Mastering MySQL Database Architecture: Deep Dive into MySQL Shell and MySQL R...
 
Apidays New York 2024 - Scaling API-first by Ian Reasor and Radu Cotescu, Adobe
Apidays New York 2024 - Scaling API-first by Ian Reasor and Radu Cotescu, AdobeApidays New York 2024 - Scaling API-first by Ian Reasor and Radu Cotescu, Adobe
Apidays New York 2024 - Scaling API-first by Ian Reasor and Radu Cotescu, Adobe
 
What Are The Drone Anti-jamming Systems Technology?
What Are The Drone Anti-jamming Systems Technology?What Are The Drone Anti-jamming Systems Technology?
What Are The Drone Anti-jamming Systems Technology?
 
Bajaj Allianz Life Insurance Company - Insurer Innovation Award 2024
Bajaj Allianz Life Insurance Company - Insurer Innovation Award 2024Bajaj Allianz Life Insurance Company - Insurer Innovation Award 2024
Bajaj Allianz Life Insurance Company - Insurer Innovation Award 2024
 
A Year of the Servo Reboot: Where Are We Now?
A Year of the Servo Reboot: Where Are We Now?A Year of the Servo Reboot: Where Are We Now?
A Year of the Servo Reboot: Where Are We Now?
 
TrustArc Webinar - Stay Ahead of US State Data Privacy Law Developments
TrustArc Webinar - Stay Ahead of US State Data Privacy Law DevelopmentsTrustArc Webinar - Stay Ahead of US State Data Privacy Law Developments
TrustArc Webinar - Stay Ahead of US State Data Privacy Law Developments
 
Exploring the Future Potential of AI-Enabled Smartphone Processors
Exploring the Future Potential of AI-Enabled Smartphone ProcessorsExploring the Future Potential of AI-Enabled Smartphone Processors
Exploring the Future Potential of AI-Enabled Smartphone Processors
 
Automating Google Workspace (GWS) & more with Apps Script
Automating Google Workspace (GWS) & more with Apps ScriptAutomating Google Workspace (GWS) & more with Apps Script
Automating Google Workspace (GWS) & more with Apps Script
 
Workshop - Best of Both Worlds_ Combine KG and Vector search for enhanced R...
Workshop - Best of Both Worlds_ Combine  KG and Vector search for  enhanced R...Workshop - Best of Both Worlds_ Combine  KG and Vector search for  enhanced R...
Workshop - Best of Both Worlds_ Combine KG and Vector search for enhanced R...
 
Tata AIG General Insurance Company - Insurer Innovation Award 2024
Tata AIG General Insurance Company - Insurer Innovation Award 2024Tata AIG General Insurance Company - Insurer Innovation Award 2024
Tata AIG General Insurance Company - Insurer Innovation Award 2024
 
Advantages of Hiring UIUX Design Service Providers for Your Business
Advantages of Hiring UIUX Design Service Providers for Your BusinessAdvantages of Hiring UIUX Design Service Providers for Your Business
Advantages of Hiring UIUX Design Service Providers for Your Business
 
Artificial Intelligence: Facts and Myths
Artificial Intelligence: Facts and MythsArtificial Intelligence: Facts and Myths
Artificial Intelligence: Facts and Myths
 
Powerful Google developer tools for immediate impact! (2023-24 C)
Powerful Google developer tools for immediate impact! (2023-24 C)Powerful Google developer tools for immediate impact! (2023-24 C)
Powerful Google developer tools for immediate impact! (2023-24 C)
 
Apidays Singapore 2024 - Building Digital Trust in a Digital Economy by Veron...
Apidays Singapore 2024 - Building Digital Trust in a Digital Economy by Veron...Apidays Singapore 2024 - Building Digital Trust in a Digital Economy by Veron...
Apidays Singapore 2024 - Building Digital Trust in a Digital Economy by Veron...
 
Strategies for Landing an Oracle DBA Job as a Fresher
Strategies for Landing an Oracle DBA Job as a FresherStrategies for Landing an Oracle DBA Job as a Fresher
Strategies for Landing an Oracle DBA Job as a Fresher
 

Python and the Raspberry Pi

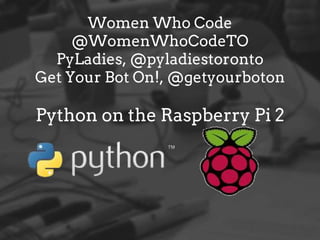
  • 1. Women Who Code @WomenWhoCodeTO PyLadies, @pyladiestoronto Get Your Bot On!, @getyourboton Python on the Raspberry Pi 2
  • 2. © 2015 - 2016 Get Your Bot On! Agenda 15 mins - intro to RPI and GPIO etc 15 mins - basic hardware set up, software installation etc 20 mins - try it: boot up, software etc, make something work (light) 35 mins - Intro to Python - focus on interaction with the GPIO 30 mins - try it: load sample code, make it work, change something 20 mins - Intro to Connecting a motor 30 mins - try it: connect 2nd motor, change the code
  • 3. © 2015 - 2016 Get Your Bot On! GPIO Library and Python Let’s make something! Photo Credits: https://openclipart.org/detail/225947/Robot
  • 4. © 2015 - 2016 Get Your Bot On! Open the Terminal
  • 5. © 2015 - 2016 Get Your Bot On! Let’s find our files Type ls to list all files and folders We need to find the “Documents” folder which holds all our code If you see Documents listed in the terminal, type: cd Documents Type in ls again to list files and folders.
  • 6. © 2015 - 2016 Get Your Bot On! Linux Command Line Folders and files are in tree structures You have to open folders to access other folders. Imagine you’re peeling an onion! Photo Credits:https://openclipart.org/detail/175418/cut-onion
  • 7. © 2015 - 2016 Get Your Bot On! Linux Command Line “cd” __name of a folder__ tells the command line to navigate to the folder name listed (Open a layer of the onion) Use “ls” to check the layer for the file or folder you’re looking for If you go into a layer and want to get out of it, type in “cd ..” (two dots)
  • 8. © 2015 - 2016 Get Your Bot On! Run Marley’s LED Once you have found the Documents folder and code files type the following into the terminal: sudo python blink.py Ask a mentor for help if you can’t find the code!
  • 9. © 2015 - 2016 Get Your Bot On! Marley’s Servo Motor Let’s make this servo motor move! Run the following command in the terminal window: sudo python servo.py
  • 10. © 2015 - 2016 Get Your Bot On! Marley’s Ultrasonic Sensor You can read distance data from the Ultrasonic sensor on the Raspberry Pi. It will output distance between the sensor and the object in front of it in centimetres. ● Open the program file called “sensor.py” Run the following command in the terminal window: sudo python sensor.py
  • 11. © 2015 - 2016 Get Your Bot On! Let’s Customize Marley! We’ve tested out the hardware, now let’s make it even better! Photo Credits: https://openclipart.org/detail/191072/blue-robot
  • 12. © 2015 - 2016 Get Your Bot On! Challenge: Add an LED to the circuit Now that you have seen how some of the hardware pieces work on Marley, let’s re-wire and reprogram the hardware! Photo Credits: https://openclipart.org/detail/227532/red-led
  • 13. © 2015 - 2016 Get Your Bot On! BUT FIRST! Mapping GPIO to the Pins Layout on the board vs Pin Number reference
  • 14. © 2015 - 2016 Get Your Bot On! What is the Pi GPIO? ● General Purpose Input/Output ● Digital input and output ● Not buffered so be careful
  • 15. © 2015 - 2016 Get Your Bot On!
  • 16. © 2015 - 2016 Get Your Bot On!
  • 17. © 2015 - 2016 Get Your Bot On!
  • 18. © 2015 - 2016 Get Your Bot On! Challenge: Reprogram an LED The LED has a positive and a negative side. You are going to match the cathode with the negative side (ground) on the breadboard. Photos Credits to https://en.wikipedia.org/wiki/LED_circuit#/media/File:%2B-_of_LED_2.svg
  • 19. © 2015 - 2016 Get Your Bot On! Breadboard: Terminal Strips Photo Credits: http://computers.tutsplus.com/tutorials/how-to-use-a-breadboard-and-build-a-led-circuit--mac-54746
  • 20. © 2015 - 2016 Get Your Bot On! Breadboard: Power Rails The power rails give you lots of easy access to power wherever you need it in your circuit. Usually they will be labeled with a ‘+’ and a ‘-’ and have a red and blue or black stripe, to indicate the positive and negative side. Pick one vertical strip for a GROUND and another for POWER
  • 21. © 2015 - 2016 Get Your Bot On!
  • 22. © 2015 - 2016 Get Your Bot On! Resistors ● A resistor implements electrical resistance to reduce current flow, and, at the same time, act to lower voltage levels within circuits. ● The electrical resistance of a resistor is measured in ohms. ● We are using resistors in our LED circuit so that the LED doesn’t blow a fuse. ● For this workshop we are using a 220K Resistor for each LED Photo Credits: https://openclipart.org/detail/8281/resistors
  • 23. © 2015 - 2016 Get Your Bot On!
  • 24. © 2015 - 2016 Get Your Bot On!
  • 25. © 2015 - 2016 Get Your Bot On! Okay Time to Wire it Up! Photo Credits: https://openclipart.org/detail/191072/blue-robot Ask a mentor for help if you’re stuck!
  • 26. © 2015 - 2016 Get Your Bot On! Let’s get programing! But wait, Why Python? ● It’s readable ● Quick to setup ● It’s great for beginners ● It’s ranked 5th most popular language based on the TIOBE index ● Lots of python community support Photo Credits: Python Foundation https://www.python.org/static/community_logos/python-logo-master-v3-TM.png
  • 27. © 2015 - 2016 Get Your Bot On! Write the new_blink.py program Go to Menu-> Accessories->Text editor File-> open new_blink.py At the top of the code file below the #comment type in: #import the libraries <- This is a comment import RPi.GPIO as GPIO import time
  • 28. © 2015 - 2016 Get Your Bot On! Let’s Create a Function ● We are going to create a function that’s going to control the GPIO pin we just rewired. ● Functions "take in" data, process it, and "return" a result. ● Functions are useful! Once a function is written, it can be used over and over again
  • 29. © 2015 - 2016 Get Your Bot On! Declare a Function ‘def’ keyword defines the function new_blink is the name of your function (pin) ‘pin’ is the value (parameters) you are passing into the function : to finish your function declaration [def] [function name] [(parameters)] [:] Type in the following to start your function: def new_blink(pin):
  • 30. © 2015 - 2016 Get Your Bot On! Indents, Spaces & Commenting def blink(pin): #turn LED on [indent] Start writing code here #turn LED off [indent]Writing more code here ● Indents and spacing matter in python, so when you declare a function, indent code after the declaration so it knows it’s part of the function ● Everything written after the “#” symbol is called a comment, it does not affect the code
  • 31. © 2015 - 2016 Get Your Bot On! blink function def blink(pin): #turn LED on GPIO.output(pin,GPIO.HIGH) time.sleep(1) #turn LED off GPIO.output(pin,GPIO.LOW) time.sleep(1) return GPIO.output(pin, GPIO.HIGH) tells the pi to light up the LED time.sleep(1) tells it how long to light up the LED
  • 32. © 2015 - 2016 Get Your Bot On! blink function def blink(pin): #turn LED on GPIO.output(pin,GPIO.HIGH) time.sleep(1) #turn LED off GPIO.output(pin,GPIO.LOW) time.sleep(1) return GPIO.out ( pin, GPIO.LOW) tells the pi to turn off the LED time.sleep(1) tells it how long to turn off the LED
  • 33. © 2015 - 2016 Get Your Bot On! Return Statement def blink(pin): #turn LED on GPIO.output(pin,GPIO.HIGH) time.sleep(1) #turn LED off GPIO.output(pin,GPIO.LOW) time.sleep(1) return The return statement, terminates the execution of a function and returns control to the calling function
  • 34. © 2015 - 2016 Get Your Bot On! #Set up the GPIO pins GPIO.setmode(GPIO.BOARD) #Set up GPIO output GPIO.setup(15, GPIO.OUT) Set the GPIO pins Tell GPIO which pin we are using (pin #15) GPIO Pin Setup
  • 35. © 2015 - 2016 Get Your Bot On! # Make the LED blink 2 times for i in range(0,2): blink(15) For Loop We are using a FOR LOOP to program the LED to blink 2 times (Or a number of your choice)
  • 36. © 2015 - 2016 Get Your Bot On! For Loop # Make the LED blink ___# of times for i in range(0, 2): blink(15) for i in range( a , b ): means for every element in this range of numbers, starting from a, ending in b do something Customize the number and change the 2! (or another number)
  • 37. © 2015 - 2016 Get Your Bot On! For Loop & Function Call # Make the LED blink ___# of times for i in range(0, 2): blink(15) The blink function we just wrote is “called” into the for loop. We are telling the program that we want to turn on/turn off an LED at pin 15 for as many times as described in the for loop.
  • 38. © 2015 - 2016 Get Your Bot On! Exit the program #Tell the program to exit GPIO.cleanup() Now you’re ready to test your code!
  • 39. © 2015 - 2016 Get Your Bot On! Run your new program! Navigate to the terminal window Type in “ls” to list all files Do you see new_blink.py? If you see new_blink.py type in: sudo python new_blink.py **If you need help ask a mentor! **
  • 40. © 2015 - 2016 Get Your Bot On! More challenge Ideas Can you make the ultrasonic sensor output different messages based on distance? Can you make the servo output a message every time it turns a direction?
  • 41. © 2015 - 2016 Get Your Bot On! Challenge Idea: Making The Sensor Talk
  • 42. © 2015 - 2016 Get Your Bot On! Let’s talk in Python Open the new_sensor.py and scroll down to find the following code. Can you make python print out a message based on these distance values? #if distance is less than 10 if distance < 10: #if distance is less than 20 elif distance < 20: #if distance is less than 30 elif distance < 30: #else print the distance is over 30 cms else:
  • 43. © 2015 - 2016 Get Your Bot On! Printing print “The distance is less than 10 cms” The print function outputs values onto the screen Type the word print followed by what you would like to print surrounded in quotes.
  • 44. © 2015 - 2016 Get Your Bot On! If , Elif, Else If, Elif and Else are known as conditional logic If, Elif and Else statements are used to execute different sets of instructions based on specific information Think of each as a Truth test, if the statement is True then it will run the indented piece of code underneath it if distance < 10: [indent]print “The distance is less than 10cms” elif distance < 20: [indent ]print “The distance is less than 20cms”
  • 45. © 2015 - 2016 Get Your Bot On! Else If none of the If and Elif statements are True then the Else will run as a default. (Think of Else as the safety net that grabs all the cases that don’t pass the if and elif truth tests.) #if distance is less than 10 if distance < 10: print "The distance is less than 10 cms" #if distance is less than 20 elif distance < 20: print “The distance is less than 20cms” #else print the distance is over 30 cms else: print “The distance is over 30cms”
  • 46. © 2015 - 2016 Get Your Bot On! Can you make the servo talk back now? Modify sensor_new.py
  • 47. © 2015 - 2016 Get Your Bot On! Setting up the Ultrasonic Sensor and Servo Wiring and circuit details
  • 48. © 2015 - 2016 Get Your Bot On! Sensor Pins You have 4 pins which you will connect to your circuit VCC - POWER TRIG ECHO GRD - GROUND
  • 49. © 2015 - 2016 Get Your Bot On! VCC + GRD ● Connect a jumper wire to the VCC pin which connects to PIN 2 on the Raspberry Pi ● PIN 2 on the Raspberry Pi sends a current of 5V through the sensor, which will power it ● Lastly, connect a jumper wire to GRD which is also connected to the GROUND(negative) power rail on the breadboard (Diagram in next slide)
  • 50. © 2015 - 2016 Get Your Bot On!
  • 51. © 2015 - 2016 Get Your Bot On! TRIG + ECHO ● Connect TRIG to PIN 12 ● Connect ECHO to Terminal strip on the breadboard, you will need two 330k resistors and another jumper wire to wire the rest. (Diagram in the next slide)
  • 52. © 2015 - 2016 Get Your Bot On! TRIG + ECHO The Yellow wire is connected to ECHO pin and the Green wire is connected to GPIO PIN 22 One 330K resistors connect the terminal strips. The other connects the terminal strip with GRD on the Power Rail
  • 53. © 2015 - 2016 Get Your Bot On! Common Types of Motors DC Motor: Apply voltage and it turns, requires a DC power supply. Used in toys and home appliances. Stepper Motor: Rotation of the motor is divided into equal “steps”, apply AC power and the motor converts the pulse into steps. Used in printers and CD Drives. Servo Motor: DC Motor + position or speed and direction sensors. Used in robots and RC cars.
  • 54. © 2015 - 2016 Get Your Bot On! Types of Servos Positional Rotation: Rotates only 180 degrees. You can control position. Continuous Rotation: Rotates indefinitely in either direction. You can control speed and direction. Linear: Rack and Pinion gear added for linear motion.
  • 55. © 2015 - 2016 Get Your Bot On! Servo PINS There are 3 PINS ORANGE - Signal RED - (VCC) POWER BROWN - GROUND
  • 56. © 2015 - 2016 Get Your Bot On! Connecting it all ● Connect the Signal to PIN 11 on the Raspberry Pi ● Connect the GRD to Ground (Negative) on the BreadBoard Power Rails ● To power the Servo you need to connect a jumper wire to PIN 4 and connect it back to the Breadboard on the Positive Power Rail ● Then you need to connect a jumper wire to VCC on the Servo and pin it to the same Power Rail vertically. (Diagram in next slide)
  • 57. © 2015 - 2016 Get Your Bot On! Servo Wiring

Editor's Notes

  1. Co-Designing with Children http://www.uxmatters.com/mt/archives/2012/04/co-designing-with-children.php Old: 2014 – MarsDD Involved through Jen Marron for promotions through Karen Schulman Dupuis Hackathons Hosted: Hardware Hackathon – March 2015 #EdAppHack – Oct 2014 Enery Hackathon – Sept 2013 EduChallege – Nov 2014 James Chan Manager, Bus Dev and Community engagement for facilities http://www.marsdd.com/bio/james-chan/ James manages business development and community engagement for MaRS’ events and conference facilities, where MaRS and its partners and stakeholders convene and host gatherings to advance innovation and entrepreneurship in Canada. Sonia Strimban Associate ICT http://www.marsdd.com/bio/sonia-strimban/ Sonia is passionate about supporting the startup community in Toronto and enabling Canadian entrepreneurs to build and grow their disruptive, IT-focused ventures. Sonia has a strong background in client relations, project coordination, communications, and research and professional writing. Her work experience in a boutique consulting firm has exposed her to diverse industry sectors, including financial services, telecommunications, retail and professional Services. A long-time art enthusiast, Sonia is a dedicated volunteer with the Art Gallery of Ontario, where she is a Chair on the Volunteer Executive Board. Sonia is completing a post-graduate Certificate in Business Innovation Management at the University of Toronto, and holds an MA in English and Professional Writing, and BA from York University. Twitter: @soniasayswhat Janet Grant http://www.marsdd.com/bio/janet-grant/ Acting Director, Events Janet Grant is responsible for all aspects of events and meetings held within the MaRS Centre, where in-person connections are a key part of how MaRS’ convergence innovation model drives economic and societal prosperity. Since joining MaRS in 2008, Janet has helped to grow the number and range of meetings and events held at MaRS, delivering an exceptional customer experience to our diverse community. Janet has a Bachelor of Arts degree from Victoria College at the University of Toronto and a Business Certificate in Hotel Management from Cornell University. Janet has held management roles in the hospitality, health and not-for profit sectors, including Commonwealth Hospitality and the Heart and Stroke Foundation of Ontario, and as Owner/Operator of a healthcare consulting business specializing in gerontology. Salim Teja EVP Ventures http://www.marsdd.com/bio/salim-teja/ Salim Teja is the EVP Ventures for MaRS, where he leads the overall strategic direction of MaRS’ three venture services areas: Health, ICT and Cleantech. He is an experienced entrepreneur and active early-stage technology investor, with deep industry expertise in software and digital media.
  2. Positional - stops at 180 to protect the sensor