SlideShare a Scribd company logo
1 of 22
Download to read offline
Commissioned by AMD
Prepare images for machine learning faster with
servers powered by AMD EPYC™
75F3 processors
A server cluster with 3rd
Gen AMD EPYC processors achieved higher
throughput and took less time to prepare images for classification than a
server cluster with 3rd
Gen Intel Xeon Platinum 8380 processors
Kubernetes®
environments can make it easy to deploy, scale, and manage the image preprocessing phase of
machine learning workflows. Choosing 3rd
Gen AMD EPYC™
processors could help you save time during that
phase and do more work by completing more image processing tasks.
We compared the performance of two four-node clusters: one comprising Supermicro AS-1124US-TNRP servers
with 32-core 3rd
Gen AMD EPYC 75F3 processors, and one comprising Supermicro SYS-620U-TNR servers with
40-core 3rd
Gen Intel®
Xeon®
Platinum 8380 processors. We used a synthetic workload that we designed for
Kubernetes containers, which emulates image processing tasks typical of the early phases of an image-based
machine learning workflow. The clusters used VMware®
vSphere®
7.0 Update 2, VMware vSAN™
pooled storage,
and VMware Tanzu™
Kubernetes Grid Service, which integrates Tanzu Kubernetes support directly into vSphere.
The AMD EPYC processor-based cluster handled 1,720 images in 7.2 percent less time than the cluster powered
by Intel Xeon processors, processing images at a 7.9 percent higher frames per second (FPS) rate. We also found
that the AMD EPYC processor-based cluster could offer a 30.2 percent lower hardware and support cost than the
Intel Xeon Scalable processor-based cluster.
Prepare images in
7.2% less time
while running a
workload of 1,720 images*
Get a 30.2%
lower cost
on hardware
and support*
Achieve a 7.9% higher
throughput rate
while processing more
frames per second*
$
*on the AMD EPYC processor-powered servers we tested vs. the Intel Xeon processor-powered servers we tested
Prepare images for machine learning faster with servers powered by AMD EPYC™ 75F3 processors March 2022
A Principled Technologies report: Hands-on testing. Real-world results.
Commissioned by AMD
How we approached testing
We compared the following four-node clusters:
• Supermicro SYS-620U-TNR servers powered by Intel Xeon
Platinum 8380 processors
 
y For one server, the total cost of hardware plus three
years of labor and support and a one-year CRS
warranty was $29,908.90—a total of $119,635.60 for a
four-node cluster1
• Supermicro AS-1124US-TNRP servers powered by AMD EPYC
75F3 processors
 
y For one server, the total cost of hardware plus three years
of support and labor and a one-year CRS warranty was
$20,870.90—a total of $83,483.60 for a four-node cluster2
Other than the processors, we configured the server clusters
identically. Each of the servers in both clusters had a 240GB 6Gbps
SATA SSD to use for the hypervisor and three PCIe®
4.0 NVMe™
SSDs
for the vSAN storage. We also equipped each server with 1,024 GB
of PC4-3200 RAM across 16 memory modules.
We configured a vSAN datastore on each cluster with a single disk
group comprising one 3.84TB NVMe SSD for cache and two 3.84TB
NVMe SSDs for capacity per server. The vSAN datastore served as
shared storage for our Tanzu Kubernetes environment. The vSphere
with Tanzu environments had one worker node per server. To account
for the core count differences between the two processors in our
comparison—that is, 32 cores per AMD EPYC processor and 40
cores per Intel Xeon processor—we assigned a different number of
CPU resources to each worker based on the CPU architecture. In the
cluster powered by 3rd
Gen AMD EPYC processors, each worker node
had 56 vCPUs and 512 GB of memory fully reserved. In the cluster
with 3rd
Gen Intel Xeon Scalable processors, each worker node had
70 vCPUs and 512 GB of memory fully reserved.
During testing, both clusters averaged 86 percent CPU utilization. For more details about our configurations,
testing methodologies, and CPU utilization, see the science behind the report.
About VMware vSAN
For organizations looking to reduce
the complexity and footprint of
their data center, hyperconverged
infrastructure (HCI) can help. As
part of their HCI portfolio, VMware
offers software-defined storage with
vSAN that eliminates the need for
bulky, expensive, external arrays and
instead brings compute and storage
resources together.
According to VMware, vSAN is “an
enterprise-class storage virtualization
software that provides the easiest
path to HCI and hybrid cloud.”3
To
learn more about VMware vSAN,
visit https://www.vmware.com/
products/vsan.html.
Prepare images for machine learning faster with servers powered by AMD EPYC™ 75F3 processors March 2022 | 2
Commissioned by AMD
Less time to process images
To use image-based machine learning algorithms, organizations must first prepare their data for analysis. For
manufacturing organizations using the algorithms during assembly, for example, this might include images
of various products taken at multiple angles. Our workload mimicked simple image processing tasks that a
company might run on Kubernetes with vSphere with Tanzu during this preparation phase, such as reading
images from storage, scaling the images to a machine-learning-friendly size, transposing the images, and
converting the images to grayscale. (For more on our custom workload, see the science behind the report.)
By sorting and preparing images more quickly, organizations could get insights sooner. As Figure 1 shows, the
cluster of AMD EPYC 75F3 processor-based servers took 107.2 seconds to process 1,720 images. That was 7.2
percent less than the cluster of servers backed by the Intel Xeon Platinum 8380 processors, which needed 115.6
seconds to complete the workload.
Figure 1: The time in seconds that each cluster needed to complete the image preprocessing tasks on 1,720 images.
Less time is better. Source: Principled Technologies.
Real-world benefits for manufacturers
Machine learning algorithms can help companies
perform quality control inspections, ensure product
safety compliance, and verify correct assemblage.
Saving time during any part of those workflows could
translate to reaching business goals sooner, improving
productivity, and reducing production costs. During
the image preprocessing phase for any part of the
manufacturing process, your company could save time
by running workloads in a vSphere, vSAN, and Tanzu
Kubernetes environment on 3rd
Gen AMD EPYC 75F3
processor-based servers. We saw better performance
from a cluster of these servers using this environment,
processing images in 7.2 percent less time and at a
7.9 percent higher FPS rate than the servers powered
by Intel Xeon Platinum 8380 processors.
About VMware vSphere with Tanzu
We used vSphere with Tanzu to run our
containerized image processing workload.
VMware states that vSphere with Tanzu
“bridges the gap between IT and developers
for cloud-native apps on-premises and in
the cloud.”4
Tanzu Kubernetes Grid Service
is part of the Kubernetes-focused VMware
Tanzu portfolio, which enables organizations
to “build, run and manage modern apps on
any cloud—and continuously deliver value to
your customers,” as well as to “simplify multi-
cloud operations and free developers to move
faster with easy access to the right resources,”
according to VMware.5
For more information,
visit https://tanzu.vmware.com/tanzu.
3rd
Gen AMD EPYC 75F3 processor-based servers
107.2
115.6
Seconds | Smaller is better
3rd
Gen Intel Xeon Platinum 8380 processor-based servers
Time to complete our image preprocessing tasks
Prepare images for machine learning faster with servers powered by AMD EPYC™ 75F3 processors March 2022 | 3
Commissioned by AMD
A higher FPS processing rate
Figure 2 shows the image processing rate that each solution achieved during our testing. The AMD EPYC 75F3
processor-based cluster offered a rate of 15,537 FPS. That’s an increase of 7.9 percent compared to the Intel
Xeon Platinum 8380 processor-powered cluster, which processed the images at a rate of 14,388 FPS.
Figure 2: The rate of FPS each solution delivered during our 1,720-image preprocessing workload. Higher numbers are
better. Source: Principled Technologies.
About VMware vSphere 7.0 Update 2
We used VMware vSphere 7.0 Update 2 for our test environment. According to VMware, this vSphere 7.0 update
includes a CPU scheduler that is optimized for AMD EPYC processors, as it is “designed to take advantage of the
multiple last-level caches (LLCs) per CPU socket offered by the AMD EPYC processors.” VMware also states that
vSphere 7.0 Update 2 with the CPU scheduler can achieve near-optimal performance on most applications and
benchmarks on AMD EPYC processors.6
For more information, visit https://www.vmware.com/products/vsphere.html.
3rd
Gen AMD EPYC 75F3 processor-based servers
15,537 FPS
14,388 FPS
Higher is better
3rd
Gen Intel Xeon Platinum 8380 processor-based servers
Frames per second while processing images
About AMD EPYC 75F3 processors
Part of the third-generation EPYC 7003 Series, the AMD EPYC 75F3 processor has 32 cores and 64 threads of
computing power. According to AMD, the processor features PCIe 4.0 I/O connectivity, supports up to eight
DDR4 memory channels per socket, and is well-suited for workloads such as VDI and HCI.7
The third generation
of AMD EPYC processors can also offer AMD Infinity Guard security features, such as Secure Encrypted
Virtualization (SEV), Secure Nested Paging (SEV-SNP), Secure Memory Encryption (SME), and more.8
To learn
more about the EPYC 75F3 processor, visit https://www.amd.com/en/products/cpu/amd-epyc-75f3.
Prepare images for machine learning faster with servers powered by AMD EPYC™ 75F3 processors March 2022 | 4
Commissioned by AMD
Conclusion
We compared the image preprocessing for machine learning performance of two server solutions powered by
different processors: the AMD EPYC 75F3 and the Intel Xeon Platinum 8380. When we ran our containerized
image preprocessing workload on each cluster, we found that the 3rd
Gen AMD EPYC processor-powered cluster
needed 7.2 percent less time to completely process 1,720 images while handling 7.9 percent more frames per
second. This kind of performance shows that an organization using vSphere with Tanzu and vSAN to run their
Kubernetes workloads could get better image processing performance with the servers powered by AMD EPYC
75F3 processors. Our price analysis also demonstrated that the hardware and support costs for the AMD EPYC
75F3 processor-powered Supermicro AS-1124US-TNRP server cluster was 30.2 less than the Intel Xeon Platinum
8380 processor-powered Supermicro SYS-620U-TNR server cluster.
1.	 We received a quote from Supermicro on February 2, 2022 for the hardware and support cost of the server minus drive
costs. To arrive at the total cost, we added this amount to a drive cost quote we had received from Supermicro on
August 9, 2021.
2.	 We received a quote from Supermicro on February 2, 2022 for the hardware and support cost of the server minus drive
costs. To arrive at the total cost, we added this amount to a drive cost quote we had received from Supermicro on
August 9, 2021.
3.	 VMware, “What is vSAN?” accessed February 15, 2022, https://www.vmware.com/products/vsan.html.
4.	 VMware, “vSphere with Tanzu,” accessed February 7, 2022,
https://www.vmware.com/products/vsphere/vsphere-with-tanzu.html.
5.	 VMware, “VMware Tanzu Solution Brief,” accessed February 7, 2022,
https://d1fto35gcfffzn.cloudfront.net/tanzu/VMware-Tanzu-Solution-Brief-0121.pdf.
6.	 VMware, “Performance Optimizations in VMware vSphere 7.0 U2 CPU Scheduler for AMD EPYC Processors,” accessed
Feburary 7, 2022, https://www.vmware.com/content/dam/digitalmarketing/vmware/en/pdf/techpaper/performance/
vsphere70u2-cpu-sched-amd-epyc.pdf.
7.	 AMD, “AMD EPYC™
75F3,” accessed February 7, 2022, https://www.amd.com/en/products/cpu/amd-epyc-75f3.
8.	 Server OEMs and cloud providers must enable AMD Infinity Guard features for use. In addition,
security features can vary by AMD EPYC processor generations. Learn more about Infinity Guard at
https://www.amd.com/en/technologies/infinity-guard.
Principled Technologies is a registered trademark of Principled Technologies, Inc.
All other product names are the trademarks of their respective owners.
For additional information, review the science behind this report.
Principled
Technologies®
Facts matter.®
Principled
Technologies®
Facts matter.®
This project was commissioned by AMD.
Read the science behind this report at https://facts.pt/pagvE8O
Prepare images for machine learning faster with servers powered by AMD EPYC™ 75F3 processors March 2022 | 5
Disclaimer:
The content on the following pages includes appendices
and methodologies from our hands-on work.
We will publish this content as a separate document linked
to the report.
We must receive your approval on both the report and this
document before taking them public simultaneously.
The science behind the report:
Prepare images for machine
learning faster with servers
powered by AMD EPYC™
75F3 processors
Commissioned by AMD
This document describes what we tested, how we tested, and what we found. To learn how these facts translate
into real-world benefits, read the report Prepare images for machine learning faster with servers powered by
AMD EPYC™
75F3 processors.
We concluded our hands-on testing on February 2, 2022. During testing, we determined the appropriate
hardware and software configurations and applied updates as they became available. The results in this report
reflect configurations that we finalized on January 24, 2022 or earlier. Unavoidably, these configurations may not
represent the latest versions available when this report appears.
Our results
To learn more about how we have calculated the wins in this report, go to http://facts.pt/calculating-and-highlighting-wins.
Unless we state otherwise, we have followed the rules and principles we outline in that document.
Table 1: Results of our testing
Supermicro SYS-620U-TNR cluster
powered by Intel®
Xeon®
Platinum
8380 processors
Supermicro AS-1124US-TNRP cluster
powered by AMD EPYC™
75F3 processors
Frames per second (FPS) 14,388.4 15,537.8
Percentage more FPS N/A 7.9%
Time to complete the workload (seconds) 115.6 107.2
Percentage less time N/A 7.2%
Average CPU utilization during median runs 86.3% 86.2%
Prepare images for machine learning faster with servers powered by AMD EPYC™ 75F3 processors March 2022
A Principled Technologies report: Hands-on testing. Real-world results.
Commissioned by AMD
CPU utilization statistics
Figure 1: The average CPU usage that the four AMD EPYC 75F3 processor-powered Supermicro AS-1124US-TNRP servers achieved during
testing. Source: Principled Technologies.
Figure 2: The average CPU usage that the four Intel Xeon Platinum 8380 processor-powered Supermicro SYS-620U-TNR servers achieved
during testing. Source: Principled Technologies.
0
10
20
30
40
50
60
70
80
90
100
0 10 20 30 40 50 60 70 80 90 100 110 120 130 140
Utilization
(%)
Seconds
Average CPU usage: AMD EPYC 75F3 processor-powered cluster
0
10
20
30
40
50
60
70
80
90
100
Utilization
(%)
Seconds
Average CPU usage: Intel Xeon Platinum 8380
processor-powered cluster
0 10 20 30 40 50 60 70 80 90 100 110 120 130 140
Prepare images for machine learning faster with servers powered by AMD EPYC™ 75F3 processors March 2022 | 2
Commissioned by AMD
System configuration information
Table 2: Detailed information on the systems we tested.
System configuration information 4 x Supermicro SYS-620U-TNR 4 x Supermicro AS-1124US-TNRP
BIOS name and version 1.1A American Megatrends Inc. 2.1
Non-default BIOS settings Maximum Performance Determinism Slider: Power
Operating system name and version/build
number
VMware®
ESXi®
7.0U2a-17867351-standard VMware ESXi-7.0U2a-17867351-standard
Date of last OS updates/patches applied 1/17/2022 1/17/2022
Power management policy Maximum Performance Determinism Slider: Power
Processor
Number of processors 2 2
Vendor and model Intel Xeon Platinum 8380 AMD EPYC 75F3
Core count (per processor) 40 32
Core frequency (GHz) 2.30 2.95
Stepping N/A N/A
Memory module(s)
Total memory in system (GB) 1,024 1,024
Number of memory modules 16 16
Vendor and model Micron MTA36ASF8G72PZ-3G2E1 Micron MTA36ASF8G72PZ-3G2E1
Size (GB) 64 64
Type PC4-3200 PC4-3200
Speed (MHz) 3,200 3,200
Speed running in the server (MHz) 3,200 3,200
Local storage (hypervisor)
Number of drives 1 1
Drive vendor and model Intel SSD SSDSC2KB240G8 Micron MTFDHBA256TCK
Drive size (GB) 240 240
Drive information (speed, interface, type) 6Gb, SATA, SSD PCIe 3.0, NVMe
Local storage (vSAN)
Number of drives 3 3
Drive vendor and model KIOXIA KCD6XLUL3T84 KIOXIA KCD6XLUL3T84
Drive size (GB) 3.84 3.84
Drive information (speed, interface, type) PCIe®
4.0, NVMe™
1.4, 64GT/s PCIe 4.0, NVMe 1.4, 64GT/s
Prepare images for machine learning faster with servers powered by AMD EPYC™ 75F3 processors March 2022 | 3
Commissioned by AMD
System configuration information 4 x Supermicro SYS-620U-TNR 4 x Supermicro AS-1124US-TNRP
Network adapter
Vendor and model Supermicro AOC-2UR68G4-I2XT Supermicro AOC-URG4N4-i4XTS
Number and type of ports 2 x 10GbE 4 x 10GbE
Driver version 8.10 0x80009661 N/A
Network adapter
Vendor and model Supermicro AOC-S25G-M2S-O Supermicro AOC-S25G-M2S-O
Number and type of ports 2 x 25GbE SFP28 2 x 25GbE SFP28
Driver version 14.28.2006 14.28.2006
Cooling fans
Vendor and model Sunon VF80381B1 Sunon PF40561BX-Q40U-S9H
Number of cooling fans 4 8
Power supplies
Vendor and model Supermicro PWS-2K08A-1R Supermicro PWS-1K22A-1R
Number of power supplies 2 2
Wattage of each (W) 2,000 1,200
Prepare images for machine learning faster with servers powered by AMD EPYC™ 75F3 processors March 2022 | 4
Commissioned by AMD
How we tested
We installed and configured the latest available version of VMware vSphere 7.0 Update 2 on a cluster of four Supermicro AS-1124US-TNRP
servers with AMD EPYC 75F3 processors, and a cluster of four Supermicro SYS-620U-TNR servers with Intel Xeon Platium 8380 processors.
We installed the OS on internal SSD drives. We ran each server using default BIOS settings with the exception of setting the BIOS to the
maximum performance power management settings available for each platform architecture. On each cluster, we configured and created
a 28TB VMware vSAN™
datastore using three NVMe drives on each server. The vSAN datastore served as a shared datastore for VMware
Tanzu deployment.
We used a Dell Networking 1Gb X1052 switch for the VM network and Management Network for Tanzu. We used a Dell 5048-ON switch
for vMotion®
, vSAN, and Workload Network for Tanzu. The Workload Network was isolated behind a NAT gateway, and it utilized private
addresses for all connectivity. We configured the Workload Network port group on a Distributed vSwitch, which is required for Tanzu
Kubernetes®
deployment. The VMware vCenter®
server and ESXi hosts were connected to the Management Network, while the Tanzu
Kubernetes Grid (TKG) workload clusters were connected to the Workload Network. We dual-networked the Tanzu Supervisor Cluster, the
Load Balancer, the NAT gateway, and the TKG CLI VM with a virtual NIC attached to both the Management Network and the Workload
Network. We deployed the two infrastructure VMs (vCenter and NAT gateway) on an infrastructure server. We deployed a TKG cluster with
four Kubernetes worker nodes (one worker on each Supermicro server). On the servers powered by AMD processors, each worker had 56
vCPUs and 512 GB of memory fully reserved. On the servers powered by Intel processors, each worker had 70 vCPUs and 512 GB of memory
fully reserved. We then deployed a Pod on each worker with one thread per core and 256 GB of memory reserved.
We compared the servers using a purpose-built preprocessing workload we wrote in Python using publicly available open-source libraries.
We define this workload in the Workload description section. We can provide the code on request.
Please contact info@principledtechnologies.com for more information.
Workload description
Our preparation workload emulates a simple image-processing workload by distributing dataset preparation tasks among M processes
running on N nodes, the exact number of which is up to the user. We specify our numbers in the methodologies below. Each process
produces a single shard of the final data set by taking input images, performing simple conversions, encoding the resulting image, and
appending it to the shard file.
This Python workload uses Pillow (https://python-pillow.org/) to perform image manipulations. The output format is a file with one Base64-
encoded image per line.
We designed this application to operate in single-node mode or clustered mode, and added built-in logic for discovering cluster members
when clustered. For this study, we used the application in single-node mode. We intended this preparation-stage application to be as
computationally lightweight as possible. However, the pipeline is still compute-limited, even when using relatively slow storage.
This workload is particularly well-suited to CPU comparisons with large thread/core-count disparity or large core frequency differences. Each
thread operates independently, performs the same work, and is CPU-bound. Additional threads and/or high frequency cores allow the server
to complete more work per unit time, showing clear differentiation for higher core/thread count CPUs and/or higher frequency CPUs.
Figure 3: Pipeline data flow and operations. Source: Principled Technologies.
Figure 3 shows how the system reads images from storage, scales the images to a machine-learning-friendly size of 300 x 300 pixels,
transposes the images, and finally, converts the images to grayscale. The system then encodes the transformed image into JPG, and then
converts the JPG-encoded to Base64 and writes it to the next line of the shard file. File systems for image-reading and shard-writing may be
local storage or HDFS, though we used local storage for testing. In addition to the shard files, the workload also outputs frame count, byte
count, frames per second, input and output bytes per second, and total runtime. In clustered mode, the workload also computes statistics
across the cluster.
Preprocessor (Python application using ZeroMQ, Pillow, HDFS, and more)
Read Scale Transpose Convert Write
(to 300 x 300) (RGB to gray)
Prepare images for machine learning faster with servers powered by AMD EPYC™ 75F3 processors March 2022 | 5
Commissioned by AMD
Installing vSphere 7.0 Update 2 on a Supermicro server
1.	 Download ESXi 7.0 Update 2 from the following link: https://my.vmware.com/group/vmware/evalcenter?p=vsphere-
eval-7#tab_download.
2.	 Open a new browser tab, and connect to the IP address of the Supermicro server BMC.
3.	 Log in with the BMC credentials.
4.	 In the main screen, click Launch Virtual Console.
5.	 In the console menu bar, select Virtual Media and then Virtual Storage.
6.	 In the Virtual Storage popup window, select ISO from the drop-down menu, and click Open Image to browse local computer to select
the image you downloaded in step 1.
7.	 Click Plug In to mount the ISO image, and click OK.
8.	 On the console menu bar, click the Power Control and select Power Reset.
9.	 The system will boot to the mounted image and the Loading ESXi installer screen will appear. When prompted, press Enter to continue.
10.	 To Accept the EULA and Continue, press F11.
11.	 Select the storage device to target for installation. We selected the internal SD card. To continue, press Enter.
12.	 To confirm the storage target, press Enter.
13.	 Select the keyboard layout, and press Enter.
14.	 Provide a root password, and confirm the password. To continue, press Enter.
15.	 To install, press F11.
16.	 Upon completion, reboot the server by pressing Enter.
Installing vCenter Server Appliance 7.0 Update 2
1.	 Download VMware vCenter 7.0 Update 2 from the VMware support portal: https://my.vmware.com.
2.	 Mount the image on your local system, and browse to the vcsa-ui-installer folder. Expand the folder for your OS, and launch the installer
if it doesn’t automatically begin.
3.	 When the vCenter Server Installer wizard opens, click Install.
4.	 To begin installation of the new vCenter server appliance, click Next.
5.	 Check the box to accept the license agreement, and click Next.
6.	 Enter the IP address of the infrastructure server with ESXi 7.0 Update 2. Provide the root password, and click Next.
7.	 To accept the SHA1 thumbprint of the server’s certificate, click Yes.
8.	 Accept the VM name, and provide and confirm the root password for the VCSA. Click Next.
9.	 Set the size for environment you’re planning to deploy. We selected Medium. Click Next.
10.	 Select the datastore on which to install vCenter. Accept the datastore defaults, and click Next.
11.	 Enter the FQDN, IP address information, and DNS servers you want to use for the vCenter server appliance. Click Next.
12.	 To begin deployment, click Finish.
13.	 When Stage 1 has completed, click Close. To confirm, click Yes.
14.	 Open a browser window and connect to https://[vcenter.FQDN:5480/.
15.	 On the Getting Started - vCenter Server page, click Set up.
16.	 Enter the root password, and click Log in.
17.	 Click Next.
18.	 Enable SSH access, and click Next.
19.	 To confirm the changes, click OK.
20.	 Enter vsphere.local for the Single Sign-On domain name. Enter a password for the administrator account, confirm it, and click Next.
21.	 Click Next.
22.	 Click Finish.
Creating a cluster in vSphere 7.0 Update 2
1.	 Open a browser, and enter the address of the vCenter server you deployed. For example: https://[vcenter.FQDN]/ui
2.	 In the left panel, select the vCenter server, right-click, and select New Datacenter.
3.	 Provide a name for the new data center, and click OK.
4.	 Select the data center you just created, right-click, and select New Cluster.
5.	 Give a name to the cluster, and enable vSphere DRS. Click OK.
6.	 In the cluster configuration panel, under Add hosts, click Add.
7.	 Check the box for Use the same credentials for all hosts. Enter the IP address and root credentials for the first host, and enter the IP
addresses of all remaining hosts. Click Next.
8.	 Check the box beside Hostname/IP Address to select all hosts. Click OK.
9.	 Click Next.
10.	 Click Finish.
Prepare images for machine learning faster with servers powered by AMD EPYC™ 75F3 processors March 2022 | 6
Commissioned by AMD
Configuring the vSAN datastore
1.	 In the left panel of the vCenter, right-click the test cluster, select vSAN, and select configuration.
2.	 Select single site cluster, and click Next.
3.	 In the Services screen, click Next.
4.	 In the Claim disks screen, click the Group by drop-down menu, and select Host.
5.	 Select disks for each host. We selected one drive for cache and two drives for capacity. Click Next.
6.	 In the Review screen, click Finish.
7.	 Click the test cluster from vCenter, and in the right panel, click the Configure tab .
8.	 In the vSAN section, select Services.
9.	 To create a distributed switch, in the Configure Cluster section, click the CONFIGURE button.
10.	 In the Physical adapters section, choose two uplink adapters for the distributed switch, and click Next.
11.	 In the Storage traffic screen, set the VLAN ID assigned for vSAN, choose Static IPs, and fill in the static IP address, Subnet mask, and
default gateway. Click Next.
12.	 In the Advanced options scree, click Next.
13.	 In the Claim disks screen, click Next.
14.	 In the Proxy settings screen, click next.
15.	 Click Finish.
Creating a distributed vSwitch and port group
1.	 From vSphere client, click HomeàNetworking.
2.	 Select your Datastore.
3.	 On the right panel, in the Actions drop-down menu, select Distributed vSwitchàNew Distributed vSwitch.
4.	 Give your vSwitch a name, or accept the default. Click Next.
5.	 Select 7.0.0 - ESXi 7.0 and later as the version, and click Next.
6.	 Select the number of uplinks per ESXi host you’ll give to the vSwitch. We selected 2. Click Next.
7.	 Click Finish.
8.	 Right-click the new DvSwitch, and select Add and Manage Hosts.
9.	 Leave Add hosts selected, and click Next.
10.	 To add new hosts, click the + sign.
11.	 To select all the hosts in your target cluster, check the box beside Host. Click OK. Click Next.
12.	 Select the NIC you want to use for this DvSwitch, and click Assign Uplink.
13.	 At the top of the panel, accept the defaults, but check the box for “Apply this uplink assignment to the rest of the hosts.” Click
OK. Click Next.
14.	 Do not assign vmkernel adapters at this time. Click Next.
15.	 Do not migrate any VM networking at this time. Click Next.
16.	 Click Finish.
17.	 Right-click the DvSwitch, and select Distributed Port GroupàNew Distributed Port Group.
18.	 Give it the name Workload Network and click Next.
19.	 Change the VLAN type to VLAN, and set the VLAN ID to VLAN 2. Click Next.
20.	 Click Finish.
Creating a DevOps user
1.	 From vSphere client, click HomeàAdministration.
2.	 In the left panel, click Users and Groups.
3.	 In the right panel, click Users, select the vsphere.local domain, and click Add.
4.	 Provide a username and password, and click Add.
5.	 For simplicity, we added the DevOps user to a group with Administrator privileges. Click Groups, and select the Administrators
group. Click Edit.
6.	 Under Add Members, search for the DevOps user you just created, and add them to the administrators group. Click Save.
Prepare images for machine learning faster with servers powered by AMD EPYC™ 75F3 processors March 2022 | 7
Commissioned by AMD
Creating the HAProxy content library
1.	 Click the following link to download the vSphere-compatible HAProxy ovf file (v0.1.8): https://github.com/haproxytech/vmware-haproxy.
2.	 From vSphere client, in the left menu pane, click Content Libraries.
3.	 In the Content Libraries panel on the right, click Create.
4.	 Name the content library HAproxy-cl, and click next
5.	 Accept the default, and click next.
6.	 Choose the storage location for the content library, and click Next.
7.	 Review, and click Finish.
8.	 Click the newly created HAproxy-cl content library.
9.	 In the upper portion of the right-side panel for HAproxy-cl, click the actions drop-down menu, and select Import Item.
10.	 Change the selection to local file, and click the upload files button.
11.	 Browse to the location of the ovf file you downloaded in step 1, and click Open.
12.	 Click Import.
Creating the TKG content library
1.	 From vSphere client, in the left menu pane, click Content Libraries.
2.	 In the Content Libraries panel on the right, click Create.
3.	 Name the content library TKG-cl and click Next.
4.	 Select Subscribed content library, and use https://wp-content.vmware.com/v2/latest/lib.json for the subscription URL. Click Next.
5.	 To verify, click Yes.
6.	 Choose the storage location for the content library, and click Next.
7.	 Review, and click Finish.
Creating the storage tag
1.	 From the vSphere client, select MenuàStorage.
2.	 From the left pane, select the vSAN datastore you created for Tanzu.
3.	 Under the Summary tab, locate the Tags panel, and click Assign.
4.	 Click Add Tag.
5.	 Name the tag Tanzu. Click Create New Category.
6.	 Give the category the name Tanzu Storage. Clear all object types except Datastore, and click Create.
7.	 Use the Category drop-down menu to select Tanzu Storage, and click Create.
8.	 Check the box beside the newly created tag, and click Assign.
Creating the VM storage policy
1.	 From the vSphere client, click MenuàPolicies and Profiles.
2.	 On the left panel, click VM Storage Policies.
3.	 Click Create.
4.	 Create a new VM Storage policy named tkg-clusters and click Next.
5.	 Check the box for Enable tag-based placement rules, and click Next.
6.	 Use the Tag Category drop-down menu, and select the Tanzu Storage policy you created. Click Browse Tags.
7.	 Click the Tanzu checkbox, and click OK.
8.	 Click Next.
9.	 Review the compatible storage, making sure your storage target is marked as compatible, and click Next.
10.	 Click Finish
Deploying HAProxy
1.	 From the vSphere client, click MenuàContent Libraries.
2.	 Click the HAproxy-cl library.
3.	 In the left panel, click OVF & OVA Templates, and right-click the HAProxy template that appears in the panel below. Select New VM
from This Template…
4.	 Provide a simple name—we used HAproxy—and select the Datacenter and/or folder to which you want to deploy. Click Next.
5.	 Select the cluster or compute resource where you want to deploy the HAproxy VM, and click Next.
6.	 Review details, and click Next.
Prepare images for machine learning faster with servers powered by AMD EPYC™ 75F3 processors March 2022 | 8
Commissioned by AMD
7.	 Check the box to accept all license agreements, and click Next.
8.	 Accept the default configuration, and click Next.
9.	 Select the target storage for the VM, and click Next.
10.	 Select VM Network for the Management network, and choose a network for the workload network. Choose the same network for the
Frontend network, and click Next.
11.	 Customize the template. We used the following:
• Appliance Configuration Section
 
y For the root password, we used Password1!
 
y Check the box for Permit Root Login.
 
y Leave the TLS CA blank.
• Network Configuration Section
 
y We left the default haproxy.local.
 
y For local DNS server, we used 10.41.0.10.
 
y For management IP, we used 10.210.201.200/16.
 
y For management gateway, we used 10.210.0.1.
 
Š Note: The description asks for the workload network gateway address. You should enter the management gateway
address instead.
 
y For Workload IP, we used 192.168.1.2/24.
 
y For Workload gateway, we used 192.168.1.1.
• Load Balancing Section
 
y For load balancer IP ranges, we used 192.168.1.240/29.
 
y Accept the default management port.
 
y For HAProxy User ID, we used admin.
 
y For the HAProxy password, we used Password1!
12.	 Click Next.
13.	 Review the summary, and click Finish. The deployment will take a few minutes to completely deploy and configure.
14.	 Power on the HAProxy VM.
Configuring Workload Management
1.	 From the vSphere client, click MenuàWorkload Management
2.	 Click Get Started.
3.	 Review the messages and warnings regarding supported configurations. Click Next.
4.	 Select the Cluster on which you want to enable workload management, and click Next.
5.	 Choose the capacity for the control plane VMs. We chose Small. Click Next.
6.	 Choose the storage policy you wish to use for the control plane nodes. We chose tkg-clusters. Click Next.
7.	 Configure the Load Balancer section with the following:
a.	 Name: haproxy
b.	 Type: HA proxy
c.	 Data plane API Addresses: 10.210.201.200:5556
d.	 User name: admin
e.	 Password: Password1!
f.	 IP Address Ranges for Virtual Servers: 192.168.1.240-192.168.1.247
g.	 Server Certificate Authority: [copied and pasted from the instructions below]
8.	 Open an SSH session to the HAProxy management address, and connect using root and Password1!
9.	 Type cat /etc/haproxy/ca.crt
10.	 Copy the entire output (including the first and last lines) and paste the contents into the Server Certificate Authority box
for step 7g above.
11.	 Close the SSH session.
12.	 Click Next.
Prepare images for machine learning faster with servers powered by AMD EPYC™ 75F3 processors March 2022 | 9
Commissioned by AMD
13.	 Configure Workload Management with the following:
a.	 Network: VM Network
b.	 Starting IP Address: 10.210.201.201
c.	 Subnet Mask: 255.255.0.0
d.	 Gateway: 10.210.0.1
e.	 DNS Server: 10.41.0.10
f.	 NTP Server: 10.40.0.1
14.	 Click Next.
15.	 Configure Workload Network with the following:
a.	 Leave the default for Services addresses.
b.	 DNS Servers: 10.41.0.10
c.	 Under Workload Network, click Add.
d.	 Accept default for network-1.
e.	 Port Group: Workload Network.
f.	 Gateway: 192.168.1.1
g.	 Subnet: 255.255.255.0
h.	 IP Address Ranges: 192.168.1.65-192.168.1.126
16.	 Click Save.
17.	 For TKG Configuration, use the following:
a.	 Beside Add Content Library, click Add.
b.	 Select the TKG-cl library, and click OK.
18.	 Click Next.
19.	 Click Finish. The workload management cluster will deploy and configure. You may see apparent errors during configuration, but these
will resolve upon successful completion.
Configuring Kubernetes namespace for service deployment
1.	 In Workload Management, click Namespaces.
2.	 Click Create Namespace.
3.	 Select the target cluster, and provide a name. We used tanzu-ns. Click Create.
4.	 Click the Permissions tab, and click Add.
5.	 Choose vSphere.local for the identity source. Search for the DevOps user you created, select the “can edit” role, and click OK.
6.	 Click the Storage tab.
7.	 In the Storage Policies section, click Edit.
8.	 Select the tkg-clusters policy, and click OK. The environment is ready for connection and deploying containers.
Configuring VM classes in vSphere with Tanzu
1.	 In Workload Management, click Services, and click Manage on the VM Service pane.
2.	 On the VM Service page, click VM Classes, and click Create VM Class.
3.	 On the Configuration page, specify the VM class attributes. In the cluster with AMD processors, we set the following attributes:
• Name: amd-vm-class
• vCPU Count: 56
• CPU resource reservation: 100%
• Memory: 512 GB
• Memory resource reservation: 100%
4.	 In the cluster with Intel processors, we set the following attributes:
• Name: intel-vm-class
• vCPU Count: 70
• CPU resource reservation: 100%
• Memory: 512GB
• Memory resource reservation: 100%
5.	 On the Review and Finish page, click Finish.
Prepare images for machine learning faster with servers powered by AMD EPYC™ 75F3 processors March 2022 | 10
Commissioned by AMD
Installing and configuring Ubuntu VM for Tanzu Kubernetes Grid CLI
1.	 Log into vCenter, and from the Menu drop-down menu, click Storage.
2.	 Select datastore1, and click Files.
3.	 Click Upload Files, and upload the Ubuntu 18.04.5 ISO image.
4.	 Right-click the cluster, and click New Virtual Machine.
5.	 Click Next.
6.	 Enter a name for the VM, and click Next.
7.	 Click Next.
8.	 Select datastore1, and click Next.
9.	 Click Next.
10.	 From the Guest OS Family drop-down menu, select Linux.
11.	 From the guest OS version drop-down menu, select Ubuntu Linux (64 bit), and click Next.
12.	 Assign the VM 2 vCPUs, 8 GB of memory, and a 40GB hard disk.
13.	 From the New CD/DVD Drive drop-down, select Datastore ISO File, and select the Ubuntu ISO you uploaded to the datastore
previously. Ensure Connect At Power On is checked, and click Next.
14.	 Click Finish.
15.	 Power on the VM, and click Launch Remote Console.
16.	 Click Install Ubuntu.
17.	 Click Continue.
18.	 Select Minimal installation, and click Continue.
19.	 Click Install now.
20.	 Click Continue.
21.	 Click Continue.
22.	 Enter your desired full name, computer name, username, and password, and click Continue.
23.	 Click Restart Now.
24.	 Press Enter.
25.	 Enter your password, and click Sign In.
26.	 When prompted by the Software Updater, install OS and software updates.
27.	 Click Restart Later, and power off the VM.
28.	 Right-click the VM in vCenter, and click Edit Settings.
29.	 Click Add New Device, and select Network Adapter.
30.	 From the New Network drop-down menu, select Browse.
31.	 Click Workload Network, and click OK.
32.	 Click OK.
33.	 Power on the VM, and click Launch Remote Console.
34.	 Enter your password, and click Sign In.
35.	 Click the network icon in the top right, and click Ethernet (ens192).
36.	 Click Wired Settings.
37.	 Next to Ethernet (ens192) click the gear icon.
38.	 Click IPv4.
39.	 Change IPv4 Method to Manual, and enter the IP address for this VM.
40.	 Click Apply, and close the settings window.
Installing Kubectl Plugin for vSphere
1.	 Open a browser on the VM, and navigate to the IP of one of the three Supervisor VMs. In our environment, the first control plane VM IP
was 10.210.201.201.
2.	 Click Advanced, and click Accept the Risk and Continue to bypass the certificate warning.
3.	 Click Download CLI Plugin Linux.
4.	 Select Save File, and click OK.
5.	 Open the Files app, and navigate to the Downloads folder.
6.	 Right-click vsphere-plugin.zip, and select Extract Here.
7.	 Open a terminal and navigate to the vsphere-plugin binary within the extracted folder:
cd Downloads/vsphere-plugin/bin
Prepare images for machine learning faster with servers powered by AMD EPYC™ 75F3 processors March 2022 | 11
Commissioned by AMD
8.	 Make the vsphere-plugin binary executable and add it to PATH:
	 sudo mv kubectl-vsphere /usr/local/bin/
	 sudo mv kubectl /usr/local/bin/
Creating the AI Workload
1.	 From the Ubuntu VM, log into the Supervisor Cluster:
kubectl vsphere login --insecure-skip-tls-verify --server=https://10.210.201.201--vsphere-
username administrator@vsphere.local
2.	 Create a yaml file for a cluster of four worker nodes with CPU and memory fully reserved:
	cat cluster.yaml
apiVersion: run.tanzu.vmware.com/v1alpha1
kind: TanzuKubernetesCluster
metadata:
name: ai-cluster
namespace: tanzu-ns
spec:
topology:
controlPlane:
count: 1
class: best-effort-xlarge
storageClass: tkg-clusters
workers:
count: 4
class: [amd-vm-class|intel-vm-class]
storageClass: tkg-clusters
distribution:
version: v1.18
settings:
network:
cni:
name: antrea
services:
cidrBlocks: [“10.96.1.0/24”]
pods:
cidrBlocks: [“172.16.0.0/16”]
3.	 Create the cluster:
	 Kubectl apply -f cluster.yaml
4.	 Log into the new cluster:
kubectl vsphere login --insecure-skip-tls-verify --vsphere-username administrator@vsphere.local
--server=https://10.218.201.201 --tanzu-kubernetes-cluster-name ai-cluster --tanzu-kubernetes-
cluster-namespace tanzu-ns
Prepare images for machine learning faster with servers powered by AMD EPYC™ 75F3 processors March 2022 | 12
Commissioned by AMD
5.	 Create a yaml file for three PersistentVolumeClaims:
cat pvc.yaml
apiVersion: v1
kind: PersistentVolumeClaim
metadata:
name: ai-pvc-data
spec:
accessModes:
- ReadWriteOnce
storageClassName: tkg-clusters
resources:
requests:
storage: 2Gi
---
apiVersion: v1
kind: PersistentVolumeClaim
metadata:
name: ai-pvc-app
spec:
accessModes:
- ReadWriteOnce
storageClassName: tkg-clusters
resources:
requests:
storage: 1Gi
---
apiVersion: v1
kind: PersistentVolumeClaim
metadata:
name: ai-pvc-out
spec:
accessModes:
- ReadWriteOnce
storageClassName: tkg-clusters
resources:
requests:
storage: 20Gi
6.	 Create four sets of PVCs (one set for each Pod) in the cluster:
Kubectl apply -f pvc.yaml
Prepare images for machine learning faster with servers powered by AMD EPYC™ 75F3 processors March 2022 | 13
Commissioned by AMD
7.	 Create a yaml file for the AI Pod in the AMD cluster with the following content:
	cat amd-pod.yaml
apiVersion: v1
kind: Pod
metadata:
name: ai-pod
spec:
containers:
- name: ai
image: ptuser/preparation:latest
ports:
- containerPort: 80
resources:
requests:
memory: “256Gi”
cpu: “55”
limits:
memory: “256Gi”
cpu: “55”
volumeMounts:
- mountPath: “/app”
name: ai-app
- mountPath: “/data”
name: ai-data
- mountPath: “/out”
name: ai-out
volumes:
- name: ai-app
persistentVolumeClaim:
claimName: ai-pvc-app
- name: ai-data
persistentVolumeClaim:
claimName: ai-pvc-data
- name: ai-out
persistentVolumeClaim:
claimName: ai-pvc-out
8.	 Create four Pods, and mount the PVCs in the cluster:
Kubectl apply -f amd-pod.yaml
Prepare images for machine learning faster with servers powered by AMD EPYC™ 75F3 processors March 2022 | 14
Commissioned by AMD
9.	 Create a yaml file for the AI pod in the Intel cluster with the following content:
cat intel-pod.yaml
apiVersion: v1
kind: Pod
metadata:
name: ai-pod
spec:
containers:
- name: ai
image: ptuser/preparation:latest
ports:
- containerPort: 80
resources:
requests:
memory: "256Gi"
cpu: "69"
limits:
memory: "256Gi"
cpu: "69"
volumeMounts:
- mountPath: "/app"
name: ai-app
- mountPath: "/data"
name: ai-data
- mountPath: "/out"
name: ai-out
volumes:
- name: ai-app
persistentVolumeClaim:
claimName: ai-pvc-app
- name: ai-data
persistentVolumeClaim:
claimName: ai-pvc-data
- name: ai-out
persistentVolumeClaim:
claimName: ai-pvc-out
10.	 Create four Pods, and mount the PVCs in the cluster:
Kubectl apply -f intel-pod.yaml
11.	 To run the benchmark, navigate to the test code GitHub repository and follow the instructions in the testing/README.md file. For this
study, we used the application in single-node mode. See Workload description section for more information.
We ran the workload on each server three times. We reported the median performance score in our final report.
Prepare images for machine learning faster with servers powered by AMD EPYC™ 75F3 processors March 2022 | 15
Principled Technologies is a registered trademark of Principled Technologies, Inc.
All other product names are the trademarks of their respective owners.
DISCLAIMER OF WARRANTIES; LIMITATION OF LIABILITY:
Principled Technologies, Inc. has made reasonable efforts to ensure the accuracy and validity of its testing, however, Principled Technologies, Inc. specifically disclaims
any warranty, expressed or implied, relating to the test results and analysis, their accuracy, completeness or quality, including any implied warranty of fitness for any
particular purpose. All persons or entities relying on the results of any testing do so at their own risk, and agree that Principled Technologies, Inc., its employees and its
subcontractors shall have no liability whatsoever from any claim of loss or damage on account of any alleged error or defect in any testing procedure or result.
In no event shall Principled Technologies, Inc. be liable for indirect, special, incidental, or consequential damages in connection with its testing, even if advised of
the possibility of such damages. In no event shall Principled Technologies, Inc.’s liability, including for direct damages, exceed the amounts paid in connection with
Principled Technologies, Inc.’s testing. Customer’s sole and exclusive remedies are as set forth herein.
This project was commissioned by AMD.
Principled
Technologies®
Facts matter.®
Principled
Technologies®
Facts matter.®
Commissioned by AMD
Read the report at https://facts.pt/JQ4z3lH
Prepare images for machine learning faster with servers powered by AMD EPYC™ 75F3 processors March 2022 | 16

More Related Content

What's hot

Business-critical applications on VMware vSphere 6, VMware Virtual SAN, and V...
Business-critical applications on VMware vSphere 6, VMware Virtual SAN, and V...Business-critical applications on VMware vSphere 6, VMware Virtual SAN, and V...
Business-critical applications on VMware vSphere 6, VMware Virtual SAN, and V...Principled Technologies
 
Compared to a similarly sized solution from a scale-out vendor, the Dell EMC ...
Compared to a similarly sized solution from a scale-out vendor, the Dell EMC ...Compared to a similarly sized solution from a scale-out vendor, the Dell EMC ...
Compared to a similarly sized solution from a scale-out vendor, the Dell EMC ...Principled Technologies
 
A single-socket Dell EMC PowerEdge R7515 solution delivered better value on a...
A single-socket Dell EMC PowerEdge R7515 solution delivered better value on a...A single-socket Dell EMC PowerEdge R7515 solution delivered better value on a...
A single-socket Dell EMC PowerEdge R7515 solution delivered better value on a...Principled Technologies
 
3 key wins: Dell EMC PowerEdge MX with OpenManage Enterprise over Cisco UCS a...
3 key wins: Dell EMC PowerEdge MX with OpenManage Enterprise over Cisco UCS a...3 key wins: Dell EMC PowerEdge MX with OpenManage Enterprise over Cisco UCS a...
3 key wins: Dell EMC PowerEdge MX with OpenManage Enterprise over Cisco UCS a...Principled Technologies
 
Boost your work with hardware from Intel
Boost your work with hardware from IntelBoost your work with hardware from Intel
Boost your work with hardware from IntelPrincipled Technologies
 
SQL Server 2016 database performance on the Dell EMC PowerEdge FC630 QLogic 1...
SQL Server 2016 database performance on the Dell EMC PowerEdge FC630 QLogic 1...SQL Server 2016 database performance on the Dell EMC PowerEdge FC630 QLogic 1...
SQL Server 2016 database performance on the Dell EMC PowerEdge FC630 QLogic 1...Principled Technologies
 
Get improved performance and new features from Dell EMC PowerEdge servers wit...
Get improved performance and new features from Dell EMC PowerEdge servers wit...Get improved performance and new features from Dell EMC PowerEdge servers wit...
Get improved performance and new features from Dell EMC PowerEdge servers wit...Principled Technologies
 
Component upgrades from Intel and Dell can increase VM density and boost perf...
Component upgrades from Intel and Dell can increase VM density and boost perf...Component upgrades from Intel and Dell can increase VM density and boost perf...
Component upgrades from Intel and Dell can increase VM density and boost perf...Principled Technologies
 
Migrate VMs faster with a new Dell EMC PowerEdge MX solution
Migrate VMs faster with a new Dell EMC PowerEdge MX solutionMigrate VMs faster with a new Dell EMC PowerEdge MX solution
Migrate VMs faster with a new Dell EMC PowerEdge MX solutionPrincipled Technologies
 
Watch your transactional database performance climb with Intel Optane DC pers...
Watch your transactional database performance climb with Intel Optane DC pers...Watch your transactional database performance climb with Intel Optane DC pers...
Watch your transactional database performance climb with Intel Optane DC pers...Principled Technologies
 
Upgrade to Dell EMC PowerEdge R940 servers with VMware vSphere 7.0 and gain g...
Upgrade to Dell EMC PowerEdge R940 servers with VMware vSphere 7.0 and gain g...Upgrade to Dell EMC PowerEdge R940 servers with VMware vSphere 7.0 and gain g...
Upgrade to Dell EMC PowerEdge R940 servers with VMware vSphere 7.0 and gain g...Principled Technologies
 
Symantec NetBackup 7.6 benchmark comparison: Data protection in a large-scale...
Symantec NetBackup 7.6 benchmark comparison: Data protection in a large-scale...Symantec NetBackup 7.6 benchmark comparison: Data protection in a large-scale...
Symantec NetBackup 7.6 benchmark comparison: Data protection in a large-scale...Principled Technologies
 
Get higher transaction throughput and better price/performance with an Amazon...
Get higher transaction throughput and better price/performance with an Amazon...Get higher transaction throughput and better price/performance with an Amazon...
Get higher transaction throughput and better price/performance with an Amazon...Principled Technologies
 
Keep remote desktop power users productive with Dell EMC PowerEdge R840 serve...
Keep remote desktop power users productive with Dell EMC PowerEdge R840 serve...Keep remote desktop power users productive with Dell EMC PowerEdge R840 serve...
Keep remote desktop power users productive with Dell EMC PowerEdge R840 serve...Principled Technologies
 
Keep data available without affecting user response time
Keep data available without affecting user response timeKeep data available without affecting user response time
Keep data available without affecting user response timePrincipled Technologies
 
Run compute-intensive Apache Hadoop big data workloads faster with Dell EMC P...
Run compute-intensive Apache Hadoop big data workloads faster with Dell EMC P...Run compute-intensive Apache Hadoop big data workloads faster with Dell EMC P...
Run compute-intensive Apache Hadoop big data workloads faster with Dell EMC P...Principled Technologies
 
Citrix XenApp hosted shared desktop performance on Cisco UCS: Cisco VM-FEX vs...
Citrix XenApp hosted shared desktop performance on Cisco UCS: Cisco VM-FEX vs...Citrix XenApp hosted shared desktop performance on Cisco UCS: Cisco VM-FEX vs...
Citrix XenApp hosted shared desktop performance on Cisco UCS: Cisco VM-FEX vs...Principled Technologies
 
Preserve user response time while ensuring data availability
Preserve user response time while ensuring data availabilityPreserve user response time while ensuring data availability
Preserve user response time while ensuring data availabilityPrincipled Technologies
 

What's hot (20)

Business-critical applications on VMware vSphere 6, VMware Virtual SAN, and V...
Business-critical applications on VMware vSphere 6, VMware Virtual SAN, and V...Business-critical applications on VMware vSphere 6, VMware Virtual SAN, and V...
Business-critical applications on VMware vSphere 6, VMware Virtual SAN, and V...
 
Compared to a similarly sized solution from a scale-out vendor, the Dell EMC ...
Compared to a similarly sized solution from a scale-out vendor, the Dell EMC ...Compared to a similarly sized solution from a scale-out vendor, the Dell EMC ...
Compared to a similarly sized solution from a scale-out vendor, the Dell EMC ...
 
A single-socket Dell EMC PowerEdge R7515 solution delivered better value on a...
A single-socket Dell EMC PowerEdge R7515 solution delivered better value on a...A single-socket Dell EMC PowerEdge R7515 solution delivered better value on a...
A single-socket Dell EMC PowerEdge R7515 solution delivered better value on a...
 
3 key wins: Dell EMC PowerEdge MX with OpenManage Enterprise over Cisco UCS a...
3 key wins: Dell EMC PowerEdge MX with OpenManage Enterprise over Cisco UCS a...3 key wins: Dell EMC PowerEdge MX with OpenManage Enterprise over Cisco UCS a...
3 key wins: Dell EMC PowerEdge MX with OpenManage Enterprise over Cisco UCS a...
 
Using VMTurbo to boost performance
Using VMTurbo to boost performanceUsing VMTurbo to boost performance
Using VMTurbo to boost performance
 
Power edge mx7000_sds_performance_1018
Power edge mx7000_sds_performance_1018Power edge mx7000_sds_performance_1018
Power edge mx7000_sds_performance_1018
 
Boost your work with hardware from Intel
Boost your work with hardware from IntelBoost your work with hardware from Intel
Boost your work with hardware from Intel
 
SQL Server 2016 database performance on the Dell EMC PowerEdge FC630 QLogic 1...
SQL Server 2016 database performance on the Dell EMC PowerEdge FC630 QLogic 1...SQL Server 2016 database performance on the Dell EMC PowerEdge FC630 QLogic 1...
SQL Server 2016 database performance on the Dell EMC PowerEdge FC630 QLogic 1...
 
Get improved performance and new features from Dell EMC PowerEdge servers wit...
Get improved performance and new features from Dell EMC PowerEdge servers wit...Get improved performance and new features from Dell EMC PowerEdge servers wit...
Get improved performance and new features from Dell EMC PowerEdge servers wit...
 
Component upgrades from Intel and Dell can increase VM density and boost perf...
Component upgrades from Intel and Dell can increase VM density and boost perf...Component upgrades from Intel and Dell can increase VM density and boost perf...
Component upgrades from Intel and Dell can increase VM density and boost perf...
 
Migrate VMs faster with a new Dell EMC PowerEdge MX solution
Migrate VMs faster with a new Dell EMC PowerEdge MX solutionMigrate VMs faster with a new Dell EMC PowerEdge MX solution
Migrate VMs faster with a new Dell EMC PowerEdge MX solution
 
Watch your transactional database performance climb with Intel Optane DC pers...
Watch your transactional database performance climb with Intel Optane DC pers...Watch your transactional database performance climb with Intel Optane DC pers...
Watch your transactional database performance climb with Intel Optane DC pers...
 
Upgrade to Dell EMC PowerEdge R940 servers with VMware vSphere 7.0 and gain g...
Upgrade to Dell EMC PowerEdge R940 servers with VMware vSphere 7.0 and gain g...Upgrade to Dell EMC PowerEdge R940 servers with VMware vSphere 7.0 and gain g...
Upgrade to Dell EMC PowerEdge R940 servers with VMware vSphere 7.0 and gain g...
 
Symantec NetBackup 7.6 benchmark comparison: Data protection in a large-scale...
Symantec NetBackup 7.6 benchmark comparison: Data protection in a large-scale...Symantec NetBackup 7.6 benchmark comparison: Data protection in a large-scale...
Symantec NetBackup 7.6 benchmark comparison: Data protection in a large-scale...
 
Get higher transaction throughput and better price/performance with an Amazon...
Get higher transaction throughput and better price/performance with an Amazon...Get higher transaction throughput and better price/performance with an Amazon...
Get higher transaction throughput and better price/performance with an Amazon...
 
Keep remote desktop power users productive with Dell EMC PowerEdge R840 serve...
Keep remote desktop power users productive with Dell EMC PowerEdge R840 serve...Keep remote desktop power users productive with Dell EMC PowerEdge R840 serve...
Keep remote desktop power users productive with Dell EMC PowerEdge R840 serve...
 
Keep data available without affecting user response time
Keep data available without affecting user response timeKeep data available without affecting user response time
Keep data available without affecting user response time
 
Run compute-intensive Apache Hadoop big data workloads faster with Dell EMC P...
Run compute-intensive Apache Hadoop big data workloads faster with Dell EMC P...Run compute-intensive Apache Hadoop big data workloads faster with Dell EMC P...
Run compute-intensive Apache Hadoop big data workloads faster with Dell EMC P...
 
Citrix XenApp hosted shared desktop performance on Cisco UCS: Cisco VM-FEX vs...
Citrix XenApp hosted shared desktop performance on Cisco UCS: Cisco VM-FEX vs...Citrix XenApp hosted shared desktop performance on Cisco UCS: Cisco VM-FEX vs...
Citrix XenApp hosted shared desktop performance on Cisco UCS: Cisco VM-FEX vs...
 
Preserve user response time while ensuring data availability
Preserve user response time while ensuring data availabilityPreserve user response time while ensuring data availability
Preserve user response time while ensuring data availability
 

Similar to Prepare images for machine learning faster with servers powered by AMD EPYC 75F3 processors

AMD EPYC 7763 processor-based servers can offer a better value for MySQL work...
AMD EPYC 7763 processor-based servers can offer a better value for MySQL work...AMD EPYC 7763 processor-based servers can offer a better value for MySQL work...
AMD EPYC 7763 processor-based servers can offer a better value for MySQL work...Principled Technologies
 
Get competitive logistic regression performance with servers with AMD EPYC 75...
Get competitive logistic regression performance with servers with AMD EPYC 75...Get competitive logistic regression performance with servers with AMD EPYC 75...
Get competitive logistic regression performance with servers with AMD EPYC 75...Principled Technologies
 
MySQL and Spark machine learning performance on Azure VMsbased on 3rd Gen AMD...
MySQL and Spark machine learning performance on Azure VMsbased on 3rd Gen AMD...MySQL and Spark machine learning performance on Azure VMsbased on 3rd Gen AMD...
MySQL and Spark machine learning performance on Azure VMsbased on 3rd Gen AMD...Principled Technologies
 
Combine containerization and GPU acceleration on VMware: Dell PowerEdge R750 ...
Combine containerization and GPU acceleration on VMware: Dell PowerEdge R750 ...Combine containerization and GPU acceleration on VMware: Dell PowerEdge R750 ...
Combine containerization and GPU acceleration on VMware: Dell PowerEdge R750 ...Principled Technologies
 
Deep Dive on Delivering Amazon EC2 Instance Performance
Deep Dive on Delivering Amazon EC2 Instance PerformanceDeep Dive on Delivering Amazon EC2 Instance Performance
Deep Dive on Delivering Amazon EC2 Instance PerformanceAmazon Web Services
 
Boosting virtualization performance with Intel SSD DC Series P3600 NVMe SSDs ...
Boosting virtualization performance with Intel SSD DC Series P3600 NVMe SSDs ...Boosting virtualization performance with Intel SSD DC Series P3600 NVMe SSDs ...
Boosting virtualization performance with Intel SSD DC Series P3600 NVMe SSDs ...Principled Technologies
 
Do more Apache Cassandra distributed database work with AMD EPYC 7601 processors
Do more Apache Cassandra distributed database work with AMD EPYC 7601 processorsDo more Apache Cassandra distributed database work with AMD EPYC 7601 processors
Do more Apache Cassandra distributed database work with AMD EPYC 7601 processorsPrincipled Technologies
 
Choosing the Right EC2 Instance and Applicable Use Cases - AWS June 2016 Webi...
Choosing the Right EC2 Instance and Applicable Use Cases - AWS June 2016 Webi...Choosing the Right EC2 Instance and Applicable Use Cases - AWS June 2016 Webi...
Choosing the Right EC2 Instance and Applicable Use Cases - AWS June 2016 Webi...Amazon Web Services
 
X13 Pre-Release Update featuring 4th Gen Intel® Xeon® Scalable Processors
X13 Pre-Release Update featuring 4th Gen Intel® Xeon® Scalable Processors X13 Pre-Release Update featuring 4th Gen Intel® Xeon® Scalable Processors
X13 Pre-Release Update featuring 4th Gen Intel® Xeon® Scalable Processors Rebekah Rodriguez
 
Deep Dive on Delivering Amazon EC2 Instance Performance
Deep Dive on Delivering Amazon EC2 Instance PerformanceDeep Dive on Delivering Amazon EC2 Instance Performance
Deep Dive on Delivering Amazon EC2 Instance PerformanceAmazon Web Services
 
Innovation with ai at scale on the edge vt sept 2019 v0
Innovation with ai at scale  on the edge vt sept 2019 v0Innovation with ai at scale  on the edge vt sept 2019 v0
Innovation with ai at scale on the edge vt sept 2019 v0Ganesan Narayanasamy
 
Virtual Private Server Documentation
Virtual Private Server DocumentationVirtual Private Server Documentation
Virtual Private Server Documentationwebhostingguy
 
Virtual Private Server Documentation
Virtual Private Server DocumentationVirtual Private Server Documentation
Virtual Private Server Documentationwebhostingguy
 
Equip your Dell EMC PowerEdge R740xd servers with Intel Optane persistent mem...
Equip your Dell EMC PowerEdge R740xd servers with Intel Optane persistent mem...Equip your Dell EMC PowerEdge R740xd servers with Intel Optane persistent mem...
Equip your Dell EMC PowerEdge R740xd servers with Intel Optane persistent mem...Principled Technologies
 
Accelerating Cassandra Workloads on Ceph with All-Flash PCIE SSDS
Accelerating Cassandra Workloads on Ceph with All-Flash PCIE SSDSAccelerating Cassandra Workloads on Ceph with All-Flash PCIE SSDS
Accelerating Cassandra Workloads on Ceph with All-Flash PCIE SSDSCeph Community
 
Grid rac preso 051007
Grid rac preso 051007Grid rac preso 051007
Grid rac preso 051007Sal Marcus
 
Supermicro X12 Performance Update
Supermicro X12 Performance UpdateSupermicro X12 Performance Update
Supermicro X12 Performance UpdateRebekah Rodriguez
 
NBU_benchmark_comparison_(part_2)_1214_v2
NBU_benchmark_comparison_(part_2)_1214_v2NBU_benchmark_comparison_(part_2)_1214_v2
NBU_benchmark_comparison_(part_2)_1214_v2Abdul Rasheed
 
VMmark virtualization performance of the Lenovo ThinkServer RD630
VMmark virtualization performance of the Lenovo ThinkServer RD630VMmark virtualization performance of the Lenovo ThinkServer RD630
VMmark virtualization performance of the Lenovo ThinkServer RD630Principled Technologies
 

Similar to Prepare images for machine learning faster with servers powered by AMD EPYC 75F3 processors (20)

AMD EPYC 7763 processor-based servers can offer a better value for MySQL work...
AMD EPYC 7763 processor-based servers can offer a better value for MySQL work...AMD EPYC 7763 processor-based servers can offer a better value for MySQL work...
AMD EPYC 7763 processor-based servers can offer a better value for MySQL work...
 
Get competitive logistic regression performance with servers with AMD EPYC 75...
Get competitive logistic regression performance with servers with AMD EPYC 75...Get competitive logistic regression performance with servers with AMD EPYC 75...
Get competitive logistic regression performance with servers with AMD EPYC 75...
 
MySQL and Spark machine learning performance on Azure VMsbased on 3rd Gen AMD...
MySQL and Spark machine learning performance on Azure VMsbased on 3rd Gen AMD...MySQL and Spark machine learning performance on Azure VMsbased on 3rd Gen AMD...
MySQL and Spark machine learning performance on Azure VMsbased on 3rd Gen AMD...
 
Combine containerization and GPU acceleration on VMware: Dell PowerEdge R750 ...
Combine containerization and GPU acceleration on VMware: Dell PowerEdge R750 ...Combine containerization and GPU acceleration on VMware: Dell PowerEdge R750 ...
Combine containerization and GPU acceleration on VMware: Dell PowerEdge R750 ...
 
Deep Dive on Delivering Amazon EC2 Instance Performance
Deep Dive on Delivering Amazon EC2 Instance PerformanceDeep Dive on Delivering Amazon EC2 Instance Performance
Deep Dive on Delivering Amazon EC2 Instance Performance
 
Boosting virtualization performance with Intel SSD DC Series P3600 NVMe SSDs ...
Boosting virtualization performance with Intel SSD DC Series P3600 NVMe SSDs ...Boosting virtualization performance with Intel SSD DC Series P3600 NVMe SSDs ...
Boosting virtualization performance with Intel SSD DC Series P3600 NVMe SSDs ...
 
Do more Apache Cassandra distributed database work with AMD EPYC 7601 processors
Do more Apache Cassandra distributed database work with AMD EPYC 7601 processorsDo more Apache Cassandra distributed database work with AMD EPYC 7601 processors
Do more Apache Cassandra distributed database work with AMD EPYC 7601 processors
 
Choosing the Right EC2 Instance and Applicable Use Cases - AWS June 2016 Webi...
Choosing the Right EC2 Instance and Applicable Use Cases - AWS June 2016 Webi...Choosing the Right EC2 Instance and Applicable Use Cases - AWS June 2016 Webi...
Choosing the Right EC2 Instance and Applicable Use Cases - AWS June 2016 Webi...
 
IBM XIV Gen3 Storage System
IBM XIV Gen3 Storage SystemIBM XIV Gen3 Storage System
IBM XIV Gen3 Storage System
 
X13 Pre-Release Update featuring 4th Gen Intel® Xeon® Scalable Processors
X13 Pre-Release Update featuring 4th Gen Intel® Xeon® Scalable Processors X13 Pre-Release Update featuring 4th Gen Intel® Xeon® Scalable Processors
X13 Pre-Release Update featuring 4th Gen Intel® Xeon® Scalable Processors
 
Deep Dive on Delivering Amazon EC2 Instance Performance
Deep Dive on Delivering Amazon EC2 Instance PerformanceDeep Dive on Delivering Amazon EC2 Instance Performance
Deep Dive on Delivering Amazon EC2 Instance Performance
 
Innovation with ai at scale on the edge vt sept 2019 v0
Innovation with ai at scale  on the edge vt sept 2019 v0Innovation with ai at scale  on the edge vt sept 2019 v0
Innovation with ai at scale on the edge vt sept 2019 v0
 
Virtual Private Server Documentation
Virtual Private Server DocumentationVirtual Private Server Documentation
Virtual Private Server Documentation
 
Virtual Private Server Documentation
Virtual Private Server DocumentationVirtual Private Server Documentation
Virtual Private Server Documentation
 
Equip your Dell EMC PowerEdge R740xd servers with Intel Optane persistent mem...
Equip your Dell EMC PowerEdge R740xd servers with Intel Optane persistent mem...Equip your Dell EMC PowerEdge R740xd servers with Intel Optane persistent mem...
Equip your Dell EMC PowerEdge R740xd servers with Intel Optane persistent mem...
 
Accelerating Cassandra Workloads on Ceph with All-Flash PCIE SSDS
Accelerating Cassandra Workloads on Ceph with All-Flash PCIE SSDSAccelerating Cassandra Workloads on Ceph with All-Flash PCIE SSDS
Accelerating Cassandra Workloads on Ceph with All-Flash PCIE SSDS
 
Grid rac preso 051007
Grid rac preso 051007Grid rac preso 051007
Grid rac preso 051007
 
Supermicro X12 Performance Update
Supermicro X12 Performance UpdateSupermicro X12 Performance Update
Supermicro X12 Performance Update
 
NBU_benchmark_comparison_(part_2)_1214_v2
NBU_benchmark_comparison_(part_2)_1214_v2NBU_benchmark_comparison_(part_2)_1214_v2
NBU_benchmark_comparison_(part_2)_1214_v2
 
VMmark virtualization performance of the Lenovo ThinkServer RD630
VMmark virtualization performance of the Lenovo ThinkServer RD630VMmark virtualization performance of the Lenovo ThinkServer RD630
VMmark virtualization performance of the Lenovo ThinkServer RD630
 

More from Principled Technologies

Boost PC performance: How more available memory can improve productivity
Boost PC performance: How more available memory can improve productivityBoost PC performance: How more available memory can improve productivity
Boost PC performance: How more available memory can improve productivityPrincipled Technologies
 
Deploy with confidence: VMware Cloud Foundation 5.1 on next gen Dell PowerEdg...
Deploy with confidence: VMware Cloud Foundation 5.1 on next gen Dell PowerEdg...Deploy with confidence: VMware Cloud Foundation 5.1 on next gen Dell PowerEdg...
Deploy with confidence: VMware Cloud Foundation 5.1 on next gen Dell PowerEdg...Principled Technologies
 
Realize 2.1X the performance with 20% less power with AMD EPYC processor-back...
Realize 2.1X the performance with 20% less power with AMD EPYC processor-back...Realize 2.1X the performance with 20% less power with AMD EPYC processor-back...
Realize 2.1X the performance with 20% less power with AMD EPYC processor-back...Principled Technologies
 
Upgrade your cloud infrastructure with Dell PowerEdge R760 servers and VMware...
Upgrade your cloud infrastructure with Dell PowerEdge R760 servers and VMware...Upgrade your cloud infrastructure with Dell PowerEdge R760 servers and VMware...
Upgrade your cloud infrastructure with Dell PowerEdge R760 servers and VMware...Principled Technologies
 
A comparison of security features in Dell, HP, and Lenovo PC systems
A comparison of security features in Dell, HP, and Lenovo PC systemsA comparison of security features in Dell, HP, and Lenovo PC systems
A comparison of security features in Dell, HP, and Lenovo PC systemsPrincipled Technologies
 
Increase security, sustainability, and efficiency with robust Dell server man...
Increase security, sustainability, and efficiency with robust Dell server man...Increase security, sustainability, and efficiency with robust Dell server man...
Increase security, sustainability, and efficiency with robust Dell server man...Principled Technologies
 
Scale up your storage with higher-performing Dell APEX Block Storage for AWS ...
Scale up your storage with higher-performing Dell APEX Block Storage for AWS ...Scale up your storage with higher-performing Dell APEX Block Storage for AWS ...
Scale up your storage with higher-performing Dell APEX Block Storage for AWS ...Principled Technologies
 
Scale up your storage with higher-performing Dell APEX Block Storage for AWS
Scale up your storage with higher-performing Dell APEX Block Storage for AWSScale up your storage with higher-performing Dell APEX Block Storage for AWS
Scale up your storage with higher-performing Dell APEX Block Storage for AWSPrincipled Technologies
 
Get in and stay in the productivity zone with the HP Z2 G9 Tower Workstation
Get in and stay in the productivity zone with the HP Z2 G9 Tower WorkstationGet in and stay in the productivity zone with the HP Z2 G9 Tower Workstation
Get in and stay in the productivity zone with the HP Z2 G9 Tower WorkstationPrincipled Technologies
 
Open up new possibilities with higher transactional database performance from...
Open up new possibilities with higher transactional database performance from...Open up new possibilities with higher transactional database performance from...
Open up new possibilities with higher transactional database performance from...Principled Technologies
 
Improving database performance and value with an easy migration to Azure Data...
Improving database performance and value with an easy migration to Azure Data...Improving database performance and value with an easy migration to Azure Data...
Improving database performance and value with an easy migration to Azure Data...Principled Technologies
 
Realize better value and performance migrating from Azure Database for Postgr...
Realize better value and performance migrating from Azure Database for Postgr...Realize better value and performance migrating from Azure Database for Postgr...
Realize better value and performance migrating from Azure Database for Postgr...Principled Technologies
 
Set up students and teachers to excel now and in the future with Intel proces...
Set up students and teachers to excel now and in the future with Intel proces...Set up students and teachers to excel now and in the future with Intel proces...
Set up students and teachers to excel now and in the future with Intel proces...Principled Technologies
 
Finding the path to AI success with the Dell AI portfolio - Summary
Finding the path to AI success with the Dell AI portfolio - SummaryFinding the path to AI success with the Dell AI portfolio - Summary
Finding the path to AI success with the Dell AI portfolio - SummaryPrincipled Technologies
 
Finding the path to AI success with the Dell AI portfolio
Finding the path to AI success with the Dell AI portfolioFinding the path to AI success with the Dell AI portfolio
Finding the path to AI success with the Dell AI portfolioPrincipled Technologies
 
Achieve strong performance and value on Azure SQL Database Hyperscale
Achieve strong performance and value on Azure SQL Database HyperscaleAchieve strong performance and value on Azure SQL Database Hyperscale
Achieve strong performance and value on Azure SQL Database HyperscalePrincipled Technologies
 
Improve backup and recovery outcomes by combining Dell APEX Data Storage Serv...
Improve backup and recovery outcomes by combining Dell APEX Data Storage Serv...Improve backup and recovery outcomes by combining Dell APEX Data Storage Serv...
Improve backup and recovery outcomes by combining Dell APEX Data Storage Serv...Principled Technologies
 

More from Principled Technologies (20)

Boost PC performance: How more available memory can improve productivity
Boost PC performance: How more available memory can improve productivityBoost PC performance: How more available memory can improve productivity
Boost PC performance: How more available memory can improve productivity
 
Deploy with confidence: VMware Cloud Foundation 5.1 on next gen Dell PowerEdg...
Deploy with confidence: VMware Cloud Foundation 5.1 on next gen Dell PowerEdg...Deploy with confidence: VMware Cloud Foundation 5.1 on next gen Dell PowerEdg...
Deploy with confidence: VMware Cloud Foundation 5.1 on next gen Dell PowerEdg...
 
Realize 2.1X the performance with 20% less power with AMD EPYC processor-back...
Realize 2.1X the performance with 20% less power with AMD EPYC processor-back...Realize 2.1X the performance with 20% less power with AMD EPYC processor-back...
Realize 2.1X the performance with 20% less power with AMD EPYC processor-back...
 
Upgrade your cloud infrastructure with Dell PowerEdge R760 servers and VMware...
Upgrade your cloud infrastructure with Dell PowerEdge R760 servers and VMware...Upgrade your cloud infrastructure with Dell PowerEdge R760 servers and VMware...
Upgrade your cloud infrastructure with Dell PowerEdge R760 servers and VMware...
 
A comparison of security features in Dell, HP, and Lenovo PC systems
A comparison of security features in Dell, HP, and Lenovo PC systemsA comparison of security features in Dell, HP, and Lenovo PC systems
A comparison of security features in Dell, HP, and Lenovo PC systems
 
Increase security, sustainability, and efficiency with robust Dell server man...
Increase security, sustainability, and efficiency with robust Dell server man...Increase security, sustainability, and efficiency with robust Dell server man...
Increase security, sustainability, and efficiency with robust Dell server man...
 
Increase security, sustainability, and efficiency with robust Dell server man...
Increase security, sustainability, and efficiency with robust Dell server man...Increase security, sustainability, and efficiency with robust Dell server man...
Increase security, sustainability, and efficiency with robust Dell server man...
 
Scale up your storage with higher-performing Dell APEX Block Storage for AWS ...
Scale up your storage with higher-performing Dell APEX Block Storage for AWS ...Scale up your storage with higher-performing Dell APEX Block Storage for AWS ...
Scale up your storage with higher-performing Dell APEX Block Storage for AWS ...
 
Scale up your storage with higher-performing Dell APEX Block Storage for AWS
Scale up your storage with higher-performing Dell APEX Block Storage for AWSScale up your storage with higher-performing Dell APEX Block Storage for AWS
Scale up your storage with higher-performing Dell APEX Block Storage for AWS
 
Get in and stay in the productivity zone with the HP Z2 G9 Tower Workstation
Get in and stay in the productivity zone with the HP Z2 G9 Tower WorkstationGet in and stay in the productivity zone with the HP Z2 G9 Tower Workstation
Get in and stay in the productivity zone with the HP Z2 G9 Tower Workstation
 
Open up new possibilities with higher transactional database performance from...
Open up new possibilities with higher transactional database performance from...Open up new possibilities with higher transactional database performance from...
Open up new possibilities with higher transactional database performance from...
 
Improving database performance and value with an easy migration to Azure Data...
Improving database performance and value with an easy migration to Azure Data...Improving database performance and value with an easy migration to Azure Data...
Improving database performance and value with an easy migration to Azure Data...
 
Realize better value and performance migrating from Azure Database for Postgr...
Realize better value and performance migrating from Azure Database for Postgr...Realize better value and performance migrating from Azure Database for Postgr...
Realize better value and performance migrating from Azure Database for Postgr...
 
Realize better value and performance migrating from Azure Database for Postgr...
Realize better value and performance migrating from Azure Database for Postgr...Realize better value and performance migrating from Azure Database for Postgr...
Realize better value and performance migrating from Azure Database for Postgr...
 
Set up students and teachers to excel now and in the future with Intel proces...
Set up students and teachers to excel now and in the future with Intel proces...Set up students and teachers to excel now and in the future with Intel proces...
Set up students and teachers to excel now and in the future with Intel proces...
 
Finding the path to AI success with the Dell AI portfolio - Summary
Finding the path to AI success with the Dell AI portfolio - SummaryFinding the path to AI success with the Dell AI portfolio - Summary
Finding the path to AI success with the Dell AI portfolio - Summary
 
Finding the path to AI success with the Dell AI portfolio
Finding the path to AI success with the Dell AI portfolioFinding the path to AI success with the Dell AI portfolio
Finding the path to AI success with the Dell AI portfolio
 
Achieve strong performance and value on Azure SQL Database Hyperscale
Achieve strong performance and value on Azure SQL Database HyperscaleAchieve strong performance and value on Azure SQL Database Hyperscale
Achieve strong performance and value on Azure SQL Database Hyperscale
 
Improve backup and recovery outcomes by combining Dell APEX Data Storage Serv...
Improve backup and recovery outcomes by combining Dell APEX Data Storage Serv...Improve backup and recovery outcomes by combining Dell APEX Data Storage Serv...
Improve backup and recovery outcomes by combining Dell APEX Data Storage Serv...
 
Improve backup and recovery outcomes by combining Dell APEX Data Storage Serv...
Improve backup and recovery outcomes by combining Dell APEX Data Storage Serv...Improve backup and recovery outcomes by combining Dell APEX Data Storage Serv...
Improve backup and recovery outcomes by combining Dell APEX Data Storage Serv...
 

Recently uploaded

Injustice - Developers Among Us (SciFiDevCon 2024)
Injustice - Developers Among Us (SciFiDevCon 2024)Injustice - Developers Among Us (SciFiDevCon 2024)
Injustice - Developers Among Us (SciFiDevCon 2024)Allon Mureinik
 
08448380779 Call Girls In Civil Lines Women Seeking Men
08448380779 Call Girls In Civil Lines Women Seeking Men08448380779 Call Girls In Civil Lines Women Seeking Men
08448380779 Call Girls In Civil Lines Women Seeking MenDelhi Call girls
 
Handwritten Text Recognition for manuscripts and early printed texts
Handwritten Text Recognition for manuscripts and early printed textsHandwritten Text Recognition for manuscripts and early printed texts
Handwritten Text Recognition for manuscripts and early printed textsMaria Levchenko
 
🐬 The future of MySQL is Postgres 🐘
🐬  The future of MySQL is Postgres   🐘🐬  The future of MySQL is Postgres   🐘
🐬 The future of MySQL is Postgres 🐘RTylerCroy
 
[2024]Digital Global Overview Report 2024 Meltwater.pdf
[2024]Digital Global Overview Report 2024 Meltwater.pdf[2024]Digital Global Overview Report 2024 Meltwater.pdf
[2024]Digital Global Overview Report 2024 Meltwater.pdfhans926745
 
From Event to Action: Accelerate Your Decision Making with Real-Time Automation
From Event to Action: Accelerate Your Decision Making with Real-Time AutomationFrom Event to Action: Accelerate Your Decision Making with Real-Time Automation
From Event to Action: Accelerate Your Decision Making with Real-Time AutomationSafe Software
 
The Role of Taxonomy and Ontology in Semantic Layers - Heather Hedden.pdf
The Role of Taxonomy and Ontology in Semantic Layers - Heather Hedden.pdfThe Role of Taxonomy and Ontology in Semantic Layers - Heather Hedden.pdf
The Role of Taxonomy and Ontology in Semantic Layers - Heather Hedden.pdfEnterprise Knowledge
 
Transcript: #StandardsGoals for 2024: What’s new for BISAC - Tech Forum 2024
Transcript: #StandardsGoals for 2024: What’s new for BISAC - Tech Forum 2024Transcript: #StandardsGoals for 2024: What’s new for BISAC - Tech Forum 2024
Transcript: #StandardsGoals for 2024: What’s new for BISAC - Tech Forum 2024BookNet Canada
 
08448380779 Call Girls In Friends Colony Women Seeking Men
08448380779 Call Girls In Friends Colony Women Seeking Men08448380779 Call Girls In Friends Colony Women Seeking Men
08448380779 Call Girls In Friends Colony Women Seeking MenDelhi Call girls
 
Breaking the Kubernetes Kill Chain: Host Path Mount
Breaking the Kubernetes Kill Chain: Host Path MountBreaking the Kubernetes Kill Chain: Host Path Mount
Breaking the Kubernetes Kill Chain: Host Path MountPuma Security, LLC
 
Unblocking The Main Thread Solving ANRs and Frozen Frames
Unblocking The Main Thread Solving ANRs and Frozen FramesUnblocking The Main Thread Solving ANRs and Frozen Frames
Unblocking The Main Thread Solving ANRs and Frozen FramesSinan KOZAK
 
My Hashitalk Indonesia April 2024 Presentation
My Hashitalk Indonesia April 2024 PresentationMy Hashitalk Indonesia April 2024 Presentation
My Hashitalk Indonesia April 2024 PresentationRidwan Fadjar
 
Mastering MySQL Database Architecture: Deep Dive into MySQL Shell and MySQL R...
Mastering MySQL Database Architecture: Deep Dive into MySQL Shell and MySQL R...Mastering MySQL Database Architecture: Deep Dive into MySQL Shell and MySQL R...
Mastering MySQL Database Architecture: Deep Dive into MySQL Shell and MySQL R...Miguel Araújo
 
IAC 2024 - IA Fast Track to Search Focused AI Solutions
IAC 2024 - IA Fast Track to Search Focused AI SolutionsIAC 2024 - IA Fast Track to Search Focused AI Solutions
IAC 2024 - IA Fast Track to Search Focused AI SolutionsEnterprise Knowledge
 
Tech-Forward - Achieving Business Readiness For Copilot in Microsoft 365
Tech-Forward - Achieving Business Readiness For Copilot in Microsoft 365Tech-Forward - Achieving Business Readiness For Copilot in Microsoft 365
Tech-Forward - Achieving Business Readiness For Copilot in Microsoft 3652toLead Limited
 
Raspberry Pi 5: Challenges and Solutions in Bringing up an OpenGL/Vulkan Driv...
Raspberry Pi 5: Challenges and Solutions in Bringing up an OpenGL/Vulkan Driv...Raspberry Pi 5: Challenges and Solutions in Bringing up an OpenGL/Vulkan Driv...
Raspberry Pi 5: Challenges and Solutions in Bringing up an OpenGL/Vulkan Driv...Igalia
 
Strategies for Unlocking Knowledge Management in Microsoft 365 in the Copilot...
Strategies for Unlocking Knowledge Management in Microsoft 365 in the Copilot...Strategies for Unlocking Knowledge Management in Microsoft 365 in the Copilot...
Strategies for Unlocking Knowledge Management in Microsoft 365 in the Copilot...Drew Madelung
 
Neo4j - How KGs are shaping the future of Generative AI at AWS Summit London ...
Neo4j - How KGs are shaping the future of Generative AI at AWS Summit London ...Neo4j - How KGs are shaping the future of Generative AI at AWS Summit London ...
Neo4j - How KGs are shaping the future of Generative AI at AWS Summit London ...Neo4j
 
Scaling API-first – The story of a global engineering organization
Scaling API-first – The story of a global engineering organizationScaling API-first – The story of a global engineering organization
Scaling API-first – The story of a global engineering organizationRadu Cotescu
 
Salesforce Community Group Quito, Salesforce 101
Salesforce Community Group Quito, Salesforce 101Salesforce Community Group Quito, Salesforce 101
Salesforce Community Group Quito, Salesforce 101Paola De la Torre
 

Recently uploaded (20)

Injustice - Developers Among Us (SciFiDevCon 2024)
Injustice - Developers Among Us (SciFiDevCon 2024)Injustice - Developers Among Us (SciFiDevCon 2024)
Injustice - Developers Among Us (SciFiDevCon 2024)
 
08448380779 Call Girls In Civil Lines Women Seeking Men
08448380779 Call Girls In Civil Lines Women Seeking Men08448380779 Call Girls In Civil Lines Women Seeking Men
08448380779 Call Girls In Civil Lines Women Seeking Men
 
Handwritten Text Recognition for manuscripts and early printed texts
Handwritten Text Recognition for manuscripts and early printed textsHandwritten Text Recognition for manuscripts and early printed texts
Handwritten Text Recognition for manuscripts and early printed texts
 
🐬 The future of MySQL is Postgres 🐘
🐬  The future of MySQL is Postgres   🐘🐬  The future of MySQL is Postgres   🐘
🐬 The future of MySQL is Postgres 🐘
 
[2024]Digital Global Overview Report 2024 Meltwater.pdf
[2024]Digital Global Overview Report 2024 Meltwater.pdf[2024]Digital Global Overview Report 2024 Meltwater.pdf
[2024]Digital Global Overview Report 2024 Meltwater.pdf
 
From Event to Action: Accelerate Your Decision Making with Real-Time Automation
From Event to Action: Accelerate Your Decision Making with Real-Time AutomationFrom Event to Action: Accelerate Your Decision Making with Real-Time Automation
From Event to Action: Accelerate Your Decision Making with Real-Time Automation
 
The Role of Taxonomy and Ontology in Semantic Layers - Heather Hedden.pdf
The Role of Taxonomy and Ontology in Semantic Layers - Heather Hedden.pdfThe Role of Taxonomy and Ontology in Semantic Layers - Heather Hedden.pdf
The Role of Taxonomy and Ontology in Semantic Layers - Heather Hedden.pdf
 
Transcript: #StandardsGoals for 2024: What’s new for BISAC - Tech Forum 2024
Transcript: #StandardsGoals for 2024: What’s new for BISAC - Tech Forum 2024Transcript: #StandardsGoals for 2024: What’s new for BISAC - Tech Forum 2024
Transcript: #StandardsGoals for 2024: What’s new for BISAC - Tech Forum 2024
 
08448380779 Call Girls In Friends Colony Women Seeking Men
08448380779 Call Girls In Friends Colony Women Seeking Men08448380779 Call Girls In Friends Colony Women Seeking Men
08448380779 Call Girls In Friends Colony Women Seeking Men
 
Breaking the Kubernetes Kill Chain: Host Path Mount
Breaking the Kubernetes Kill Chain: Host Path MountBreaking the Kubernetes Kill Chain: Host Path Mount
Breaking the Kubernetes Kill Chain: Host Path Mount
 
Unblocking The Main Thread Solving ANRs and Frozen Frames
Unblocking The Main Thread Solving ANRs and Frozen FramesUnblocking The Main Thread Solving ANRs and Frozen Frames
Unblocking The Main Thread Solving ANRs and Frozen Frames
 
My Hashitalk Indonesia April 2024 Presentation
My Hashitalk Indonesia April 2024 PresentationMy Hashitalk Indonesia April 2024 Presentation
My Hashitalk Indonesia April 2024 Presentation
 
Mastering MySQL Database Architecture: Deep Dive into MySQL Shell and MySQL R...
Mastering MySQL Database Architecture: Deep Dive into MySQL Shell and MySQL R...Mastering MySQL Database Architecture: Deep Dive into MySQL Shell and MySQL R...
Mastering MySQL Database Architecture: Deep Dive into MySQL Shell and MySQL R...
 
IAC 2024 - IA Fast Track to Search Focused AI Solutions
IAC 2024 - IA Fast Track to Search Focused AI SolutionsIAC 2024 - IA Fast Track to Search Focused AI Solutions
IAC 2024 - IA Fast Track to Search Focused AI Solutions
 
Tech-Forward - Achieving Business Readiness For Copilot in Microsoft 365
Tech-Forward - Achieving Business Readiness For Copilot in Microsoft 365Tech-Forward - Achieving Business Readiness For Copilot in Microsoft 365
Tech-Forward - Achieving Business Readiness For Copilot in Microsoft 365
 
Raspberry Pi 5: Challenges and Solutions in Bringing up an OpenGL/Vulkan Driv...
Raspberry Pi 5: Challenges and Solutions in Bringing up an OpenGL/Vulkan Driv...Raspberry Pi 5: Challenges and Solutions in Bringing up an OpenGL/Vulkan Driv...
Raspberry Pi 5: Challenges and Solutions in Bringing up an OpenGL/Vulkan Driv...
 
Strategies for Unlocking Knowledge Management in Microsoft 365 in the Copilot...
Strategies for Unlocking Knowledge Management in Microsoft 365 in the Copilot...Strategies for Unlocking Knowledge Management in Microsoft 365 in the Copilot...
Strategies for Unlocking Knowledge Management in Microsoft 365 in the Copilot...
 
Neo4j - How KGs are shaping the future of Generative AI at AWS Summit London ...
Neo4j - How KGs are shaping the future of Generative AI at AWS Summit London ...Neo4j - How KGs are shaping the future of Generative AI at AWS Summit London ...
Neo4j - How KGs are shaping the future of Generative AI at AWS Summit London ...
 
Scaling API-first – The story of a global engineering organization
Scaling API-first – The story of a global engineering organizationScaling API-first – The story of a global engineering organization
Scaling API-first – The story of a global engineering organization
 
Salesforce Community Group Quito, Salesforce 101
Salesforce Community Group Quito, Salesforce 101Salesforce Community Group Quito, Salesforce 101
Salesforce Community Group Quito, Salesforce 101
 

Prepare images for machine learning faster with servers powered by AMD EPYC 75F3 processors

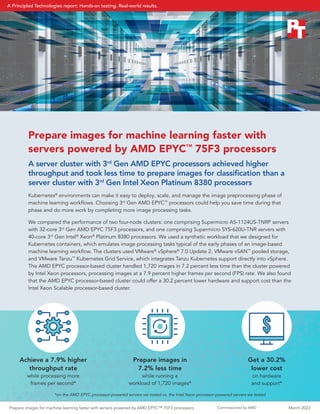
  • 1. Commissioned by AMD Prepare images for machine learning faster with servers powered by AMD EPYC™ 75F3 processors A server cluster with 3rd Gen AMD EPYC processors achieved higher throughput and took less time to prepare images for classification than a server cluster with 3rd Gen Intel Xeon Platinum 8380 processors Kubernetes® environments can make it easy to deploy, scale, and manage the image preprocessing phase of machine learning workflows. Choosing 3rd Gen AMD EPYC™ processors could help you save time during that phase and do more work by completing more image processing tasks. We compared the performance of two four-node clusters: one comprising Supermicro AS-1124US-TNRP servers with 32-core 3rd Gen AMD EPYC 75F3 processors, and one comprising Supermicro SYS-620U-TNR servers with 40-core 3rd Gen Intel® Xeon® Platinum 8380 processors. We used a synthetic workload that we designed for Kubernetes containers, which emulates image processing tasks typical of the early phases of an image-based machine learning workflow. The clusters used VMware® vSphere® 7.0 Update 2, VMware vSAN™ pooled storage, and VMware Tanzu™ Kubernetes Grid Service, which integrates Tanzu Kubernetes support directly into vSphere. The AMD EPYC processor-based cluster handled 1,720 images in 7.2 percent less time than the cluster powered by Intel Xeon processors, processing images at a 7.9 percent higher frames per second (FPS) rate. We also found that the AMD EPYC processor-based cluster could offer a 30.2 percent lower hardware and support cost than the Intel Xeon Scalable processor-based cluster. Prepare images in 7.2% less time while running a workload of 1,720 images* Get a 30.2% lower cost on hardware and support* Achieve a 7.9% higher throughput rate while processing more frames per second* $ *on the AMD EPYC processor-powered servers we tested vs. the Intel Xeon processor-powered servers we tested Prepare images for machine learning faster with servers powered by AMD EPYC™ 75F3 processors March 2022 A Principled Technologies report: Hands-on testing. Real-world results.
  • 2. Commissioned by AMD How we approached testing We compared the following four-node clusters: • Supermicro SYS-620U-TNR servers powered by Intel Xeon Platinum 8380 processors   y For one server, the total cost of hardware plus three years of labor and support and a one-year CRS warranty was $29,908.90—a total of $119,635.60 for a four-node cluster1 • Supermicro AS-1124US-TNRP servers powered by AMD EPYC 75F3 processors   y For one server, the total cost of hardware plus three years of support and labor and a one-year CRS warranty was $20,870.90—a total of $83,483.60 for a four-node cluster2 Other than the processors, we configured the server clusters identically. Each of the servers in both clusters had a 240GB 6Gbps SATA SSD to use for the hypervisor and three PCIe® 4.0 NVMe™ SSDs for the vSAN storage. We also equipped each server with 1,024 GB of PC4-3200 RAM across 16 memory modules. We configured a vSAN datastore on each cluster with a single disk group comprising one 3.84TB NVMe SSD for cache and two 3.84TB NVMe SSDs for capacity per server. The vSAN datastore served as shared storage for our Tanzu Kubernetes environment. The vSphere with Tanzu environments had one worker node per server. To account for the core count differences between the two processors in our comparison—that is, 32 cores per AMD EPYC processor and 40 cores per Intel Xeon processor—we assigned a different number of CPU resources to each worker based on the CPU architecture. In the cluster powered by 3rd Gen AMD EPYC processors, each worker node had 56 vCPUs and 512 GB of memory fully reserved. In the cluster with 3rd Gen Intel Xeon Scalable processors, each worker node had 70 vCPUs and 512 GB of memory fully reserved. During testing, both clusters averaged 86 percent CPU utilization. For more details about our configurations, testing methodologies, and CPU utilization, see the science behind the report. About VMware vSAN For organizations looking to reduce the complexity and footprint of their data center, hyperconverged infrastructure (HCI) can help. As part of their HCI portfolio, VMware offers software-defined storage with vSAN that eliminates the need for bulky, expensive, external arrays and instead brings compute and storage resources together. According to VMware, vSAN is “an enterprise-class storage virtualization software that provides the easiest path to HCI and hybrid cloud.”3 To learn more about VMware vSAN, visit https://www.vmware.com/ products/vsan.html. Prepare images for machine learning faster with servers powered by AMD EPYC™ 75F3 processors March 2022 | 2
  • 3. Commissioned by AMD Less time to process images To use image-based machine learning algorithms, organizations must first prepare their data for analysis. For manufacturing organizations using the algorithms during assembly, for example, this might include images of various products taken at multiple angles. Our workload mimicked simple image processing tasks that a company might run on Kubernetes with vSphere with Tanzu during this preparation phase, such as reading images from storage, scaling the images to a machine-learning-friendly size, transposing the images, and converting the images to grayscale. (For more on our custom workload, see the science behind the report.) By sorting and preparing images more quickly, organizations could get insights sooner. As Figure 1 shows, the cluster of AMD EPYC 75F3 processor-based servers took 107.2 seconds to process 1,720 images. That was 7.2 percent less than the cluster of servers backed by the Intel Xeon Platinum 8380 processors, which needed 115.6 seconds to complete the workload. Figure 1: The time in seconds that each cluster needed to complete the image preprocessing tasks on 1,720 images. Less time is better. Source: Principled Technologies. Real-world benefits for manufacturers Machine learning algorithms can help companies perform quality control inspections, ensure product safety compliance, and verify correct assemblage. Saving time during any part of those workflows could translate to reaching business goals sooner, improving productivity, and reducing production costs. During the image preprocessing phase for any part of the manufacturing process, your company could save time by running workloads in a vSphere, vSAN, and Tanzu Kubernetes environment on 3rd Gen AMD EPYC 75F3 processor-based servers. We saw better performance from a cluster of these servers using this environment, processing images in 7.2 percent less time and at a 7.9 percent higher FPS rate than the servers powered by Intel Xeon Platinum 8380 processors. About VMware vSphere with Tanzu We used vSphere with Tanzu to run our containerized image processing workload. VMware states that vSphere with Tanzu “bridges the gap between IT and developers for cloud-native apps on-premises and in the cloud.”4 Tanzu Kubernetes Grid Service is part of the Kubernetes-focused VMware Tanzu portfolio, which enables organizations to “build, run and manage modern apps on any cloud—and continuously deliver value to your customers,” as well as to “simplify multi- cloud operations and free developers to move faster with easy access to the right resources,” according to VMware.5 For more information, visit https://tanzu.vmware.com/tanzu. 3rd Gen AMD EPYC 75F3 processor-based servers 107.2 115.6 Seconds | Smaller is better 3rd Gen Intel Xeon Platinum 8380 processor-based servers Time to complete our image preprocessing tasks Prepare images for machine learning faster with servers powered by AMD EPYC™ 75F3 processors March 2022 | 3
  • 4. Commissioned by AMD A higher FPS processing rate Figure 2 shows the image processing rate that each solution achieved during our testing. The AMD EPYC 75F3 processor-based cluster offered a rate of 15,537 FPS. That’s an increase of 7.9 percent compared to the Intel Xeon Platinum 8380 processor-powered cluster, which processed the images at a rate of 14,388 FPS. Figure 2: The rate of FPS each solution delivered during our 1,720-image preprocessing workload. Higher numbers are better. Source: Principled Technologies. About VMware vSphere 7.0 Update 2 We used VMware vSphere 7.0 Update 2 for our test environment. According to VMware, this vSphere 7.0 update includes a CPU scheduler that is optimized for AMD EPYC processors, as it is “designed to take advantage of the multiple last-level caches (LLCs) per CPU socket offered by the AMD EPYC processors.” VMware also states that vSphere 7.0 Update 2 with the CPU scheduler can achieve near-optimal performance on most applications and benchmarks on AMD EPYC processors.6 For more information, visit https://www.vmware.com/products/vsphere.html. 3rd Gen AMD EPYC 75F3 processor-based servers 15,537 FPS 14,388 FPS Higher is better 3rd Gen Intel Xeon Platinum 8380 processor-based servers Frames per second while processing images About AMD EPYC 75F3 processors Part of the third-generation EPYC 7003 Series, the AMD EPYC 75F3 processor has 32 cores and 64 threads of computing power. According to AMD, the processor features PCIe 4.0 I/O connectivity, supports up to eight DDR4 memory channels per socket, and is well-suited for workloads such as VDI and HCI.7 The third generation of AMD EPYC processors can also offer AMD Infinity Guard security features, such as Secure Encrypted Virtualization (SEV), Secure Nested Paging (SEV-SNP), Secure Memory Encryption (SME), and more.8 To learn more about the EPYC 75F3 processor, visit https://www.amd.com/en/products/cpu/amd-epyc-75f3. Prepare images for machine learning faster with servers powered by AMD EPYC™ 75F3 processors March 2022 | 4
  • 5. Commissioned by AMD Conclusion We compared the image preprocessing for machine learning performance of two server solutions powered by different processors: the AMD EPYC 75F3 and the Intel Xeon Platinum 8380. When we ran our containerized image preprocessing workload on each cluster, we found that the 3rd Gen AMD EPYC processor-powered cluster needed 7.2 percent less time to completely process 1,720 images while handling 7.9 percent more frames per second. This kind of performance shows that an organization using vSphere with Tanzu and vSAN to run their Kubernetes workloads could get better image processing performance with the servers powered by AMD EPYC 75F3 processors. Our price analysis also demonstrated that the hardware and support costs for the AMD EPYC 75F3 processor-powered Supermicro AS-1124US-TNRP server cluster was 30.2 less than the Intel Xeon Platinum 8380 processor-powered Supermicro SYS-620U-TNR server cluster. 1. We received a quote from Supermicro on February 2, 2022 for the hardware and support cost of the server minus drive costs. To arrive at the total cost, we added this amount to a drive cost quote we had received from Supermicro on August 9, 2021. 2. We received a quote from Supermicro on February 2, 2022 for the hardware and support cost of the server minus drive costs. To arrive at the total cost, we added this amount to a drive cost quote we had received from Supermicro on August 9, 2021. 3. VMware, “What is vSAN?” accessed February 15, 2022, https://www.vmware.com/products/vsan.html. 4. VMware, “vSphere with Tanzu,” accessed February 7, 2022, https://www.vmware.com/products/vsphere/vsphere-with-tanzu.html. 5. VMware, “VMware Tanzu Solution Brief,” accessed February 7, 2022, https://d1fto35gcfffzn.cloudfront.net/tanzu/VMware-Tanzu-Solution-Brief-0121.pdf. 6. VMware, “Performance Optimizations in VMware vSphere 7.0 U2 CPU Scheduler for AMD EPYC Processors,” accessed Feburary 7, 2022, https://www.vmware.com/content/dam/digitalmarketing/vmware/en/pdf/techpaper/performance/ vsphere70u2-cpu-sched-amd-epyc.pdf. 7. AMD, “AMD EPYC™ 75F3,” accessed February 7, 2022, https://www.amd.com/en/products/cpu/amd-epyc-75f3. 8. Server OEMs and cloud providers must enable AMD Infinity Guard features for use. In addition, security features can vary by AMD EPYC processor generations. Learn more about Infinity Guard at https://www.amd.com/en/technologies/infinity-guard. Principled Technologies is a registered trademark of Principled Technologies, Inc. All other product names are the trademarks of their respective owners. For additional information, review the science behind this report. Principled Technologies® Facts matter.® Principled Technologies® Facts matter.® This project was commissioned by AMD. Read the science behind this report at https://facts.pt/pagvE8O Prepare images for machine learning faster with servers powered by AMD EPYC™ 75F3 processors March 2022 | 5
  • 6. Disclaimer: The content on the following pages includes appendices and methodologies from our hands-on work. We will publish this content as a separate document linked to the report. We must receive your approval on both the report and this document before taking them public simultaneously.
  • 7. The science behind the report: Prepare images for machine learning faster with servers powered by AMD EPYC™ 75F3 processors Commissioned by AMD This document describes what we tested, how we tested, and what we found. To learn how these facts translate into real-world benefits, read the report Prepare images for machine learning faster with servers powered by AMD EPYC™ 75F3 processors. We concluded our hands-on testing on February 2, 2022. During testing, we determined the appropriate hardware and software configurations and applied updates as they became available. The results in this report reflect configurations that we finalized on January 24, 2022 or earlier. Unavoidably, these configurations may not represent the latest versions available when this report appears. Our results To learn more about how we have calculated the wins in this report, go to http://facts.pt/calculating-and-highlighting-wins. Unless we state otherwise, we have followed the rules and principles we outline in that document. Table 1: Results of our testing Supermicro SYS-620U-TNR cluster powered by Intel® Xeon® Platinum 8380 processors Supermicro AS-1124US-TNRP cluster powered by AMD EPYC™ 75F3 processors Frames per second (FPS) 14,388.4 15,537.8 Percentage more FPS N/A 7.9% Time to complete the workload (seconds) 115.6 107.2 Percentage less time N/A 7.2% Average CPU utilization during median runs 86.3% 86.2% Prepare images for machine learning faster with servers powered by AMD EPYC™ 75F3 processors March 2022 A Principled Technologies report: Hands-on testing. Real-world results.
  • 8. Commissioned by AMD CPU utilization statistics Figure 1: The average CPU usage that the four AMD EPYC 75F3 processor-powered Supermicro AS-1124US-TNRP servers achieved during testing. Source: Principled Technologies. Figure 2: The average CPU usage that the four Intel Xeon Platinum 8380 processor-powered Supermicro SYS-620U-TNR servers achieved during testing. Source: Principled Technologies. 0 10 20 30 40 50 60 70 80 90 100 0 10 20 30 40 50 60 70 80 90 100 110 120 130 140 Utilization (%) Seconds Average CPU usage: AMD EPYC 75F3 processor-powered cluster 0 10 20 30 40 50 60 70 80 90 100 Utilization (%) Seconds Average CPU usage: Intel Xeon Platinum 8380 processor-powered cluster 0 10 20 30 40 50 60 70 80 90 100 110 120 130 140 Prepare images for machine learning faster with servers powered by AMD EPYC™ 75F3 processors March 2022 | 2
  • 9. Commissioned by AMD System configuration information Table 2: Detailed information on the systems we tested. System configuration information 4 x Supermicro SYS-620U-TNR 4 x Supermicro AS-1124US-TNRP BIOS name and version 1.1A American Megatrends Inc. 2.1 Non-default BIOS settings Maximum Performance Determinism Slider: Power Operating system name and version/build number VMware® ESXi® 7.0U2a-17867351-standard VMware ESXi-7.0U2a-17867351-standard Date of last OS updates/patches applied 1/17/2022 1/17/2022 Power management policy Maximum Performance Determinism Slider: Power Processor Number of processors 2 2 Vendor and model Intel Xeon Platinum 8380 AMD EPYC 75F3 Core count (per processor) 40 32 Core frequency (GHz) 2.30 2.95 Stepping N/A N/A Memory module(s) Total memory in system (GB) 1,024 1,024 Number of memory modules 16 16 Vendor and model Micron MTA36ASF8G72PZ-3G2E1 Micron MTA36ASF8G72PZ-3G2E1 Size (GB) 64 64 Type PC4-3200 PC4-3200 Speed (MHz) 3,200 3,200 Speed running in the server (MHz) 3,200 3,200 Local storage (hypervisor) Number of drives 1 1 Drive vendor and model Intel SSD SSDSC2KB240G8 Micron MTFDHBA256TCK Drive size (GB) 240 240 Drive information (speed, interface, type) 6Gb, SATA, SSD PCIe 3.0, NVMe Local storage (vSAN) Number of drives 3 3 Drive vendor and model KIOXIA KCD6XLUL3T84 KIOXIA KCD6XLUL3T84 Drive size (GB) 3.84 3.84 Drive information (speed, interface, type) PCIe® 4.0, NVMe™ 1.4, 64GT/s PCIe 4.0, NVMe 1.4, 64GT/s Prepare images for machine learning faster with servers powered by AMD EPYC™ 75F3 processors March 2022 | 3
  • 10. Commissioned by AMD System configuration information 4 x Supermicro SYS-620U-TNR 4 x Supermicro AS-1124US-TNRP Network adapter Vendor and model Supermicro AOC-2UR68G4-I2XT Supermicro AOC-URG4N4-i4XTS Number and type of ports 2 x 10GbE 4 x 10GbE Driver version 8.10 0x80009661 N/A Network adapter Vendor and model Supermicro AOC-S25G-M2S-O Supermicro AOC-S25G-M2S-O Number and type of ports 2 x 25GbE SFP28 2 x 25GbE SFP28 Driver version 14.28.2006 14.28.2006 Cooling fans Vendor and model Sunon VF80381B1 Sunon PF40561BX-Q40U-S9H Number of cooling fans 4 8 Power supplies Vendor and model Supermicro PWS-2K08A-1R Supermicro PWS-1K22A-1R Number of power supplies 2 2 Wattage of each (W) 2,000 1,200 Prepare images for machine learning faster with servers powered by AMD EPYC™ 75F3 processors March 2022 | 4
  • 11. Commissioned by AMD How we tested We installed and configured the latest available version of VMware vSphere 7.0 Update 2 on a cluster of four Supermicro AS-1124US-TNRP servers with AMD EPYC 75F3 processors, and a cluster of four Supermicro SYS-620U-TNR servers with Intel Xeon Platium 8380 processors. We installed the OS on internal SSD drives. We ran each server using default BIOS settings with the exception of setting the BIOS to the maximum performance power management settings available for each platform architecture. On each cluster, we configured and created a 28TB VMware vSAN™ datastore using three NVMe drives on each server. The vSAN datastore served as a shared datastore for VMware Tanzu deployment. We used a Dell Networking 1Gb X1052 switch for the VM network and Management Network for Tanzu. We used a Dell 5048-ON switch for vMotion® , vSAN, and Workload Network for Tanzu. The Workload Network was isolated behind a NAT gateway, and it utilized private addresses for all connectivity. We configured the Workload Network port group on a Distributed vSwitch, which is required for Tanzu Kubernetes® deployment. The VMware vCenter® server and ESXi hosts were connected to the Management Network, while the Tanzu Kubernetes Grid (TKG) workload clusters were connected to the Workload Network. We dual-networked the Tanzu Supervisor Cluster, the Load Balancer, the NAT gateway, and the TKG CLI VM with a virtual NIC attached to both the Management Network and the Workload Network. We deployed the two infrastructure VMs (vCenter and NAT gateway) on an infrastructure server. We deployed a TKG cluster with four Kubernetes worker nodes (one worker on each Supermicro server). On the servers powered by AMD processors, each worker had 56 vCPUs and 512 GB of memory fully reserved. On the servers powered by Intel processors, each worker had 70 vCPUs and 512 GB of memory fully reserved. We then deployed a Pod on each worker with one thread per core and 256 GB of memory reserved. We compared the servers using a purpose-built preprocessing workload we wrote in Python using publicly available open-source libraries. We define this workload in the Workload description section. We can provide the code on request. Please contact info@principledtechnologies.com for more information. Workload description Our preparation workload emulates a simple image-processing workload by distributing dataset preparation tasks among M processes running on N nodes, the exact number of which is up to the user. We specify our numbers in the methodologies below. Each process produces a single shard of the final data set by taking input images, performing simple conversions, encoding the resulting image, and appending it to the shard file. This Python workload uses Pillow (https://python-pillow.org/) to perform image manipulations. The output format is a file with one Base64- encoded image per line. We designed this application to operate in single-node mode or clustered mode, and added built-in logic for discovering cluster members when clustered. For this study, we used the application in single-node mode. We intended this preparation-stage application to be as computationally lightweight as possible. However, the pipeline is still compute-limited, even when using relatively slow storage. This workload is particularly well-suited to CPU comparisons with large thread/core-count disparity or large core frequency differences. Each thread operates independently, performs the same work, and is CPU-bound. Additional threads and/or high frequency cores allow the server to complete more work per unit time, showing clear differentiation for higher core/thread count CPUs and/or higher frequency CPUs. Figure 3: Pipeline data flow and operations. Source: Principled Technologies. Figure 3 shows how the system reads images from storage, scales the images to a machine-learning-friendly size of 300 x 300 pixels, transposes the images, and finally, converts the images to grayscale. The system then encodes the transformed image into JPG, and then converts the JPG-encoded to Base64 and writes it to the next line of the shard file. File systems for image-reading and shard-writing may be local storage or HDFS, though we used local storage for testing. In addition to the shard files, the workload also outputs frame count, byte count, frames per second, input and output bytes per second, and total runtime. In clustered mode, the workload also computes statistics across the cluster. Preprocessor (Python application using ZeroMQ, Pillow, HDFS, and more) Read Scale Transpose Convert Write (to 300 x 300) (RGB to gray) Prepare images for machine learning faster with servers powered by AMD EPYC™ 75F3 processors March 2022 | 5
  • 12. Commissioned by AMD Installing vSphere 7.0 Update 2 on a Supermicro server 1. Download ESXi 7.0 Update 2 from the following link: https://my.vmware.com/group/vmware/evalcenter?p=vsphere- eval-7#tab_download. 2. Open a new browser tab, and connect to the IP address of the Supermicro server BMC. 3. Log in with the BMC credentials. 4. In the main screen, click Launch Virtual Console. 5. In the console menu bar, select Virtual Media and then Virtual Storage. 6. In the Virtual Storage popup window, select ISO from the drop-down menu, and click Open Image to browse local computer to select the image you downloaded in step 1. 7. Click Plug In to mount the ISO image, and click OK. 8. On the console menu bar, click the Power Control and select Power Reset. 9. The system will boot to the mounted image and the Loading ESXi installer screen will appear. When prompted, press Enter to continue. 10. To Accept the EULA and Continue, press F11. 11. Select the storage device to target for installation. We selected the internal SD card. To continue, press Enter. 12. To confirm the storage target, press Enter. 13. Select the keyboard layout, and press Enter. 14. Provide a root password, and confirm the password. To continue, press Enter. 15. To install, press F11. 16. Upon completion, reboot the server by pressing Enter. Installing vCenter Server Appliance 7.0 Update 2 1. Download VMware vCenter 7.0 Update 2 from the VMware support portal: https://my.vmware.com. 2. Mount the image on your local system, and browse to the vcsa-ui-installer folder. Expand the folder for your OS, and launch the installer if it doesn’t automatically begin. 3. When the vCenter Server Installer wizard opens, click Install. 4. To begin installation of the new vCenter server appliance, click Next. 5. Check the box to accept the license agreement, and click Next. 6. Enter the IP address of the infrastructure server with ESXi 7.0 Update 2. Provide the root password, and click Next. 7. To accept the SHA1 thumbprint of the server’s certificate, click Yes. 8. Accept the VM name, and provide and confirm the root password for the VCSA. Click Next. 9. Set the size for environment you’re planning to deploy. We selected Medium. Click Next. 10. Select the datastore on which to install vCenter. Accept the datastore defaults, and click Next. 11. Enter the FQDN, IP address information, and DNS servers you want to use for the vCenter server appliance. Click Next. 12. To begin deployment, click Finish. 13. When Stage 1 has completed, click Close. To confirm, click Yes. 14. Open a browser window and connect to https://[vcenter.FQDN:5480/. 15. On the Getting Started - vCenter Server page, click Set up. 16. Enter the root password, and click Log in. 17. Click Next. 18. Enable SSH access, and click Next. 19. To confirm the changes, click OK. 20. Enter vsphere.local for the Single Sign-On domain name. Enter a password for the administrator account, confirm it, and click Next. 21. Click Next. 22. Click Finish. Creating a cluster in vSphere 7.0 Update 2 1. Open a browser, and enter the address of the vCenter server you deployed. For example: https://[vcenter.FQDN]/ui 2. In the left panel, select the vCenter server, right-click, and select New Datacenter. 3. Provide a name for the new data center, and click OK. 4. Select the data center you just created, right-click, and select New Cluster. 5. Give a name to the cluster, and enable vSphere DRS. Click OK. 6. In the cluster configuration panel, under Add hosts, click Add. 7. Check the box for Use the same credentials for all hosts. Enter the IP address and root credentials for the first host, and enter the IP addresses of all remaining hosts. Click Next. 8. Check the box beside Hostname/IP Address to select all hosts. Click OK. 9. Click Next. 10. Click Finish. Prepare images for machine learning faster with servers powered by AMD EPYC™ 75F3 processors March 2022 | 6
  • 13. Commissioned by AMD Configuring the vSAN datastore 1. In the left panel of the vCenter, right-click the test cluster, select vSAN, and select configuration. 2. Select single site cluster, and click Next. 3. In the Services screen, click Next. 4. In the Claim disks screen, click the Group by drop-down menu, and select Host. 5. Select disks for each host. We selected one drive for cache and two drives for capacity. Click Next. 6. In the Review screen, click Finish. 7. Click the test cluster from vCenter, and in the right panel, click the Configure tab . 8. In the vSAN section, select Services. 9. To create a distributed switch, in the Configure Cluster section, click the CONFIGURE button. 10. In the Physical adapters section, choose two uplink adapters for the distributed switch, and click Next. 11. In the Storage traffic screen, set the VLAN ID assigned for vSAN, choose Static IPs, and fill in the static IP address, Subnet mask, and default gateway. Click Next. 12. In the Advanced options scree, click Next. 13. In the Claim disks screen, click Next. 14. In the Proxy settings screen, click next. 15. Click Finish. Creating a distributed vSwitch and port group 1. From vSphere client, click HomeàNetworking. 2. Select your Datastore. 3. On the right panel, in the Actions drop-down menu, select Distributed vSwitchàNew Distributed vSwitch. 4. Give your vSwitch a name, or accept the default. Click Next. 5. Select 7.0.0 - ESXi 7.0 and later as the version, and click Next. 6. Select the number of uplinks per ESXi host you’ll give to the vSwitch. We selected 2. Click Next. 7. Click Finish. 8. Right-click the new DvSwitch, and select Add and Manage Hosts. 9. Leave Add hosts selected, and click Next. 10. To add new hosts, click the + sign. 11. To select all the hosts in your target cluster, check the box beside Host. Click OK. Click Next. 12. Select the NIC you want to use for this DvSwitch, and click Assign Uplink. 13. At the top of the panel, accept the defaults, but check the box for “Apply this uplink assignment to the rest of the hosts.” Click OK. Click Next. 14. Do not assign vmkernel adapters at this time. Click Next. 15. Do not migrate any VM networking at this time. Click Next. 16. Click Finish. 17. Right-click the DvSwitch, and select Distributed Port GroupàNew Distributed Port Group. 18. Give it the name Workload Network and click Next. 19. Change the VLAN type to VLAN, and set the VLAN ID to VLAN 2. Click Next. 20. Click Finish. Creating a DevOps user 1. From vSphere client, click HomeàAdministration. 2. In the left panel, click Users and Groups. 3. In the right panel, click Users, select the vsphere.local domain, and click Add. 4. Provide a username and password, and click Add. 5. For simplicity, we added the DevOps user to a group with Administrator privileges. Click Groups, and select the Administrators group. Click Edit. 6. Under Add Members, search for the DevOps user you just created, and add them to the administrators group. Click Save. Prepare images for machine learning faster with servers powered by AMD EPYC™ 75F3 processors March 2022 | 7
  • 14. Commissioned by AMD Creating the HAProxy content library 1. Click the following link to download the vSphere-compatible HAProxy ovf file (v0.1.8): https://github.com/haproxytech/vmware-haproxy. 2. From vSphere client, in the left menu pane, click Content Libraries. 3. In the Content Libraries panel on the right, click Create. 4. Name the content library HAproxy-cl, and click next 5. Accept the default, and click next. 6. Choose the storage location for the content library, and click Next. 7. Review, and click Finish. 8. Click the newly created HAproxy-cl content library. 9. In the upper portion of the right-side panel for HAproxy-cl, click the actions drop-down menu, and select Import Item. 10. Change the selection to local file, and click the upload files button. 11. Browse to the location of the ovf file you downloaded in step 1, and click Open. 12. Click Import. Creating the TKG content library 1. From vSphere client, in the left menu pane, click Content Libraries. 2. In the Content Libraries panel on the right, click Create. 3. Name the content library TKG-cl and click Next. 4. Select Subscribed content library, and use https://wp-content.vmware.com/v2/latest/lib.json for the subscription URL. Click Next. 5. To verify, click Yes. 6. Choose the storage location for the content library, and click Next. 7. Review, and click Finish. Creating the storage tag 1. From the vSphere client, select MenuàStorage. 2. From the left pane, select the vSAN datastore you created for Tanzu. 3. Under the Summary tab, locate the Tags panel, and click Assign. 4. Click Add Tag. 5. Name the tag Tanzu. Click Create New Category. 6. Give the category the name Tanzu Storage. Clear all object types except Datastore, and click Create. 7. Use the Category drop-down menu to select Tanzu Storage, and click Create. 8. Check the box beside the newly created tag, and click Assign. Creating the VM storage policy 1. From the vSphere client, click MenuàPolicies and Profiles. 2. On the left panel, click VM Storage Policies. 3. Click Create. 4. Create a new VM Storage policy named tkg-clusters and click Next. 5. Check the box for Enable tag-based placement rules, and click Next. 6. Use the Tag Category drop-down menu, and select the Tanzu Storage policy you created. Click Browse Tags. 7. Click the Tanzu checkbox, and click OK. 8. Click Next. 9. Review the compatible storage, making sure your storage target is marked as compatible, and click Next. 10. Click Finish Deploying HAProxy 1. From the vSphere client, click MenuàContent Libraries. 2. Click the HAproxy-cl library. 3. In the left panel, click OVF & OVA Templates, and right-click the HAProxy template that appears in the panel below. Select New VM from This Template… 4. Provide a simple name—we used HAproxy—and select the Datacenter and/or folder to which you want to deploy. Click Next. 5. Select the cluster or compute resource where you want to deploy the HAproxy VM, and click Next. 6. Review details, and click Next. Prepare images for machine learning faster with servers powered by AMD EPYC™ 75F3 processors March 2022 | 8
  • 15. Commissioned by AMD 7. Check the box to accept all license agreements, and click Next. 8. Accept the default configuration, and click Next. 9. Select the target storage for the VM, and click Next. 10. Select VM Network for the Management network, and choose a network for the workload network. Choose the same network for the Frontend network, and click Next. 11. Customize the template. We used the following: • Appliance Configuration Section   y For the root password, we used Password1!   y Check the box for Permit Root Login.   y Leave the TLS CA blank. • Network Configuration Section   y We left the default haproxy.local.   y For local DNS server, we used 10.41.0.10.   y For management IP, we used 10.210.201.200/16.   y For management gateway, we used 10.210.0.1.   Š Note: The description asks for the workload network gateway address. You should enter the management gateway address instead.   y For Workload IP, we used 192.168.1.2/24.   y For Workload gateway, we used 192.168.1.1. • Load Balancing Section   y For load balancer IP ranges, we used 192.168.1.240/29.   y Accept the default management port.   y For HAProxy User ID, we used admin.   y For the HAProxy password, we used Password1! 12. Click Next. 13. Review the summary, and click Finish. The deployment will take a few minutes to completely deploy and configure. 14. Power on the HAProxy VM. Configuring Workload Management 1. From the vSphere client, click MenuàWorkload Management 2. Click Get Started. 3. Review the messages and warnings regarding supported configurations. Click Next. 4. Select the Cluster on which you want to enable workload management, and click Next. 5. Choose the capacity for the control plane VMs. We chose Small. Click Next. 6. Choose the storage policy you wish to use for the control plane nodes. We chose tkg-clusters. Click Next. 7. Configure the Load Balancer section with the following: a. Name: haproxy b. Type: HA proxy c. Data plane API Addresses: 10.210.201.200:5556 d. User name: admin e. Password: Password1! f. IP Address Ranges for Virtual Servers: 192.168.1.240-192.168.1.247 g. Server Certificate Authority: [copied and pasted from the instructions below] 8. Open an SSH session to the HAProxy management address, and connect using root and Password1! 9. Type cat /etc/haproxy/ca.crt 10. Copy the entire output (including the first and last lines) and paste the contents into the Server Certificate Authority box for step 7g above. 11. Close the SSH session. 12. Click Next. Prepare images for machine learning faster with servers powered by AMD EPYC™ 75F3 processors March 2022 | 9
  • 16. Commissioned by AMD 13. Configure Workload Management with the following: a. Network: VM Network b. Starting IP Address: 10.210.201.201 c. Subnet Mask: 255.255.0.0 d. Gateway: 10.210.0.1 e. DNS Server: 10.41.0.10 f. NTP Server: 10.40.0.1 14. Click Next. 15. Configure Workload Network with the following: a. Leave the default for Services addresses. b. DNS Servers: 10.41.0.10 c. Under Workload Network, click Add. d. Accept default for network-1. e. Port Group: Workload Network. f. Gateway: 192.168.1.1 g. Subnet: 255.255.255.0 h. IP Address Ranges: 192.168.1.65-192.168.1.126 16. Click Save. 17. For TKG Configuration, use the following: a. Beside Add Content Library, click Add. b. Select the TKG-cl library, and click OK. 18. Click Next. 19. Click Finish. The workload management cluster will deploy and configure. You may see apparent errors during configuration, but these will resolve upon successful completion. Configuring Kubernetes namespace for service deployment 1. In Workload Management, click Namespaces. 2. Click Create Namespace. 3. Select the target cluster, and provide a name. We used tanzu-ns. Click Create. 4. Click the Permissions tab, and click Add. 5. Choose vSphere.local for the identity source. Search for the DevOps user you created, select the “can edit” role, and click OK. 6. Click the Storage tab. 7. In the Storage Policies section, click Edit. 8. Select the tkg-clusters policy, and click OK. The environment is ready for connection and deploying containers. Configuring VM classes in vSphere with Tanzu 1. In Workload Management, click Services, and click Manage on the VM Service pane. 2. On the VM Service page, click VM Classes, and click Create VM Class. 3. On the Configuration page, specify the VM class attributes. In the cluster with AMD processors, we set the following attributes: • Name: amd-vm-class • vCPU Count: 56 • CPU resource reservation: 100% • Memory: 512 GB • Memory resource reservation: 100% 4. In the cluster with Intel processors, we set the following attributes: • Name: intel-vm-class • vCPU Count: 70 • CPU resource reservation: 100% • Memory: 512GB • Memory resource reservation: 100% 5. On the Review and Finish page, click Finish. Prepare images for machine learning faster with servers powered by AMD EPYC™ 75F3 processors March 2022 | 10
  • 17. Commissioned by AMD Installing and configuring Ubuntu VM for Tanzu Kubernetes Grid CLI 1. Log into vCenter, and from the Menu drop-down menu, click Storage. 2. Select datastore1, and click Files. 3. Click Upload Files, and upload the Ubuntu 18.04.5 ISO image. 4. Right-click the cluster, and click New Virtual Machine. 5. Click Next. 6. Enter a name for the VM, and click Next. 7. Click Next. 8. Select datastore1, and click Next. 9. Click Next. 10. From the Guest OS Family drop-down menu, select Linux. 11. From the guest OS version drop-down menu, select Ubuntu Linux (64 bit), and click Next. 12. Assign the VM 2 vCPUs, 8 GB of memory, and a 40GB hard disk. 13. From the New CD/DVD Drive drop-down, select Datastore ISO File, and select the Ubuntu ISO you uploaded to the datastore previously. Ensure Connect At Power On is checked, and click Next. 14. Click Finish. 15. Power on the VM, and click Launch Remote Console. 16. Click Install Ubuntu. 17. Click Continue. 18. Select Minimal installation, and click Continue. 19. Click Install now. 20. Click Continue. 21. Click Continue. 22. Enter your desired full name, computer name, username, and password, and click Continue. 23. Click Restart Now. 24. Press Enter. 25. Enter your password, and click Sign In. 26. When prompted by the Software Updater, install OS and software updates. 27. Click Restart Later, and power off the VM. 28. Right-click the VM in vCenter, and click Edit Settings. 29. Click Add New Device, and select Network Adapter. 30. From the New Network drop-down menu, select Browse. 31. Click Workload Network, and click OK. 32. Click OK. 33. Power on the VM, and click Launch Remote Console. 34. Enter your password, and click Sign In. 35. Click the network icon in the top right, and click Ethernet (ens192). 36. Click Wired Settings. 37. Next to Ethernet (ens192) click the gear icon. 38. Click IPv4. 39. Change IPv4 Method to Manual, and enter the IP address for this VM. 40. Click Apply, and close the settings window. Installing Kubectl Plugin for vSphere 1. Open a browser on the VM, and navigate to the IP of one of the three Supervisor VMs. In our environment, the first control plane VM IP was 10.210.201.201. 2. Click Advanced, and click Accept the Risk and Continue to bypass the certificate warning. 3. Click Download CLI Plugin Linux. 4. Select Save File, and click OK. 5. Open the Files app, and navigate to the Downloads folder. 6. Right-click vsphere-plugin.zip, and select Extract Here. 7. Open a terminal and navigate to the vsphere-plugin binary within the extracted folder: cd Downloads/vsphere-plugin/bin Prepare images for machine learning faster with servers powered by AMD EPYC™ 75F3 processors March 2022 | 11
  • 18. Commissioned by AMD 8. Make the vsphere-plugin binary executable and add it to PATH: sudo mv kubectl-vsphere /usr/local/bin/ sudo mv kubectl /usr/local/bin/ Creating the AI Workload 1. From the Ubuntu VM, log into the Supervisor Cluster: kubectl vsphere login --insecure-skip-tls-verify --server=https://10.210.201.201--vsphere- username administrator@vsphere.local 2. Create a yaml file for a cluster of four worker nodes with CPU and memory fully reserved: cat cluster.yaml apiVersion: run.tanzu.vmware.com/v1alpha1 kind: TanzuKubernetesCluster metadata: name: ai-cluster namespace: tanzu-ns spec: topology: controlPlane: count: 1 class: best-effort-xlarge storageClass: tkg-clusters workers: count: 4 class: [amd-vm-class|intel-vm-class] storageClass: tkg-clusters distribution: version: v1.18 settings: network: cni: name: antrea services: cidrBlocks: [“10.96.1.0/24”] pods: cidrBlocks: [“172.16.0.0/16”] 3. Create the cluster: Kubectl apply -f cluster.yaml 4. Log into the new cluster: kubectl vsphere login --insecure-skip-tls-verify --vsphere-username administrator@vsphere.local --server=https://10.218.201.201 --tanzu-kubernetes-cluster-name ai-cluster --tanzu-kubernetes- cluster-namespace tanzu-ns Prepare images for machine learning faster with servers powered by AMD EPYC™ 75F3 processors March 2022 | 12
  • 19. Commissioned by AMD 5. Create a yaml file for three PersistentVolumeClaims: cat pvc.yaml apiVersion: v1 kind: PersistentVolumeClaim metadata: name: ai-pvc-data spec: accessModes: - ReadWriteOnce storageClassName: tkg-clusters resources: requests: storage: 2Gi --- apiVersion: v1 kind: PersistentVolumeClaim metadata: name: ai-pvc-app spec: accessModes: - ReadWriteOnce storageClassName: tkg-clusters resources: requests: storage: 1Gi --- apiVersion: v1 kind: PersistentVolumeClaim metadata: name: ai-pvc-out spec: accessModes: - ReadWriteOnce storageClassName: tkg-clusters resources: requests: storage: 20Gi 6. Create four sets of PVCs (one set for each Pod) in the cluster: Kubectl apply -f pvc.yaml Prepare images for machine learning faster with servers powered by AMD EPYC™ 75F3 processors March 2022 | 13
  • 20. Commissioned by AMD 7. Create a yaml file for the AI Pod in the AMD cluster with the following content: cat amd-pod.yaml apiVersion: v1 kind: Pod metadata: name: ai-pod spec: containers: - name: ai image: ptuser/preparation:latest ports: - containerPort: 80 resources: requests: memory: “256Gi” cpu: “55” limits: memory: “256Gi” cpu: “55” volumeMounts: - mountPath: “/app” name: ai-app - mountPath: “/data” name: ai-data - mountPath: “/out” name: ai-out volumes: - name: ai-app persistentVolumeClaim: claimName: ai-pvc-app - name: ai-data persistentVolumeClaim: claimName: ai-pvc-data - name: ai-out persistentVolumeClaim: claimName: ai-pvc-out 8. Create four Pods, and mount the PVCs in the cluster: Kubectl apply -f amd-pod.yaml Prepare images for machine learning faster with servers powered by AMD EPYC™ 75F3 processors March 2022 | 14
  • 21. Commissioned by AMD 9. Create a yaml file for the AI pod in the Intel cluster with the following content: cat intel-pod.yaml apiVersion: v1 kind: Pod metadata: name: ai-pod spec: containers: - name: ai image: ptuser/preparation:latest ports: - containerPort: 80 resources: requests: memory: "256Gi" cpu: "69" limits: memory: "256Gi" cpu: "69" volumeMounts: - mountPath: "/app" name: ai-app - mountPath: "/data" name: ai-data - mountPath: "/out" name: ai-out volumes: - name: ai-app persistentVolumeClaim: claimName: ai-pvc-app - name: ai-data persistentVolumeClaim: claimName: ai-pvc-data - name: ai-out persistentVolumeClaim: claimName: ai-pvc-out 10. Create four Pods, and mount the PVCs in the cluster: Kubectl apply -f intel-pod.yaml 11. To run the benchmark, navigate to the test code GitHub repository and follow the instructions in the testing/README.md file. For this study, we used the application in single-node mode. See Workload description section for more information. We ran the workload on each server three times. We reported the median performance score in our final report. Prepare images for machine learning faster with servers powered by AMD EPYC™ 75F3 processors March 2022 | 15
  • 22. Principled Technologies is a registered trademark of Principled Technologies, Inc. All other product names are the trademarks of their respective owners. DISCLAIMER OF WARRANTIES; LIMITATION OF LIABILITY: Principled Technologies, Inc. has made reasonable efforts to ensure the accuracy and validity of its testing, however, Principled Technologies, Inc. specifically disclaims any warranty, expressed or implied, relating to the test results and analysis, their accuracy, completeness or quality, including any implied warranty of fitness for any particular purpose. All persons or entities relying on the results of any testing do so at their own risk, and agree that Principled Technologies, Inc., its employees and its subcontractors shall have no liability whatsoever from any claim of loss or damage on account of any alleged error or defect in any testing procedure or result. In no event shall Principled Technologies, Inc. be liable for indirect, special, incidental, or consequential damages in connection with its testing, even if advised of the possibility of such damages. In no event shall Principled Technologies, Inc.’s liability, including for direct damages, exceed the amounts paid in connection with Principled Technologies, Inc.’s testing. Customer’s sole and exclusive remedies are as set forth herein. This project was commissioned by AMD. Principled Technologies® Facts matter.® Principled Technologies® Facts matter.® Commissioned by AMD Read the report at https://facts.pt/JQ4z3lH Prepare images for machine learning faster with servers powered by AMD EPYC™ 75F3 processors March 2022 | 16