SlideShare a Scribd company logo
1 of 12
Download to read offline
Important Export Restrictions! Commodities, products, tech-
nologies and services of this manual are controlled by the U.S.
Department of State Office of Defense Trade Controls, in accor-
dance with International Traffic in Arms (ITAR), Title 22, Code of
Federal Regulations Part 120-130 and/or by the Export Adminis-
tration Regulations (EAR) of U.S. Department of Commerce. At any
time when a license or a written approval of the U.S. Government
is applicable to it, it is illegal and strictly forbidden to export, in-
tend to export, transfer in any other manner whatsoever, sell any
hardware or technical data, provide any associated service to any
non-U.S. resident, beyond or within the United States territory,
until the valid license or written approval has been issued by the
Departments of the U.S. Government having jurisdiction. Addi-
tionally U.S. law prohibits the sale, transfer, or export of items to
certain restricted parties, destinations, and embargoed countries,
as identified on lists maintained by the U.S. Department of State,
the U.S. Department of Commerce, and the U.S. Department of
Treasury. It is the responsibility of the Customer to be aware of
these lists. The sale, transfer, transportation, or shipment out-
side of the U.S. of any product prohibited or restricted for export
without complying with U.S. export control laws and regulations,
including proper export licensing, documentation or authoriza-
tion, is unlawful and may result in civil and/or criminal penalties
and/or constitute a federal crime. Diversion contrary to U.S. law
is strictly prohibited.
NinoxNight Vision Goggles
USER’S MANUAL
2
PARTS OF THE GOGGLES
WARNING:
This product contains natural rubber latex, which may cause allergic reactions! The FDA
has reported an increase in the number of deaths that are associated with an apparent sensitiv-
ity to natural latex proteins. If you are allergic to latex, it is a good idea to learn which products
contain it and strictly avoid exposure to those products.
We provide the information in this manual for familiarization purposes only. The contents may undergo further
changes with no commitment by Armasight to keep customers notified about any updates.
Armasight© assumes no responsibility for any misprints or other errors that this manual may contain.
diopter Adjustment
on/off Button
IR Button
Battery compartment
IR illuminator
with pivotal focusing lens
Mounting rail
Objective
Lens cap
Optional XLR-IR850 Detachable
Long Range Infrared Illuminator
w/Dovetail to Weaver Transfer Piece #21
(Part# ANKIXLR017)
flip-up head mount
(included)
objective
Lens focus
LED indicator
3
1.	 Description and Data
Description
If low-cost, high quality head-mounted night vision is what you need, the Armasight Ninox is the best
choice for you! The Generation 1 Ninox comes complete with a flip-up head mount and is the perfect
inexpensive, hands-free option for air soft games, paintball, hunting or security at night, where the Ar-
masight Ninox will give you the edge. A built-in, short-range IR illuminator with pivotal flood lens allows
the Ninox to work exceptionally well even in complete darkness, and an optional Armasight long-range
infrared illuminator will dramatically boost your viewing range when required. The Armasight Ninox
features all-glass optics, a simple, push-button control, and durable, reinforced composite housing.
features
Compact and Lightweight
––Designed for Hand-Free operations
––High resolution Gen. 1+ Image Intensifier Tube
––Built-in IR illuminator with pivotal lens to select between IR spot and flood beam
––Fully adjustable headgear for ultimate comfort
––Flip-Up headgear
––Dual-eye viewing system for comfortable nighttime operation, even during long sessions
––Can be used in conjunction with long-range IR Illuminator
––Water and fog resistant
––Limited Two-Year Warranty
––SPECIFICAtions
Generation 1+
Magnification 1x
Lens System 35 mm; F/1.7
Field of View 35°
Focus Range 0.2 m to infinity
Exit Pupil Diameter 8 mm
Eye Relief 20 mm
Power Supply One CR123 Lithium (3V) *
Battery Life (IR off) up to 30 hours
Body Material Glass-fiber reinforced composite
Lens Material/ Type Multicoated heavy glass
Operating Temperature -30 °C to +45 °C
Dimensions (LxWxH) 158 x 140 x 63 mm / 6.2 x 5.5 x 2.5 in
Weight 0.65 kg / 1.4 lbs
4
STANDARD COMPONENTS and optional equipment
1) Armasight Ninox
Night vision goggles with 1x magnification.
2) Objective Lens Caps
The Objective Lens Caps are designed to protect the objective lens from physical damage, as well as
allow the testing of the device’s operation in daylight.
3) Eye Cups
The rubber eye cups are designed to protect the eyepieces and to provide comfort of use for the user.
4) CR123A Lithium Battery
3V CR123A lithium batteries are used to supply power to the unit.
5) Head Mount
Adjustable universal assembly that secures the goggles to the user’s head, providing hands-free opera-
tion.
6) User Manual
The user manual contains a full description of the device and accessories, information about controls,
installation, maintenance and troubleshooting procedures.
7) Carrying Case
The carrying case is used to store and carry the Ninox goggles and accessories.
8) Optional XLR-IR850 Detachable Long Range IR illuminator (Part# ANKIXLR017)
Extra long-range infrared illuminator with a wide, adjustable beam angle. Provides greater viewing ca-
pabilities when the environment has little or no ambient light. Comes fully assembled with a dedicated
mount in order to be installed on a Picatinny/Weaver rail. Completed with Dovetail to Weaver Transfer
Piece #21 that allows the IR illuminator to be mounted on the Ninox. 18650 rechargeable battery and
Charger are included.
2.	 PREPARATIONS FOR OPERATION
WARNING:
The Ninox night vision goggles are designed for several years of reliable service. To ensure
trouble-free performance, please observe the following instructions:
•	 Do not activate the device in daylight unless the protective lens covers is fitted securely over
the lenses. If the device is ON, do not direct the device at bright light sources, such as car head-
lights, camp fires, street lights, etc., as this will cause damage to the device.
•	 Do not check the device operation in daylight unless the front lens caps are fitted securely
over the lenses, and even then, the device should only be ON for the few seconds it takes to
establish correct operation.
•	 Do not open the body of the device or otherwise disassemble it.
•	 Avoid dropping or otherwise impacting the device.
•	 Do not expose the device  to moisture or extreme temperatures.
•	 Do not touch the lenses. Clean optical parts with a clean, soft cloth, and only use professional
lens cleaners designed for use with optics.
•	 Do not forget to remove the battery from the battery compartment if the device is to be
stored for more than 3 days.
•	 Do not forget to turn the device OFF during periods of non-operation.
5
WARNING:
Take into consideration the following information and restrictions in order to avoid damag-
ing the device and to ensure a long service life and failure-free operation:
•	 Performance of the device in nighttime conditions depends on the level of ambient light in
the environment. Some light (moonlight, starlight, etc.) is required for the device to provide an
image.
•	 Ambient light level is reduced by the presence of clouds, shade, or objects that block natural
light (buildings, trees, etc.).
•	 The device loses its effectiveness when operated in shadowed areas.
•	 The effectiveness of the device is adversely affected by weather conditions such as rain,
snow, sleet, or fog, and environmental conditions such as smoke or dust.
•	 The device resolution level is reduced in environments with very low light sources. The vis-
ibility will degrade significantly under starlit conditions, particularly in low contrast environ-
ments such as deserts, large areas of uniform vegetation, etc.
•	 The device is equipped with a protection system that will automatically disable the image
intensifier tube when the illuminance level stays above 40 lux for over 10 seconds.
BATTERY INSTALLATION
1) Unscrew the battery compartment cap on the back side of the goggles body.
2) Insert the CR123A battery into the battery compartment in accordance with polarity markings.
3) Screw the cap onto the place.
ATTACHING THE Ninox TO A HEAD MOUNT
To attach your Ninox to a head mount perform the following steps:
1) Loosen the screw (A), press the button (B); put the binocu-
lar rail into the headset socket (C).
2) Put the head mount, with the Ninox attached, on your
head.
3) Loosen the screw (A) and perform an eye relief adjustment
by moving the binocular on the rail.
4) The head mount intended for use with the Ninox is fitted
with a flip-up mechanism. Press the button (D) from the head
mount side and lift the binocular to the top position.
5) To return the unit back to the operating position, press the
button (D) again and lower the binocular.
6) Press the button (E) and move the binocular on the rail (F)
to reach the most comfortable position for observation.
3.	 OPERATION INSTRUCTIONS
Controls
The Ninox is designed to meet the needs and requirements of various users. Each user can individually
set the unit to the most desirable and effective position with the help of the controls. The Ninox unit
controls and indicators are shown and detailed further, below:
ON/OFF Button. Press the button to turn the unit on. Press the button again to turn the unit off. The IR
will also turn off automatically.
C
A
B
D
E
F
6
IR Button. This button controls the power supply to the built-in infrared illuminator. Use this button to
turn the IR illuminator on and off. The IR will also turn off automatically when unit off.
Lens Focus. Focuses the objective lens. Adjust the lens for sharpest image of viewed object.
Diopter Adjustment. Focuses the eyepieces. Focus the eyepieces to get a clear image on the IIT
screen.
Pivotal Focusing Lens. Allows the user to choose between the following:
1. The IR illuminator spot beam. When the pivotal focusing lens is placed in the leftmost position of the
window of the IR illuminator.
2. The IR illuminator flood beam. When the focusing lens is placed in the center position.
Power/IR ON Indicator. The LED indicator located near the ocular will light up green when unit is on,
and will change to red when built-in IR illuminator is activated.
Low Battery Indicator. The flashing red LED indicates that the battery is low.
FOCUSING
1) Adjust the diopters. For the best possible image resolution, you must first adjust the eyepieces (di-
opters). Turn the diopter adjustment rings clockwise until it stops. While looking through the eyepiec-
es, observe the scene and slowly begin turning the diopter adjustment rings counterclockwise until
the image becomes clear and sharp.
2) Adjust the focus of the lenses. To focus your Ninox at different distances, simply rotate the objective
lens focus rings.
Testing PROCEDURES
CAUTION:
Do not test the device in daylight conditions for more than 10 minutes, even with lens protec-
tive cap on.
To check device operation in daylight or in an illuminated room observe the following procedures:
1)	 Verify that the battery is inserted into the battery compartment in accordance with polarity mark-
ings on the goggles’ body.
2) Verify that the objective lenses are closed securely.
3) Activate the unit by pushing the operation button, but without removing the protective caps. While
looking through the eyepieces of your Ninox, observe the scene. Verify whether or not the green light
is indicating that correct IIT operation is occurring.
OPERATION IN NIGHTTIME CONDITIONS
CAUTION:
Avoid exposing the goggles to bright light sources. Bright light emitted by fires, automobile
headlights, lanterns, projectors, etc. will cause serious damage your Ninox.
1)	 Visually estimate the illuminance level in the viewing area. Operation with the objective lens caps
off is safe when the illuminance level is less than 1 lux; at an illuminance level of 1 lux, you will
barely be able to read a newspaper, even after your eyes have adapted to the low light conditions.
2) Verify that the battery is inserted into the battery compartment in accordance with the polarity
markings on the goggles’ body.
3) Remove the front lens caps.
4) Activate the unit by pushing the operation button. A green light indicating correct IIT operation will
appear after a momentary delay.
5) Observe the scene and focus your Ninox.
7
6) Turn the unit off after completing your operations. The green glow will disappear from the eye-
pieces.
7) Securely place the objective lens caps over the objective lenses.
IR ILLUMINATOR OPERATION
CAUTION:
Do not forget that light emitted from the IR illuminator is invisible to the naked eye; however, it
can be easily detected when using night vision devices (NVD).
Infrared illuminators are used in areas where the level of light is not sufficient for surveillance. An IR
illuminator can provide an extra source of infrared light, which, although invisible to a naked eye, can
greatly enhance the performance of night vision devices. Turn on the IR illuminator when working in
total darkness. Please remember that the beam emitted by your IR illuminator will lose its brightness
over distance. The built-in IR illuminator is designed to provide additional source of light for reading
maps or other basic, short-range applications; the viewing distance is up to 3m.
You can activate the IR illuminator of your goggles by pushing the IR button after you’ve turned the
unit on. A green LED light will appear when the IR illumination is turned on.
NOTE:
The IR will automatically turn off when the unit’s main power is turned OFF.
Focus the IR light, if necessary, by placing the pivotal focusing lens onto the IR illuminator output win-
dow.
optional XLR-IR850 ILLUMINATOR
XLR-IR850 long-range infrared illuminator provides greater viewing capabilities when the environment
has little or no ambient light.
To mount an XLR-IR850 to the Ninox, use the Dovetail to Weaver Transfer Piece. Perform the following
steps:
1) Install the transfer piece onto Ninox mounting rail.
2) Tighten the two fixing screws on the transfer piece.
3) Loosen the IR illuminator fixing screw.
4) Mount the IR illuminator on the Weaver rail of transfer piece and tighten the fixing screw.
The Armasight XLR-IR850 runs on a single 18650 rechargeable battery. Fully charge the 18650 battery
before installing in XLR-IR850 illuminator. Insert battery into charger, aligning the polarity symbols on
the battery with the polarity symbols on the charger. Never install battery backwards.
Connect power cord to an appropriate power source. Indicator light will flash red when a battery is
charging, and will change to green when battery has been fully charged. Remove the battery promptly
after charging has been completed.
Install 18650 battery into the battery compartment of
goggles. To install the battery, unscrew the battery com-
partment cap and insert the battery in accordance with
the polarity markings on the unit’s body. Screw the battery
compartment cap back into position.
To turn the IR illuminator on, rotate the operation switch
from the OFF position.
To change the radiated power level, turn the operation
switch to one of the spots between the two OFF positions. focus adjustment
fixing screw
battery cap
operation switchscrew of clamp
beam direction
adjustment
Transfer
Piece
8
Focus the IR beam to change the field of coverage. To adjust IR beam divergence, turn the lens of IR
illuminator.
Adjust the IR spot position in the field of view of the Ninox as follows:
1)	 Loosen the screw of the clamp on the IR illuminator mount.
2)	 Turn on the night vision device and the IR illuminator.
3)	 Carefully move the IR illuminator up and down and side to side. While looking through the eye-
pieces of your NVD, observe the IR spot position.
4)	 Tighten the fixing screw of the clamp once the IR spot is centered in the field of view.
4.	 MAINTENANCE PROCEDURES
The Ninox should always be stored in the supplied packaging, particularly in heated and ventilated
rooms. To keep the device operational, please follow the instructions listed previously regarding prep-
arations for storage. The battery should be stored separately from the device and be inserted into the
battery compartment only when the device is being prepared for use. The presence of both acids and
alkalis near the goggles is not recommended.
When stored, your Ninox should be protected from exposure to direct sunlight or extreme tempera-
tures.
Goggles CLEANING PROCEDURES
1)	 Gently remove any dirt from the goggles using a clean, soft cloth.
2)	 Wipe external surfaces down (with the exception of optical surfaces) with a clean cloth moistened
with pure water.
3)	 Dry all wet surfaces with a different clean, dry cloth.
4)	 Carefully remove any dirt from the optical surfaces using a lens brush.
5)	 To avoid scratches, optical surfaces must be cleaned using a clean cotton swab that has been slight-
ly dampened with pure alcohol. The glass should be wiped in circular motions starting from the center
and moving out towards the edge, without touching the barrel. Change the cotton swab as soon as it
becomes dirty.
PREPARATION FOR STORAGE
When preparing your Ninox for storage, perform the following steps:
1)	 Verify that the goggles are operating in accordance with all previously specified procedures.
2)	 Remove the battery from the battery compartment.
3)	 Clean the goggles and all accessories.
4)	 Place all components into the storage case.
5.	 Troubleshooting
Common problems that may occur with your goggles or the detection and viewing tests, as well as ac-
tions you can take to correct them, are listed in the Troubleshooting Table, below. This table does not
list all of the malfunctions that may occur with your device. If you experience a malfunction of the
device that is not listed in this table, please contact Armasight or your Ninox retailer.
NOTE:
Before you use this table, be sure you have performed all normal operational safety, care and
handling checks and procedures. If your device malfunctions in a way not listed in this table,
contact Armasight or your Ninox retailer.
9
Troubleshooting Guide
Problem Possible Cause Action
The goggles do not
turn on
Press Power button. Press the Power button repeatedly.
Inspect for a missing, defective or im-
properly installed battery.
Replace the battery or install it prop-
erly
If these actions fail, submit the device for unit level maintenance.
Poor image quality
Check if the goggles are focused. Focus the oculars and objectives.
Check if the lenses are greasy, fogged
or dirty.
Thoroughly clean the surfaces of each
lens.
If the problem persists, contact your service center.
Light visible through
the eyecups
Check the exit pupil distance value. Press the eyecups to your face.
Check the eyepieces resilience.
If the eyecups is defective, contact
your service center.
Diopter adjustment
cannot be performed
Check to see if the diopter adjustment
rings are deformed or broken.
If the diopter adjustment rings are
damaged, contact your service center.
Lens focus cannot be
performed
Check to see if the lens focus adjustment
ring is deformed or broken.
If the lens focus adjustment ring is
damaged, contact your service center.
IR illuminator does not
switch on
Turn the IR illuminator on in dark area.
Visually estimate if the observed scene
is properly lighted.
If the IR illuminator does not turn on,
contact your service center.
10
ARMASIGHT PRODUCT WARRANTY REGISTRATION CARD
PRODUCT INFORMATION
CUSTOMER INFORMATION
Product Name
Purchase Date
Name
Purchased From
Product Serial #
Address
City
Day Phone #
E-mail address
Country Zip
Home Phone #
Customer Signature Required
11
6. warranty INFORMATION
This product is guaranteed to be free from manufacturing defects in material and workmanship under normal use for
a period of two (2) years from the date of purchase. In the event that a defect covered by the below warranty occurs
during the applicable period stated above, Armasight, at its discretion, will either repair or replace the product; such
action on the part of Armasight shall be the full extent of Armasight’s liability, and the Customer’s sole and exclusive
reparation. This warranty does not cover a product if it has (a) been used in ways other than its normal and customary
manner; (b) subjected to misuse; (c) subjected to alterations, modifications or repairs by the Customer or by any party
other than Armasight without prior written consent of Armasight; (d) special order or “close-out” merchandise or
merchandise sold “as-is” by either Armasight or the Armasight dealer; or (e) merchandise that has been discontinued
by the manufacturer and either parts or replacement units are not available due to reasons beyond the control of
Armasight. Armasight shall not be responsible for any defects or damage that in Armasight’s view are a result from the
mishandling, abuse, misuse, improper storage or improper operation of the device, including use in conjunction with
equipment that iselectricallyor mechanicallyincompatiblewith,or ofinferiorqualityto,theproduct,aswellasfailure
to maintain the environmental conditions specified by the manufacturer. CUSTOMER IS HEREBY NOTIFIED THAT OP-
ERATION OF THE EQUIPMENT DURING DAYLIGHT HOURS OR UNDER ANY EXCESSIVE LIGHT CONDITIONS MAY PERMA-
NENTLY DAMAGE THE INTERNAL COMPONENTS OF THE UNIT AND SAID DAMAGE WILL NOT BE COVERED UNDER THIS
WARRANTY. This warranty is extended only to the original purchaser. Any breach of this warranty shall be enforced
unless the customer notifies Armasight at the address noted below within the applicable warranty period.
The customer understands and agrees that except for the foregoing warranty, no other warranties written or oral,
statutory, expressed or implied, including any implied warranty of merchantability or fitness for a particular purpose,
shall apply to the product. All such implied warranties are hereby and expressly disclaimed.
Limitation of liability
Armasight will not be liable for any claims, actions, suits, proceedings, costs, expenses, damages or liabilities arising
outoftheuseofthisproduct.OperationanduseoftheproductarethesoleresponsibilityoftheCustomer.Armasight’s
sole undertaking is limited to providing the products and services outlined herein in accordance with the terms and
conditions of this Agreement. The provision of products sold and services performed by Armasight to the Customer
shall not be interpreted, construed, or regarded, either expressly or implied, as being for the benefit of or creating any
obligation toward any third party of legal entity outside Armasight and the Customer; Armasight’s obligations under
this Agreement extend solely to the Customer. Armasight’s liability hereunder for damages, regardless of the form or
action, shall not exceed the fees or other charges paid to Armasight by the customer or customer’s dealer. Armasight
shall not, in any event, be liable for special, indirect, incidental, or consequential damages, including, but not limited
to, lost income, lost revenue, or lost profit, whether such damages were foreseeable or not at the time of purchase,
and whether or not such damages arise out of a breach of warranty, a breach of agreement, negligence, strict liability
or any other theory of liability.
Product warranty registration
In order to validate the warranty on your product, Armasight must receive a completed Product Warranty Registra-
tion Card for each unit, or the Customer can complete a warranty registration on our website, at www.armasight.com.
Please complete the included form and immediately mail it to our Service Center:
Armasight Inc.
815 Dubuque Avenue
South San Francisco
CA 94080
United States of America.
Obtaining warranty service
To obtain warranty service on your unit, the End-user (Customer) must notify the Armasight service department via
email. Send any requests to service@armasight.com to receive a Return Merchandise Authorization number (RMA).
When returning any device, please take in the product to your retailer, or send the product, postage paid and with a
copyofyoursalesreceipt,toArmasightCorporation’sservicecenterattheaddresslistedabove.Allmerchandisemust
be fully insured with the correct postage; Armasight will not be responsible for improper postage or merchandise
that becomes lost or damaged during shipment. When sending product back, please clearly write the RMA# on the
outside of the shipping box. Please include a letter that indicates your RMA#, the Customer’s Name, a Return Address,
reason for the return, Contact information (valid telephone numbers and/or an e-mail address), and proof of purchase
that will help us to establish the valid start date of the warranty. Product merchandise returns that do not have an
RMA# listed may be refused, or a significant delay in processing may occur. Estimated Warranty service time is 10-20
business days. The End-user/ Customer is responsible for postage to Armasight for warranty service. Armasight will
cover return postage/ shipping after warranty repair to the End-user/ Customer only if the product is covered by the
aforementioned warranty. Armasight will return the product after warranty service by domestic UPS Ground service
and/ or domestic mail. Should any other requested, required or international shipping methods be necessary, the
postage/ shipping fee will be the responsibility of the End-user/ Customer.
v3-20150323
www.armasight.com
Armasight Inc.
815 Dubuque Avenue
South San Francisco
CA 94080, USA
Phone: (888)959-2259
Fax: (888)959-2260
Intl Phone/Fax: (650)492-7755
info@armasight.com
WARNING:
This product contains natural rubber latex
which may cause allergic reactions! FDA
has noted an increase in the number of deaths
reported to the agency that are associated with
an apparent sensitivity to natural latex proteins.
If you are allergic to latex, it is a good idea to
learn which products contain it and strictly avoid
exposure.

More Related Content

What's hot

Technical data ATN PS15-3 Goggles | Optics Trade
Technical data ATN PS15-3 Goggles | Optics TradeTechnical data ATN PS15-3 Goggles | Optics Trade
Technical data ATN PS15-3 Goggles | Optics TradeOptics-Trade
 
Instruction Manual ATN NVB5X Series NV Bi-ocular | Optics Trade
Instruction Manual ATN NVB5X Series NV Bi-ocular | Optics TradeInstruction Manual ATN NVB5X Series NV Bi-ocular | Optics Trade
Instruction Manual ATN NVB5X Series NV Bi-ocular | Optics TradeOptics-Trade
 
Technical data ATN PS15-3P Goggles | Optics Trade
Technical data ATN PS15-3P Goggles | Optics TradeTechnical data ATN PS15-3P Goggles | Optics Trade
Technical data ATN PS15-3P Goggles | Optics TradeOptics-Trade
 
Technical data ATN NVG7-3P Goggles | Optics Trade
Technical data ATN NVG7-3P Goggles | Optics TradeTechnical data ATN NVG7-3P Goggles | Optics Trade
Technical data ATN NVG7-3P Goggles | Optics TradeOptics-Trade
 
Technical data ATN PS15-3A Goggles | Optics Trade
Technical data ATN PS15-3A Goggles | Optics TradeTechnical data ATN PS15-3A Goggles | Optics Trade
Technical data ATN PS15-3A Goggles | Optics TradeOptics-Trade
 
Technical data ATN PS15 Goggles | Optics Trade
Technical data ATN PS15 Goggles | Optics TradeTechnical data ATN PS15 Goggles | Optics Trade
Technical data ATN PS15 Goggles | Optics TradeOptics-Trade
 
Technical data ATN PS28-4 | Optics Trade
Technical data ATN PS28-4 | Optics TradeTechnical data ATN PS28-4 | Optics Trade
Technical data ATN PS28-4 | Optics TradeOptics-Trade
 
Instruction Manual ATN Night Scout VX NV Binoculars | Optics Trade
Instruction Manual ATN Night Scout VX NV Binoculars | Optics TradeInstruction Manual ATN Night Scout VX NV Binoculars | Optics Trade
Instruction Manual ATN Night Scout VX NV Binoculars | Optics TradeOptics-Trade
 
Technical data ATN PS28-3A | Optics Trade
Technical data ATN PS28-3A | Optics TradeTechnical data ATN PS28-3A | Optics Trade
Technical data ATN PS28-3A | Optics TradeOptics-Trade
 
Technical data ATN NVM14-HPT Monocular | Optics Trade
Technical data ATN NVM14-HPT Monocular | Optics TradeTechnical data ATN NVM14-HPT Monocular | Optics Trade
Technical data ATN NVM14-HPT Monocular | Optics TradeOptics-Trade
 
Instruction Manual ATN NVM14 Series Monocular | Optics Trade
Instruction Manual ATN NVM14 Series Monocular | Optics TradeInstruction Manual ATN NVM14 Series Monocular | Optics Trade
Instruction Manual ATN NVM14 Series Monocular | Optics TradeOptics-Trade
 
Technical data ATN Night Scout VX Binoculars | Optics Trade
Technical data ATN Night Scout VX Binoculars | Optics TradeTechnical data ATN Night Scout VX Binoculars | Optics Trade
Technical data ATN Night Scout VX Binoculars | Optics TradeOptics-Trade
 
Technical data ATN DNVM-4 Digital NV Monocular 4x | Optics Trade
Technical data ATN DNVM-4 Digital NV Monocular 4x | Optics TradeTechnical data ATN DNVM-4 Digital NV Monocular 4x | Optics Trade
Technical data ATN DNVM-4 Digital NV Monocular 4x | Optics TradeOptics-Trade
 
Technical data ATN PS28-WPT | Optics Trade
Technical data ATN PS28-WPT | Optics TradeTechnical data ATN PS28-WPT | Optics Trade
Technical data ATN PS28-WPT | Optics TradeOptics-Trade
 
Technical data ATN NVG7-CGT Goggles | Optics Trade
Technical data ATN NVG7-CGT Goggles | Optics TradeTechnical data ATN NVG7-CGT Goggles | Optics Trade
Technical data ATN NVG7-CGT Goggles | Optics TradeOptics-Trade
 
Instruction Manual ARMASIGHT DISCOVERY Series NV Binoculars | Optics Trade
Instruction Manual ARMASIGHT DISCOVERY Series NV Binoculars | Optics TradeInstruction Manual ARMASIGHT DISCOVERY Series NV Binoculars | Optics Trade
Instruction Manual ARMASIGHT DISCOVERY Series NV Binoculars | Optics TradeOptics-Trade
 
Instruction Manual ARMASIGHT SPARK NV Monocular | Optics Trade
Instruction Manual ARMASIGHT SPARK NV Monocular | Optics TradeInstruction Manual ARMASIGHT SPARK NV Monocular | Optics Trade
Instruction Manual ARMASIGHT SPARK NV Monocular | Optics TradeOptics-Trade
 
Technical data ATN NVG7-WPT Goggles | Optics Trade
Technical data ATN NVG7-WPT Goggles | Optics TradeTechnical data ATN NVG7-WPT Goggles | Optics Trade
Technical data ATN NVG7-WPT Goggles | Optics TradeOptics-Trade
 
Technical data ATN PS15-4 Goggles | Optics Trade
Technical data ATN PS15-4 Goggles | Optics TradeTechnical data ATN PS15-4 Goggles | Optics Trade
Technical data ATN PS15-4 Goggles | Optics TradeOptics-Trade
 
Technical data ATN NVM14-WPT Monoculars | Optics Trade
Technical data ATN NVM14-WPT Monoculars | Optics TradeTechnical data ATN NVM14-WPT Monoculars | Optics Trade
Technical data ATN NVM14-WPT Monoculars | Optics TradeOptics-Trade
 

What's hot (20)

Technical data ATN PS15-3 Goggles | Optics Trade
Technical data ATN PS15-3 Goggles | Optics TradeTechnical data ATN PS15-3 Goggles | Optics Trade
Technical data ATN PS15-3 Goggles | Optics Trade
 
Instruction Manual ATN NVB5X Series NV Bi-ocular | Optics Trade
Instruction Manual ATN NVB5X Series NV Bi-ocular | Optics TradeInstruction Manual ATN NVB5X Series NV Bi-ocular | Optics Trade
Instruction Manual ATN NVB5X Series NV Bi-ocular | Optics Trade
 
Technical data ATN PS15-3P Goggles | Optics Trade
Technical data ATN PS15-3P Goggles | Optics TradeTechnical data ATN PS15-3P Goggles | Optics Trade
Technical data ATN PS15-3P Goggles | Optics Trade
 
Technical data ATN NVG7-3P Goggles | Optics Trade
Technical data ATN NVG7-3P Goggles | Optics TradeTechnical data ATN NVG7-3P Goggles | Optics Trade
Technical data ATN NVG7-3P Goggles | Optics Trade
 
Technical data ATN PS15-3A Goggles | Optics Trade
Technical data ATN PS15-3A Goggles | Optics TradeTechnical data ATN PS15-3A Goggles | Optics Trade
Technical data ATN PS15-3A Goggles | Optics Trade
 
Technical data ATN PS15 Goggles | Optics Trade
Technical data ATN PS15 Goggles | Optics TradeTechnical data ATN PS15 Goggles | Optics Trade
Technical data ATN PS15 Goggles | Optics Trade
 
Technical data ATN PS28-4 | Optics Trade
Technical data ATN PS28-4 | Optics TradeTechnical data ATN PS28-4 | Optics Trade
Technical data ATN PS28-4 | Optics Trade
 
Instruction Manual ATN Night Scout VX NV Binoculars | Optics Trade
Instruction Manual ATN Night Scout VX NV Binoculars | Optics TradeInstruction Manual ATN Night Scout VX NV Binoculars | Optics Trade
Instruction Manual ATN Night Scout VX NV Binoculars | Optics Trade
 
Technical data ATN PS28-3A | Optics Trade
Technical data ATN PS28-3A | Optics TradeTechnical data ATN PS28-3A | Optics Trade
Technical data ATN PS28-3A | Optics Trade
 
Technical data ATN NVM14-HPT Monocular | Optics Trade
Technical data ATN NVM14-HPT Monocular | Optics TradeTechnical data ATN NVM14-HPT Monocular | Optics Trade
Technical data ATN NVM14-HPT Monocular | Optics Trade
 
Instruction Manual ATN NVM14 Series Monocular | Optics Trade
Instruction Manual ATN NVM14 Series Monocular | Optics TradeInstruction Manual ATN NVM14 Series Monocular | Optics Trade
Instruction Manual ATN NVM14 Series Monocular | Optics Trade
 
Technical data ATN Night Scout VX Binoculars | Optics Trade
Technical data ATN Night Scout VX Binoculars | Optics TradeTechnical data ATN Night Scout VX Binoculars | Optics Trade
Technical data ATN Night Scout VX Binoculars | Optics Trade
 
Technical data ATN DNVM-4 Digital NV Monocular 4x | Optics Trade
Technical data ATN DNVM-4 Digital NV Monocular 4x | Optics TradeTechnical data ATN DNVM-4 Digital NV Monocular 4x | Optics Trade
Technical data ATN DNVM-4 Digital NV Monocular 4x | Optics Trade
 
Technical data ATN PS28-WPT | Optics Trade
Technical data ATN PS28-WPT | Optics TradeTechnical data ATN PS28-WPT | Optics Trade
Technical data ATN PS28-WPT | Optics Trade
 
Technical data ATN NVG7-CGT Goggles | Optics Trade
Technical data ATN NVG7-CGT Goggles | Optics TradeTechnical data ATN NVG7-CGT Goggles | Optics Trade
Technical data ATN NVG7-CGT Goggles | Optics Trade
 
Instruction Manual ARMASIGHT DISCOVERY Series NV Binoculars | Optics Trade
Instruction Manual ARMASIGHT DISCOVERY Series NV Binoculars | Optics TradeInstruction Manual ARMASIGHT DISCOVERY Series NV Binoculars | Optics Trade
Instruction Manual ARMASIGHT DISCOVERY Series NV Binoculars | Optics Trade
 
Instruction Manual ARMASIGHT SPARK NV Monocular | Optics Trade
Instruction Manual ARMASIGHT SPARK NV Monocular | Optics TradeInstruction Manual ARMASIGHT SPARK NV Monocular | Optics Trade
Instruction Manual ARMASIGHT SPARK NV Monocular | Optics Trade
 
Technical data ATN NVG7-WPT Goggles | Optics Trade
Technical data ATN NVG7-WPT Goggles | Optics TradeTechnical data ATN NVG7-WPT Goggles | Optics Trade
Technical data ATN NVG7-WPT Goggles | Optics Trade
 
Technical data ATN PS15-4 Goggles | Optics Trade
Technical data ATN PS15-4 Goggles | Optics TradeTechnical data ATN PS15-4 Goggles | Optics Trade
Technical data ATN PS15-4 Goggles | Optics Trade
 
Technical data ATN NVM14-WPT Monoculars | Optics Trade
Technical data ATN NVM14-WPT Monoculars | Optics TradeTechnical data ATN NVM14-WPT Monoculars | Optics Trade
Technical data ATN NVM14-WPT Monoculars | Optics Trade
 

Similar to Instructions ARMASIGHT Ninox NV Goggles | Optics Trade

Instructions ARMASIGHT Vega NV Goggles | Optics Trade
Instructions ARMASIGHT Vega NV Goggles | Optics TradeInstructions ARMASIGHT Vega NV Goggles | Optics Trade
Instructions ARMASIGHT Vega NV Goggles | Optics TradeOptics-Trade
 
Instruction Manual ARMASIGHT AVENGER Series NV Monocular | Optics Trade
Instruction Manual ARMASIGHT AVENGER Series NV Monocular | Optics TradeInstruction Manual ARMASIGHT AVENGER Series NV Monocular | Optics Trade
Instruction Manual ARMASIGHT AVENGER Series NV Monocular | Optics TradeOptics-Trade
 
Instruction Manual ARMASIGHT DARK STRIDER NV Binoculars | Optics Trade
Instruction Manual ARMASIGHT DARK STRIDER NV Binoculars | Optics TradeInstruction Manual ARMASIGHT DARK STRIDER NV Binoculars | Optics Trade
Instruction Manual ARMASIGHT DARK STRIDER NV Binoculars | Optics TradeOptics-Trade
 
Instruction Manual ARMASIGHT PRIME Series NV Monocular | Optics Trade
Instruction Manual ARMASIGHT PRIME Series NV Monocular | Optics TradeInstruction Manual ARMASIGHT PRIME Series NV Monocular | Optics Trade
Instruction Manual ARMASIGHT PRIME Series NV Monocular | Optics TradeOptics-Trade
 
Instruction Manual ARMASIGHT PRIME D Series NV Monocular | Optics Trade
Instruction Manual ARMASIGHT PRIME D Series NV Monocular | Optics TradeInstruction Manual ARMASIGHT PRIME D Series NV Monocular | Optics Trade
Instruction Manual ARMASIGHT PRIME D Series NV Monocular | Optics TradeOptics-Trade
 
Instruction Manual ARMASIGHT VAMPIRE NV Weapon Sights | Optics Trade.pdf
Instruction Manual ARMASIGHT VAMPIRE NV Weapon Sights | Optics Trade.pdfInstruction Manual ARMASIGHT VAMPIRE NV Weapon Sights | Optics Trade.pdf
Instruction Manual ARMASIGHT VAMPIRE NV Weapon Sights | Optics Trade.pdfOptics-Trade
 
Instruction Manual ARMASIGHT WWZ NV Weapon Sights | Optics Trade
Instruction Manual ARMASIGHT WWZ NV Weapon Sights | Optics TradeInstruction Manual ARMASIGHT WWZ NV Weapon Sights | Optics Trade
Instruction Manual ARMASIGHT WWZ NV Weapon Sights | Optics TradeOptics-Trade
 
Instruction Manual ARMASIGHT ORION Series NV Weapon Sights | Optics Trade
Instruction Manual ARMASIGHT ORION Series NV Weapon Sights | Optics TradeInstruction Manual ARMASIGHT ORION Series NV Weapon Sights | Optics Trade
Instruction Manual ARMASIGHT ORION Series NV Weapon Sights | Optics TradeOptics-Trade
 
Instruction Manual ARMASIGHT PRIME DC Series NV Monocular | Optics Trade
Instruction Manual ARMASIGHT PRIME DC Series NV Monocular | Optics TradeInstruction Manual ARMASIGHT PRIME DC Series NV Monocular | Optics Trade
Instruction Manual ARMASIGHT PRIME DC Series NV Monocular | Optics TradeOptics-Trade
 
Instruction Manual ARMASIGHT SIRIUS MG NV Monocular | Optics Trade
Instruction Manual ARMASIGHT SIRIUS MG NV Monocular | Optics TradeInstruction Manual ARMASIGHT SIRIUS MG NV Monocular | Optics Trade
Instruction Manual ARMASIGHT SIRIUS MG NV Monocular | Optics TradeOptics-Trade
 
Instruction Manual ARMASIGHT EAGLE NV Binoculars | Optics Trade
Instruction Manual ARMASIGHT EAGLE NV Binoculars | Optics TradeInstruction Manual ARMASIGHT EAGLE NV Binoculars | Optics Trade
Instruction Manual ARMASIGHT EAGLE NV Binoculars | Optics TradeOptics-Trade
 
Instruction Manual ATN PVS14 Series NV Monocular | Optics Trade
Instruction Manual ATN PVS14 Series NV Monocular | Optics TradeInstruction Manual ATN PVS14 Series NV Monocular | Optics Trade
Instruction Manual ATN PVS14 Series NV Monocular | Optics TradeOptics-Trade
 
Instruction Manual ATN 6015 Series NV Monocular | Optics Trade
Instruction Manual ATN 6015 Series NV Monocular | Optics TradeInstruction Manual ATN 6015 Series NV Monocular | Optics Trade
Instruction Manual ATN 6015 Series NV Monocular | Optics TradeOptics-Trade
 
Instruction Manual ATN NVB3X Series NV Bi-ocular | Optics Trade
Instruction Manual ATN NVB3X Series NV Bi-ocular | Optics TradeInstruction Manual ATN NVB3X Series NV Bi-ocular | Optics Trade
Instruction Manual ATN NVB3X Series NV Bi-ocular | Optics TradeOptics-Trade
 
Instructions ARMASIGHT CO-MINI Clip-On | Optics Trade
Instructions ARMASIGHT CO-MINI Clip-On | Optics TradeInstructions ARMASIGHT CO-MINI Clip-On | Optics Trade
Instructions ARMASIGHT CO-MINI Clip-On | Optics TradeOptics-Trade
 
Instruction Manual ATN NVB8X Series NV Bi-ocular | Optics Trade
Instruction Manual ATN NVB8X Series NV Bi-ocular | Optics TradeInstruction Manual ATN NVB8X Series NV Bi-ocular | Optics Trade
Instruction Manual ATN NVB8X Series NV Bi-ocular | Optics TradeOptics-Trade
 
Instructions ARMASIGHT CO-X Clip-On | Optics Trade
Instructions ARMASIGHT CO-X Clip-On | Optics TradeInstructions ARMASIGHT CO-X Clip-On | Optics Trade
Instructions ARMASIGHT CO-X Clip-On | Optics TradeOptics-Trade
 
Instructions ARMASIGHT CO-MR Clip-On | Optics Trade
Instructions ARMASIGHT CO-MR Clip-On | Optics TradeInstructions ARMASIGHT CO-MR Clip-On | Optics Trade
Instructions ARMASIGHT CO-MR Clip-On | Optics TradeOptics-Trade
 
Instruction Manual ARMASIGHT 6015 NV Monocular | Optics Trade
Instruction Manual ARMASIGHT 6015 NV Monocular | Optics TradeInstruction Manual ARMASIGHT 6015 NV Monocular | Optics Trade
Instruction Manual ARMASIGHT 6015 NV Monocular | Optics TradeOptics-Trade
 
Instruction Manual ARMASIGHT PVS14 NV Monocular | Optics Trade
Instruction Manual ARMASIGHT PVS14 NV Monocular | Optics TradeInstruction Manual ARMASIGHT PVS14 NV Monocular | Optics Trade
Instruction Manual ARMASIGHT PVS14 NV Monocular | Optics TradeOptics-Trade
 

Similar to Instructions ARMASIGHT Ninox NV Goggles | Optics Trade (20)

Instructions ARMASIGHT Vega NV Goggles | Optics Trade
Instructions ARMASIGHT Vega NV Goggles | Optics TradeInstructions ARMASIGHT Vega NV Goggles | Optics Trade
Instructions ARMASIGHT Vega NV Goggles | Optics Trade
 
Instruction Manual ARMASIGHT AVENGER Series NV Monocular | Optics Trade
Instruction Manual ARMASIGHT AVENGER Series NV Monocular | Optics TradeInstruction Manual ARMASIGHT AVENGER Series NV Monocular | Optics Trade
Instruction Manual ARMASIGHT AVENGER Series NV Monocular | Optics Trade
 
Instruction Manual ARMASIGHT DARK STRIDER NV Binoculars | Optics Trade
Instruction Manual ARMASIGHT DARK STRIDER NV Binoculars | Optics TradeInstruction Manual ARMASIGHT DARK STRIDER NV Binoculars | Optics Trade
Instruction Manual ARMASIGHT DARK STRIDER NV Binoculars | Optics Trade
 
Instruction Manual ARMASIGHT PRIME Series NV Monocular | Optics Trade
Instruction Manual ARMASIGHT PRIME Series NV Monocular | Optics TradeInstruction Manual ARMASIGHT PRIME Series NV Monocular | Optics Trade
Instruction Manual ARMASIGHT PRIME Series NV Monocular | Optics Trade
 
Instruction Manual ARMASIGHT PRIME D Series NV Monocular | Optics Trade
Instruction Manual ARMASIGHT PRIME D Series NV Monocular | Optics TradeInstruction Manual ARMASIGHT PRIME D Series NV Monocular | Optics Trade
Instruction Manual ARMASIGHT PRIME D Series NV Monocular | Optics Trade
 
Instruction Manual ARMASIGHT VAMPIRE NV Weapon Sights | Optics Trade.pdf
Instruction Manual ARMASIGHT VAMPIRE NV Weapon Sights | Optics Trade.pdfInstruction Manual ARMASIGHT VAMPIRE NV Weapon Sights | Optics Trade.pdf
Instruction Manual ARMASIGHT VAMPIRE NV Weapon Sights | Optics Trade.pdf
 
Instruction Manual ARMASIGHT WWZ NV Weapon Sights | Optics Trade
Instruction Manual ARMASIGHT WWZ NV Weapon Sights | Optics TradeInstruction Manual ARMASIGHT WWZ NV Weapon Sights | Optics Trade
Instruction Manual ARMASIGHT WWZ NV Weapon Sights | Optics Trade
 
Instruction Manual ARMASIGHT ORION Series NV Weapon Sights | Optics Trade
Instruction Manual ARMASIGHT ORION Series NV Weapon Sights | Optics TradeInstruction Manual ARMASIGHT ORION Series NV Weapon Sights | Optics Trade
Instruction Manual ARMASIGHT ORION Series NV Weapon Sights | Optics Trade
 
Instruction Manual ARMASIGHT PRIME DC Series NV Monocular | Optics Trade
Instruction Manual ARMASIGHT PRIME DC Series NV Monocular | Optics TradeInstruction Manual ARMASIGHT PRIME DC Series NV Monocular | Optics Trade
Instruction Manual ARMASIGHT PRIME DC Series NV Monocular | Optics Trade
 
Instruction Manual ARMASIGHT SIRIUS MG NV Monocular | Optics Trade
Instruction Manual ARMASIGHT SIRIUS MG NV Monocular | Optics TradeInstruction Manual ARMASIGHT SIRIUS MG NV Monocular | Optics Trade
Instruction Manual ARMASIGHT SIRIUS MG NV Monocular | Optics Trade
 
Instruction Manual ARMASIGHT EAGLE NV Binoculars | Optics Trade
Instruction Manual ARMASIGHT EAGLE NV Binoculars | Optics TradeInstruction Manual ARMASIGHT EAGLE NV Binoculars | Optics Trade
Instruction Manual ARMASIGHT EAGLE NV Binoculars | Optics Trade
 
Instruction Manual ATN PVS14 Series NV Monocular | Optics Trade
Instruction Manual ATN PVS14 Series NV Monocular | Optics TradeInstruction Manual ATN PVS14 Series NV Monocular | Optics Trade
Instruction Manual ATN PVS14 Series NV Monocular | Optics Trade
 
Instruction Manual ATN 6015 Series NV Monocular | Optics Trade
Instruction Manual ATN 6015 Series NV Monocular | Optics TradeInstruction Manual ATN 6015 Series NV Monocular | Optics Trade
Instruction Manual ATN 6015 Series NV Monocular | Optics Trade
 
Instruction Manual ATN NVB3X Series NV Bi-ocular | Optics Trade
Instruction Manual ATN NVB3X Series NV Bi-ocular | Optics TradeInstruction Manual ATN NVB3X Series NV Bi-ocular | Optics Trade
Instruction Manual ATN NVB3X Series NV Bi-ocular | Optics Trade
 
Instructions ARMASIGHT CO-MINI Clip-On | Optics Trade
Instructions ARMASIGHT CO-MINI Clip-On | Optics TradeInstructions ARMASIGHT CO-MINI Clip-On | Optics Trade
Instructions ARMASIGHT CO-MINI Clip-On | Optics Trade
 
Instruction Manual ATN NVB8X Series NV Bi-ocular | Optics Trade
Instruction Manual ATN NVB8X Series NV Bi-ocular | Optics TradeInstruction Manual ATN NVB8X Series NV Bi-ocular | Optics Trade
Instruction Manual ATN NVB8X Series NV Bi-ocular | Optics Trade
 
Instructions ARMASIGHT CO-X Clip-On | Optics Trade
Instructions ARMASIGHT CO-X Clip-On | Optics TradeInstructions ARMASIGHT CO-X Clip-On | Optics Trade
Instructions ARMASIGHT CO-X Clip-On | Optics Trade
 
Instructions ARMASIGHT CO-MR Clip-On | Optics Trade
Instructions ARMASIGHT CO-MR Clip-On | Optics TradeInstructions ARMASIGHT CO-MR Clip-On | Optics Trade
Instructions ARMASIGHT CO-MR Clip-On | Optics Trade
 
Instruction Manual ARMASIGHT 6015 NV Monocular | Optics Trade
Instruction Manual ARMASIGHT 6015 NV Monocular | Optics TradeInstruction Manual ARMASIGHT 6015 NV Monocular | Optics Trade
Instruction Manual ARMASIGHT 6015 NV Monocular | Optics Trade
 
Instruction Manual ARMASIGHT PVS14 NV Monocular | Optics Trade
Instruction Manual ARMASIGHT PVS14 NV Monocular | Optics TradeInstruction Manual ARMASIGHT PVS14 NV Monocular | Optics Trade
Instruction Manual ARMASIGHT PVS14 NV Monocular | Optics Trade
 

More from Optics-Trade

Technical Data | Sig Sauer Easy6 BDX 1-6x24 | Optics Trade
Technical Data | Sig Sauer Easy6 BDX 1-6x24 | Optics TradeTechnical Data | Sig Sauer Easy6 BDX 1-6x24 | Optics Trade
Technical Data | Sig Sauer Easy6 BDX 1-6x24 | Optics TradeOptics-Trade
 
Technical Data | ThermTec Wild 650L | Optics Trade
Technical Data | ThermTec Wild 650L | Optics TradeTechnical Data | ThermTec Wild 650L | Optics Trade
Technical Data | ThermTec Wild 650L | Optics TradeOptics-Trade
 
Technical Data | ThermTec Wild 635L | Optics Trade
Technical Data | ThermTec Wild 635L | Optics TradeTechnical Data | ThermTec Wild 635L | Optics Trade
Technical Data | ThermTec Wild 635L | Optics TradeOptics-Trade
 
Technical Data | ThermTec Wild 650 | Optics Trade
Technical Data | ThermTec Wild 650 | Optics TradeTechnical Data | ThermTec Wild 650 | Optics Trade
Technical Data | ThermTec Wild 650 | Optics TradeOptics-Trade
 
Technical Data | ThermTec Wild 635 | Optics Trade
Technical Data | ThermTec Wild 635 | Optics TradeTechnical Data | ThermTec Wild 635 | Optics Trade
Technical Data | ThermTec Wild 635 | Optics TradeOptics-Trade
 
Technical Data | ThermTec Wild 335 | Optics Trade
Technical Data | ThermTec Wild 335 | Optics TradeTechnical Data | ThermTec Wild 335 | Optics Trade
Technical Data | ThermTec Wild 335 | Optics TradeOptics-Trade
 
Technical Data | ThermTec Wild 325 | Optics Trade
Technical Data | ThermTec Wild 325 | Optics TradeTechnical Data | ThermTec Wild 325 | Optics Trade
Technical Data | ThermTec Wild 325 | Optics TradeOptics-Trade
 
Instruction Manual | ThermTec Wild Thermal Monoculars | Optics Trade
Instruction Manual | ThermTec Wild Thermal Monoculars | Optics TradeInstruction Manual | ThermTec Wild Thermal Monoculars | Optics Trade
Instruction Manual | ThermTec Wild Thermal Monoculars | Optics TradeOptics-Trade
 
Technical Data | ThermTec Hunt 335 | Optics Trade
Technical Data | ThermTec Hunt 335 | Optics TradeTechnical Data | ThermTec Hunt 335 | Optics Trade
Technical Data | ThermTec Hunt 335 | Optics TradeOptics-Trade
 
Instruction Manual | ThermTec Hunt Thermal Clip-On Series | Optics Trade
Instruction Manual | ThermTec Hunt Thermal Clip-On Series | Optics TradeInstruction Manual | ThermTec Hunt Thermal Clip-On Series | Optics Trade
Instruction Manual | ThermTec Hunt Thermal Clip-On Series | Optics TradeOptics-Trade
 
Instruction Manual | Steiner eRanger LRF 10x42 | Optics Trade
Instruction Manual | Steiner eRanger LRF 10x42 | Optics TradeInstruction Manual | Steiner eRanger LRF 10x42 | Optics Trade
Instruction Manual | Steiner eRanger LRF 10x42 | Optics TradeOptics-Trade
 
Flyer | Guide DN Series Handheld Digital Binoculars | Optics Trade
Flyer | Guide DN Series Handheld Digital Binoculars | Optics TradeFlyer | Guide DN Series Handheld Digital Binoculars | Optics Trade
Flyer | Guide DN Series Handheld Digital Binoculars | Optics TradeOptics-Trade
 
Quick Start Guide | Guide TB Series | Optics Trade
Quick Start Guide | Guide TB Series | Optics TradeQuick Start Guide | Guide TB Series | Optics Trade
Quick Start Guide | Guide TB Series | Optics TradeOptics-Trade
 
Instruction Manual | Pard FD1 Digital NV Front Attachment | Optics Trade
Instruction Manual | Pard FD1 Digital NV Front Attachment | Optics TradeInstruction Manual | Pard FD1 Digital NV Front Attachment | Optics Trade
Instruction Manual | Pard FD1 Digital NV Front Attachment | Optics TradeOptics-Trade
 
Instruction Manual | EOTech Vudu X 2-12x40 | Optics Trade
Instruction Manual | EOTech Vudu X 2-12x40 | Optics TradeInstruction Manual | EOTech Vudu X 2-12x40 | Optics Trade
Instruction Manual | EOTech Vudu X 2-12x40 | Optics TradeOptics-Trade
 
Instruction Manual | EOTech Vudu X 1-6x24 | Optics Trade
Instruction Manual | EOTech Vudu X 1-6x24 | Optics TradeInstruction Manual | EOTech Vudu X 1-6x24 | Optics Trade
Instruction Manual | EOTech Vudu X 1-6x24 | Optics TradeOptics-Trade
 
Instruction Manual | Nightforce CFS 6-36x50 F1 | Optics Trade
Instruction Manual | Nightforce CFS 6-36x50 F1 | Optics TradeInstruction Manual | Nightforce CFS 6-36x50 F1 | Optics Trade
Instruction Manual | Nightforce CFS 6-36x50 F1 | Optics TradeOptics-Trade
 
Instruction Manual | Athlon Cronus Tactical G2 ED 7-42x60 | Optics Trade
Instruction Manual | Athlon Cronus Tactical G2 ED 7-42x60 | Optics TradeInstruction Manual | Athlon Cronus Tactical G2 ED 7-42x60 | Optics Trade
Instruction Manual | Athlon Cronus Tactical G2 ED 7-42x60 | Optics TradeOptics-Trade
 
Insrtuction Manual | Swarovski CL Companion Habicht | Optics Trade
Insrtuction Manual | Swarovski CL Companion Habicht | Optics TradeInsrtuction Manual | Swarovski CL Companion Habicht | Optics Trade
Insrtuction Manual | Swarovski CL Companion Habicht | Optics TradeOptics-Trade
 
Technical Data | Swarovski CL Companion Habicht | Optics Trade
Technical Data | Swarovski CL Companion Habicht | Optics TradeTechnical Data | Swarovski CL Companion Habicht | Optics Trade
Technical Data | Swarovski CL Companion Habicht | Optics TradeOptics-Trade
 

More from Optics-Trade (20)

Technical Data | Sig Sauer Easy6 BDX 1-6x24 | Optics Trade
Technical Data | Sig Sauer Easy6 BDX 1-6x24 | Optics TradeTechnical Data | Sig Sauer Easy6 BDX 1-6x24 | Optics Trade
Technical Data | Sig Sauer Easy6 BDX 1-6x24 | Optics Trade
 
Technical Data | ThermTec Wild 650L | Optics Trade
Technical Data | ThermTec Wild 650L | Optics TradeTechnical Data | ThermTec Wild 650L | Optics Trade
Technical Data | ThermTec Wild 650L | Optics Trade
 
Technical Data | ThermTec Wild 635L | Optics Trade
Technical Data | ThermTec Wild 635L | Optics TradeTechnical Data | ThermTec Wild 635L | Optics Trade
Technical Data | ThermTec Wild 635L | Optics Trade
 
Technical Data | ThermTec Wild 650 | Optics Trade
Technical Data | ThermTec Wild 650 | Optics TradeTechnical Data | ThermTec Wild 650 | Optics Trade
Technical Data | ThermTec Wild 650 | Optics Trade
 
Technical Data | ThermTec Wild 635 | Optics Trade
Technical Data | ThermTec Wild 635 | Optics TradeTechnical Data | ThermTec Wild 635 | Optics Trade
Technical Data | ThermTec Wild 635 | Optics Trade
 
Technical Data | ThermTec Wild 335 | Optics Trade
Technical Data | ThermTec Wild 335 | Optics TradeTechnical Data | ThermTec Wild 335 | Optics Trade
Technical Data | ThermTec Wild 335 | Optics Trade
 
Technical Data | ThermTec Wild 325 | Optics Trade
Technical Data | ThermTec Wild 325 | Optics TradeTechnical Data | ThermTec Wild 325 | Optics Trade
Technical Data | ThermTec Wild 325 | Optics Trade
 
Instruction Manual | ThermTec Wild Thermal Monoculars | Optics Trade
Instruction Manual | ThermTec Wild Thermal Monoculars | Optics TradeInstruction Manual | ThermTec Wild Thermal Monoculars | Optics Trade
Instruction Manual | ThermTec Wild Thermal Monoculars | Optics Trade
 
Technical Data | ThermTec Hunt 335 | Optics Trade
Technical Data | ThermTec Hunt 335 | Optics TradeTechnical Data | ThermTec Hunt 335 | Optics Trade
Technical Data | ThermTec Hunt 335 | Optics Trade
 
Instruction Manual | ThermTec Hunt Thermal Clip-On Series | Optics Trade
Instruction Manual | ThermTec Hunt Thermal Clip-On Series | Optics TradeInstruction Manual | ThermTec Hunt Thermal Clip-On Series | Optics Trade
Instruction Manual | ThermTec Hunt Thermal Clip-On Series | Optics Trade
 
Instruction Manual | Steiner eRanger LRF 10x42 | Optics Trade
Instruction Manual | Steiner eRanger LRF 10x42 | Optics TradeInstruction Manual | Steiner eRanger LRF 10x42 | Optics Trade
Instruction Manual | Steiner eRanger LRF 10x42 | Optics Trade
 
Flyer | Guide DN Series Handheld Digital Binoculars | Optics Trade
Flyer | Guide DN Series Handheld Digital Binoculars | Optics TradeFlyer | Guide DN Series Handheld Digital Binoculars | Optics Trade
Flyer | Guide DN Series Handheld Digital Binoculars | Optics Trade
 
Quick Start Guide | Guide TB Series | Optics Trade
Quick Start Guide | Guide TB Series | Optics TradeQuick Start Guide | Guide TB Series | Optics Trade
Quick Start Guide | Guide TB Series | Optics Trade
 
Instruction Manual | Pard FD1 Digital NV Front Attachment | Optics Trade
Instruction Manual | Pard FD1 Digital NV Front Attachment | Optics TradeInstruction Manual | Pard FD1 Digital NV Front Attachment | Optics Trade
Instruction Manual | Pard FD1 Digital NV Front Attachment | Optics Trade
 
Instruction Manual | EOTech Vudu X 2-12x40 | Optics Trade
Instruction Manual | EOTech Vudu X 2-12x40 | Optics TradeInstruction Manual | EOTech Vudu X 2-12x40 | Optics Trade
Instruction Manual | EOTech Vudu X 2-12x40 | Optics Trade
 
Instruction Manual | EOTech Vudu X 1-6x24 | Optics Trade
Instruction Manual | EOTech Vudu X 1-6x24 | Optics TradeInstruction Manual | EOTech Vudu X 1-6x24 | Optics Trade
Instruction Manual | EOTech Vudu X 1-6x24 | Optics Trade
 
Instruction Manual | Nightforce CFS 6-36x50 F1 | Optics Trade
Instruction Manual | Nightforce CFS 6-36x50 F1 | Optics TradeInstruction Manual | Nightforce CFS 6-36x50 F1 | Optics Trade
Instruction Manual | Nightforce CFS 6-36x50 F1 | Optics Trade
 
Instruction Manual | Athlon Cronus Tactical G2 ED 7-42x60 | Optics Trade
Instruction Manual | Athlon Cronus Tactical G2 ED 7-42x60 | Optics TradeInstruction Manual | Athlon Cronus Tactical G2 ED 7-42x60 | Optics Trade
Instruction Manual | Athlon Cronus Tactical G2 ED 7-42x60 | Optics Trade
 
Insrtuction Manual | Swarovski CL Companion Habicht | Optics Trade
Insrtuction Manual | Swarovski CL Companion Habicht | Optics TradeInsrtuction Manual | Swarovski CL Companion Habicht | Optics Trade
Insrtuction Manual | Swarovski CL Companion Habicht | Optics Trade
 
Technical Data | Swarovski CL Companion Habicht | Optics Trade
Technical Data | Swarovski CL Companion Habicht | Optics TradeTechnical Data | Swarovski CL Companion Habicht | Optics Trade
Technical Data | Swarovski CL Companion Habicht | Optics Trade
 

Recently uploaded

Transforming Data Streams with Kafka Connect: An Introduction to Single Messa...
Transforming Data Streams with Kafka Connect: An Introduction to Single Messa...Transforming Data Streams with Kafka Connect: An Introduction to Single Messa...
Transforming Data Streams with Kafka Connect: An Introduction to Single Messa...HostedbyConfluent
 
08448380779 Call Girls In Civil Lines Women Seeking Men
08448380779 Call Girls In Civil Lines Women Seeking Men08448380779 Call Girls In Civil Lines Women Seeking Men
08448380779 Call Girls In Civil Lines Women Seeking MenDelhi Call girls
 
IAC 2024 - IA Fast Track to Search Focused AI Solutions
IAC 2024 - IA Fast Track to Search Focused AI SolutionsIAC 2024 - IA Fast Track to Search Focused AI Solutions
IAC 2024 - IA Fast Track to Search Focused AI SolutionsEnterprise Knowledge
 
How to convert PDF to text with Nanonets
How to convert PDF to text with NanonetsHow to convert PDF to text with Nanonets
How to convert PDF to text with Nanonetsnaman860154
 
Pigging Solutions Piggable Sweeping Elbows
Pigging Solutions Piggable Sweeping ElbowsPigging Solutions Piggable Sweeping Elbows
Pigging Solutions Piggable Sweeping ElbowsPigging Solutions
 
Salesforce Community Group Quito, Salesforce 101
Salesforce Community Group Quito, Salesforce 101Salesforce Community Group Quito, Salesforce 101
Salesforce Community Group Quito, Salesforce 101Paola De la Torre
 
Factors to Consider When Choosing Accounts Payable Services Providers.pptx
Factors to Consider When Choosing Accounts Payable Services Providers.pptxFactors to Consider When Choosing Accounts Payable Services Providers.pptx
Factors to Consider When Choosing Accounts Payable Services Providers.pptxKatpro Technologies
 
Key Features Of Token Development (1).pptx
Key  Features Of Token  Development (1).pptxKey  Features Of Token  Development (1).pptx
Key Features Of Token Development (1).pptxLBM Solutions
 
Benefits Of Flutter Compared To Other Frameworks
Benefits Of Flutter Compared To Other FrameworksBenefits Of Flutter Compared To Other Frameworks
Benefits Of Flutter Compared To Other FrameworksSoftradix Technologies
 
GenCyber Cyber Security Day Presentation
GenCyber Cyber Security Day PresentationGenCyber Cyber Security Day Presentation
GenCyber Cyber Security Day PresentationMichael W. Hawkins
 
AI as an Interface for Commercial Buildings
AI as an Interface for Commercial BuildingsAI as an Interface for Commercial Buildings
AI as an Interface for Commercial BuildingsMemoori
 
FULL ENJOY 🔝 8264348440 🔝 Call Girls in Diplomatic Enclave | Delhi
FULL ENJOY 🔝 8264348440 🔝 Call Girls in Diplomatic Enclave | DelhiFULL ENJOY 🔝 8264348440 🔝 Call Girls in Diplomatic Enclave | Delhi
FULL ENJOY 🔝 8264348440 🔝 Call Girls in Diplomatic Enclave | Delhisoniya singh
 
Neo4j - How KGs are shaping the future of Generative AI at AWS Summit London ...
Neo4j - How KGs are shaping the future of Generative AI at AWS Summit London ...Neo4j - How KGs are shaping the future of Generative AI at AWS Summit London ...
Neo4j - How KGs are shaping the future of Generative AI at AWS Summit London ...Neo4j
 
Install Stable Diffusion in windows machine
Install Stable Diffusion in windows machineInstall Stable Diffusion in windows machine
Install Stable Diffusion in windows machinePadma Pradeep
 
Integration and Automation in Practice: CI/CD in Mule Integration and Automat...
Integration and Automation in Practice: CI/CD in Mule Integration and Automat...Integration and Automation in Practice: CI/CD in Mule Integration and Automat...
Integration and Automation in Practice: CI/CD in Mule Integration and Automat...Patryk Bandurski
 
Tech-Forward - Achieving Business Readiness For Copilot in Microsoft 365
Tech-Forward - Achieving Business Readiness For Copilot in Microsoft 365Tech-Forward - Achieving Business Readiness For Copilot in Microsoft 365
Tech-Forward - Achieving Business Readiness For Copilot in Microsoft 3652toLead Limited
 
Beyond Boundaries: Leveraging No-Code Solutions for Industry Innovation
Beyond Boundaries: Leveraging No-Code Solutions for Industry InnovationBeyond Boundaries: Leveraging No-Code Solutions for Industry Innovation
Beyond Boundaries: Leveraging No-Code Solutions for Industry InnovationSafe Software
 
Transcript: #StandardsGoals for 2024: What’s new for BISAC - Tech Forum 2024
Transcript: #StandardsGoals for 2024: What’s new for BISAC - Tech Forum 2024Transcript: #StandardsGoals for 2024: What’s new for BISAC - Tech Forum 2024
Transcript: #StandardsGoals for 2024: What’s new for BISAC - Tech Forum 2024BookNet Canada
 
A Domino Admins Adventures (Engage 2024)
A Domino Admins Adventures (Engage 2024)A Domino Admins Adventures (Engage 2024)
A Domino Admins Adventures (Engage 2024)Gabriella Davis
 
Azure Monitor & Application Insight to monitor Infrastructure & Application
Azure Monitor & Application Insight to monitor Infrastructure & ApplicationAzure Monitor & Application Insight to monitor Infrastructure & Application
Azure Monitor & Application Insight to monitor Infrastructure & ApplicationAndikSusilo4
 

Recently uploaded (20)

Transforming Data Streams with Kafka Connect: An Introduction to Single Messa...
Transforming Data Streams with Kafka Connect: An Introduction to Single Messa...Transforming Data Streams with Kafka Connect: An Introduction to Single Messa...
Transforming Data Streams with Kafka Connect: An Introduction to Single Messa...
 
08448380779 Call Girls In Civil Lines Women Seeking Men
08448380779 Call Girls In Civil Lines Women Seeking Men08448380779 Call Girls In Civil Lines Women Seeking Men
08448380779 Call Girls In Civil Lines Women Seeking Men
 
IAC 2024 - IA Fast Track to Search Focused AI Solutions
IAC 2024 - IA Fast Track to Search Focused AI SolutionsIAC 2024 - IA Fast Track to Search Focused AI Solutions
IAC 2024 - IA Fast Track to Search Focused AI Solutions
 
How to convert PDF to text with Nanonets
How to convert PDF to text with NanonetsHow to convert PDF to text with Nanonets
How to convert PDF to text with Nanonets
 
Pigging Solutions Piggable Sweeping Elbows
Pigging Solutions Piggable Sweeping ElbowsPigging Solutions Piggable Sweeping Elbows
Pigging Solutions Piggable Sweeping Elbows
 
Salesforce Community Group Quito, Salesforce 101
Salesforce Community Group Quito, Salesforce 101Salesforce Community Group Quito, Salesforce 101
Salesforce Community Group Quito, Salesforce 101
 
Factors to Consider When Choosing Accounts Payable Services Providers.pptx
Factors to Consider When Choosing Accounts Payable Services Providers.pptxFactors to Consider When Choosing Accounts Payable Services Providers.pptx
Factors to Consider When Choosing Accounts Payable Services Providers.pptx
 
Key Features Of Token Development (1).pptx
Key  Features Of Token  Development (1).pptxKey  Features Of Token  Development (1).pptx
Key Features Of Token Development (1).pptx
 
Benefits Of Flutter Compared To Other Frameworks
Benefits Of Flutter Compared To Other FrameworksBenefits Of Flutter Compared To Other Frameworks
Benefits Of Flutter Compared To Other Frameworks
 
GenCyber Cyber Security Day Presentation
GenCyber Cyber Security Day PresentationGenCyber Cyber Security Day Presentation
GenCyber Cyber Security Day Presentation
 
AI as an Interface for Commercial Buildings
AI as an Interface for Commercial BuildingsAI as an Interface for Commercial Buildings
AI as an Interface for Commercial Buildings
 
FULL ENJOY 🔝 8264348440 🔝 Call Girls in Diplomatic Enclave | Delhi
FULL ENJOY 🔝 8264348440 🔝 Call Girls in Diplomatic Enclave | DelhiFULL ENJOY 🔝 8264348440 🔝 Call Girls in Diplomatic Enclave | Delhi
FULL ENJOY 🔝 8264348440 🔝 Call Girls in Diplomatic Enclave | Delhi
 
Neo4j - How KGs are shaping the future of Generative AI at AWS Summit London ...
Neo4j - How KGs are shaping the future of Generative AI at AWS Summit London ...Neo4j - How KGs are shaping the future of Generative AI at AWS Summit London ...
Neo4j - How KGs are shaping the future of Generative AI at AWS Summit London ...
 
Install Stable Diffusion in windows machine
Install Stable Diffusion in windows machineInstall Stable Diffusion in windows machine
Install Stable Diffusion in windows machine
 
Integration and Automation in Practice: CI/CD in Mule Integration and Automat...
Integration and Automation in Practice: CI/CD in Mule Integration and Automat...Integration and Automation in Practice: CI/CD in Mule Integration and Automat...
Integration and Automation in Practice: CI/CD in Mule Integration and Automat...
 
Tech-Forward - Achieving Business Readiness For Copilot in Microsoft 365
Tech-Forward - Achieving Business Readiness For Copilot in Microsoft 365Tech-Forward - Achieving Business Readiness For Copilot in Microsoft 365
Tech-Forward - Achieving Business Readiness For Copilot in Microsoft 365
 
Beyond Boundaries: Leveraging No-Code Solutions for Industry Innovation
Beyond Boundaries: Leveraging No-Code Solutions for Industry InnovationBeyond Boundaries: Leveraging No-Code Solutions for Industry Innovation
Beyond Boundaries: Leveraging No-Code Solutions for Industry Innovation
 
Transcript: #StandardsGoals for 2024: What’s new for BISAC - Tech Forum 2024
Transcript: #StandardsGoals for 2024: What’s new for BISAC - Tech Forum 2024Transcript: #StandardsGoals for 2024: What’s new for BISAC - Tech Forum 2024
Transcript: #StandardsGoals for 2024: What’s new for BISAC - Tech Forum 2024
 
A Domino Admins Adventures (Engage 2024)
A Domino Admins Adventures (Engage 2024)A Domino Admins Adventures (Engage 2024)
A Domino Admins Adventures (Engage 2024)
 
Azure Monitor & Application Insight to monitor Infrastructure & Application
Azure Monitor & Application Insight to monitor Infrastructure & ApplicationAzure Monitor & Application Insight to monitor Infrastructure & Application
Azure Monitor & Application Insight to monitor Infrastructure & Application
 

Instructions ARMASIGHT Ninox NV Goggles | Optics Trade

  • 1. Important Export Restrictions! Commodities, products, tech- nologies and services of this manual are controlled by the U.S. Department of State Office of Defense Trade Controls, in accor- dance with International Traffic in Arms (ITAR), Title 22, Code of Federal Regulations Part 120-130 and/or by the Export Adminis- tration Regulations (EAR) of U.S. Department of Commerce. At any time when a license or a written approval of the U.S. Government is applicable to it, it is illegal and strictly forbidden to export, in- tend to export, transfer in any other manner whatsoever, sell any hardware or technical data, provide any associated service to any non-U.S. resident, beyond or within the United States territory, until the valid license or written approval has been issued by the Departments of the U.S. Government having jurisdiction. Addi- tionally U.S. law prohibits the sale, transfer, or export of items to certain restricted parties, destinations, and embargoed countries, as identified on lists maintained by the U.S. Department of State, the U.S. Department of Commerce, and the U.S. Department of Treasury. It is the responsibility of the Customer to be aware of these lists. The sale, transfer, transportation, or shipment out- side of the U.S. of any product prohibited or restricted for export without complying with U.S. export control laws and regulations, including proper export licensing, documentation or authoriza- tion, is unlawful and may result in civil and/or criminal penalties and/or constitute a federal crime. Diversion contrary to U.S. law is strictly prohibited. NinoxNight Vision Goggles USER’S MANUAL
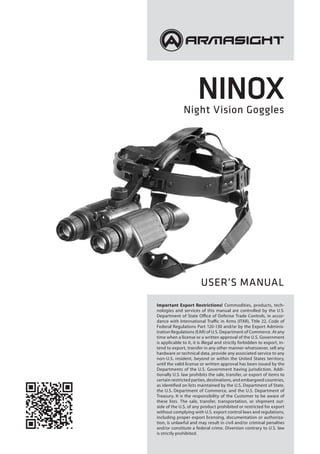
  • 2. 2 PARTS OF THE GOGGLES WARNING: This product contains natural rubber latex, which may cause allergic reactions! The FDA has reported an increase in the number of deaths that are associated with an apparent sensitiv- ity to natural latex proteins. If you are allergic to latex, it is a good idea to learn which products contain it and strictly avoid exposure to those products. We provide the information in this manual for familiarization purposes only. The contents may undergo further changes with no commitment by Armasight to keep customers notified about any updates. Armasight© assumes no responsibility for any misprints or other errors that this manual may contain. diopter Adjustment on/off Button IR Button Battery compartment IR illuminator with pivotal focusing lens Mounting rail Objective Lens cap Optional XLR-IR850 Detachable Long Range Infrared Illuminator w/Dovetail to Weaver Transfer Piece #21 (Part# ANKIXLR017) flip-up head mount (included) objective Lens focus LED indicator
  • 3. 3 1. Description and Data Description If low-cost, high quality head-mounted night vision is what you need, the Armasight Ninox is the best choice for you! The Generation 1 Ninox comes complete with a flip-up head mount and is the perfect inexpensive, hands-free option for air soft games, paintball, hunting or security at night, where the Ar- masight Ninox will give you the edge. A built-in, short-range IR illuminator with pivotal flood lens allows the Ninox to work exceptionally well even in complete darkness, and an optional Armasight long-range infrared illuminator will dramatically boost your viewing range when required. The Armasight Ninox features all-glass optics, a simple, push-button control, and durable, reinforced composite housing. features Compact and Lightweight ––Designed for Hand-Free operations ––High resolution Gen. 1+ Image Intensifier Tube ––Built-in IR illuminator with pivotal lens to select between IR spot and flood beam ––Fully adjustable headgear for ultimate comfort ––Flip-Up headgear ––Dual-eye viewing system for comfortable nighttime operation, even during long sessions ––Can be used in conjunction with long-range IR Illuminator ––Water and fog resistant ––Limited Two-Year Warranty ––SPECIFICAtions Generation 1+ Magnification 1x Lens System 35 mm; F/1.7 Field of View 35° Focus Range 0.2 m to infinity Exit Pupil Diameter 8 mm Eye Relief 20 mm Power Supply One CR123 Lithium (3V) * Battery Life (IR off) up to 30 hours Body Material Glass-fiber reinforced composite Lens Material/ Type Multicoated heavy glass Operating Temperature -30 °C to +45 °C Dimensions (LxWxH) 158 x 140 x 63 mm / 6.2 x 5.5 x 2.5 in Weight 0.65 kg / 1.4 lbs
  • 4. 4 STANDARD COMPONENTS and optional equipment 1) Armasight Ninox Night vision goggles with 1x magnification. 2) Objective Lens Caps The Objective Lens Caps are designed to protect the objective lens from physical damage, as well as allow the testing of the device’s operation in daylight. 3) Eye Cups The rubber eye cups are designed to protect the eyepieces and to provide comfort of use for the user. 4) CR123A Lithium Battery 3V CR123A lithium batteries are used to supply power to the unit. 5) Head Mount Adjustable universal assembly that secures the goggles to the user’s head, providing hands-free opera- tion. 6) User Manual The user manual contains a full description of the device and accessories, information about controls, installation, maintenance and troubleshooting procedures. 7) Carrying Case The carrying case is used to store and carry the Ninox goggles and accessories. 8) Optional XLR-IR850 Detachable Long Range IR illuminator (Part# ANKIXLR017) Extra long-range infrared illuminator with a wide, adjustable beam angle. Provides greater viewing ca- pabilities when the environment has little or no ambient light. Comes fully assembled with a dedicated mount in order to be installed on a Picatinny/Weaver rail. Completed with Dovetail to Weaver Transfer Piece #21 that allows the IR illuminator to be mounted on the Ninox. 18650 rechargeable battery and Charger are included. 2. PREPARATIONS FOR OPERATION WARNING: The Ninox night vision goggles are designed for several years of reliable service. To ensure trouble-free performance, please observe the following instructions: • Do not activate the device in daylight unless the protective lens covers is fitted securely over the lenses. If the device is ON, do not direct the device at bright light sources, such as car head- lights, camp fires, street lights, etc., as this will cause damage to the device. • Do not check the device operation in daylight unless the front lens caps are fitted securely over the lenses, and even then, the device should only be ON for the few seconds it takes to establish correct operation. • Do not open the body of the device or otherwise disassemble it. • Avoid dropping or otherwise impacting the device. • Do not expose the device to moisture or extreme temperatures. • Do not touch the lenses. Clean optical parts with a clean, soft cloth, and only use professional lens cleaners designed for use with optics. • Do not forget to remove the battery from the battery compartment if the device is to be stored for more than 3 days. • Do not forget to turn the device OFF during periods of non-operation.
  • 5. 5 WARNING: Take into consideration the following information and restrictions in order to avoid damag- ing the device and to ensure a long service life and failure-free operation: • Performance of the device in nighttime conditions depends on the level of ambient light in the environment. Some light (moonlight, starlight, etc.) is required for the device to provide an image. • Ambient light level is reduced by the presence of clouds, shade, or objects that block natural light (buildings, trees, etc.). • The device loses its effectiveness when operated in shadowed areas. • The effectiveness of the device is adversely affected by weather conditions such as rain, snow, sleet, or fog, and environmental conditions such as smoke or dust. • The device resolution level is reduced in environments with very low light sources. The vis- ibility will degrade significantly under starlit conditions, particularly in low contrast environ- ments such as deserts, large areas of uniform vegetation, etc. • The device is equipped with a protection system that will automatically disable the image intensifier tube when the illuminance level stays above 40 lux for over 10 seconds. BATTERY INSTALLATION 1) Unscrew the battery compartment cap on the back side of the goggles body. 2) Insert the CR123A battery into the battery compartment in accordance with polarity markings. 3) Screw the cap onto the place. ATTACHING THE Ninox TO A HEAD MOUNT To attach your Ninox to a head mount perform the following steps: 1) Loosen the screw (A), press the button (B); put the binocu- lar rail into the headset socket (C). 2) Put the head mount, with the Ninox attached, on your head. 3) Loosen the screw (A) and perform an eye relief adjustment by moving the binocular on the rail. 4) The head mount intended for use with the Ninox is fitted with a flip-up mechanism. Press the button (D) from the head mount side and lift the binocular to the top position. 5) To return the unit back to the operating position, press the button (D) again and lower the binocular. 6) Press the button (E) and move the binocular on the rail (F) to reach the most comfortable position for observation. 3. OPERATION INSTRUCTIONS Controls The Ninox is designed to meet the needs and requirements of various users. Each user can individually set the unit to the most desirable and effective position with the help of the controls. The Ninox unit controls and indicators are shown and detailed further, below: ON/OFF Button. Press the button to turn the unit on. Press the button again to turn the unit off. The IR will also turn off automatically. C A B D E F
  • 6. 6 IR Button. This button controls the power supply to the built-in infrared illuminator. Use this button to turn the IR illuminator on and off. The IR will also turn off automatically when unit off. Lens Focus. Focuses the objective lens. Adjust the lens for sharpest image of viewed object. Diopter Adjustment. Focuses the eyepieces. Focus the eyepieces to get a clear image on the IIT screen. Pivotal Focusing Lens. Allows the user to choose between the following: 1. The IR illuminator spot beam. When the pivotal focusing lens is placed in the leftmost position of the window of the IR illuminator. 2. The IR illuminator flood beam. When the focusing lens is placed in the center position. Power/IR ON Indicator. The LED indicator located near the ocular will light up green when unit is on, and will change to red when built-in IR illuminator is activated. Low Battery Indicator. The flashing red LED indicates that the battery is low. FOCUSING 1) Adjust the diopters. For the best possible image resolution, you must first adjust the eyepieces (di- opters). Turn the diopter adjustment rings clockwise until it stops. While looking through the eyepiec- es, observe the scene and slowly begin turning the diopter adjustment rings counterclockwise until the image becomes clear and sharp. 2) Adjust the focus of the lenses. To focus your Ninox at different distances, simply rotate the objective lens focus rings. Testing PROCEDURES CAUTION: Do not test the device in daylight conditions for more than 10 minutes, even with lens protec- tive cap on. To check device operation in daylight or in an illuminated room observe the following procedures: 1) Verify that the battery is inserted into the battery compartment in accordance with polarity mark- ings on the goggles’ body. 2) Verify that the objective lenses are closed securely. 3) Activate the unit by pushing the operation button, but without removing the protective caps. While looking through the eyepieces of your Ninox, observe the scene. Verify whether or not the green light is indicating that correct IIT operation is occurring. OPERATION IN NIGHTTIME CONDITIONS CAUTION: Avoid exposing the goggles to bright light sources. Bright light emitted by fires, automobile headlights, lanterns, projectors, etc. will cause serious damage your Ninox. 1) Visually estimate the illuminance level in the viewing area. Operation with the objective lens caps off is safe when the illuminance level is less than 1 lux; at an illuminance level of 1 lux, you will barely be able to read a newspaper, even after your eyes have adapted to the low light conditions. 2) Verify that the battery is inserted into the battery compartment in accordance with the polarity markings on the goggles’ body. 3) Remove the front lens caps. 4) Activate the unit by pushing the operation button. A green light indicating correct IIT operation will appear after a momentary delay. 5) Observe the scene and focus your Ninox.
  • 7. 7 6) Turn the unit off after completing your operations. The green glow will disappear from the eye- pieces. 7) Securely place the objective lens caps over the objective lenses. IR ILLUMINATOR OPERATION CAUTION: Do not forget that light emitted from the IR illuminator is invisible to the naked eye; however, it can be easily detected when using night vision devices (NVD). Infrared illuminators are used in areas where the level of light is not sufficient for surveillance. An IR illuminator can provide an extra source of infrared light, which, although invisible to a naked eye, can greatly enhance the performance of night vision devices. Turn on the IR illuminator when working in total darkness. Please remember that the beam emitted by your IR illuminator will lose its brightness over distance. The built-in IR illuminator is designed to provide additional source of light for reading maps or other basic, short-range applications; the viewing distance is up to 3m. You can activate the IR illuminator of your goggles by pushing the IR button after you’ve turned the unit on. A green LED light will appear when the IR illumination is turned on. NOTE: The IR will automatically turn off when the unit’s main power is turned OFF. Focus the IR light, if necessary, by placing the pivotal focusing lens onto the IR illuminator output win- dow. optional XLR-IR850 ILLUMINATOR XLR-IR850 long-range infrared illuminator provides greater viewing capabilities when the environment has little or no ambient light. To mount an XLR-IR850 to the Ninox, use the Dovetail to Weaver Transfer Piece. Perform the following steps: 1) Install the transfer piece onto Ninox mounting rail. 2) Tighten the two fixing screws on the transfer piece. 3) Loosen the IR illuminator fixing screw. 4) Mount the IR illuminator on the Weaver rail of transfer piece and tighten the fixing screw. The Armasight XLR-IR850 runs on a single 18650 rechargeable battery. Fully charge the 18650 battery before installing in XLR-IR850 illuminator. Insert battery into charger, aligning the polarity symbols on the battery with the polarity symbols on the charger. Never install battery backwards. Connect power cord to an appropriate power source. Indicator light will flash red when a battery is charging, and will change to green when battery has been fully charged. Remove the battery promptly after charging has been completed. Install 18650 battery into the battery compartment of goggles. To install the battery, unscrew the battery com- partment cap and insert the battery in accordance with the polarity markings on the unit’s body. Screw the battery compartment cap back into position. To turn the IR illuminator on, rotate the operation switch from the OFF position. To change the radiated power level, turn the operation switch to one of the spots between the two OFF positions. focus adjustment fixing screw battery cap operation switchscrew of clamp beam direction adjustment Transfer Piece
  • 8. 8 Focus the IR beam to change the field of coverage. To adjust IR beam divergence, turn the lens of IR illuminator. Adjust the IR spot position in the field of view of the Ninox as follows: 1) Loosen the screw of the clamp on the IR illuminator mount. 2) Turn on the night vision device and the IR illuminator. 3) Carefully move the IR illuminator up and down and side to side. While looking through the eye- pieces of your NVD, observe the IR spot position. 4) Tighten the fixing screw of the clamp once the IR spot is centered in the field of view. 4. MAINTENANCE PROCEDURES The Ninox should always be stored in the supplied packaging, particularly in heated and ventilated rooms. To keep the device operational, please follow the instructions listed previously regarding prep- arations for storage. The battery should be stored separately from the device and be inserted into the battery compartment only when the device is being prepared for use. The presence of both acids and alkalis near the goggles is not recommended. When stored, your Ninox should be protected from exposure to direct sunlight or extreme tempera- tures. Goggles CLEANING PROCEDURES 1) Gently remove any dirt from the goggles using a clean, soft cloth. 2) Wipe external surfaces down (with the exception of optical surfaces) with a clean cloth moistened with pure water. 3) Dry all wet surfaces with a different clean, dry cloth. 4) Carefully remove any dirt from the optical surfaces using a lens brush. 5) To avoid scratches, optical surfaces must be cleaned using a clean cotton swab that has been slight- ly dampened with pure alcohol. The glass should be wiped in circular motions starting from the center and moving out towards the edge, without touching the barrel. Change the cotton swab as soon as it becomes dirty. PREPARATION FOR STORAGE When preparing your Ninox for storage, perform the following steps: 1) Verify that the goggles are operating in accordance with all previously specified procedures. 2) Remove the battery from the battery compartment. 3) Clean the goggles and all accessories. 4) Place all components into the storage case. 5. Troubleshooting Common problems that may occur with your goggles or the detection and viewing tests, as well as ac- tions you can take to correct them, are listed in the Troubleshooting Table, below. This table does not list all of the malfunctions that may occur with your device. If you experience a malfunction of the device that is not listed in this table, please contact Armasight or your Ninox retailer. NOTE: Before you use this table, be sure you have performed all normal operational safety, care and handling checks and procedures. If your device malfunctions in a way not listed in this table, contact Armasight or your Ninox retailer.
  • 9. 9 Troubleshooting Guide Problem Possible Cause Action The goggles do not turn on Press Power button. Press the Power button repeatedly. Inspect for a missing, defective or im- properly installed battery. Replace the battery or install it prop- erly If these actions fail, submit the device for unit level maintenance. Poor image quality Check if the goggles are focused. Focus the oculars and objectives. Check if the lenses are greasy, fogged or dirty. Thoroughly clean the surfaces of each lens. If the problem persists, contact your service center. Light visible through the eyecups Check the exit pupil distance value. Press the eyecups to your face. Check the eyepieces resilience. If the eyecups is defective, contact your service center. Diopter adjustment cannot be performed Check to see if the diopter adjustment rings are deformed or broken. If the diopter adjustment rings are damaged, contact your service center. Lens focus cannot be performed Check to see if the lens focus adjustment ring is deformed or broken. If the lens focus adjustment ring is damaged, contact your service center. IR illuminator does not switch on Turn the IR illuminator on in dark area. Visually estimate if the observed scene is properly lighted. If the IR illuminator does not turn on, contact your service center.
  • 10. 10 ARMASIGHT PRODUCT WARRANTY REGISTRATION CARD PRODUCT INFORMATION CUSTOMER INFORMATION Product Name Purchase Date Name Purchased From Product Serial # Address City Day Phone # E-mail address Country Zip Home Phone # Customer Signature Required
  • 11. 11 6. warranty INFORMATION This product is guaranteed to be free from manufacturing defects in material and workmanship under normal use for a period of two (2) years from the date of purchase. In the event that a defect covered by the below warranty occurs during the applicable period stated above, Armasight, at its discretion, will either repair or replace the product; such action on the part of Armasight shall be the full extent of Armasight’s liability, and the Customer’s sole and exclusive reparation. This warranty does not cover a product if it has (a) been used in ways other than its normal and customary manner; (b) subjected to misuse; (c) subjected to alterations, modifications or repairs by the Customer or by any party other than Armasight without prior written consent of Armasight; (d) special order or “close-out” merchandise or merchandise sold “as-is” by either Armasight or the Armasight dealer; or (e) merchandise that has been discontinued by the manufacturer and either parts or replacement units are not available due to reasons beyond the control of Armasight. Armasight shall not be responsible for any defects or damage that in Armasight’s view are a result from the mishandling, abuse, misuse, improper storage or improper operation of the device, including use in conjunction with equipment that iselectricallyor mechanicallyincompatiblewith,or ofinferiorqualityto,theproduct,aswellasfailure to maintain the environmental conditions specified by the manufacturer. CUSTOMER IS HEREBY NOTIFIED THAT OP- ERATION OF THE EQUIPMENT DURING DAYLIGHT HOURS OR UNDER ANY EXCESSIVE LIGHT CONDITIONS MAY PERMA- NENTLY DAMAGE THE INTERNAL COMPONENTS OF THE UNIT AND SAID DAMAGE WILL NOT BE COVERED UNDER THIS WARRANTY. This warranty is extended only to the original purchaser. Any breach of this warranty shall be enforced unless the customer notifies Armasight at the address noted below within the applicable warranty period. The customer understands and agrees that except for the foregoing warranty, no other warranties written or oral, statutory, expressed or implied, including any implied warranty of merchantability or fitness for a particular purpose, shall apply to the product. All such implied warranties are hereby and expressly disclaimed. Limitation of liability Armasight will not be liable for any claims, actions, suits, proceedings, costs, expenses, damages or liabilities arising outoftheuseofthisproduct.OperationanduseoftheproductarethesoleresponsibilityoftheCustomer.Armasight’s sole undertaking is limited to providing the products and services outlined herein in accordance with the terms and conditions of this Agreement. The provision of products sold and services performed by Armasight to the Customer shall not be interpreted, construed, or regarded, either expressly or implied, as being for the benefit of or creating any obligation toward any third party of legal entity outside Armasight and the Customer; Armasight’s obligations under this Agreement extend solely to the Customer. Armasight’s liability hereunder for damages, regardless of the form or action, shall not exceed the fees or other charges paid to Armasight by the customer or customer’s dealer. Armasight shall not, in any event, be liable for special, indirect, incidental, or consequential damages, including, but not limited to, lost income, lost revenue, or lost profit, whether such damages were foreseeable or not at the time of purchase, and whether or not such damages arise out of a breach of warranty, a breach of agreement, negligence, strict liability or any other theory of liability. Product warranty registration In order to validate the warranty on your product, Armasight must receive a completed Product Warranty Registra- tion Card for each unit, or the Customer can complete a warranty registration on our website, at www.armasight.com. Please complete the included form and immediately mail it to our Service Center: Armasight Inc. 815 Dubuque Avenue South San Francisco CA 94080 United States of America. Obtaining warranty service To obtain warranty service on your unit, the End-user (Customer) must notify the Armasight service department via email. Send any requests to service@armasight.com to receive a Return Merchandise Authorization number (RMA). When returning any device, please take in the product to your retailer, or send the product, postage paid and with a copyofyoursalesreceipt,toArmasightCorporation’sservicecenterattheaddresslistedabove.Allmerchandisemust be fully insured with the correct postage; Armasight will not be responsible for improper postage or merchandise that becomes lost or damaged during shipment. When sending product back, please clearly write the RMA# on the outside of the shipping box. Please include a letter that indicates your RMA#, the Customer’s Name, a Return Address, reason for the return, Contact information (valid telephone numbers and/or an e-mail address), and proof of purchase that will help us to establish the valid start date of the warranty. Product merchandise returns that do not have an RMA# listed may be refused, or a significant delay in processing may occur. Estimated Warranty service time is 10-20 business days. The End-user/ Customer is responsible for postage to Armasight for warranty service. Armasight will cover return postage/ shipping after warranty repair to the End-user/ Customer only if the product is covered by the aforementioned warranty. Armasight will return the product after warranty service by domestic UPS Ground service and/ or domestic mail. Should any other requested, required or international shipping methods be necessary, the postage/ shipping fee will be the responsibility of the End-user/ Customer. v3-20150323
  • 12. www.armasight.com Armasight Inc. 815 Dubuque Avenue South San Francisco CA 94080, USA Phone: (888)959-2259 Fax: (888)959-2260 Intl Phone/Fax: (650)492-7755 info@armasight.com WARNING: This product contains natural rubber latex which may cause allergic reactions! FDA has noted an increase in the number of deaths reported to the agency that are associated with an apparent sensitivity to natural latex proteins. If you are allergic to latex, it is a good idea to learn which products contain it and strictly avoid exposure.