1. Cultures of the World with Power Point – Session 1
__Select country
__Complete Countries and Cultures of the world work sheet
Start building the Power Point presentation.
FIRST SLIDE: Title Slide
SKILL: Adding a slide, choosing a format, inserting a picture, formatting text, aligning text and graphics
1) Layout: Title and Content
2) Put the country as the title
a) Change font to size 60 Algerian, change color
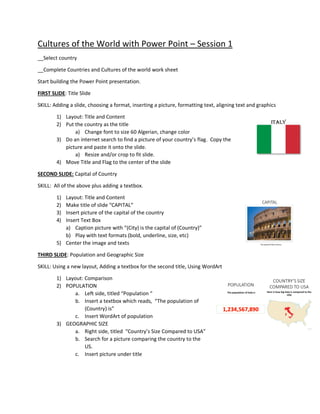
3) Do an internet search to find a picture of your country’s flag. Copy the
picture and paste it onto the slide.
a) Resize and/or crop to fit slide.
4) Move Title and Flag to the center of the slide
SECOND SLIDE: Capital of Country
SKILL: All of the above plus adding a textbox.
1) Layout: Title and Content
2) Make title of slide “CAPITAL”
3) Insert picture of the capital of the country
4) Insert Text Box
a) Caption picture with “(City) is the capital of (Country)”
b) Play with text formats (bold, underline, size, etc)
5) Center the image and texts
THIRD SLIDE: Population and Geographic Size
SKILL: Using a new layout, Adding a textbox for the second title, Using WordArt
1) Layout: Comparison
2) POPULATION
a. Left side, titled “Population “
b. Insert a textbox which reads, “The population of
(Country) is”
c. Insert WordArt of population
3) GEOGRAPHIC SIZE
a. Right side, titled “Country’s Size Compared to USA”
b. Search for a picture comparing the country to the
US.
c. Insert picture under title
2. FOURTH SLIDE: Cuisine
SKILL: Using another new layout, Inserting multiple pictures, Arranging, Inserting shapes
1) Layout: Picture/Content with Caption
2) Make title of slide “CUISINE OF (COUNTRY)”
3) Insert 2-3 pictures of various foods from country
a. Play with “ Arrange”
4) Write a short paragraph (3-5 sentences) about the food
of the country in the caption
a. Play with fonts, keep size to around 16
5) Insert shape. From Insert, Shape, choose “Stars and
Banners” , third to last image.
a. Size shape and move over “CUISINE OF (Country)”
b. Adjust outline and fill colors
c. Arrange, “Send to Back”
FIFTH SLIDE: Currency
SKILL: Inserting a table and a currency symbol (copy & paste)
1) Layout: Title and Content
2) Make title “CURRENCY OF (COUNTRY)”
3) Insert a picture of the country’s currency
4) Create Textbox to either the side or underneath of the
picture
a. State the name of the currency
b. Include symbol of the currency
c. State the exchange rate of the currency into US
dollars
5) Insert a table with 2 columns and 2 rows.
a. Row 1 – Country & Currency, then US Dollar
b. Row2 – One unit of currency from Country, then the value in US dollars
SIXTH SLIDE: Religions
SKILL: Inserting a graph, Putting data into the graph, Styling the graph
1) Layout: Title and Content
2) Title “RELIGION IN ITALY”
3) Insert Chart
a. Select a type of chart (pie or bar)
b. Title chart “Percentages of Religions in (Country)”
c. Plug in name of 3 major Religions and then the
percentage of that religion in the country in the Excel sheet that will pop up
d. Select style for the graph
3. SEVENTH SLIDE: Sayings/Proverb SKILL: Adding a Recording, Using Bing Translator
1) Layout: Comparison
2) Title “SAYING/PROVERB OF (COUNTRY)”
3) Left Side
a. Text: type saying in language of the Country
b. Insert: Recording of the saying in the
language of the Country
i. For this, go to Bing Translate and have
the translator speak while PowerPoint
is recording.
4) Right Side
a. Text: A literal translation of the phrase (These can be pretty funny)
b. Text: The English equivalent and/or the meaning in English (so that we know what it
means in the language)
EIGTH SLIDE: National Anthem of the Country (Note: The black box in the picture on the right is a video
in the powerpoint)
SKILL: Inserting a video from YouTube
1) Layout: Title and Content
2) Title: “NATIONAL ANTHEM OF (COUNTRY)”
3) Insert Video from Web
a. Select “YouTube”
b. Search for the national anthem of the country
i. If possible, choose a video with the lyrics in
both the language of the country and
English
c. Insert video into slide
i. Because we can’t trim videos from the internet, we will only show 15-20
seconds of the national anthem, then manually stop.
OPTIONAL SLIDES: If you like, you could add one or two additional slides to showcase what you have
learned. Additional slides could supply information about famous people from the country, national
holidays, popular sports, traditional dress ,music or dances or surprise us with another category!
Cultures of the World with Power Point – Session 2
4. __ Open project from last session
__Review some of the skills learned in the first session.
__ Photo Formatting – Learn about formatting and adding borders and artistic accents. Go back and add
formats to your imported photos.
__ Transitions- Learn about making interesting and artistic transitions from slide to slide. Go back and
add transitions to your presentation.
__Animations – Learn about animating your text and photos. Go back and add animations to your
presentation. In particular, animate slide #7, Proverbs, so that the right side, which has the English
Translation and/or meaning of the phrase, will not be on the slide until you click for it to appear .
___Presenter notes- Learn about inserting presenter notes that only you will see. Go back and add those
to your presentation.
__Presentation tips- Review a list of presentation tips.
__Research a dish or recipe you would like to prepare for your next class.
__Review your final presentation. Ideally, your presentation will be between 5 -7 minutes.
Cultures of the World with Power Point – Session 3
Today is Presentation day! Bring your completed presentation along with a dish from your country to
share with the class today. If you like, you can enhance your presentation with other “show and tell”
type additions. For example, last year, some students wore traditional dress and another brought scale
models of national landmarks and another performed a traditional song.
Remember to bring –
__Your completed presentation on your USB drive(5-7 minutes)
__Your dish to share
__ Any enhancements
Then just sit back , relax and prepare to be WOWED!!