
Recommended
More Related Content
Similar to Handwoven Home : Weaving Techniques, Tips, and Projects for the Rigid-Heddle Loom
Similar to Handwoven Home : Weaving Techniques, Tips, and Projects for the Rigid-Heddle Loom (10)
More from Lucky Gods
More from Lucky Gods (20)
Recently uploaded
Recently uploaded (20)
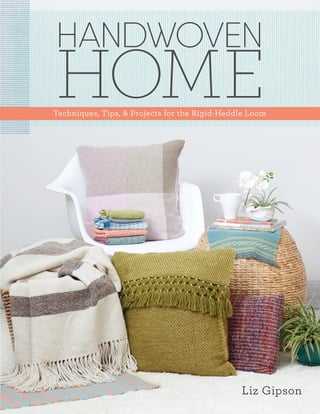
Handwoven Home : Weaving Techniques, Tips, and Projects for the Rigid-Heddle Loom
- 2. 🌟Welcome to Your Journey of Ultimate Wellness! 🌈💖 Thank you for choosing our ebook/magazine! 📘✨To enhance your health and beauty experience, we've curated some phenomenal products that promise to elevate your well-being. 🌺🌟 Skincare Saviors: Hydrossential - Unique Beauty Serum: 💦One Simple Way To Maintain A Flawless Skin. Link: https://mas.so/hydrossential Sun-Kissed Confidence: Totally Bangin' Tan by Turbo Babe: ☀️Go From “Pale Princess” to “Golden Goddess” with this Anti-Aging Sunless Tanning. Link: https://mas.so/bangin Hairraisingly Healthy: FoliPrime - The Natural Egyptian Hair Balm: 💆♀️Supports Hair Health. Link: https://mas.so/foliprime Men's Wellness Wonders: Endo Pump - Male Enhancement MONSTER: 💪U.S. Scientists Discover Secret For Stamina & Virility At Any Age. Link: https://mas.so/endopump African “Sex Monkeys” Unveil How To Reverse Erectile Dysfunction So You Can Have A Rock Hard Erection Again And Last At Least 30 Minute In Bed! (Note: Due to the potentially offensive language, I recommend considering revising this title and description.) Link: https://mas.so/edprotocol Conquer Health Concerns: MenoRescue: 🧘♀️Support healthy hormone levels with MenoRescue™. Formulated using the latest Ivy League research. Link: https://mas.so/menorescue GlucoFence - Blood Sugar Support: 🛡️#1 Most Hated By Big Pharma , Rogue Doctor Fixes Type 2 Diabetes. Link: https://mas.so/glucofence Bonus Goodies: NEW '23: Archangel Health Prayers for 400 Diseases, Weight Loss... Link: https://mas.so/archangels Natural Therapy With Killer VSL & Captivating Hook That Converts Like Crazy For Both Health & PD Niches! Powerful Therapy Based On Acupuncture. New Non- Invasive Alternative. To Electro-Acupuncture, Producing Astounding Results… Self- Application Is Easy, Rapid Response. Link: https://mas.so/naturaltherapy Every Morning This Ancient Amazonian “Drip Method” Is Being Used To Support Healthy Weight Loss. Link: https://mas.so/ignite The "Hidden Survival Muscle" In Your Body Missed By Modern Physicians That Keep Millions Of Men And Women Defeated By Pain, Frustrated With Belly Fat, And Struggling To Feel Energized Every Day… Link: https://mas.so/hipflexors Meditation - "InnaPeace Meditation Program" : The InnaPeace Program for Anxiety Sufferers, Discover why thousands are flocking to what experts are calling “the most advanced self-development method known to human kind”. Link: https://mas.so/innapeace Don't miss out on these amazing products! Click the links above and start your journey to a healthier, happier you! Don't let shortened links with mas.so send shivers down your spine! 🥶It's just a friendly URL shrinker, like a superhero packing superpowers into a tiny suit. 💪👀Fear not, visit https://mas.so and see what mas.so is. ✨Then, click with confidence and discover your favorite products! 🗺️Trust needs to be built on the first click. Thanks!💎
- 4. WEAVING TECHNIQUES, TIPS, AND PROJECTS FOR THE RIGID-HEDDLE LOOM LIZ GIPSON
- 5. CONTENTS INTRODUCTION PART ONE: WEAVING FOR THE HOME CHAPTER ONE: Yarn for Interiors CHAPTER TWO: Know-How for the Rigid-Heddle Weaver CHAPTER THREE: Following the Patterns PART TWO: PROJECTS CHAPTER FOUR: The Kitchen Four Looks Kitchen Towels Fabric Stash Rag Rug Light Bright Towels Fresh Baked Bread Cloth Linen & Lace Cafe Curtains CHAPTER FIVE: The Dining Room Hemp Hot Pads Skip-a-Slot Placemats Twill Be Done Runner Four-Sided Fringe Napkins Luxe Linen Placemats Campy Gamp Runner Go Your Own Way Runner
- 6. CHAPTER SIX: The Living Room Hudson Bay Inspired Throw Tweed and Twill Pillow Cover Bejeweled Table Square Oversized Mug Rugs Mixed-Warp Pillow Cover Mesaland Doubleweave Pillow CHAPTER SEVEN: The Bathroom Linen Facecloths Bordering on Perfect Hand Towels Two-Color Krokbragd Rug PART THREE: BEGINNINGS AND ENDINGS CHAPTER EIGHT: Warp Your Rigid-Heddle Loom CHAPTER NINE: Finish Your Weaving GLOSSARY RESOURCES
- 7. INTRODUCTION I relish the quiet, contemplative moments in life—cooking a pot of soup, curling up on the couch with a good book, or taking the dog for a long walk. All of these activities are made better by textiles. Yes, even walking the dog is enhanced by textiles. It is on these walks that I work out my next weaving project. Weaving in your head counts! Probably much like you, I look at curtains, floor coverings, table linens, and bathroom towels and think “How lovely would it be to weave that for myself!” I see a sunset, and I think “colorway;” I hike a high desert mesa, and I think “pattern.” On New Year’s day 2015, I woke up with one of those lightning-bolt ideas. I had just moved into a new house, and it was a wide-open canvas begging for cloth. I decided I would weave something for every room in the house to realize a lifelong dream of living in a handwoven home.
- 8. My challenge was inspired by need. Next to the sink is a towel rack, which is handy because we have no dishwasher. We also have limited counter space, so the towels I had on hand were constantly competing with the other objects on the counter. Commercial towels were all too long. As a weaver, I designed a fingertip towel in exactly the colors, materials, and size I wanted. Because I can weave multiple projects on one warp, I wove two fingertip towels and one longer and thicker towel to hang on the oven door. Made of a linen-cotton blend, these towels wear like iron—they will outlast almost all of their store-bought counterparts. They give me great pleasure every time I use them—and use them I do. This is why we weave, even when we can buy towels for next to nothing at a big box store. Making our own is better. I can tailor the cloth to my needs—size, color, and texture—and make it of materials that last. I know the story of the yarn, and I remember all that happened in my life as I wove it. Handwoven cloth is like a memory scrapbook that you can use. What is a Rigid-Heddle Loom?
- 9. The rigid-heddle loom gets its name from the ingenious part of the loom called a rigid heddle. It is made up of two supports between which are held heddles—the plastic pieces with the eye in the middle. These heddles are spaced so that there are gaps between them. This construction makes up the clever slot and hole construction of the rigid-heddle loom. The rigid heddle is used to evenly space the yarns, lift and lower the yarns threaded in the holes, and to press the yarn into place. These functions are all served by separate parts in the rigid-heddle loom’s larger cousins, the floor and table looms. This simple construction is what makes the rigid- heddle loom so accessible to the beginner. Don’t be fooled by its simplicity, though; with a little know-how you can weave virtually any cloth your heart desires. Weaving is particularly suited for the home. Looms produce long rectangular objects perfect for efficiently and effectively making all your home textiles—rugs, pillows, throws, curtain, placemats, runners,
- 10. and towels. I use the words “efficiently” and “effectively” purposefully. Once you have the loom set up—and the rigid-heddle loom is extremely easy to set up—producing multiples of a project is relatively simple. Your projects come off the loom practically as finished objects that need only your finishing touch. How elaborate the finishing is up to you. Simple hemstitching requires no additional finishing, or you can enhance your textiles with elaborate knotting that no machine can do. Using two heddles, you can create pillows that only need to be seamed on one end or throws and tablecloths that are twice as wide as your loom. In my previous book, Weaving Made Easy, I covered the fundamentals of weaving on a rigid-heddle loom for crafters who know next to nothing about weaving. If you are brand-new to this style of weaving, you may find that book helpful. While writing Handwoven Home, I assumed you have at least one project under your belt and are familiar with some basic terms. I have included abbreviated warping information in the back of the book so you don’t have to search for that information elsewhere, particularly the more advanced setups of indirect and two-heddle warping. There is a lot of jargon in any craft, so if you are confused by some of terms, refer to the glossary in the back of this book. The ability to create a textile for your specific purpose is one of the best reasons to weave. Having the skills and techniques to do so gives you the confidence to tackle any project your heart desires. It is my hope that this book, which is one part recipe book and one part technique manual, will serve as your guide for creating textiles that you can live with for a lifetime.
- 12. CHAPTER ONE YARN for INTERIORS Selecting yarns for home projects is different than selecting yarns for wearables. Keep in mind that table linens and towels are washed regularly, window treatments are exposed to sunlight on a daily basis, rugs are trod upon, and cushions are sat on. Yarn is the base material from which a weaver’s particular brand of fun is made. I am not a big fan of rules, but I am a huge fan of knowledge. If you know a bit about yarn, how it is made, what makes one yarn different from another, and how this relates to the projects you make for your home, you will have more fun at the loom and find even more happiness with the final product. Yarn Content and Construction The incredible world of yarn design is a marriage of fiber and construction. To make the best choices for your home décor projects, it pays to learn a bit about what goes into the making of yarn.
- 13. As a handspinner, I can wax poetic about yarn construction for ages, but I’ll spare you and focus on what you need to know as a weaver. Whether cotton, wool, or synthetic, tightly spun, smooth yarns are good for weaving. RAW MATERIALS The basic building block of yarn is fiber. Natural fibers— cotton, linen, hemp, silk, wool, mohair, and the like—all have different fiber lengths referred to as a staple length. Among other factors, the length of the fiber determines how much twist the fiber needs to have enough integrity to stay put
- 14. during use. Short fibers such as cotton need a lot of twist. Long fibers such as silk and mohair need less twist. Other factors go into manufacturing decisions such as the diameter of the individual fibers, the crimp or natural wave of the fiber, the luster or how the fiber refracts light, and the way the fiber was harvested. How the yarn is prepared and twisted will ultimately decide how these properties will be brought forth. Singles and plied yarns vary greatly in size and strength. PLY Also, you will hear the word “ply” thrown around a lot. An individual strand of fiber twisted together is called a singles
- 15. or a single ply (ply here being a noun and not a verb). These singles can be used on their own or plied with other singles for a variety of reasons—to impart more strength, to make a thicker yarn, or to balance the yarn. Different fibers call for different treatments. Tightly spun smooth yarns are traditionally thought of as good weaving yarns. Loosely plied or softly spun yarns are often shunned. There is a trade off between these two extremes. You want yarn that is strong, but you may also want it to be pliable, depending on your end use. You may also run into the terms “woolen” and “worsted.” From a yarn construction standpoint, they refer to the fiber preparation and spinning technique used to make the yarn. Worsted yarns are smooth, dense, long wearing, and create very good pattern definition. Woolen yarns are light, airy, fuzzy, and have more elasticity. To confuse matters evenmore, worsted is also a weight classification for knitting yarns. YARN FOR THE RIGID-HEDDLE The good news for the rigid-heddle weaver is that this loom allows you to use perhaps the widest range of yarns compared to other loom types. The rigid- heddle loom itself causes less abrasion and stress on the yarn than many other types of looms. Its relatively short distance from warp beam to cloth beam means you can get tight tension without a great deal of force.
- 16. Still, the weaver may be left wondering which yarn to use for which project and how do all the many cotton, wool, and other fiber-based yarns differ from one another. Knowing a little bit about yarn content and construction will allow you to make an informed selection when faced with a wall of yarn and a project you want to make. In the kitchen, bath, and dining room, cellulose-based yarn is the go-to choice for weaving. Cellulose Fibers For kitchen, dining, and bath projects, cellulose is king. Cotton, linen, and hemp yarns wash, wear, and weave
- 17. beautifully. You won’t find wool yarns in my patterns for the kitchen, dining room, or bath. COTTON Cotton is nature’s way of protecting the seeds of the cotton plant until they are ready to germinate. It is a marvelous fiber; strong, cool to the touch, absorbent, non static, and resistant to abrasion. It requires a lot of twist for the yarn to have enough integrity to hold up to weaving’s rigors. I’ve noticed that if a pattern calls for cotton yarn, many weavers dig into their stash and pull out whatever cotton they have on hand. Conversely, some weavers are baffled by the wide variety of cottons and want to know which one to use for which project. All cotton yarns are not the same. Depending on their type, they will behave differently in the finished cloth. MERCERIZED COTTON (aka perle or pearl cotton) is soaked in a sodium hydroxide bath. This increases the surface area of the yarn and gives it a shiny appearance. Mercerization increases the fiber’s ability to take dye and strengthens it. It also slightly decreases the yarn’s ability to absorb water. Mercerized cotton is the go-to for most household linens, such as table runners, placemats, pillows, and curtains. Strong as an ox, it can take whatever abuse you throw its way. It can work for towels, but I prefer unmercerized cotton’s absorbency and it’s relatively faster drying time.
- 18. UNMERCERIZED COTTON is just that, cotton that hasn’t been mercerized. It has a nubby appearance that imparts a handspun look to the finished fabric, and it is highly absorbent. It isn’t as strong as mercerized cotton. COTTON CARPET WARP is a tightly twisted 4-ply unmercerized cotton. It is extremely strong and comes in a variety of colors. The hard twist makes it very stable and decreases its tendency to bloom or puff out in the wash. It is great as a base for rugs or mats, but if you use this yarn for a towel, it may have a stiffer hand than you may like. ORGANIC COTTON is grown so that it retains much of the plant’s natural wax in addition to avoiding the use of petrochemicals for its production. This gives the yarn a lovely, buttery feel. In its unmercerized form, it is shinier than you might expect. It is a great choice for soft, absorbent towels. NATURALLY-COLORED COTTON is grown in a range of natural colors from rich browns to lovely greens and reds, and it is also a great choice for towels. The industrial revolution and its need for uniformity almost drove these plants to extinction. Farmer and inventor Sally Fox rescued them and created a strain appropriate for mill spinning. You can’t always judge its color by what you see on the cone, spool, or skein. This cotton often deepens when washed, producing richer, more intense hues. CROCHET COTTON is easy to find in big box craft stores. It is designed for crocheters and is often used by tatters for its
- 19. unique construction. Crochet cotton is mercerized and very tightly spun, opposite to most conventional yarns—spun to the left and plied to the right. The twist and ply direction don't really make a difference to weavers. Similar to carpet warp, it doesn’t bloom as much as other cottons. It is a good substitution for Pearl cotton; just keep in mind that due to the extremely tight twist, it will be a bit stiffer and crisper looking in the final cloth. CRAFT COTTON is my catchall name for a 4-ply, unmercerized yarn with moderate twist. It tends toward the light-worsted weight. Depending on the quality of the cotton, it can be an excellent choice for absorbent soft towels and other household items. However, it can be linty, depending on how tightly the yarn is spun. Cotton spun with low twist feels soft, but those short fibers tend to work their way out over time, causing your fabric to pill. These yarns may not create heirloom-quality fabrics, but they will hold up quite well to daily use. RECYCLED COTTON is highly variable and fun to work with. It is made from the remnants of garment manufacturing. The waste is sorted in color lots, shredded, and remade into a lovely tweedy yarn that has a lot of character. This yarn can be used in a wide variety of projects, but don’t fall in love with a particular colorway, because they can come and go from a yarn line pretty quickly. NOVELTY COTTON is a pretty broad category. These yarns are softly spun, textured, and have a larger than expected
- 20. grist for cotton. They can be used to create a lively textured fabric perfect for lightweight, decorative household items. They aren’t a great choice for fabrics that are rubbed and wetted continuously, such as towels. These yarns will pill and shred with vigorous use. (Shaft-loom weavers avoid using them as warp because the metal or nylon heddles and reed will rip them to shreds, but rigid-heddle weavers can have at it!) Some novelty cottons are finer and more tightly spun. Use the abrasion test to determine if they will work for you. I used a novelty cotton in the Go Your Own Way Runner as an accent yarn. My Yarn Pantry In the vast jungle of yarn possibilities, these are the yarns I go to over and over and over again for my home projects. I always have these five yarns at the ready, because I can make anything I want for my home from them: 22/2 cottolin* 8/2 unmercerized cotton 3/2 pearl cotton Worsted or DK weight wool Worsted-weight cotton or cottolin * This is about the the same size as an 8/2 cotton, but it is measured on a different count system; see "The Count System" section for more information.
- 22. Bast fibers such as linen and hemp make lovely, heirloom-quality fabrics that will last a lifetime. BAST FIBERS Bast fibers such as linen, hemp, and jute have long been prized for the home. They wear well and have a unique drape and a crisp hand. Highly absorbent and cool to the touch, bast fibers are extremely durable, and their luster makes them ideal for heirloom-quality table linens and sophisticated curtains. Bast-based yarns are extremely inelastic and like to be woven under tight tension. They transform during wet finishing as the fibers relax and move into position. A good pressing will also bring out their shine. LINEN, the most common bast fiber, is made from the flax plant. Considered a luxury fiber, it is renowned for its use in fine home textiles.
- 23. HEMP is not all hype. It is a lovely fiber that is making a strong comeback. It is molecularly different from linen, so it takes dye better. It also resists mildew, which comes in handy for cloth used in wet environments, such as the bathroom. JUTE is not often found in a very refined state. It makes an excellent rope that is good for use in rugs that receive a lot of foot traffic. Look for jute that is smooth and doesn’t shed when you rub it. COTTOLIN is a blend of cotton and linen. It adds a bit of elasticity to the linen, making it easier to work with, and the linen adds strength to the cotton. With repeated washings, cottonlin textiles sometimes release a bit of lint. This is caused by the short cotton fibers working their way free of the long linen fibers. Wool Yarns Wool and other protein fibers deserve as much consideration for interior weaving projects as cotton. It struts its stuff in rooms meant for relaxing. If you are a fan of breed-specific wools on the long and strong side, interiors are the perfect application. (Check out the Tweed and Twill Floor Pillow.) Short, soft fibers such as Merino are lovely for next-to-skin wear, but they won’t hold up well underfoot; if used in a pillow, they may pill with repeated use.
- 24. Longwools include breeds such as Border Leicester, Coopworth, Cotswold, Leicester Longwool, Lincoln, and Romney. Long, lustrous, strong, with wavy crimp, they are prized for their strength and high gloss. They don’t felt easily and keep their shape wash after wash. Longwools result in smooth, sleek, worsted low-twist yarn that is strong. These yarns make great choices for rugs, pillows, and throws. Wool cloth comes to life when wet finished. During washing, wool yarns expand and settle in a process called "blooming." THE PRICKLE FACTOR Yarn folks tend to shy away from strong wools because they prickle, which is caused when the microscopic ends of the fiber work their way free of the yarn and give you a little poke. The thicker the diameter of the fiber, the stronger the poke. Although you may feel an initial sensation, it may dissipate quite rapidly as you relax into the textile.. I enjoy the long-wearing benefits and the pleasure of using long and medium wools, so I can live with a little poke. Superwash Yarns Superwash yarns are designed to be stable and don’t bloom much. This is fine with the loopy construction of knitting and crochet, but it can be problematic in woven fabric. I use them only in fabrics that I want to be stable, such as the Oversized Mug Rugs.
- 25. Synthetic Fibers Synthetic yarns are a vast class of yarns created in a lab, similar to superwash and mercerized yarns. Like all yarns, synthetics must be used appropriately. They tend not to be absorbent, so they are not good for towels; that lack of absorbency, though, can be great for table runners. Synthetics also tend to be dyed in their raw state before put into yarn form, so the colors are through and through— not just on the surface of the yarn—making them more lightfast. This makes them a good choice for curtains. Perhaps surprisingly, ynthetic yarns have a base of natural materials. Some are renewable, such as wood, bamboo, and soy; some are not, such as coal and petroleum. Although the fiber is created in a lab, when it heads to the mill, the same principles of fiber length, twist, and ply are used to create the final product. RAYON, OR ARTIFICIAL SILK, are considered a semi- senthetic yarn and comes under all sorts of brand names such as Tencel and Soysilk. These yarns have either a cellulose base, such as wood or bamboo, or a protein base, such as soy or milk. The base is cooked into a “batter,” then fibers are extruded into a wide variety of yarns. They can be long, sleek, and shiny like silk, or lofty and airy like wool. They play well with other fibers and blends, and they make great curtain or pillow-cover fabrics. These yarns can be good alternatives for those who are allergic to wool.
- 26. NYLON YARN is derived from coal. It is shiny, tough, stretchable, and melts under a hot iron. The fibers are nonabsorbent, quick drying, and won’t wrinkle. Nylon is often blended with other fibers to increase a yarn's toughness. ACRYLIC YARN is petroleum based. The yarn is lightweight, warm, and quick drying. It has less stretch than nylon and can cause the same issues in cloth as superwash. Both types of yarn are designed to be stable and don’t bloom in the final wash. Like nylon, blending acrylic with other fibers can lend both of their good qualities to the final yarn. Both of these yarns are inexpensive and designed for lots of wash and wear, but neither is very absorbent and won’t make a good choice for kitchen and bath items. NOTE: All yarn production consumes resources—water, land, fuel, and labor. Most involve some sort of chemical. Just because a yarn is synthetic doesn’t mean it’s bad, and a yarn that is natural isn’t necessarily good. Modern farming practices can be highly water intensive and use vast amounts of pesticides to create natural fibers. Some manufactured yarns use naturally growing renewable resources and less water than some of the natural counterparts—and some do not. Get to know your fiber and yarn to make the best choice for your home and lifestyle. Weaving vs Knitting Yarns
- 27. Industrially speaking, yarns that are manufactured for weaving and those manufactured for knitting are different. Weaving yarns often, but not always, have more twist. Some manufacturers leave in the spinning oil that protects the yarn from the rigors of the loom. This oil washes out when the fabric is finished, and the yarn transforms once released from the bounds of the oil. This matters if you purchase mill ends, which are getting harder and harder to find; and if you find the perfect yarn, you may not be able to find that exact yarn again. As the name implies, these are remnants from commercial-weaving mills. If a mill-end wool feels rough to the touch, wash a little sample and see what happens. It may finish with a very different hand than what you find on the cone. In recent years, as knitting has become more popular and consumer demand has increased, many manufacturers catering to the handcraft market changed their formulas. They have softened the yarn by decreasing the singles and ply twist and using more and more superfine and superwash wools. Almost any yarn—made for weaving, knitting, or crocheting—can be used for weft. Still, consider how well it will wear over time and under the rigors of daily household use. Yarn Put-Up
- 28. Yarns are sold in all sorts of ways, the most common being hanks, skeins, and cones. Traditionally, yarns for weaving were put up on cones because it was easier to wind a warp from the cone, and the fine cellulose and linen yarns popular with weavers get tangled when wound into skeins or hanks. These terms have been somewhat muddied over the years. You may also hear a hank referred to as a skein. This is a technical definition used in some measurement systems that indicates a smaller unit size than a hank. This distinction has lost some of its meaning to the consumer. A skein is more commonly recognized as an oblong ball.
- 29. The most common yarn put-ups are cones, skeins, and hanks. The Count System New weavers often ask, “What is the deal with coned yarns and those funny numbers?” The numbers, such as 8/2 or
- 30. 5/2, are part of the names of the fibers. This naming convention is called the Count System, a very old system established when each fiber, including wool, cotton, linen, and silk, had a separate industry- trade group responsible for setting the standards on yarn sizes. Today, it seems a little nonsensical. A good manufacturer will provide the yards per pound and a balanced plain weave sett of the yarn, so you don’t have to memorize what these numbers mean; but, it is helpful to know. The first number is the relative weight of the yarn. The higher that number, the finer the yarn. So, a 5/2 yarn is thinner than a 3/2 yarn. The second number is the number of plies in the yarn. So, a 5/2 yarn has two plies. The cotton guild long ago determined that their system would be based on a skein of yarn that is 840 yards (768 meters). This base yarn would be a size 1/1, a singles yarn measuring 840 yards (768 meters)/lb. A size 2 yarn would require two skeins of thinner yarn to equal one pound or two skeins of even thinner yarn plied. So, a 5/2 yarn is a 2-ply yarn that measures 2,100 yards (1,829 meters) per pound; this is 840 multiplied by 5 and then divided by 2. Choosing Warp and Weft Yarn Whatever yarn you select, it must be able to hold up to the rigors of the loom as well as the wear and tear of daily use.
- 31. Luckily, the rigid-heddle loom is an extremely yarn-friendly loom. Weaving puts tension on the yarns collectively, not on each individual yarn. While you have to evaluate the yarn individually, you also have to understand how pressure is exerted on it within the framework of the loom. The plastic heddles that make up the rigid heddle itself are gentler on yarn compared to other heddle types. The relatively short length of warp held taut between the beams allows you to use less tension than on a larger loom, which requires much more tension on the warp to prevent sagging in the middle. With this in mind, your yarn doesn’t have to hold up to industrial standards. It just has to pass the simple pinch-and-pull test. PINCH-AND-PULL TEST To determine if your yarn is strong enough as warp, with the yarns held taunt on the loom, give it the simple pinch-and- pull test: Pinch both ends of a 4"– 6" (10 – 15 cm) section of yarn between your index finger and thumb. Apply steady, firm pressure as if to pull the yarn apart. If the yarn easily drifts apart or breaks, it will fail as a warp yarn. If your yarn passes the pinch-and-pull test, observe the yarn with tension and without. Holding the yarn between your index finger and thumb again, observe it both under tension and in its natural state as you tug and release. Note how much elasticity the yarn has. Does it stretch and rebound? Or does it hold steady? This knowledge will come in
- 32. handy when you are deciding how to use the yarn. If the yarn holds steady, then it should hold up to the rigors of the loom. The Count System BASE NUMBERS COTTOLIN: 300 yards COTTON: 840 yards WOOLEN (WOOL): 256 yards WORSTED (WOOL): 560 yards SILK: 840 yards LINEN: 300 yards * Woolen yarns are less compact than worsted yarns, so they have a lower count number in the Count System. ABRASION TEST Understanding how your yarn will wear can also be evaluated up front. Take a piece of yarn and rub it back and forth on the corner of a table vigorously a number of times. This is a good test of the yarn's ability to resist abrasion. If the yarn shreds or pills, it is most likely going to do this in your finished cloth. Weft yarns, the yarns you weave with, don’t have to pass the pinch-and-pull test. But if the yarn shreds or pills easily during the abrasion test, it may not be the best choice for home décor projects.
- 33. Fringes can be short or long, knotted or loose, or trimmed close to the work and encased in a hem. Fringe Treatment
- 34. A final major consideration when selecting yarns for weaving is how they will act in the fringe. Singles yarns puff out in the wash, making little tufts. Plied yarns and some fancy novelties can fray. These can be negatives or positives depending on the look you are going for. To get an idea of how the yarn will act in the fringe, cut a few pieces about 12" (30 cm) long and hand wash them vigorously in hot water with a little soap. Pay attention to how the ends behave—this will show you what will happen in the fringe. Regardless of your tests, remember: All yarn will fray eventually. If you like the look of straight fringe, handwashing is recommended. You can trim away ends that stray over time, and the fringe still shows off the yarn’s beauty. If your yarn has the potential to fray at the ends, finish them off with twisted or braided fringes and trim them close to the knots. You can trim away ends that stray over time, and the fringe still shows off the yarn’s beauty. Learning which yarn works best for what type of project comes with experience. The good news is that there are a wealth of projects in this book where I have done all that choosing for you, allowing you to gain experience as you make beautiful fabrics for your home.
- 37. CHAPTER TWO KNOW-HOW for the RIGID- HEDDLE WEAVER Handweaving great cloth is like baking a cake. It is one part ingredients, one part know-how, and one part finishing touches. Selecting the right ingredients—yarn— understanding the right technique for the job at hand—know- how—and then adding your own personal details—finishing touches—is what makes a good cloth great. This chapter is all about the middle part, the know-how. Go-To Tips and Techniques When weaving for the home, I use a handful of techniques and tools over and over again. With this know-how, I can weave multiple projects that are all the same size, place design elements so they fall in the same place on each successive textile, make seamless transitions between colors, and create hard-wearing textiles. Perhaps most importantly, they allow me to head off potential problems before they become problems.
- 38. Following is a laundry list of go-to techniques that will help you weave with less fuss and more fun. Weaving a Header In almost every instance, I recommend weaving a header of smooth scrap yarn before you start to weave your project. A header is scrap yarn that is woven into the beginning and end of a project and removed later. The purpose of a beginning header is to spread the warp evenly so there are no gaps in the warp and to give your cloth a firm foundation on which to grow. I like to use a smooth cotton scrap yarn that contrasts well with the actual project yarns, making it easier to distinguish from my project yarns when I am ready to remove it. You may be tempted to skip this step. But, unlike floor or table looms, the rigid heddle isn’t secured to the loom. It hangs freely when you release it from the heddle block. You guide the rigid heddle toward the edge of your cloth to place the next weft with your hands. I recommend using both hands to guide the heddle into place. Even so, one side of the heddle always hits the cloth before the other. Typically, the side of your non-dominant hand will hit first because you have less control over it. If you don’t weave a header, you may notice that one side of your cloth grows faster than the other, causing your
- 39. weaving to have a slight angle. This isn’t the only reason this happens, but it is one of the most common reasons. This may or may not cause issues in the final cloth. If you are weaving with wool, these irregularities will most likely fill in after you wash your project. However, if you are weaving with a yarn that doesn’t bloom much, such as linen and tightly twisted cotton, these uneven lines may be more obvious. Also, fine threads tend to show irregularities more than thicker ones. There is also the issue of finishing. If you are hemstitching, having the yarn spread evenly will ensure that your stitches are even. If you are knotting the fringe, the header will keep your weft in place until you are ready to finish, particularly when working with smooth, fine, or slippery yarns. If you are knotting your fringe, you may also want to weave a footer with the same scrap yarn at the end of your project to keep the weft in place as you remove the fabric from the loom. Managing Selvedges Maintaining straight selvedges is the number two pain point for weavers, second only to warping tips. You must do the following three things if you want to maintain tidy edges and prevent draw-in:
- 40. WEFT ANGLE The weft yarn doesn’t travel in a straight line from selvedge to selvedge. It bends over and under the warp yarns. To allow enough length for the weft to do its thing, you need to lay it in at an angle before pressing it into place. How much of an angle depends on the width of the fabric and structure. Your angle is too low if your selvedge begins to draw in, crowding the other threads. The angle is too steep if loops appear at the edges. Experiment a bit before starting each project to determine the correct weft angle and then maintain that angle as you weave (photos 1 and 2). ADVANCE OFTEN Advance the warp after weaving 2"- 3" (5–7.5 cm) of cloth. The closer the cloth is to the rigid heddle, the greater the tension placed on the selvedge threads. Another factor is that as your fabric grows closer to the heddle it becomes more difficult to maintain an appropriate weft angle. WEIGHT YOUR SELVEDGES Weighting your selvedges gives them an extra bit of tension, making it easier to maintain crisp edges. My favorite way to do this is to slip a 3" (7.5 cm) S-hook around each selvedge and let it hang off the back beam. SLOT OR HOLE?
- 41. Yarns are threaded through a rigid heddle, alternating between slots and holes. Threading selvedges in a hole will result in a tighter tension at the selvedges than threading them in a slot. This may lead you to conclude that it would be best to have your selvedges in a hole, but I actually prefer them in a slot. The slot yarns act more like a floating selvedge on a floor loom where the yarns aren’t fixed in a heddle. Weighting them adds more tension and still allows you to manipulate them if necessary, such as when you're weaving certain pick- up patterns. However, not all patterns call for an odd number of warp ends, and some may require that you end in a slot on one side and a hole in the other side or a hole on both sides. Weave a beginning header with scrap yarn to spread the warp evenly.
- 42. Shift your weft angle to ensure that you don’t cause your selvedges to pull in or create extra loops at the selvedges. Weighting your selvedges adds extra tension and can help keep your edges tidy. Using a Temple
- 43. Despite following the best practices for managing your selvedges, some patterns have a tendency to draw in more than others, particularly twill or weft- faced weaves. A temple is a handy tool to have to keep the weaving width even. A temple is a stretcher with prongs or clips that pulls or pushes your weaving to a consistent width (photo 4). The most common temple is made of wood or metal and adjusts to multiple lengths. It has small sharp teeth on either side of the temple that allow you to place it at the edge of the fabric and then lock it in place at a fixed width. When using a temple, you need to advance often, moving the temple up as you weave so that you always maintain the fixed width. Using a temple will make it easier to maintain a consistent width while weaving.
- 44. Managing Multiples One of the best things about being a weaver is that you can put on a long warp and weave several towels, placemats, or napkins at one time. You can alter the color and pattern of each, making them unique, but coordinated. The challenge is weaving them all the same size, and if you have an accent— such as a stripe of pattern along the border, as in the Bordering on Perfect Towels—placing that pattern in the same place on every object. MAKE A PAPER GUIDE This is a trick handed from weaver to weaver. To ensure that your towels, for example, are all the same size and have stripes in the same place, make a thin paper guide and pin it to your warp as you weave. Use a 3" (7.5 cm) wide strip of craft paper cut from a roll so that it already has a curl (photo 5). Cut it a bit longer than you want each of your multiples to be. Measure and mark the beginning and any hem or pattern marks along the way. Roll the paper tightly from the end of the marking to the beginning and secure with a paperclip. Allow a 3" (7.5 cm) tab to stick out from the beginning of the project. Weave the first few inches (or several centimeters) of your project, then pin the guide to your work with a T-pin. As you weave, roll out and re-pin the paper to your fabric. Use it as a guide to begin and end design elements and start and finish each weaving. When you finish one object, leave
- 45. an appropriate amount of warp and start your next weaving, pinning and rolling the guide as you work. Using a guide is a great way to measure your textiles as you weave. If you aren't weaving multiples, you can still use the same principle and pin a cloth tape measure to your fabric as you weave. A paper guide can help make sure each project in a set of multiples is the same size and the patterns remain consistent. Measuring the Cloth
- 46. I often get the question, “Should I measure while the cloth is under tension or not?” Measuring under tension makes little difference with cellulose fibers such as cotton and linen, but it can make a big difference with yarns that have more elasticity. I recommend measuring wools and similar yarns with the tension backed off enough to allow the yarn to relax, but with enough tension so that you can measure it on a flat plane. Using a Tapestry Beater A number of weft-faced fabrics in this book require the use of a beater, including the Skip-A-Slot Placemats, Oversized Mug Rugs, and Fabric Stash Rag Rug, just to name a few. The rigid heddle isn’t heavy enough nor does it have enough inertia compared to the weight of a beater on a floor loom to pack these textiles firmly enough. Using a tapestry beater to further pack the weft will give your fabric a firm, functional hand. There are many styles of tapestry beaters. For most of the projects in this book, I recommend a 2" (5 cm) beater with prongs spaced ⁄ " (6 mm) apart with a wide base of at least 2" (5 cm) and a comfortable handle. To pack the weft, stop every 1" (2.5 cm) or so and place the heddle in the position for the next pick—if you just wove an up shed, place the heddle in the down position or vice versa. This will lock in your weft threads. Then when you 1 4
- 47. pack the weft, the threads will not be able to spring back in the same way as they would if the shed was open. Use the tapestry beater to firmly pack the weft by starting in the middle of the weaving and firmly working out toward one selvedge. Then return to the middle and firmly pack the other side. This will dramatically change the look of most patterns. You may not see the effect of the final pattern until you compact the weft.
- 48. Using a tapestry beater will give your weft-faced weaves a firm, functional hand.
- 49. Changing Wefts You can choose from a number of techniques to transition between one color or yarn to the next. TUCKING TAILS The tail-tuck method is the most common technique used to transition between colors. The simplest way to change weft colors is the good old tail- tuck method (photo 7). Cut the working weft, leaving a 6" (15 cm) tail, change the shed, and tuck the old color weft into this shed. Lay in the new color in this same shed, starting on the opposite side of the old color tail tuck, leaving
- 50. a 6" (15 cm) tail. Press this pick and the old color’s tail into place and then change sheds. Tuck in the new color’s tail into the next shed and pass the shuttle through this same shed and press into place. This placement will put the tail tucks on either side of the weaving and decrease bulk. However, if you are making multiple changes in quick succession, these joins can start to show or even cause your fabric to build up at the selvedges where the tails are tucked. TRAVELING WEFT When weaving with two colors that change frequently, leave the nonworking yarn active and interlock the working and nonworking wefts at the selvedge to diminish large loops. Treat the nonworking weft as you would the selvedge. If the selvedge is down, pass the working weft over the nonworking weft. If the selvedge end is up, pass the working weft under the nonworking weft. Place the shuttle with the nonworking weft behind the rigid heddle, allowing it to follow the path of the selvedge thread. In this case, the last warp end (selvedge) is up, so the nonworking weft is also up. When you weave the next pick, pass the working weft under the nonworking weft.
- 52. For quick color transitions, carry the nonworking weft along the selvedge. PLY SPLITTING When working with more than two colors that change frequently or with thick yarns, use the ply-splitting method to transition between colors. It creates an almost seamless join with little extra bulk. Ply splitting involves dividing the new and old weft tails in two equal sections. This is easy to do if you are working with doubled wefts, yarns with multiple plies, or even rags, which you can cut. Ply Splitting: First, split the second yarn's tail and lay half of it in the same shed as the first yarn.
- 53. Then, split the first yarn’s tail and lay half of it in the open shed. Ply splitting creates a virtually invisible transition between two colors and prevents build up at the selvedges.
- 54. JOINING THE SAME COLOR To join yarns of the same color, work the join in the middle of the cloth. Cut the yarn from the shuttle 6" (15 cm) longer than half the width of your cloth, and then split the weft in two for 6" (15 cm). Place the heddle in the next shed, maintain your weft angle, and lay the weft into the shed, bringing it to the middle of the cloth. Pull out half of the split ply 4" (10 cm) from the end of the yarn and allow the other half to travel another 4" (10 cm), exiting it so a 2" (5 cm) tail sticks out from the shed. Wind a new shuttle and split the end 6" (15 cm). Place the new weft in the same shed starting from the same side as the old weft. Pull the tail halfway through, stopping when the base of the split yarn is a few warp ends away from where the old yarn exits the shed. Place one half of the new weft in the shed and exit it after traveling 4" (10 cm), a few warp ends beyond the longer of the two old weft tails. Press the yarn into place. Leave the tails in place until after washing the project, then trim them flush with the cloth. TRANSITIONING TO A NEW COLOR To start a new color, work a ply split of the old color at the selvedge. Then work another join on the opposite selvedge with the new color. Lay in the working weft as you would lay in a new pick. Cut the yarn from the shuttle, leaving a 6" (15 cm) tail. Pull the weft from the shed 2" (5 cm) from the
- 55. selvedge. Lay one half of the ply back in the shed, wrap it around the selvedge, and place it back in the same shed, exiting it a few warp ends beyond the other ply. Press the weft into place. Add in your new color, joining it at the selvedge as you did with the old. Leave the tails in place and cut them flush with the cloth after washing. BOAT SHUTTLES If you're weaving with fine yarn or managing multiple colors that change frequently, a boat shuttle can be very handy. Wind a bobbin with each color and then swap out the bobbins as you work. Bobbins should be wound with the yarn under moderate tension and so that the yarn builds up on the bobbin evenly and smoothly. Lumps or soft spots will cause your yarn to wind off with a jerky motion. To wind a tidy bobbin, place the yarn supply on the floor or in a cone holder to allow the weft to travel in a straight line from the supply to the working action of the winder. Holding the yarn under just moderate tension, guide the yarn back and forth with your hand to evenly fill the bobbin. Take care not to overfill so that the yarn spills over the lip of the bobbins. Doubling Ends
- 56. Doubling fine yarns and using them as one thread in the heddle is a great way to create fine cloth without using two heddles. The cloth will be a bit stiffer than if you used the yarn singly; however, depending on your use, this may not have an impact on its function. If you prefer the direct warping method, you can thread the holes at the same time you thread the slots, making it much easier to warp complex color orders. Do this warp as you normally would, but, instead of passing the yarn just through the slots, thread the holes, too, following the color order required. This can only be done in patterns where you are using two ends as one. There are a number of ways to work with a doubled warp and weft. No matter which method you choose, wind your threads with even tension on both threads. Mini cones are an excellent put-up for this purpose. Use two cones of the same color when winding your warp or weft. It decreases your warping time because you are threading two ends at a time. It also allows you to manage the two yarns easily. If you purchased your yarn on a single large cone, you can wind off a center-pull ball and use the cone and ball as separate yarn supplies. You can also pull from both ends of a center-pull ball. If you are using two threads of weft, wind them evenly, applying equal tension to both threads so that they come off the shuttle or bobbin at the same rate.
- 57. Wind doubled ends by using double-bobbin boat shuttles, winding from two separate yarn sources, or pulling from the outer and inner ends of a center-pull ball. Fixing Mistakes No matter how careful you are, mistakes happen. Get in the habit of spot checking your work as you weave. If you spot a mistake, you have four choices. Ignore the mistake because no one will notice; unweave and fix it; cut it out and start anew; or fix it after the project is off the loom. If I spot a mistake that I can’t live with, I’ll cut out the wefts and start weaving again. It saves lots of time and puts less wear and tear on the warp. To do this, take a sharp pair
- 58. of embroidery scissors and carefully cut the weft down the middle. Pull out the cut yarns at the selvedge and start weaving over again. Pick-up Stick Primer Many of the patterns in this book make use of one or more pick-up sticks. They are used to break the over/under order of plain weave to create sections of warp that float over or under more than one warp or weft. Pick-up sticks come in a variety of shapes and sizes. A good pick-up stick will be sanded smooth so it doesn’t snag the warp and will have at least one beveled end to allow you to easily pick up warp threads. The width of the pick-up stick will determine how tall your shed will be. CATCHING YOUR SELVEDGES Because pick-up patterns break the over/under configuration of plain weave, you will end up with floats at the selvedge. This may cause you to skip the selvedge when weaving the next pick. In these cases, you must manually pick up the selvedge thread in order to catch it. WORKING IN FRONT OF THE HEDDLE You can use pick-up sticks in front of or behind the rigid heddle. When picking up in front of the heddle, you have to pick up each row; tip the pick on its edge, place the weft,
- 59. and then remove the stick before pressing the yarn into place. WORKING BEHIND THE HEDDLE When working with a single pick-up stick behind the rigid heddle, you don’t have to remove the stick each time. You do, however, want to be sure that you only pick up the slot threads. To do this, place the rigid heddle in the down position so that only the slot threads are up. It may make it easier to see the warp threads to add a sheet of contrasting paper between the warp layers (photo 13). Working behind the heddle, pick up the slot threads indicated in the pick-up. The patterns in this book will tell you how to load or charge the pick-up stick. When not in use, push the pick-up stick to the back of the loom so that it doesn’t interfere with the up plain weave shed (photo 14). When reading a pick-up pattern, you will see two different kinds of instructions: “Pick-up stick” and “Up and pick-up stick.” “Pick-up stick” indicates that you should place the heddle in neutral, slide the pick-up stick forward, and tip it up on its edge, raising the threads on the stick above the warp (photo 15). This position creates a weft float. For some styles of rigid-heddle looms, placing the heddle in neutral can be fiddly. If your loom doesn’t allow you to place the heddle in neutral, you can let it hang in front of the heddle block and tip the pick-up stick on edge. Be sure that
- 60. you have good tension on the yarns, otherwise the heddle will interfere and you won’t get a clean shed. “Up and pick-up stick” indicates that you should place the heddle in the up position and slide the pick-up stick to the back of the rigid heddle (photo 16). This position creates a warp float. Note when weaving a down shed in this position, you can leave the pick-up stick in place. You only need to push it to the back of the loom when weaving an up shed. These skills, tools, and tips will come in handy for the rest of your weaving life. They are the techniques that I see solve so many of my student’s issues when they struggle with making cloth they love. Prepared with this know-how, you can confidently go to the loom to weave. With the heddle in the down position, slide a piece of paper behind the heddle and between the down ends in the holes and the up ends in the slots to make it easier to pick up the correct
- 61. threads. When not in use, you can slide the pick-up stick to the back of the loom so it won’t interfere with an up or down plainweave shed.
- 62. To weave “pick-up stick” place the heddle in neutral and tip the pick-up stick on its edge. To weave “up and pick-up stick,” place the heddle in the up position and slide the pick-up stick toward the back of the heddle.
- 63. PLACING A HEDDLE ROD When working with more than one pick-up stick, it is possible they might interfere with one another. Using a heddle rod will eliminate this problem. Several patterns in this book, such as the Twill and Tweed Pillow Cover, require using a second pick-up stick that is picked up in the opposite order as the first. If these warp ends are left on a pick-up stick, they will interfere with the warp ends on the first stick (photo 1). By placing the warp ends on a heddle rod, they can be easily picked up without interfering with the first pick-up stick, at the same time eliminating the need to remove and recharge the pick-up stick every time. You will need a dowel or rod that is at least 2" (5 cm) longer than the width of your warp to be your heddle rod. The appropriate warp ends will be attached to the rod via string heddles. These are small loops of yarn that slide under
- 64. the warp threads and attach the warp ends to the rod, allowing you to lift them up to make an appropriate shed. Use your rigid heddle as a guide to tie uniform string heddles. Start by making a string heddle for every end you are going to pick up, using your rigid heddle as a guide (photo 2). Sturdy smooth cotton, such as crochet or mercerized cotton, works best. Tie the string around the heddle, then tie a sturdy square knot. Cut the string and then wrap and tie another heddle. Continue working in this manner until you have created enough string heddles for your project.
- 65. Use the string heddles to secure the pick-up warp ends to a heddle rod. With the rigid heddle in the down position and working behind the rigid heddle, pick up the warp ends you wish to place on the rod. Bring the pick-up stick up close to the rigid heddle and set it on its edge so that it raises the picked-up warp ends. Take one of your string heddles and place it under the first lifted end. Fold it in half so that the string heddle encases the warp end and place both ends of the loop on the heddle rod. Take the next string heddle and place it under the picked up end(s) and place it on the heddle rod (photo 3). Continue in this manner until you have placed all of the string heddles on the heddle rod. It is a good idea to secure the loops to the rod using painter’s tape so that the rod doesn’t slip out while you’re weaving. Painter’s tape isn’t as sticky as duct or masking tape, so it will be easy to remove.
- 66. To engage the heddle rod, place the heddle in the appropriate position (up is shown), then pull up on the rod to lift the picked-up warp end. The heddle rod resides behind the rigid heddle and in front of the first pick-up stick. When the pattern calls for the heddle rod, lift up on the rod to engage those warp ends (photo 4). When not in use, it can rest behind the rigid heddle.
- 68. CHAPTER THREE FOLLOWING the PATTERNS If you are relatively new to weaving, you might not be familiar with how to read a pattern. This chapter provides a short guide to the information given with each project in this book and describes how to make the best use of it. Reading the Weaving Instructions Each pattern has a list of project specs that details the information you need to set up and weave the pattern. This information includes everything from the finished size to the materials and equipment you’ll need to gather, including: FINISHED SIZE This is the final finished size of the project after washing it. WEAVE STRUCTURE A weave structure is the interlacement that is formed via a specific setup or technique. Weave structures range from plain weave, in which the weft travels over 1 warp end and
- 69. under the adjacent warp end, to more elaborate structures in which the weft travels over or under more than 1 warp end. EQUIPMENT This lists the size loom and rigid heddle you need to weave the project and the necessary accessories. NOTIONS This lists any additional tools or materials necessary to complete the project. SETT Sett is the weaver’s gauge. It tells you how open or dense your warp spacing should be to weave the project successfully. It is expressed in a number that represents the number of ends of warp in 1" (2.5 cm), measured on the loom, to space the yarns. WEAVING WIDTH This measurement is the width of the warp in the rigid heddle. You use this number to center your project in the rigid heddle. PICKS PER INCH (PPI) This is the number of weft ends, called picks, that are in the woven cloth under tension on the loom. Paying attention to
- 70. this number will ensure that your final cloth looks like the sample cloth in the picture. WARP LENGTH This measurement indicates the length of your warp. NUMBER OF ENDS This is the number of individual warp ends you need to wind for the project. . YARNS This section lists the yarns and amounts used in the project, as well as the colors and brand names. The information is listed in this order: the generic name of yarn, its fiber content, the yarn's yardage listed as yd (m)/lb, and the amount of each yarn you will need and in what colors. This generic yarn information is followed by details about the specific yarn used in the pattern, including the yarn maker, brand name, fiber content, yardage by put-up, and color names and numbers. TIP: When gathering your yarns, be sure you are looking at the project yardage number and not the yarn's yardage number. RECOMMENDED WARPING METHOD Each project includes my recommendation for a warping method in the project specs. (See Chapter Nine for more
- 71. information about warping techniques.) Following Charts There are two types of charts used in a number of the patterns. These charts offer an easy-to-read shorthand of how to thread the loom and weave the pattern. WARP COLOR ORDER CHART Read this chart from right to left. The number indicates how many warp ends to thread in a particular color before changing to a different color. Keep in mind that an “end” is a working end, which is 1 unit in a slot or hole. The chart key will tell you if there is more than 1 thread in a slot or hole. The chart will also indicate if it is important to start in a slot or a hole. The bracket at the top indicates how many times to repeat each sequence. For instance, in the example chart (figure 1) from the Four Looks Kitchen Towels, you will thread 5 dark blue ends of 2 threads each, then 5 light blue ends of 2 threads each, etc. The note under the figure tells you the total number of ends, which also equals the total number of slots and holes and the total number of threads or individual yarns. The bracket indicates that you will repeat this sequence 7 times.
- 72. FIGURE 1 WEAVE COLOR ORDER CHART Read this chart from top to bottom. It tells you the color order of your weaving, and each color is listed across the top, like in the example chart (figure 2). The number indicates how many picks of that color you will weave. If there is a bracket along the side, it indicates that the information within the brackets should be repeated a specific number of times.
- 73. FIGURE 2
- 75. CHAPTER FOUR THE KITCHEN The kitchen is perhaps the most woven-for room in the house. The key to project weaving for the kitchen is to create fabrics that both wear well and dry easily. The humble kitchen towel, a favorite weaver’s project, need not be so humble. When you make them with customized stripes, favorite plaids, or a bright hounds-tooth check, your handwoven towels turn everyday chores into daily pleasures. Weavers can decorate their kitchens from floor to (almost) the ceiling with café curtains and rag rugs, too.
- 77. Four Looks KITCHEN TOWELS Striped warps are fun to play around with. From one warp, you can get many looks. Pair these striking plaid and stripe patterns with a highly absorbent mix of unmercerized cotton and cottolin yarns in a generously sized towel, and you get an everyday towel that will bring a smile every time you use it. Size them up or down according to the width of your loom or the needs of your kitchen. PROJECT SPECS FINISHED SIZE Four towels, each 19 ⁄ " x 28 ⁄ " (49.5 x 72.5 cm). WEAVE STRUCTURE Plain weave. EQUIPMENT 10-dent rigid-heddle loom with a 23" (58.5 cm) weaving width; 5 stick shuttles or a boat shuttle with 5 bobbins. NOTIONS Tapestry needle; sewing thread and needle; scrap yarn. WARP AND WEFT SPECS SETT (EPI) 10 (working ends are doubled threads in the heddle). 1 2 1 2
- 78. WEAVING WIDTH 22 ⁄ " (57 cm). PICKS PER INCH (PPI) 10 (using a doubled weft). WARP LENGTH 4 ⁄ yd (4.1 m; includes 18" [45.7 cm] for loom waste and take-up). NUMBER OF ENDS 224 ends (448 total threads used doubled). RECOMMENDED WARPING METHOD Indirect. YARNS Warp: 22/2 cottolin (3,246 yd [2,968 m]/lb): 630 yd (576 m) each light blue, dark blue; 8/2 unmercerized cotton (3,369 yd [3,081 m]/lb): 126 yd (115 m) light green, 630 yd (576 m) white. Shown here: Louet North America 22/2 Organic Cottolin (60% cotton/40% linen; 710 yd [649 m] /3.5 oz mini cone): #24042 Light Blue, #25003 Kentucky Blue; Cotton Clouds Aurora Earth (100% unmercerized cotton; 890 yd [814 m] 4 oz mini cone): #45 Nile Green, #75 Bleach. Weft: 22/2 cottolin: 452 yd (413 m) light blue; 858 yd (785 m)dark blue; 8/2 unmercerized cotton (3,369 yd [3,080 m]/lb: 72 yd (66 m) light green; 356 yd (326 m)white. Shown here: Louet North America 22/2 Organic Cottolin: #24042 Light Blue, #25003 Kentucky Blue; Cotton Clouds Aurora Earth: #45 Nile Green, #75 Bleach. Warping 1 2 1 2
- 79. 1 Warp your loom following the project specs and the Warp Color Order chart, threading 2 ends in every slot and hole. NOTE: The indirect method of warping is recommended for this project because of the odd number of warp ends in the stripes. However, if you prefer the direct method, it can be warped easily by threading both the holes and slots at the same time. Simply pull loops of yarn through the heddle and to the warping peg. This method can only be used in patterns like this one when you are using 2 ends of the same yarn as 1. Weaving 2 Wind 4 shuttles or bobbins with doubled ends of each weft color and a fifth shuttle or bobbin with scrap yarn. (See Chapter Two for tips on winding and weaving with doubled wefts.) 3 Weave a 1" (2.5 cm) header of scrap yarn to spread your warp (see Chapter Two). 4 Begin the first towel by leaving a tail 6 times the weaving width. Weave 2" (5 cm) plain weave in the color indicated in the Weave Color Order chart.
- 80. 5 Thread the tail in a tapestry needle and, using the hem or embroidery stitch (see Chapter Ten), secure the beginning of the weaving. 6 Continue to weave each of the 4 different towels following the Weave Color Order charts and using a double strand of weft for all picks. Finish each towel with hem or embroidery stitch, leave a 4" (10 cm) unwoven gap of warp, and then start the next towel, again leaving a long tail for hem or embroidery stitch.
- 81. Note: Each doubled weft pick is made up of two yarns. Finishing 7 Remove the cloth from the loom. Trim any tails to 2" (5 cm). Trim the fringe to ⁄ " (6 mm). 8 Fold the end over ⁄ " (6 mm), and then fold again ⁄ " (1.3 cm) to encase the fringe. Pin the seam to secure for stitching. Using coordinating sewing thread, machine or whipstitch the fold in place (see Chapter Ten). 1 4 1 4 1 2
- 82. 9 Machine wash towels on the gentle cycle in cool water with a regular detergent. Tumble dry on low and remove towels while still damp. Trim any weft tails flush with the fabric.
- 85. Fabric Stash RAG RUG Rugs and rags, what could be better? This is one of the most versatile weaving materials because it isn’t limited to your floor. Rags make great runners, placemats, and table squares. Keep an eye out at the thrift store or the sale rack for interesting fabrics that you can recycle into fodder for your loom. This rug incorporates stripes and checks for a clean, cheerful accent on your floor. PROJECT SPECS FINISHED SIZE One 20 ⁄ " x 36 ⁄ " (52 x 92 cm) rug. WEAVE STRUCTURE Plain weave. EQUIPMENT 8-dent rigid-heddle loom with a 21" (53.5 cm) weaving width; four 20" (51 cm) stick shuttles; tapestry beater; sewing machine. NOTIONS Self-healing mat and rotary cutter; quilting ruler; sewing thread and needle; scrap yarn; two 3" (7.5 cm) S-hooks (optional). WARP AND WEFT SPECIFICATIONS SETT (EPI) 1 2 1 4
- 86. 8. WEAVING WIDTH 21" (53.5 cm). PICKS PER INCH (PPI) 5. WARP LENGTH 60" (152.5 cm; includes 18" [45.5 cm] for loom waste and take-up). NUMBER OF ENDS 168. RECOMMENDED WARPING METHOD Direct. YARNS Warp: 8/4 cotton carpet warp (1,600 yd [1,463 m]/lb): 200 yd (183 m) dark green, 80 yd (73 m) pink. Shown here: Cotton Clouds Rug Warp (100% unmercerized cotton, 800 yd [732 m]/8 oz cone): #15 Myrtle Green, #11 Peach. Weft: 1 ⁄ " (3.8 cm) bias-cut 100% cotton rag strips: 35 yd (32 m) green print, 75 yd (69 m) light yellow, 30 yd (27 m) aqua blue. Shown here: 45" (114 cm) wide 100% cotton quilting fabric. Warping 1 2
- 87. 1 Warp your loom following the project specs and the Warp Color Order chart. Weaving 2 Wind 3 shuttles with the rag weft strips and a fourth shuttle with scrap yarn. 3 Weave a 1" (2.5 cm) header of scrap yarn to spread your warp (see Chapter Two). 4 Starting with the patterned green rag weft and leaving a 4" (10 cm) tail, weave 1 pick. Open a second shed, tuck the tail into this shed 3" (7.5 cm), and allow the rest of the tail to exit the warp. 5 Continue weaving following the Weave Color Order chart. As you weave, pack the weft firmly with the rigid heddle. Stop every 1" (2.5 cm) with the heddle in position for the next shed—if you just wove an up shed, place the heddle in the down position or vice versa. Use a tapestry beater to firmly pack the weft. You will most likely compress the warp to half its height. TIP: If you run out of weft within a color strip, overlap the ends in the middle of the fabric, tapering each end to decrease bulk. To
- 88. transition between one color and another, use the ply-splitting method to decrease bulk(see Chapter Two). To create the split, cut 10" (25.5 cm) of the end of the rag weft in half. As you weave, maintain a generous weft angle to keep the selvedges from pulling in. You may notice some crowding of the selvedge threads. This can happen when weaving on an open sett. Use your finger to manually spread the threads closer to the selvedge occasionally. You may also find it helpful to weight the selvedge threads with S-hooks. If using a rag fabric that is printed only on one side, you may have to sometimes flip or tuck the fabric so that the face of the rug mostly shows the face of the fabric; otherwise, you will have splotches of white fabric within the pattern areas.
- 89. Finishing 6 Remove the cloth from the loom, leaving 5" (12.5 cm) of warp on each end for tying fringe knots. 7 Finish with 2 rows of staggered overhand knots worked in groups of 4 warp ends. Remove the scrap yarn a few inches (or centimeters) at a time to keep the weft from working its way loose as you tie the knots. 8 Use a rotary cutter and self-healing mat to trim the fringe to ⁄ " (1.3 cm) or your desired length. Trim any rag tails flush with the rug. 1 2
- 90. 9 It isn't necessary to wash your rug before using. If it becomes soiled over time, machine wash on the gentle cycle.
- 92. SELECTING, PREPARING, AND CUTTING FABRIC FOR RAG RUG WEFT Almost any type of fabric will work for making the Rag Rug. I prefer working with yardage off the bolt rather than discarded clothing because there are no lumpy seams to deal with. I look for fabric with interesting patterns on the front and back. You can use a wide variety of fabric types, including wool, rayon, cotton, and cotton-poly blends. Wash and dry your fabric first to remove any sizing and to make the rags easier to compress. It isn’t necessary to press the fabric after washing. Cutting Your Fabric There are many ways to cut or rip rags for weaving. If you are ripping strips for rags, start with an extremely long piece of fabric, 3–5 yd (2.7–3.7 m) long. Lay it so that the cut end is facing you, then make a small cut every 1 ⁄ " (3.8 cm) along the width of the end. Rip the fabric at these cuts to create long strips of fabric. My preferred method is to cut them on the bias so that the edges are less likely to fray. Plus, you can create an extremely long piece of continuous rag weft. If you are familiar with making bias tape, this is a similar method on a much larger scale. 1. Fold in half 2 yd (1.8 m) of fabric. Using coordinating sewing thread and the straight stitch, machine sew the 3 raw sides together, leaving ⁄ " (1.3 cm) seam allowance. 1 2 1 2
- 93. FIGURE 1 2. Lay the fabric on a flat surface with the fold on your left. Using a sharp pair of scissors, cut a small slit inside the seam through the top layer of fabric, being careful not to cut the stitching and just the top layer. Insert your scissors and cut just the top layer from the bottom right corner to the top left corner, stopping just before the stitching (figure 1).
- 94. FIGURE 2 3. Flip the fabric over, keeping the fold on your left, and cut through the top layer—it was the bottom layer during the first cut—from the bottom left corner to the top right corner (figure 2).
- 95. FIGURE 3 4. Place your left hand in the middle of the left side of the upper layer cut line and your right hand in the middle of the right side the upper cut line (figure 3).
- 96. FIGURE 4 Lift the fabric off the table so that the fabric forms a tube (figure 4). FIGURE 5 Fold the fabric over lengthwise so that the right fold stops 4" (10 cm) shy of the left fold (figure 5).
- 97. FIGURE 6 5. Using a self-healing mat, rotary cutter, and quilting ruler, cut away the raw edges and even the sides. Cut the fabric in 1 ⁄ " (3.8 cm) strips, starting from the right fold and stopping 3" (7.5 cm) from the left fold (figure 6). 1 2
- 98. FIGURE 7 6. Place your left arm inside the tube formed at the left side fold and lift the fabric off the table. You will have a solid piece of fabric on your arm and loops of 1 ⁄ " (3.8 cm) fabric hanging down from the top fold. This is often called a bias tape hula (figure 7). FIGURE 8 Cut the fabric strips at an angle so that they form a continuous strip of bias tape. To do this, roll your arm so that your palm is facing the ground and the fold of solid cloth is facing you on the top of your arm. The first cut is the most important! If you cut straight across, you will have loops of fabric fall to the floor. Start by cutting the first strip at an angle from the middle of the fold to the left side of the first strip of fabric (figure 8). Let this strip fall to the ground. 7. Next, working carefully so as not to nick your arm, cut from the outer edge of the right strip still on your arm to the outer edge of the strip on the other side of the fold. 1 2
- 99. 8. Continue cutting in this manner until you have cut all the strips from your hand. The last cut will go from the lower strip to the middle of the fold. Let the strips fall to the ground as you work. 9. You now have a pile of continuous strips on the floor. Wind the fabric in a ball or straight onto your shuttle. Specialized shuttles used for rag weaving allow you to efficiently pack on a lot of bulky wefts. But most of these shuttles are too tall for the relatively small shed that a rigid- heddle loom produces. I used a stick shuttle and wound my rags on as flat as possible around the middle of the shuttle. Because you are weaving relatively short repeats, you don't need a specialized tool to get the job done.
- 101. Light Bright TOWELS These cheerful towels work up quickly. From one warp, you can get several looks using the magic of color-and-weave. Color-and-weave is a plain weave structure that alternates light and dark yarns in differing combinations to create seemingly complex structures. It's all optics! In a chunky cotton, you can weave up in one weekend a stack of towels that will brighten any kitchen and impress your guests. PROJECT SPECS FINISHED SIZE Three towels, each 13 ⁄ " x 19 ⁄ " (33.5 x 49.5 cm). WEAVE STRUCTURE Color-and-weave. EQUIPMENT 8-dent rigid-heddle loom with a 15" (38.1 cm) weaving width; 4 stick shuttles. NOTIONS Sewing thread and needle; scrap yarn. WARP AND WEFT SPECIFICATIONS SETT (EPI) 8. 1 4 1 2
- 102. WEAVING WIDTH 15" (38 cm). PICKS PER INCH (PPI) 8. WARP LENGTH 97" (246 cm; includes 24" [45.5 cm] for loom waste, take-up, and interstitial fringe). NUMBER OF ENDS 118. RECOMMENDED WARPING METHOD Direct. YARNS Warp: 4-ply worsted-weight cotton (792 yd [724 m]/lb): 162 yd (148 m) pink, 157 yd (144 m) yellow. Shown here: Lion Brand Yarns Kitchen Cotton (100% cotton, 99 yd [91 m]/2 oz): #103 Bubblegum, #157 Citrus. Weft: 4-ply worsted-weight cotton: 138 yd (126 m) pink, 108 yd (99 m) yellow; 8/2 unmercerized cotton (3,360 yd [3,070 m]: 26 yd (24 m) pink, 22 yd (20 m) pink, 43 yd (39 m) yellow. Shown here: Lion Brand Yarns Kitchen Cotton: #103 Bubblegum, #157 Citrus, Cotton Clouds Aurora Earth, #32 Maize, #24 Beauty Rose. Warping
- 103. 1 Warp your loom following the project specs. Start with 2 pink ends, then alternate 2 yellow and 2 pink ends across the warp 29 times for a total of 118 ends (60 pink and 58 yellow). Weaving 2 Wind 1 shuttle with each color of weft and 1 with a smooth, chunky scrap yarn. 3 Weave a 1" (2.5 cm) header of scrap yarn to spread your warp. 4 Begin and end each towel with 15 picks, about 1 ⁄ " (3.8 cm) of the 8/2 weft, allowing for your preferred method of hemming (see Chapter Ten). 5 Continue to weave the towels following the Weave Color Order chart, leaving a 2" (5 cm) gap of unwoven warp between towels. Be mindful of managing your selvedges as you exchange colors (see Chapter Two). Finishing 1 2
- 104. 6 Remove the cloth from the loom. Trim any tails to 2" (5 cm). Trim the fringe to ⁄ " (6 mm). 7 Fold the end over ⁄ " (6 mm), then fold again ⁄ " (1.3 cm) to encase the fringe. Line up the folded edge with the transition from solid color to pattern, taking care that the weaving done with 8/2 cotton is on the back. Pin the seam to secure for stitching and press. Using coordinating sewing thread, machine stitch or whipstitch the fold in place. 8 Machine wash the towels on the gentle cycle in cool water with laundry detergent. 9 Tumble dry on low and remove towels while still damp. Trim any weft tails flush with the fabric. 1 4 1 4 1 2
- 109. Fresh Baked Bread CLOTH This is the kind of cloth that inspired the term “linens.” Finely woven from quality linen yarn, it will wear like iron. With two heddles, you can weave fine cloth, like this one, with amazing drape and add sweet pattern accents that you can weave without using pick-up sticks. PROJECT SPECS FINISHED SIZE One 22" x 29" (56 x 74 cm) cloth. WEAVE STRUCTURES Plain weave with English Plain Weave and Bird’s Eye Twill. EQUIPMENT Rigid-heddle loom with a 24" (61 cm) weaving width; two 10-dent rigid heddles; 3 stick shuttles; warping sticks. NOTIONS Tapestry needle; sewing thread and needle; scrap yarn. WARP AND WEFT SPECIFICATIONS SETT (EPI) 20. WEAVING WIDTH
- 110. 24" (61 cm). PICKS PER INCH (PPI) 10 plain weave; 15 pattern. WARP LENGTH 50" (127 cm; includes 18" [45.5 cm] for loom waste and take-up). NUMBER OF ENDS 480. RECOMMENDED WARPING METHOD Indirect 2-Heddle YARNS Warp: 16/2 dry-spun linen (2,400 yd [2,195 m]/lb): 668 yd (610 m) green. Shown here: Halcyon Newport Linen (100% dry-spun linen, 2,400 yd [2,195 m]/lb): #2370 Green. Weft: 16/2 dry spun linen: 240 yd (220 m) green, 38 yd (35 m) pink. Shown here: Halcyon Newport Linen: #2370 Green, #2060 Pink. Warping 1 Warp your loom using 2 heddles, following the project specs. (See Chapter Nine for tips on warping wide warps.) Weaving
- 111. 2 Wind 1 shuttle with the green ground weft yarn, 1 shuttle with the pink pattern weft yarn, and 1 shuttle with scrap yarn. 3 Weave a 1" (2.5 cm) header of scrap yarn to spread your warp. 4 Leaving a tail 6 times the weaving width, weave 2" (5 cm) plain weave. Pack the weft firmly as you weave by pressing firmly with the rigid heddle. You may notice that the plain weave areas look uneven on the loom. Three threads may be clumped together while one stands apart. Once washed, the fabric will even out. 5 Thread the tail in a tapestry needle and use the hem or embroidery stitch to secure the beginning of the weaving. 6 Weave another 4" (10 cm) plain weave for a total of 6" (15 cm) as shown in the Weave Color Order chart. PATTERN REPEAT 7 Continue to follow the Twill Pattern Sequence list for the English Plain Weave and the Bird’s Eye Twill patterns as well as the Weave Order chart. Within the pattern sequence area, carry the nonworking weft yarn along the selvedge.
- 112. When you have finished each pattern area, cut the pattern weft, leaving a 6" (15 cm) tail, and tuck the tail into the next shed of plain weave. 8 When you have finished weaving the pattern sequence 4 times and have woven the final 6" (15 cm) of plain weave, secure the end of the cloth with hem or embroidery stitch. TWILL PATTERN SEQUENCE English Plain Weave (pattern weft) 1 Heddle 1 up. 2 Heddle 2 down. 3 Heddle 1 up. Bird’s Eye Twill (pattern weft) 1 Heddle 1 up.
- 113. 2 Heddle 2 up. 3 Heddle 1 down. 4 Heddle 2 down. 5 Heddle 1 down. 6 Heddle 2 up. 7 Heddle 1 up. Hemming 9 Remove the cloth from the loom. Trim any tails to 2" (5 cm). Trim the fringe to ⁄ " (1.3 cm). 10 The side of the cloth that was facing you as you wove it is the front of the cloth. Turn the cloth over so the back faces you. Fold the end over a few picks below the fringe, then fold again ⁄ " (1.3 cm) to encase the fringe and press. Pin the seam to secure for stitching. Using coordinating sewing thread, machine or whipstitch the fold in place. Finishing 11 Machine wash your cloth on a regular cycle using hot water and laundry detergent, including a terry-cloth towel to provide additional agitation. Tumble dry on low and remove while still damp. 1 2 1 2
- 114. 12 Press immediately with a hot iron to bring out the shine in the linen yarn. Trim any remaining tails flush with the cloth. WEAVING WITH LINEN Linen is the ultimate luxury fiber for the home. Highly absorbent and cool to the touch, with a unique drape and a crisp hand, its durability and luster make linen prized for heirloom-quality table linens and curtains. Its greatest strength is also its greatest weakness. It is made of bast fibers from the stem of the flax plant, which give the plant strength and stability. Its extremely long fiber length and stable nature create a yarn that has almost no elasticity. This is also why it is prone to wrinkle. Warping Linen’s lack of rebound presents weavers with certain challenges. It requires tight and even tension, so when warping you need to treat the warp as a whole and not rake the fibers while winding on. Let the rigid heddle do the work. When pulling up the slack in the warp as you wind on the back beam, provide strong, steady tension on the entire warp, being careful not to pull on individual warp ends. One of the few instances that I recommend using warping sticks instead of paper as a packing material is when weaving with linen. Warping sticks are laid between the warp layers as you wind onto the back beam at regular intervals. Paper can give way ever so slightly under the tension of the warp, but wood doesn’t. This give can lead to soft spots in linen that won’t show up with most other fibers. Selvedges When weaving with linen, keep an extra-close eye on the selvedges because crowding can cause them to break. To prevent crowding, maintain a consistent weft angle appropriate for your width of fabric. Advance the fabric every 2" (5 cm) to keep the weaving action in the area where the shed angle is low. Weighting the selvedges is also a good idea. Using a temple
- 115. can be extremely helpful in maintaining the width of the fabric between pattern and plain weave areas (see Chapter Two). Don’t despair if you develop soft spots in your warp or if individual threads become loose; weight them using an S-hook and add additional weight if necessary. There is no shame in having a dozen hooks hanging off the back of your warp! When linen fabric is fresh off the loom (this is called the “loom state”), it can look nothing like the finished cloth, particularly when you are using 2 heddles. This is called “rigid heddle” or "reed" marks. Because of linen's inelasticity, the 3 yarns that travel through the front slot clump together. Finishing Linen will completely transform in the wash. Linen likes a rough finish, so machine wash your project on the regular cycle with laundry detergent. It benefits from extra agitation, so some folks add in a terry-cloth towel or even tennis shoes. Then machine dry the entire load—towels and all—but remove your weaving while it’s still damp. Press with a hot iron to bring out the shine in the yarn. If you are new to working with linen, start with a small project and work your way up to a larger project, or consider using a less expensive and more elastic yarn blend such as cottolin.
- 117. Linen & Lace CAFÉ CURTAINS Light streaming through linen is mesmerizing. Made from narrow panels that you can finish off in multiple ways, these lacy curtains will brighten up any room. Use this all-over pattern or weave lace borders on a plain weave ground. With this pattern as a guide, you can create lots of creative window treatments with your rigid-heddle loom, regardless of the width of your windows. PROJECT SPECS FINISHED SIZE Four curtain panels, each 14" x 33" (35.5 x 84 cm) with 3" (7.5 cm) casings and 2" (5 cm) fringe. WEAVE STRUCTURE Honeycomb. EQUIPMENT 10-dent rigid-heddle loom with a 15" (38 cm) weaving width; 2 shuttles; 16" (40.5 cm) pick-up stick; 16" (40.5 cm) heddle rod; 13 string heddles. NOTIONS Sewing thread and needle; self-healing mat and rotary cutter; scrap yarn; grommets or curtain clips (optional). WARP AND WEFT SPECIFICATIONS SETT (EPI)
- 118. 10. WEAVING WIDTH 15" (38 cm). PICKS PER INCH (PPI) 10. WARP LENGTH 5.5 yd (5 m; includes 38" [96.5 cm] for loom waste and take-up; loom waste includes interstitial fringe). NUMBER OF ENDS 149. RECOMMENDED WARPING METHOD Indirect. YARNS Warp: 4-ply DK weight viscose linen blend (1,409 yd [1,288 m]/lb): 882 yd (807 m) indigo blue. Shown here: Classic Elite Firefly (75% viscose/25% linen; 155 yd [142 m]/1 ⁄ oz skein): #7793 Denim. Weft: 4-ply DK weight viscose linen blend: 847 yd (775 m) light blue. Shown here: Classic Elite Firefly: #7757 Chicory. Warping 3 4
- 119. 1 Warp your loom following the project specs. Start and end the warp in a hole. (See Chapter Nine for details on how to choose the best warping method and tips for winding long warps.) Charging the Heddle Rod and Pick-Up Stick First charge the heddle rod, then prepare the pick-up stick (see Chapter Two for how to make a heddle rod). HEDDLE ROD 2 Place the heddle in the down position. Working behind the rigid heddle, pick up the slot threads: 1 up, [3 down/3 up x 12], 1 down. 3 Place the rigid heddle in neutral and tip the pick-up stick on its edge. Transfer the up threads to a heddle rod, wrapping a string heddle around each group of 3 up ends and the 1 up end at the beginning and placing the string heddles on the heddle rod. PICK-UP STICK
- 120. 4 Place the heddle in the down position. Working behind the rigid heddle, pick up the threads: 4 up, [(3 down/3 up) x11], 4 up. The pick-up stick should be behind the heddle rod. Weaving TIP: The trick to weaving an all-over lace pattern that you plan to seam is making a plan for the pattern to line up—or, as in this case, offset, so you call as little attention to the seam as possible. This means that you need to work on maintaining a consistent beat so that the picks from one panel line up with the picks from the other. However, don’t fret over this too much. With all-over lace, so much is going on that the eye will hardly notice if the patterns are slightly off at the seam. 5 To ensure that the panels are all the same size, make a paper guide, marking 33 ⁄ " (85 cm) of pattern and 6 ⁄ " (16.5 cm) of plain weave. Move and pin the guide to the fabric as you work. Each panel is woven from the bottom up, starting with the honeycomb pattern and ending with the plain weave casing. 6 Wind 1 shuttle with the weft yarn and 1 shuttle with scrap yarn. 1 2 1 2
- 121. 7 Weave a 1" (2.5 cm) header of scrap yarn to spread your warp for the first panel and keep your weft in place until you are ready to work the finishing knots. 8 Weave 2 panels as follows, leaving 4" (10 cm) of warp between them: Weave 2 picks of plain weave starting in the down position. Weave 33 ⁄ " (85 cm) in the honeycomb pattern following the Panel A Pattern. (See Chapter Two for tips on weaving warp and weft floats.) 9 Weave 6 ⁄ " (16.5 cm) of plain weave. 10 Work a row of hemstitching to keep the weft in place during seaming. 11 Weave 2 more panels as you did the first, but start with 2 picks of plain weave and then reverse the order of the pick- up stick and heddle rod. This change in the pick-up pattern will offset the pattern at the selvedges for seaming. Follow the Panel B Pattern and leave 3" (10 cm) of warp between the panels. 12 Weave 6 ⁄ " (16.5 cm) of plain weave, ending with a row of hemstitching. 1 2 1 2 1 2
- 122. Finishing 13 Remove the cloth from the loom. Cut the panels apart, leaving the fringes intact, and trim any tails to 2" (5 cm). Trim the warp to ⁄ " (6 mm) from the hemstitching after the plain weave areas. JOIN TWO PANELS 14 To seam the 2 panels together, lay an A panel next to a B panel on a flat surface so that the plain weave headers line up and the pattern is offset at the seam. TIP: It is easier to make adjustments at the bottom of the curtain than it is at the top. If your panels don’t quite line up at the bottom, you can remove a few picks until they do. For instance, if you have one more pattern repeat on one panel than the other, remove that repeat. You may have to remove the plain weave picks on the other panel so that they line up. The bottom will be a little wavy, but that just adds to the beauty of the curtain. 15 Use the invisible seam stitch to join 2 panels (see Chapter Ten). Because this is a work of the hand, you may run into sections where the pattern doesn’t quite line up; don’t worry—it is far better to have the panels sewn together evenly without puckers than it is that the pattern lines up 1 4
- 123. perfectly. Seams don't have to be seamless to be beautiful to the eye! 16 Repeat Steps 14 and 15 to join the 2 other panels. PANEL A PATTERN 1 1 up. 2 Pick-up stick. 3 1 up. 4 Pick-up stick. 5 1 up. 6 Heddle rod. 7 1 up. 8 Heddle rod. PANEL B PATTERN 1 1 up. 2 Heddle rod. 3 1 up. 4 Heddle rod. 5 1 up. 6 Pick-up stick. 7 1 up. 8 Pick-up stick. Note: The patterns are woven upside down so that the weft floats are on top. This configuration allows you to engage the heddle rod easily and removes the necessity of having to pick up that row every time.
- 124. SEW THE CASING 17 Place the 2 sets of joined panels right side down; this is the side that was facing away from you as you wove. Fold the end over 2 picks below the fringe. 18 Finger press the fold in place or give it a light press with a steam iron on low. Fold again, so that the fold lines up with the last plain weave pick to make a 3" (7.5 cm) tube at the top of the
- 125. curtain that encases the fringe. Pin the seam to secure for stitching. Using coordinating sewing thread, whipstitch the fold in place to complete the casing. KNOT THE FRINGE 19 This finish mimics the oval shapes in the pattern. Remove the header and tie the fringe off in sets of 2 warp ends using an overhand knot (see Chapter Ten for knots instructions). Work 2 rows of Staggered Macramé Square Knots to make the fringe, using 2 ends as 1. Finish with a row of staggered overhand knots. WASH THE PANELS 20 Fill a bathtub with lukewarm water and 1/8 cup of leave-in soap. Swish the water to mix in the soap and lay each panel in the tub flat, one on top of the other. Let soak for an hour. 21 Gently lift each panel out of the water, roll, and press with your hands to remove the water. Lay flat to dry on a clean towel.
- 126. 22 Trim any remaining tails flush with the cloth. Trim fringe to desired length using a self-healing mat and a rotary cutter. HANGING THE LINEN & LACE CAFÉ CURTAINS
- 128. Windows are the perfect frame to show off your handwovens, and you can hang your curtains in a few different ways. You can slip a curtain rod in the casing at the top of the panels (photo 1), whether they’re seamed or hung singly, or you can add grommets for a curtain that is easy to push to the side of the curtain rod (photo 2). Grommets are sold at any craft or sewing store. Simply follow the instructions on the package to install them. I like to run a line of sealant on the fabric, such as Fray Check, after I cut out the holes for the grommets.
- 129. Alternatively, you can buy clips that have curtain rod hangers built in (photo 3). These are great ways to display your handwoven curtains on your windows or your walls.
- 131. CHAPTER FIVE THE DINING ROOM Dare to dine! Bring back the sit-down meal by dressing your table with your beautiful handmade creations. From functional to fanciful, sitting down to a meal adorned with handwovens is always everyday treat. If you use the dining table as a workstation, create a designated space for your devices. In this chapter are mats, runners, napkins, and more that will make your table more than just a place to dump and run, but rather a space to live and linger.
- 133. Hemp HOT PADS Working with nontraditional materials is a great way to work up quick projects. Experiment with chunky cord or rope that you can find at any craft or hardware store and combine it with any number of pick-up patterns. Start in the morning and by tea time, you’ll have something new to tuck under your teapot. PROJECT SPECS FINISHED SIZE Two hot pads, each 7" x 7" (17.8 cm x 17.8 cm) with 1" (2.5 cm) fringe. WEAVE STRUCTURES Pick-up lace and honeycomb. EQUIPMENT 5-dent rigid-heddle loom with a 9" (23 cm) weaving width; 1 stick shuttle; 10" (25.5 cm) pick-up stick. NOTIONS Tapestry needle; scrap yarn (optional). WARP AND WEFT SPECIFICATIONS SETT (EPI) 5.
- 134. WEAVING WIDTH 8 ⁄ " (21.5 cm). PICKS PER INCH (PPI) 6. WARP LENGTH 40" (102 cm; includes 23" [58 cm] for loom waste, take-up, and interstitial fringe). NUMBER OF ENDS 41. RECOMMENDED WARPING METHOD Direct. YARNS Warp: Hemp cord (400 yd [366 m]/lb): 46 yd (42 m) tan. Shown here: Darice Hemp (100% hemp, 67 yd [61 m]/8 oz ball): natural. Warp: Hemp cord (400 yd [366 m]/lb): 25 yd (23 m) tan. Shown here: Darice Hemp: natural. Warping 1 Warp the loom following the project specs. TIP: Yarns that are thick and stiff, like the hemp cord shown, are likely to move easily around the apron rod. 1 2
- 135. To keep the warp in place, tie a choke around the end of the warp. The warp must start and end in a slot to balance the pick-up patterns. Weaving 2 Wind the shuttle with the weft yarn. HOT PAD 1 NOTE: This is one of the few projects in which weaving a header isn’t necessary. The thick yarns should be fairly well spread out. However, if you prefer beating against a header, weave a few picks with a worsted weight scrap yarn. 3 Charge pick-up stick A: Place the heddle in the down position. Pick up warp ends in the slots: 3 down/3 up 3 times, ending with 3 down. 4 Start in a down shed, and, leaving a 40" (101.5 cm) tail for hemstitching, weave 2 plain weave picks. 5 Weave the Hot Pad 1 Pattern once. 6 Thread the tail in the tapestry needle and work 1 row of hemstitching (see Chapter Ten) over 2 warp ends and 2 weft
- 136. picks to the last 3 warp ends. Work a stitch over a single warp end and 2 weft ends. Finish by working the final 2 warp ends and 2 weft picks. Making this adjustment in the hemstitching takes into account the odd number of warp ends. You may find it difficult to beat such large, stiff twine into place. Do your best to maintain an even beat and consistent number of picks. Because you are working a lace pattern, the yarns will move where they need to go after you take the project off the loom and wash it. 7 Repeat the Hot Pad 1 Pattern 5 more times. 8 End with 1 pick of plain weave and work 1 row of hemstitching as before. HOT PAD 2 9 Leave 3" (7.5 cm) of warp between pads for fringe. Starting in a down position, weave 2 picks of plain weave, remembering again to leave a tail for hemstitching. 10 Weave 1 Hot Pad 2 Pattern repeat using pick-up stick A and hemstitch as for the first pad. 11 Charge pick-up stick B: Recharge the pick-up stick by reversing the order of the Hot Pad 2 Pattern pick-up pattern:
- 137. 3 up/3 down, ending with 3 ends up. 12 Weave 1 pattern repeat using pick-up stick B. 13 Repeat the pick-up sequence in Steps 10–12 four more times, alternating between pick-up stick A and pick-up stick B. 14 End with a final round of the Hot Pad 2 Pattern using pick-up stick A. 15 Weave 3 picks of plain weave (down, up, down) and work 1 row of hemstitching as before. Finishing 16 Remove the cloth from the loom and cut the 2 hot pads apart. Trim the fringe to 1" (2.5 cm). 17 Fill a basin large enough to submerge both mats with warm water. Soak the mats in water for at least an hour. 18 Lift them from the basin and allow the water to drain away from the cloth. Place the hot pads on a dry towel in the
- 138. sunshine. This will both dry the mats and dissipate any musty odor that the twine may have picked up in processing. HOT PAD 1 PATTERN 1 Down. 2 Up and pick-up stick. 3 Down. 4 Up and pick-up stick. 5 Down. 6 Up. HOT PAD 2 PATTERN 1 Down. 2 Up and pick-up stick. 3 Down. 4 Up and pick-up stick.
- 141. Skip-a-Slot PLACEMATS A chance mistake while sampling led to this fabric—sampling has its benefits! By skipping a slot every so often, you allow the weft to pop in these warp-dominate placemats without using a pick-up stick. The texture is created by alternating thick and thin picks and beating with a firm hand. This project is for all of you rigid-heddle weavers who like to play with color! PROJECT SPECS FINISHED SIZE Two placemats, each 14 ⁄ " × 20" (36 x 51 cm). WEAVE STRUCTURES Crammed and spaced plain weave. EQUIPMENT 12-dent rigid-heddle loom with a 16" (40.5 cm) weaving width; 12" (30.5 cm) stick shuttle or boat shuttle; 18" (45.5 cm) stick shuttle; tapestry beater. NOTIONS Sewing thread and needle; straight pins; tapestry needle; scrap yarn; two 3" (7.5 cm) S-hooks (optional). WARP AND WEFT SPECIFICATIONS SETT (EPI) 1 4
- 142. 12 (2 ends in every hole and most slots, skipping slots as shown in the Warp Color Order chart). WEAVING WIDTH 15" (38 cm). PICKS PER INCH (PPI) 8. WARP LENGTH 78" (198 cm; includes 24" [61 cm] for loom waste and take up). NUMBER OF ENDS 169 ends (338 total threads, used doubled). RECOMMENDED WARPING METHOD Indirect. YARNS Weft: 3/2 mercerized cotton (1,260 yd [1,152 m]/lb): 170 yd (155 m) eachsilver blue, gray blue; 221 yd (202 m) turquoise, aqua each. Shown here: Cotton Clouds Pearly Pearl (100% mercerized cotton, 1,260 yd [1,152 m]/lb cone): #55 Jade, #134 Cactus, #65 Crab, #60 Duck. Weft: 3/2 mercerized cotton: 255 yd (233 m) maroon; 135 yd (123 m)coral. Shown here: Cotton Clouds Pearly Pearl: #143 Raisin, #77 Dusty Coral. Warping
- 143. 1 Using the indirect warping method (which is recommended to best handle the frequent color changes), wind 91 pairs of the silver blue and grayblue threads and 78 pairs of the turquoise and aqua yarns threads, following the Warp Color Order chart. Start and end in a hole. Thread all holes with the silver- blue and grayblue combination and the slots with the turquoise and aqua combination, skipping slots as indicated in the chart. NOTE: The selvedges are both in a hole. Weaving NOTE: You are weaving this fabric upside down, so you won’t see the maroon stripes created by the skipped slots on the face of the fabric. If you peek under your loom, you will see them. 2 Wind your larger stick shuttle with 2 strands each of maroon and coral for a total of 4 threads. (See Chapter Two for tips on weaving with multiple threads.) This is your thick weft. Wind a second shuttle with 1 strand of maroon. This is your thin weft. Wind a third shuttle with scrap yarn and weave 2" – 3" (5–7.5 cm), beating firmly to spread your warp and provide a firm foundation for your fabric.