SlideShare a Scribd company logo
1 of 199
Download to read offline
1
PRELIMINARY TRAINING SESSION (PTS)
A Handbook for Students and Teachers
By: Mehmooda Afroz
RM,RN&BScN
Principal Cowasjee School of Midwifery
Lady Dufferin Hospital &
Secretory General Midwifery Association of
Pakistan (MAP)
2
PRELIMINARY TRAINING SESSION (PTS )
Handbook for Students and Teachers
Based on
Community Midwifery Curriculum
Pakistan Nursing Counsel (PNC)
First Edition 2019
By: Mehmooda Afroz Ali Khowaja
RM, RN, BScN
Principal Cowasjee School of Midwifery
Lady Dufferin Hospital &
Secretory General Midwifery Association of
Pakistan (MAP)
3
Table of Content
S# TOPIC PAGE #
1
NUTRITION 05
2
FUNDAMENTAL OF NRSING
Eithic value & morality
Hygiene and patient care
Back Massage
Perineal Care
Bed Patient Hair Care
Personal hygiene
Admission, transfer and discharge procedure
Bed making
Use and removal of bedpan
Hot and cold compression
Steam inhalation
Techniques of body mechanics
Positioning and ambulating the adult patient
Administering Enema
Assessing with bedpan
Height and weight
Vital Signs: Temperature, pulse, respiration and Blood
Pressure
Specimen collection
Urine testing by dip stick
Bedsore
Catheterization procedures
13
15
21
22
22
23
26
28
29
30
32
33
35
41
44
46
47
55
58
60
62
3 FIRST AID
Shock
Haemorrhage
Wounds
Fractures
Burns
Chocking
Foreign bodies in eye, ear
Other emergencies
CPR
71
73
76
77
80
81
84
86
96
4
4 MICROBIOLOGY
Infection prevention
Hand washing
Sharp Injury
EPI vaccine/Immunity and Immunization
Techniques of administrating vaccine
Cold chain
102
107
108
111
116
119
5 COMMUNICATION
Respectfull Maternity Care
121
122
6 PHARMACOLOGY
Rights of Medication administration
Medication preparation
Principles and Responsibilities of Medication
administration
Content and Types of Drug orders
Medication orders
Drugs administration and Routs of Medication
administration
Medication Errors and Reporting
127
128
129
131
131
132
135
138
7 ANATOMY AND PHYSIOLOGY
Introduction
Cell
Cell division
Tissue
Skeletal system
Muscular system
Nervous system
Respiratory
Digestive system
Urinary System
Blood circulatory System
Blood
Lymphatic system
Glandular system
Integumentary system
Female Reproductive system
Male Reproductive
Special senses
140
147
150
151
153
157
161
166
169
173
175
179
183
185
189
190
193
196
5
NUTRITION:
BALANCED DIET: A diet that contains the proper proportions of
carbohydrates, fats, proteins, vitamins, minerals, and water necessary to maintain
good health
Vitamins:
Vitamins are organic compounds that are required in small amounts in our diet
but their deficiency causes specific diseases.
 Most of the vitamins cannot be synthesized in our body but plants can
synthesize almost all of them, so they are considered as essential food
factors.
 However, the bacteria of the gut can produce some of the vitamins required
by us.
 All the vitamins are generally available in our diet. Different vitamins belong
to various chemical classes and it is difficult to define them on the basis of
structure.
 They are generally regarded as organic compounds required in the diet
in small amounts to perform specific biological functions for normal
maintenance of optimum growth and health of the organism.
 Vitamins are designated by alphabets A, B, C, D, etc. Some of them are
further named as sub- groups e.g. B1, B2, B6, B12, etc.
 Vitamin A keeps our skin and eyes healthy.
 Vitamin C helps body to fight against many diseases. Vitamin C gets easily
destroyed by heat during cooking.
 Vitamin D helps our body to use calcium for bones and teeth.
 Excess of vitamins is also harmful and vitamin pills should not be taken
without the advice of doctor.
 The term ―Vitamine‖ was coined from the word vital + amine since the
earlier identified compounds had amino groups.
 Later work showed that most of them did not contain amino groups, so the
letter ‗e‘ was dropped and the term vitamin is used these days.
6
Vitamins are classified into two groups depending upon their solubility in
water or fat.
Fat soluble vitamins:
 Vitamins which are soluble in fat and oils but insoluble in water are kept in
this group. These are vitamins A, D, E and K. They are stored
in liver and adipose (fat storing) tissues
Water soluble vitamins:
 B group vitamins and vitamin C are soluble in water so they are grouped
together.
 Water soluble vitamins must be supplied regularly in diet because they are
readily excreted in urine and cannot be stored (except vitamin B12) in our
body.
Deficiency Diseases:
 A person may be getting enough food to eat, but sometimes the food may not
contain a particular nutrient. If this continues over a long period of time, the
person may suffer from its deficiency.
 Deficiency of one or more nutrients can cause diseases or disorders in our
body. Diseases that occur due to lack of nutrients over a long period are
called deficiency diseases.
1. Vitamin A——— Night blindness
2. Vitamin B1———Beriberi
3. Vitamin B2——– Ariboflavinosis
4. Vitamin B3 ——–Pellagra
5. Vitamin B5 ——–Paresthesia
6. Vitamin B6 ——–Anemia
7. Vitamin B7 —— Dermatitis, enteritis
8. Vitamin B9 & Vitamin B12 —– Megaloblastic anemia
9. Vitamin C —— Scurvy, Swelling of Gums
10. Vitamin D —— Rickets & Osteomalacia
11. Vitamin E —— Less Fertility
12. Vitamin K —— Non-Clotting of Blood.
Vitamin A (Retinol) :
Sources : Dairy products, eggs, liver, fish and butter.
7
Deficiency : The deficiency of vitamin leads to skin changes and to night
blindness or failure of dark adaptation due to the effects of deficiency on retina.
Vitamin B1 (Thiamine) :
Sources: Yeast, egg yolk, liver, wheatgerm, nuts, red meat and cereals.
Deficiency: Fatigue, irritability, loss of appetite; severe deficiency can lead to
beri-beri.
Vitamin B2 (Riboflavin):
Sources: Dairy products, liver, vegetables, eggs, cereals, fruit, yeast.
Deficiency: Painful tongue and fissures to the corners of the mouth, chapped
lips.
Vitamin B3 (Nicotinic acid or Niacin) :
Sources: Lean meats, peanuts and other legumes, and whole-grain or enriched
bread and cereal products are among the best sources of niacin.
Deficiency: The deficiency state in humans causes skin disease, diarrhea,
dementia, and ultimately death.
Vitamin B5 (Pantothenic acid):
Sources: liver, kidney, eggs, poultry, and whole grains and dairy products while
apart from that it is present in perhaps all animal and plant tissues, as well as in
many microorganisms.
Deficiency: There is no known naturally occurring deficiency state.
Vitamin B6 (Pyridoxine):
Sources: liver and other organ meats, corn, whole-grain cereal, seeds and soy
products.
Deficiency: can result in central nervous system disturbances e.g. convulsions in
infants, More generally the effects of deficiency include inadequate growth or
weight loss and anemia due to the role of B6 in the manufacture of hemoglobin.
Vitamin B7 (Biotin):
Sources: fruits and meats, egg yolk, kidney, liver, tomatoes, and yeast.
Deficiency: No deficiency yet is known associated with this vitamin.
Vitamin B9 (Folic Acid):
Sources: green leafy vegetables, fruits like apples and oranges dried beans,
avocados, sunflower seeds, and wheat germ.
Deficiency: Its Deficiency during pregnancy is associated with birth defects,
such as neural tube defects
Vitamin B12 (Cyanocobalamin):
Sources: Liver, red meat, dairy products and fish.
Deficiency: megaloblastic anaemia.
8
Vitamin C (Ascorbic acid):
Sources: Green vegetables and fruit.
Deficiency: Scurvy.
Vitamin D (Calciferol):
Sources: Fish liver oils, dairy produce. Vitamin D is formed in the skin when it
is exposed to sunlight
Deficiency: Rickets.
Vitamin E (Tocopherol):
Sources: Pure vegetable oils, wheat germ, whole meal bread and cereals, egg
yolk, nuts sunflower seeds.
Deficiency: May cause muscular dystrophy
Vitamin K (Phylloquinone or Naphthoquinone):
Sources: Green vegetables.
Deficiency: vitamin K deficiency results in impaired blood clotting, usually
demonstrated by tests that measure clotting time. Symptoms include easy
bruising and bleeding diathesis. In infants, vitamin K deficiency may result in
intracranial hemorrhage.
NUTIRIENTS:
Nutrients are molecules in food that all organisms need to make energy, grow,
develop, and reproduce. Nutrients are digested and then broken down into basic
parts to be used by the organism.
There are two main types of nutrients, macronutrients and micronutrients.
Micronutrients – Vitamins and Minerals
Micronutrients, are comprised of vitamins and minerals which are required in
small quantities to ensure normal metabolism, growth and physical well
Five Important Micronutrients:
1. Vitamin A
2. Folate (folic acid)
3. Iodine
4. Iron
5. Zinc
9
Vitamin A:
 This vital micronutrient is found in a range of different foods including
carrots, spinach, broccoli, milk, egg, liver and fish.
 It plays an essential role in vision (lack of Vitamin A is a common cause
of blindness), reproduction and growth, and the functioning of a healthy
immune system (it plays a key role in the development of white blood
cells).
 Worldwide about 5 million children under the age of five are affected
by xerophthalmia, a serious eye disorder caused by vitamin A
deficiency.
 These children are at risk of becoming blind and are more likely to die
of common childhood disease
Folic Acid:
 This is a generic term for a group of B vitamins including folic acid
 Folic acid is a synthetic folate compound used in vitamin supplements
and fortified food of its increased stability.
 Folates are found in egg, dairy products, asparagus, orange juice, dark
green leafy vegetables, beans and brown bread.
 They play a key role in the metabolism of amino acids and
the production of proteins, the synthesis of nucleic acid (the molecules
that carry genetic information in the cells), and the formation of blood
cells.
Iodine:
 Seaweed and fish are rich sources but in many countries the addition of
iodine (known as iodization) to salt is an important source.
 Iodine is one of the most important elements required by the developing
foetus due to its effect on brain development.
 Iodine also serves a number of other important functions especially in
the production of hormones.
 Goitre is a visible sign of severe iodine deficiency.
Zinc:
Found in a range of foodstuffs including liver, eggs, nuts, cereals and seafood.
The absence of zinc is associated with a number of conditions including, short
stature, anemia, impaired healing of wounds, poor gonadal function, and
impaired cognitive and motor function.
10
It can also lead to appetite disorders, as well as contributing to the increased
severity and incidence of diarrhea and pneumonia.
The most important effect of zinc deficiency is its impact on children‘s resistance
to infectious diseases including the risk of infection, the recurrence of infections
and the severity of infection. This is well document in the case of diarrhoea. Zinc
nutrition is therefore an important determinant of mortality in children.
Iron:
 Iron has a number of key functions within the body. It acts as a carrier for
oxygen from the lungs to the body‘s tissues – it does so in the form
of hemoglobin – and it also integral to the working of various tissues through
the role that it plays in enzymatic reactions.
 Iron deficiency ultimately leads to iron deficiency anemia, the most
common cause of anemia, a condition in which the blood lacks healthy red
bloods cells required to carry oxygen, and which results in morbidity and
death.
 Iron deficiency is the most widespread health problem in the world,
impairing normal mental development in 40‐ 60% of infants in the
developing world.
 Iron rich foods include lentils, red meat, poultry, fish, leaf vegetables and
chicken
MACRONUTRIENTS (PROTEIN, CARBOHYDRATES AND FAT):
Macronutrients:
 a type of food (e.g. fat, protein, carbohydrate) required in large amounts in
the diet.
 a chemical element (e.g. potassium, magnesium, calcium) required in large
amounts for plant growth.
Carbohydrates:
Are a type of macronutrient used for quick energy in cells. The basic unit of
carbohydrates is a monosaccharide. An example of a monosaccharide
is glucose or sugar. Glucose can be by itself, or assembled into long chains to
make things like starch, which can be found in potatoes.
11
Proteins: are a macronutrient that the cells in your body use for structure.
Protein is very important for building tissues, such as muscle. Muscle is mainly
made up of proteins. Proteins are made from smaller monomers called amino
acids. There are twenty amino acids that make up all the kinds of protein your
body needs. Your body can make some of the amino acids you need, but there are
nine that you must consume in your diet. These are called essential amino acids.
Meat, fish, beans, and eggs are examples of foods rich in protein.
Fats: are called lipids and are a macronutrient in your body that stores energy.
Fats have long chains of carbon and hydrogen, which store lots of energy in the
chemical bonds. Fats are important in our body to cushion organs, protect our
cells, and send signals in the form of hormones around our body. Foods that are
rich in fats are butter and oil.
12
13
ETHICS VALUES & MORALITY
Ethics: is delivered from the great word is ethos meaning custom or character.
Values: Believes or attitude about the worth of a person, object, idea.
Maraility: is similar to ethics. It usually refers to personal stand of right &
wrong.
Honestly:Nurse should be honest in
 Her duty time
 Her clinical work
 With doctor & other health team worker.
Punctuality:
Nurse should be punctual in her duties and other activities.
Responsibilities:
Nurse is fully responsible all the work towards patient care should be awear of all
the care patient getting.
Behaviour:
Nurse should be well behaved polite with the patient relatives medical & pare
medical staff.
Manner:
Low tone and polite way of talking is the main quality of a nurse she should be
well mannered towards her elders.
Uniform Code
Means there are certain principles which should be obey while in uniform
 Neat & Clean
 Wear only when on duty
 No jewelries
 Heir should be above the shoulder
 Only black hair band no colour full pin or band.
 Very tile make up.
 No nails polish no long nail.
 Only black shoes for student
 No giggling, chatting improper sitting.
 Kit should be always her.
 No mehndi.
Sense of Judgment:
Means to know what is right and how it is applies
14
General Rules:
 Never discuss personal matter in public or during lunch or tea break.
 Respect your patient matter.
 Respect patient need for privacy at all the time screen your patient for all
the time
 Remove patient chart is for private information never disclosed it always.
 Respect your Co- worker & call them by names notes by bed # or
nickname.
 Accept Responsibility anticipate patient need.
 Gratuities in the from of money, gift or tip is not allowed.
 Do not waste or misuse hospital supplies.
 Do not involve personally with your patient.
 Remain at your assign placed.
 Never eat chew gum when in uniform, or eat supari when on uniform
 Respect your uniform do not sit on floor when you are in uniform
 Do not screen or laugh in patient area
 Do not give any information when you don‘t know about that consult the
person when know of.
15
HYGIENE AND CARE:
Providing for a patient's hygiene is probably the most basic of all nursing care
activities, but it is undoubtedly one of the most important. Not only is it a
provision for the patient's physical needs; it also contributes immeasurably to the
patient's feeling of emotional well-being.
PURPOSE OF THE PATIENT'S DAILY BATH:
1. Removal of bacteria from the skin.
2. Confinement in bed increases perspiration, and bacterial growth is
stimulated by moisture.
3. Skin irritation from hospital bed linens may result in skin breakdown and
subsequent infection.
4. Relaxation effect on the patient.
5. Stimulation of blood circulation to the skin, respirations, and elimination.
6. Maintenance of joint mobility.
7. Improvement of the patient's self-image and emotional and mental well-
being.
8. Providing the nurse with an opportunity for health teaching and
assessment.
9. Providing the nurse with an opportunity to give the patient psychological
support.
 The process of building rapport may begin during the initial bath.
 The bath aids in the development of the therapeutic nurse-patient
relationship as the patient has the nurse's undivided attention.
PHYSICAL CONDITIONS WHICH ENCOURAGE SKIN BREAKDOWN
IN A PATIENT WHO IS CONFINED TO BED:
a. Immobility. Continuous pressure over any body part impairs circulation
to that part and can cause breakdown and eventual ulcerations.
b. Incontinence. If the patient is unable to control the bladder or bowel
functions, skin breakdown is likely to occur due to the presence of
moisture and bacteria on the skin.
c. Emaciation. An emaciated patient may be prone to skin breakdown over
bony prominence (heels, elbows, and coccyx).
d. Obesity. An obese patient may have many skin folds where perspiration
and bacteria may contribute to skin breakdown.
e. Age-Related Skin Changes. An older person's skin is very thin and
inelastic. The sweat and oil glands are less active. Thin, dry skin is more
susceptible to pressure areas and skin breakdown.
f. Any Disease or Condition that Affects Circulation can encourage skin
breakdown in a patient who is confined to bed.
16
NURSING INTERVENTION TO PREVENT SKIN BREAKDOWN:
1. The time of the patient's bath or back massage is the most logical time to
thoroughly observe the patient's skin for pressure areas.
2. At the first sign of redness, the area should be washed with soap and
water and rubbed with lotion; measures should then be taken to keep the
patient off the reddened area.
3. Report any signs of pressure to the charge nurse.
4. Keep sheets under the patient clean, smooth, and tight to help eliminate
skin irritation.
5. Ensure adequate nutrition and fluid intake, according to physician's
orders.
6. Every effort should be made to keep urine and feces off the patient's skin,
washing the skin with soap and water and keeping the buttocks and
genital area dry (lotion or powder may be used depending upon the
patient's skin type) when the patient is incontinent.
7. Obese patients may need assistance washing and drying areas under skin
folds (groin, buttocks, under breasts, and so forth.)
8. For the patient with very dry skin, various bath oils may be added to the
bath water.
 Soap may be omitted because of its drying effect.
 Lotions and oils may be used after the bath.
PROVIDING FOR SELECTED PATIENT NEEDS WHILE BATHING A
PATIENT:
a. Safety:
1. The bed may be in the high position during the patient's bed bath, but should
be placed in the low position upon completion.
2. The side rails should be up after the patient's bath for the patient who is
confined to the bed.
 Side rails help to prevent falls for the elderly patient or the patient who is
confused or has a decreased level of consciousness.
 The legal aspect requires diligence on the part of nursing personnel.
3. The patient's call light should be within easy reach to prevent the need to reach
for it and risk falling out of bed and to provide easy access in case of pain or
distress.
4. Fire safety in the patient care area calls for the following rules:
 No smoking in bed.
 No smoking if oxygen is in use.
17
5. Always wash your hands before entering and upon leaving the patient's room.
b. Privacy:
 Respect for the patient's privacy decreases the patient's emotional
discomfort during personal care.
 Keep the door to the patient's room closed.
 Pull the curtains around the unit and drape the patient's body during care.
 Allow the patient to complete as much personal care as possible; self-care
is appropriate and provides additional privacy.
c. Comfort.
 Ensure a comfortable temperature in the patient's room.
 Close any windows and the door to the patient's room to prevent drafts
and chilling.
 Drape the patient appropriately during the bath.
 For a bedside bath, maintain bath water between 110° F and 115° F;
change the water as it cools and/or gets soapy.
SIGNIFICANT NURSING OBSERVATIONS DURING THE BATHING
PROCEDURE
a. Physical Observations:
 Observe the skin under good, natural light.
 Any abnormal skin condition should be described as to its location, color,
and size and how it feels to the patient.
 The following skin observations should be checked upon admission and
daily thereafter:
Cleanliness:
 Odor. May be caused by sweat secreted by the sweat glands; by abnormal
conditions, such as infection or kidney disease; or by bodily discharges
(urine, feces) that need to be cleaned.
 Texture. Smooth and elastic or dry and rough; nutritional deficiencies can
influence skin texture.
 Color. Reddened areas that could indicate pressure, cyanosis (bluish
tinge) or jaundice (yellowish tinge).
 Tmperature. Hot skin could mean fever; cold skin could mean poor
circulation.
 (Sensitivity. Pain, tenderness, itching, or burning.
 Swelling (edema). Stretched or tight appearing; usually begins in the
ankles or legs or any other dependent part; may be associated with injury.
18
 Skin lesions. Rashes, growths, or breaks in the skin.
 Observations may begin at the head (scalp) and proceed to the feet in a
systematic manner.
b. Psychosocial Observations:
 Problems in this area may be related to the patient's present problems.
 The time of the patient's bath may be a good time to find out more about
the patient's psychosocial needs.
 Remember that the patient's nonverbal communication may tell you much
about the way he/she is feeling.
MOUTH CARE:
a. Purposes:
 Provide oral care of the teeth, gums, and mouth.
 Remove offensive odors and food debris.
 Promote patient comfort and a feeling of well-being.
 Preserve the integrity and hydration of the oral mucosa and lips.
 Alleviate pain and discomfort, thereby enhancing oral intake.
b. General Guidelines:
 Oral hygiene should be performed before breakfast, after each meal, and
at bedtime.
 Oral hygiene is especially important for patients receiving oxygen
therapy, patients who have nasogastric tubes, and patients who are
NPO. Their oral mucosa dries out much faster than normal due to their
mouth-breathing.
 You should provide for patient privacy during the procedure, as this is an
extremely personal procedure for most patients.
 Oral care for the unconscious patient should be performed at least every
four hours.
 Lipstick, chap stick, or vaseline may be applied to the lips to keep them
from drying out.
c. Nursing Records. Nursing observations for the patient's mouth should be
recorded in the clinical record, noting such factors as:
 Bleeding.
 Swelling of gums.
 Unusual mouth odor.
Effect of brushing the teeth. Note if there is bleeding when you brush the
patient's gums and teeth.
19
d. Conscious Patients with Dentures:
General considerations
 Many patients are sensitive or embarrassed about wearing dentures;
therefore, the patient's privacy should be respected when the dentures are
cleaned.
 Dentures must be handled carefully; they are fragile and expensive, and
the patient is handicapped without them.
 If the dentures are left out of the mouth for any period of time, place them
in a covered opaque container with the patient's name on the container.
 Dentures must be kept in water to preserve their fit and general quality;
the color may change if they become dry.
You may avoid breaking the dentures while cleaning them by holding them over
a basin of water with a washcloth folded in the bottom.
 Dentures are brushed in the same way as natural teeth; be sure to rinse
them well.
 The denture cup should be labeled with the patient's name and room
number.
 Never use hot water to rinse the dentures as it could warp them; use cool
or lukewarm water.
 The patient's gums and soft tissues should be cared for at least twice per
day while the dentures are out of the mouth; a soft-bristled toothbrush,
swab, or gauze-covered tongue blade dipped in mouthwash should be
used to cleanse the gums, tongue, and soft tissues.
e. PATIENTS WITH MOUTH COMPLICATIONS:
The following problems are common in patients receiving chemotherapy and
radiation therapy:
(1) Bleeding:
 Observe the patient's mouth frequently for the amount of bleeding present
and the specific areas.
 Do not floss the patient's teeth; use a Water-pik
Brush the teeth and clean the mouth using one of the following methods:
 Brush the teeth carefully with a very soft toothbrush.
 Wrap a tongue blade with a gauze sponge saturated with a prescribed
solution; carefully swab the teeth and mouth. Do not use lemon/glycerine
swabs or commercial mouthwash because they contain alcohol, which
causes burning.
20
(2) Infection:
 Observe the patient's mouth for appearance, integrity, and general
condition.
 Wear clean gloves during the procedure.
 Obtain a culture, if ordered.
 Do not floss the teeth if the mouth is irritated or painful.
 Assist the patient with brushing the teeth and cleaning the mouth, using a
soft toothbrush or a gauze-padded tongue blade.
 Rinse the mouth with water and the prescribed solution, if ordered.
(3) Ulcerations, To Include Stomatitis:
 Basic procedure for the patient with an infection should be followed.
 If the patient's mouth is extremely painful, rinsing the mouth with a local
anesthetic, as prescribed by a physician, may be necessary.
 Mouthwash and other solutions which contain alcohol should not be used
for the patient with ulcerations as they are frequently very painful.
f. Unconscious Patients:
 Oral care should be performed at least every four hours.
 Oral suctioning may be required for the unconscious patient to prevent
aspiration.
 A soft toothbrush or gauze-padded tongue blade may be used to clean the
teeth and mouth.
 The patient should be positioned in the lateral position with the head
turned toward the side to provide for drainage and to prevent aspiration.
21
BACK MASSAGE AS A PATIENT COMFORT MEASURE:
Purpose:
 Decreases muscle tension and promotes relaxation.
 Increases circulation to the area.
 Aids in the development of the therapeutic nurse-patient relationship.
Basic Principles of Back Massage:
 The psychological benefits of back massage cannot be overstressed for
the hospitalized patient.
 The following statements illustrate the concept of therapeutic touch as an
integral part of the domain of nursing.
 Touch can be perceived as a manifestation of caring and communication
between the nurse and the patient.
 Tactile communication between healthy and ill individuals can have
highly beneficial results.
 Therapeutic touch may make some patients uncomfortable; you are
entering their personal space and their feelings must be respected, so
make sure you ask the patient if he/she would like a back rub.
Agents used for back massage:
1 .Lotions or emollients
 Lotions and emollients reduce friction and lubricate the skin.
 They are appropriate for most patients, especially those with a tendency
toward dry skin; that is, elderly patients.
2, Rubbing alcohol
 Alcohol evaporates quickly, so it has a cooling but very drying effect.
 A certain amount of alcohol is absorbed by the skin so it should not be
used on infants, elderly patients, or patients with liver disease.
3, Powder.
 Powder reduces friction but also has a drying effect on the skin.
 It may be appropriate for those patients who perspire freely and/or are
confined to bed
e. General guidelines:
22
 A back massage should take about five to ten minutes and can be given
with the patient's bath, before bedtime, or at any other time during the
day.
 Determine if any patient allergies or skin sensitivities exist before
applying lotion to the patient's skin.
 The greatest relaxation effect of a massage occurs when the rhythm of the
massage is coordinated with the patient's breathing.
PERINEAL CARE:
 Perineal care is often referred to as "pericare;" it consists of external
irrigation of the vulva and perineum following voiding or defecation and
is part of the routine A. M. and P. M. care.
 Patients may be able to perform their own perineal care or may need
partial or total assistance from the nurse.
 Embarrassment on the part of the patient and the nurse can be effectively
dealt with by ensuring patient privacy during the procedure and not
totally exposing the patient's genital area.
Key points:
 Ensure patient privacy.
 Wipe from front to back (vagina toward rectum) on female patients to
avoid contaminating the vagina or urethral meatus.
 Do not use the same washcloth for any other portion of the patient's bath.
BED PATIENT'S HAIR CARE:
a. Principles for Shampooing the Bed Patient's Hair.
 The supine position is preferred for weaker patients.
 Patients with significant heart or lung disease will not tolerate being
supine; they must be in a sitting position.
 Hair care should be given regularly during illness, just as it would be
normally.
b. Purposes of Hair Care.
 Hair care improves the morale of the patient.
 It stimulates the circulation of the scalp.
c. Shampooing removes bacteria, microorganisms, oils, and dirt that cling to the
hairs
23
PERSONAL HYGIENE:
Definition:
Personal hygiene is described as the principle of maintaining cleanliness and
grooming of the external body.
Failure to keep up a standard of hygiene can have many implications. There an
increased risk of getting an infection or illness.
Importance of Personal Hygiene:
 Personal grooming is important for a positive self-image.
 Self-esteem, confidence and motivation can all be altered by our body
image, often reflected on our ability to care for ourselves and keep good
hygiene practices.
 keeping a good standard of hygiene helps to prevent the development
and spread of infections, illnesses and bad odours.
Daily Hygiene Needs:
 Bathing
 Skin care
 Back care
 Oral hygiene
 Shaving
 Shampooing hair
 Hair care
 Nail care
 Perineal care
 Dressing and undressing
Factors That Affect Hygiene Practices:
 Culture
 Family Practices
 Illness
 Individual preferences
 Bath in morning or before going to bed
 Frequency of bathing, shaving
 Shampooing hair daily or weekly
Bathing:
Purpose of Bathing
 Removes perspiration, dirt and microorganisms
 Stimulates circulation
24
 Exercises body parts
 Refreshes, relaxes and promotes physical comfort
 Removes odors
 Allows for evaluation of skin condition
Body Odor:
Perspiration, or sweat, comes from sweat glands. Due to puberty, these glands
not only become more active than before, but at the same time, they also begin to
secrete different chemicals into the sweat that has a stronger smelling odor.
The best way to keep clean is to bath or shower every day, because this will help
wash away any bacteria that contribute to the smells.
Skin Observations while Bathing:
 Color of skin, lips, nail beds and sclera of eyes
 Location and description of rashes
 Dry skin
 Bruises or open areas on skin
Hair Wash
Washing your hair every day or every other day can help control oily hair.
Don't scrub or rub too hard this doesn't get rid of oil any better and can irritate
your scalp or damage your hair.
Oral Hygiene
Definition: measures used to keep mouth and teeth clean and free of
microorganism
Teeth: Brushing
 Brushing your teeth properly, along with regular dental checkups, can
help prevent tooth decay and gum disease.
 To prevent cavities, you need to remove plaque, the transparent layer of
bacteria that coats the teeth.
 Brushing also stimulates the gums, which helps to keep them healthy and
prevent gum disease.
 Teeth: Brushing
 Bad breath is caused by odor-producing bacteria that grow in the mouth.
When a person doesn‘t brush and floss regularly, bacteria accumulate on
the bits of food left in the mouth and between the teeth.
Nail Care:
Requires daily cleaning and trimming of fingernails and toenails as needed
Maintain nails by keeping nails: Short, clean and free of rough edges
25
Purpose:
Prevent infection
Prevent injury
Prevent odors
Steps of Hand Washing
Perineal Care:
 Used to clean genital and anal areas
 Prevents infection
 Prevents odors
 Promotes comfort
 Rules of medical asepsis and Standard Precautions followed
 Work from cleanest to dirtiest area (front to back)
 urethral area – cleanest anal area – dirtiest
26
ADMISSION, TRANSFER AND DISCHARGE PROCEDURE
ADMISSION PROCEDUR:
Definition:
Admission is a process through which the patient get admitted in the hospital
for a shorter or
longer period of time as prescribed by his/her doctor for treatment. A patient
coming into hospital
as occasionally frightened & uncomfortable. They may or may not be
seriously ill or in pain. This is a time where you are very important to the
patient. Being pleasant & courteous will make the
patient arrived easier for him. A nice relaxed environment & Well come well
create a favorable first impression.
Types of admission:
 Ordinary or elective
 Emergency admission
 Transfer admission
 Day care admission
Purpose of admission:
To get the treatment & care for his/her disease
 Diagnostic procedure
 Child birth
 Chemotherapy
Tips to follow when admitting the patient:
1. Introduction yourself
2. Learn patient name & use it often
3. your way of speaking & behaving will have a lot to do with the
patient impression of the institution
4. Be friendly
5. Smile
6. Do not arrear to be rushed or busy with other things
7. Do your work quietly & efficiently
27
DISCHARGE PROCEDURE:
Staff must be able to assist the patient while preparing to go home at the time of
discharge.
Discharging the patient:
The patient being discharged is often still weak and may get tired easily.
However, the patient is usually happy to know that he can go to home. Written
order from the doctor is required for the patient‘s discharge.
Health teaching to the discharge patient is the responsibility of the assign nurse
or the team leader. The nurse will give instruction about take home medication,
diet, exercise, activities of daily living the special care to a diabetic patient.
Types of Discharge
There are three types of discharge:
1. Ordinary / routine discharge: when the doctor give the written permission for
the patient to go home
2. Leave Against medical advised (LAMA): When the patient and his family
make the decision to leave the hospital on there own risk. A special from is
filled by the doctor and the patient. or his family member write stating that
they take the responsibility of the patient by discharge him against the
doctor‘s order and sign on it
3. Discharge by transfer: Patient are sometimes discharged from one health care
institution to another. These patients may leave the hospital in an ambulance.
Staff responsibility:
The assigned nurse or the team leader will tell you about the patient discharge.
1.Inform the patient and his attendant about the patient discharge. Help the
patient contact his family, if the patient is alone
2.Assemble all the patient‘s personal belonging and assist him in packing, for
example, his clothes, shaving box etc
3.Check that hospitals items are returned, for example, kidney dish, gallipots etc.
4.Assist the patient get dressed, if necessary. Cut the identification band.
5.Check that the assigned nurse has given health teaching, medication etc.
6.Make sure that she removes I/V Canula, catheter. N.G. Tube. If any doctor has
ordered to discharg the patient with N.G Tube or Foleys‘s catheter or n
intravenous canula, then the assigned nurse will change it with a new one before
the patient goes off.
7.Guide the patient to billing office ( follow unit policy)
8.Check that the discharge summary etc has handed over to patient.
9.Wheel the patient to the ear or taxi and say good bye to him.
10.Remove bed linen and place it in the hamper bag.
11.Report to the assigned nurse that the patient has been discharge safely, and
has accompanied the patient, husband wife etc
28
BED MAKING:
Patients spend most of their time in bed during hospitalization. Therefore, it is
important to make patient‘s bed with great care as to maximize comfort & rest
to the patient.
Purpose of bed making:
 To provide comfort & promote rest to the patients.
 To promote safety by having a neat, clean & wrinkled free bed to patients.
 To conserve energy & add to a neat environment.
Principles of bed making:
1. Save energy & time by organizing items as per use & making bed on side
then moving to other side.
2. Tuck bottom sheet firmly to remove wrinkles.
3. Do not use torn linen.
4. Never place one patient linen on another patient bed.
5. Pull mattress well up to head of bed. It must be clean & dry before bed
making.
6. Do not expose the patient or cover his/her face while changing top sheet.
7. Do not mix clean linen with dirty linen.
8. Never throw dirty or soiled linen on the floor. Always use a hamper beg.
9. Place soiled linen (linen soiled with blood, stool) in a separate plastic beg &
label it.
10. Do not shake linen while making bed. Shaking will spread germs in the
environment.
11. Have everything ready before beginning.
12. Never use bed linen for any other purpose than that for which it is intended.
Types of beds:
There are four basic types of bed, which student usually makes.
1. Closed bed: Closed bed is made when house- keeping staff have
cleaned the one bed unit following a patient discharge. The bed is
made UP CLOSED so it will remain clean until a new patient
assigned to it.
2. Open bed: When a patient is admitted to a unit the closed bed is
made into an open bed fan folding the top sheets down to the foot of
the bed. An open bed is also made for a patient who is already
hospitalization & is up & about.
3. Occupied bed: Some patients are unable or not permitted to get out of
bed. As a result this many patients are fed, bathed & cared in bed.
29
When the patient the patient is completely bedridden, the bed is made
with the patient in the bed. It is called occupied bed.
4. Post-operative bed: A special way of making of bed to receive a patient
who returning to the unit after having a surgery.
USE AND REMOVAL OF BEDPAN:
Requirement
The bedridden client may have altered elimination patterns. Reduced mobility,
Pain, privacy issues, the need for assistant ,deleys in getting assistance when
needed, and the fear of interruption can all alter normal elimination patterns.
Voiding and bowel elimination for the client confined to bed require a bedpan .
Equipment Needed:
Bedpan (regular or fracture) or urinal
Disposable gloves
Bedpan cover
Toilet paper
Washcloth and towel.
Procedure:
1. Close curtain or door.
2. Wash hand; apply gloves.
3. Lower head of bed so client is in supin position.
4. Elevate bed.
5. Assist client to side-lying position using side rail for support.
6. Warm bedpan under warm water if needed; power if necessary
7. Place bedpan under buttocks.Place a fracture pan with the lower near the
client‘s lower back region. Place large bedpan with the opening near the
client‘s thighs.
8. While holding the bedpan with one hand, help the client roll onto the back,
while pushing against the bedpan (toward the center of the bed) to hold it in
place.Alternate: Help the client raise the hips using the overbed trapeze, and
slide the pan in place.Allternate:if the client is unable to turn or raise hips,
30
use fracture pan instead of a bedpan. With fracture pan ,the flat side in
placed to ward the client‘s head
9. Check placement of bedpan by looking between client‘s legs.
10. If indicate, elevate head of bed to 45* angle or higher for comfort.
11. Place cell light within reach of client; place side rails in upright position,
lower bed, and Provide privacy.
12. Remove gloves; Wash hands.
Removing a Bedpan:
1. Wash hands; apply gloves.
2. Gather toilet paper and washing supplies.
3. Lower head of bed to supine position.
4. While holding bedpan with one hand, roll client to side and remove the pan,
being careful not to pull or shear skin sticking to the pan and being careful
not to spill contents
5. Assist with cleaning or wiping; always wipe with a front to back motion.
6. Empty bedpan (measure urine output if ordered),clean bedpan, and store it in
proper place; if bedpan is to be emptied outside client‘s room ,cover in during
transport.
7. Remove soiled gloves. Wash hands.
8. Allow client to wash hands.
9. Place call light within reach.
10. Recheck that side rails are in the upright position
11. Wash hand
HOT AND COLD COMPRESSION:
Purpose:
 To relieve pain.
 To relieve congestion.
 To reduce swelling.
 To control bleeding.
Procedure:
 Full the ice bag ½ -2/3rd
full of crushed ice.
 Remove the residual air from the bag by pressing the bag against a flat
surface.
 Seal the bag.
 Dry the out side of the bag and cover it with towel.
 Refilling may be necessary at hourly intervals, or depending on the
environmental temperature.
 Remove the hag after 02 hrs for ½ hr before reapplying.
 Do not leave the bag on one area more than 02 hrs.
31
 Check the under skin every10 minutes for blanches or white, if its so,
remove the ―ice bag‖.
 Cover the area informs your staff and head nurse.
 Make the patient comfortable.
 Clean and dry the equipment and replace back to the assigned place.
 Wash hand.
Report to your head nurse/team leader:
Time length.
Area of application.
How the patient to letrated.
Observe of any thing unusual. and report to team leader
ICE BAG:
Purpose:
 To relieve pain.
 To relieve congestion.
 To reduce swelling.
 To control bleeding.
Procedure:
 Full the ice bag ½ -2/3rd
full of crushed ice.
 Remove the residual air from the bag by pressing the bag against a
flat surface.
 Seal the bag.
 Dry the out side of the bag and cover it with towel.
 Refilling may be necessary at hourly intervals, or depending on the
environmental temperature remove the hag after 02 hrs for ½ hr
before reapplying.
 Do not leave the bag on one area more than 02 hrs.
 Check the under skin every10 minutes for blanches or white, if its so,
remove the ―icebag‖. Cover the area informs your staff and head
nurse.
 Make the patient comfortable.
 Clean and dry the equipment and replace back to the assigned place.
 Wash hand.
Report to your head nurse/team leader:
1. Time length.
2. Area of application
3. How the patient to letrated
4. Observation of any thing unusual
32
STEAM INHALATION:
Steam inhalation a method by which heated moisture is conveyed to the upper
respiratory tract by inhalation of steam.
Steam inhalation is one of the most widely used home remedies to soothe and
open the nasal passages and get relief from the symptoms of a cold or sinus
infection.
Also called steam therapy, it involves the inhalation of water vapor. The warm,
moist air is thought to work by loosening the mucus in the nasal passages, throat,
and lungs. This may relieve symptoms of inflamed, swollen blood vessels in your
nasal passages.
While steam inhalation won‘t cure an infection, like a cold or the flu, it may help
make you feel a lot better while your body fights it off.
Don't steam longer than 10 to 15 minutes for each session. However, you can
repeat steam inhalation two or three times per day if you're still having
symptoms.
Purpose:
 To ease breathing by increasing the humidity of the air in order to sooth
mucus membrane.
 To relieve and prevent inflammation, congestion and edema of the larynx
andair passages.
 To stimulate expectoration and loosen secretions of the respiratory
system.
 To relieve coughing.
Materials required for steam inhalation
 a large bowl
 water
 a pot or kettle and a stove or microwave for heating up water
 towel
Here’s the process:
1. Heat up the water to boiling.
2. Carefully pour the hot water into the bowl.
3. Drape the towel over the back of your head.
4. Turn on a timer.
5. Shut your eyes and slowly lower your head toward the hot water until
you‘re about 8 to 12 inches away from the water. Be extremely careful to
avoid making direct contact with the water.
6. Inhale slowly and deeply through your nose for at least two to five
minutes.
33
Don‘t steam longer than 10 to 15 minutes for each session. However, you can
repeat steam inhalation two or three times per day if you‘re still having
symptoms.
You can also purchase an electric steam inhaler (also called a vaporizer) online
or at a drugstore. For these, you just need to add water to the level indicated and
plug in the system. The vaporizer uses electricity to make steam that cools before
exiting the machine. Some vaporizers come with a built-in mask that fits around
your mouth and nose.
Steam vaporizers can get dirty with germs quickly, so you‘ll need to wash it
often to prevent bacterial and fungal growth. Wash the bucket and filter system
every few days during use, too.
TECHNIQUES OF BODY MECHANICS:
Some of the most common injuries sustained by members of the health care team
are severe musculoskeletal strains. Many injuries can be avoided by the
conscious use of proper body mechanics when performing physical labor.
Body mechanics is the utilization of correct muscles to complete a task safely
and efficiently, without undue strain on any muscle or joint.
Principles of good body mechanics
a. Maintain a stable center of gravity:
 Keep your center of gravity low.
 Keep your back straight.
 Bend at the knees and hips.
b. Maintain a Wide Base of Support. This will provide you with maximum
stability while lifting:
 Keep your feet apart.
 Place one foot slightly ahead of the other.
 Flex your knees to absorb jolts.
 Turn with your feet.
c. Maintain the Line of Gravity. The line should pass vertically through the
base of support:
 Keep your back straight.
 Keeps the object being lifted close to your body
d. Maintain Proper Body Alignment.
34
 Tuck in your buttocks.
 Pull your abdomen in and up.
 Keep your back flat.
 Keep your head up.
 Keep your chin in.
 Keep your weight forward and supported on the outside of your feet.
Techniques of body mechanics:
A. Lifting.
 Use the stronger leg muscles for lifting.
 Bend at the knees and hips; keep your back straight.
 Lift straight upward, in one smooth motion.
b. Reaching.
 Stand directly in front of and close to the object.
 Avoid twisting or stretching.
 Use a stool or ladder for high objects.
 Maintain a good balance and a firm base of support.
 Before moving the object, be sure that it is not too large or too heavy.
c. Pivoting.
 Place one foot slightly ahead of the other.
 Turn both feet at the same time, pivoting on the heel of one foot and the toe
of the other.
 Maintain a good center of gravity while holding or carrying the object
d. Avoid Stooping.
 Squat (bending at the hips and knees).
 Avoid stooping (bending at the waist).
 Use your leg muscles to return to an upright position.
4-5. General considerations for performing physical tasks
 It is easier to pull, push, or roll an object than it is to lift it.
 Movements should be smooth and coordinated rather than jerky.
 Less energy or force is required to keep an object moving than it is to start
and stop it.
 Use the arm and leg muscles as much as possible, the back muscles as little
as possible.
35
 Keep the work as close as possible to your body. It puts less of a strain on
your back, legs, and arms.
 Rock backward or forward on your feet to use your body weight as a pushing
or pulling force.
 Keep the work at a comfortable height to avoid excessive bending at the
waist.
 Keep your body in good physical condition to reduce the chance of injury.
Reasons for the use of proper body mechanics
 Use proper body mechanics in order to avoid the following:
 Excessive fatigue.
 Muscle strains or tears.
 Skeletal injuries.
 Injury to the patient.
 Injury to assisting staff members.
POSITIONING AND AMBULATING THE ADULT PATIENT:
One of the basic procedures that nursing personnel perform most frequently is
that of changing the patient's position. Any position, even the most comfortable
one, will become unbearable after a period of time. Whereas the healthy person
has the ability to move at will, the sick person's movements may be limited by
disease, injury, or helplessness. It is often the responsibility of the practical nurse
to position the patient and change his position frequently. Once the patient is able
to ambulate, certain precautions must be taken to ensure the patient's safety.
36
Reasons for changing the position of a patient:
The following are reasons for changing a patient's position.
 To promote comfort and relaxation.
 To restore body function.
 Changing positions improves gastrointestinal function.
 It also improves respiratory function.
 Changing positions allows for greater lung expansion.
 It relieves pressure on the diaphragm.
 To prevent deformities.
 When one lies in bed for long periods of time, muscles become atonic and
atrophy.
 Prevention of deformities will allow the patient to ambulate when his
activity level is advanced.
 To relieve pressure and prevent strain (which lead to the formation of
decubiti).
 To stimulate circulation. . To give treatments (that is), range of motion
exercises).
Turning the adult patient :
a. General Principles for Turning the Adult Patient.
(1) Sometimes the physician will specify how often to turn a patient.
(a) A schedule can be set up for turning the adult patient throughout his "awake"
hours.
(b) The patient should be rotated through four positions (unless a particular
position is contraindicated):
37
Prone position
Supine position.
Sim's position
 Plan a schedule and follow it.
 Record the position change each time to ensure that all positions are used.
 One example of a schedule for turning would be:
38
10 a.m Prone position
12 p.m. Left Sim's position
2 p.m Supine position
4 p.m. Right Sim's position
6 p.m. Prone position
1 Notice that in the preceding sequence, the patient is required to make only a
quarter turn rather than a half turn each time the position is changed.
2 If the patient experiences pain while turning, a quarter turn will be less painful
than a half turn.
COMMON POSITIONS UTILIZED FOR THE ADULT PATIENT
A. Placing the adult patient in the supine position
(1) Collect equipment.
 Pillows.
 Positioning aids as indicated.
(2) Wash your hands.
(3) Approach and identify the patient (by checking the identification band) and
explain the procedure (using simple terms and pointing out the benefits).
(4) Provide privacy throughout the procedure.
(5) Position the bed.
 Place the bed in a flat or level position at working height, unless
contraindicated.
 Lower the side rails on the proximal side (as necessary).
39
(6) Move the patient from a lateral (side) position to a supine position.
 For the patient on his side, remove supportive pillows.
 Fold top bedding back to the hips, being careful to avoid any undue exposure
of the patient's body.
 With one hand on the patient's shoulder and one on the hip, roll his body in
one piece (like a log) over onto his back.
(7) Align the patient's body in good position.
 Head, neck, and spine are in a straight line.
 Arms are at the patient's sides (parallel to the body) with hands prone.
 Legs are parallel to his body.
 Hips, knees, and feet should be in good alignment.
(8) Support the body parts in good alignment for comfort.
 Place a pillow under the head and shoulders to prevent strain on neck muscles
and hyperextension and flexion of the neck.
 Support the small of the back with a folded bath towel or small pillow.
 Put a footboard at the foot of the bed and place the feet flat against it (at right
angles to the legs) to prevent plantar flexion ("foot drop").
 Arrange a sandbag along the outer portion of the right foot to keep the foot
upright.
 Make a trochanter roll and arrange it along the right hip and thigh to keep the
hip joint from rotating outward.
 Place a pillow under each forearm so the arm is at least six inches from the
body.
(9) Provide for the patient's comfort and safety.
 Replace the bedding neatly and raise the side rails, if used.
 Place the call light within reach.
 Position the bedside stand or overbed table so that the patient will be within
easy reach of drinking water and personal items.
 (d) Leave the bed in the low position.
(10) Report significant nursing observations to the charge nurse.
(11)Report significant nursing observations to the charge nurse.
40
B. Placing the adult patient in the fowler's and semi-fowler's positions.
Fowler's position
Semi fowler position
.
41
ADMINISTERING AN ENEMA:
Definition:
An enema is a solution inserted into the rectum and sigmoid colon for
the purpse of removing faces and /or flatus.
Types of Enema:
There are several types of enema used of purposes other than cleansing.
1. Clean enema.
2. Soapy water enema.
Large volume cleansing enema:
Equipment Needed:
 Absorbent pad for the bed.
 Disposable gloves.
 Bedside commonde or bedpan if client will not be able to ambulate to
 bathroom
 Lubricant..
 Enema container
 Tubing with clamp and nozzle. .
 Thermometer for enema solution
 Toilet tissue.
 IV pole.
 Wash Cloth, towel and basin.
Large volume cleansing Enema:
1. Wash hands.
2. Assess client‘s understanding of procedure and provide privavy.
3. Apply gloves.
4. Prepare equipment (see Figure 6-19-5)
5. Place absorbent pad on bed under client.Assist client in attaining left
lateral position with right leg flexed as sharply as possible.If there is
question regarding the client‘s ability to hold the solution, place a
bedpan on the bed near to the Patient.
6. If specified,heat solution to desired temperature using thermometer to
measure. enemas administered to adults are usually given at 105*-
110*F (40.5*-43*C),and those adminis-tered children are usually at
100*F(37.7*C)Solution should be at least body temperature to
prevent cramping and discomfort.
7. Pour solution into the bag or bucket ; add water if needed .Open
clamp and allow solution to prime tubing .Clamp tubing when
primed.
42
8. Lubricate 5 cm (2 inches) of the rectal tube unless the tube is part of
the rectal tube unless the tube is part of a prelubricated enema set.
9. Holding the enema container level with the rectum , have the client
take a deep breath. Slowly and smoothly insert rectal tube into rectum
approximately 7-10 cm in an adult. The rectum of an adult is usually
10- 20 cm (4-6 inches). Aim the rectal tube toward the client‘s
umbilicus.
10. Raise the container holding the solution and open clamp.(If using an
enemaset, sqeez the container holding solution).The solution should
be 30-45 cm(12-18 inches)above the rectum for an adult,and 7.5 cm
(3 inches)above the rectum for an infant.The solution may be paced
on an IV pole at the proper height.
11. Slowly administer the fluid.
12. When solution has been completely administered or when the client
cannot hold any more fluid,clamp the tubing and remove the rectal
tube, disposing of it properly.
13. Clean lubricant, any solution, and any faces from the anus with toilet
tissue.
14. Have the client continue to lie on the left side for the prescribed
length of time.
15. When the client has retained the enema for the prescribed amount of
time, assist to the bedside commode or toilet onto the bedpan .If the
client using the bathroom, instruct not to flash the toilet when
finished.
16. When the client finishing expelling the enema assist to clean the
perineal area if needed.
17. Return the client to a comfortable position place a clean, dry protective
pad under the client to catch any solution or feces that may continue
to be expelled.
18. Observe feces and document data.
19. Remove gloves and wash hands.
Small volume, Prepackaged Enema:
Equipment Needed:
 Prescribe package prepackage enema.
 Lubricant if the tip is not pre lubricated.
 Toilet tissue.
 Bedpan or commode if the client cannot use the bathroom.
 Absorbent pad for bed.
Small volume, Prepackaged Enema:
1. Wash hands.
2. Remove prepackaged enema from packaging. Be familiar with any
special instructions include with the enema .The packaged enema may
be stood in a basin of warm water to warm the fluid prior to use
43
3. Apply gloves.
4. Place absorbent pad on bed under client. Assist client in attaining left
lateral position with right leg flexed as sharply as possible .Or you
may use the knee-chest position If there is a question regarding the
client‘s ability to hold the solution, place a bedpan on the bed nearby.
5. Remove the protective cap from the nozzle and inspect the nozzle for
lubrication. If the lubrication is not adequate, add more.
6. Squeeze the container gently to remove any air and prime the nozzle.
7. Have a client take a deep breath. Simultaneously gently insert the
enema nozzle into the anus pointing the nozzle toward the umbilicus.
8. Squeeze the container until all the solution is instilled
9. Remove the nozzle from the anus and dispose of the empty container
in a trash receptacle
Equipment Needed:
 Absorbent pad for the bed
 Disposable gloves
 Bedside commode or bedpan if client will not be able to ambulate to
bathroom
 Prescribed solution
 Lubricant
 Enema container
 Tubing with clamp and nozzle
 Thermometer
 Toilet tissue
Procedure:
1. Wash hands Assess if client understands procedure.
2. Apply gloves.
3. Place absorbent pad on bed under client. Assist client in
4. attaining left lateral position with right leg flexed.
5. If specified, heat solution to desired temperature using thermometer to
measure Enemas
6. . Administered to adults are usually given a 105*-110-F(40.5—43-C) and
thos administered to children are usually administered at 100*F
7. Solution should be at least body temperature to prevent cramping and
discomfort.
8. Pour solution in to the bag or bucket ,open clamp,and allow solution to prime
tubing.Clamp tubing when primed.
9. Lubricant 5 cm (2 inches)of the rectal tube unless the tube is part of a
prelubricated enema set. Holding the enema container level with the rectum,
44
have a client take a deep breath.simultaneously; slowly and smoothly insert
rectal tube into rectum approximately 7-10 cm in and adult. Insertion of rectal
tube toward the umbilicus guides tube along rectum. Rectum of an adult is
usually 10-20cm (4-6inches).The tube should be inserted beyond the internal
sphincter. Aim the rectal tube toward the client‘s umbilicus.Raise the
container holding the solution and open clamp. The solution should be 30-
45cm (12-18 inches)above the rectum for an infant. The solution may be
placed an IV pole at the proper height.
10. Slowly administered the fluid.
8. When solution has been completely administered or when the client cannot
hold any more fluid, clamp the tubing and remove the rectal tube, disposing
of it properly.lubticant,any solution, and any feces from the anus with toilet
tissue.When the client has retained the enema for the prescribed amount of
time, assist to the bedside commode and toilet or on to the bedpan. if the
client is using the bathroom instruct not to flush the toilet when finished.
9. When the client‘s is finished expelling the enema, assist to clean the
perineal area if needed.
11. Return the client to a comfortable position. Place a clean, dry protective pad
under the client to catch any solution or feces that may continue to be expelled.
12. Observe feces and document data.
13.Remove gloves and wash hands
ASSISTING WITH A BEDPAN:
Use of Bedpan:
Voiding and bowel elimination for the client confined to bed require a bedpan
and /or a urinal.
Requirement:
The bedridden client may have altered elimination patterns. Reduced
mobility, pain ,privacy issues, the need for assistant ,delays in getting assistance
when needed, and the fear of interruption can all alter normal elimination
patterns.
Equipment Needed:
 Bedpan (regular or fracture) or urinal
 Disposable gloves
 Bedpan cover
 Toilet paper
45
 Washcloth and towel.
Procedure:
1. Close curtain or door.
2. Wash hand; apply gloves.
3. Lower head of bed so client is in supin position.
4. Elevate bed.
5. Assist client to side-lying position using side rail for support.
6. Warm bedpan under warm water if needed; power if necessary
7. Place bedpan under buttocks.Place a fracture pan with the lower near the
client‘s lower back region. Place large bedpan with the opening near the
client‘s thighs.
8. While holding the bedpan with one hand, help the client roll onto the back,
while pushing against the bedpan (toward the center of the bed) to hold it in
place.
9. Alternate: Help the client raise the hips using the ove-rbed trapeze, and slide
the pan in place.Allternate:if the client is unable to turn or raise hips, use
fracture pan instead of a bedpan. With fracture pan ,the flat side in placed to
ward the client‘s head
10. Check placement of bedpan by looking between client‘s legs.
11. If indicate, elevate head of bed to 45* angle or higher for comfort.
12. Place cell light within reach of client; place side rails in upright position,
lower bed, and provide privacy.
13. Remove gloves; Wash hands.
Removing a Bedpan:
1. Wash hands; apply gloves.
2. Gather toilet paper and washing supplies.
3. Lower head of bed to supine position.
4. While holding bedpan with one hand, roll client
46
HEIGHT AND WEIGHT:
The patient's height and weight are recorded on admission for several reasons.
1. Diet Management
The patient's ideal weight may be determined. The health care team will also be
able to monitor weight loss or gain.
2. Observation of Medical Status
Taking the patient's height and weight may indicate that the patient is
overweight, underweight, or is retaining fluids (edema). The health care team can
observe changes in weight caused by specific disease processes and determine
the effectiveness of nutrition supplements prescribed to maintain weight.
3. Calculation of Medication Dosages
Drug dosage is often prescribed in relation to a patient's weight when a specific
blood concentration of the drug is desired. Larger doses may be required in a
heavier person.
MEASURING HEIGHT AND WEIGHING THE PATIENT
a. To measure height, have the patient stand on the scale with the back to the
measuring bar.
b. Ask the patient to stand straight. Lower the bar so that it lightly touches the
top of the patient's head.
c. Record the height in inches or centimeters in accordance with local policy.
d. If the patient cannot stand, obtain an approximate height in bed.
 Have the patient lie on his back and stretch as much as possible.
 Place a mark on the bottom sheet at the patient's heel and at the top of
the patient's head.
 Measure between these two marks on the taut bottom sheet.
e. Principles related to weighing the patient.
 Weigh the patient before breakfast, at the same time each day.
 Use the same scale each time.
 Ensure that the scale is properly balanced.
 Weigh the patient in the same amount of clothing each day (i.e., hospital
gown or pajamas). Have the patient void before weighing.
 Avoid weighing any equipment attached to the patient such as drainage
bags. Hold the equipment while actually weighing the patient.
f. A helpless patient may be weighed while lying down on a litter scale. This
scale is a sling-type device that looks like a suspended hammock. You will
need assistance to place the patient on the scale.
g. Record the patient's weight on the graphic sheet and in the nurses' note
47
VITAL SIGNS:
TEMPERATURE, PULSE, RESPIRATION
Definition
Body Temperature: body temperature is the balance between heat produce and
heat lost from the body.
Pulse: the pulse is a wave of blood created by contraction of the left ventricle of
the heart. OR pulse assessment is the of a pressure pulsation created when the
heart contracts and ejects blood into the aorta.
Respiration: Respiration is the act of breathing, it include the intake of oxygen
and the output of carbon dioxide. OR respiratory assessment is the
measurement of the breathing pattern. When assessing respiration ascertain the
rate, depth, and rhythm of ventilator movement.
Vital Signs:
 Temperature, pulse, respiration, blood pressure (B/P) height & weight are
the most frequent measurements taken by HCP.
 Because of the importance of these measurements they are referred to as
Vital Signs. They are important indicators of the body‘s response to
physical, environmental, and psychological stressors.
 VS may reveal sudden changes in a client‘s condition in addition to
changes that occur progressively over time. A baseline set of VS are
important to identify changes in the patient‘s condition.
 VS are part of a routine physical assessment and are not assessed in
isolation.Other factors such as physical signs & symptoms are also
considered.
When to take vital signs:
Soon after a patient arrives on the nursing unit you should begin your nursing
assessment. You should take several measurements to establish a baseline for
further observations of that patient. Among these measurements are height,
weight, and vital signs. Other indications are as follow.
 On a client‘s admission
 According to the physician‘s order or the institution‘s policy or standard
of practice
 When assessing the client during home health visit
48
 Before & after a surgical or invasive diagnostic procedure
 Before & after the administration of meds or therapy that affect
cardiovascular, respiratory & temperature control functions.
 When the client‘s general physical condition changes
loss of conscious, pain
 Before, after & during nursing interventions influencing vital signs
 When client reports symptoms of physical distress
Body temperature:
 It is the balance b/w heat gain and heat lost.
 Core temperature – temperature of the body tissues, is controlled by the
hypothalamus (control center in the brain) – maintained within a narrow
range.
 Skin temperature rises & falls in response to environmental conditions &
depends on bld flow to skin & amount of heat lost to external
environment
 The body‘s tissues & cells function best between the range from 36 deg C
to 38 deg C
 Temperature is lowest in the morning, highest during the evening.
 Temperature varies with the type of food eaten.( cold or hot)
Routs for taking Temperature:
 Oral
 Rectal
 axillary
Thermometers – 3 types
 Glass mercury – mercury expands or contracts in response to heat. (just
recently non mercury)
 Electronic – heat sensitive probe, (reads in seconds) there
is a probe for oral/axillary use (red) & a probe for rectal use (blue). There
are disposable plastic cover for each use. Relies on battery power –
return to charging unit after use.
 Infrared Tympanic (Ear) – sensor probe shaped like an
otoscope in external opening of ear canal. Ear canal must be sealed &
probe sensor aimed at tympanic membrane – return to charging unit after
use.
49
PULSE:
 Left ventricle contracts causing a wave of bld to surge through arteries –
called a pulse. Felt by palpating artery lightly against underlying bone or
muscle.
 Carotid, brachial, radial, femoral, popliteal, posterior tibial, dorsalis pedis
 Assess: rate, rhythm, strength – can assess by using palpation &
auscultation.
 Pulse deficit – the difference between the radial pulse and the apical pulse
– indicates a decrease in peripheral perfusion from some heart conditions
ie. Atrial fibrillation.
Procedure for Assessing Pulses
Gather Materials:
You will need a clock or watch with a second hand, a pencil or pen, and
something to write on (form, note pad, and so forth).
Verify Patient's Identity.
If you are ordered to take a patient's pulse, make sure that you are taking the
pulse of the proper patient. For example, check the patient's name on your orders
against the name on his hospital identification bracelet or ask the patient his
name.
If you have already established the patient's identity, this step is skipped.
Select Site:
Select a site for taking the patient's pulse. Normally, the radial site is usually
chosen. The brachial and the carotid sites are other commonly used locations.
These sites are normally used because of their availability and because little or no
clothing have to be removed in order to expose these sites. Other sites may be
used when you wish to check the blood circulation to a specific body part.
Prepare Site:
Remove any clothing from over the site (open shirt for apical, remove boot and
sock for dorsalis pedis, and so forth.). Then position the body part so that you can
take the pulse easily.
When taking a patient's radial pulse, place the patient's arm across his chest as
shown in figure 3-3. This will allow you to count his breaths after taking his
pulse without having to move. The patient's breathing pattern may change if he
knows you are watching his breathing.
50
Taking a patient's pulse
A - carotid pulse. B - radial pulse.
Locate Pulse:
Put the tips of your index finger and middle finger together and feel for the pulse
by pressing down moderately with you fingertips on the site.
If you cannot feel a pulse, move your fingertips around the area until you locate
the pulse. Do not use your thumb to search for the patient's pulse. The thumb
contains a blood vessel that is large enough for a pulse to be felt.
If you use your thumb, the pulse that you find may be your own thumb pulse, not
the patient's pulse.
Some people prefer to use three fingers to take a pulse.
Count Pulse Beats and Note Abnormalities. Count the pulse beats felt during a
60-second period. Use the clock or watch. As you count the beats, note the
strength and regularity (rhythm) of the beats.
 If you are using the dorsalis pedis site, use gentle pressure
when palpating the artery. Too much pressure at this or other sites may
press the artery closed and stop blood from flowing pass the site. Apical –
beat of the heart at it‘s apex or PMI (point of maximum impulse) – 5th
intercostal space, midclavicular line, just below lt. nipple – listen for a
full minute ―Lub-Dub‖
 Lub – close of atrioventricular (AV) values – tricuspid &
mitral valves
 Dub – close of semilunar valves – aortic & pulmonic valves
Record Pulse Rate:
By convention (general agreement), the patient's pulse rate is recorded as an even
number (ending in 0, 2, 4, 6, or 8). For example, if you counted 72 beats during
51
the 60-second period, you would record "72." Suppose, however, that you had
counted 83 beats during the 60-second period. Would you record a pulse rate of
"82" or "84"? By convention, an odd pulse rate is recorded as the next higher
rate. Therefore, a pulse rate of 83 would be recorded as "84."
Once you have sufficient practice in taking pulses, you may wish to use a shorter
method of determining the pulse rate of a patient with a regular pulse. You may
count the number of pulse beats that you feel during a 30-second period and
multiply this number by 2. If, for example, you counted 37 pulse beats during a
30-second period, you would record "74" (37 X 2 = 74). This method will always
give you an even number as your pulse rate. This method is used only if the
patient has a regular rhythm. If the patient has an irregular pulse, you must use a
least a 60-second time period.
Assess: rate, rhythm, strength & tension:
1.Rate – N – 60-100, average 80 bpm
Tachycardia – greater than 100 bpm
Bradycardia – less than 60 bpm
2.Rhythm – the pattern of the beats (regular or irregular)
3.Strength or size – or amplitude
The volume of bld pushed against the wall of an artery during the ventricular
contraction
 weak or thready (lacks fullness)
 Full, bounding (volume higher than normal)
 Imperceptible (cannot be felt or heard)
Record any Abnormalities:
If you noticed anything about the patient's pulse that is not normal (irregular,
intermittent, thready, bounding, and so forth), record your observations on the
form or piece of paper.
If the patient's pulse is very different from the previous time (for example, a
patient whose pulse was normal four hours ago and is now irregular), notify the
appropriate nursing personnel.
Take Pulse at Other Sites, if Needed. Sometimes a pulse cannot be taken
accurately at a particular site because of blockage in the artery or other reasons.
In such a case, you should take a pulse at another site in order to check your
results. Sometimes a physician will order that the apical pulse be taken in
addition to the pulse at another site. Such a procedure allows the physician to
check the pulse at a particular site against the rate and characteristics of the
actual heartbeat (apical pulse).
52
RESPIRATIONS:
Assess by observing rate, rhythm & depth
Inspiration – inhalation (breathing in)
Expiration – exhalation (breathing out)
I&E is automatic & controlled by the medulla oblongata (respiratory center of
brain)
Women breathe thoracically, while men & young children breathe
diaphragmatically usually.
Asses after taking pulse, while still holding hand, so pt is unaware you are
counting respirations.
BLOOD PRESSURE:
Force exerted by the bld against vessel walls. Pressure of bld within the arteries
of the body.
As left ventricle contracts – bld is forced out into the aorta to the large arteries,
smaller arteries & capillaries
Systolic- force exerted against the arterial wall as left. ventricle contracts &
pumps bld into the aorta – max. pressure exerted on vessel wall.
Diastolic – arterial pressure during ventricular relaxation, when the heart is
filling, minimum pressure in arteries.
Factors affecting B/P:
 lower during sleep
 Lower with bld loss
 Position changes B/P
 Anything causing vessels to dilate or constrict - medications
Measured in mmHg – millimeters of mercury
Normal range
syst 110-140 dias 60-90
Hypertensive - >160, >90
Hypotensive <90
Equipments for B/P measurement
1.Stethoscope
2.Sphygmomanometer
types of sphygmomanometers
Aneroid – glass enclosed circular gauge with needle that registers the B/P as it
descends the calibrations on the dial.
Mercury – mercury in glass tube - more reliable – read at eye level.
Electronic – cuff with built in pressure transducer reads systolic & diastolic B/P
53
3. Cuff – inflatable rubber bladder, tube connects to the manometer, another to
the bulb, important to have correct cuff size (judge by circumference of the arm
not age)
Support arm at heart level, palm turned upward - above heart causes false low
reading
Cuff too wide – false low reading
Cuff too narrow – false high reading
Cuff too loose – false high reading.
4. Sprit swab for cleaning ear piece
Do not take B/P in
 Arm with cast
 Arm with arteriovenous (AV) fistula
 Arm on the side of a mastectomy i.e. rt mastectomy, rt arm
How to Take Your Temperature
Using a thermometer to monitor your temperature can help you manage an
illness. A rise in your temperature is usually caused by an illness, infection, or
injury.
Normal body temperature
Normal body temperature is about 98.6 degrees Fahrenheit (or 37 degrees
Celsius). Your temperature often varies from 1 to 2 degrees Fahrenheit (.5 to 1
degrees Celsius) throughout the day. Your temperature is usually low in the
morning and gradually increases during the day, reaching its high in the late
afternoon or evening.
Types of thermometers
An oral thermometer has a long, slender bulb at one end, containing mercury.
Oral thermometers are usually used in the mouth, but can also be placed under
the armpit. A rectal thermometer has a shorter bulb of mercury at one end and is
used in the rectum, usually in children. As the mercury in the thermometer
54
expands in response to your body heat, it moves up the column to display your
temperature.
Electronic and temperature strip thermometers are also available, but might be
less accurate.
When purchasing a thermometer, choose one with a column that is easy to see
and with degree markings that are easy to read.
How to take your temperature
1. Wash your hands with soap and warm water.
2. Wash the thermometer in cold water.
3. Make sure the top of the mercury column is down near the bulb.
4. Hold the thermometer firmly at the end away from the mercury bulb and
shake it with a downward flick of your wrist. This drives the mercury level
down below the normal mark.
5. Insert the bulb end of the thermometer under your tongue and close your
mouth.
6. Wait one minute and remove the thermometer. To read the temperature, hold
the thermometer near the light and rotate it slowly until you see the silver
column of mercury. The number on the thermometer at the top of the
mercury column is your temperature.
7. Rinse the thermometer in cold water and clean it with alcohol before storing
it.
Thermometers:Takingyourchild'stemperature
Thermometers differ in accuracy and ease of use. The best way to take your
child's temperature depends on his or her age and ability to cooperate.
Match method to age
The best place to insert the thermometer depends on the child's age.
 Newborns: For babies less than 3 months old, start with an armpit
(axillary) temperature. If it's higher than 99 F (37.2 C), take a second
measurement rectally. Rectal temperatures higher than 100.4 F (38 C) in
newborns and infants up to 3 months of age require immediate medical
attention.
 3 months old to 4 years old: For this age group, you can check your
child's temperature rectally, or with an electronic pacifier thermometer or
an ear thermometer.
 Older than 4 years: After age 4, most children are able to hold an oral
digital thermometer under the tongue for the short time it takes to get a
temperature reading.
55
Accuracy varies
A rectal temperature is the most accurate, although temperatures measured by
mouth and ear are accurate if done properly. Armpit (axillary) temperatures are
the least accurate, but are better than nothing.
Whatever the method, make sure you know exactly how to use your
thermometer. Read the instructions that came with your thermometer. For safety
— and to make sure the thermometer stays in place — never leave your child
unattended while you are taking his or her temperature.
SPECIMEN COLLECTION:
Specimen:
It is a sample of blood/body fluid or waste product of the body e.g.Urine, stool &
sputum.
Purpose
 To investigate disease in the patient.
 To find out diagnosis and decide appropriate treatment.
Specimens are collected on the units from patients and then they are send to
laboratory for investigation.
Right for specimen collection
1. Right patient.
2. Right specimen.
3. Right time.
4. Right amount.
5. Right container.
6. Right label.
7. Right requisition slip for lab.
8. Right method.
9. Right asepsis
10. .Right approach.
Specimen collection and transport:
Purpose:
To ensure that specimens being submitted to the laboratory meet the required
standards.
56
TYPES OF SPECIMEN COLLECTION:
 Urine Detail reports(D/R)
 Urine C/S.
 24hrs urine collection.
 Sputum collection.
 Stool D/R
 Stool C/S.
1. URINE DETAIL REPORTS (D/R):
Purpose:
The random urine specimen usually collected as a part of physical examination
or at
various times during hospitalization, permits laboratory screening for urinary and
systematic pathologies.
2. URINE CULTURE AND SENSITIVITY C/S:
Purpose:
To obtain sterile urine specimen for culture and sensitivity test.
A mid stream urine specimen is required for urine C/S.
Midstream specimen:
Means catching the urine specimen between the time the patient begins to void
and the time he stops. Clean catch refers to the fact that anything outside the
patient body does not contaminate the urine. Clean catch also requires careful
washing of genital area.
24 hours urine collection:
It is collection of all urine voided by the patient over 24-hrs period.
It is the diagnostic test for urinary tract disease.
COLLECTION SPUTUM SAMPLE:
Sputum is the substance collected from patient lungs, contains saliva, mucus ,pus
and sometimes blood. It is thicker than ordinary salvia.
.
Equipment:
 Sputum mug.
 Disposable gloves.
 Lab request.
57
Procedure:
Assemble equipment.
Wash hand.
Check I.D. band of patient.
Explained procedure to the patient.
If patient has eaten recently, rinse his mouth very well.
Give sputum container to the patient and asked him to take 3 three consequent
deep breath and on the third exhalation, cough deep from lungs to bring out he
sputum.
Cover the container immediately. Do not touch inside the
container.
Label the container right away and take to the lab immediately.
Make the patient comfortable.
Clean and replace things.
Wash hands.
Report to incharge /team leader:
 Sputum is obtained.
 Observation.Colour, odour, amount and consistency.
 How the patient has toleration the procedure.
STOOL SPECIMAN:
Stool for Dr or C/S is collection in the same container because it is contaminated
with organisms.
Procedure:
 Assemble equipment.
 Bed pan with cover.
 Specimen Container.
 Wooden Tongue Depressor.
 Lab request.
 Disposable gloves.
Procrdure
 Wash hand.
 Identify the patient.
 Provide privacy.
 Explain the patient, that stool specimen is required for lab test, so when ever
he moves his bowel, he calls you.
 Ask patient not to urinate in the bedpan, not to put toilet papers in the
bedpan (ifpatient is bed ridden.
58
 After patient has moved bowel, cover bedpan, taken to bathroom.
 Place the specimen in the container and put wooden tongue depressor in the
container.
 Cover the container immediately; empty the remaining feces in the toilet.
 Clean bedpan and put in the proper place.
 Wash hand.
 Make patient comfortable.
 Send the specimen to laboratory with lab request.
 Match the results with the color-chart on the multistix bottle in good
lightening.
 Discharge used strips properly.
 Wash hand.
 Record results in diabetic protocol.
 Report to your assigned nurse.
59
URINE TESTIND BY DIPSTICK:
A urine test strip or dipstick test is a basic diagnostic tool used to determine
pathological changes in a patient's urine in standard urinalysis. A standard urine
teststrip may comprise up to 10 different chemical pads or reagents which react
(change color) when immersed in, and then removed from, a urine sample.
It‘s dipped into urine, and the chemicals on the stick react and change color if
levels are above normal.
Things the dipstick test can check for include:
 Acidity or pH. If the acid is above normal, one could have kidney stones,
a urinary tract infection or another condition.
 Protein. This can be a sign that kidneys are not working right. Kidneys
filter waste products out of blood, and body needs protein.
 Glucose. A high sugar content is a marker for diabetes.
 White blood cells. These are a sign of infection.
 Bilirubin. If this waste product, which is normally eliminated by liver,
show up, it may mean liver isn‘t working properly.
 Blood in urine. Sometimes this is a sign of infections or certain illnesses.
 Nitrites. The presence of nitrites in urine most commonly means there‘s a
bacterial infection in urinary tract. This is usually called a urinary tract
infection (UTI).
Procedure:
 Wash hands use protective equipment
 Check urine dipstick expiry date.
 Explain procedure to patient
 Advise patient how to collect a fresh sample, preferably a mid-stream
sample if possible
 Remove testing strip from container.
 Fully submerge test strip in the urine sample.
 Remove the test strip & wipe away any excess urine. Hold for
approximately two seconds.
 Ensure the test strip remains horizontal to avoid cross contamination.
 Compare reagent strip against colour reference guide on outside of
container
 Dispose of urine, used strip, urine container and gloves,
 Document results, and inform doctor and patient; take appropriate action
as required
60
BEDSORE:
What are bed sores?
Bed sores are ulcers that occur on areas of the skin that are under pressure from
lying in bed, sitting in a wheelchair, and/or wearing a cast for a prolonged period
of time. Bed sores can occur when a person is bedridden, unconscious, unable to
sense pain, or immobile.
Bedsore is also called decubitus ulcer or pressure sore, are area where the skin
has broken down because of prolonged underlying pressure. The pressure can
come from the weight of the body, splints, cast or wrinkled. If bedsores are not
treated quickly it gets larger and become very painful and infected. It is often
made worse by continued pressure, heat, moister and lack of cleanliness.
61
Why does a bed sore develop?
A bed sore develops when blood supply to the skin is cut off for more than two to
three hours. As the skin dies, the bed sore first starts as a red, painful area, which
eventually turns purple. Left untreated, the skin can break open and become
infected. A bed sore can become deep, extending into the muscle. Once a bed
sore develops, it is often very slow to heal. Bed sores often occur in the buttocks
area (on the sacrum or iliac crest), or on the heels of the feet.
Preventing bed sores:
Bed sores can be prevented by inspecting the skin for areas of redness (the first
sign of skin breakdown). Other methods of preventing bed sores and preventing
progression of existing bed sores include:
 frequent turning and repositioning
 providing soft padding in wheelchairs and beds to reduce pressure
 providing good skin care by keeping the skin clean and dry
 Nursing consideration is:
 Change position q 2hrly for all bed-ridden patients.
 bed sheets should be wrinkle free
 keep the patient body clean and dry as possible
 Avoid friction when pulling the patient on and off bed pain pen.
 Wash patient skin with mild soap and warm water.
 To remove urine/ faces.
 Give back rub to all bed ridden patient when change the position it will
help to increase. Circulation and prevent bedsore.
 If sign of bedsore appear gentle rub the area with skin lotion rub in
circulatory motion away from affected area, rubbing stimulates the
circulation of blood.
Treatment for bed sores:
Specific treatment of a bed sore is determined by your physician and based on
the severity of the condition. Treatment may be more difficult once the skin is
broken, and may include:
1. removing pressure on the affected area
2. protecting the wound with medicated gauze or other special dressings
3. keeping the wound clean
4. transplanting healthy skin to the wound area
5. medication (i.e., antibiotics to treat infections
62
CATHETERIZATION:
Catheterization of the urinary bladder is the insertion of a hollow tube through
the urethra into the bladder for removing urine. It is an aseptic procedure for
which sterile equipment is required.
Purposes of urinary catheterization:
Purposes for urinary catheterization include the following.
a. Relieve Urinary Retention. Urine retained in the bladder for any reason causes
the patient discomfort and increases the likelihood of infection. A catheter may
be inserted to relieve urinary retention when a patient is temporarily unable to
void or has difficulty releasing urine from the bladder due to an obstruction of
the urethra or at the meatus.
b. Obtain a Sterile Urine Specimen from a Female Patient. At one time, this was
considered necessary to obtain a urine specimen entirely free of contamination.
Most physicians now order a collection of a voided, midstream clean-catch
specimen.
c. Measure Residual Urine. Catheterization can be done to measure the amount
of residual urine in the bladder when voiding only partly empties it.
d. Empty the Bladder Before, During, or After Surgery. A catheter may be
inserted before or following abdominal surgery, especially if the patient cannot
be up and about. Catheterization to keep the bladder empty of urine during a
surgical procedure permits the surgeon a better view and palpation of internal
tissue, and prevents accidental injury to the bladder.
The French scale (Fr.) is used to denote the size of catheters. Each unit is roughly
The smaller the number, the smaller the catheter. A larger sized catheter is used
for a male because it is stiffer, thus easier to push the distance of the male
urethra. Catheters come in several sizes:
a. Number 8 Fr. and 10 Fr. are used for children.
b. Number 14 Fr. and 16 Fr. are used for female adults.
c. Number 20 Fr. and 22 Fr. are usually used for male adults.
Types of urinary catheters:
The catheters most commonly used are made of plastic. Each type of catheter has
a rounded tip to prevent injury to the meatus or the urethra. The Foley catheter is
frequently used. It is usually inserted by the nurse. Catheters should be
considered disposable and discarded after they have been removed.
63
a. Intermittent Catheter:
An intermittent catheter is used to drain the bladder for short periods (5-10
minutes). It may be inserted by the patient.
b. Retention/Indwelling Catheter:
This type of catheter is placed into the bladder and secured there for a period of
time. It is used following surgery, bladder injury, or in bladder infections. It may
also be used for an incontinent or nonresponsive patient.
1. It provides continuous temporary or permanent drainage of urine.
2. It is used for gradual decompression of an over distended bladder.
3. It is used for intermittent drainage and irrigation.
4. The most commonly used indwelling catheter is the Foley catheter. A
drainage tube and collection device are connected to the catheter. It has
a balloon at the distal end, which is inflated with sterile water or saline to
prevent the catheter from slipping out of the bladder. It is multi-lumened
(having several passages within the catheter). One lumen provides a
passage for fluid to inflate the balloon. This passage may be self-sealing
or may require a clamp. The second lumen is the passage through which
the urine drains. Some indwelling catheters have a third lumen for
instilling irrigation fluid.
c. Supra Pubic Catheter:
This type of catheter is inserted into the bladder through a small incision above
the pubic area. It is used for continuous drainage.
Preparing for catheterization:
A catheter should be used only when absolutely necessary and the catheterization
procedure itself should be done only by trained personnel under sterile
conditions. Infection is a major risk of urinary catheterization.
Gather All Equipment:
Disposable indwelling catheter kit. The kit contains the required equipment
needed for catheterization and is packaged to ensure that the equipment is sterile.
The kit includes the
 catheter,
 a drape,
 a receptacle to receive urine,
 materials to clean the area of insertion,
 a lubricant,
 a specimen container,
64
 Sterile gloves.
 Lamp.
 Urine collection bag.
 leg strap or anchoring tape.
 Waterproof pad .
Explain the Procedure to the Patient:
Advise the patient that he may feel a burning sensation and pressure as the
catheter is inserted, and that he will feel that he needs to void after the catheter is
in place. Do not suggest to the patient that he may feel pain; however,
introducing a catheter in swollen or injured tissue may cause discomfort.
Provide for Privacy and Adequate Lighting:
1. Close the door or pull the curtain surrounding the patient's bed and
position the lamp at the end of the bed.
2. Position the female patient in a dorsal recumbent position with the knees
flexed and the feet about two feet apart. Place makintosh under the
patient's buttocks. Cover the upper body and each leg. Place the catheter
set between the female patient's legs.
3. Position a male patient in a supine position. Under the patient's buttocks.
Drape the patient so that only the area around the penis is exposed. Place
the catheter set next to the legs of the male patient.
INSERTING THE FOLEY CATHETER IN A FEMALE PATIENT:
The following procedures are used to insert the Foley catheter in a female
patient.
a. Wash the area around the meatus with warm soap and water. Rinse and dry.
b. Wash your hands.
c. Open the sterile catheterization kit, using sterile technique.
d. Put on sterile gloves.
e. Place the perineal sheet on the patient with the hole over the female genitalia.
f. Apply sterile lubricant liberally to the catheter tip. Lubricate at least three
inches of the catheter for the female. Leave the lubricated catheter over the
cotton balls.
g. Place the urine specimen collection container within reach.
h. Place the thumb and forefinger of your non-dominant hand between the labia
minora, spread and separate upward. The gloved hand that has touched the
patient is now contaminated.
i. Using the forceps, pick up a cotton ball saturated with antiseptic solution. Use
one cotton ball for each stroke. Swab from above the meatus downward
toward the rectum.
j. Keeping the labia separated, cleanse each side of the meatus in the same
downward manner . Do not go back over any previously cleansed area.
65
k. Deposit each cotton ball into the disposal bag. After the last cotton ball is used,
deposit the forceps into the bag as well.
l. Continue to hold the labium apart after cleansing. Insert the lubricated catheter
into the female patient's urinary meatus.
m. Angle the catheter upward as it is advanced. If the catheter will not advance,
instruct the patient to inhale and exhale slowly. This may relax the sphincter
muscle. Do not force the catheter.
Cleansing the female meatus
Inserting the catheter in a female
66
n. When urine starts to flow, insert the catheter approximately one inch further.
Place the cup under the stream of flowing urine to obtain a sterile specimen if
required.
o. Hold the catheter in place while the urine drains into the collection container.
NOTE: If the catheter is inadvertently placed in the patient's vagina, leave it
in place temporarily. Insert another catheter properly by repeating the
entire procedure using another sterile set; then remove the catheter from the
vagina.
p. Attach the syringe to the balloon port of the catheter. Inject the water slowly to
inflate the balloon. If the water will not inject easily or the patient complains of
pain, deflate the balloon completely and advance the catheter further, then re-
inflate.
q. Remove the syringe. To position the balloon correctly, pull on the catheter
gently until you feel resistance.
r. Connect the drainage bag to the catheter. Secure the catheter to the inner aspect
of the female patient's thigh.
s. Attach the urinary drainage bag
to the bed, below the level of the
bladder but off the floor. Coil any
extra tubing on the bed.
t. Remove any lubricant or
antiseptic on the patient's skin.
Remove your gloves, the drapes
from around the patient.
u. Discard disposable equipment
and return reusable equipment to
the appropriate area.
v. Record the time that the
procedure was done and by whom, the patient's reaction to the procedure, all
patient teaching done, and the patient's level of understanding.
Report observations to the in -charge nurse to include:
(1) The amount, color, and clarity of the urine.
(2) Any difficulty with the procedure.
(3) The presence of blood in the urine.
Maintaining an indwelling catheter:
When an indwelling or retention catheter is inserted, the nurse is responsible for
the daily care required to maintain proper drainage and reduce the possibility of
an infection occurring. Always have a confident, reassuring, and professional
67
attitude when maintaining the catheter so that the patient will not feel
embarrassed.
a. Wash your hands before and after caring for the patient and wear gloves when
handling an indwelling catheter.
b. Clean the perineal area with soap and water twice daily and after each bowel
movement especially around the meatus. Use a separate area of the cloth for
each stroke.
d. In some cases, an antiseptic may be used for perineal care. Povidone iodine
(Betadine) is most commonly recommended.
d. Avoid use of lotions or powder in the perineal area.
e. Arrange for the patient to take a shower or tub bath when permitted. The
collecting container may be hung over the side of the tub. The catheter should
be clamped temporarily if the collecting container is higher than the bladder.
Removing an indwelling catheter:
Eventually, a catheter must be removed because the need for it no longer exist or
it is crusting and must be changed. The nurse usually removes the catheter.
Assemble all supplies and equipment.
1. 10 cc syringe.
2. Washcloth and towel.
3. Exam gloves.
4. Soap and water.
5. Makintosh
a. Identify the patient and explain the procedure to him. Advise him that
therewill be a slight burning during removal of the catheter.
b. Provide privacy and assist the female patient into a dorsal recumbent
position. The male should be in a supine position. Place Chux® under the
patient's buttocks and provide proper draping.
c. Wash your hands and put on exam gloves.
d. Empty the balloon by inserting the barrel of the syringe and withdrawing
the amount of fluid used during inflation.
e. Pinch off and gently pull on the catheter near the point where it exits from
the meatus.
f. Clean the perineum or penis with soap and water. Dry the area well.
g. Inspect the catheter to be sure no remnants remained in the bladder. If the
catheter is not totally intact, report this promptly and save the catheter for
further inspection.
h. Empty the drainage bag. Measure the amount of urine and record on the
intake and output (I&O) sheet.
i. Remove the gloves and wash your hands.
j. Discard disposable supplies and return reusable supplies and equipment
to the appropriate area.
k. Record that the catheter was removed, the time and date and by whom.
Note the amount, color, and clarity of the urine in the drainage bag. Also
68
document all patient teaching done and the patient's level of
understanding.
l. After removal of the catheter, assess the patient for 24 hours for patterns
of urinary elimination.
Note the time and amount of the first voided urine. Report any of the
following:
1. Inability to void within 8 to 10 hours.
2. Frequency, burning, dribbling, or hesitation in starting the stream of
urine.
3. Cloudiness or any other unusual color or characteristic of the urine.
4. . Provide a level of fluids similar to the intake when the catheter was in
place.
5. Record that the catheter was removed, the date and time, and by whom.
69
70
DRAB in First Aid
DANGER
RESPONSE
SHOUT FOR HELP
YES AIRWAYBREATHING NORMALLY?
NO
CALL AMBULANCE
30 CHEST COMPRESSIONS
2 BREATHS
30:2
RECOVERY POSITION CALL FOR AMBULANCE
Preliminary Training Session Handbook for Students and Teachers

More Related Content

Similar to Preliminary Training Session Handbook for Students and Teachers

Powerpoint Presentation
Powerpoint PresentationPowerpoint Presentation
Powerpoint PresentationPraful MP
 
Introduction to Vitamins
Introduction to VitaminsIntroduction to Vitamins
Introduction to VitaminsDHANANJAY PATIL
 
Role of vitamins in human growth
Role of vitamins in human growthRole of vitamins in human growth
Role of vitamins in human growthZeeshan Hanjra
 
1. Vitamins and Minerals.ppt
1. Vitamins and Minerals.ppt1. Vitamins and Minerals.ppt
1. Vitamins and Minerals.pptmyLord3
 
Multivitamins supplements
Multivitamins supplementsMultivitamins supplements
Multivitamins supplementsimedmart
 
Vital vitamin nutrients
Vital vitamin nutrientsVital vitamin nutrients
Vital vitamin nutrientsteachuse
 
The comprehensive review on Fat Soluble Vitamins
The comprehensive review on Fat Soluble VitaminsThe comprehensive review on Fat Soluble Vitamins
The comprehensive review on Fat Soluble Vitaminsabhishekarreddy143
 
The Comprehensive Review on Fat Soluble Vitamins
The Comprehensive Review on Fat Soluble VitaminsThe Comprehensive Review on Fat Soluble Vitamins
The Comprehensive Review on Fat Soluble Vitaminsiosrphr_editor
 
Bradley Joseph Mancuso - Explaining what is Balanced Diet ?
Bradley Joseph Mancuso - Explaining what is Balanced Diet ?Bradley Joseph Mancuso - Explaining what is Balanced Diet ?
Bradley Joseph Mancuso - Explaining what is Balanced Diet ?bradleyjoseph8
 
Vitamins and Deficiencies - Yash Damani MBBS
Vitamins and Deficiencies - Yash Damani MBBSVitamins and Deficiencies - Yash Damani MBBS
Vitamins and Deficiencies - Yash Damani MBBSyrdamani
 

Similar to Preliminary Training Session Handbook for Students and Teachers (20)

Vitamins.pdf
Vitamins.pdfVitamins.pdf
Vitamins.pdf
 
Praful mp
Praful mpPraful mp
Praful mp
 
Powerpoint Presentation
Powerpoint PresentationPowerpoint Presentation
Powerpoint Presentation
 
Vitamins
VitaminsVitamins
Vitamins
 
Introduction to Vitamins
Introduction to VitaminsIntroduction to Vitamins
Introduction to Vitamins
 
Role of vitamins in human growth
Role of vitamins in human growthRole of vitamins in human growth
Role of vitamins in human growth
 
1. Vitamins and Minerals.ppt
1. Vitamins and Minerals.ppt1. Vitamins and Minerals.ppt
1. Vitamins and Minerals.ppt
 
vitamin
vitaminvitamin
vitamin
 
Multivitamins supplements
Multivitamins supplementsMultivitamins supplements
Multivitamins supplements
 
Vital vitamin nutrients
Vital vitamin nutrientsVital vitamin nutrients
Vital vitamin nutrients
 
The comprehensive review on Fat Soluble Vitamins
The comprehensive review on Fat Soluble VitaminsThe comprehensive review on Fat Soluble Vitamins
The comprehensive review on Fat Soluble Vitamins
 
The Comprehensive Review on Fat Soluble Vitamins
The Comprehensive Review on Fat Soluble VitaminsThe Comprehensive Review on Fat Soluble Vitamins
The Comprehensive Review on Fat Soluble Vitamins
 
Vitamins
VitaminsVitamins
Vitamins
 
Balanced diet ppt
Balanced diet pptBalanced diet ppt
Balanced diet ppt
 
Bradley Joseph Mancuso - Explaining what is Balanced Diet ?
Bradley Joseph Mancuso - Explaining what is Balanced Diet ?Bradley Joseph Mancuso - Explaining what is Balanced Diet ?
Bradley Joseph Mancuso - Explaining what is Balanced Diet ?
 
Essential vitamins
Essential vitaminsEssential vitamins
Essential vitamins
 
Vitamins
VitaminsVitamins
Vitamins
 
Vitamins and Deficiencies - Yash Damani MBBS
Vitamins and Deficiencies - Yash Damani MBBSVitamins and Deficiencies - Yash Damani MBBS
Vitamins and Deficiencies - Yash Damani MBBS
 
Praful mp
Praful mpPraful mp
Praful mp
 
VITAMINS.pptx
VITAMINS.pptxVITAMINS.pptx
VITAMINS.pptx
 

Recently uploaded

Call Girl Coimbatore Prisha☎️ 8250192130 Independent Escort Service Coimbatore
Call Girl Coimbatore Prisha☎️  8250192130 Independent Escort Service CoimbatoreCall Girl Coimbatore Prisha☎️  8250192130 Independent Escort Service Coimbatore
Call Girl Coimbatore Prisha☎️ 8250192130 Independent Escort Service Coimbatorenarwatsonia7
 
Call Girls Service Pune Vaishnavi 9907093804 Short 1500 Night 6000 Best call ...
Call Girls Service Pune Vaishnavi 9907093804 Short 1500 Night 6000 Best call ...Call Girls Service Pune Vaishnavi 9907093804 Short 1500 Night 6000 Best call ...
Call Girls Service Pune Vaishnavi 9907093804 Short 1500 Night 6000 Best call ...Miss joya
 
♛VVIP Hyderabad Call Girls Chintalkunta🖕7001035870🖕Riya Kappor Top Call Girl ...
♛VVIP Hyderabad Call Girls Chintalkunta🖕7001035870🖕Riya Kappor Top Call Girl ...♛VVIP Hyderabad Call Girls Chintalkunta🖕7001035870🖕Riya Kappor Top Call Girl ...
♛VVIP Hyderabad Call Girls Chintalkunta🖕7001035870🖕Riya Kappor Top Call Girl ...astropune
 
VIP Call Girls Pune Sanjana 9907093804 Short 1500 Night 6000 Best call girls ...
VIP Call Girls Pune Sanjana 9907093804 Short 1500 Night 6000 Best call girls ...VIP Call Girls Pune Sanjana 9907093804 Short 1500 Night 6000 Best call girls ...
VIP Call Girls Pune Sanjana 9907093804 Short 1500 Night 6000 Best call girls ...Miss joya
 
Call Girls Colaba Mumbai ❤️ 9920874524 👈 Cash on Delivery
Call Girls Colaba Mumbai ❤️ 9920874524 👈 Cash on DeliveryCall Girls Colaba Mumbai ❤️ 9920874524 👈 Cash on Delivery
Call Girls Colaba Mumbai ❤️ 9920874524 👈 Cash on Deliverynehamumbai
 
(👑VVIP ISHAAN ) Russian Call Girls Service Navi Mumbai🖕9920874524🖕Independent...
(👑VVIP ISHAAN ) Russian Call Girls Service Navi Mumbai🖕9920874524🖕Independent...(👑VVIP ISHAAN ) Russian Call Girls Service Navi Mumbai🖕9920874524🖕Independent...
(👑VVIP ISHAAN ) Russian Call Girls Service Navi Mumbai🖕9920874524🖕Independent...Taniya Sharma
 
Call Girls Service Jaipur Grishma WhatsApp ❤8445551418 VIP Call Girls Jaipur
Call Girls Service Jaipur Grishma WhatsApp ❤8445551418 VIP Call Girls JaipurCall Girls Service Jaipur Grishma WhatsApp ❤8445551418 VIP Call Girls Jaipur
Call Girls Service Jaipur Grishma WhatsApp ❤8445551418 VIP Call Girls Jaipurparulsinha
 
Best Rate (Hyderabad) Call Girls Jahanuma ⟟ 8250192130 ⟟ High Class Call Girl...
Best Rate (Hyderabad) Call Girls Jahanuma ⟟ 8250192130 ⟟ High Class Call Girl...Best Rate (Hyderabad) Call Girls Jahanuma ⟟ 8250192130 ⟟ High Class Call Girl...
Best Rate (Hyderabad) Call Girls Jahanuma ⟟ 8250192130 ⟟ High Class Call Girl...astropune
 
Call Girls Service Navi Mumbai Samaira 8617697112 Independent Escort Service ...
Call Girls Service Navi Mumbai Samaira 8617697112 Independent Escort Service ...Call Girls Service Navi Mumbai Samaira 8617697112 Independent Escort Service ...
Call Girls Service Navi Mumbai Samaira 8617697112 Independent Escort Service ...Call girls in Ahmedabad High profile
 
(Rocky) Jaipur Call Girl - 9521753030 Escorts Service 50% Off with Cash ON De...
(Rocky) Jaipur Call Girl - 9521753030 Escorts Service 50% Off with Cash ON De...(Rocky) Jaipur Call Girl - 9521753030 Escorts Service 50% Off with Cash ON De...
(Rocky) Jaipur Call Girl - 9521753030 Escorts Service 50% Off with Cash ON De...indiancallgirl4rent
 
VIP Mumbai Call Girls Hiranandani Gardens Just Call 9920874524 with A/C Room ...
VIP Mumbai Call Girls Hiranandani Gardens Just Call 9920874524 with A/C Room ...VIP Mumbai Call Girls Hiranandani Gardens Just Call 9920874524 with A/C Room ...
VIP Mumbai Call Girls Hiranandani Gardens Just Call 9920874524 with A/C Room ...Garima Khatri
 
CALL ON ➥9907093804 🔝 Call Girls Baramati ( Pune) Girls Service
CALL ON ➥9907093804 🔝 Call Girls Baramati ( Pune)  Girls ServiceCALL ON ➥9907093804 🔝 Call Girls Baramati ( Pune)  Girls Service
CALL ON ➥9907093804 🔝 Call Girls Baramati ( Pune) Girls ServiceMiss joya
 
Russian Call Girls in Bangalore Manisha 7001305949 Independent Escort Service...
Russian Call Girls in Bangalore Manisha 7001305949 Independent Escort Service...Russian Call Girls in Bangalore Manisha 7001305949 Independent Escort Service...
Russian Call Girls in Bangalore Manisha 7001305949 Independent Escort Service...narwatsonia7
 
Russian Escorts Girls Nehru Place ZINATHI 🔝9711199012 ☪ 24/7 Call Girls Delhi
Russian Escorts Girls  Nehru Place ZINATHI 🔝9711199012 ☪ 24/7 Call Girls DelhiRussian Escorts Girls  Nehru Place ZINATHI 🔝9711199012 ☪ 24/7 Call Girls Delhi
Russian Escorts Girls Nehru Place ZINATHI 🔝9711199012 ☪ 24/7 Call Girls DelhiAlinaDevecerski
 
Call Girls Service In Shyam Nagar Whatsapp 8445551418 Independent Escort Service
Call Girls Service In Shyam Nagar Whatsapp 8445551418 Independent Escort ServiceCall Girls Service In Shyam Nagar Whatsapp 8445551418 Independent Escort Service
Call Girls Service In Shyam Nagar Whatsapp 8445551418 Independent Escort Serviceparulsinha
 
Call Girl Number in Vashi Mumbai📲 9833363713 💞 Full Night Enjoy
Call Girl Number in Vashi Mumbai📲 9833363713 💞 Full Night EnjoyCall Girl Number in Vashi Mumbai📲 9833363713 💞 Full Night Enjoy
Call Girl Number in Vashi Mumbai📲 9833363713 💞 Full Night Enjoybabeytanya
 
Call Girls Cuttack Just Call 9907093804 Top Class Call Girl Service Available
Call Girls Cuttack Just Call 9907093804 Top Class Call Girl Service AvailableCall Girls Cuttack Just Call 9907093804 Top Class Call Girl Service Available
Call Girls Cuttack Just Call 9907093804 Top Class Call Girl Service AvailableDipal Arora
 
VIP Call Girls Tirunelveli Aaradhya 8250192130 Independent Escort Service Tir...
VIP Call Girls Tirunelveli Aaradhya 8250192130 Independent Escort Service Tir...VIP Call Girls Tirunelveli Aaradhya 8250192130 Independent Escort Service Tir...
VIP Call Girls Tirunelveli Aaradhya 8250192130 Independent Escort Service Tir...narwatsonia7
 
Russian Call Girls in Pune Tanvi 9907093804 Short 1500 Night 6000 Best call g...
Russian Call Girls in Pune Tanvi 9907093804 Short 1500 Night 6000 Best call g...Russian Call Girls in Pune Tanvi 9907093804 Short 1500 Night 6000 Best call g...
Russian Call Girls in Pune Tanvi 9907093804 Short 1500 Night 6000 Best call g...Miss joya
 

Recently uploaded (20)

Call Girl Coimbatore Prisha☎️ 8250192130 Independent Escort Service Coimbatore
Call Girl Coimbatore Prisha☎️  8250192130 Independent Escort Service CoimbatoreCall Girl Coimbatore Prisha☎️  8250192130 Independent Escort Service Coimbatore
Call Girl Coimbatore Prisha☎️ 8250192130 Independent Escort Service Coimbatore
 
Call Girls Service Pune Vaishnavi 9907093804 Short 1500 Night 6000 Best call ...
Call Girls Service Pune Vaishnavi 9907093804 Short 1500 Night 6000 Best call ...Call Girls Service Pune Vaishnavi 9907093804 Short 1500 Night 6000 Best call ...
Call Girls Service Pune Vaishnavi 9907093804 Short 1500 Night 6000 Best call ...
 
♛VVIP Hyderabad Call Girls Chintalkunta🖕7001035870🖕Riya Kappor Top Call Girl ...
♛VVIP Hyderabad Call Girls Chintalkunta🖕7001035870🖕Riya Kappor Top Call Girl ...♛VVIP Hyderabad Call Girls Chintalkunta🖕7001035870🖕Riya Kappor Top Call Girl ...
♛VVIP Hyderabad Call Girls Chintalkunta🖕7001035870🖕Riya Kappor Top Call Girl ...
 
VIP Call Girls Pune Sanjana 9907093804 Short 1500 Night 6000 Best call girls ...
VIP Call Girls Pune Sanjana 9907093804 Short 1500 Night 6000 Best call girls ...VIP Call Girls Pune Sanjana 9907093804 Short 1500 Night 6000 Best call girls ...
VIP Call Girls Pune Sanjana 9907093804 Short 1500 Night 6000 Best call girls ...
 
Escort Service Call Girls In Sarita Vihar,, 99530°56974 Delhi NCR
Escort Service Call Girls In Sarita Vihar,, 99530°56974 Delhi NCREscort Service Call Girls In Sarita Vihar,, 99530°56974 Delhi NCR
Escort Service Call Girls In Sarita Vihar,, 99530°56974 Delhi NCR
 
Call Girls Colaba Mumbai ❤️ 9920874524 👈 Cash on Delivery
Call Girls Colaba Mumbai ❤️ 9920874524 👈 Cash on DeliveryCall Girls Colaba Mumbai ❤️ 9920874524 👈 Cash on Delivery
Call Girls Colaba Mumbai ❤️ 9920874524 👈 Cash on Delivery
 
(👑VVIP ISHAAN ) Russian Call Girls Service Navi Mumbai🖕9920874524🖕Independent...
(👑VVIP ISHAAN ) Russian Call Girls Service Navi Mumbai🖕9920874524🖕Independent...(👑VVIP ISHAAN ) Russian Call Girls Service Navi Mumbai🖕9920874524🖕Independent...
(👑VVIP ISHAAN ) Russian Call Girls Service Navi Mumbai🖕9920874524🖕Independent...
 
Call Girls Service Jaipur Grishma WhatsApp ❤8445551418 VIP Call Girls Jaipur
Call Girls Service Jaipur Grishma WhatsApp ❤8445551418 VIP Call Girls JaipurCall Girls Service Jaipur Grishma WhatsApp ❤8445551418 VIP Call Girls Jaipur
Call Girls Service Jaipur Grishma WhatsApp ❤8445551418 VIP Call Girls Jaipur
 
Best Rate (Hyderabad) Call Girls Jahanuma ⟟ 8250192130 ⟟ High Class Call Girl...
Best Rate (Hyderabad) Call Girls Jahanuma ⟟ 8250192130 ⟟ High Class Call Girl...Best Rate (Hyderabad) Call Girls Jahanuma ⟟ 8250192130 ⟟ High Class Call Girl...
Best Rate (Hyderabad) Call Girls Jahanuma ⟟ 8250192130 ⟟ High Class Call Girl...
 
Call Girls Service Navi Mumbai Samaira 8617697112 Independent Escort Service ...
Call Girls Service Navi Mumbai Samaira 8617697112 Independent Escort Service ...Call Girls Service Navi Mumbai Samaira 8617697112 Independent Escort Service ...
Call Girls Service Navi Mumbai Samaira 8617697112 Independent Escort Service ...
 
(Rocky) Jaipur Call Girl - 9521753030 Escorts Service 50% Off with Cash ON De...
(Rocky) Jaipur Call Girl - 9521753030 Escorts Service 50% Off with Cash ON De...(Rocky) Jaipur Call Girl - 9521753030 Escorts Service 50% Off with Cash ON De...
(Rocky) Jaipur Call Girl - 9521753030 Escorts Service 50% Off with Cash ON De...
 
VIP Mumbai Call Girls Hiranandani Gardens Just Call 9920874524 with A/C Room ...
VIP Mumbai Call Girls Hiranandani Gardens Just Call 9920874524 with A/C Room ...VIP Mumbai Call Girls Hiranandani Gardens Just Call 9920874524 with A/C Room ...
VIP Mumbai Call Girls Hiranandani Gardens Just Call 9920874524 with A/C Room ...
 
CALL ON ➥9907093804 🔝 Call Girls Baramati ( Pune) Girls Service
CALL ON ➥9907093804 🔝 Call Girls Baramati ( Pune)  Girls ServiceCALL ON ➥9907093804 🔝 Call Girls Baramati ( Pune)  Girls Service
CALL ON ➥9907093804 🔝 Call Girls Baramati ( Pune) Girls Service
 
Russian Call Girls in Bangalore Manisha 7001305949 Independent Escort Service...
Russian Call Girls in Bangalore Manisha 7001305949 Independent Escort Service...Russian Call Girls in Bangalore Manisha 7001305949 Independent Escort Service...
Russian Call Girls in Bangalore Manisha 7001305949 Independent Escort Service...
 
Russian Escorts Girls Nehru Place ZINATHI 🔝9711199012 ☪ 24/7 Call Girls Delhi
Russian Escorts Girls  Nehru Place ZINATHI 🔝9711199012 ☪ 24/7 Call Girls DelhiRussian Escorts Girls  Nehru Place ZINATHI 🔝9711199012 ☪ 24/7 Call Girls Delhi
Russian Escorts Girls Nehru Place ZINATHI 🔝9711199012 ☪ 24/7 Call Girls Delhi
 
Call Girls Service In Shyam Nagar Whatsapp 8445551418 Independent Escort Service
Call Girls Service In Shyam Nagar Whatsapp 8445551418 Independent Escort ServiceCall Girls Service In Shyam Nagar Whatsapp 8445551418 Independent Escort Service
Call Girls Service In Shyam Nagar Whatsapp 8445551418 Independent Escort Service
 
Call Girl Number in Vashi Mumbai📲 9833363713 💞 Full Night Enjoy
Call Girl Number in Vashi Mumbai📲 9833363713 💞 Full Night EnjoyCall Girl Number in Vashi Mumbai📲 9833363713 💞 Full Night Enjoy
Call Girl Number in Vashi Mumbai📲 9833363713 💞 Full Night Enjoy
 
Call Girls Cuttack Just Call 9907093804 Top Class Call Girl Service Available
Call Girls Cuttack Just Call 9907093804 Top Class Call Girl Service AvailableCall Girls Cuttack Just Call 9907093804 Top Class Call Girl Service Available
Call Girls Cuttack Just Call 9907093804 Top Class Call Girl Service Available
 
VIP Call Girls Tirunelveli Aaradhya 8250192130 Independent Escort Service Tir...
VIP Call Girls Tirunelveli Aaradhya 8250192130 Independent Escort Service Tir...VIP Call Girls Tirunelveli Aaradhya 8250192130 Independent Escort Service Tir...
VIP Call Girls Tirunelveli Aaradhya 8250192130 Independent Escort Service Tir...
 
Russian Call Girls in Pune Tanvi 9907093804 Short 1500 Night 6000 Best call g...
Russian Call Girls in Pune Tanvi 9907093804 Short 1500 Night 6000 Best call g...Russian Call Girls in Pune Tanvi 9907093804 Short 1500 Night 6000 Best call g...
Russian Call Girls in Pune Tanvi 9907093804 Short 1500 Night 6000 Best call g...
 

Preliminary Training Session Handbook for Students and Teachers

  • 1. 1 PRELIMINARY TRAINING SESSION (PTS) A Handbook for Students and Teachers By: Mehmooda Afroz RM,RN&BScN Principal Cowasjee School of Midwifery Lady Dufferin Hospital & Secretory General Midwifery Association of Pakistan (MAP)
  • 2. 2 PRELIMINARY TRAINING SESSION (PTS ) Handbook for Students and Teachers Based on Community Midwifery Curriculum Pakistan Nursing Counsel (PNC) First Edition 2019 By: Mehmooda Afroz Ali Khowaja RM, RN, BScN Principal Cowasjee School of Midwifery Lady Dufferin Hospital & Secretory General Midwifery Association of Pakistan (MAP)
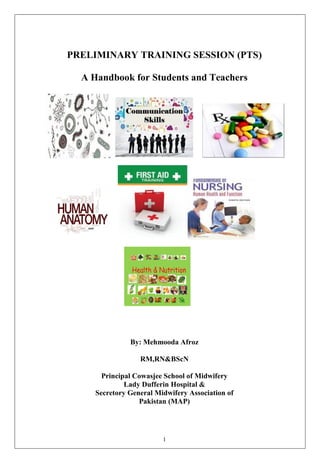
  • 3. 3 Table of Content S# TOPIC PAGE # 1 NUTRITION 05 2 FUNDAMENTAL OF NRSING Eithic value & morality Hygiene and patient care Back Massage Perineal Care Bed Patient Hair Care Personal hygiene Admission, transfer and discharge procedure Bed making Use and removal of bedpan Hot and cold compression Steam inhalation Techniques of body mechanics Positioning and ambulating the adult patient Administering Enema Assessing with bedpan Height and weight Vital Signs: Temperature, pulse, respiration and Blood Pressure Specimen collection Urine testing by dip stick Bedsore Catheterization procedures 13 15 21 22 22 23 26 28 29 30 32 33 35 41 44 46 47 55 58 60 62 3 FIRST AID Shock Haemorrhage Wounds Fractures Burns Chocking Foreign bodies in eye, ear Other emergencies CPR 71 73 76 77 80 81 84 86 96
  • 4. 4 4 MICROBIOLOGY Infection prevention Hand washing Sharp Injury EPI vaccine/Immunity and Immunization Techniques of administrating vaccine Cold chain 102 107 108 111 116 119 5 COMMUNICATION Respectfull Maternity Care 121 122 6 PHARMACOLOGY Rights of Medication administration Medication preparation Principles and Responsibilities of Medication administration Content and Types of Drug orders Medication orders Drugs administration and Routs of Medication administration Medication Errors and Reporting 127 128 129 131 131 132 135 138 7 ANATOMY AND PHYSIOLOGY Introduction Cell Cell division Tissue Skeletal system Muscular system Nervous system Respiratory Digestive system Urinary System Blood circulatory System Blood Lymphatic system Glandular system Integumentary system Female Reproductive system Male Reproductive Special senses 140 147 150 151 153 157 161 166 169 173 175 179 183 185 189 190 193 196
  • 5. 5 NUTRITION: BALANCED DIET: A diet that contains the proper proportions of carbohydrates, fats, proteins, vitamins, minerals, and water necessary to maintain good health Vitamins: Vitamins are organic compounds that are required in small amounts in our diet but their deficiency causes specific diseases.  Most of the vitamins cannot be synthesized in our body but plants can synthesize almost all of them, so they are considered as essential food factors.  However, the bacteria of the gut can produce some of the vitamins required by us.  All the vitamins are generally available in our diet. Different vitamins belong to various chemical classes and it is difficult to define them on the basis of structure.  They are generally regarded as organic compounds required in the diet in small amounts to perform specific biological functions for normal maintenance of optimum growth and health of the organism.  Vitamins are designated by alphabets A, B, C, D, etc. Some of them are further named as sub- groups e.g. B1, B2, B6, B12, etc.  Vitamin A keeps our skin and eyes healthy.  Vitamin C helps body to fight against many diseases. Vitamin C gets easily destroyed by heat during cooking.  Vitamin D helps our body to use calcium for bones and teeth.  Excess of vitamins is also harmful and vitamin pills should not be taken without the advice of doctor.  The term ―Vitamine‖ was coined from the word vital + amine since the earlier identified compounds had amino groups.  Later work showed that most of them did not contain amino groups, so the letter ‗e‘ was dropped and the term vitamin is used these days.
  • 6. 6 Vitamins are classified into two groups depending upon their solubility in water or fat. Fat soluble vitamins:  Vitamins which are soluble in fat and oils but insoluble in water are kept in this group. These are vitamins A, D, E and K. They are stored in liver and adipose (fat storing) tissues Water soluble vitamins:  B group vitamins and vitamin C are soluble in water so they are grouped together.  Water soluble vitamins must be supplied regularly in diet because they are readily excreted in urine and cannot be stored (except vitamin B12) in our body. Deficiency Diseases:  A person may be getting enough food to eat, but sometimes the food may not contain a particular nutrient. If this continues over a long period of time, the person may suffer from its deficiency.  Deficiency of one or more nutrients can cause diseases or disorders in our body. Diseases that occur due to lack of nutrients over a long period are called deficiency diseases. 1. Vitamin A——— Night blindness 2. Vitamin B1———Beriberi 3. Vitamin B2——– Ariboflavinosis 4. Vitamin B3 ——–Pellagra 5. Vitamin B5 ——–Paresthesia 6. Vitamin B6 ——–Anemia 7. Vitamin B7 —— Dermatitis, enteritis 8. Vitamin B9 & Vitamin B12 —– Megaloblastic anemia 9. Vitamin C —— Scurvy, Swelling of Gums 10. Vitamin D —— Rickets & Osteomalacia 11. Vitamin E —— Less Fertility 12. Vitamin K —— Non-Clotting of Blood. Vitamin A (Retinol) : Sources : Dairy products, eggs, liver, fish and butter.
  • 7. 7 Deficiency : The deficiency of vitamin leads to skin changes and to night blindness or failure of dark adaptation due to the effects of deficiency on retina. Vitamin B1 (Thiamine) : Sources: Yeast, egg yolk, liver, wheatgerm, nuts, red meat and cereals. Deficiency: Fatigue, irritability, loss of appetite; severe deficiency can lead to beri-beri. Vitamin B2 (Riboflavin): Sources: Dairy products, liver, vegetables, eggs, cereals, fruit, yeast. Deficiency: Painful tongue and fissures to the corners of the mouth, chapped lips. Vitamin B3 (Nicotinic acid or Niacin) : Sources: Lean meats, peanuts and other legumes, and whole-grain or enriched bread and cereal products are among the best sources of niacin. Deficiency: The deficiency state in humans causes skin disease, diarrhea, dementia, and ultimately death. Vitamin B5 (Pantothenic acid): Sources: liver, kidney, eggs, poultry, and whole grains and dairy products while apart from that it is present in perhaps all animal and plant tissues, as well as in many microorganisms. Deficiency: There is no known naturally occurring deficiency state. Vitamin B6 (Pyridoxine): Sources: liver and other organ meats, corn, whole-grain cereal, seeds and soy products. Deficiency: can result in central nervous system disturbances e.g. convulsions in infants, More generally the effects of deficiency include inadequate growth or weight loss and anemia due to the role of B6 in the manufacture of hemoglobin. Vitamin B7 (Biotin): Sources: fruits and meats, egg yolk, kidney, liver, tomatoes, and yeast. Deficiency: No deficiency yet is known associated with this vitamin. Vitamin B9 (Folic Acid): Sources: green leafy vegetables, fruits like apples and oranges dried beans, avocados, sunflower seeds, and wheat germ. Deficiency: Its Deficiency during pregnancy is associated with birth defects, such as neural tube defects Vitamin B12 (Cyanocobalamin): Sources: Liver, red meat, dairy products and fish. Deficiency: megaloblastic anaemia.
  • 8. 8 Vitamin C (Ascorbic acid): Sources: Green vegetables and fruit. Deficiency: Scurvy. Vitamin D (Calciferol): Sources: Fish liver oils, dairy produce. Vitamin D is formed in the skin when it is exposed to sunlight Deficiency: Rickets. Vitamin E (Tocopherol): Sources: Pure vegetable oils, wheat germ, whole meal bread and cereals, egg yolk, nuts sunflower seeds. Deficiency: May cause muscular dystrophy Vitamin K (Phylloquinone or Naphthoquinone): Sources: Green vegetables. Deficiency: vitamin K deficiency results in impaired blood clotting, usually demonstrated by tests that measure clotting time. Symptoms include easy bruising and bleeding diathesis. In infants, vitamin K deficiency may result in intracranial hemorrhage. NUTIRIENTS: Nutrients are molecules in food that all organisms need to make energy, grow, develop, and reproduce. Nutrients are digested and then broken down into basic parts to be used by the organism. There are two main types of nutrients, macronutrients and micronutrients. Micronutrients – Vitamins and Minerals Micronutrients, are comprised of vitamins and minerals which are required in small quantities to ensure normal metabolism, growth and physical well Five Important Micronutrients: 1. Vitamin A 2. Folate (folic acid) 3. Iodine 4. Iron 5. Zinc
  • 9. 9 Vitamin A:  This vital micronutrient is found in a range of different foods including carrots, spinach, broccoli, milk, egg, liver and fish.  It plays an essential role in vision (lack of Vitamin A is a common cause of blindness), reproduction and growth, and the functioning of a healthy immune system (it plays a key role in the development of white blood cells).  Worldwide about 5 million children under the age of five are affected by xerophthalmia, a serious eye disorder caused by vitamin A deficiency.  These children are at risk of becoming blind and are more likely to die of common childhood disease Folic Acid:  This is a generic term for a group of B vitamins including folic acid  Folic acid is a synthetic folate compound used in vitamin supplements and fortified food of its increased stability.  Folates are found in egg, dairy products, asparagus, orange juice, dark green leafy vegetables, beans and brown bread.  They play a key role in the metabolism of amino acids and the production of proteins, the synthesis of nucleic acid (the molecules that carry genetic information in the cells), and the formation of blood cells. Iodine:  Seaweed and fish are rich sources but in many countries the addition of iodine (known as iodization) to salt is an important source.  Iodine is one of the most important elements required by the developing foetus due to its effect on brain development.  Iodine also serves a number of other important functions especially in the production of hormones.  Goitre is a visible sign of severe iodine deficiency. Zinc: Found in a range of foodstuffs including liver, eggs, nuts, cereals and seafood. The absence of zinc is associated with a number of conditions including, short stature, anemia, impaired healing of wounds, poor gonadal function, and impaired cognitive and motor function.
  • 10. 10 It can also lead to appetite disorders, as well as contributing to the increased severity and incidence of diarrhea and pneumonia. The most important effect of zinc deficiency is its impact on children‘s resistance to infectious diseases including the risk of infection, the recurrence of infections and the severity of infection. This is well document in the case of diarrhoea. Zinc nutrition is therefore an important determinant of mortality in children. Iron:  Iron has a number of key functions within the body. It acts as a carrier for oxygen from the lungs to the body‘s tissues – it does so in the form of hemoglobin – and it also integral to the working of various tissues through the role that it plays in enzymatic reactions.  Iron deficiency ultimately leads to iron deficiency anemia, the most common cause of anemia, a condition in which the blood lacks healthy red bloods cells required to carry oxygen, and which results in morbidity and death.  Iron deficiency is the most widespread health problem in the world, impairing normal mental development in 40‐ 60% of infants in the developing world.  Iron rich foods include lentils, red meat, poultry, fish, leaf vegetables and chicken MACRONUTRIENTS (PROTEIN, CARBOHYDRATES AND FAT): Macronutrients:  a type of food (e.g. fat, protein, carbohydrate) required in large amounts in the diet.  a chemical element (e.g. potassium, magnesium, calcium) required in large amounts for plant growth. Carbohydrates: Are a type of macronutrient used for quick energy in cells. The basic unit of carbohydrates is a monosaccharide. An example of a monosaccharide is glucose or sugar. Glucose can be by itself, or assembled into long chains to make things like starch, which can be found in potatoes.
  • 11. 11 Proteins: are a macronutrient that the cells in your body use for structure. Protein is very important for building tissues, such as muscle. Muscle is mainly made up of proteins. Proteins are made from smaller monomers called amino acids. There are twenty amino acids that make up all the kinds of protein your body needs. Your body can make some of the amino acids you need, but there are nine that you must consume in your diet. These are called essential amino acids. Meat, fish, beans, and eggs are examples of foods rich in protein. Fats: are called lipids and are a macronutrient in your body that stores energy. Fats have long chains of carbon and hydrogen, which store lots of energy in the chemical bonds. Fats are important in our body to cushion organs, protect our cells, and send signals in the form of hormones around our body. Foods that are rich in fats are butter and oil.
  • 12. 12
  • 13. 13 ETHICS VALUES & MORALITY Ethics: is delivered from the great word is ethos meaning custom or character. Values: Believes or attitude about the worth of a person, object, idea. Maraility: is similar to ethics. It usually refers to personal stand of right & wrong. Honestly:Nurse should be honest in  Her duty time  Her clinical work  With doctor & other health team worker. Punctuality: Nurse should be punctual in her duties and other activities. Responsibilities: Nurse is fully responsible all the work towards patient care should be awear of all the care patient getting. Behaviour: Nurse should be well behaved polite with the patient relatives medical & pare medical staff. Manner: Low tone and polite way of talking is the main quality of a nurse she should be well mannered towards her elders. Uniform Code Means there are certain principles which should be obey while in uniform  Neat & Clean  Wear only when on duty  No jewelries  Heir should be above the shoulder  Only black hair band no colour full pin or band.  Very tile make up.  No nails polish no long nail.  Only black shoes for student  No giggling, chatting improper sitting.  Kit should be always her.  No mehndi. Sense of Judgment: Means to know what is right and how it is applies
  • 14. 14 General Rules:  Never discuss personal matter in public or during lunch or tea break.  Respect your patient matter.  Respect patient need for privacy at all the time screen your patient for all the time  Remove patient chart is for private information never disclosed it always.  Respect your Co- worker & call them by names notes by bed # or nickname.  Accept Responsibility anticipate patient need.  Gratuities in the from of money, gift or tip is not allowed.  Do not waste or misuse hospital supplies.  Do not involve personally with your patient.  Remain at your assign placed.  Never eat chew gum when in uniform, or eat supari when on uniform  Respect your uniform do not sit on floor when you are in uniform  Do not screen or laugh in patient area  Do not give any information when you don‘t know about that consult the person when know of.
  • 15. 15 HYGIENE AND CARE: Providing for a patient's hygiene is probably the most basic of all nursing care activities, but it is undoubtedly one of the most important. Not only is it a provision for the patient's physical needs; it also contributes immeasurably to the patient's feeling of emotional well-being. PURPOSE OF THE PATIENT'S DAILY BATH: 1. Removal of bacteria from the skin. 2. Confinement in bed increases perspiration, and bacterial growth is stimulated by moisture. 3. Skin irritation from hospital bed linens may result in skin breakdown and subsequent infection. 4. Relaxation effect on the patient. 5. Stimulation of blood circulation to the skin, respirations, and elimination. 6. Maintenance of joint mobility. 7. Improvement of the patient's self-image and emotional and mental well- being. 8. Providing the nurse with an opportunity for health teaching and assessment. 9. Providing the nurse with an opportunity to give the patient psychological support.  The process of building rapport may begin during the initial bath.  The bath aids in the development of the therapeutic nurse-patient relationship as the patient has the nurse's undivided attention. PHYSICAL CONDITIONS WHICH ENCOURAGE SKIN BREAKDOWN IN A PATIENT WHO IS CONFINED TO BED: a. Immobility. Continuous pressure over any body part impairs circulation to that part and can cause breakdown and eventual ulcerations. b. Incontinence. If the patient is unable to control the bladder or bowel functions, skin breakdown is likely to occur due to the presence of moisture and bacteria on the skin. c. Emaciation. An emaciated patient may be prone to skin breakdown over bony prominence (heels, elbows, and coccyx). d. Obesity. An obese patient may have many skin folds where perspiration and bacteria may contribute to skin breakdown. e. Age-Related Skin Changes. An older person's skin is very thin and inelastic. The sweat and oil glands are less active. Thin, dry skin is more susceptible to pressure areas and skin breakdown. f. Any Disease or Condition that Affects Circulation can encourage skin breakdown in a patient who is confined to bed.
  • 16. 16 NURSING INTERVENTION TO PREVENT SKIN BREAKDOWN: 1. The time of the patient's bath or back massage is the most logical time to thoroughly observe the patient's skin for pressure areas. 2. At the first sign of redness, the area should be washed with soap and water and rubbed with lotion; measures should then be taken to keep the patient off the reddened area. 3. Report any signs of pressure to the charge nurse. 4. Keep sheets under the patient clean, smooth, and tight to help eliminate skin irritation. 5. Ensure adequate nutrition and fluid intake, according to physician's orders. 6. Every effort should be made to keep urine and feces off the patient's skin, washing the skin with soap and water and keeping the buttocks and genital area dry (lotion or powder may be used depending upon the patient's skin type) when the patient is incontinent. 7. Obese patients may need assistance washing and drying areas under skin folds (groin, buttocks, under breasts, and so forth.) 8. For the patient with very dry skin, various bath oils may be added to the bath water.  Soap may be omitted because of its drying effect.  Lotions and oils may be used after the bath. PROVIDING FOR SELECTED PATIENT NEEDS WHILE BATHING A PATIENT: a. Safety: 1. The bed may be in the high position during the patient's bed bath, but should be placed in the low position upon completion. 2. The side rails should be up after the patient's bath for the patient who is confined to the bed.  Side rails help to prevent falls for the elderly patient or the patient who is confused or has a decreased level of consciousness.  The legal aspect requires diligence on the part of nursing personnel. 3. The patient's call light should be within easy reach to prevent the need to reach for it and risk falling out of bed and to provide easy access in case of pain or distress. 4. Fire safety in the patient care area calls for the following rules:  No smoking in bed.  No smoking if oxygen is in use.
  • 17. 17 5. Always wash your hands before entering and upon leaving the patient's room. b. Privacy:  Respect for the patient's privacy decreases the patient's emotional discomfort during personal care.  Keep the door to the patient's room closed.  Pull the curtains around the unit and drape the patient's body during care.  Allow the patient to complete as much personal care as possible; self-care is appropriate and provides additional privacy. c. Comfort.  Ensure a comfortable temperature in the patient's room.  Close any windows and the door to the patient's room to prevent drafts and chilling.  Drape the patient appropriately during the bath.  For a bedside bath, maintain bath water between 110° F and 115° F; change the water as it cools and/or gets soapy. SIGNIFICANT NURSING OBSERVATIONS DURING THE BATHING PROCEDURE a. Physical Observations:  Observe the skin under good, natural light.  Any abnormal skin condition should be described as to its location, color, and size and how it feels to the patient.  The following skin observations should be checked upon admission and daily thereafter: Cleanliness:  Odor. May be caused by sweat secreted by the sweat glands; by abnormal conditions, such as infection or kidney disease; or by bodily discharges (urine, feces) that need to be cleaned.  Texture. Smooth and elastic or dry and rough; nutritional deficiencies can influence skin texture.  Color. Reddened areas that could indicate pressure, cyanosis (bluish tinge) or jaundice (yellowish tinge).  Tmperature. Hot skin could mean fever; cold skin could mean poor circulation.  (Sensitivity. Pain, tenderness, itching, or burning.  Swelling (edema). Stretched or tight appearing; usually begins in the ankles or legs or any other dependent part; may be associated with injury.
  • 18. 18  Skin lesions. Rashes, growths, or breaks in the skin.  Observations may begin at the head (scalp) and proceed to the feet in a systematic manner. b. Psychosocial Observations:  Problems in this area may be related to the patient's present problems.  The time of the patient's bath may be a good time to find out more about the patient's psychosocial needs.  Remember that the patient's nonverbal communication may tell you much about the way he/she is feeling. MOUTH CARE: a. Purposes:  Provide oral care of the teeth, gums, and mouth.  Remove offensive odors and food debris.  Promote patient comfort and a feeling of well-being.  Preserve the integrity and hydration of the oral mucosa and lips.  Alleviate pain and discomfort, thereby enhancing oral intake. b. General Guidelines:  Oral hygiene should be performed before breakfast, after each meal, and at bedtime.  Oral hygiene is especially important for patients receiving oxygen therapy, patients who have nasogastric tubes, and patients who are NPO. Their oral mucosa dries out much faster than normal due to their mouth-breathing.  You should provide for patient privacy during the procedure, as this is an extremely personal procedure for most patients.  Oral care for the unconscious patient should be performed at least every four hours.  Lipstick, chap stick, or vaseline may be applied to the lips to keep them from drying out. c. Nursing Records. Nursing observations for the patient's mouth should be recorded in the clinical record, noting such factors as:  Bleeding.  Swelling of gums.  Unusual mouth odor. Effect of brushing the teeth. Note if there is bleeding when you brush the patient's gums and teeth.
  • 19. 19 d. Conscious Patients with Dentures: General considerations  Many patients are sensitive or embarrassed about wearing dentures; therefore, the patient's privacy should be respected when the dentures are cleaned.  Dentures must be handled carefully; they are fragile and expensive, and the patient is handicapped without them.  If the dentures are left out of the mouth for any period of time, place them in a covered opaque container with the patient's name on the container.  Dentures must be kept in water to preserve their fit and general quality; the color may change if they become dry. You may avoid breaking the dentures while cleaning them by holding them over a basin of water with a washcloth folded in the bottom.  Dentures are brushed in the same way as natural teeth; be sure to rinse them well.  The denture cup should be labeled with the patient's name and room number.  Never use hot water to rinse the dentures as it could warp them; use cool or lukewarm water.  The patient's gums and soft tissues should be cared for at least twice per day while the dentures are out of the mouth; a soft-bristled toothbrush, swab, or gauze-covered tongue blade dipped in mouthwash should be used to cleanse the gums, tongue, and soft tissues. e. PATIENTS WITH MOUTH COMPLICATIONS: The following problems are common in patients receiving chemotherapy and radiation therapy: (1) Bleeding:  Observe the patient's mouth frequently for the amount of bleeding present and the specific areas.  Do not floss the patient's teeth; use a Water-pik Brush the teeth and clean the mouth using one of the following methods:  Brush the teeth carefully with a very soft toothbrush.  Wrap a tongue blade with a gauze sponge saturated with a prescribed solution; carefully swab the teeth and mouth. Do not use lemon/glycerine swabs or commercial mouthwash because they contain alcohol, which causes burning.
  • 20. 20 (2) Infection:  Observe the patient's mouth for appearance, integrity, and general condition.  Wear clean gloves during the procedure.  Obtain a culture, if ordered.  Do not floss the teeth if the mouth is irritated or painful.  Assist the patient with brushing the teeth and cleaning the mouth, using a soft toothbrush or a gauze-padded tongue blade.  Rinse the mouth with water and the prescribed solution, if ordered. (3) Ulcerations, To Include Stomatitis:  Basic procedure for the patient with an infection should be followed.  If the patient's mouth is extremely painful, rinsing the mouth with a local anesthetic, as prescribed by a physician, may be necessary.  Mouthwash and other solutions which contain alcohol should not be used for the patient with ulcerations as they are frequently very painful. f. Unconscious Patients:  Oral care should be performed at least every four hours.  Oral suctioning may be required for the unconscious patient to prevent aspiration.  A soft toothbrush or gauze-padded tongue blade may be used to clean the teeth and mouth.  The patient should be positioned in the lateral position with the head turned toward the side to provide for drainage and to prevent aspiration.
  • 21. 21 BACK MASSAGE AS A PATIENT COMFORT MEASURE: Purpose:  Decreases muscle tension and promotes relaxation.  Increases circulation to the area.  Aids in the development of the therapeutic nurse-patient relationship. Basic Principles of Back Massage:  The psychological benefits of back massage cannot be overstressed for the hospitalized patient.  The following statements illustrate the concept of therapeutic touch as an integral part of the domain of nursing.  Touch can be perceived as a manifestation of caring and communication between the nurse and the patient.  Tactile communication between healthy and ill individuals can have highly beneficial results.  Therapeutic touch may make some patients uncomfortable; you are entering their personal space and their feelings must be respected, so make sure you ask the patient if he/she would like a back rub. Agents used for back massage: 1 .Lotions or emollients  Lotions and emollients reduce friction and lubricate the skin.  They are appropriate for most patients, especially those with a tendency toward dry skin; that is, elderly patients. 2, Rubbing alcohol  Alcohol evaporates quickly, so it has a cooling but very drying effect.  A certain amount of alcohol is absorbed by the skin so it should not be used on infants, elderly patients, or patients with liver disease. 3, Powder.  Powder reduces friction but also has a drying effect on the skin.  It may be appropriate for those patients who perspire freely and/or are confined to bed e. General guidelines:
  • 22. 22  A back massage should take about five to ten minutes and can be given with the patient's bath, before bedtime, or at any other time during the day.  Determine if any patient allergies or skin sensitivities exist before applying lotion to the patient's skin.  The greatest relaxation effect of a massage occurs when the rhythm of the massage is coordinated with the patient's breathing. PERINEAL CARE:  Perineal care is often referred to as "pericare;" it consists of external irrigation of the vulva and perineum following voiding or defecation and is part of the routine A. M. and P. M. care.  Patients may be able to perform their own perineal care or may need partial or total assistance from the nurse.  Embarrassment on the part of the patient and the nurse can be effectively dealt with by ensuring patient privacy during the procedure and not totally exposing the patient's genital area. Key points:  Ensure patient privacy.  Wipe from front to back (vagina toward rectum) on female patients to avoid contaminating the vagina or urethral meatus.  Do not use the same washcloth for any other portion of the patient's bath. BED PATIENT'S HAIR CARE: a. Principles for Shampooing the Bed Patient's Hair.  The supine position is preferred for weaker patients.  Patients with significant heart or lung disease will not tolerate being supine; they must be in a sitting position.  Hair care should be given regularly during illness, just as it would be normally. b. Purposes of Hair Care.  Hair care improves the morale of the patient.  It stimulates the circulation of the scalp. c. Shampooing removes bacteria, microorganisms, oils, and dirt that cling to the hairs
  • 23. 23 PERSONAL HYGIENE: Definition: Personal hygiene is described as the principle of maintaining cleanliness and grooming of the external body. Failure to keep up a standard of hygiene can have many implications. There an increased risk of getting an infection or illness. Importance of Personal Hygiene:  Personal grooming is important for a positive self-image.  Self-esteem, confidence and motivation can all be altered by our body image, often reflected on our ability to care for ourselves and keep good hygiene practices.  keeping a good standard of hygiene helps to prevent the development and spread of infections, illnesses and bad odours. Daily Hygiene Needs:  Bathing  Skin care  Back care  Oral hygiene  Shaving  Shampooing hair  Hair care  Nail care  Perineal care  Dressing and undressing Factors That Affect Hygiene Practices:  Culture  Family Practices  Illness  Individual preferences  Bath in morning or before going to bed  Frequency of bathing, shaving  Shampooing hair daily or weekly Bathing: Purpose of Bathing  Removes perspiration, dirt and microorganisms  Stimulates circulation
  • 24. 24  Exercises body parts  Refreshes, relaxes and promotes physical comfort  Removes odors  Allows for evaluation of skin condition Body Odor: Perspiration, or sweat, comes from sweat glands. Due to puberty, these glands not only become more active than before, but at the same time, they also begin to secrete different chemicals into the sweat that has a stronger smelling odor. The best way to keep clean is to bath or shower every day, because this will help wash away any bacteria that contribute to the smells. Skin Observations while Bathing:  Color of skin, lips, nail beds and sclera of eyes  Location and description of rashes  Dry skin  Bruises or open areas on skin Hair Wash Washing your hair every day or every other day can help control oily hair. Don't scrub or rub too hard this doesn't get rid of oil any better and can irritate your scalp or damage your hair. Oral Hygiene Definition: measures used to keep mouth and teeth clean and free of microorganism Teeth: Brushing  Brushing your teeth properly, along with regular dental checkups, can help prevent tooth decay and gum disease.  To prevent cavities, you need to remove plaque, the transparent layer of bacteria that coats the teeth.  Brushing also stimulates the gums, which helps to keep them healthy and prevent gum disease.  Teeth: Brushing  Bad breath is caused by odor-producing bacteria that grow in the mouth. When a person doesn‘t brush and floss regularly, bacteria accumulate on the bits of food left in the mouth and between the teeth. Nail Care: Requires daily cleaning and trimming of fingernails and toenails as needed Maintain nails by keeping nails: Short, clean and free of rough edges
  • 25. 25 Purpose: Prevent infection Prevent injury Prevent odors Steps of Hand Washing Perineal Care:  Used to clean genital and anal areas  Prevents infection  Prevents odors  Promotes comfort  Rules of medical asepsis and Standard Precautions followed  Work from cleanest to dirtiest area (front to back)  urethral area – cleanest anal area – dirtiest
  • 26. 26 ADMISSION, TRANSFER AND DISCHARGE PROCEDURE ADMISSION PROCEDUR: Definition: Admission is a process through which the patient get admitted in the hospital for a shorter or longer period of time as prescribed by his/her doctor for treatment. A patient coming into hospital as occasionally frightened & uncomfortable. They may or may not be seriously ill or in pain. This is a time where you are very important to the patient. Being pleasant & courteous will make the patient arrived easier for him. A nice relaxed environment & Well come well create a favorable first impression. Types of admission:  Ordinary or elective  Emergency admission  Transfer admission  Day care admission Purpose of admission: To get the treatment & care for his/her disease  Diagnostic procedure  Child birth  Chemotherapy Tips to follow when admitting the patient: 1. Introduction yourself 2. Learn patient name & use it often 3. your way of speaking & behaving will have a lot to do with the patient impression of the institution 4. Be friendly 5. Smile 6. Do not arrear to be rushed or busy with other things 7. Do your work quietly & efficiently
  • 27. 27 DISCHARGE PROCEDURE: Staff must be able to assist the patient while preparing to go home at the time of discharge. Discharging the patient: The patient being discharged is often still weak and may get tired easily. However, the patient is usually happy to know that he can go to home. Written order from the doctor is required for the patient‘s discharge. Health teaching to the discharge patient is the responsibility of the assign nurse or the team leader. The nurse will give instruction about take home medication, diet, exercise, activities of daily living the special care to a diabetic patient. Types of Discharge There are three types of discharge: 1. Ordinary / routine discharge: when the doctor give the written permission for the patient to go home 2. Leave Against medical advised (LAMA): When the patient and his family make the decision to leave the hospital on there own risk. A special from is filled by the doctor and the patient. or his family member write stating that they take the responsibility of the patient by discharge him against the doctor‘s order and sign on it 3. Discharge by transfer: Patient are sometimes discharged from one health care institution to another. These patients may leave the hospital in an ambulance. Staff responsibility: The assigned nurse or the team leader will tell you about the patient discharge. 1.Inform the patient and his attendant about the patient discharge. Help the patient contact his family, if the patient is alone 2.Assemble all the patient‘s personal belonging and assist him in packing, for example, his clothes, shaving box etc 3.Check that hospitals items are returned, for example, kidney dish, gallipots etc. 4.Assist the patient get dressed, if necessary. Cut the identification band. 5.Check that the assigned nurse has given health teaching, medication etc. 6.Make sure that she removes I/V Canula, catheter. N.G. Tube. If any doctor has ordered to discharg the patient with N.G Tube or Foleys‘s catheter or n intravenous canula, then the assigned nurse will change it with a new one before the patient goes off. 7.Guide the patient to billing office ( follow unit policy) 8.Check that the discharge summary etc has handed over to patient. 9.Wheel the patient to the ear or taxi and say good bye to him. 10.Remove bed linen and place it in the hamper bag. 11.Report to the assigned nurse that the patient has been discharge safely, and has accompanied the patient, husband wife etc
  • 28. 28 BED MAKING: Patients spend most of their time in bed during hospitalization. Therefore, it is important to make patient‘s bed with great care as to maximize comfort & rest to the patient. Purpose of bed making:  To provide comfort & promote rest to the patients.  To promote safety by having a neat, clean & wrinkled free bed to patients.  To conserve energy & add to a neat environment. Principles of bed making: 1. Save energy & time by organizing items as per use & making bed on side then moving to other side. 2. Tuck bottom sheet firmly to remove wrinkles. 3. Do not use torn linen. 4. Never place one patient linen on another patient bed. 5. Pull mattress well up to head of bed. It must be clean & dry before bed making. 6. Do not expose the patient or cover his/her face while changing top sheet. 7. Do not mix clean linen with dirty linen. 8. Never throw dirty or soiled linen on the floor. Always use a hamper beg. 9. Place soiled linen (linen soiled with blood, stool) in a separate plastic beg & label it. 10. Do not shake linen while making bed. Shaking will spread germs in the environment. 11. Have everything ready before beginning. 12. Never use bed linen for any other purpose than that for which it is intended. Types of beds: There are four basic types of bed, which student usually makes. 1. Closed bed: Closed bed is made when house- keeping staff have cleaned the one bed unit following a patient discharge. The bed is made UP CLOSED so it will remain clean until a new patient assigned to it. 2. Open bed: When a patient is admitted to a unit the closed bed is made into an open bed fan folding the top sheets down to the foot of the bed. An open bed is also made for a patient who is already hospitalization & is up & about. 3. Occupied bed: Some patients are unable or not permitted to get out of bed. As a result this many patients are fed, bathed & cared in bed.
  • 29. 29 When the patient the patient is completely bedridden, the bed is made with the patient in the bed. It is called occupied bed. 4. Post-operative bed: A special way of making of bed to receive a patient who returning to the unit after having a surgery. USE AND REMOVAL OF BEDPAN: Requirement The bedridden client may have altered elimination patterns. Reduced mobility, Pain, privacy issues, the need for assistant ,deleys in getting assistance when needed, and the fear of interruption can all alter normal elimination patterns. Voiding and bowel elimination for the client confined to bed require a bedpan . Equipment Needed: Bedpan (regular or fracture) or urinal Disposable gloves Bedpan cover Toilet paper Washcloth and towel. Procedure: 1. Close curtain or door. 2. Wash hand; apply gloves. 3. Lower head of bed so client is in supin position. 4. Elevate bed. 5. Assist client to side-lying position using side rail for support. 6. Warm bedpan under warm water if needed; power if necessary 7. Place bedpan under buttocks.Place a fracture pan with the lower near the client‘s lower back region. Place large bedpan with the opening near the client‘s thighs. 8. While holding the bedpan with one hand, help the client roll onto the back, while pushing against the bedpan (toward the center of the bed) to hold it in place.Alternate: Help the client raise the hips using the overbed trapeze, and slide the pan in place.Allternate:if the client is unable to turn or raise hips,
  • 30. 30 use fracture pan instead of a bedpan. With fracture pan ,the flat side in placed to ward the client‘s head 9. Check placement of bedpan by looking between client‘s legs. 10. If indicate, elevate head of bed to 45* angle or higher for comfort. 11. Place cell light within reach of client; place side rails in upright position, lower bed, and Provide privacy. 12. Remove gloves; Wash hands. Removing a Bedpan: 1. Wash hands; apply gloves. 2. Gather toilet paper and washing supplies. 3. Lower head of bed to supine position. 4. While holding bedpan with one hand, roll client to side and remove the pan, being careful not to pull or shear skin sticking to the pan and being careful not to spill contents 5. Assist with cleaning or wiping; always wipe with a front to back motion. 6. Empty bedpan (measure urine output if ordered),clean bedpan, and store it in proper place; if bedpan is to be emptied outside client‘s room ,cover in during transport. 7. Remove soiled gloves. Wash hands. 8. Allow client to wash hands. 9. Place call light within reach. 10. Recheck that side rails are in the upright position 11. Wash hand HOT AND COLD COMPRESSION: Purpose:  To relieve pain.  To relieve congestion.  To reduce swelling.  To control bleeding. Procedure:  Full the ice bag ½ -2/3rd full of crushed ice.  Remove the residual air from the bag by pressing the bag against a flat surface.  Seal the bag.  Dry the out side of the bag and cover it with towel.  Refilling may be necessary at hourly intervals, or depending on the environmental temperature.  Remove the hag after 02 hrs for ½ hr before reapplying.  Do not leave the bag on one area more than 02 hrs.
  • 31. 31  Check the under skin every10 minutes for blanches or white, if its so, remove the ―ice bag‖.  Cover the area informs your staff and head nurse.  Make the patient comfortable.  Clean and dry the equipment and replace back to the assigned place.  Wash hand. Report to your head nurse/team leader: Time length. Area of application. How the patient to letrated. Observe of any thing unusual. and report to team leader ICE BAG: Purpose:  To relieve pain.  To relieve congestion.  To reduce swelling.  To control bleeding. Procedure:  Full the ice bag ½ -2/3rd full of crushed ice.  Remove the residual air from the bag by pressing the bag against a flat surface.  Seal the bag.  Dry the out side of the bag and cover it with towel.  Refilling may be necessary at hourly intervals, or depending on the environmental temperature remove the hag after 02 hrs for ½ hr before reapplying.  Do not leave the bag on one area more than 02 hrs.  Check the under skin every10 minutes for blanches or white, if its so, remove the ―icebag‖. Cover the area informs your staff and head nurse.  Make the patient comfortable.  Clean and dry the equipment and replace back to the assigned place.  Wash hand. Report to your head nurse/team leader: 1. Time length. 2. Area of application 3. How the patient to letrated 4. Observation of any thing unusual
  • 32. 32 STEAM INHALATION: Steam inhalation a method by which heated moisture is conveyed to the upper respiratory tract by inhalation of steam. Steam inhalation is one of the most widely used home remedies to soothe and open the nasal passages and get relief from the symptoms of a cold or sinus infection. Also called steam therapy, it involves the inhalation of water vapor. The warm, moist air is thought to work by loosening the mucus in the nasal passages, throat, and lungs. This may relieve symptoms of inflamed, swollen blood vessels in your nasal passages. While steam inhalation won‘t cure an infection, like a cold or the flu, it may help make you feel a lot better while your body fights it off. Don't steam longer than 10 to 15 minutes for each session. However, you can repeat steam inhalation two or three times per day if you're still having symptoms. Purpose:  To ease breathing by increasing the humidity of the air in order to sooth mucus membrane.  To relieve and prevent inflammation, congestion and edema of the larynx andair passages.  To stimulate expectoration and loosen secretions of the respiratory system.  To relieve coughing. Materials required for steam inhalation  a large bowl  water  a pot or kettle and a stove or microwave for heating up water  towel Here’s the process: 1. Heat up the water to boiling. 2. Carefully pour the hot water into the bowl. 3. Drape the towel over the back of your head. 4. Turn on a timer. 5. Shut your eyes and slowly lower your head toward the hot water until you‘re about 8 to 12 inches away from the water. Be extremely careful to avoid making direct contact with the water. 6. Inhale slowly and deeply through your nose for at least two to five minutes.
  • 33. 33 Don‘t steam longer than 10 to 15 minutes for each session. However, you can repeat steam inhalation two or three times per day if you‘re still having symptoms. You can also purchase an electric steam inhaler (also called a vaporizer) online or at a drugstore. For these, you just need to add water to the level indicated and plug in the system. The vaporizer uses electricity to make steam that cools before exiting the machine. Some vaporizers come with a built-in mask that fits around your mouth and nose. Steam vaporizers can get dirty with germs quickly, so you‘ll need to wash it often to prevent bacterial and fungal growth. Wash the bucket and filter system every few days during use, too. TECHNIQUES OF BODY MECHANICS: Some of the most common injuries sustained by members of the health care team are severe musculoskeletal strains. Many injuries can be avoided by the conscious use of proper body mechanics when performing physical labor. Body mechanics is the utilization of correct muscles to complete a task safely and efficiently, without undue strain on any muscle or joint. Principles of good body mechanics a. Maintain a stable center of gravity:  Keep your center of gravity low.  Keep your back straight.  Bend at the knees and hips. b. Maintain a Wide Base of Support. This will provide you with maximum stability while lifting:  Keep your feet apart.  Place one foot slightly ahead of the other.  Flex your knees to absorb jolts.  Turn with your feet. c. Maintain the Line of Gravity. The line should pass vertically through the base of support:  Keep your back straight.  Keeps the object being lifted close to your body d. Maintain Proper Body Alignment.
  • 34. 34  Tuck in your buttocks.  Pull your abdomen in and up.  Keep your back flat.  Keep your head up.  Keep your chin in.  Keep your weight forward and supported on the outside of your feet. Techniques of body mechanics: A. Lifting.  Use the stronger leg muscles for lifting.  Bend at the knees and hips; keep your back straight.  Lift straight upward, in one smooth motion. b. Reaching.  Stand directly in front of and close to the object.  Avoid twisting or stretching.  Use a stool or ladder for high objects.  Maintain a good balance and a firm base of support.  Before moving the object, be sure that it is not too large or too heavy. c. Pivoting.  Place one foot slightly ahead of the other.  Turn both feet at the same time, pivoting on the heel of one foot and the toe of the other.  Maintain a good center of gravity while holding or carrying the object d. Avoid Stooping.  Squat (bending at the hips and knees).  Avoid stooping (bending at the waist).  Use your leg muscles to return to an upright position. 4-5. General considerations for performing physical tasks  It is easier to pull, push, or roll an object than it is to lift it.  Movements should be smooth and coordinated rather than jerky.  Less energy or force is required to keep an object moving than it is to start and stop it.  Use the arm and leg muscles as much as possible, the back muscles as little as possible.
  • 35. 35  Keep the work as close as possible to your body. It puts less of a strain on your back, legs, and arms.  Rock backward or forward on your feet to use your body weight as a pushing or pulling force.  Keep the work at a comfortable height to avoid excessive bending at the waist.  Keep your body in good physical condition to reduce the chance of injury. Reasons for the use of proper body mechanics  Use proper body mechanics in order to avoid the following:  Excessive fatigue.  Muscle strains or tears.  Skeletal injuries.  Injury to the patient.  Injury to assisting staff members. POSITIONING AND AMBULATING THE ADULT PATIENT: One of the basic procedures that nursing personnel perform most frequently is that of changing the patient's position. Any position, even the most comfortable one, will become unbearable after a period of time. Whereas the healthy person has the ability to move at will, the sick person's movements may be limited by disease, injury, or helplessness. It is often the responsibility of the practical nurse to position the patient and change his position frequently. Once the patient is able to ambulate, certain precautions must be taken to ensure the patient's safety.
  • 36. 36 Reasons for changing the position of a patient: The following are reasons for changing a patient's position.  To promote comfort and relaxation.  To restore body function.  Changing positions improves gastrointestinal function.  It also improves respiratory function.  Changing positions allows for greater lung expansion.  It relieves pressure on the diaphragm.  To prevent deformities.  When one lies in bed for long periods of time, muscles become atonic and atrophy.  Prevention of deformities will allow the patient to ambulate when his activity level is advanced.  To relieve pressure and prevent strain (which lead to the formation of decubiti).  To stimulate circulation. . To give treatments (that is), range of motion exercises). Turning the adult patient : a. General Principles for Turning the Adult Patient. (1) Sometimes the physician will specify how often to turn a patient. (a) A schedule can be set up for turning the adult patient throughout his "awake" hours. (b) The patient should be rotated through four positions (unless a particular position is contraindicated):
  • 37. 37 Prone position Supine position. Sim's position  Plan a schedule and follow it.  Record the position change each time to ensure that all positions are used.  One example of a schedule for turning would be:
  • 38. 38 10 a.m Prone position 12 p.m. Left Sim's position 2 p.m Supine position 4 p.m. Right Sim's position 6 p.m. Prone position 1 Notice that in the preceding sequence, the patient is required to make only a quarter turn rather than a half turn each time the position is changed. 2 If the patient experiences pain while turning, a quarter turn will be less painful than a half turn. COMMON POSITIONS UTILIZED FOR THE ADULT PATIENT A. Placing the adult patient in the supine position (1) Collect equipment.  Pillows.  Positioning aids as indicated. (2) Wash your hands. (3) Approach and identify the patient (by checking the identification band) and explain the procedure (using simple terms and pointing out the benefits). (4) Provide privacy throughout the procedure. (5) Position the bed.  Place the bed in a flat or level position at working height, unless contraindicated.  Lower the side rails on the proximal side (as necessary).
  • 39. 39 (6) Move the patient from a lateral (side) position to a supine position.  For the patient on his side, remove supportive pillows.  Fold top bedding back to the hips, being careful to avoid any undue exposure of the patient's body.  With one hand on the patient's shoulder and one on the hip, roll his body in one piece (like a log) over onto his back. (7) Align the patient's body in good position.  Head, neck, and spine are in a straight line.  Arms are at the patient's sides (parallel to the body) with hands prone.  Legs are parallel to his body.  Hips, knees, and feet should be in good alignment. (8) Support the body parts in good alignment for comfort.  Place a pillow under the head and shoulders to prevent strain on neck muscles and hyperextension and flexion of the neck.  Support the small of the back with a folded bath towel or small pillow.  Put a footboard at the foot of the bed and place the feet flat against it (at right angles to the legs) to prevent plantar flexion ("foot drop").  Arrange a sandbag along the outer portion of the right foot to keep the foot upright.  Make a trochanter roll and arrange it along the right hip and thigh to keep the hip joint from rotating outward.  Place a pillow under each forearm so the arm is at least six inches from the body. (9) Provide for the patient's comfort and safety.  Replace the bedding neatly and raise the side rails, if used.  Place the call light within reach.  Position the bedside stand or overbed table so that the patient will be within easy reach of drinking water and personal items.  (d) Leave the bed in the low position. (10) Report significant nursing observations to the charge nurse. (11)Report significant nursing observations to the charge nurse.
  • 40. 40 B. Placing the adult patient in the fowler's and semi-fowler's positions. Fowler's position Semi fowler position .
  • 41. 41 ADMINISTERING AN ENEMA: Definition: An enema is a solution inserted into the rectum and sigmoid colon for the purpse of removing faces and /or flatus. Types of Enema: There are several types of enema used of purposes other than cleansing. 1. Clean enema. 2. Soapy water enema. Large volume cleansing enema: Equipment Needed:  Absorbent pad for the bed.  Disposable gloves.  Bedside commonde or bedpan if client will not be able to ambulate to  bathroom  Lubricant..  Enema container  Tubing with clamp and nozzle. .  Thermometer for enema solution  Toilet tissue.  IV pole.  Wash Cloth, towel and basin. Large volume cleansing Enema: 1. Wash hands. 2. Assess client‘s understanding of procedure and provide privavy. 3. Apply gloves. 4. Prepare equipment (see Figure 6-19-5) 5. Place absorbent pad on bed under client.Assist client in attaining left lateral position with right leg flexed as sharply as possible.If there is question regarding the client‘s ability to hold the solution, place a bedpan on the bed near to the Patient. 6. If specified,heat solution to desired temperature using thermometer to measure. enemas administered to adults are usually given at 105*- 110*F (40.5*-43*C),and those adminis-tered children are usually at 100*F(37.7*C)Solution should be at least body temperature to prevent cramping and discomfort. 7. Pour solution into the bag or bucket ; add water if needed .Open clamp and allow solution to prime tubing .Clamp tubing when primed.
  • 42. 42 8. Lubricate 5 cm (2 inches) of the rectal tube unless the tube is part of the rectal tube unless the tube is part of a prelubricated enema set. 9. Holding the enema container level with the rectum , have the client take a deep breath. Slowly and smoothly insert rectal tube into rectum approximately 7-10 cm in an adult. The rectum of an adult is usually 10- 20 cm (4-6 inches). Aim the rectal tube toward the client‘s umbilicus. 10. Raise the container holding the solution and open clamp.(If using an enemaset, sqeez the container holding solution).The solution should be 30-45 cm(12-18 inches)above the rectum for an adult,and 7.5 cm (3 inches)above the rectum for an infant.The solution may be paced on an IV pole at the proper height. 11. Slowly administer the fluid. 12. When solution has been completely administered or when the client cannot hold any more fluid,clamp the tubing and remove the rectal tube, disposing of it properly. 13. Clean lubricant, any solution, and any faces from the anus with toilet tissue. 14. Have the client continue to lie on the left side for the prescribed length of time. 15. When the client has retained the enema for the prescribed amount of time, assist to the bedside commode or toilet onto the bedpan .If the client using the bathroom, instruct not to flash the toilet when finished. 16. When the client finishing expelling the enema assist to clean the perineal area if needed. 17. Return the client to a comfortable position place a clean, dry protective pad under the client to catch any solution or feces that may continue to be expelled. 18. Observe feces and document data. 19. Remove gloves and wash hands. Small volume, Prepackaged Enema: Equipment Needed:  Prescribe package prepackage enema.  Lubricant if the tip is not pre lubricated.  Toilet tissue.  Bedpan or commode if the client cannot use the bathroom.  Absorbent pad for bed. Small volume, Prepackaged Enema: 1. Wash hands. 2. Remove prepackaged enema from packaging. Be familiar with any special instructions include with the enema .The packaged enema may be stood in a basin of warm water to warm the fluid prior to use
  • 43. 43 3. Apply gloves. 4. Place absorbent pad on bed under client. Assist client in attaining left lateral position with right leg flexed as sharply as possible .Or you may use the knee-chest position If there is a question regarding the client‘s ability to hold the solution, place a bedpan on the bed nearby. 5. Remove the protective cap from the nozzle and inspect the nozzle for lubrication. If the lubrication is not adequate, add more. 6. Squeeze the container gently to remove any air and prime the nozzle. 7. Have a client take a deep breath. Simultaneously gently insert the enema nozzle into the anus pointing the nozzle toward the umbilicus. 8. Squeeze the container until all the solution is instilled 9. Remove the nozzle from the anus and dispose of the empty container in a trash receptacle Equipment Needed:  Absorbent pad for the bed  Disposable gloves  Bedside commode or bedpan if client will not be able to ambulate to bathroom  Prescribed solution  Lubricant  Enema container  Tubing with clamp and nozzle  Thermometer  Toilet tissue Procedure: 1. Wash hands Assess if client understands procedure. 2. Apply gloves. 3. Place absorbent pad on bed under client. Assist client in 4. attaining left lateral position with right leg flexed. 5. If specified, heat solution to desired temperature using thermometer to measure Enemas 6. . Administered to adults are usually given a 105*-110-F(40.5—43-C) and thos administered to children are usually administered at 100*F 7. Solution should be at least body temperature to prevent cramping and discomfort. 8. Pour solution in to the bag or bucket ,open clamp,and allow solution to prime tubing.Clamp tubing when primed. 9. Lubricant 5 cm (2 inches)of the rectal tube unless the tube is part of a prelubricated enema set. Holding the enema container level with the rectum,
  • 44. 44 have a client take a deep breath.simultaneously; slowly and smoothly insert rectal tube into rectum approximately 7-10 cm in and adult. Insertion of rectal tube toward the umbilicus guides tube along rectum. Rectum of an adult is usually 10-20cm (4-6inches).The tube should be inserted beyond the internal sphincter. Aim the rectal tube toward the client‘s umbilicus.Raise the container holding the solution and open clamp. The solution should be 30- 45cm (12-18 inches)above the rectum for an infant. The solution may be placed an IV pole at the proper height. 10. Slowly administered the fluid. 8. When solution has been completely administered or when the client cannot hold any more fluid, clamp the tubing and remove the rectal tube, disposing of it properly.lubticant,any solution, and any feces from the anus with toilet tissue.When the client has retained the enema for the prescribed amount of time, assist to the bedside commode and toilet or on to the bedpan. if the client is using the bathroom instruct not to flush the toilet when finished. 9. When the client‘s is finished expelling the enema, assist to clean the perineal area if needed. 11. Return the client to a comfortable position. Place a clean, dry protective pad under the client to catch any solution or feces that may continue to be expelled. 12. Observe feces and document data. 13.Remove gloves and wash hands ASSISTING WITH A BEDPAN: Use of Bedpan: Voiding and bowel elimination for the client confined to bed require a bedpan and /or a urinal. Requirement: The bedridden client may have altered elimination patterns. Reduced mobility, pain ,privacy issues, the need for assistant ,delays in getting assistance when needed, and the fear of interruption can all alter normal elimination patterns. Equipment Needed:  Bedpan (regular or fracture) or urinal  Disposable gloves  Bedpan cover  Toilet paper
  • 45. 45  Washcloth and towel. Procedure: 1. Close curtain or door. 2. Wash hand; apply gloves. 3. Lower head of bed so client is in supin position. 4. Elevate bed. 5. Assist client to side-lying position using side rail for support. 6. Warm bedpan under warm water if needed; power if necessary 7. Place bedpan under buttocks.Place a fracture pan with the lower near the client‘s lower back region. Place large bedpan with the opening near the client‘s thighs. 8. While holding the bedpan with one hand, help the client roll onto the back, while pushing against the bedpan (toward the center of the bed) to hold it in place. 9. Alternate: Help the client raise the hips using the ove-rbed trapeze, and slide the pan in place.Allternate:if the client is unable to turn or raise hips, use fracture pan instead of a bedpan. With fracture pan ,the flat side in placed to ward the client‘s head 10. Check placement of bedpan by looking between client‘s legs. 11. If indicate, elevate head of bed to 45* angle or higher for comfort. 12. Place cell light within reach of client; place side rails in upright position, lower bed, and provide privacy. 13. Remove gloves; Wash hands. Removing a Bedpan: 1. Wash hands; apply gloves. 2. Gather toilet paper and washing supplies. 3. Lower head of bed to supine position. 4. While holding bedpan with one hand, roll client
  • 46. 46 HEIGHT AND WEIGHT: The patient's height and weight are recorded on admission for several reasons. 1. Diet Management The patient's ideal weight may be determined. The health care team will also be able to monitor weight loss or gain. 2. Observation of Medical Status Taking the patient's height and weight may indicate that the patient is overweight, underweight, or is retaining fluids (edema). The health care team can observe changes in weight caused by specific disease processes and determine the effectiveness of nutrition supplements prescribed to maintain weight. 3. Calculation of Medication Dosages Drug dosage is often prescribed in relation to a patient's weight when a specific blood concentration of the drug is desired. Larger doses may be required in a heavier person. MEASURING HEIGHT AND WEIGHING THE PATIENT a. To measure height, have the patient stand on the scale with the back to the measuring bar. b. Ask the patient to stand straight. Lower the bar so that it lightly touches the top of the patient's head. c. Record the height in inches or centimeters in accordance with local policy. d. If the patient cannot stand, obtain an approximate height in bed.  Have the patient lie on his back and stretch as much as possible.  Place a mark on the bottom sheet at the patient's heel and at the top of the patient's head.  Measure between these two marks on the taut bottom sheet. e. Principles related to weighing the patient.  Weigh the patient before breakfast, at the same time each day.  Use the same scale each time.  Ensure that the scale is properly balanced.  Weigh the patient in the same amount of clothing each day (i.e., hospital gown or pajamas). Have the patient void before weighing.  Avoid weighing any equipment attached to the patient such as drainage bags. Hold the equipment while actually weighing the patient. f. A helpless patient may be weighed while lying down on a litter scale. This scale is a sling-type device that looks like a suspended hammock. You will need assistance to place the patient on the scale. g. Record the patient's weight on the graphic sheet and in the nurses' note
  • 47. 47 VITAL SIGNS: TEMPERATURE, PULSE, RESPIRATION Definition Body Temperature: body temperature is the balance between heat produce and heat lost from the body. Pulse: the pulse is a wave of blood created by contraction of the left ventricle of the heart. OR pulse assessment is the of a pressure pulsation created when the heart contracts and ejects blood into the aorta. Respiration: Respiration is the act of breathing, it include the intake of oxygen and the output of carbon dioxide. OR respiratory assessment is the measurement of the breathing pattern. When assessing respiration ascertain the rate, depth, and rhythm of ventilator movement. Vital Signs:  Temperature, pulse, respiration, blood pressure (B/P) height & weight are the most frequent measurements taken by HCP.  Because of the importance of these measurements they are referred to as Vital Signs. They are important indicators of the body‘s response to physical, environmental, and psychological stressors.  VS may reveal sudden changes in a client‘s condition in addition to changes that occur progressively over time. A baseline set of VS are important to identify changes in the patient‘s condition.  VS are part of a routine physical assessment and are not assessed in isolation.Other factors such as physical signs & symptoms are also considered. When to take vital signs: Soon after a patient arrives on the nursing unit you should begin your nursing assessment. You should take several measurements to establish a baseline for further observations of that patient. Among these measurements are height, weight, and vital signs. Other indications are as follow.  On a client‘s admission  According to the physician‘s order or the institution‘s policy or standard of practice  When assessing the client during home health visit
  • 48. 48  Before & after a surgical or invasive diagnostic procedure  Before & after the administration of meds or therapy that affect cardiovascular, respiratory & temperature control functions.  When the client‘s general physical condition changes loss of conscious, pain  Before, after & during nursing interventions influencing vital signs  When client reports symptoms of physical distress Body temperature:  It is the balance b/w heat gain and heat lost.  Core temperature – temperature of the body tissues, is controlled by the hypothalamus (control center in the brain) – maintained within a narrow range.  Skin temperature rises & falls in response to environmental conditions & depends on bld flow to skin & amount of heat lost to external environment  The body‘s tissues & cells function best between the range from 36 deg C to 38 deg C  Temperature is lowest in the morning, highest during the evening.  Temperature varies with the type of food eaten.( cold or hot) Routs for taking Temperature:  Oral  Rectal  axillary Thermometers – 3 types  Glass mercury – mercury expands or contracts in response to heat. (just recently non mercury)  Electronic – heat sensitive probe, (reads in seconds) there is a probe for oral/axillary use (red) & a probe for rectal use (blue). There are disposable plastic cover for each use. Relies on battery power – return to charging unit after use.  Infrared Tympanic (Ear) – sensor probe shaped like an otoscope in external opening of ear canal. Ear canal must be sealed & probe sensor aimed at tympanic membrane – return to charging unit after use.
  • 49. 49 PULSE:  Left ventricle contracts causing a wave of bld to surge through arteries – called a pulse. Felt by palpating artery lightly against underlying bone or muscle.  Carotid, brachial, radial, femoral, popliteal, posterior tibial, dorsalis pedis  Assess: rate, rhythm, strength – can assess by using palpation & auscultation.  Pulse deficit – the difference between the radial pulse and the apical pulse – indicates a decrease in peripheral perfusion from some heart conditions ie. Atrial fibrillation. Procedure for Assessing Pulses Gather Materials: You will need a clock or watch with a second hand, a pencil or pen, and something to write on (form, note pad, and so forth). Verify Patient's Identity. If you are ordered to take a patient's pulse, make sure that you are taking the pulse of the proper patient. For example, check the patient's name on your orders against the name on his hospital identification bracelet or ask the patient his name. If you have already established the patient's identity, this step is skipped. Select Site: Select a site for taking the patient's pulse. Normally, the radial site is usually chosen. The brachial and the carotid sites are other commonly used locations. These sites are normally used because of their availability and because little or no clothing have to be removed in order to expose these sites. Other sites may be used when you wish to check the blood circulation to a specific body part. Prepare Site: Remove any clothing from over the site (open shirt for apical, remove boot and sock for dorsalis pedis, and so forth.). Then position the body part so that you can take the pulse easily. When taking a patient's radial pulse, place the patient's arm across his chest as shown in figure 3-3. This will allow you to count his breaths after taking his pulse without having to move. The patient's breathing pattern may change if he knows you are watching his breathing.
  • 50. 50 Taking a patient's pulse A - carotid pulse. B - radial pulse. Locate Pulse: Put the tips of your index finger and middle finger together and feel for the pulse by pressing down moderately with you fingertips on the site. If you cannot feel a pulse, move your fingertips around the area until you locate the pulse. Do not use your thumb to search for the patient's pulse. The thumb contains a blood vessel that is large enough for a pulse to be felt. If you use your thumb, the pulse that you find may be your own thumb pulse, not the patient's pulse. Some people prefer to use three fingers to take a pulse. Count Pulse Beats and Note Abnormalities. Count the pulse beats felt during a 60-second period. Use the clock or watch. As you count the beats, note the strength and regularity (rhythm) of the beats.  If you are using the dorsalis pedis site, use gentle pressure when palpating the artery. Too much pressure at this or other sites may press the artery closed and stop blood from flowing pass the site. Apical – beat of the heart at it‘s apex or PMI (point of maximum impulse) – 5th intercostal space, midclavicular line, just below lt. nipple – listen for a full minute ―Lub-Dub‖  Lub – close of atrioventricular (AV) values – tricuspid & mitral valves  Dub – close of semilunar valves – aortic & pulmonic valves Record Pulse Rate: By convention (general agreement), the patient's pulse rate is recorded as an even number (ending in 0, 2, 4, 6, or 8). For example, if you counted 72 beats during
  • 51. 51 the 60-second period, you would record "72." Suppose, however, that you had counted 83 beats during the 60-second period. Would you record a pulse rate of "82" or "84"? By convention, an odd pulse rate is recorded as the next higher rate. Therefore, a pulse rate of 83 would be recorded as "84." Once you have sufficient practice in taking pulses, you may wish to use a shorter method of determining the pulse rate of a patient with a regular pulse. You may count the number of pulse beats that you feel during a 30-second period and multiply this number by 2. If, for example, you counted 37 pulse beats during a 30-second period, you would record "74" (37 X 2 = 74). This method will always give you an even number as your pulse rate. This method is used only if the patient has a regular rhythm. If the patient has an irregular pulse, you must use a least a 60-second time period. Assess: rate, rhythm, strength & tension: 1.Rate – N – 60-100, average 80 bpm Tachycardia – greater than 100 bpm Bradycardia – less than 60 bpm 2.Rhythm – the pattern of the beats (regular or irregular) 3.Strength or size – or amplitude The volume of bld pushed against the wall of an artery during the ventricular contraction  weak or thready (lacks fullness)  Full, bounding (volume higher than normal)  Imperceptible (cannot be felt or heard) Record any Abnormalities: If you noticed anything about the patient's pulse that is not normal (irregular, intermittent, thready, bounding, and so forth), record your observations on the form or piece of paper. If the patient's pulse is very different from the previous time (for example, a patient whose pulse was normal four hours ago and is now irregular), notify the appropriate nursing personnel. Take Pulse at Other Sites, if Needed. Sometimes a pulse cannot be taken accurately at a particular site because of blockage in the artery or other reasons. In such a case, you should take a pulse at another site in order to check your results. Sometimes a physician will order that the apical pulse be taken in addition to the pulse at another site. Such a procedure allows the physician to check the pulse at a particular site against the rate and characteristics of the actual heartbeat (apical pulse).
  • 52. 52 RESPIRATIONS: Assess by observing rate, rhythm & depth Inspiration – inhalation (breathing in) Expiration – exhalation (breathing out) I&E is automatic & controlled by the medulla oblongata (respiratory center of brain) Women breathe thoracically, while men & young children breathe diaphragmatically usually. Asses after taking pulse, while still holding hand, so pt is unaware you are counting respirations. BLOOD PRESSURE: Force exerted by the bld against vessel walls. Pressure of bld within the arteries of the body. As left ventricle contracts – bld is forced out into the aorta to the large arteries, smaller arteries & capillaries Systolic- force exerted against the arterial wall as left. ventricle contracts & pumps bld into the aorta – max. pressure exerted on vessel wall. Diastolic – arterial pressure during ventricular relaxation, when the heart is filling, minimum pressure in arteries. Factors affecting B/P:  lower during sleep  Lower with bld loss  Position changes B/P  Anything causing vessels to dilate or constrict - medications Measured in mmHg – millimeters of mercury Normal range syst 110-140 dias 60-90 Hypertensive - >160, >90 Hypotensive <90 Equipments for B/P measurement 1.Stethoscope 2.Sphygmomanometer types of sphygmomanometers Aneroid – glass enclosed circular gauge with needle that registers the B/P as it descends the calibrations on the dial. Mercury – mercury in glass tube - more reliable – read at eye level. Electronic – cuff with built in pressure transducer reads systolic & diastolic B/P
  • 53. 53 3. Cuff – inflatable rubber bladder, tube connects to the manometer, another to the bulb, important to have correct cuff size (judge by circumference of the arm not age) Support arm at heart level, palm turned upward - above heart causes false low reading Cuff too wide – false low reading Cuff too narrow – false high reading Cuff too loose – false high reading. 4. Sprit swab for cleaning ear piece Do not take B/P in  Arm with cast  Arm with arteriovenous (AV) fistula  Arm on the side of a mastectomy i.e. rt mastectomy, rt arm How to Take Your Temperature Using a thermometer to monitor your temperature can help you manage an illness. A rise in your temperature is usually caused by an illness, infection, or injury. Normal body temperature Normal body temperature is about 98.6 degrees Fahrenheit (or 37 degrees Celsius). Your temperature often varies from 1 to 2 degrees Fahrenheit (.5 to 1 degrees Celsius) throughout the day. Your temperature is usually low in the morning and gradually increases during the day, reaching its high in the late afternoon or evening. Types of thermometers An oral thermometer has a long, slender bulb at one end, containing mercury. Oral thermometers are usually used in the mouth, but can also be placed under the armpit. A rectal thermometer has a shorter bulb of mercury at one end and is used in the rectum, usually in children. As the mercury in the thermometer
  • 54. 54 expands in response to your body heat, it moves up the column to display your temperature. Electronic and temperature strip thermometers are also available, but might be less accurate. When purchasing a thermometer, choose one with a column that is easy to see and with degree markings that are easy to read. How to take your temperature 1. Wash your hands with soap and warm water. 2. Wash the thermometer in cold water. 3. Make sure the top of the mercury column is down near the bulb. 4. Hold the thermometer firmly at the end away from the mercury bulb and shake it with a downward flick of your wrist. This drives the mercury level down below the normal mark. 5. Insert the bulb end of the thermometer under your tongue and close your mouth. 6. Wait one minute and remove the thermometer. To read the temperature, hold the thermometer near the light and rotate it slowly until you see the silver column of mercury. The number on the thermometer at the top of the mercury column is your temperature. 7. Rinse the thermometer in cold water and clean it with alcohol before storing it. Thermometers:Takingyourchild'stemperature Thermometers differ in accuracy and ease of use. The best way to take your child's temperature depends on his or her age and ability to cooperate. Match method to age The best place to insert the thermometer depends on the child's age.  Newborns: For babies less than 3 months old, start with an armpit (axillary) temperature. If it's higher than 99 F (37.2 C), take a second measurement rectally. Rectal temperatures higher than 100.4 F (38 C) in newborns and infants up to 3 months of age require immediate medical attention.  3 months old to 4 years old: For this age group, you can check your child's temperature rectally, or with an electronic pacifier thermometer or an ear thermometer.  Older than 4 years: After age 4, most children are able to hold an oral digital thermometer under the tongue for the short time it takes to get a temperature reading.
  • 55. 55 Accuracy varies A rectal temperature is the most accurate, although temperatures measured by mouth and ear are accurate if done properly. Armpit (axillary) temperatures are the least accurate, but are better than nothing. Whatever the method, make sure you know exactly how to use your thermometer. Read the instructions that came with your thermometer. For safety — and to make sure the thermometer stays in place — never leave your child unattended while you are taking his or her temperature. SPECIMEN COLLECTION: Specimen: It is a sample of blood/body fluid or waste product of the body e.g.Urine, stool & sputum. Purpose  To investigate disease in the patient.  To find out diagnosis and decide appropriate treatment. Specimens are collected on the units from patients and then they are send to laboratory for investigation. Right for specimen collection 1. Right patient. 2. Right specimen. 3. Right time. 4. Right amount. 5. Right container. 6. Right label. 7. Right requisition slip for lab. 8. Right method. 9. Right asepsis 10. .Right approach. Specimen collection and transport: Purpose: To ensure that specimens being submitted to the laboratory meet the required standards.
  • 56. 56 TYPES OF SPECIMEN COLLECTION:  Urine Detail reports(D/R)  Urine C/S.  24hrs urine collection.  Sputum collection.  Stool D/R  Stool C/S. 1. URINE DETAIL REPORTS (D/R): Purpose: The random urine specimen usually collected as a part of physical examination or at various times during hospitalization, permits laboratory screening for urinary and systematic pathologies. 2. URINE CULTURE AND SENSITIVITY C/S: Purpose: To obtain sterile urine specimen for culture and sensitivity test. A mid stream urine specimen is required for urine C/S. Midstream specimen: Means catching the urine specimen between the time the patient begins to void and the time he stops. Clean catch refers to the fact that anything outside the patient body does not contaminate the urine. Clean catch also requires careful washing of genital area. 24 hours urine collection: It is collection of all urine voided by the patient over 24-hrs period. It is the diagnostic test for urinary tract disease. COLLECTION SPUTUM SAMPLE: Sputum is the substance collected from patient lungs, contains saliva, mucus ,pus and sometimes blood. It is thicker than ordinary salvia. . Equipment:  Sputum mug.  Disposable gloves.  Lab request.
  • 57. 57 Procedure: Assemble equipment. Wash hand. Check I.D. band of patient. Explained procedure to the patient. If patient has eaten recently, rinse his mouth very well. Give sputum container to the patient and asked him to take 3 three consequent deep breath and on the third exhalation, cough deep from lungs to bring out he sputum. Cover the container immediately. Do not touch inside the container. Label the container right away and take to the lab immediately. Make the patient comfortable. Clean and replace things. Wash hands. Report to incharge /team leader:  Sputum is obtained.  Observation.Colour, odour, amount and consistency.  How the patient has toleration the procedure. STOOL SPECIMAN: Stool for Dr or C/S is collection in the same container because it is contaminated with organisms. Procedure:  Assemble equipment.  Bed pan with cover.  Specimen Container.  Wooden Tongue Depressor.  Lab request.  Disposable gloves. Procrdure  Wash hand.  Identify the patient.  Provide privacy.  Explain the patient, that stool specimen is required for lab test, so when ever he moves his bowel, he calls you.  Ask patient not to urinate in the bedpan, not to put toilet papers in the bedpan (ifpatient is bed ridden.
  • 58. 58  After patient has moved bowel, cover bedpan, taken to bathroom.  Place the specimen in the container and put wooden tongue depressor in the container.  Cover the container immediately; empty the remaining feces in the toilet.  Clean bedpan and put in the proper place.  Wash hand.  Make patient comfortable.  Send the specimen to laboratory with lab request.  Match the results with the color-chart on the multistix bottle in good lightening.  Discharge used strips properly.  Wash hand.  Record results in diabetic protocol.  Report to your assigned nurse.
  • 59. 59 URINE TESTIND BY DIPSTICK: A urine test strip or dipstick test is a basic diagnostic tool used to determine pathological changes in a patient's urine in standard urinalysis. A standard urine teststrip may comprise up to 10 different chemical pads or reagents which react (change color) when immersed in, and then removed from, a urine sample. It‘s dipped into urine, and the chemicals on the stick react and change color if levels are above normal. Things the dipstick test can check for include:  Acidity or pH. If the acid is above normal, one could have kidney stones, a urinary tract infection or another condition.  Protein. This can be a sign that kidneys are not working right. Kidneys filter waste products out of blood, and body needs protein.  Glucose. A high sugar content is a marker for diabetes.  White blood cells. These are a sign of infection.  Bilirubin. If this waste product, which is normally eliminated by liver, show up, it may mean liver isn‘t working properly.  Blood in urine. Sometimes this is a sign of infections or certain illnesses.  Nitrites. The presence of nitrites in urine most commonly means there‘s a bacterial infection in urinary tract. This is usually called a urinary tract infection (UTI). Procedure:  Wash hands use protective equipment  Check urine dipstick expiry date.  Explain procedure to patient  Advise patient how to collect a fresh sample, preferably a mid-stream sample if possible  Remove testing strip from container.  Fully submerge test strip in the urine sample.  Remove the test strip & wipe away any excess urine. Hold for approximately two seconds.  Ensure the test strip remains horizontal to avoid cross contamination.  Compare reagent strip against colour reference guide on outside of container  Dispose of urine, used strip, urine container and gloves,  Document results, and inform doctor and patient; take appropriate action as required
  • 60. 60 BEDSORE: What are bed sores? Bed sores are ulcers that occur on areas of the skin that are under pressure from lying in bed, sitting in a wheelchair, and/or wearing a cast for a prolonged period of time. Bed sores can occur when a person is bedridden, unconscious, unable to sense pain, or immobile. Bedsore is also called decubitus ulcer or pressure sore, are area where the skin has broken down because of prolonged underlying pressure. The pressure can come from the weight of the body, splints, cast or wrinkled. If bedsores are not treated quickly it gets larger and become very painful and infected. It is often made worse by continued pressure, heat, moister and lack of cleanliness.
  • 61. 61 Why does a bed sore develop? A bed sore develops when blood supply to the skin is cut off for more than two to three hours. As the skin dies, the bed sore first starts as a red, painful area, which eventually turns purple. Left untreated, the skin can break open and become infected. A bed sore can become deep, extending into the muscle. Once a bed sore develops, it is often very slow to heal. Bed sores often occur in the buttocks area (on the sacrum or iliac crest), or on the heels of the feet. Preventing bed sores: Bed sores can be prevented by inspecting the skin for areas of redness (the first sign of skin breakdown). Other methods of preventing bed sores and preventing progression of existing bed sores include:  frequent turning and repositioning  providing soft padding in wheelchairs and beds to reduce pressure  providing good skin care by keeping the skin clean and dry  Nursing consideration is:  Change position q 2hrly for all bed-ridden patients.  bed sheets should be wrinkle free  keep the patient body clean and dry as possible  Avoid friction when pulling the patient on and off bed pain pen.  Wash patient skin with mild soap and warm water.  To remove urine/ faces.  Give back rub to all bed ridden patient when change the position it will help to increase. Circulation and prevent bedsore.  If sign of bedsore appear gentle rub the area with skin lotion rub in circulatory motion away from affected area, rubbing stimulates the circulation of blood. Treatment for bed sores: Specific treatment of a bed sore is determined by your physician and based on the severity of the condition. Treatment may be more difficult once the skin is broken, and may include: 1. removing pressure on the affected area 2. protecting the wound with medicated gauze or other special dressings 3. keeping the wound clean 4. transplanting healthy skin to the wound area 5. medication (i.e., antibiotics to treat infections
  • 62. 62 CATHETERIZATION: Catheterization of the urinary bladder is the insertion of a hollow tube through the urethra into the bladder for removing urine. It is an aseptic procedure for which sterile equipment is required. Purposes of urinary catheterization: Purposes for urinary catheterization include the following. a. Relieve Urinary Retention. Urine retained in the bladder for any reason causes the patient discomfort and increases the likelihood of infection. A catheter may be inserted to relieve urinary retention when a patient is temporarily unable to void or has difficulty releasing urine from the bladder due to an obstruction of the urethra or at the meatus. b. Obtain a Sterile Urine Specimen from a Female Patient. At one time, this was considered necessary to obtain a urine specimen entirely free of contamination. Most physicians now order a collection of a voided, midstream clean-catch specimen. c. Measure Residual Urine. Catheterization can be done to measure the amount of residual urine in the bladder when voiding only partly empties it. d. Empty the Bladder Before, During, or After Surgery. A catheter may be inserted before or following abdominal surgery, especially if the patient cannot be up and about. Catheterization to keep the bladder empty of urine during a surgical procedure permits the surgeon a better view and palpation of internal tissue, and prevents accidental injury to the bladder. The French scale (Fr.) is used to denote the size of catheters. Each unit is roughly The smaller the number, the smaller the catheter. A larger sized catheter is used for a male because it is stiffer, thus easier to push the distance of the male urethra. Catheters come in several sizes: a. Number 8 Fr. and 10 Fr. are used for children. b. Number 14 Fr. and 16 Fr. are used for female adults. c. Number 20 Fr. and 22 Fr. are usually used for male adults. Types of urinary catheters: The catheters most commonly used are made of plastic. Each type of catheter has a rounded tip to prevent injury to the meatus or the urethra. The Foley catheter is frequently used. It is usually inserted by the nurse. Catheters should be considered disposable and discarded after they have been removed.
  • 63. 63 a. Intermittent Catheter: An intermittent catheter is used to drain the bladder for short periods (5-10 minutes). It may be inserted by the patient. b. Retention/Indwelling Catheter: This type of catheter is placed into the bladder and secured there for a period of time. It is used following surgery, bladder injury, or in bladder infections. It may also be used for an incontinent or nonresponsive patient. 1. It provides continuous temporary or permanent drainage of urine. 2. It is used for gradual decompression of an over distended bladder. 3. It is used for intermittent drainage and irrigation. 4. The most commonly used indwelling catheter is the Foley catheter. A drainage tube and collection device are connected to the catheter. It has a balloon at the distal end, which is inflated with sterile water or saline to prevent the catheter from slipping out of the bladder. It is multi-lumened (having several passages within the catheter). One lumen provides a passage for fluid to inflate the balloon. This passage may be self-sealing or may require a clamp. The second lumen is the passage through which the urine drains. Some indwelling catheters have a third lumen for instilling irrigation fluid. c. Supra Pubic Catheter: This type of catheter is inserted into the bladder through a small incision above the pubic area. It is used for continuous drainage. Preparing for catheterization: A catheter should be used only when absolutely necessary and the catheterization procedure itself should be done only by trained personnel under sterile conditions. Infection is a major risk of urinary catheterization. Gather All Equipment: Disposable indwelling catheter kit. The kit contains the required equipment needed for catheterization and is packaged to ensure that the equipment is sterile. The kit includes the  catheter,  a drape,  a receptacle to receive urine,  materials to clean the area of insertion,  a lubricant,  a specimen container,
  • 64. 64  Sterile gloves.  Lamp.  Urine collection bag.  leg strap or anchoring tape.  Waterproof pad . Explain the Procedure to the Patient: Advise the patient that he may feel a burning sensation and pressure as the catheter is inserted, and that he will feel that he needs to void after the catheter is in place. Do not suggest to the patient that he may feel pain; however, introducing a catheter in swollen or injured tissue may cause discomfort. Provide for Privacy and Adequate Lighting: 1. Close the door or pull the curtain surrounding the patient's bed and position the lamp at the end of the bed. 2. Position the female patient in a dorsal recumbent position with the knees flexed and the feet about two feet apart. Place makintosh under the patient's buttocks. Cover the upper body and each leg. Place the catheter set between the female patient's legs. 3. Position a male patient in a supine position. Under the patient's buttocks. Drape the patient so that only the area around the penis is exposed. Place the catheter set next to the legs of the male patient. INSERTING THE FOLEY CATHETER IN A FEMALE PATIENT: The following procedures are used to insert the Foley catheter in a female patient. a. Wash the area around the meatus with warm soap and water. Rinse and dry. b. Wash your hands. c. Open the sterile catheterization kit, using sterile technique. d. Put on sterile gloves. e. Place the perineal sheet on the patient with the hole over the female genitalia. f. Apply sterile lubricant liberally to the catheter tip. Lubricate at least three inches of the catheter for the female. Leave the lubricated catheter over the cotton balls. g. Place the urine specimen collection container within reach. h. Place the thumb and forefinger of your non-dominant hand between the labia minora, spread and separate upward. The gloved hand that has touched the patient is now contaminated. i. Using the forceps, pick up a cotton ball saturated with antiseptic solution. Use one cotton ball for each stroke. Swab from above the meatus downward toward the rectum. j. Keeping the labia separated, cleanse each side of the meatus in the same downward manner . Do not go back over any previously cleansed area.
  • 65. 65 k. Deposit each cotton ball into the disposal bag. After the last cotton ball is used, deposit the forceps into the bag as well. l. Continue to hold the labium apart after cleansing. Insert the lubricated catheter into the female patient's urinary meatus. m. Angle the catheter upward as it is advanced. If the catheter will not advance, instruct the patient to inhale and exhale slowly. This may relax the sphincter muscle. Do not force the catheter. Cleansing the female meatus Inserting the catheter in a female
  • 66. 66 n. When urine starts to flow, insert the catheter approximately one inch further. Place the cup under the stream of flowing urine to obtain a sterile specimen if required. o. Hold the catheter in place while the urine drains into the collection container. NOTE: If the catheter is inadvertently placed in the patient's vagina, leave it in place temporarily. Insert another catheter properly by repeating the entire procedure using another sterile set; then remove the catheter from the vagina. p. Attach the syringe to the balloon port of the catheter. Inject the water slowly to inflate the balloon. If the water will not inject easily or the patient complains of pain, deflate the balloon completely and advance the catheter further, then re- inflate. q. Remove the syringe. To position the balloon correctly, pull on the catheter gently until you feel resistance. r. Connect the drainage bag to the catheter. Secure the catheter to the inner aspect of the female patient's thigh. s. Attach the urinary drainage bag to the bed, below the level of the bladder but off the floor. Coil any extra tubing on the bed. t. Remove any lubricant or antiseptic on the patient's skin. Remove your gloves, the drapes from around the patient. u. Discard disposable equipment and return reusable equipment to the appropriate area. v. Record the time that the procedure was done and by whom, the patient's reaction to the procedure, all patient teaching done, and the patient's level of understanding. Report observations to the in -charge nurse to include: (1) The amount, color, and clarity of the urine. (2) Any difficulty with the procedure. (3) The presence of blood in the urine. Maintaining an indwelling catheter: When an indwelling or retention catheter is inserted, the nurse is responsible for the daily care required to maintain proper drainage and reduce the possibility of an infection occurring. Always have a confident, reassuring, and professional
  • 67. 67 attitude when maintaining the catheter so that the patient will not feel embarrassed. a. Wash your hands before and after caring for the patient and wear gloves when handling an indwelling catheter. b. Clean the perineal area with soap and water twice daily and after each bowel movement especially around the meatus. Use a separate area of the cloth for each stroke. d. In some cases, an antiseptic may be used for perineal care. Povidone iodine (Betadine) is most commonly recommended. d. Avoid use of lotions or powder in the perineal area. e. Arrange for the patient to take a shower or tub bath when permitted. The collecting container may be hung over the side of the tub. The catheter should be clamped temporarily if the collecting container is higher than the bladder. Removing an indwelling catheter: Eventually, a catheter must be removed because the need for it no longer exist or it is crusting and must be changed. The nurse usually removes the catheter. Assemble all supplies and equipment. 1. 10 cc syringe. 2. Washcloth and towel. 3. Exam gloves. 4. Soap and water. 5. Makintosh a. Identify the patient and explain the procedure to him. Advise him that therewill be a slight burning during removal of the catheter. b. Provide privacy and assist the female patient into a dorsal recumbent position. The male should be in a supine position. Place Chux® under the patient's buttocks and provide proper draping. c. Wash your hands and put on exam gloves. d. Empty the balloon by inserting the barrel of the syringe and withdrawing the amount of fluid used during inflation. e. Pinch off and gently pull on the catheter near the point where it exits from the meatus. f. Clean the perineum or penis with soap and water. Dry the area well. g. Inspect the catheter to be sure no remnants remained in the bladder. If the catheter is not totally intact, report this promptly and save the catheter for further inspection. h. Empty the drainage bag. Measure the amount of urine and record on the intake and output (I&O) sheet. i. Remove the gloves and wash your hands. j. Discard disposable supplies and return reusable supplies and equipment to the appropriate area. k. Record that the catheter was removed, the time and date and by whom. Note the amount, color, and clarity of the urine in the drainage bag. Also
  • 68. 68 document all patient teaching done and the patient's level of understanding. l. After removal of the catheter, assess the patient for 24 hours for patterns of urinary elimination. Note the time and amount of the first voided urine. Report any of the following: 1. Inability to void within 8 to 10 hours. 2. Frequency, burning, dribbling, or hesitation in starting the stream of urine. 3. Cloudiness or any other unusual color or characteristic of the urine. 4. . Provide a level of fluids similar to the intake when the catheter was in place. 5. Record that the catheter was removed, the date and time, and by whom.
  • 69. 69
  • 70. 70 DRAB in First Aid DANGER RESPONSE SHOUT FOR HELP YES AIRWAYBREATHING NORMALLY? NO CALL AMBULANCE 30 CHEST COMPRESSIONS 2 BREATHS 30:2 RECOVERY POSITION CALL FOR AMBULANCE