SlideShare a Scribd company logo
1 of 68
The Battle of Hamel
4th
July 1918
by
John Earnshaw
To - Huddersfield Military History Society
19th
November 2014
THE AGGRESSIVE GERMAN SPRING 1918
OFFENSIVE, CREATED A BULGE IN THE
BRITISH LINE THAT ENCOMPASSED THE
FRENCH VILLAGE OF HAMEL, NEAR
AMIENS.
ON 4TH
APRIL AS A RESULT, ALLIED TROOPS
WERE EXPOSED TO GERMAN OBSERVERS
AND ENFILADING FIRE.
The Aggressive German Spring
1918 Offensive
Position at April 1918
Hindenburg Line 1918
IN JUNE 1918, THE ALLIES MADE PLANS TO
RETAKE HAMEL, A MOVE THAT WOULD
STRENGTHEN THEIR POSITION AND
IMPROVE THE ARTILLERY SITUATION
THAT ATTACK WOULD ALSO SHOWCASE
THE AUSTRALIAN CORPS AND THE
INNOVATIVE TACTICS OF ITS COMMANDER,
LIEUTENANT GENERAL JOHN MONASH
Plans to re-take Hamel
June 1918
APPALLED AT THE HORRIFIC CASUALTIES AND
'GHASTLY INEFFICIENCY' OF WORLD WAR I COMBAT,
MONASH, A 53-YEAR-OLD FORMER ENGINEER FROM
MELBOURNE, ADOPTED THE VIEW THAT THE
INFANTRY'S ROLE WAS 'NOT TO EXPEND ITSELF UPON
HEROIC PHYSICAL EFFORT,' BUT 'TO ADVANCE UNDER
THE MAXIMUM POSSIBLE ARRAY OF MECHANICAL
RESOURCES, IN THE FORM OF GUNS, MACHINE GUNS,
TANKS, MORTARS, AND AEROPLANES…TO THE
APPOINTED GOAL.'
An advocate of the use of
combined arms operations –
tanks!
Lieutenant General
John Monash
The use of combined arms
operations and tanks!
British Mark V Tank – 1917/18
The designation "Mark V" was switched to an improved
version of the Mark IV, equipped with the new systems. The
original design of the Mark IV was to be a large
improvement on the Mark III but had been scaled back to
be a mild improvement because of technical delays.
Manfred von Richthofen
The Red Baron
The Red Baron
The Red Baron
Manfred von Richthofen was killed on April 21st
1918.
During combat, a single .303 bullet hit Richthofen. He
managed to land his Fokker Dr 1 safely but in Allied
held territory.
The bullet had done fatal damage to his heart and
lungs.
The End of The Red Baron
He died soon after Australian troops found him in
his aircraft. He was buried with full military honours
in the cemetery of the villages of Bertangles near
Ameins
American Troops Included
Monash had a reputation for devising unusual tactics
and planning operations in precise detail. The Hamel
action was to be no exception.
On June 21, he submitted his meticulously worked
out proposal for a dawn attack by elements of the
Australian Corps' 4th, 6th, 7th and 11th brigades
under the 4th Division's Maj. Gen. Ewan Sinclair-
McLaglan, to his superior, General Sir Henry
Rawlinson, commander of the British Fourth Army.
The operation also called for the use of some newly
arrived American troops.
Monash Requests 2,000 Men
Rawlinson approved it forthwith. He agreed that the
Americans — though not experienced — could boost
Monash's numbers and in carrying out his battle
plan, they could gain valuable experience alongside
the more seasoned Australian infantry, or 'Diggers.'
Monash immediately requested about 2,000 men.
Americans Welcome!
The American companies, each numbering about
250 troops, were welcome.
The Australian 42nd Battalion, 1,027 strong when it
landed in France in November 1916, had only 433
men in June 1918.
The 43rd, with 41 officers and 575 troops,
incorporated a platoon from the 131st Infantry's E
Company in each of its four companies.
Mutual Respect
Mutual respect quickly grew.
The Americans' commander had exhorted his troops,
saying, 'you're going into action with some mighty
celebrated troops guaranteed to win and you've got
to get up to their level and stay with them.'
The Yanks, in turn, soon impressed the Diggers with
their modesty and keenness to learn, as they
practiced with Lewis light machine guns and
grenades and began operating the Mark V tanks.
Billy Hughes Addressing Troops
On July 2, two days before the counteroffensive was
scheduled to begin, Monash arranged for the popular
Australian prime minister, Billy Hughes, to address
some troops from each brigade, taking care that
Hughes' visit would not disrupt preparations for the
coming show!
2nd July 1918
Then Monash's planning had hit a serious snag!
During a visit to the U.S. II Corps headquarters, the
AEF commander, General John J. Pershing, learned
of the plan to commit American troops to the assault
on Hamel and advised General Read that they should
not participate.
The next day, he telephoned with 'further and
positive instructions…that our troops should be
withdrawn!'
4 p.m. on the day before the Battle
Monash received an order from Rawlinson's
headquarters calling for the withdrawal of all
Americans. By 5 p.m., Monash had confronted his
commander and insisted that the remaining four
companies were essential.
Pershing's order came too late, he said, and unless
Rawlinson absolutely insisted that Pershing's order
to withdraw all Americans by 6:30 p.m. be carried
out, he intended to proceed as planned — using the
Americans. Monash's demand threatened to put
Rawlinson at loggerheads with the American
command. There could be serious consequences.
Rawlinson’s Concerns
'You don't realize what it means,' Rawlinson said.
'Do you want me to run the risk of being sent back to
England? Do you mean it is worth that?'
'Yes, I do,' replied Monash. 'It is more important to
keep the confidence of the Americans and
Australians in each other than to preserve even an
Army commander.'
Rawlinson’s Change of Heart
Rawlinson, knowing that Monash was a talented
officer, decided to back his corps commander if
Marshal Sir Douglas Haig did not countermand the
decision by 7 p.m. As it happened, Haig called just
before 7 p.m. and he turned out to be very helpful.
Citing the importance of the assault, he resolved the
matter, saying, 'The attack must be launched as
prepared, even if a few American detachments
cannot be got out before zero hour.'
Early to Bed
Monash, who had planned the opening action to
occur before daylight, went to bed early. In the early
morning hours of 4th July, his artillery commander,
Brigadier W.A. Coxen, saw him pacing the drive.
When the opening barrage thundered out, Monash
looked toward the front, then turned to his office.
Monash's plan called for capturing the town of
Hamel, the woods near Hamel and Vaire, and the
spur beyond, entailing an advance on a six-kilometer
front to a depth of about three kilometers in the
center, tapering to one kilometer in the south.
Attack on Hamel – by Henry
Fullwood
Strategy
The essence of Monash's combined operations
strategy, was to infiltrate his men and equipment
close enough under cover of darkness to use heavy
weaponry against the targeted areas, then employ
tanks as a cover for the advancing infantry. If the
artillery did its job, the infantry's task would devolve
into a mop-up operation.
Monash's plan also called for extensive use of
reconnaissance aircraft so that he could direct troop
movements quickly and effectively.
Top Intellegence Estimates Correct!
Monash's top intelligence officer had rightly
estimated Hamel's defenders at about 3,000 troops.
He assessed them as being for the most part of
indifferent quality and located in poor defensive
positions.
There were some exceptions, however, including
strongpoints at an installation called Pear Trench, in
the northern sector of the targeted area around
Hamel, and scattered areas where he expected
serious resistance in parts of the woods and in the
village.
Map of Hamel and The Somme
Hot Meal the Night Before!
In the trenches, the 42nd Battalion enjoyed a hot
meal at about 11 p.m. as they listened to 144 Allied
aircraft dropping more than 1,100 bombs on Hamel
— an initial softening-up operation.
Meanwhile, cloaked by darkness and the noisy
uproar of the aircraft, the tanks began their three-
mile move from sheltered positions in woods and
orchards to their attack positions.
By 3 a.m., the troops — who hailed from Illinois and
every province of Australia — had been issued rum
and were in position, ready to attack.
Waiting for the Orders to Attack!
Let the Battle Commence!
Harrassing artillery fire kicked in at 3:02 a.m. For
several weeks previously, Monash had ordered that
high explosives, smoke bombs and poison gas shells
be fired toward the target at about that time, a tactic
intended to condition the defenders to regularly
expect a barrage — and make them think that the
smoke masked the presence of gas.
This time, however, Monash purposely omitted the
gas, making it possible for his troops to move
forward safely under cover of smoke and noise.
Early in the Morning!
At 3:10 a.m., 313 heavy guns and 326 field artillery
pieces, joined by mortars and more than 100 Vickers
machine guns, produced a barrage worthy of the
4th of July, while the tanks gunned their engines
for the half-mile dash. A mix of 10 percent smoke, 40
percent high-explosive and 50 percent shrapnel
shells fell 200 yards ahead of the infantry, while
larger shells landed 400 yards farther ahead.
The infantrymen rose and moved forward. In four
minutes, the artillery adjusted its range 100 yards
farther ahead, and the infantry advanced in the wake
of the covering fire.
Things Not Always Went to Plan!
Captain Carroll M. Gale's C Company, accompanying
the Australian 42nd Battalion, followed the barrage,
advancing 100 yards every three minutes. His troops
came within 75 yards of the exploding shells without
sustaining any casualties, but other units were not so
fortunate. One squad from E Company and an
American section attached to the 15th Battalion lost
12 men killed and 30 wounded because shells fell
short of their target. The 15th then hung back while
survivors of Lieutenant R. Canaway's 43rd Battalion
moved between the barrage and those shells that
were falling short
American & Australian Troops Dug In
Costly Moves!
Advancing into the barrage proved costly to some
other Americans as well. After their officers became
casualties, three platoons attached to the 13th
Battalion were guided to safer ground by Australian
NCOs.
When Sergeant F.J. Darke saw an American officer
wounded by the shelling, he took over his platoon
and turned it back from the barrage and Corporal
M.J. Roach was mortally wounded while extricating
another U.S. platoon from danger.
The 15th
Battalion
One such team, from the 15th Battalion, silenced an
enemy machine-gun post. Then the team's'second
member,' Private Harry Dalziel from Irvinebank,
Queensland, spotted another German machine-gun
nest as it opened fire. Dashing toward it, revolver in
hand, he killed or captured the gun's crew, allowing
the Australians in front of it to proceed with their
advance. Although the tip of Dalziel's trigger finger
had been shot off, he ignored an order to retire and
continued to serve his gunner until Pear Trench was
secured.
Private Harry Dalziel VC
When again ordered to report to the aid post, Dalziel
instead elected to bring up ammunition. While he was
doing so, a bullet smashed his skull. Miraculously, he did
not die. He was transferred to Britain for treatment and
later received the Victoria Cross from King George V.
Kidney Trench
During another firefight, this time in the woods,
German machine guns in the so-called Kidney
Trench killed the 16th Battalion's company
commander, his sergeant major and one of its Lewis
gunners, stalling the battalion's advance. From the
flank, Lance Cpl. Thomas Leslie 'Jack' Axford, a
former brewery worker from Kalgoorlie who
already had won the Military Medal, grenaded
and bayoneted 10 Germans, captured six of them,
tossed their machine guns out of their positions,
called the stalled platoon to come up and then
rejoined his own unit.
Lance Cpl. Thomas Leslie 'Jack'
Axford VC
Dugouts connected to Kidney Trench yielded 47 more
prisoners. Axford was later awarded the
Victoria Cross for his 'great initiative and magnificent
courage.'
Battle of Bullecourt Failure!
Six minutes after the operation was launched, the
tanks arrived, in accordance with the careful plan of
Monash and his tank commander, Maj. Gen. H.J.
Elles.
Unsupported by heavy artillery and bogged down in
mud and barbed wire, the tanks — intended to
provide cover for the infantry — had failed the
Aussies on April 11, 1917, at the Battle of Bullecourt.
Change of Plan after Bullecourt
There, at a village in the center of the Hindenberg
line, 10,000 Australians had been killed. With that
failure in mind, Monash revised the scenario for
Hamel and added some public relations.
Using prebattle demonstrations of tank operations,
intense rehearsals, joy rides and long persuasive
discussions, Monash generated enough of a rapport
between infantry and tank crews that many of the
British tanks sported Australian battalion colors and
names
East-West Topographical Section
Innovation in Tank Strategy at Hamel
The single most important innovation in tank
strategy at Hamel lay in placing the tanks under the
control of infantry commanders who could order
them to follow closely on the heels of their troops
and eliminate enemy strongpoints.
Tank commanders also had worries. They protested
that advancing so close behind the artillery barrage
could expose their 8-foot-8-inch-high vehicles to
overhead hits from friendly fire, but they accepted
Monash's order, which overruled their objections
Soldiers and Tanks Join Together
Took and Held the Final Objective!
With combined air, artillery and tank attacks, the
42nd Battalion's assault in the northern flank had
met little resistance. Meanwhile, to its south, the 6th
Brigade's 21st and 23rd battalions smoothly followed
the barrage and the tanks.
The southernmost sector was more difficult — the
25th Battalion suffered 93 casualties. Two platoons
were cut down to only eight troops, but Sergeant
C.G. Ham led them to take and hold the final
objective, for which he was later awarded the
Distinguished Conduct Medal (DCM).
C. G HAM’S Citation
Sgt. C. G. HAM - D.C.M
New Strategy!
The new strategy yielded many prisoners, starting
with the Germans' communication trench in Vaire
Wood. When one Digger took a prisoner using the
fractured French comment, 'Finis la guerre,' the
German stunned him by laughingly replying, 'Yes,
my — — oath' — a phrase that demonstrated how
well he had learned Australian English while
working in the West Australian gold fields before the
war.
Capture of Hamel
4th
July 1918
The Tanks
When the advance resumed, the tanks came fully
into their own. Following their commander's dictum,
'It is the primary duty of the tanks to save casualties
to the Australian infantry,' they hugged the barrage,
destroying strong points with machine guns, canister
fire or their treads.
Hamel 0n 5th
July 1918
Hamel & British Tank on 5th
July 1918
Communications
Success signals flowed to the rear by pigeon, lights,
rockets, telephone and radio. Signalers maintained
communications throughout the battle, while special
squads confused the enemy by contradicting any
German flare with the opposite color.
Air Power!
Monash's plan also added some new roles to the
AFC's repertory.
The two-seaters of No. 9 Squadron, Royal Air Force
(RAF), delivered nearly 120,000 rounds of small-
arms ammunition, dropping them by parachute from
boxes fitted under the wings to marked sites along
the line.
That innovation — inspired by a captured German
document — had been developed by Captain
Lawrence J. Wackett and Sergeant W. Nicholson and
his mechanics at No. 3 Squadron, AFC
Air Superiority!
Other aircraft strafed and bombed German
positions, and except for a half hour in the late
morning, the Allies maintained air superiority with
the loss of only two planes.
Lieutenants A.E. Grigson and H.B. James of No. 3
Squadron AFC shot down one enemy fighter that
tried to interfere with their work and drove another
down out of control.
Lieutenants D.F. Dimsey and F.J. Mart shot down a
Pfalz D.IIIa that was attacking another RE-8.
Willy Coppens
Willy Omer Francois Jean Coppens
6th July 1892 – 21st December 1986
Belgium's leading fighter ace and the champion of
World War I.
Willy Coppens – Awards & Medals
 Officer of the Order of Leopold with Palm
 Commander of the Order of the Crown (Belgium)
 Commander of the Order of Leopold II with swords (Belgium)
 Croix de Guerre 1914-1918 with 27 Palms and 13 Bronze Lions
(Belgium)
 Military Cross 2nd class (Belgium)
 Croix de Guerre 1914-1918 with 2 Palms (France)
 Commander of the Légion d'honneur (France)
 Distinguished Service Order (United Kingdom)
 Military Cross (United Kingdom)
 Officer of the Order of the White Eagle with Swords (Serbia)
 Grand Officer of the Order of Ouissam Alaouite (Morocco)
 Order of Nichan-Iftikhar (Tunisia)
 Order of the Black Star (Dahomey)
Order of Isabella the Catholic (Spain)
Officer of the Order of St. Maurice
and St. Lazarus (Italy)
Knight of the Order of Virtuti
Militari (Poland)
Silver Medal for Military Valour
(Italy)
War Cross with Golden Cross in
Palm (Portugal)
Croce di Guerra 1914-1918 (Italy)
War Cross 1914-1918 (Poland)[citation
needed]
Yser Medal
Fire Cross 1914-1918
1914-1918 Commemorative War
Medal
Inter-Allied Victory Medal 1914-1918
Centenary of National Independence
Commemorative Medal
Result
Taking and securing Hamel cost the Allies a total of 1,400
casualties, including 39 Americans killed and 196 wounded.
The Germans lost more than 2,000 men, including 43
officers and 1,562 enlisted men captured, together with two
anti-tank machine guns, a new .53-caliber anti-tank rifle,
32 trench mortars and 177 machine guns.
In addition, the Allies recovered 73,000 rounds of British
ammunition and boxes of grenades lost when the Germans
had first taken Hamel in April. On top of that, the Aussies
of the 21st Battalion enjoyed coffee that was mistakenly
dropped into their lines by a German airplane.
Americans Greatful
The Americans were grateful for the experience. Captain
Gale spoke for many of them when he said that 'more real
good was done…by this small operation with the
Australians than could have been accomplished in months
of training behind the lines.'
As for Pershing, in his memoir My Experiences in the
World War, he described the American participation at
Hamel as 'somewhat of a surprise,' and though the behavior
of our troops was splendid….Its [the battle's] immediate
effect was to cause me to make the instructions so positive
that nothing of the kind could occur again!'
Awards
Later, at Moulliens-au-Bois on 12th August 1918, Pershing
watched King George V award the DCM to Corporal Tom
Pope and two other doughboys for their valour at Hamel,
while four others got the Military Cross and 11 received the
Military Medal.
Pershing Presenting Awards
Later still, in Luxembourg on 22nd
April 1919,
Pershing himself would present Pope with the
Medal of Honour.
Armistice Day – 11th
November
After the War ended, my grandfather returned to
Bath, England where he married!
On 11th
day of the 11th
month in 1923, his wife gave
birth to their first child – a daughter (my mother) -
and she was called ‘Poppy’
My Grandfather and his two sisters
Hamel Today
You can understand why they called her
“Poppy”, when you see the picture of Hamel
below!
Monuments at Le Hamel
Further reading

More Related Content

What's hot

W. e. b. du bois and washington
W. e. b. du bois and washingtonW. e. b. du bois and washington
W. e. b. du bois and washingtonDebra Cohn
 
Golden gate bridge, San Francisco
Golden gate bridge, San Francisco Golden gate bridge, San Francisco
Golden gate bridge, San Francisco Ankur Saxena
 
Unit 12 Powerpoint The 90s To Present Day
Unit 12 Powerpoint The 90s To Present DayUnit 12 Powerpoint The 90s To Present Day
Unit 12 Powerpoint The 90s To Present DayCrosswinds High School
 
Historic Black and White Photos
Historic Black and White PhotosHistoric Black and White Photos
Historic Black and White Photosguimera
 
The Gulf War
The Gulf WarThe Gulf War
The Gulf WarBen Dover
 
Modelling of Cable stayed bridge by AIT
Modelling of Cable stayed bridge by AITModelling of Cable stayed bridge by AIT
Modelling of Cable stayed bridge by AITRahul Saraswat
 
Vietnam -> Bakke
Vietnam -> BakkeVietnam -> Bakke
Vietnam -> Bakkewtidwell
 
Kvantovyi 774 -elektrogenerator-instruktsia-25-3-14
Kvantovyi 774 -elektrogenerator-instruktsia-25-3-14Kvantovyi 774 -elektrogenerator-instruktsia-25-3-14
Kvantovyi 774 -elektrogenerator-instruktsia-25-3-1421bronko
 
Case study bridge construction upto pier and road construction
Case study   bridge construction upto pier and road constructionCase study   bridge construction upto pier and road construction
Case study bridge construction upto pier and road constructionSatish Kambaliya
 
PPT Pelaksana Lapangan Pekerjaan Pemasangan Jembatan Rangka Baja_Ibnu.pptx_16...
PPT Pelaksana Lapangan Pekerjaan Pemasangan Jembatan Rangka Baja_Ibnu.pptx_16...PPT Pelaksana Lapangan Pekerjaan Pemasangan Jembatan Rangka Baja_Ibnu.pptx_16...
PPT Pelaksana Lapangan Pekerjaan Pemasangan Jembatan Rangka Baja_Ibnu.pptx_16...Taufikkurrahman Upik Teler
 
Bar bending works
Bar bending worksBar bending works
Bar bending worksMani Das
 
Martin Luther King
Martin Luther KingMartin Luther King
Martin Luther Kingomar_mukthar
 
The Vietnam War
The Vietnam WarThe Vietnam War
The Vietnam WarMiss Seha
 
Muh. Azhar Syukur_SKK Gedung.pptx
Muh. Azhar Syukur_SKK Gedung.pptxMuh. Azhar Syukur_SKK Gedung.pptx
Muh. Azhar Syukur_SKK Gedung.pptxMuhammadAyyub36
 
Italian Campaign: Canada and the Battle of Ortona
Italian Campaign: Canada and the Battle of OrtonaItalian Campaign: Canada and the Battle of Ortona
Italian Campaign: Canada and the Battle of Ortonajeffmarshall
 
Vietnam War - reasons for US involvement
Vietnam War - reasons for US involvementVietnam War - reasons for US involvement
Vietnam War - reasons for US involvementmrmarr
 
Tacoma Narrows Bridge Presentation
Tacoma Narrows Bridge PresentationTacoma Narrows Bridge Presentation
Tacoma Narrows Bridge PresentationTaylor Leszczynski
 

What's hot (20)

W. e. b. du bois and washington
W. e. b. du bois and washingtonW. e. b. du bois and washington
W. e. b. du bois and washington
 
golden gate bridge
golden gate bridgegolden gate bridge
golden gate bridge
 
Golden gate bridge
Golden gate bridgeGolden gate bridge
Golden gate bridge
 
Golden gate bridge, San Francisco
Golden gate bridge, San Francisco Golden gate bridge, San Francisco
Golden gate bridge, San Francisco
 
Unit 12 Powerpoint The 90s To Present Day
Unit 12 Powerpoint The 90s To Present DayUnit 12 Powerpoint The 90s To Present Day
Unit 12 Powerpoint The 90s To Present Day
 
Historic Black and White Photos
Historic Black and White PhotosHistoric Black and White Photos
Historic Black and White Photos
 
1950s Civil Rights Movement
1950s Civil Rights Movement1950s Civil Rights Movement
1950s Civil Rights Movement
 
The Gulf War
The Gulf WarThe Gulf War
The Gulf War
 
Modelling of Cable stayed bridge by AIT
Modelling of Cable stayed bridge by AITModelling of Cable stayed bridge by AIT
Modelling of Cable stayed bridge by AIT
 
Vietnam -> Bakke
Vietnam -> BakkeVietnam -> Bakke
Vietnam -> Bakke
 
Kvantovyi 774 -elektrogenerator-instruktsia-25-3-14
Kvantovyi 774 -elektrogenerator-instruktsia-25-3-14Kvantovyi 774 -elektrogenerator-instruktsia-25-3-14
Kvantovyi 774 -elektrogenerator-instruktsia-25-3-14
 
Case study bridge construction upto pier and road construction
Case study   bridge construction upto pier and road constructionCase study   bridge construction upto pier and road construction
Case study bridge construction upto pier and road construction
 
PPT Pelaksana Lapangan Pekerjaan Pemasangan Jembatan Rangka Baja_Ibnu.pptx_16...
PPT Pelaksana Lapangan Pekerjaan Pemasangan Jembatan Rangka Baja_Ibnu.pptx_16...PPT Pelaksana Lapangan Pekerjaan Pemasangan Jembatan Rangka Baja_Ibnu.pptx_16...
PPT Pelaksana Lapangan Pekerjaan Pemasangan Jembatan Rangka Baja_Ibnu.pptx_16...
 
Bar bending works
Bar bending worksBar bending works
Bar bending works
 
Martin Luther King
Martin Luther KingMartin Luther King
Martin Luther King
 
The Vietnam War
The Vietnam WarThe Vietnam War
The Vietnam War
 
Muh. Azhar Syukur_SKK Gedung.pptx
Muh. Azhar Syukur_SKK Gedung.pptxMuh. Azhar Syukur_SKK Gedung.pptx
Muh. Azhar Syukur_SKK Gedung.pptx
 
Italian Campaign: Canada and the Battle of Ortona
Italian Campaign: Canada and the Battle of OrtonaItalian Campaign: Canada and the Battle of Ortona
Italian Campaign: Canada and the Battle of Ortona
 
Vietnam War - reasons for US involvement
Vietnam War - reasons for US involvementVietnam War - reasons for US involvement
Vietnam War - reasons for US involvement
 
Tacoma Narrows Bridge Presentation
Tacoma Narrows Bridge PresentationTacoma Narrows Bridge Presentation
Tacoma Narrows Bridge Presentation
 

Similar to The Battle of Hamel - 4th July 1918 - Nov 14

The Battle of Mount Sorrel
The Battle of Mount SorrelThe Battle of Mount Sorrel
The Battle of Mount Sorrelguestefd4395c
 
General George S. Patton
General George S. PattonGeneral George S. Patton
General George S. PattonMelanie Smith
 
Layman's guide to The Battle of the Somme
Layman's guide to The Battle of the SommeLayman's guide to The Battle of the Somme
Layman's guide to The Battle of the SommeScott Addington
 
Was Pearl Harbour an Unprecedented Surprise Attack
Was Pearl Harbour an Unprecedented Surprise Attack Was Pearl Harbour an Unprecedented Surprise Attack
Was Pearl Harbour an Unprecedented Surprise Attack Peter Hammond
 
9.2 major events of wwii [powerpoint] 1944 45
9.2 major events of wwii [powerpoint] 1944 459.2 major events of wwii [powerpoint] 1944 45
9.2 major events of wwii [powerpoint] 1944 45William Hogan
 
America at War (Part II)
America at War (Part II)America at War (Part II)
America at War (Part II)afrancksjrcs
 
America at War, 1941 1945 (Part II) PowerPoint
America at War, 1941 1945 (Part II) PowerPointAmerica at War, 1941 1945 (Part II) PowerPoint
America at War, 1941 1945 (Part II) PowerPointafrancksjrcs
 
D Day Invasion
D Day InvasionD Day Invasion
D Day InvasionBen Dover
 
D Day Invasion
D  Day  InvasionD  Day  Invasion
D Day InvasionBen Dover
 
D Day Invasion
D Day InvasionD Day Invasion
D Day InvasionBen Dover
 
Paul Revere’s Ride
Paul Revere’s RidePaul Revere’s Ride
Paul Revere’s RideKristi Beria
 
Family Feud 3 Cousins of WWI- all grandsons of
Family Feud 3 Cousins of WWI- all grandsons of Family Feud 3 Cousins of WWI- all grandsons of
Family Feud 3 Cousins of WWI- all grandsons of ChereCheek752
 

Similar to The Battle of Hamel - 4th July 1918 - Nov 14 (20)

The Royal Regina Rifles D-Day
The Royal Regina Rifles D-DayThe Royal Regina Rifles D-Day
The Royal Regina Rifles D-Day
 
The Royal Regina Rifles #2
The Royal Regina Rifles #2The Royal Regina Rifles #2
The Royal Regina Rifles #2
 
The Battle of Mount Sorrel
The Battle of Mount SorrelThe Battle of Mount Sorrel
The Battle of Mount Sorrel
 
General George S. Patton
General George S. PattonGeneral George S. Patton
General George S. Patton
 
Layman's guide to The Battle of the Somme
Layman's guide to The Battle of the SommeLayman's guide to The Battle of the Somme
Layman's guide to The Battle of the Somme
 
Was Pearl Harbour an Unprecedented Surprise Attack
Was Pearl Harbour an Unprecedented Surprise Attack Was Pearl Harbour an Unprecedented Surprise Attack
Was Pearl Harbour an Unprecedented Surprise Attack
 
19.2 b
19.2 b19.2 b
19.2 b
 
19.2 b
19.2 b19.2 b
19.2 b
 
9.2 major events of wwii [powerpoint] 1944 45
9.2 major events of wwii [powerpoint] 1944 459.2 major events of wwii [powerpoint] 1944 45
9.2 major events of wwii [powerpoint] 1944 45
 
D Day
D DayD Day
D Day
 
Ww2
Ww2Ww2
Ww2
 
America at War (Part II)
America at War (Part II)America at War (Part II)
America at War (Part II)
 
America at War, 1941 1945 (Part II) PowerPoint
America at War, 1941 1945 (Part II) PowerPointAmerica at War, 1941 1945 (Part II) PowerPoint
America at War, 1941 1945 (Part II) PowerPoint
 
D Day Invasion
D Day InvasionD Day Invasion
D Day Invasion
 
D Day Invasion
D  Day  InvasionD  Day  Invasion
D Day Invasion
 
D Day Invasion
D Day InvasionD Day Invasion
D Day Invasion
 
14 part 3
14 part 314 part 3
14 part 3
 
Paul Revere’s Ride
Paul Revere’s RidePaul Revere’s Ride
Paul Revere’s Ride
 
Family Feud 3 Cousins of WWI- all grandsons of
Family Feud 3 Cousins of WWI- all grandsons of Family Feud 3 Cousins of WWI- all grandsons of
Family Feud 3 Cousins of WWI- all grandsons of
 
V4n1 myitkyina part_1
V4n1 myitkyina part_1V4n1 myitkyina part_1
V4n1 myitkyina part_1
 

The Battle of Hamel - 4th July 1918 - Nov 14

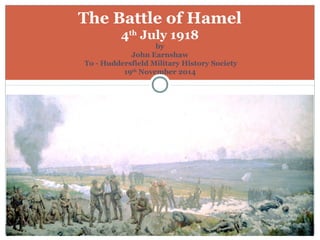
  • 1. The Battle of Hamel 4th July 1918 by John Earnshaw To - Huddersfield Military History Society 19th November 2014
  • 2. THE AGGRESSIVE GERMAN SPRING 1918 OFFENSIVE, CREATED A BULGE IN THE BRITISH LINE THAT ENCOMPASSED THE FRENCH VILLAGE OF HAMEL, NEAR AMIENS. ON 4TH APRIL AS A RESULT, ALLIED TROOPS WERE EXPOSED TO GERMAN OBSERVERS AND ENFILADING FIRE. The Aggressive German Spring 1918 Offensive
  • 5. IN JUNE 1918, THE ALLIES MADE PLANS TO RETAKE HAMEL, A MOVE THAT WOULD STRENGTHEN THEIR POSITION AND IMPROVE THE ARTILLERY SITUATION THAT ATTACK WOULD ALSO SHOWCASE THE AUSTRALIAN CORPS AND THE INNOVATIVE TACTICS OF ITS COMMANDER, LIEUTENANT GENERAL JOHN MONASH Plans to re-take Hamel June 1918
  • 6. APPALLED AT THE HORRIFIC CASUALTIES AND 'GHASTLY INEFFICIENCY' OF WORLD WAR I COMBAT, MONASH, A 53-YEAR-OLD FORMER ENGINEER FROM MELBOURNE, ADOPTED THE VIEW THAT THE INFANTRY'S ROLE WAS 'NOT TO EXPEND ITSELF UPON HEROIC PHYSICAL EFFORT,' BUT 'TO ADVANCE UNDER THE MAXIMUM POSSIBLE ARRAY OF MECHANICAL RESOURCES, IN THE FORM OF GUNS, MACHINE GUNS, TANKS, MORTARS, AND AEROPLANES…TO THE APPOINTED GOAL.' An advocate of the use of combined arms operations – tanks!
  • 8. The use of combined arms operations and tanks!
  • 9. British Mark V Tank – 1917/18 The designation "Mark V" was switched to an improved version of the Mark IV, equipped with the new systems. The original design of the Mark IV was to be a large improvement on the Mark III but had been scaled back to be a mild improvement because of technical delays.
  • 12. The Red Baron Manfred von Richthofen was killed on April 21st 1918. During combat, a single .303 bullet hit Richthofen. He managed to land his Fokker Dr 1 safely but in Allied held territory. The bullet had done fatal damage to his heart and lungs.
  • 13. The End of The Red Baron He died soon after Australian troops found him in his aircraft. He was buried with full military honours in the cemetery of the villages of Bertangles near Ameins
  • 14. American Troops Included Monash had a reputation for devising unusual tactics and planning operations in precise detail. The Hamel action was to be no exception. On June 21, he submitted his meticulously worked out proposal for a dawn attack by elements of the Australian Corps' 4th, 6th, 7th and 11th brigades under the 4th Division's Maj. Gen. Ewan Sinclair- McLaglan, to his superior, General Sir Henry Rawlinson, commander of the British Fourth Army. The operation also called for the use of some newly arrived American troops.
  • 15. Monash Requests 2,000 Men Rawlinson approved it forthwith. He agreed that the Americans — though not experienced — could boost Monash's numbers and in carrying out his battle plan, they could gain valuable experience alongside the more seasoned Australian infantry, or 'Diggers.' Monash immediately requested about 2,000 men.
  • 16. Americans Welcome! The American companies, each numbering about 250 troops, were welcome. The Australian 42nd Battalion, 1,027 strong when it landed in France in November 1916, had only 433 men in June 1918. The 43rd, with 41 officers and 575 troops, incorporated a platoon from the 131st Infantry's E Company in each of its four companies.
  • 17. Mutual Respect Mutual respect quickly grew. The Americans' commander had exhorted his troops, saying, 'you're going into action with some mighty celebrated troops guaranteed to win and you've got to get up to their level and stay with them.' The Yanks, in turn, soon impressed the Diggers with their modesty and keenness to learn, as they practiced with Lewis light machine guns and grenades and began operating the Mark V tanks.
  • 18. Billy Hughes Addressing Troops On July 2, two days before the counteroffensive was scheduled to begin, Monash arranged for the popular Australian prime minister, Billy Hughes, to address some troops from each brigade, taking care that Hughes' visit would not disrupt preparations for the coming show!
  • 19. 2nd July 1918 Then Monash's planning had hit a serious snag! During a visit to the U.S. II Corps headquarters, the AEF commander, General John J. Pershing, learned of the plan to commit American troops to the assault on Hamel and advised General Read that they should not participate. The next day, he telephoned with 'further and positive instructions…that our troops should be withdrawn!'
  • 20. 4 p.m. on the day before the Battle Monash received an order from Rawlinson's headquarters calling for the withdrawal of all Americans. By 5 p.m., Monash had confronted his commander and insisted that the remaining four companies were essential. Pershing's order came too late, he said, and unless Rawlinson absolutely insisted that Pershing's order to withdraw all Americans by 6:30 p.m. be carried out, he intended to proceed as planned — using the Americans. Monash's demand threatened to put Rawlinson at loggerheads with the American command. There could be serious consequences.
  • 21. Rawlinson’s Concerns 'You don't realize what it means,' Rawlinson said. 'Do you want me to run the risk of being sent back to England? Do you mean it is worth that?' 'Yes, I do,' replied Monash. 'It is more important to keep the confidence of the Americans and Australians in each other than to preserve even an Army commander.'
  • 22. Rawlinson’s Change of Heart Rawlinson, knowing that Monash was a talented officer, decided to back his corps commander if Marshal Sir Douglas Haig did not countermand the decision by 7 p.m. As it happened, Haig called just before 7 p.m. and he turned out to be very helpful. Citing the importance of the assault, he resolved the matter, saying, 'The attack must be launched as prepared, even if a few American detachments cannot be got out before zero hour.'
  • 23. Early to Bed Monash, who had planned the opening action to occur before daylight, went to bed early. In the early morning hours of 4th July, his artillery commander, Brigadier W.A. Coxen, saw him pacing the drive. When the opening barrage thundered out, Monash looked toward the front, then turned to his office. Monash's plan called for capturing the town of Hamel, the woods near Hamel and Vaire, and the spur beyond, entailing an advance on a six-kilometer front to a depth of about three kilometers in the center, tapering to one kilometer in the south.
  • 24. Attack on Hamel – by Henry Fullwood
  • 25. Strategy The essence of Monash's combined operations strategy, was to infiltrate his men and equipment close enough under cover of darkness to use heavy weaponry against the targeted areas, then employ tanks as a cover for the advancing infantry. If the artillery did its job, the infantry's task would devolve into a mop-up operation. Monash's plan also called for extensive use of reconnaissance aircraft so that he could direct troop movements quickly and effectively.
  • 26. Top Intellegence Estimates Correct! Monash's top intelligence officer had rightly estimated Hamel's defenders at about 3,000 troops. He assessed them as being for the most part of indifferent quality and located in poor defensive positions. There were some exceptions, however, including strongpoints at an installation called Pear Trench, in the northern sector of the targeted area around Hamel, and scattered areas where he expected serious resistance in parts of the woods and in the village.
  • 27. Map of Hamel and The Somme
  • 28. Hot Meal the Night Before! In the trenches, the 42nd Battalion enjoyed a hot meal at about 11 p.m. as they listened to 144 Allied aircraft dropping more than 1,100 bombs on Hamel — an initial softening-up operation. Meanwhile, cloaked by darkness and the noisy uproar of the aircraft, the tanks began their three- mile move from sheltered positions in woods and orchards to their attack positions. By 3 a.m., the troops — who hailed from Illinois and every province of Australia — had been issued rum and were in position, ready to attack.
  • 29. Waiting for the Orders to Attack!
  • 30. Let the Battle Commence! Harrassing artillery fire kicked in at 3:02 a.m. For several weeks previously, Monash had ordered that high explosives, smoke bombs and poison gas shells be fired toward the target at about that time, a tactic intended to condition the defenders to regularly expect a barrage — and make them think that the smoke masked the presence of gas. This time, however, Monash purposely omitted the gas, making it possible for his troops to move forward safely under cover of smoke and noise.
  • 31. Early in the Morning! At 3:10 a.m., 313 heavy guns and 326 field artillery pieces, joined by mortars and more than 100 Vickers machine guns, produced a barrage worthy of the 4th of July, while the tanks gunned their engines for the half-mile dash. A mix of 10 percent smoke, 40 percent high-explosive and 50 percent shrapnel shells fell 200 yards ahead of the infantry, while larger shells landed 400 yards farther ahead. The infantrymen rose and moved forward. In four minutes, the artillery adjusted its range 100 yards farther ahead, and the infantry advanced in the wake of the covering fire.
  • 32. Things Not Always Went to Plan! Captain Carroll M. Gale's C Company, accompanying the Australian 42nd Battalion, followed the barrage, advancing 100 yards every three minutes. His troops came within 75 yards of the exploding shells without sustaining any casualties, but other units were not so fortunate. One squad from E Company and an American section attached to the 15th Battalion lost 12 men killed and 30 wounded because shells fell short of their target. The 15th then hung back while survivors of Lieutenant R. Canaway's 43rd Battalion moved between the barrage and those shells that were falling short
  • 33. American & Australian Troops Dug In
  • 34. Costly Moves! Advancing into the barrage proved costly to some other Americans as well. After their officers became casualties, three platoons attached to the 13th Battalion were guided to safer ground by Australian NCOs. When Sergeant F.J. Darke saw an American officer wounded by the shelling, he took over his platoon and turned it back from the barrage and Corporal M.J. Roach was mortally wounded while extricating another U.S. platoon from danger.
  • 35. The 15th Battalion One such team, from the 15th Battalion, silenced an enemy machine-gun post. Then the team's'second member,' Private Harry Dalziel from Irvinebank, Queensland, spotted another German machine-gun nest as it opened fire. Dashing toward it, revolver in hand, he killed or captured the gun's crew, allowing the Australians in front of it to proceed with their advance. Although the tip of Dalziel's trigger finger had been shot off, he ignored an order to retire and continued to serve his gunner until Pear Trench was secured.
  • 36. Private Harry Dalziel VC When again ordered to report to the aid post, Dalziel instead elected to bring up ammunition. While he was doing so, a bullet smashed his skull. Miraculously, he did not die. He was transferred to Britain for treatment and later received the Victoria Cross from King George V.
  • 37. Kidney Trench During another firefight, this time in the woods, German machine guns in the so-called Kidney Trench killed the 16th Battalion's company commander, his sergeant major and one of its Lewis gunners, stalling the battalion's advance. From the flank, Lance Cpl. Thomas Leslie 'Jack' Axford, a former brewery worker from Kalgoorlie who already had won the Military Medal, grenaded and bayoneted 10 Germans, captured six of them, tossed their machine guns out of their positions, called the stalled platoon to come up and then rejoined his own unit.
  • 38. Lance Cpl. Thomas Leslie 'Jack' Axford VC Dugouts connected to Kidney Trench yielded 47 more prisoners. Axford was later awarded the Victoria Cross for his 'great initiative and magnificent courage.'
  • 39. Battle of Bullecourt Failure! Six minutes after the operation was launched, the tanks arrived, in accordance with the careful plan of Monash and his tank commander, Maj. Gen. H.J. Elles. Unsupported by heavy artillery and bogged down in mud and barbed wire, the tanks — intended to provide cover for the infantry — had failed the Aussies on April 11, 1917, at the Battle of Bullecourt.
  • 40. Change of Plan after Bullecourt There, at a village in the center of the Hindenberg line, 10,000 Australians had been killed. With that failure in mind, Monash revised the scenario for Hamel and added some public relations. Using prebattle demonstrations of tank operations, intense rehearsals, joy rides and long persuasive discussions, Monash generated enough of a rapport between infantry and tank crews that many of the British tanks sported Australian battalion colors and names
  • 42. Innovation in Tank Strategy at Hamel The single most important innovation in tank strategy at Hamel lay in placing the tanks under the control of infantry commanders who could order them to follow closely on the heels of their troops and eliminate enemy strongpoints. Tank commanders also had worries. They protested that advancing so close behind the artillery barrage could expose their 8-foot-8-inch-high vehicles to overhead hits from friendly fire, but they accepted Monash's order, which overruled their objections
  • 43. Soldiers and Tanks Join Together
  • 44. Took and Held the Final Objective! With combined air, artillery and tank attacks, the 42nd Battalion's assault in the northern flank had met little resistance. Meanwhile, to its south, the 6th Brigade's 21st and 23rd battalions smoothly followed the barrage and the tanks. The southernmost sector was more difficult — the 25th Battalion suffered 93 casualties. Two platoons were cut down to only eight troops, but Sergeant C.G. Ham led them to take and hold the final objective, for which he was later awarded the Distinguished Conduct Medal (DCM).
  • 45. C. G HAM’S Citation
  • 46. Sgt. C. G. HAM - D.C.M
  • 47. New Strategy! The new strategy yielded many prisoners, starting with the Germans' communication trench in Vaire Wood. When one Digger took a prisoner using the fractured French comment, 'Finis la guerre,' the German stunned him by laughingly replying, 'Yes, my — — oath' — a phrase that demonstrated how well he had learned Australian English while working in the West Australian gold fields before the war.
  • 49. The Tanks When the advance resumed, the tanks came fully into their own. Following their commander's dictum, 'It is the primary duty of the tanks to save casualties to the Australian infantry,' they hugged the barrage, destroying strong points with machine guns, canister fire or their treads.
  • 51. Hamel & British Tank on 5th July 1918
  • 52. Communications Success signals flowed to the rear by pigeon, lights, rockets, telephone and radio. Signalers maintained communications throughout the battle, while special squads confused the enemy by contradicting any German flare with the opposite color.
  • 53. Air Power! Monash's plan also added some new roles to the AFC's repertory. The two-seaters of No. 9 Squadron, Royal Air Force (RAF), delivered nearly 120,000 rounds of small- arms ammunition, dropping them by parachute from boxes fitted under the wings to marked sites along the line. That innovation — inspired by a captured German document — had been developed by Captain Lawrence J. Wackett and Sergeant W. Nicholson and his mechanics at No. 3 Squadron, AFC
  • 54. Air Superiority! Other aircraft strafed and bombed German positions, and except for a half hour in the late morning, the Allies maintained air superiority with the loss of only two planes. Lieutenants A.E. Grigson and H.B. James of No. 3 Squadron AFC shot down one enemy fighter that tried to interfere with their work and drove another down out of control. Lieutenants D.F. Dimsey and F.J. Mart shot down a Pfalz D.IIIa that was attacking another RE-8.
  • 55. Willy Coppens Willy Omer Francois Jean Coppens 6th July 1892 – 21st December 1986 Belgium's leading fighter ace and the champion of World War I.
  • 56. Willy Coppens – Awards & Medals  Officer of the Order of Leopold with Palm  Commander of the Order of the Crown (Belgium)  Commander of the Order of Leopold II with swords (Belgium)  Croix de Guerre 1914-1918 with 27 Palms and 13 Bronze Lions (Belgium)  Military Cross 2nd class (Belgium)  Croix de Guerre 1914-1918 with 2 Palms (France)  Commander of the Légion d'honneur (France)  Distinguished Service Order (United Kingdom)  Military Cross (United Kingdom)  Officer of the Order of the White Eagle with Swords (Serbia)  Grand Officer of the Order of Ouissam Alaouite (Morocco)  Order of Nichan-Iftikhar (Tunisia)  Order of the Black Star (Dahomey)
  • 57. Order of Isabella the Catholic (Spain) Officer of the Order of St. Maurice and St. Lazarus (Italy) Knight of the Order of Virtuti Militari (Poland) Silver Medal for Military Valour (Italy) War Cross with Golden Cross in Palm (Portugal) Croce di Guerra 1914-1918 (Italy) War Cross 1914-1918 (Poland)[citation needed] Yser Medal Fire Cross 1914-1918 1914-1918 Commemorative War Medal Inter-Allied Victory Medal 1914-1918 Centenary of National Independence Commemorative Medal
  • 58.
  • 59. Result Taking and securing Hamel cost the Allies a total of 1,400 casualties, including 39 Americans killed and 196 wounded. The Germans lost more than 2,000 men, including 43 officers and 1,562 enlisted men captured, together with two anti-tank machine guns, a new .53-caliber anti-tank rifle, 32 trench mortars and 177 machine guns. In addition, the Allies recovered 73,000 rounds of British ammunition and boxes of grenades lost when the Germans had first taken Hamel in April. On top of that, the Aussies of the 21st Battalion enjoyed coffee that was mistakenly dropped into their lines by a German airplane.
  • 60. Americans Greatful The Americans were grateful for the experience. Captain Gale spoke for many of them when he said that 'more real good was done…by this small operation with the Australians than could have been accomplished in months of training behind the lines.' As for Pershing, in his memoir My Experiences in the World War, he described the American participation at Hamel as 'somewhat of a surprise,' and though the behavior of our troops was splendid….Its [the battle's] immediate effect was to cause me to make the instructions so positive that nothing of the kind could occur again!'
  • 61. Awards Later, at Moulliens-au-Bois on 12th August 1918, Pershing watched King George V award the DCM to Corporal Tom Pope and two other doughboys for their valour at Hamel, while four others got the Military Cross and 11 received the Military Medal.
  • 62. Pershing Presenting Awards Later still, in Luxembourg on 22nd April 1919, Pershing himself would present Pope with the Medal of Honour.
  • 63. Armistice Day – 11th November After the War ended, my grandfather returned to Bath, England where he married! On 11th day of the 11th month in 1923, his wife gave birth to their first child – a daughter (my mother) - and she was called ‘Poppy’
  • 64. My Grandfather and his two sisters
  • 65. Hamel Today You can understand why they called her “Poppy”, when you see the picture of Hamel below!