2. content :
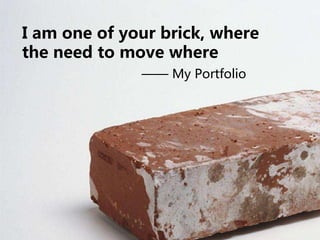
• 1. Introduction
• 2. Utilise the opportunity
• 3. A Simple project
• 4. Learn something
• 5. My experience
3. Introduction
Click to add text
Welcome to all. First of all I would thanks to
you to spend little bit time to read my portfolio.
“ My mind is a partner to my work”
I hope that my portfolio will reflect my stuff,
power ,skills , working capability Etc….
I am DHILIP KUMAR studying
MECHANICAL Engineering in GCT college.
4. Introduction of my work
My work is a creative
one. Because we are
creating the art in a
metal.
Doing design in a
solid works software.
This is only a small part
of my work.
5. In between start to end
Of the product I learn
Something, like that time
Management , If any
Mistake how to solve it,
Must to improve
customer’s satisfaction
and Quality of the
product.
6. Utilize The Opportunity
• Our honorable Principle Mrs. LAKSMI PRABHA and our
senior Mr. BALA & Mrs. Jaqulin gave me the opportunity to
do this work.
That day was my memorable day because I am not able to
pay my fees. So I met my principle and she asked to me to
meet Mr.Bala . After that I went to his house. He gave me an
internship as well as a part time work in his company.
Mr.Bala and his friend Mrs. Jacqueline fully supported me by
financial also.
This one is very help to me to develop myself and my
skills. I hope that I had utilized this opportunity.
7. STUDIES BASED PROJECTS :
1. Stationary stand
2.Trishul design and fabrication
3.Chair manufacturing
4.Ladder design
5.Elevator design
6.RC Car chassis design
WORK BASED PROJECT :
6.Singapore project
7.Chennai map project
8.Dr. A B J Abdul kalam project
9. Vengadajalapathi project
10. Reflector sheet project
8. The basic aim is how to reuse the
waste.
“ WASTE COME GOOD AND BEST “
Source :
Collect the waste glass piece in a
old factory. Then the waste pieces are cut
by equal size.
That the basic idea is to create a
hole on the glass piece. And the glass is
placed in side the rod.
9. Assembly :
That the threaded rod is
fixed inside the base then nut and bolt
is used to fix the bottom end.
The nut is put in to the
hallow pipe and that setup is fixed
shown in the figure.
10.
11. Result :
My first idea is a failure idea because I create
only two hole on the glass piece so that the stand have
low stability and made more vibration.
After that study what to do then I create 3
hole on the glass piece , it may increase the stability
and the strength of the product.
After that it has no more vibration.
My experience:
1.Planning is important for all project.
2.Everyone should know stability.
“EVERYBODY LEARN, SOMETHING ONLY
FROM THEIR MISTAKES”
12. Thrishul design and fabrication
This project is one of the good chance to think 360 degree. This is an
electrical based vehicle. It is a finished design just I am doing some
modification in the design because of reducing the cost of the vehicle.
In a old design it has more
welds and the assembly of
part is very complicated.
My motto is to reduce
welds and cost also the working
times.
My project mates
Mr.Ramadas and Mr.Karmukilan
help me to do this project.
13. Required materials
Thus the required material are
given .These files are generated in
DWG format by using solid work
software and reference are in Pdf
format.
Thus the assembly parts were
cutted by using “ TURRET
CUTTING ”.
Assembly parts :
1. Bottom piece
2. Battery cover box
3. Shaft
4. Base flange
5. Handle bar
6. Fork assembly
7. Front wheel with Bobo hub motor
8. Supporting back wheel
15. Modifying the design
We create some modification in the design.
1) First of all we desired to increase the stability of the bottom piece because
it may broken to carry above 75 kg of weight.
2 ) To give additional support to the wheel shaft.
3 ) To give proper open & closed section for battery in the form of battery box.
4 ) Battery clamp is used to arrest the battery in safe mode.
5 ) And the other parts are used from old design.
After that the normal assembly are done by using the parts.
My work is only make a design and assemble the parts. That the electrical
works are done by the company.
18. Result:
This is the finishing part. I
recover all the problems the.
I learn more from this project.
I may give more core knowledge
About mechanical field.
19. Chair design and manufacturing
This is my favorite project, Because at that time I think this is
very simple project, it has less work and do that project very less time.
But while dong this project I met more difficulties and problems.
Mr.Bala gave me a little time to finish the project. The target is manufacture
100 chair within 7 days.
This is the new chance for learn something from welding and help us to
know process planning and time schedule for a project.
20. Mr.suresh welder give a
advice for planning.
My project mates
Karmukilan and Ramadass
help me to do this work.
Construction and details:
This is a steel based
Chair, So we are purchased
the steel pipe.
Steel pipe-2 mm thickness
Dia of pipe- 2mm
Sitting sheet-Req amount
21. To create jig for
chair
• That the model type of
chair is give us.
• After that we may create
the base of the chair shown
in figure. This is called as jig.
• Jig is a device that is used
to make a project with high
accuracy.
• It may reduce the work and
also the time.
•Increase the production of
the chair.
• After that go to do the
required bending in the
pipe.
22. Welding tools
• It may take two days .
That day was my
semester holiday so, I
can work with him up to
start to end.
• We were using these
tool cutting, grinding
and buffing wheel.
• MIG welding machine
is used to make a weld
on the chair.
• In this project help us
to learn the basic
welding and welding
tools.
23. Learn MIG welding
process
At that time we have lot of
work for doing chair. So, sureh
welder ask me to learn MIG
welding and do some full
welding in the chair .
The shown figure is just a
triangle piece . I am doing
some weld in the triangle. And
give it to suresh for correction
and he told me this is fine you
may continue your work to do
weld on the chair.
So, we have two welding
machine my project mates
Mr.Karmukilan and
Mr.Ramadass help as to did
the work successfully.
25. Result:
That the given project is
finished successfully . It may
giving a new experience for us.
Learn and experience:
1. I get knowledge about MIG
welding also Arc welding
2. Also from grinding and buffing.
3. How to calculate the time for do
anything.
26. Elevator design
This is a simple project
for test my software skill.
Mr.Suresh told me an idea for
making elevator.
He is a welder. so, he got a
order from Chennai in a small
scale industry.
It is a cloth washing
company. They want simple
elevator for carry wet dresses
from ground floor to top floor.
And I have an idea , I told to
Suresh and I make a drawing
in solid works.
27. He told that it has less work and more stability and it have low cost.
So, I only use sheet metal in the form of square and rectangular bar. That the
image can reflect my idea.
That the elevator contains base stand and rope and a little motor for up
and down moment.
This is the basic model of the elevator.
28. Result :
This is the final
design. I change 3 design
this is the last design. They
accept that model and the
same idea create new and
simple elevator .
29.
30.
31.
32.
33.
34.
35.
36.
37.
38.
39.
40.
41. Dr. A P J . Abdulkalam design
This is my favorite design in my design
history. Because, in my knowledge all are
know who is Mr.kalam , I am one of the
fan of kalam sir.
While am starting the work am very
impressed to do that work. Mainly two
reason for my happiness.
1. That the design is placed in my college
with my name.
2. Also the design is placed in Mr.Klam
sir house.
Both reason give me more happiness
and confidence.
I finished the work very quickly. After
completing the drawing. Gave the drawing
files in to Laser cutting and then giving it
in to powder coating. This is the main idea
shown in figure.
42. In this project design have little bit difficulties. We consider not only the design but
also the base of the product. Because it has 8 feet height, so we increase the stability to
give more strength at the base. First I finished the drawing. Then create the required stand
for carry the design.
First I create normal stand and then give the support at
the backside of the image. It has low stability because
It has a chance of fall down in front side.
So, my next idea is giving the equal stability for front and
back. After changing the ideas. First I give 2feet on both side
now the main role is increase base strength. So, provide
3 feet on both side. And the top view of the stand is in “ H “
shape.
That is give the more stability to the product.
Specification :
Height of the design = 12 ft
Width = 3 ft
Thickness = 2mm
Rectangular bar = 13 ft
44. Identify the mistake
While doing the project
I am in happy. But that
more happiness is spoil my
thinking. I make very big
mistake on it because of
my carelessness .
I write kalam’s quotes at
the bottom of his design.
The quote is,
“You cannot change your FUTURE,
You can change your HABITS.
And surely your HABITS,
Will change your FUTURE “
45. Recover the mistakes
My mistake is putting double “B “ for
HABBITS .
It is a very critical time. Because I complete
all work including cutting also. Tomorrow it
must be delivered in kalam sir house.
So, I consult with my project mates they
advising me to modify the design immediately .
That the idea is cut the B letter in the design
and join them by using MIG welding.
48. Memorable day in my life
It is the good opportunity to visit kalam sir house. After correct the mistake
that the design go to be powder well powder coated. I reach his house and present it to
his brother.
49. After that another kalam sir design is fitted in my college. Our honorable
principle giving the motivation to us. We are get a award from principal.
My project mates names are written at the end of design.
With my project mates in our
college
Present to our Principal
51. This is one of my best design. Sir advised me to do the design
carefully. Because it is fixed in the bye pass road so, I take special
care for this design .
He suggest some idea to me. At the starting stage of the design I
confused more times. Because that the design have approximately
more 70 kg weight so, there is no support only the bottom
concrete is the base and support.
I have no idea about that, after that the design is made by using
solid works software. Then create the assembly design.
That the ABJ design fixing in the stand. After that I don’t know
the simulation in the software, then download simulation video to
learn from that video.
52. Designing process
That the actual process we have done. After that analysing
them by using solid works software. We understood that to
increase the length of the bottom stand it will with stand the air
force.
There is a very different place Because it contains up & down
place so, it is difficult to place the stand. Here after we reduce
this problem by the help welder, he suggest some ideas to me.
My design is normal one. Because am using standard size of
sheet . That the stand also have 4 feet to 8 feet this one is not
given sufficient balance to the sheet. After finishing powder we
increasing length at bottom, welder gave good idea to me. After
that I correct my mistake what am did it.
53. Give solution to the problem,
At the time sir give more stress
To me. So, this is the last date
Tomorrow I will see ABJ sir image
in front of the bye pass road .
That time I reach more stress but I
gave good idea and this is the one of the
best my solution.
That image shows the increasing
length of the ABJ image.
After solving this problem we fix the
image into the bye pass road.
57. I proud to work this
Field.
Design is my
Hobby also my
passion.
I harvest
•A passion for the field
•A respected employer
•A development platform
•A decent income
Thank you…!