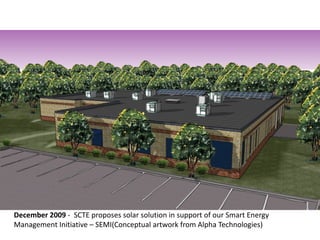
More Related Content Similar to SCTE Solar Story Similar to SCTE Solar Story (19) 1. December 2009 - SCTE proposes solar solution in support of our Smart Energy
Management Initiative – SEMI(Conceptual artwork from Alpha Technologies)
2. December 2009 - Online mapping reference check to see how much unobstructed
southern facing rooftop SCTE has on our building (space for a total of 18 kW)
– SCTE receives bids for the project
4. February 2010 - SCTE selects Alpha Energy as the solar project solution provider
5. April 2010 - After submitting permit requests SCTE and Alpha needed to appear before
the township board to get approval of proposed installation – safety and aesthetics were
taken into consideration
6. July 2010 - An interconnect application needed to be filed with the local electricity grid
provider, giving SCTE and Alpha permission to connect the new solar system to their
system
7. March 2010 - Site inspection illustrating panel height (5’ 9”) for township approval
8. May 2010 - Power purchase agreement (PPA) and contract negotiations completed
between Alpha and SCTE to insure fair system options for both companies
Power Purchase Agreement
11. May 2010 – Alpha drafts engineering documents and hardware is ordered
12. June 2010 - SMA inverters, Sharp panels and Shletter aluminum mounting system
13. July 2010 - Lift used to move materials onto the roof deck
14. July 2010 - First load of materials unloaded onto the roof
15. July 2010 - Cutting the “spaghetti matting” to shape
16. July 2010 - Placing the pans precisely over the building’s support joists
17. July 2010 - Lifting the pavers that will weigh the pans down
18. July 2010 - Getting ready to finish up placing the pans
19. July 2010 - Placing the support frames into position over the center of the pans
20. July 2010 - Placing the support frames into position over the center of the pans
21. July 2010 - Placing the support frames into position over the center of the pans
24. July 2010 - Checking the second section rack placement and preparing that build
25. July 2010 - Making progress on the racking assembly
27. July 2010 - Making progress on the rack installation
31. July 2010 - Average July full sun roof top temperature (164 degrees Fahrenheit)
33. July 2010 - Hanging the first panel – ensure that the placement is square
35. July 2010 - Tying the square reference string into place
37. July 2010 - Beginning the install of second row of panels
41. July 2010 - Progress hanging the second row of panels
42. July 2010 - Temperature of the back of panels (full sun - 136 degrees Fahrenheit)
43. July 2010 - Installing the conduit mounting brackets to the frame
44. July 2010 - Installing the conduit mounting brackets to the frame
45. July 2010 - Getting the combiner box ready on the rooftop
46. July 2010 - Combiner box ready for conduit and cabling
48. July 2010 - All panels racked and ready for wiring procedures
49. July 2010 - Look down the back of the array after panel wire clean up is completed
50. July 2010 - Cleaning up positive and negative panel connection cables with wire ties
51. July 2010 - Cleaning up the positive and negative panel cables with panel clips
52. July 2010 - First row of wind shield deflector braces installed
53. July 2010 - First row of wind shield deflector braces installed
54. July 2010 - Grounding clip installed on every panel and rack piece
55. July 2010 - Fishing the DC and ground wire through the conduit under the array
58. July 2010 - Lightning arrestor attached to the roof top disconnect boxes
59. July 2010 - Conduit taking the DC power from the disconnect boxes to the combiner box
60. July 2010 - Combiner box taking the power down the side of the building
64. July 2010 - Sensor control box mounted adjacent to the array
65. July 2010 - Anemometer and ambient air temperature devices
67. July 2010 - Look down the back of the array at the wind shields
74. July 2010 - View from ground level at the side of SCTE’s building
75. July 2010 - View of the panels from ground level behind SCTE’s building
76. July 2010 - Drilling a hole in the cement block to feed the cable into the building
77. July 2010 - Examining the internal workings of the inverter
79. July 2010 – Mounting the new inverters and system boxes
80. July 2010 - Mounting the inverters and new breaker boxes
82. July 2010 - Preparing to pull the rooftop wires into the building
83. July 2010 - Preparing to pull the rooftop wires into the building
84. July 2010 - Preparing to pull the rooftop wires into the building
85. July 2010 - Completing the AC/DC wiring requirements
86. July 2010 - Completing the AC/DC wiring requirements
87. July 2010 - Preparing for the DC to AC wiring project
88. July 2010 - Installation of new system meter and circuit breakers
89. July 2010 - Brining the DC cable feed into the combiner box inside the building
92. July 2010 - Inner workings of the inverter shut off switch
94. August 2010 - Initial look of the inverter receiving DC power from the panels
95. August 2010 - Initial reading of output coming off the panels
96. August 2010 - Alpha and SCTE team assembling on the roof for the launch ceremonies
97. August 2010 - Launch of the power purchase agreement and solar system
98. August 2010 - Alpha and SCTE team on the roof for opening day
100. System Specifications
• 11.28 kW DC
• 10 kW AC
• Phase: 3phase
• Voltage: 208
• Frequency: 60Hz
• 48 Sharp 235 mono-crystalline modules
• Schletter ballasted racking system
• 2 SMA Sunnyboy 5000US inverters
• Data Monitoring – website, data logging, weather
and auto-alerts