V-Ray Mag Issue #1, 2014
•
2 likes•2,063 views

Featured: The Ningyo, Blake Sweeney of Method, Rugbybugs, Nick Gaul, A La Francaise, and more.

Recommended
Recommended
More Related Content
Similar to V-Ray Mag Issue #1, 2014
Similar to V-Ray Mag Issue #1, 2014 (20)
Recently uploaded
Recently uploaded (20)
V-Ray Mag Issue #1, 2014
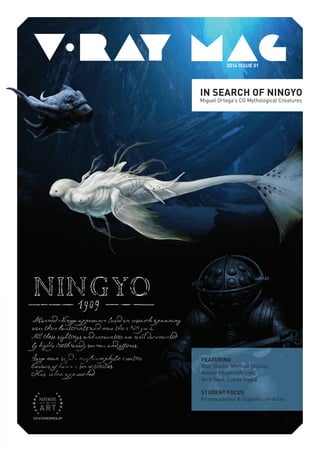
- 1. In Search of Ningyo Miguel Ortega's CG Mythological Creatures featuring Blur Studio, Method Studios, Atelier Feuerroth, INK, Nick Gaul, Lukas Hajka student focus Filmakademie & Supinfocom Arles 2014 Issue 01
- 2. CONTENTS Blur in Motion page 3-4 Catching up with "PORTALS" page 5 VFX Behind Blockbusters An Interview with Blake Sweeney page 6-8 Planes, Dogs and V-Ray page 9 In Search of Ningyo page 10-15 The Making of Amanda page 18-19 Atelier Feuerroth page 20 Crossing the Uncanny Valley An Interview with Lukas Hajka page 22-25 The Rise and Fall of Globosome page 26-27 Parlez-Vous Poulet? page 28 Rugbybugs page 29 Life End in Bet She'an page 30-31 artwork by Anders Ehrenborg
- 3. inmotion Blur Blur Studio has moved into their new home in Culver City, California. A new and very different district to their original Venice digs. In fact it is now situated in one of the iconic Eric Owen Moss buildings in the area, called the Paramount Laundry,usedbyParamountStudiosinthe1940s. Thefirstthingyounoticeofcourseatstreetlevel is the prominent Blur logo on the big steel door. Tim Miller is the co-founder of what has become one of the stalwarts of the VFX industry. Miller and CG Supervisor Kevin Margo showed the Chaos Group crew around the studio and told us a bit about the life of this incredible talent bank. “I started Blur over in Venice Beach in the mid-nineties,” Miller explains. “I was tired of the corporate world of VFX and decided to do our own thing.” Miller says he wanted to open a place that could control its own creative destiny. He wanted to create a company, “where all kinds of creativity could flourish and not just the way I thought it should be done,” he says. Blur Studio has a reputation for producing the kind of creative mix that has allowed some of the industry’s most incredible movie sequences, game cinematics and TV spots to take shape. Working with clients like EA, Fox, Microsoft, Universal Studios, CBS, Y&R, Warner Bros and Activision, the quality and breadth of work is breathtaking. There are plenty of impressive work areas in the new studio, in a huddle of collaborative visual invention. Images © Blur / www.blur.com 3
- 4. Links: Blur Studio http://www.blur.com Chaos Group http://www.chaosgroup.com V-Ray 3.0 http://www.v-ray.com Paramount Laundry Building http://ericowenmoss.com/project/paramount-laundry/ The modeling department is situated in between the concept art department and the rigging area. Celebrated Lead Character Modeler Alessandro Baldasseroni tells us that his department receives the art from the concept guys and the modelers produce technical 3D characters and assets to be then passed on to the riggers. “We take care of the shading aspects of the model, not only the texturing, but we bring a lot of extra detail and interest to the character’s presence, which would be difficult to do just in sculpting.” There’s certainly a lot more to modeling than just blocking the creatures together in a 3D space. Mathieu Aerni, a Lead Character Modeler at Blur Studio finds that being so involved in character creation is very exciting. “As character modelers, we actually do everything to do with the character, from scratch,” he says. “So, modeling, UV, texturing and shading.” Aerni finds this is a very good way to get very involved with the character. “It’s your own, so you’re really into it,” he adds. “People come to Blur because we do come up with a lot of great ideas,” adds CG Supervisor Chris Bedrosian. “We’ll flesh it from concepts through to final, and if the clients don’t know what they want, we’ll help them figure that out too,” says Bedrosian. “Blur Studio has always had a general philosophy to hire good artists and enable those artists to put their talent to as broad a use as possible,” says Kevin Margo. One of the most innovative areas at Blur Studio these days is the Scene Assembly department. Developed to be the real generalist area of the studio, this is the place where everything is put together. But there is a stark difference. The artists here are typically involved in environment modeling, shading, lighting and compositing. With all the talk of generalists, it is good to hear there are specialists employed at Blur as well. We spoke to a dedicated Hair TD, Danny Young, who is busy full time modeling the material from splines. “I am applying this for long hair on female characters, to monsters with fur, all kinds of characters. Simulating it, rendering it,” he says. “We used to run a plugin in multiple passes, but now with the new modifier in V-Ray, it is possible to run motion blur, depth-of-field, all the passes all in one go.” Looking ahead to the features in V-Ray 3.0, the crew at Blur were interested in discussing how much faster and easier rendering had become. “Sub-surface scattering is not just for skin anymore, and can be applied to any surface, bringing in new light and life to any surface,” Simon Blanc explains. “It used to be more about the technical side, but since we switched to V-Ray, now it’s more about the artistic side that makes stuff look as complex and detailed as possible. We don’t worry too much on the technical rendering side because we know it’s going to render just fine.” The tools are so good now, in general, it really comes down to that last 10% that matters, and we spend more time in that last 10% withV-Raythanwedidwithotherrenderers,forsure,”saysMiller. “ The big thing that’s happened just recently, is the increase in confidence in the pipeline at Blur. The crew has spent a lot of time, refining and perfecting each step in the workflow and structure of the pipeline to the next, all the way through. “V-Ray took care of a lot of things we were brute-forcing with a lot of other renderers,” says Tim Miller. “Whether it was flickering or too grainy; or long render times that had to be micro-managed to get down to something reasonable. All of these things take artists a lot of time and they’re not very fun tasks to do, and this took them away from the creative task. V-Ray seemed to bypass all of that and very quickly you get a pretty good-looking render. And then, it’s the artists coming in and pulling it up that much further.” “V-Ray took care of a lot of things...” “And you put it all together and you think, there’s no way this is going to render. Always does, with V-Ray.” “There are definitely times when you get all the assets together from a lot of guys,” says James Atilano, a Lead in the Scene Assembly department. “Since we switched to V-Ray, now it’s more about the artistic side...” 4
- 5. The “Portals” animated short was featured in our FMX 2013 magazine upon the release of the film’s trailer. A year later, we talk to Director Simeon Sokerov and Concept Artist Viktor Mazhlekov to find out more about the film’s release and people’s reactions to it. The setting of Portals could not be more unique. It appears to take place in a microscopic yet fantastical world. The life resembles that which you’d see in a science documentary or in a textbook from school, but the resemblance to reality ends there. Audiences have reacted enthusiastically to “Portals” which was a pleasant surprise to the film’s director. “What struck me is that people didn’t think about how the film was created. They simply enjoyed the world they were immersed in and the feeling they were left with after watching it,” says Sokerov. The duo was very flattered by the overall response and the response of committee members and festival organizers after “Portals” was shown. The film was submitted to various festivals over the past year including Annecy, Zagreb, Anima Mundi, Hiroshima and Siggraph, but in the end Sokerov and Mazhlekov weren’t focused on festival success. “We made the type of film we wanted to make and that is what was most important to us,” says Sokerov. “Portals” will soon be available for viewing in its entirety through various channels and we’ll be sure to share the news when it is released. You can currently watch the trailer for “Portals” on Vimeo here: http://vimeo.com/66317120 http://portals.mazhlekov.com/ Catching up with 5
- 6. Looking at your IMDB profile, you've worked on an impressive and diverse number of projects over the years. Looking back, are there any that are especially memorable for you in your career? If so, why? I had some great opportunities over the years, allowing me to work with talented people on terrific projects at a variety of companies. Each project was memorable for different reasons. "Pearl Harbor" at ILM was the first show where I was able to light shots on a feature film and the production team, supervisors, and other artists were completely supportive of rookie work and mistakes. I wasn't trusted with much -- a fifty pixel boat on the horizon, for example -- but the chance to work on a movie at all was exciting. "Star Wars: Episode II" was another amazing experience, my first show as a dedicated artist rather than with one foot in a support roll. That show gave me the opportunity to run a number of crowd simulations of clone armies and even to light some shots with Yoda. Who doesn't want to light Yoda? "Lord of the Rings: Return of the King" at Weta in New Zealand was a completely different experience. It had the benefit of both box office and critical success, which is rare in big budget movies. And it also felt like the whole country of New Zealand was emotionally involved in the project. Despite long hours, the entire crew seemed to have positive energy because everyone knew they were working on something epic. More recently, "Real Steel" was a complete pleasure. It felt like the entire show -- from the client side team to Legacy (who built the practical robots) to the VFX team at DD -- was all setup for success. I joined the team after a stint on Tron, which provided my first taste of V-Ray, and we decided to use V-Ray for all of the robots on Real Steel. That's when I really witnessed the power of V-Ray and the quality it could produce. I remember some people commented that the simplicity of look development and lighting in V-Ray actually made lighting fun again. Chaos Group was a valuable ally on that show to help overcome a number of technical challenges, including hair rendering, normal differentials, and a bevy of other things. "Cloud Atlas" was another amazing experience. We had a tremendous and surprisingly compact team at Method that turned out some incredibly complicated work. I'd never had a chance to feel so close to the design process of a show before. Matt Dessero, the VFX supervisor, led the team of artists to truly explore and design shots organically for the client, who was totally supportive. Like "Cloud Atlas," "Divergent" had a number of the same, talented people working towards the end goal. The mirror room was especially complicated and was about as demanding as you can be on a raytracer. The entire design of the shoot and render philosophy were fun to witness and dissect with the team. Vlado and the Chaos Group helped answer some questions and added some features to support breaking out reflections at different ray depths to aid the compositors in reassembling the layers. An Interview with Blake Sweeney, CG Supervisor at Method Studios 6
- 7. Is there a project that stands out as especially challenging to you and how did you handle the challenge? Again, I have to go to the mirror room in Divergent. It was with the team of people including VFX Supervisor, CG Supervisor, Tracking Supervisor, Rigging Supervisor, Comp Lead, and Lighting Lead who worked together to determine what layers we would need, how much would be done in comp versus lighting, and how everything should look. I asked one of the VFX Supervisors on Star Wars: Episode II how you can tackle a show with thousands of visual effects shots. I'm summarizing, but he said, "You take the one big problem, visual effects for a movie, then you break it up into smaller problems. You break it up into sequences, then you break it up into shots, then you break the shots up into the individual tasks in a shot -- like roto, a camera matchmove, etc -- and you keep breaking things down until it's broken into pieces that can be done by individual people." Like any problem, we approached this one by trying to break it down into small, digestible pieces. No one person made decisions for everyone, rather each department discussed the approach from their perspective and each group discussed what they needed from each other. Then everyone tries to do what they need to and we meet again and go through the same process any time there's an issue. There's already been a great article in fxguide about the mirror effects for Divergent. How common is it over the course of a film that you have to come up with something as you go, regardless of the amount of pre-planning that goes on prior to a shot? Many challenges don’t become apparent until you start to work on a shot. To give a small example for Divergent, since the city of Chicago was supposed to be abandoned there was a ton of city cleanup. A lot of the shots were initially bid as 2D cleanup only and only once we saw the first couple of takes would it become clear that a 3D camera track would expedite the process. I feel like our team was especially open to changes in philosophy and considered suggestions from everyone. This isn’t to say that we only ended up with good decisions or took every suggestion; if a shot was near completion and a more efficient approach emerged, we would still generally finish the shot using the less perfect approach since the rebuild time would’ve taken longer than finishing with the poor solution. But at least reevaluating at different points allows you to make the best decision you can with the facts at that time. How did V-Ray fit into Divergent? It was fun to devise a rendering strategy for Massive within Maya. Marion Spates is a Massive expert, and he and I experimented, where he would export sims and different components from Massive and I would try to process the results on the Maya side to offer decent visualization of the simulation and an invisible layer to pass the Massive .vrscene file to V-Ray. In the end the Massive setup was basic, where we exported a series of .vrscene files and also animated PDC files with particle positions for each agent in Maya. Based on that data, we import the particles into Maya and instance a bounding box onto each particle so it’s easy to see the location and movement of the sim. Then at render time the V-Ray python post translate appends the massive .vrscene file if the simulation is visible in the current render layer. Over the course of the project we added other features as needed, including individual agent kill based on particle selection, sim time offset, sim transform offset, and individual agent transform offsets. Of course, Vlado and the Chaos Group team were involved along the way, including testing and communicating with Massive Software to optimize agent generation in V-Ray and working through some brain teasers in terms of reflections. What are some of the more difficult aspects of working on a film of this scale? In general, it takes more time than one could ever imagine to schedule so that individuals in a large team are all working on something productive. For example, one day we could have a scheduling meeting and a compositor will have five shots assigned, which looks like a lot. Yet, merely days later this compositor has nothing to do, which is because there are no renders, and then there might be no renders because there’s no animation, and there’s no animation because there’s no camera track, and there’s no camera track because the dates for this track had to shift because another shot became the hottest priority the day before. We use Shotgun, which definitely helps with scheduling, but with the rapidity of changes it’s a challenge to stay ahead of them. This scheduling burden was shouldered across the team, from everyone in the production staff through the VFX Supervisor. How do you like working on commercials versus working on films? Commercial and feature work each require a different mindset and each has its own pros and cons. I can’t speak with much authority since 90% of my career has been working on features, but I like in commercials that the short schedule doesn’t allow time to second guess every solution or iterate over the same shot hundreds of times. You need to move forward at a consistent speed, constantly show versions to the client, and generally be done with the entire process in less than six weeks. Additionally, you get a lot more experience working on these short projects with different visuals and different clients. The downside is that, due to the time constraints, you often can’t construct elegant, reusable solutions. With feature work you usually have a longer time schedule and more time to work on “tentpole” shots that determine the blueprint for every similar shot on the project. And with more time to iterate on assets and shots I feel like you inevitably get a more mature, better looking image even without realizing it. I’ve worked on shows where a shot will literally be on take 100 and everyone thinks it looks pretty good. Then, 100 takes later on take 200, you look back at take 100 and it looks primitive in comparison. A huge percentage of time spent goes into making something that’s already good even better. Or as one VFX Supervisor put it, the last 10% of a shot is 90% of the work. We used V-Ray extensively on Divergent, including trains, digital doubles, digital environments and cityscapes, the mirror room, and even a number of massive shots. Images © Method Studios / www.methodstudios.com 7
- 8. Can you speak a little bit about learning your craft and what helped you along the way? Oh man, that's a tough one. I love computers, have always loved movies, video games, and comic books. I lucked out and went to university at the University of California at Davis, which had a really strong graphics department and some great professors, including Ken Joy and Bernd Hamman who were two of my favorites. The school had a ton of SGI machines back when that was important, and I spent many nights in the computer lab programming graphics applications in OpenGL and C++ and learning PowerAnimator. A number of people from our UC Davis computer lab went on to ILM, Pixar, and PDI, who actually came to our career fair. It was at the career fair where I applied for a job as a technical assistant. I got the job at ILM, most likely because two of my classmates, Matt Bouchard and Dan Lobl, already worked there. And despite the strange hours, the job was a blast. We were all more than happy to do whatever it took -- even if it were two years of technical shift work -- to have the chance to work on movies at ILM. One of the nicest things about that job was it had a genuine career path. They viewed it as a training position to develop new technical directors, and usually people would work as technical assistants for two years and then be picked out from a show to become Assistant Technical Directors. My number was called on Pearl Harbor and Ben Snow and Michael Bauer, both supervisors, spent a lot of time answering questions and teaching me about what it actually meant to do the job. Coming from a Computer Science background definitely came in handy and allowed me to start to do some Python programming and lots of MEL programming within Maya. Since then, almost everyone I've met has taught me something. Samson Kao and I started a visual effects company back in 2005 which was really eye opening. Being a part of large VFX companies shielded me from the details that go into every job, and it was fun to actually work on camera tracks, do roto, pull green screens, do animation and anything else that was needed to take on the jobs that came in. Although I didn't master anything, it definitely gave me an appreciation and broader overview for what it takes to put together a shot. How have changes in software changed the way you've worked over the years? Changes in both software and hardware have drastically changed the landscape of visual effects since I started in 1998. Back then, film VFX companies were running primarily on SGI machines using the IRIX OS, which meant that there was a serious financial barrier to entry. The cheapest SGI machine then was around $5000. Now however, artists can build a good machine for considerably less, install Linux for free and download demo versions of software to start to practice at home. Additionally, it feels like most of the big VFX companies used to rely very heavily on proprietary hardware. If you just look at compositing, ILM used “comptime” (proprietary), R&H used “comp” (proprietary), DD used “Nuke” (proprietary at that time), Sony Imageworks used Bonsai, etc. Shake emerged in 1997 and started to slowly change the paradigm. In my mind, that’s a very interesting paradigm shift. If a person works at a company that has primarily proprietary software, I believe that the company and the employees are both more committed to one another. From the company’s perspective, bringing in people off the street means that they need to be trained from the ground up on a piece of software they have never seen. From the employee’s perspective, it’s considerably more daunting to leave the safety of a company where you know all of the homegrown tools, and there’s a big question as to whether the skills you’ve learned are at all portable. These days, since the core pieces of software are mostly third party, I believe companies have become a lot less devoted to the artists. At the same time, this also means that more students can emerge from a university or art school and feel prepared to be artists using familiar software from day one. It’s a much more open world now, in my opinion. Changes in both software and hardware have drastically changed the landscape of visual effects since I started in 1998. 8
- 9. INK Planes, Dogs and V-Ray They found that some planes naturally lent themselves to certain breeds. For example, the Lancaster Wellington - a very hardy, trusty British airplane - paired perfectly with the hardy and popular family dog, the Golden Retriever. While entertaining the idea of using a jet plane to match with a breed, it was agreed upon that propeller planes were more conducive to the playfulness of the project. “Which dog is that plane?” was a constant topic of conversation around the studio. All modeling, texturing and lighting was done in 3ds Max using the Hair Farm plugin to craft the fur. Artists found that V-Ray provided them with about 90% of the final product and was an excellent base for further retouching. One of the challenges was to brush the right type of fur for the specific dog. A Golden Retriever has short yet relatively messy fur, whereas a Schnauzer’s is more fine, longer and hangs free from the face, so to recreate this specifically presented a steep learning curve to begin with. From the beginning the idea was to go for a studio fashion shoot aesthetic. Using V-Ray RT for scene and lighting setup proved to be essential. INK uses V-Ray for all of their projects. INK is an award winning digital production studio in London, UK. Spurred by their love of dogs and airplanes, artists at INK decided to blend the two together to create “Dogfighters.” World War II planes were carefully paired with various breeds of dog with the hope of matching the dog’s personality with that of a particular plane. We use V-Ray in every single project in the studio. It’s a critical part of our pipeline. James Boll, Partner at INK You can learn more about INK and their amazing work by visiting: http://www.weareink.co.uk/ Images © INK 9
- 10. In the story of Faust, Dr. Marlowe loses his way in his pursuit of success, but for director Miguel Ortega, it's a story of an artist finding his way under challenging circumstances. Miguel has gone to great lengths to bring his CG masterpiece to life. In fact, he's shooting in his dining room daily. But living on the set of his film is only a small challenge compared to funding a full-length indie feature film, with insane digital FX, whose story is about a hunt for mythic zoological beasts. Ortega is a veteran CG artist, having worked on well-known projects like Thor, The Mist, Transformers 3, Alice in Wonderland, and G.I. Joe; just to name a few. His current venture is inspired by his fascination with cryptozoology and mythic beasts. It's a Faustian tale that follows the character Dr. Marlowe, a paleontologist and professor (Indiana Jones-esque) on his hunt for the Ningyo, a mythical mermaid-like Japanese creature whose flesh is infamous for increasing longevity. The doctor is mocked by his peers for his search of the exotic beast but proceeds, hoping that a discovery could be an amazing contribution to science. What he comes up against is the greatest challenge to his morality that he could ever imagine. Why one CG Storyteller transformed his home in search of the Mythical Ningyo 10
- 11. It was definitely no small feat, but there's now a 35 minute pilot that is hoped to expand into a feature film. The real trick, when making an indie film of this scope, is "making something that looks like it costs many times more", Ortega says. Initially, the project was much smaller in scope, because there was no guarantee that there would be funding. Cryptology and museumology from over 100 years ago aren't, on the surface, blockbuster subjects. Ortega is inspired by scientists, naturalists, and explorers of the 1900's, like Carl Akeley (who invented taxidermy), Frederick Sealous, and Allan Quatermain, who was the inspiration for Indiana Jones himself. Not to mention Grover Krantz, who was the first to research cryptozoology in the 1960's. The film is set in 1909, a time when science was not the death of magic, but still full of mystery and possibility. As a storyteller, Ortega found this era irresistible, and a perfect setting for his unique artistry with CG technology. Monsters were still real in this time period, and it's this mysterious possibility that inspired Ortega to transform his home into a full-blown set, and climb the tricky mountain of funding his dream project through sites like Kickstarter. He's well into post-production, but getting the film shot on budget was a self-proclaimed "painful experience". The real trick, when making an indie film of this scope, is "making something that looks like it costs many times more" 11
- 12. In “The Ningyo,” the characters are authentic. There are fantastic elements, for sure, but this only serves to illuminate the humanity of the main players. "We want to keep the consequences of our characters' actions more grounded in reality; death should have a deeper weight. And any character can die. We are more interested in the psychological than in the action", Ortega says. That doesn't mean that he doesn't love creatures; in fact, he is one of the premier geniuses at creating them from scratch. But what is most important is creating beings that seem as though they really could exist in the world. That means no "Heavy Metal" monsters, but beings that are inspired by nature, and therefore have added realism. There's an immensely talented team behind this project, who have helped Ortega to transform his ENTIRE home into a set. Though this may sound exciting on the surface, (one has visions of 'Synecdoche New York' where Phillip Seymour Hoffman's character keeps building and building until his whole world is his stage play), but it was actually quite insane for Ortega. He went about buying all the necessary skulls, taxidermy, and antiques for the set (because it was cheaper than renting) and to this day he is living amidst this odd home decor. All the items were found on Craigslist, and only the bathroom and bedroom remain immune to it all. "A period film is expensive, but by using our wits instead of our wallets we have managed to find ways of making this possible.". By distressing and refurbishing these online-bought props and set pieces, they've managed to create a whole new world on a very tight budget. Finding funding through Kickstarter was helpful but also something Ortega notes was a "full time job". At one point the whole funding process came to a halt, and he was tired of donors asking him what he was going to do when his project failed. That was tremendously hard for the director and his creative team, but they pushed on. When funding was low his team stuck by him nonetheless. "A period film is expensive, but by using our wits instead of our wallets we have managed to find ways of making this possible." 12
- 13. The actors involved in the project were chosen for their tremendous talent and skill. "Rodrigo Lopresti and Gabe Fazio are New York based actors, very accomplished in their craft. We really went out of our way to cast the right people and not shortchange that aspect of the production in favor of VFX.". Jerry Lacy, a native Californian, is also a part of the cast, whose credits include working alongside Woody Allen, as well as being a featured actor in the original Dark Shadows series. Exceptional artists from Weta, ILM, Digital Domain, as well as students from Gnomon School of VFX showed their support and enthusiasm even during the roughest times of budgeting and filming. Images © Spy Films / www.spyfilms.com 13
- 14. It's important for him to build as much as he possibly can within the confines of his home, and then take care of the impossible with digital technology. The reason for making his home so detailed with set pieces as opposed to creating elements in post-production is "that the more detailed the sets are, the easier we can light and texture them", Ortega says. The technology is "huge for us, it was a revelation for us when we first started using it. It allowed us to stop being technicians and really focus on making pretty images. For the first time we can put a light in a scene and it just looks good.". V-Ray is an amazing innovation in computer graphics with some of the best rendering technology ever seen. Ortega took advantage of the photo-realistic images and architectural visualization capacity of this software to bridge the gap between his imagination and what he could create on screen. "Coming from a traditional photography background makes it even more of a joy to use: Physical Cameras, Kelvin Color Temperatures in lights and simple to setup rendering elements." Creating an independent film with visual effects is always a challenge, but Ortega cites V-Ray as being something that liberated his team, and allowed them to do the FX for themselves. "Ironically, what is expensive to most filmmakers is cheap for us and what's cheap for Hollywood is expensive for us." CG environments take a tremendous amount of hardware and time to light, shade and render. The environments that Ortega works with have displacements, 4K textures and "all the bells and whistles we can throw at it.". After that, V-Ray handles the rest in terms of data and rendering, which Ortega says is "quite surprisingly quick". He takes a "Disney approach" to visual storytelling, and begins with elaborate storyboards that are a combination of 2D, 3D, and photography, and from here the team begins to visualize how to shoot the sequences in respect to their limitations; taking stock of which scenes can be shot with lenses they already own. Bringing to life the topography of completely imaginary locations is no small feat, so it's done in steps. Ortega explains: "We start by collecting as much reference as possible, roughing out basic forms in Maya and then having our art team paint on top of our very rough 3D models to get an idea of the lighting, details, etc. Then we move to Maya and use a combination of all 3D backgrounds as well as matte painting projections inside Nuke." For Miguel, CG is his great skill, but he doesn't want to rely upon it like a crutch. 14
- 15. Any filmmaker in Hollywood with a big budget is going to find it much easier to film Ponce de Leon-style adventure sequences in underwater caverns, so shooting in Miguel Ortega's living room presents unique challenges. Modestly, he claims that the greatest difficulty comes from creating detailed dynamics like bubbles, water particles, and dust atmospherics. With the help of Houdini for FX and rendering done through V-Ray, Ortega got his bubbles, to say the least. The very first project that Ortega transformed his home for was The Green Ruby Pumpkin, a short film inspired by the work of Edward Gorey, Dr. Seuss, and Shel Silverstein. It was created with $7,000, by hand, and in the living room. The motivation behind it was to "try doing creature films that don't fall into the typical formula. We want to try a creature film that treats monsters and creatures as plausible, not as fantastical (even if they are). We want to try a tone that isn't typical to this genre of films, blending history with creatures." Today Ortega is still working in post production on “The Ningyo,” and with his extraordinary team and technology behind him, he's sure to overcome some mythological challenges that are involved when making an indie film with advanced graphic artistry. Through it all, his greatest concern is ART. "Its simplicity and its strength", he says. In the end, it looks like the leading character in this story will not lose himself in his pursuit of success. The technology is "huge for us, it was a revelation for us when we first started using it. It allowed us to stop being technicians and really focus on making pretty images. For the first time we can put a light in a scene and it just looks good." V-Ray is an amazing innovation in computer graphics with some of the best rendering technology ever seen. 15
- 18. NICK GAUL AMANDAFor whatever reason, some images just seem to grab and hold our attention.Thefinestartworkalmostseemstochallengeyoutotryand look away. For many of us at Chaos Group this was exactly the feeling we had when we first looked upon Nick Gaul’s latest female portrait. Using a combination of Maya, Mudbox and V-Ray, Gaul created a human portrait that is both realistic and stylized. Inspired by the look of actor Amanda Seyfried, the portrait is reminiscent of classic Hollywood photo shoots from the 40s and 50s. “I started this piece looking for images of actresses who I found looked interesting or had a certain timeless quality to them,” Gaul says. “There was a nostalgic sense that I wanted to try and convey.” The aim was for something that would “feel realistic, but not quite photoreal,” pushing towards a slightly stylized look with the use of color and lighting. T h e m a k i n g o f 18
- 19. Gaul has always been interested in and has enjoyed doing sculpts of the human face. Exploring subtle details, nuances and giving character to a CG portrait is a challenge, especially when you are trying capture a likeness and make it look believable. “I enjoy using a realistic portrait as a way to study different areas in CG such as sculpting, lighting and shading. V-Ray was actually what got me started in doing fully lit and shaded portraits,” adds Gaul. When approaching a project like this, Gaul first starts with collecting reference images and then doing some freehand sculpting to block in the main forms and proportions of the face. This is followed by lining up the model to the reference photos in Maya and starting to tighten up the likeness. He also looked at examples of fashion photography to get inspiration for use of color and composition. “I knew I wanted to use a lot of golds and browns in the image, with a subtle use of complementary blues that you see in her eyes and rim lighting. I felt that these hues would push this sense of nostalgia and give it a retro feel.” Halfway through the sculpting process, Gaul begins to experiment with lighting and shading with V-Ray. Once again, reference images are used to see how the skin should look under certain lighting environments. This recreation of a photo studio environment helps to expose parts of the mesh and shading that need refinement. There is always a challenge of balancing artistic and technical adjustments according to Gaul, “It’s extremely difficult to make a portrait that doesn't come off looking creepy or slightly off.” As for materials and textures, Gaul relied heavily on VrayFastSSS shader and VrayMtl, “I really appreciated how the skin shader in V-Ray, with some presets, can be a great point to start from and get quick results.” For the hair, Gaul created a layered shader grabbing some extra reflection controls from VrayMtl to mix with the VrayHair shader. For Gaul, one of the biggest challenges was to get the eyes just right. He ended up using thesamematerialforthescleracolorandiris and painted maps for driving scatter amount and thickness. To get just the right amount of detail and shadow catching in the iris, Gaul decided to do a detailed displacement pass on the iris fibers themselves that helped to give the eyes extra depth. As a final touch, some of the caustic settings were bumped up on the iris material to get a “bit of a kick” from the lighting. With a portrait such as this, Gaul is able to create an image that evokes mood through color and light. With attention to photographic reference and detail, he has managed to balance realism and stylistic choice in such a way that garners admiration and demands our attention. Am a n da v-ray hair3d mo del V-Ray was actually what got me started in doing fully lit and shaded portraits. 19
- 20. Michael Feuerroth and Aleksandar Krndija guide us in the latest project from Atelier Feuerroth. What you see here are exclusive “behind-the-curtains” shots of an upcoming project that we’ve been working on. We settled on an appetizer, the main purpose being to captivate the viewer’s interest and turn their curiosity into attention. Using a variety of techniques, some well-known and others secret to the Atelier Feuerroth, the following set of images was created using the latest release of the V-Ray Rendering Plug-In. Aside from the features listed on the V-Ray webpage, we have discovered a very neat aspect, namely the bitmap aperture in the V-Ray Camera settings. Chaos Group went the extra mile with the implemen- tation of the custom aperture maps feature in the physical camera settings. As we utilize a photographic approach in our renderings it is fantastic to be able to recreate conditions such as depth-of-field and real world aperture inside of the renderer without having to use third party software or to do anything in post-production. The camera is capable of generating bokeh effects from light sources that are “physically“ in the scene, as well as ones that are just projected e.g. from bitmaps. Another feature that this scene benefits greatly from is the speed increase during the brute force calculations. Using the combination BR-LC (Brute Force as the primary engine for the GI calculations and Light Cache as secondary) we can integrate very nice and subtle noise into the image which adds to the photorealism. The essential lighting of the scene comes from a VrayDomeLight with an HDRI, which is also responsible for the bokeh effects that are seen in the frontal shot. Regarding the assets, most of them were modeled using straightforward procedures such as box modeling, a little bit of spline modeling and the well-known push- and-pull-vertex-modeling. As for the bun, it was handcrafted and sprinkled with lots of magic powder. After kneading the dough for 7-9 minutes, it was put into a mixing bowl coated with oil and left to rise for about an hour. Later it was put into the oven which was preheated to 220°C. The leek and the apples were provided by trustworthy organic farmers - we try to support organic farmers even in our renderings – so make sure to use fair trade 3D models. Caution! Do not touch the oven while it’s hot! Jokes aside, the bun was built in 3ds Max using a series of modifiers, a pinch of turbosmoothing and the VrayDisplacementMod for the finishing touches such as the fine details on the crust. The photographs for the textures were taken with a Canon 5D Mk III because it is capable of taking very sharp images, keeping out the noise. We tried to stay within the Autodesk family for this one and used Mudbox for the texturing of the bun. When working on a very high level of photorealism, there is one question that you have to ask yourself, “What would my scene look like in real life?” The attempt to mimic the real world with all its flaws and imperfections is not as nerve-wracking as you might think. The key to success here is observation. Take a look at the part of the image with the chopping- board. At first glance, we see a wooden board with a bun, a salt grinder and some apples. If you take a closer look, you will notice that there are crumbs lying in front of the bun as if a second one was cut into pieces earlier and the crumbs weren’t cleaned up. Instead of modeling these tiny objects, a simple shader was created using a photograph of crumbs as the diffuse map, an opacity map to exclude any unwanted surroundings and a VrayDisplacementMod to give them the three-dimensional feel. The salt grinder also has very subtle traces of use - the fingerprints. After cutting the bread and preparing the food, your fingers become floury and fatty which of course leaves marks on anything you touch. This was solved by inserting a greyscale bitmap into the reflection glossiness slot of the salt grinder’s black plastic shader. As for the other materials, they are standard V-Ray Materials with a bit of glossiness here and there as we tend to keep things straightforward. Chaos Group went the extra mile with the implementation of the custom aperture maps feature in the physical camera settings. The following set of images was created using the latest release of the V-Ray Rendering Plug-In. A t e l i e r Fe u e r r o t h Stay on the lookout for this upcoming project and feel free to contact Atelier Feuerroth at facebook.com/feuerroth. Images © Atelier Feuerroth / www.feuerroth.de Atelier Feuerroth, founded by Michael Feuerroth has been responsible for high-class 3D Visualization, mainly architectural, for over 10 years. Their debut project “Ouverture” won a number of 3D community awards and was published in various magazines, not to mention a nomination for the Animago Award in 2013. 20
- 21. You can read an interview with V-Ray for Blender developer, Andrei Izrantcev, at RenderStreet.com: http://blog.render.st/the-v-ray-for-blender-story-by-andrei-izrantcev/ artwork by Max Puliero V-Ray for Blender is now available Chaos Group is a proud sponsor of the 2014 Architectural 3D Awards in the student category. http://3dawards.cgarchitect.com 21
- 22. How did you first learn 3D and what made you decide to pursue it? I started 6 years ago, in the spring of 2008. Before 3D I was interestedineditingvideos.Thenonedaytheideaofcombining live action with CG caught my attention I suppose and that’s when I started digging into Maya 8.0. I rarely finished any of my personal projects, but still they felt meaningful to me and I was having fun working on them. Your thread on CG Talk started in 2011 and it has been an amazing journey to watch and for others to learn from. What prompted you to start this project and be so open with it? Thanks. I was testing some free photo scanning solutions on environment props and later on human faces. Some really good results encouraged me to progress further, and now here I am, almost at the end. I also thought that the modeling workflow was really cool and accurate, so I shared it on CG Talk and later on CGfeedback. People started posting questions and I kept answering them. That’s all there is to it. Honestly, I would feel like a jerk if I just ignored or evaded their questions. Crossing Тhe Uncanny Valley 22
- 23. What is the most surprising thing about this project and the community feedback over the years? What is most surprising is the amount of attention this project has gained in the community lately, and it's not even finished yet. I mean, I totally wasn’t expecting that I’d do an interview for Chaos Group regarding this project some day. That’s indeed surprising. What industry are you in and has this project benefited your skills and abilities for your job? I’m making print ads for local agencies mostly here in Slovakia. I had some offers from two high profile video game and VFX studios, but at the moment working from home suits me much more. Yeah, stuff I’ve learned working on the project definitely helped me in my job and vice versa. Tell me how you define "uncanny valley." My understanding of the uncanny valley wouldn’t be much different from anyone else’s I suppose. When it comes to CG characters, it’s simply a failed attempt at a photorealistic approach. The human brain perceives faces very sensitively and it can spot discrepancies right away, so every detail counts. When achieving this level of photorealism, there is a careful balance between the scientific and aesthetic choices you make. Can you explain how you handle that balance? Itendtostartwiththe‘science,’bygatheringrelevantresearch papers, measured data and so on just to help me gain a basic understanding and some sort of starting point. It eliminates lots of guessing work in the process. But at the end, I don’t want to restrict myself too much by it. Often during R&D, I pick a parameter that’s supposed to be accurate then do a test render with a double value and a half value, just to visualize that range and understand how it influences the overall look. Then I shift to whatever direction that I think looks better. You seem to make the choice to change your hair and facial hair from the references we have seen. You also give yourself a smile and look reminding me Aphex Twin. Can you explain why you chose to change your look throughout this project? For the record, the portrayed face is not my own, it belongs to Ondrej Virág, a friend of mine, whom I want to thank for his cooperation. Now back to the question…To give the character a genuine emotion, in this case a smile, was planned from the beginning. The smile was taken from the motion capture animation and applied as a blendshape. The facial hair is the same as the reference, only longer. When doing the hair, I wasn’t sure where to go with the character, I was testing various short hairstyles and I didn’t really like any of them, so I took a U-turn and started over with the long hair version. And although Richard D. James is my favorite musician, the resemblance is purely coincidental. 23
- 24. When looking at the forum thread, you seem to have a very straightforward system for your shaders. Most of the work is done in the shader itself allowing you to focus on the textures going in. Can you explain your ideas behind how the shader is built? The shader is broken down into smaller building blocks, different ones for the SSS, diffuse and reflectance. The reflectance was a challenge. It needed to have multiple reflectance lobes, a different set of microstructure textures for different facial parts blended together properly and so on. In my shaders I also like to put some extra care into areas of contact between two different objects (for example where an eyeball meets the eyelids, or teeth penetrate gums, the hairline, etc.). It’s important for these transitions to look soft, natural and organic. Any harsh looking edge is an instant giveaway. Since the shaders rely heavily on the textures going in, what system do you use to ensure that they are "correct"? I shot some reference images, tried my best to replicate the light scenario in V-Ray, and then compared and adjusted accordingly. If you were to start over, would you do it differently? I think I would, the only way to improve is to change something…so yeah. What advice would you give based on your experiences with the creation and sharing of this work? Study your references, pay very close attention to details and be patient. What can we look forward to from you next on this and other projects? You will have to wait and see. ;) You stated in the thread something along the lines of, “CG is never final or finished.” I suspect that a project like this one is a prime example of that. What would you like to focus on next in terms of this project? My next focus will be aimed at the post-production, where I’ll try to push it a step further. 24
- 25. Follow the thread for updates: Crossing the uncanny valley WIP http://goo.gl/k6jze2 As seen and used in Kevin Margo's CONSTRUCT The 3DBOXX4920 GPU Edition When I was working on digital humans I found out quickly that there is no easy answer or solution. I suspect that you feel the same. Do you think that there will be something in the future that will make this process more intuitive and logical? If so, what would it be? Some instant (or at least faster) feedback would be really nice. Waiting for dozens of test renders to finish breaks the focus a lot. I am sure you have seen that V-Ray 3.0 has put a lot of focus on features that could have an effect on this project. Things like raytraced SSS, a dedicated skin shader, and faster rendering hair. Will you start to look at these features and start to apply them to this project? With this project, I think I’m going to stick with V-Ray 2.4. I’m really looking forward to using the new functionality on the next character. Images © Lukas Hajka 25 www.boxxtech.com 1-877-877-2699 512-835-0400
- 26. 26
- 27. “Globosome,”anewanimatedshortfromstudentsattheFilmakademie Baden-Wuerttemberg, shows us the evolution and struggles on a planet overrun with the dominant species: little black blobs. Sascha Geddert’s inspiration sprouted from his interest in climate change. He interviewed local climate scientists and made a short film to show his classmates. From this, “Globosome” began to take shape, the idea being how can a species remain renewable after millennia of growth and the depletion of natural resources. “Globosome” is a civilization of blobs that go through various phases of evolution and change their planet forever. It starts in the beginning with verdant plant life creating an atmosphere, making a perfect setting for little blobs. They appear, multiply and evolve at a rapid pace. Alone they are puny, but en masse they appear ominous and powerful. Geddert conscientiously makes many nods to science playing with the idea of the apocalypse. It doesn’t sound too good for the blobs. When asked about the ending, Geddert commented, “The ending was especially tough and I don’t want to spoil it. Let me just quote Ian Malcolm from ‘Jurassic Park’ here, ‘Life finds a way.’” Geddert knew he would be facing a lot of technical challenges when he started working on the film. “I knew there would be hundreds of these rolling, little creatures that had to interact with the environment and with each other,” says Geddert. In addition, Geddert wanted lush, translucent vegetation that would grow, move with the wind and then dramatically get destroyed. For software he went with 3ds Max and V-Ray. A fellow student, Patrick Schuler, studied swarm dynamics and incorporated them into thinking particles for 3ds Max. The plants were created with the GrowFX plugin and replicated with MultiScatter. V-Ray was used for rendering, and Phoenix FD was used to create atmospheric effects. “V-Ray was absolutely essential in the creation of the film. Basically, everything revolves around it,” says Geddert. “I love V-Ray’s materials and GI systems, its proxy workflow and its ability to chew through the millions and millions of polygons that MultiScatter provided,” he continued. The Rise and Fall of Globosome A talk with Sascha Geddert Currently a game for “Globosome” is in the works and should be available in the coming months. Hopefully it will be possible to have a more uplifting ending in the upcoming game. We’ll just have to wait and see. how can a species remain renewable AFTER MILLENIA OF GROWTH AND the depletion of natural resources. “V-Ray was absolutely essential in the creation of the film. Basically, everything revolves around it,” says Geddert. “I love V-Ray’s materials and GI systems, its proxy workflow and its ability to chew through the millions and millions of polygons that MultiScatter provided.” Geddert also used V-Ray’s displacement to create movement in the clouds for the nebulas. 27
- 28. Playing off expectations is one of the oldest tricks in comedy. If an audience sees Louis XIV- era France as a place filled with exquisite architecture and opulent wealth, then that’s fertile ground for a joke. Especially when it’s shaped like a chicken. The student team behind the award-winning short “A La Française” decided to skewer history with a graduation piece that found comic gold in asking a farm bird to be proper. Sword-happy sentries, randy lords, and well-mannered ladies who may or may not be able to contain their chickenly urges populate an animated world that is both vivid and intricate. Colors are vibrant, costumes are packed with embroidered details, and the wordless vignettes play off real-life situations recounted by the famous French playwright, Molière. So how did this group of ambitious Supinfocom students re-create their version of 1700 Versailles? They turned to V-Ray. Looking back, their demands weren’t revolutionary; they wanted speed, simplicity and final frames that could match what they saw in their minds. Julien Hazebroucq, the lighting and rendering lead, decided to build their pipeline around V-Ray. Five years of experience made them confident that wherever this idea was heading, V-Ray could help them bring it out. “V-Ray can be very fast, to the point where you can end up with a lot of leftover time for more animation and details,” said Julien. “Each iteration makes your film better so anything that can bring you back to the process is a blessing.” With Global Illumination (GI) turned on, the team was able to walk that fine line between cartoon and realism. As color played a big role in their vision, V-Ray’s GI came in handy as it allowed the artists to bounce environmental color light onto their character’s clothing. A wooden floor quickly became an accentuator at court, while a blue sky became a cooling agent in the garden. “GI helped us do a lot with a little,” added Julien. “In the reverence scene our only light source was the windows, which was challenging since we had to light a packed hall full of characters wearing colorful attire as well as a mirror reflection. A combination of GI and V-Ray Sphere Fade was all we needed to do it though. It worked with what we had and made it look great.” V-Ray Sphere Fade proved important to the team since they wanted to avoid camera movement. Every shot was fixed, which meant that they had to only render their character to save time. On the reverence scene this meant only moving characters, which could be accomplished since V-Ray Sphere Fade allows artists to define where they want V-Ray to render. With some resourceful thinking and V-Ray on hand, more time-consuming processes like real hair simulation could be traded out for wig work completed with the help of V-Ray’s displacement mode. “We honestly didn’t have time to create a full head of hair for each chicken, so we had to think on our feet. Those faces are probably part of the reason the film has been such a smash hit since its release. Already a grand prize winner at SIGGRAPH 2013, “A La Française” has also won 12 other awards or honorable mentions in film festivals across the US, Europe and Asia. “As a symbol of France, the rooster is a perfect instrument,” said Julien. “What can be elegant and proud, can also be ridiculous and foolish, not unlike those luxurious nobles in the palace of Louis XIV. In order to achieve such a "A La Française" (French) movie, these two elements had to come together. We’re just glad we had V-Ray there to make it look right.” Credits: Julien Hazebroucq Co-director - Team Management - Set Design/Modeling/ Texturing - Lighting - Rendering Compositing - Sound Emmanuelle Leleu Co-director - Character Design - Animation - Texturing (characters) - Sound Morrigane Boyer Co-director - Layout - Modeling (character/set) - Skin/ Texturing (character) - Cloth William Lorton Co-director - Character Design - Storyboard - Animation - FX - Sound Ren Hsien Hsu Co-director - Script Development - Character Design/ Modeling - Animation - Cloth Parlez-Vous Poulet? V-Ray’s displacement mode provided great detail and a fun shape that tied to the amusing faces our characters were making,” recalled Hazebroucq. “We’re just glad we had V-Ray there to make it look right.” 28
- 29. Asked about the win, Seifert said, “Being nominated, let alone winning, the VES award in the student category was totally amazing. When you work on a project very intensely for quite some time, it gets difficult to judge your own work. The nomination was the ultimate confirmation that our work was really pretty solid.” From preproduction to final polish, the project took about eight months by a core team of eight people, each with varying degrees of experience with Maya. “When we started working on this project, I came from a 3ds Max background and hadn’t used Maya before. Fortunately, I had used V-Ray a lot with 3ds Max. Since my task was shading, lighting and rendering, I only had to learn some Maya basics and could start working productively almost immediately,” says Seifert. The trailer for FMX 2014 was a team effort, not just a team effort for the students involved in the project, but also for the team of bugs who work together in the animated short, “Rugbybugs.” A small group of students at Filmakademie Baden-Wurttemberg teamed up to make this year’s FMX trailer and ended up with some awards in the process. Deep in a forest at night, bugs of all kinds seem to race against the clock as they gather, carry, fly, pass along and deliver glowing red crystals. “Rugbybugs” plays like a dramatic action sequence, an idea that was appealing to Timm Wagener who set up the pipeline and coordinated the overall workflow for the project. “I like fast, forceful and dynamic animation. The chase setting in “Rugbybugs” seemed to be the perfect setup for that.” One of the appealing challenges of the project for Manuel Seifert, whose task was shading, lighting and rendering, was to create a photorealistic look and integrate it within an actual physical set, “For me the biggest challenge was to get the shading of the characters right in the amount of time we had. The team agreed from the beginning on a photorealistic look, since creating a tight set integration was a challenge we all wanted. This meant for me that I had to push my shading to a level of photorealism that I knew I hadn’t reached before.” The look of the FMX logo, comprised of crystals charged with a kind of magic energy, took some time to create in order to get the right look. “After a lot of look development, where I played a lot with subsurface scattering for that deep, rich glow from the inside, I decided to use animated layers of V-Ray fog inside the geometry,” Wagener says. Asked if they would approach the project differently if they started it today, Seifert says he would shoot more HDR images on set to be used for lighting, “Shooting HDR light maps in a miniature set is difficult. The team members who shot chrome balls (actually a Christmas tree ball) on set did a good job, but there was still a lot of additional manual lighting needed in CG. I learned from this project that it is a good idea to shoot each of the lights that were used on set separately as an unclipped HDR texture, which then could be used as an area light.” RugbybugsA talk with Manuel Seifert and Timm Wagener “During the project, I became very fond of the V-Ray implementation for Maya. Especially when it comes to rendering different passes, V-Ray Object Properties and Maya Render Layers work together really beautifully. Additionally, even with displacement and lots of subsurface scattering, our render times where very moderate.” said Seifert. This past February, “Rugbybugs” won the VES award for “Outstanding Visual Effects in a Student Project.” 29
- 30. Named after one of the oldest cities in Israel, “Bet She’an” is a student film from the Supinfocom in Arles, France. The students are obviously very talented since another project from the school, “A La Francaise,” has also met with great success. “Bet She’an” shows us an anachronistic city in ruins, where humans are morphing into crows. David Calvert, the Technical Director on the project, explained to us what inspired this talented small group of students to create this dark work. “The idea of the project began with a simple drawing from Julien Soler who would end up being our Art Director on the project. He did a simple drawing of a man with bird wings instead of arms, sitting on his King's chair and waiting to turn into a crow,” says Calvert. “We developed this idea of morphing into a crow as a metaphor for dying.” The setting for the short is a world in mutation and the last of mankind lives in an ancient citadel high in the sky. The buildings look like the ruins of Bet She’an, but amongst the rubble are objects from various times in history, an old radio, an empty Coke can, a dusty camera, even a rusty French horn. In this city, the residents gradually forget what they are and wait to fly as crows. The main character is a sculptor spending his remaining days as a human building a giant statue, a stele for humankind. Since the release of “Bet She’an,” the former students have created their own group, the Bandits Collective. http://banditscollective.com A talk with David Calvert The look of the film was inspired by the work of Moebius and Sergio Toppi. Calvert worked with Soler to create a two dimensional graphic novel look in a 3D film. Soler drew more than 250 different types of cross-hatching to use as textures on the characters and their surroundings. The hatching even varies in scale dependent on where the characters are in relation to the camera. Calvert meanwhile researched various rendering techniques from scripts, 2D effects and also different rendering engines. One pass involved creative use of global illumination and playing with the light cache, followed by the use of 2D filters. The last pass was for hatching and had to match the earlier passes perfectly. The effect is stunning and makes for a perfect look in a short animation dealing with change and the finality of life. Calvert hopes that their animation about the end of humanity will prompt the viewer to think, “What will we leave behind?” To achieve a flat watercolor look and contain the details of cross-hatching, the team decided to go with multiple passes using V-Ray and 3ds Max. 30
- 31. Bet She’an 31
- 32. #VRay www.v-ray.comartwork by Toni Bratincevic artWorKfLoW The V-Ray community is supportive, collaborative, and very active. Sharing new ideas, workflow techniques, and inspiring artwork is all part of the V-Ray Experience.