Grade 3 School Garden Lesson Plan - Pollination Lesson; Look Inside a Flower ~ Massachusetts

Grade 3 School Garden Lesson Plan - Pollination Lesson; Look Inside a Flower ~ Massachusetts |=> In this activity students will develop a basic understanding of basic flower parts. They will take flowers apart to gain familiarity with the different structures Healthy F` For more information, Please see websites below: ` Organic Edible Schoolyards & Gardening with Children http://scribd.com/doc/239851214 ` Double your School Garden Food Production with Organic Tech http://scribd.com/doc/239851079 ` Free School Gardening Art Posters http://scribd.com/doc/239851159` ` Companion Planting Increases School Garden Food Production by 250 Percent http://scribd.com/doc/239851159 ` Healthy Foods Dramatically Improves Student Academic Success http://scribd.com/doc/239851348 ` City Chickens for your Organic School Garden http://scribd.com/doc/239850440 ` Simple Square Foot Gardening for Schools - Teacher Guide http://scribd.com/doc/239851110oods Dramatically Improves Student Academic Success

Recommended
Recommended
More Related Content
Viewers also liked
Viewers also liked (19)
More from School Vegetable Gardening - Victory Gardens
More from School Vegetable Gardening - Victory Gardens (20)
Recently uploaded
Recently uploaded (20)
Grade 3 School Garden Lesson Plan - Pollination Lesson; Look Inside a Flower ~ Massachusetts
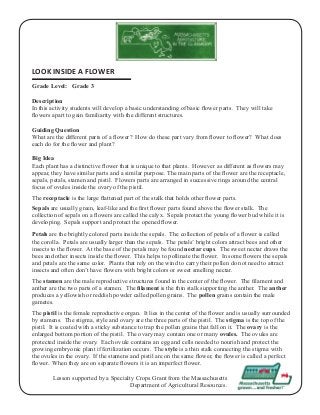
- 1. LOOK INSIDE A FLOWER Grade Level: Grade 3 Description In this activity students will develop a basic understanding of basic flower parts. They will take flowers apart to gain familiarity with the different structures. Guiding Question What are the different parts of a flower? How do these part vary from flower to flower? What does each do for the flower and plant? Big Idea Each plant has a distinctive flower that is unique to that plants. However as different as flowers may appear, they have similar parts and a similar purpose. The main parts of the flower are the receptacle, sepals, petals, stamen and pistil. Flowers parts are arranged in successive rings around the central focus of ovules inside the ovary of the pistil. The receptacle is the large flattened part of the stalk that holds other flower parts. Sepals are usually green, leaf-like and the first flower parts found above the flower stalk. The collection of sepals on a flowers are called the calyx. Sepals protect the young flower bud while it is developing. Sepals support and protect the opened flower. Petals are the brightly colored parts inside the sepals. The collection of petals of a flower is called the corolla. Petals are usually larger than the sepals. The petals’ bright colors attract bees and other insects to the flower. At the base of the petals may be found nectar cups. The sweet nectar draws the bees and other insects inside the flower. This helps to pollinate the flower. In some flowers the sepals and petals are the same color. Plants that rely on the wind to carry their pollen do not need to attract insects and often don’t have flowers with bright colors or sweet smelling nectar. The stamen are the male reproductive structures found in the center of the flower. The filament and anther are the two parts of a stamen. The filament is the thin stalk supporting the anther. The anther produces a yellowish or reddish powder called pollen grains. The pollen grains contain the male gametes. The pistil is the female reproductive organ. It lies in the center of the flower and is usually surrounded by stamens. The stigma, style and ovary are the three parts of the pistil. The stigma is the top of the pistil. It is coated with a sticky substance to trap the pollen grains that fall on it. The ovary is the enlarged bottom portion of the pistil. The ovary may contain one or many ovules. The ovules are protected inside the ovary. Each ovule contains an egg and cells needed to nourish and protect the growing embryonic plant if fertilization occurs. The style is a thin stalk connecting the stigma with the ovules in the ovary. If the stamens and pistil are on the same flower, the flower is called a perfect flower. When they are on separate flowers it is an imperfect flower. Lesson supported by a Specialty Crops Grant from the Massachusetts Department of Agricultural Resources.
- 2. Learning Objectives To understand that flowers have several different parts and that each part has a role in helping the flower to reproduce. Flowers of different plants are very different in appearance but have similar parts. Materials * Flowers of bulbs such as lilies, daylilies, tulips, crocus, alstroemeria (enough for each student or pair of students to have one flower * A variety of flowers collected from the garden or school yard * Paper * Pencils Preparation Bring in enough flowers of a similar plant so that each student or pair of students have the same flower. Choose a large enough flower so that students can see all the parts. Be sure that you also choose a perfect flower that has both male and female flower parts. Flowers from members of the lily family such as lilies, daylilies, tulips, alstroemeria and even crocus work very well. Introducing the Lesson Activate prior knowledge: Ask students what is the purpose of the flower? Do all flowers have the same parts? Ask them what the parts of the flower are? What do they think is the purpose of each one? Engage Student Interest: Tell students that they are going to examine flowers closely and taken them apart to look inside. Procedure Total Time approximately forty five minutes. In the Classroom: 1. Give each student or pair of students one flower. Ask them to draw the flower and all of the visible parts. What did they notice? (5-10 minutes.) 2. Explain that sepals enclose and protect the bud. Ask students to remain the sepals from their flowers. Invite them to use the removed sepals to color the sepals on their drawing by crushing the sepals against the paper. What color do they produce? 3. Talk about the petals and their role in attracting pollinators. Ask the students to remove the petals from their flowers. Do they have markings on them to show the pollinator a route to the nectar or pollen. Can they see the nectar cups. Invite them to use the petals to color the petals on their drawings. This lesson supported by a Specialty Crops Grant from the Massachusetts Department of Agricultural Resources.
- 3. 4. Introduce the subject of stamens to the students. Ask them to look for the stalk-like filament and the anthers at the top of the stalk. What color is the pollen? Invite them to color the anthers on their drawing with the pollen from the anthers. 2. When students return to the classroom, ask them to look carefully at the collected flowers. They can draw it and then take the flower apart. Draw each part and color the flower with the parts. (15 minutes.) 5. Introduce the subject of the pistil to the students. They should look for the sticky stigma and the tube-like style. Can they see any pollen grains that have been trapped on the sticky stigma? At the base of the pistol at the center of the flower is the ovary. They can use their finger nail or a pencil point to open up the ovary and look inside. They may be able to see the ovules (eggs). Invite the students to color the pistil on their flower drawing with the parts of the pistil. (15 minutes.) Wrap Up Give students a diagram of a perfect flower with all the parts labeled. Review with them each part of the flower and its purpose. (10 minutes.) Assessing Student Knowledge: Offer each student a diagram of a flower without the parts pre-labeled. Ask them to label the parts of the flower and write one thing that each flower part does. Extensions Ask students to guess what pollinator might visit each of their flowers. Ask students to go outdoors and quietly observe their flowers. Who comes to visit the flowers. Try to guess how the pollinators enter the flowers. * MA Department of Education Standards in this lesson * Life Science Standard 2. Identify the structures in plants that are responsible for food production, support, . . . (etc.) Life Science Standard 3. Recognize that plants and animals go though life cycles. Books and Resources Massachusetts Agriculture in the Classroom Newsletter on Pollination http://aginclassroom.org/Newsletter/spring2006.html Botany for All Ages by Jorie Hunken, Globe Pequot Press, 1993. Project Seasons by Deborah Parrella, Shelburne Farms, VT, 1995. Grow Lab Activities for Growing Minds from the National Gardening Association, 1990. Please visit the Massachusetts Agriculture in the Classroom website at www.aginclassroom.org to tell us how you used this Pollination Garden-Based Lesson Lesson supported by a Specialty Crops Grant from the Massachusetts Department of Agricultural Resources.
- 4. DIAGRAM OF A PERFECT FLOWER
- 5. DIAGRAM OF A PERFECT FLOWER