
Recommended
Recommended
More Related Content
Recently uploaded
Recently uploaded (20)
Featured
Featured (20)
MSEASUSlides: Photoshop for Screencasts Prep Slide Set
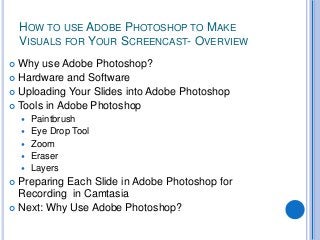
- 1. HOW TO USE ADOBE PHOTOSHOP TO MAKE VISUALS FOR YOUR SCREENCAST- OVERVIEW Why use Adobe Photoshop? Hardware and Software Uploading Your Slides into Adobe Photoshop Tools in Adobe Photoshop Paintbrush Eye Drop Tool Zoom Eraser Layers Preparing Each Slide in Adobe Photoshop for Recording in Camtasia Next: Why Use Adobe Photoshop?
- 2. WHY USE ADOBE PHOTOSHOP Easily Creates Visuals on Slides in Your Set for Your Screencast Allows You to Write on the Slide Important Points Does NOT Record Your Video. Camtasia Does That. Cannot Edit Your Video. Camtasia Does That. Next: Hardware and Software
- 3. HARDWARE AND SOFTWARE FOR PHOTOSHOP Digital Tablet and Tablet Pen PowerPoint Adobe Photoshop CS6 or Adobe Photoshop Elements 11 Future Supplies (To Be Discussed Later) To record, You Will Need Camtasia and a Microphone Next: How to Upload Your PowerPoint Into Photoshop
- 4. HOW TO UPLOAD YOUR POWERPOINT INTO PHOTOSHOP Open Your PowerPoint Slide Set in PowerPoint In PowerPoint go to File> Save As Save Your PowerPoint as a PDF in a Location You Can Access Later Opening Photoshop for the First Time How to Open PDFs in Photoshop Next: Tools in Photoshop Overview
- 5. TOOLS IN PHOTOSHOP- AN OVERVEIW 4 Main Tools for Screencast Visuals Paintbrush Eye Drop Tool Zoom Tool Eraser New Function: Layers What are Layers? Using Layers in Your Visuals Next: The Paintbrush
- 6. THE PAINTBRUSH Used for Writing on Your Slides Changing Thickness Changing Opacity Changing Color Next: The Eye Drop Tool
- 7. THE EYE DROP TOOL Used for Making Your Brush Match a Color of Your Choice Matching Colors from Your Slide Changing Colors with the Eye Drop Tool Next: The Zoom Tool
- 8. THE ZOOM TOOL Why Would You Want to Zoom in and out? How to Zoom in How to Zoom out Other Zoom Tool functions Next: The Eraser
- 9. THE ERASER What is the Eraser Used for? What Happens When I Erase? Undoing and Redoing Introducing Layers to Erase Next: Layers
- 10. LAYERS What are Layers? Invisible Sheets Can be Drawn on Separately Can be Stacked in the Order You Choose Think Tracing Paper What are Layers Used for? Used for Protecting Your Slides from Being Erased Used for Making Text Appear Quickly When Using Camtasia Next: Demonstrating Layer Functions
- 11. DEMONSTRATING LAYER FUNCTIONS Adding a New Layer Deleting a Layer Drawing and Erasing on Layers Changing the Order of Layers Next: Demonstrating Use of Layers
- 13. PREPARING EACH SLIDE IN PHOTOSHOP FOR RECORDING IN CAMTASIA Setting up Layers for Each Slide Choosing Appropriate Zoom Choosing Appropriate Paintbrush Color Moving from Slide to Slide in Photoshop Next: Review
- 14. REVIEW Why use Photoshop? Hardware and Software Uploading Your Slides into Photoshop Tools in Photoshop Paintbrush Eye Drop Tool Zoom Eraser Layers Preparing Each Slide in Photoshop to Record in Camtasia Now We’re Ready to View the Camtasia Video