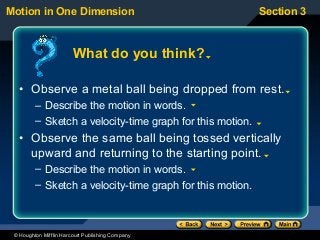
When asking students to express their ideas, you might try one of the following methods. (1) You could ask them to write their answers in their notebook and then discuss them. (2) You could ask them to first write their ideas and then share them with a small group of 3 or 4 students. At that time you can have each group present their consensus idea. This can be facilitated with the use of whiteboards for the groups. The most important aspect of eliciting student’s ideas is the acceptance of all ideas as valid. Do not correct or judge them. You might want to ask questions to help clarify their answers. You do not want to discourage students from thinking about these questions and just waiting for the correct answer from the teacher. Thank them for sharing their ideas. Misconceptions are common and can be dealt with if they are first expressed in writing and orally. Students may not see that the ball is accelerating uniformly and, as a result, they may draw a graph that rises and then starts to level off. You might also ask them how their answers would change if you dropped a similar but lighter ball. Then, drop the two simultaneously and let them observe the motion.
When presenting this slide, you may wish to refer students to Figure 14 in their textbook. You could also begin this slide with a video clip of the “feather and hammer” experiment on the moon. It is available on NASA and other web sites. Perform an internet search with the terms “feather and hammer on moon” to find a link. Discuss the effects of air resistance with students. With air resistance, an object will continue to accelerate at a smaller rate until the acceleration is zero. At that point the object has reached “terminal velocity.”
When presenting this slide, you may wish to refer students to Figure 15 in their textbook. You can also demonstrate the motion for students. Toss a ball up and catch it. Ask students to focus on the spot half-way up and observe the motion at that time. They can then predict the sign for the velocity and acceleration at that point. Then ask students to focus on the peak and, finally, on a point half-way down. Often students believe the acceleration at the top is zero because the velocity is zero. Point out to them that acceleration is not velocity, but changing velocity. At the top, the velocity is changing from + to -. Ask students to explain each combination above. For example, a positive velocity (moving upward) and a negative acceleration (downward) would cause the velocity to decrease.
Now students are asked to graph the motion they just observed. This graph should match the answers to the chart on the last slide. Remind them that they are graphing velocity, but acceleration is the slope of the velocity-time graph. Student graphs may have a different initial velocity and a different x -intercept (the time at which the velocity reaches zero), but their graphs should have the same shape and slope as the one given on the slide. Point out that the velocity is zero at the peak ( t = 1.1 s for this graph) while the acceleration is never zero because the slope is always negative. Help them get an approximate slope for the graph shown on the slide. It should be close to -9.81 (m/s)/s.
The equations from Section 2 apply because this is uniform acceleration. Simply use “ y ” instead of “ x, ” and the acceleration is -9.81 m/s 2 . Allow students some time to get the answers for t = 1.00 s, and then show them the calculations. Then have them continue with the following rows of the table. Students can use equation (4) from the previous lecture to get y , and the second version of equation (2) to get v . Or, they could get y by using equation (1) after getting the velocity, but they must get the average before using equation (1). Point out to students that the ball turns around between the 2.00 and 3.00 second mark. This makes sense, since it starts with a velocity of 15.2 m/s and loses 9.81 m/s of it’s velocity each second (in other words, the velocity decreases by 9.8 m/s in each step).
Have students revisit their original descriptions and graphs to see if they want to make any modifications based on what they have learned from the presentation. Have a discussion with students about what changes they have made, and ask them to explain why they made the changes.