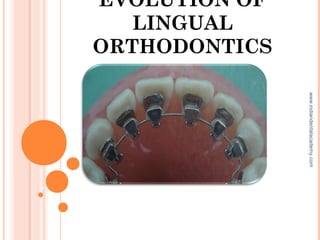
Evolution of lingual orthodontics
•
46 likes•6,325 views

This document provides an overview of the evolution and development of lingual orthodontics. It discusses the history from initial suggestions in the 1700s to modern bracket designs. Key developments include the first lingual appliance in the 1970s and establishment of lingual orthodontic societies in the 1980s. Characteristics and advantages of lingual appliances are outlined. The document also reviews patient selection considerations, diagnostic factors, challenges encountered, and techniques for addressing various types of malocclusions with lingual orthodontics.

Recommended
Recommended
More Related Content
What's hot
What's hot (20)
Similar to Evolution of lingual orthodontics
Similar to Evolution of lingual orthodontics (20)
More from Indian dental academy
More from Indian dental academy (20)
Recently uploaded
Recently uploaded (20)
Evolution of lingual orthodontics
- 2. CONTENTS Introduction History Characteristics of the bracket Advantages of Lingual Appliances Over Labial Appliances Difficulties with lingual appliances Patient selection and Diagnostic considerations Keys to success of lingual orthodontic treatment Wire Sequencing in Lingual Orthodontics Biomechanics and comparative biomechanics Anchorage considerations in Lingual Orthodontics Treatment Sequence Finishing and Detailing Retention in Lingual orthodontics Lingual Laboratory procedures for Bracket positioning Future of Lingual orthodontics Summary References www.indiandentalacademy.com
- 3. INTRODUCTION Nothing stays the same in life ,given time everything changes,so it is with orthodontics The popularity of adult orthodontics has dramatically increased over the last decade .The reason for this increased acceptance is most likely due to changes in social values regarding appearance, and increased acceptance of braces particularly with the advent of cosmetic alternatives. The cosmetic braces options currently available include clear or tooth colored braces and wires , and the so called ‘Invisible braces or Lingual braces’. In the early days of its evolution,the lingual technique went through some difficult times,however since then it has evolved into a sophisticated technique capable of treating most malocclusions. www.indiandentalacademy.com
- 4. YEAR DEVELOPMENT 1726 Pierre Fauchard suggested using appliance on the lingual surface 1841 Pierre Lefoulon desined the first lingual arch for expansion 1889 John Farrar published Lingual Removable arch 1918 Dr John Mershon published a paper on Removable lingual arch 1942 Dr Oren Oliver gave a clinic on a Labio lingual technique. 1970 Dr Craven Kurz developed the first Lingual appliance 1976 Ormco deveoped Non Edgewise lingual appliance 1979 Dr Kinya Fujita developed Lingual bracket design and Mushroom shaped arch wire HISTORY www.indiandentalacademy.com
- 5. HISTORY OF DEVELOPMENT OF DIFFERENT LINGUAL SOCIETIES YEAR SOCIETY 1980 Lingual Task Force was established 1981 Ormco held first lingual appliance seminar 1985 Japanese lingual orthodontic association formed ,its currently the largest orthodontic society 1987 American lingual orthodontic association developed 1992 European society of lingual orthodontics developed 1996 Lingual study group developed by Carven Kurz,William Laughlin, Thomas Creekmore,Jim Wildman .Didier Fillion www.indiandentalacademy.com
- 6. HISTORY OF EVOLUTION OF LINGUAL BRACKETS GENERATION #1—1976 The first Kurz Lingual Appliance was manufactured by Ormco. This appliance had a flat maxillary occlusal bite plane from canine to canine. The lower incisor and premolar brackets were low profile and half- round and there were no hooks on any brackets. www.indiandentalacademy.com
- 7. Generation #2—1980 Hooks were added to all canine brackets Generation #3—1981 Hooks were added to all anterior and premolar brackets. The first molar had a bracket with an internal hook. The second molar had a terminal sheath without a hook but had a terminal recess for elastic traction www.indiandentalacademy.com
- 8. Generation #4—1982–84 This generation saw the addition of a low profile anterior inclined plane on the central and lateral incisor brackets. Hooks were optional, based upon individual treat-ment needs and hygiene concerns www.indiandentalacademy.com
- 9. Generation #5—1985–86 The anterior inclined plane became more pronounced, with an increase in labial torque in the maxillary anterior region. The canine also had an inclined plane; however, it was bibeveled to allow intercuspation of the maxillary cusp with the embrasure between the mandibular canine and the first premolar. Hooks were optional. A transpalatal bar attachment was now available for the first molar bracket www.indiandentalacademy.com
- 10. GENERATION #6—1987–90 The inclined plane on the maxillary anteriors become more square in shape Hooks on the anteriors and premolars were elongated. Hooks were now available for all the brackets. The transpalatal bar attachment for the first molar band was optional. A hinge cap, allowing ease of archwire manipulation, was now available for molar brackets. www.indiandentalacademy.com
- 11. GENERATION #7—1990 TO PRESENT The maxillary anterior inclined plane is now heart-shaped with short hooks. The lower anterior brackets have a larger inclined plane with short hooks. All hooks have a greater recess/access for ligation. The premolar brackets were widened mesiodistally and the hooks were shortened. The increased width of the premolar bracket allows better angulation and rotation control. The molar brackets now come with either a hinge cap or a terminal sheath. www.indiandentalacademy.com
- 12. Giuseppe Scuzzo together with Kyoto Takemoto from Japan developed a prototype of a lingual straight wire bracket and technique the STb (Scuzzo/Takemoto bracket,Ormco) STb www.indiandentalacademy.com
- 13. Massimo Roncnin from Italy in 1994 developed a self ligating lingual bracket based on Begg technique,(Frostadent). Dirk Wiechmann from Germany developed the Incognita brackets. Hatto Loidl from Germany developed a self ligating lingual bracket ,Evolution LT (Adenta) www.indiandentalacademy.com
- 14. CHARACTERISTICS OF THE BRACKET Bite plane Base pad Preangulated slot www.indiandentalacademy.com
- 15. ADVANTAGES OF LINGUAL APPLIANCES OVER LABIAL APPLIANCES Facial surfaces of the teeth are not damaged from bonding, debonding, adhesive removal or decalcification from plaque retained around labial appliances. Facial gingival tissues are not adversely affected. The position of the teeth can be more precisely seen when their surfaces are not obstructed by brackets and arch wires. Facial contours are truly visualized since the contour and drape of the lips are not distorted by protruding labial appliances. Most adult and many young patients would prefer “invisible” lingual appliances if costs, treatment times and results were comparable to those of labial appliance treatment. www.indiandentalacademy.com
- 16. Four distinct situations exist where lingual appliances may be more effective than labial appliances- Intrusion of anterior teeth Maxillary arch expansion Combining mandibular repositioning therapy with orthodontic movements. Distalization of maxillary molars www.indiandentalacademy.com
- 17. INTRUSION OF ANTERIOR TEETH Lingual brackets are positioned closer to the Center of resistance (Cr) than is found with labial brackets. As a result the intrusive force vector passes through the Cr ,as the dentition occludes due to the bite plane effect there is a light continuous ,intrusive force on the anteriors and extrusion occurs in the posterior segment. www.indiandentalacademy.com
- 18. Maxillary arch expansion Dentoalveolar expansion with lingual technique is more as compared to labial technique.Some possible reasons for this are- The force which is developed is of centrifugal type ,from inside towards the outside of the arch. Thickness of the brackets which interpose themselves between the tonge and lingual wall of the teeth can result in expansive effect. Shorter interbracket distance may play a significant role. www.indiandentalacademy.com
- 19. Combining mandibular repositioning therapy with orthodontic movements. When treating patients with Temporomandibular disorders(TMDs),treatment is carried out in two phases. First correction of TMD,second correction of occlusion Orthodontic phase of treatment is tedious and time consuming as labial appliances are placed on one arch ad positioning splint on the opposite. While using lingual appliance both the arches can be treated simultaneously while maintaining the effect of the splints due to presence of bite planes and posterior build ups. www.indiandentalacademy.com
- 20. Distalization of maxillary molars Lingual brackets are placed closer to the Cr of tooth than labial brackets. Hence molar distalization in lingual technique produces bodily tooth movement and less distal tipping. www.indiandentalacademy.com
- 21. DRAWBACKS OF LINGUAL ORTHODONTIC TECHNIQUE Discomfort to the tongue. Difficulty in speech which usually improves within 2-3 wks of therapy. Extended chair side time needed for appliance placement and adjustment. Difficulty of insertion and removal of arch wires Technique sensitive Increased armamentarium required. Expensive. www.indiandentalacademy.com
- 22. DIFFICULTIES ENCOUNTERED DURING THE LINGUAL ORTHODONTIC THERAPY 1. Tissue Irritation and Speech Difficulties The earlier brackets placed on the lingual surface of the teeth were irritating to the tongue and impeded normal speech. The current generation of brackets has been redesigned with smooth exterior surfaces and a low profile. The increased comfort allows normal tongue activity, hence speech is not affected significantly. 2. Gingival Impingement Earlier generations of the lingual appliance had a broad bonding base extending towards the gingival margin. Access for adequate oral hygiene and the self-cleansing nature of the oral cavity were compromised. Brackets have been redesigned to be more self-cleansing. The base now extends incisally and mesiodistally providing adequate bond strength, yet retaining hygienic qualities. Additionally, the bracket hooks have been redesigned with a lower profile and are located several millimeters from the gingival margin www.indiandentalacademy.com
- 23. 3.Occlusal Interference The bracket was redesigned with an inclined or bite plane strategically placed to redirect the vertical shearing forces to a horizontal seating force.The location of the inclined plane is such that when a 1 mm overjet and overbite relationship is obtained, all mandibular anterior contact with the inclined plane is eliminated. To avoid deleterious effects caused by tooth contact with the archwire, the inclined plane is located incisal to the slot. Patient tolerance of the bite plane effect of the inclined plane has been favorable. The incline plane. The red arrows represent the primary force applied, and the broken black lines represent the secondary/resultant forces exerted www.indiandentalacademy.com
- 24. 4. Appliance control & Base Pad Adaptation As with all appliances, accurate contour of base pads improves not only retentive capabilities but also the accuracy of bracket placement and therefore the quality of treatment Topographic maps were constructed for each tooth and individual bracket base curvatures were calculated. 5. Appliance Placement and Bonding The original appliances were direct bonded. With the variability of lingual tooth con-tours, accurate bracket placement was difficult. This approach produced unpredictable tooth alignment with tremendous variations in tip, torque, and tooth height. Initially, the Torque Angulation Referencing Guide (TARG) system was used. A more sophisticated sys-tem, using a diagnostic set-up constructed from articulated models was developed and has met with considerable success. This method, the Custom Lingual Appliance Set-Up Service (CLASS), involves indirect bonding set-up on a diagnostic or ideal model of the teeth. www.indiandentalacademy.com
- 25. 6. Wire Placement Access for the placement of wires in the molar tubes from the lingual was limited. The tubes were redesigned by widening the mesial aperture of the slot of the first molar bracket, creating a funnel effect. 7. Ligation To permit stable ligation with ligature wires or A elastics, ligature locking grooves that are both deep set and easy to hook have been designed. When teeth are crowded and slot engagement is especially difficult, a vertical slot is provided so the archwire can be attached to the bracket even through the initial stages of leveling and aligning (Figure 1–19). A double over-tie with metal is used when a tooth is to be an attach-ment for anchorage or rotation of the other teeth. 8. Attachments A gingival hook is an integral part of the bracket and provides rotational control. The original hook was large and in close proximity to the gingival margin, impeding access for hygiene. This hook was redesigned with a lower profile and moved away from the gingival margin www.indiandentalacademy.com
- 26. PATIENT SELECTION AND DIAGNOSTIC CONSIDERATIONS Patient Selection Favourable Cases Mild incisor crowding and anterior deep bite Long uniform lingual tooth surfaces without fillings ,crowns or bridges Good gingival and periodontal health Compliant patient Skeletal Class I pattern Mesocephalic /mild Brachycephalic skeletal pattern Patients who are able to adequately open their mouth and extend their neck. Unfavourable cases Dolichocephalic skeletal pattern Maximum anchorage cases unless treated with micro implants Short abraed and irregular lingual tooth surfaces,multiple crowns /restorations Limited mouth opening Low level of compliance www.indiandentalacademy.com
- 27. DIAGNOSIS Diagnosis and treatment planning is an important issue for all orthodontic treatment techniques. It essentially involves establishing an ideal goal and then determining a method of achieving the goal. Diagnostic considerations for lingual orthodontics are under following headings-: General, with preference to esthetics and periodontal and gingival condition Dental ,with reference to presence of crowns and large restorations Dentoalveolar discrepancy Vertical skeletal/dental problems Anteroposterior skeletal/dental problems Transverse skeletal/dental problems Surgical cases Preprosthetic cases www.indiandentalacademy.com
- 28. GENERAL CONSIDERATIONS Esthetic Factors Requirements for achieveing a beautifull smile are as follows-: Beautiful individual teeth Beautifully aligned and leveled teeth Sufficient dental arch width Sufficient lip support Beautiful teeth and gingival exposure in rest position ,conversation and smiling. Periodontal and gingival considerations The patient should have a healthy periodontium and should be able to maintain oral hygiene. Gingival inflammation can be minimized by Bending hooks to reduce gingival impingement Prophylaxis at each archwire change Use of liquid adhesive & correct quantity of adhesive Carefully maintain & control the effect of tooth movement on gingival tissues www.indiandentalacademy.com
- 29. DENTAL CONSIDERATIONS Patients with high risk for caries or with colour alterations of teeth or with decacifications can be treated with lingual orthodontics.since the risk for all this is transferred to the lingual side and labial surface is kept intact. Most suitable teeth for lingual orthodontics are those with long and smooth lingual surfaces.In general the lingual surface should be more than 7mm, but now a days STb brackets are reasonably small and can be used on short teeths. Lingual surfaces of incisors < 7mm & bicuspids with short lingual surfaces should be reconstructed In exceptional cases molars with very short lingual surface may be bonded on buccal aspect {Takemoto technique} The presence of crowns ,bridges and large restorations impact negatively on achieving good adhesion of brackets. www.indiandentalacademy.com
- 30. DENTOALVEOLAR DISCREPANCY Methods used in labial orthodontics for correction of dentoalveolar discrepancies can also be used in lingual therapy. Protrusion,expansion,stripping,distalization or extractions are all modalities of treatment that can be applied to both labial as well as lingual techniques. www.indiandentalacademy.com
- 31. VERTICAL CONSIDERATIONS The built-in bite planes on the upper incisor and cuspid will interfere with occlusion and result in a posterior open bite the extent of which depends on the intial overbite. The lingual brackets on the maxillary incisors should be bonded to allow a vertical distance of 2mm from the incisal edge to the bracket, which allows the case to finish with a normal overbite and good posterior occlusion. www.indiandentalacademy.com
- 32. Management of the posterior open bite created after bracket placement is dependent on the degree of disocclusion. Open-bite – 2 mm – occlusion re-establishes in 20-30 days If only one lower incisor contacts upper bite plane and/or Posterior open-bite > 3 mm –then it can lead to periodontal trauma- So advisable to build bite blocks on the lower molars (Tripodisation) With a combination of molar extrusion and a incisor intrusion there will be an increase in anterior facial height which is desirable in brachycephalic morphology, but care has to be taken in patients with increased anterior facial height to control vertical molar anchorage by considering occlusal build up,TPAs and minimum use of Class II &III elastics. www.indiandentalacademy.com
- 33. ANTEROPOSTERIOR CONSIDERATIONS Skeletal Class I Easiest group to treat, but it should be remembered that due to bite opening effect of bite plane mandibular posterior rotation can occur which in turn increases the overjet and leads to lingual tipping of incisors. Anterior open bite on a Class I skeletal base does not present any problem regarding the initial bonding, irrespective of the overjet. Deep overbite on a Class I skeletal base presents three options depending on overjet. Normal overjet- If posterior disocclusion does not exceed 3mm and there is anterior contact between two or more lower incisors, with same number of maxillary incisors then bite blocks not necessary. -If posterior disocclusion exceeds 3mm or there is only one incisor contact then ,tripodisation is required by build up on occlusal surface of lower molars. The height of build up is reduced regularly as more anterior incisor contact develops. www.indiandentalacademy.com
- 34. Increased overjet-In such cases there is no anterior contact ,but as the maxillary incisors are retracted and overjet reduced the maxillary brackets can become interposed between upper and lower teethand contribute to debonding, it can also lead to TMJ problems . - In such cases build up is indicated on occlusal surface of left and right lower molars and first bicuspids, Occlusion is stabilized with four duly balanced contacts. Decreased overjet-In case of anterior crossbite and deepbite it is indicated to build up four point occlusal contact. www.indiandentalacademy.com
- 35. Skeletal Class II and Class III – Mild cases treated successfully by camouflage Severe cases – orthognathic surgery www.indiandentalacademy.com
- 36. TRANSVERSE CONSIDERATIONS Posterior cross bites should be treated before starting Lingual treatment In case rapid maxillary expansion is undertaken ,then impression for bracket positioning should not be taken till expansion is completed. www.indiandentalacademy.com
- 37. PREPROSTHETIC CASES Preprosthetic segmental Lingual orthodontic mechanics are rapid, economical and comfortable. Lingual orthodontic techniques can be successfully combined with micro implants in preprosthetic cases. www.indiandentalacademy.com
- 38. KEYS TO SUCCESS OF LINGUAL ORTHODONTIC TREATMENT Case selection Set up Indirect Bonding Rotation correction Ligatures Force system Retention www.indiandentalacademy.com
- 39. CASE SELECTION Lingual orthodontic treatment is different from that of labial orthodontics because of a larger amount of anchorage available in lingual orthodontics. Vectors of orthodontic forces applied to lingual brackets pass lingually to the centers of rotation of the teeth, which increases lingual crown torque on the anterior teeth and forces the posterior teeth into an upright position. www.indiandentalacademy.com
- 40. A case requiring extraction in labial orthodontics may be treatable by non-extrac-tion in lingual orthodontics. A case indicated for surgery in the labial approach may be treated non-surgically in the lingual approach Ideal Lingual cases Non extraction cases Deep bite, class I with mild crowding,good facial pattern Deep bite, class I with generalized spacing, good facial pattern Deep bite, mild class II ,good facial pattern Class II div 2 with retruded mandible Cases requiring expansion Consolidation (diastema) cases Extraction cases Class II,maxillary first bicuspid and mandibular second bicuspid extractions Maxillary first bicuspid only extractions Mild double protrusions with four first bicuspid extractions,where in anchorage is not critical. More difficult cases Surgical cases Class III tendencies Class II, four first bicuspid extractions Moderate mandibular plane angles Cases with multiple restorative work www.indiandentalacademy.com
- 41. CASES CONTRAINDICATED FOR LINGUAL THERAPY Acute TMJ dysfunction. Mutilated posterior occlusion. High angle or dolicofacial patterns. Extensive anterior prosthesis. Short clinical crowns. Critical anchorage cases. Severe class II discrepancies. Poor oral hygiene or Unresolved periodontal involvement. www.indiandentalacademy.com
- 42. SET-UP Set-up models are essential for lingual orthodontic treatment: they provide a means of identifying plans and goals of treatment, and determine bracket positions. Bracket positions hold the key to success of the treatment . For example a slight change in bracket position or height will result in a large variation in the torque. These problems can be overcome by use of set up models to determine the bracket position and the amount of torque or movement required. www.indiandentalacademy.com
- 43. INDIRECT BONDING The lingual surface of teeth has a unique morphology that makes it difficult to place brackets in the ideal position. Indirect bonding has become the established method of overcoming these discrepancies. www.indiandentalacademy.com
- 44. ARCH FORM Cuspid to bicuspid offset-a 2 to 4 mm 90 degree bend is placed between cuspid and bicuspid. Molar offset- a lingual offset of about 1mm is often indicated between the bicuspids and molars. In some cases ,the maxillary lateral incisors may require a labial offset(0.5-1mm)to compensate for a significant change in facio-lingo thickness from the centrals to the laterals. www.indiandentalacademy.com
- 45. ROTATION CORRECTION The span between two brackets placed on lingual tooth surfaces is very short because of the lingual anatomies of the teeth. The following methods are available for efficient rotation correction- Smith's rotation tie A power chain is passed between the wire and the gingiva. One end of the power chain is threaded through the first link at the other end to secure it to the wire. The power chain is brought to the labial side, passed through the opposite proximal surface and placed on the hook at the bottom of the brack-et. The power chain should be tied to the wire on the distal side and placed on the hook from the mesial side for a mesially rotated tooth, and in the opposite direction for a distally rotated tooth. but it has several disadvan-tages: the power chain shows on the labial side, may slip incisaily on the canine due to its morphol- ogy, and may risk devitalizing the tooth if pulled too tight www.indiandentalacademy.com
- 46. Bend loops The wire length between brackets can be increased with loops bent into the archwire to make up for a short inter-bracket span. Bracket spans are particularly short between the lower anterior teeth. Use of a power arm A short bracket span shortens the horizontal moment of orthodontic force. The use of a power arm lengthens this moment arm to correct rotations. This is a very effective method in the lingual approach. www.indiandentalacademy.com
- 47. LIGATURE S Once accurate set-up models are made and brackets are correctly positioned, it is essential to tie an archwire securely to the brackets in order to transmit forces efficiently. Double-over ties should be used on the six anterior teeth to engage the wire to the bottom of each bracket slot, and the wire firmly tied. Loose ties would decrease the efficiency of force transmission from the wire to the teeth, slowing down the leveling process. www.indiandentalacademy.com
- 48. FORCE SYSTEM The mechanics of tooth movement from the lingual side has different characteristics from the labial mechanics. The appliance is located on the lingual side, vectors of forces to the teeth are directed lingually to the center of rotation of each tooth, which puts labial root torque on anterior teeth. Consequently, anterior teeth tip lingually, in reaction to which posterior teeth become upright distally. In the horizontal plane, forces are applied that rotate posterior teeth distally. Cortical bone anchorage is established when roots approach the cortical bone. This cortical bone anchorage is increased in lingual orthodontics, particularly in the lower arch which has thicker cortical bone than the upper arch. www.indiandentalacademy.com
- 49. During anterior retraction and space closure, the phenomena called "vertical bowing effect" and "transverse bowing effect" occur, causing archwires to deform three-dimensionally, which in turn causes anterior teeth to tip lingually, posterior teeth to tip mesially and the posterior bite to open. In the horizontal plane, the inter premolar width is expanded (flared out). A good understanding of the mechanics of tooth movement and attention to the following holds the key to successful treatment. www.indiandentalacademy.com
- 50. Establish torque before retraction of anterior teeth Establish adequate torque (lingual root torque) to counteract the bowing effect during retraction. An area with different torque becomes an anchor and may interfere with smooth retraction. The wire used are .0175x.0175 or .017x.025 TMA Do not use round wire for anterior retraction Retraction with a round wire causes only the crowns of anterior teeth to tip lingually producing the vertical bowing effect. To counteract this effect, anlerior teeth should be retracted with a rectangular wire of sufficient rigidity (.017 x .025 TMA) www.indiandentalacademy.com
- 51. Use light wires for detailing A rigid rectangular wire with precise bends to correct individual tooth positions is difficult to engage into bracket slots and ligate securely due to short inter-bracket spans. Such wires also apply exces-sive forces and incorrect torque to the teeth. Light wires should therefore be used to allow physiolog-ical tooth movement during detailing. Utilize en masse retraction This method of retraction is esthetically more acceptable since a space does not open between the lateral and canine. In addition, when space is available distal to the canine, the insets placed into the archwire between the canine and premolar, which are required in lingual orthodontics, do not get in the way during retraction. The retraction force should be minimized during en masse retraction, and more intrusion and torquing force is needed to retract the anteriors in lingual orthodontics than in a labial system. www.indiandentalacademy.com
- 52. RETENTION Since most lingual orthodontic patients are adults. Retention in adult patients has the following characteristics: Adult patients are likely to be esthetically more demanding and do not like visible retainers. Many adult patients have dental problems such as gingival recession, occlusal wear, poor restorations and missing teeth, requiring dental procedures during retention. Adult patients have limited time to wear retainers owing to social restrictions. Ideally the use of retainers should be started on the day braces are removed. It is important fully o explain the importance of retainers, proper handling and regular check-ups to patients. www.indiandentalacademy.com
- 53. WIRE SEQUENCING IN LINGUAL ORTHODONTICS Successful lingual orthodontic treatment, more than any other orthodontic treatment modalities, requires the rigid adherence to a series of protocols among all the protocols, the most important one is defensive archwire sequencing. The archwire sequencing program uses very few wires, each selected to perform specific tasks during treatment. The following protocols maximize the potential of each wire and reduce archwire changes to a minimum, at the same time effecting high quality results. 1) First initial archwires: .016 Ni-Ti (Rarely an 0.0155 or .0175 Respond) 2) Second initial archwire: .016 Special-Plus Wilcocks (Australian) heat-treated stainless steel 3) Intermediate wires: .017 ´x .025 TMA 4) Finishing wires: .017 ´ x .025 or .016 ´x .022 SS 5) Detailing wires: Wilcocks (Australian) .016 or .018 Special- Plus This sequence is followed for all cases: Class I, II, or III malocclusions, and extraction or nonextraction cases www.indiandentalacademy.com
- 54. INITIAL ARCHWIRES Initial archwires are the most important in the sequence and their application can often be time consuming. The goals to be achieved at this stage are initial levelling, alignment, derotations and tip control, to allow maximum bracket slot engagement. When crowding is severe, a second initial wire is required to ensure full bracket slot engagement. www.indiandentalacademy.com
- 55. INTERMEDIATE WIRES Intermediate wires like .017 ´ .025 TMA may occasionally be used as finishing wires, especially in nonextraction cases. In extraction cases, the arch form in the initial wires should be modified to ensure that the cuspid-bicuspid offset is placed just distal to the canine bracket to allow space closure. The buccolingual compensatory curve is reduced in the intermediate wire since it is relatively stiffer than the initial wire. Elastic forces may be applied at this stage of treatment to initiate A-P control.TMA wires are not suitable for prolonged or heavy elastic forces, either intra- or interarch. If Class II elastics are required, an extra buccal compensatory bend should be made to negate the rotational effect of the elastic forces on the lower second molars. With rectangular archwires, steel ligation is essential to ensure full bracket slot engagement and full expression of appliance prescription. www.indiandentalacademy.com
- 56. FINISHING AND DETAILING WIRES Stainless steel archwires are used to complete arch recontouring and space closure, and to eliminate any side effects noticed earlier in the procedure. Providing original treat-ment prescription and compensatory archwire modifications are adequate. Treatment should be be completed with .017 ´x.025 upper arch and .016 ´x .022 lower stainless steel archwires, except in Class III cases where the upper and lower archwires are reversed. The archform of stainless steel wires is the same as the intermediate archwire, with subtleadjustments to the canine or molar offsets, if required, and compensatory bends to facilitate completion of space and interarch adjustment. More flexible wires are required for final detailing, or for individual tooth overcompensation. These archwires could be Wilcocks (Australian) .016 or .018 Special-Plus. www.indiandentalacademy.com
- 57. The success of defensive archwire sequencing depends on the following: Correct treatment planning and well-planned goals. Allowing sufficient time for each archwire to do its work completely. Steel ligation is required with all rectangular archwires. These measures help to reduce stress to the patient, doctor and the materials used, increase patient comfort and satisfaction, cut costs and enhance efficiency www.indiandentalacademy.com
- 58. BIOMECHANICS AND COMPARATIVE BIOMECHANICS Lingual multibracket appliances, besides solving esthetic needs, have biomechanical advantages so far as the point of application of the force in relation to the Center of resistance (Cr) of the teeth. A single rooted tooth has its center of resistance located almost in the middle of the root, at approximately 40% the distance from the alveolar crest to the apex. Unlike the labial technique, the lingual bracket rests on the upper incisors in the vertical position, which is more in line with the Cr, thus allowing easier movement whenever an occlusal force is applied. Moreover, the lingual bracket has a posi-tion closer to the long axis which passes through the center of resistance than does the labial one. Unwanted or inefficient tooth movement during orthodontic therapy results from individual variation in biological response and the improper use of forces. www.indiandentalacademy.com
- 59. SAGITTAL PLANE The location of the Cr of a tooth is not related to the technique ,the relation between the Cr location and bracket placement directly influences the magnitude and the direction of moments created by the applied forces The distance in sagittal plane between a lingual bracket and the Cr (D2) is much shorter than between a buccal bracket and the Cr (D1).Hence pure intrusion movement in Lingual orthodontics will be closer to bodily movement than in buccal orthodontics Lingual appliance D2 www.indiandentalacademy.com
- 60. VERTICAL PLANE The distance in vertical plane between alingual bracket and the Cr (D4) is greater than between a buccal bracket and the Cr (D3).Therefore the retraction movement in lingual orthodontics will result in a greater moment of force than in buccal orthodontics for the same applied load. D3D4 Labial appliance www.indiandentalacademy.com
- 61. In normally inclined incisors, a vertical force of 40 g applied on the labial side, at 7 mm from the CR (in the horizontal plane), produces a counter-clockwise moment of 280 g mm (7 mm ,x 40 g = 280g mm}. The same amount of vertical force applied on the lingual side, at 1 mm from the CR (in the hori-zontal plane), produces a counter-clockwise moment of 40 g mm (1 mm x 40g = 40g mm) www.indiandentalacademy.com
- 62. Clinical orthodontic movements are not pure vertical or sagittal in direction.The orthodontic movement is a cognizant of the resultant force generated by the vertical and sagittal forces. In buccal orthodontics the net force is generally ahead of the Cr,while in lingual orthodontics it is behind the Cr. Hence tendency for retroclination of anterior teeth is more pronounced in lingual orthodontics,in certain cases it is necessary to counteract this tendency by creating a negative buccal force by incorporating a labial crown torque (palatal root torque) www.indiandentalacademy.com
- 63. In the lower arch the lingual bracket slot is closer to the axis passing through the Cr, in normally inclined lower incisors, as compared to one on the labial side. For this reason, during the leveling phase of treatment, the lingual application of the force allows easier intrusion coupled with less labial inclination of the crown, when compared with the labial application of the force. The lingual technique will cause more distal inclination of the lower molar crowns and more lingual tipping of the lower incisors . www.indiandentalacademy.com
- 64. HORIZONTAL PLANE The teeth are positioned along geometrically elliptical arches in the occlusal plane (parallel to the horizontal plane). In the occlusal plane the interbracket distance in lingual orthodontics is shorter than in labial. For this reason the archwire stiffness increases and the rotational moment is less on lingual than on the labial side. It is more difficult to have an efficient coupling of forces on the lingual side during rotational movement. In cases of crowding it is more difficult to engage the archwire in the lingual brackets than in the labial, so we need to use more resilient wire www.indiandentalacademy.com
- 65. ANCHORAGE CONSIDERATIONS IN LINGUAL ORTHODONTICS Anchorage provision and control is key requirement for successful treatment of most malocclusions. Lingual technique a specific problems relating to the provision of adequate anchorage due to a number of factors like Most patients seeking lingual orthodontics are non growing adults Many have mutilated malocclusion Compromised periodontal condition These patients have a high esthetic demands precluding the use of many anchorage devices like extraoral appliances, pendulum,lip bumper or intermaxillary elastics. Bite plane effect causes loss of occlusion and intercuspation which causes loss of anchorage. www.indiandentalacademy.com
- 66. Generally, lingual appliances provide good anchorage control, because of the smaller arch perimeter which in turn increases the rigidity of lingual archwires during retraction. Takemoto compared anchorage loss in labial versus lingual extraction cases treated with loop mechanics and found higher anchorage value of posterior dentition in lingual cases. Due to proximity of lingual brackets to centre of resistance of tooth. Also the direction of force during space closure creates a degree of buccal root torque and distopalatal rotation of the molar crown ,which in turn produes cortical bone anchorage. www.indiandentalacademy.com
- 67. SIX KEYS FOR ANCHORAGE CONTROL IN LINGUAL MECHANICS 1. Standard lingual bracket jig prescription for anterior teeth ,incorporating slight extra palatal root torque, molar tubes placed off center in a more mesial position incorporating a mesial tip to encourage molar tip back(uprighting). 2. Reduced friction, using sliding mechanics together with bidimensional archwires incorporating a rectangular anterior section & round posterior section or using a standard archwire and placing brackets with larger slot size for posterior teeth. 3. Bite blocks on molar teeth to open the bite 4. Light Class I, II, III forces for retraction or space closure 5. Incorporation of second molars 6. Exaggerated curve of spee in maxillary space closing arch wire www.indiandentalacademy.com
- 68. MECHANICS USED TO CONTROL ANCHORAGE IN THE UPPER ARCH Mechanical advantages gained from lingual treatment are buccal root torque and distal rotation of the molars, especially due to the easily established cortical bone anchorage. Also, an intrusive force is applied to the functional or lingual cusps of the upper molars because the appliance is placed near these cusps. Therefore, the COCR discrepancy caused by the primary initial contact and the mandibular clockwise rotation caused by the elongation of molars due to bite planes are reduced. Combinations of loops, elastics, transpalatal arches, and headgear have been used to successfully control both the horizontal and vertical anchorage in both the upper and lower arches. Applied intrusion force to the upper molars resulting in cortical bone anchorage. Distal rotation can be easily established with the posterior teeth by retraction forces. www.indiandentalacademy.com
- 69. MAXIMUM ANCHORAGE (UPPER ARCH) Helical loop and Tloop mechanics (.017 ´ .025 TMA) are combined with a transpalatal arch and a buccal sectional arch from first to second upper molars for stabilization. Also, highpull headgear and Class II elastics are used. Anchorage preparation for a maximum anchorage case with helical loop mechanics in the upper arch, using a . 017 .025 TMA with a transpalatal arch and buccal sectional arch from 6-7. High-pull headgear and Class II elastics are also used Anchorage preparation for a maximum anchorage case with T- loop mechanics in the upper arch. www.indiandentalacademy.com
- 70. MODERATE ANCHORAGE (UPPER ARCH) Anchorage preparation for a moderate anchorage case with L-loop mechanics in the upper arch. A transpalatal arch is added to prevent a transverse bowing effect. The anterior segment (3-3) and the posterior segment (5-7) is “figure-eighted” with ligature wire. Anchorage preparation for a moderate anchorage case with sliding mechanics in the upper arch. To eliminate the transverse bowing effect a power chain is used from the lingual of the canine to the buccal of the first molar, to rotate the first molars mesially. www.indiandentalacademy.com
- 71. MINIMUM ANCHORAGE (UPPER ARCH) Extraction spaces are closed by a reciprocal elastic force, with a power chain placed on both the buccal and lingual of the canine and first molar The anterior segment (usually 4 | 4) is “figureeighted” with ligature wire. Frequently, cases requiring minimum anchorage control are those in which second premolars have been extracted and mesial molar movement is encouraged. Sometimes Class III elastics are used to enhance mesial movement of the molars. www.indiandentalacademy.com
- 72. MECHANICS USED TO CONTROL ANCHORAGE IN THE LOWER ARCH The anchorage value of the lower arch is higher than that of the upper arch because the mandible has a thicker cortical layer and thinner cancellous layer of bone. Because of this difference in anchorage value, a buccal sectional arch is usually placed on the posterior teeth to control the functional or buccal cusp. Sliding mechanics using a .016 ´x .022 stainless steel archwire are used most frequently for space closure. Sliding mechanics minimize the bowing effect and avoid tongue irritation from loops. When sliding mechanics are not the optimum choice for space closure, loop mechanics may be used. This includes Class III malocclusions treated nonsurgically, where dental compensations by tipping the anteriors lingually may be needed, when the right and left extraction spaces are not symmetric, or when the space closure cannot be accomplished with sliding mechanics because of root contact with the cortical bone. In these cases, the lower six anterior teeth are tipped lingually with loop mechanics. www.indiandentalacademy.com
- 73. MAXIMUM ANCHORAGE (LOWER ARCH) Anchorage preparation for a maximum anchorage case with sliding mechanics in the lower arch. An elastic power chain is used on .017X .025 TMA or .016X .022 SS archwires. A buccal sectional arch is used for stabilization and the anterior segment (33) and the posterior segment (57) is “figureeighted” with ligature wire. Class III elastics are used both buccally and lingually usually with extra oral force traction for reinforced anchorage. www.indiandentalacademy.com
- 74. MODERATE ANCHORAGE (LOWER ARCH) Anchorage preparation for a moderate anchorage case with sliding mechanics in the lower arch. The anterior segment (3|3) and the posterior segment (7–5| 5–7) are “figureeighted” with ligature wire. Reciprocal elastic forces are used and buccal segmental wires are not needed. www.indiandentalacademy.com
- 75. MINIMUM ANCHORAGE (LOWER ARCH) Most cases requiring minimum anchorage are those in which second premolars have been extracted. An elastic power chain is placed circularly from the lingual of the first molar, encircling the canine, and attaching to the buccal of the first molar. Class II elastics are used to facilitate mesial movement of the molars. The anterior segment (4 |4) is “figureeighted” with ligature wire. As the molars move mesially, gingival recession over the mesial root of the first molar should be prevented. www.indiandentalacademy.com
- 76. ANTERIOR AND LATERAL CONCERNS Patients with severe anterior tongue thrust often present a challenge when attempting to retract the anterior dentition. The lingual appliance, due to the discomfort associated with tongue contact, redirects the tongue tip to the palatal vault in speech and swallowing. Therefore, the anterior thrust component is eliminated, and normal muscle balance is restored. The excessive pressure from the tongue against the anteriors is minimized while retraction is facilitated. A similar effect is seen with the use of lingual elastics. This has been termed the “fence effect,” in which the lingual appliance or the elastics create a fencing of the tongue musculature from the dentition.The fence effect contributes to the increase in anchorage values with lingual appliances as opposed to labial appliances. Another factor contributing to anchorage control is the lateral occlusal function. The lateral occlusion prevents the transverse bowing effect which is often seen during lingual treatment. The anteriorposterior forces used for retraction should be light, minimizing anchorage loss while maintaining lateral occlusal function. www.indiandentalacademy.com
- 77. TREATMENT SEQUENCE Leveling,aligning,rotational control and bite opening. Torque control. Consolidation and retraction. Detailing and finishing. www.indiandentalacademy.com
- 78. LEVELING, ALIGNING, ROTATIONAL CONTROL AND BITE OPENING Initiate tooth movement with light forces. Provide for a period of patient adaptation. Correct rotations. Level and align individual arches to permit wire progression. Obtain initial torque control when required. Establish posterior anchorage units with buccal segments. Initiate posterior segment control with extra oral traction and TPA when required. Reduce any excessive overbite. Gain space for rotations. www.indiandentalacademy.com
- 79. LEVELING The first stage in lingual orthodontic treatment is partial canine retraction to eliminate crowding and create space for the alignment of the four incisors in both the upper and lower arches. Partial retraction prevents space from opening between lateral incisor and canine for esthetic reason and leaves adequate room for activation during enmasse retraction of the anterior teeth. Following this stage,the six anterior teeth are leveled with a full arch wire. During anterior leveling,care must be taken to prevent the vertical bowing effect. www.indiandentalacademy.com
- 80. TORQUE LEVELING Once anterior leveling has been achieved,torque leveling of the six anterior teeth is necessary prior to en masse retraction. The wire used are .017x.025TMA or.0175x.0175 TMA. It is important that the wire is fully engaged into bracket slots. The six anterior teeth need double over ties for effective torquing. www.indiandentalacademy.com
- 81. EN MASSE RETRACTION Two methods are available for en masse retraction. Loop mechanics. Sliding mechanics. www.indiandentalacademy.com
- 82. SLIDING MECHANICS VERSUS LOOP MECHANICS DURING EN MASSE RETRACTION In labial orthodontics, the mechanics usually involves canine retraction, and once it is accomplished, upper and lower incisors are retracted. Lingual patients, however, strongly demand that esthetics be maintained throughout the treatment,so in addition to the invisible braces, care needs to be taken to avoid opening spaces between the lateral incisors and canines during treatment. Therefore, the anterior segment is retracted as one unit. www.indiandentalacademy.com
- 83. En masse retraction can cause many mechanical problems such as bowing effect (vertical and transverse) and anchorage control. The vertical bowing effect is the most serious problem, since it cannot be avoided with simple auxiliaries like transpalatal arches. When a strong retraction force is used in an anterior– posterior direction , the upper anterior segment (33) may tip lingually. The bite plane effect of the upper lingual brackets can cause posterior disocclusion and consequently loss of lateral occlusal function. As a result, bowing effect occurs. www.indiandentalacademy.com
- 84. En masse retraction can be performed with sliding mechanics Advantages of sliding mechanics : Simple and effective for preventing transverse bowing effects without using a transpalatal arch. Disadvantages of sliding mechanics: Wire friction and uncontrolled retraction force Anchor loss Increased depression of lower anteriors due to the force applied by the anterior bite plane while retracting the upper incisors. Difficulty in applying the technique to unusual extraction cases where different teeth are extracted on the right and left sides. Increased retraction time and consequently increased treatment time. www.indiandentalacademy.com
- 85. SLIDING MECHANICS Archwire: .016 ´x.022 SS Indications: Minimum or moderate anchorage cases with upper second bicuspid extraction Nervous patients who do not want auxiliaries like loops Lower arch extraction cases. www.indiandentalacademy.com
- 86. In en masse retraction with loop mechanics ,three different kinds of loops are commonly used: closed loop, helical loop and Lloop. Advantage of Loop mechanics : Effective in closing space without wire friction. Bigger tipping bends can be incorporated in to archwire Disadvantages of sliding mechanics: Complicated to bend the wires with the different loops Requires a lot of skill from the orthodontist. www.indiandentalacademy.com
- 87. CONSIDERATIONS IN LOOP MECHANICS Care must be taken to prevent the loops from impinging on the palatal mucosa. Bend the loops 45 to 60 degree away from the tissue. Activate the loops about 1mm once every 8 weeks (never activate them every month). No activation is necessary on the day the loop wire is placed. www.indiandentalacademy.com
- 88. CLOSED HELICAL LOOP OR L-LOOP MECHANICS Archwire: .016 X .022 SS or .017 ´ .025 TMA Indications: Open bite cases with little need for upper anterior torque control or active tipping of anteriors Closure of small spaces. T-LOOP MECHANICS Archwire: .017 X .025 TMA Indications: When maximum anterior retraction is needed while maintaining anterior torque. When active intrusion of anteriors is indicated In seventy percent of total extraction cases. www.indiandentalacademy.com
- 89. In a study done to compare Loop and sliding mechanics it was found that No significant difference in the skeletal pattern between sliding and loop mechanics. Upper anterior torque (U1 to FH) was maintained better with Tloop mechanics compared to sliding mechanics and worse with closed helical loops. Anchorage was controlled better with all loop mechanics. Lower anterior intrusion was significantly smaller with Tloop mechanics. There were no significant differences in facial axis between both mechanics which means that there is no opening of mandible. Retraction was accomplished in a shorter time with loop mechanics than with sliding mechanics www.indiandentalacademy.com
- 90. Loop mechanics Sliding mechanics Wire friction Not affected Affected Untipping bend Easy to place Limitation in placing bens to minimize wire friction Control of retraction force Easy to control depending on loop activation Hard to control as difficult to quantify force level Unusual extraction case Suitable Unsuitable Bite opening control Suitable Unsuitable Discomfort Much discomfort Little Wire bending Difficult Easy www.indiandentalacademy.com
- 91. DETAILING After en masse retraction is complete, detailing is required to obtain solid intercuspation and arch coordination. The wire sizes used here are .0175x.0175 TMA or.016 TMA,Wilcocks 0.016 /0.018 special plus Rigid rectangular wires are not appropriate for detailing because it is often difficult to engage those wires fully into bracket slots, even with small inout step and torque bends, due to the short interbracket span. It is necessary to figureeight the canine and second premolar and cinch back the wire ends to prevent the extraction sites from reopening. www.indiandentalacademy.com
- 92. EXTRACTION MECHANICS Due to the unique biomechanics of lingual orthodontics extraction choices often differ from those in labial orthodontics www.indiandentalacademy.com
- 95. FINISHING AND DETAILING Difficulties encountered in finishing are derived from Patient characteristics - Restorative & Periodontal complications - Thickness of tooth varies - Compensating bends are less accurate & less effective Anatomy of lingual surfaces Mechanics of Lingual orthodontics - -The point of application of force is at some distnce from the labial surface which actually defines the final alignment - -difficulty to give finishing bends due to shrt archwire - -Uprighting ,torque and rotation movements are difficult to achieve www.indiandentalacademy.com
- 96. Prevention of finishing problems Correct diagnosis & Rx planning- asymmetric extractions Precise bracket bonding Light forces to avoid side effects www.indiandentalacademy.com
- 97. SYSTEMATIC FINISHING PROTOCOL Step 1 of finishing protocol - Reuse of initial resilient rectagular arch wire for 3-4 months(017x017 Cu-NiTi for 0.018”brackets) - Problems deriving from treatment errors such as torque of incisors,expansion and some of the rotations can be corrected with this procedure. Step II finishing protocol -Settling the occlusion by establishing correct interdigitation , correction of minor midline, A-P & vertical discrepancies. - Settling in the occlusion can be done by using a lower stabilizing arch, SS or 0.0175 x 0.0175 TMA and an upper 0.014 round sectional wire from canine-canine or lateral incisor to lateral incisor -Vertical elastics for 4-6 weeks Step lll finishing protocol -Final detailing & finishing bends -Pablo Echarri- finishing wire bends on models -Upper arch 0175 x 0175 TMA -Lower- 016”TMA www.indiandentalacademy.com
- 98. ORTHODONTICS Patient undergoing lingual orthodontic treatment are often esthetically demanding and donot like visible retainers. Hence Clear retainers made of 0.4”/0.5” thick thermoplastic material can be used. Advantages- Comfortable Decreased speech interference Disadvantages- Breakage Deformation Cannot be used for long time Recommendation- Clear retainer during day time Hawleys retainer during night time For lower arch Scuzzo and Takemoto prefer 0.012” Australian arch wire fixed lingual retainer Advantage- Encourages PDL rearrangement Corrects minor incisor malalignment www.indiandentalacademy.com
- 99. LINGUAL LABORATORY PROCEDURES FOR BRACKET POSITIONING The irregular lingual tooth morphology creates a requirement for custom contouring of lingual bracket bases with appropriate bracket base thickness and torque Various procedure have been developed for this like- CLASS (Custom lingual appliance setup service) TARG (Torque angulation reference guide) Slot Machine BEST – Bonding with Equal Specific Thickness system Ray Set Biaggini bracket positioner Lingual bracket jig Mushroom bracket positioner Hiro system www.indiandentalacademy.com
- 100. CLASS (CUSTOM LINGUAL APPLIANCE SETUP SERVICE) A pretreatment diagnostic setup is manufactured and then used as a template for definitive bracket fitting. After determining ideal anterior tooth position in the setup, the technician then places the brackets in their correct preprogrammed position. Adv- placing anterior brackets using an arch radius with the CLASS system,the in-out discrepancies along the arch are compensated for by filling the gaps between the mesh pads and lingual surfaces of the teeth with composite material. www.indiandentalacademy.com
- 101. TARG (TORQUE ANGULATION REFERENCE GUIDE) Machine developed by Ormco in 1984 for lingual bracket positioning. The machines torque blades are used to define a horizontal plane and torque for all teeth, using this the brackets can be placed at a proper vertical distance from the occlusal edges and in a central position on each tooth. The draw back was that the original TARG machine did not allow preprogramming of in-and out-bends for individual teeth. Does not consider different thickness of the teeth 1st order archwire bends are necessary www.indiandentalacademy.com
- 102. SLOT MACHINE Introduced in the year 1986 by,Dr.TD Creekmore; the slot machine is to be used with the conceal bracket system , it also used a labial reference to position the lingual brackets like the TARG machine www.indiandentalacademy.com
- 103. Fillions Lingual Indirect bonding system Didier Fillion improved this method in 1987 by adding an electronic device to the TARG machine with the purpose of measuring labio- lingual thickness of tooth. This improvement reduced the number of first- order bends in the wire. BEST – Bonding with Equal Specific Thickness system www.indiandentalacademy.com
- 104. Thickness Measurement System records the thickness (the width of the teeth with bracket) of the six anterior teeth. The greatest thickness is chosen as the standard thickness. Because of the standardization of thickness, this system permits us to avoid all first-order bends, except the ones between the cuspids and bicuspids and between the bicuspids and molars. www.indiandentalacademy.com
- 105. The macrofilled resin is applied to the bracket base; then the bracket, placed on the blade, is moved toward the plaster until the selected thickness measurement appears on the screen. The resin excesses, even on the gingival margins, are removed before polymerization. By this technique, we achieve a thickness standardization while the brackets are each supported on resin pads of different thicknesses. For bicuspids and molars, the thicknesses are standardized in the same way www.indiandentalacademy.com
- 106. The Transfer System The transfer tray allows us to transfer the brackets which have been bonded on the malocclusion model to the patient’s mouth. This tray can be made of different materials, but we use a low-viscosity silicone that does not apply any pressure on the brackets and can guarantee a bracket’s total stability during this stage. www.indiandentalacademy.com
- 107. The Bonding Procedure The bonding is performed very rapidly because of the precision and reliability of the laboratory procedure and with unfilled resins only. It is very important in lingual orthodontics to know that the bonding height is reduced by 13% and that the brackets are placed close to the gingival margin. www.indiandentalacademy.com
- 108. THE DALI PROGRAM (DESSIN DEL’ ARC LINGUAL INFORMATISÉ OR COMPUTERIZED DRAWING OF THE LINGUAL ARCHWIRE) It uses the measurements of the tooth widths performed at the laboratory by the technician, and with the help of a computer develops a detailed drawing of the ideal lingual archwire, with all the teeth perfectly aligned. The clinician can choose an arch form in function for the initial arch form and a final one that is more ideal for the end of the treatment. It permits us to obtain an extremely accurate tracing of the finishing archwire, at a 1:1 ratio. It allows us to know with a very high accuracy (with 0.1 mm) the width of the first-order bends placed between the cuspids and bicuspids, and between the bicuspids and molars. During treatment, it allows us to know the ideal arch shape needed to achieve a good occlusion, especially in asymmetric cases. It permits us to preform all archwires with great precision, except for the first ones which are bent from the copy of the bonded brackets on the initial model. It is not necessary to coordinate the archwires during treatment because the drawing of the upper and lower archwires are made from the same labial arch curves www.indiandentalacademy.com
- 109. RAY SET BIAGGINI BRACKET POSITIONER A 3-dimensional goniometer control system determines 1st , 2nd & 3rd order values for each tooth. Both pre and post set up values of each tooth are evaluated and the amount of orthodontic tooth movement for each tooth on set up model is calculated. www.indiandentalacademy.com
- 110. LINGUAL BRACKET JIG Developed by Dr.Silvia Geron in 1999. It is a chair side direct bonding system Is used with horizontal slot brackets,it transfers the Andrews SWA labial bracket prescription to the lingual surface. Its main advantage is that it allows orthodontist to perform direct as well as indirect bonding with no special training. www.indiandentalacademy.com
- 111. THE MUSHROOM BRACKET POSITIONER FOR LINGUAL ORTHODONTICS. Developed by Kyung etal in 2002 The MBP consists of a setup model holder with horizontal and vertical arms. Two mushroom shaped horizontal plates with long,narrow slots and lingual bracket holders. Each plate comes with two curved anterior bracket holders,two single bracket holders,and two posterior bracket holders. The anterior bracket holders are curved so that the 4 anterior teeth can be bonded at the same time if there is no great variation in the lingual surfaces Canine and posterior brackets can be placed in the large posterior bracket holders Single bracket holders are used for canines or abnormally shaped teethwww.indiandentalacademy.com
- 112. HIRO SYSTEM It was invented by Dr.Toshiaki Hiro, and was later improved by Dr. Kyoto Takemoto and Dr.Giuseppe Scuzzo ,and brought about a break through in indirect bonding. Bracket placement o Bracket placement starts with six anterior teeth ligated to the full size arch wire with elastic ligatures. o Place the wire complete ith the brackets on the set up,with each bracket properly centerd on its tooth wnd smallest possible gap between the mesh pad and lingual tooth surface. o Set the posterior teeth in the same way and fix the archwire to the model with orthodontic wax. www.indiandentalacademy.com
- 113. Making cores (Individual hard trays) o Separator is applied to the set up model. o Ultra band-lok,blue /white, a fluoride releasing GIC or a chemical cure acrylic resin can be used for making individual hard trays. o Chosen material is applied with a brush to cap an area which varies according to tooth morphology. www.indiandentalacademy.com
- 114. o On the anteriors cap is built few millimeters from the labial surface on to the occlusal surface ,upto the occlusal margin of the brackets. While in posteriors only the occlusal surface is capped. o Once all the caps have been light cured they are numbered and the archwire with brackets with the resin cores are carefully removed as a unit from the set model. The elastic ligature is cut and each bracket separated from the wire. www.indiandentalacademy.com
- 115. Customizing bracket base o Small spaces which exist between the bracket base and the lingual tooth surface are filled with composite material and cured on the set up model. Remove the excess from the sides. o These bases are exact reproduction of the lingual dental anatomy of the teeth and will fit precisely. www.indiandentalacademy.com
- 116. STEPS IN INDIRECT BONDING 1) Isolation is very important for successful bonding 2) Apply etchent on lingual surface 3)Rinse and dry the field 4) Apply primer 5) Apply primer and bracket adhesive www.indiandentalacademy.com
- 117. 6) Setting an individual tray and light curing 8)Removal of individual tray and placement of wire 7) Bonding complete www.indiandentalacademy.com
- 118. ADVANTAGES AND IMPROVEMENTS OF HIRO TECHNIQUE No electronic equipment required. No need to transfer brackets from set up model to original cast as in CLASS technique. Extractions ,expansions distallizations can be carried out bet impressions and bonding Individual hard tray is small and provides accuracy Limited composite overflow makes hygiene easier Easier in case of severe crowding as separate sequential bonding can be done. Core is customized for each tooth so precise Rebonding is quick and accurate. Cost is low. www.indiandentalacademy.com
- 119. Other techniques are Converible resin core technique Hybrid core system Simplified technique associated with new Stb brackets Orapix system www.indiandentalacademy.com
- 120. FUTURE OF LINGUAL ORTHODONTICS Three areas of change will affect the future of lingual orthodontics- Technology Appliance design and manufacture Laboratory protocols Demography Falling birth rates Increasing aging population Attitude A change in public and professional attitudesto lingual orthodontics www.indiandentalacademy.com
- 121. SUMMARY We are all aware that there are still many short comings in our knowledge and management of the skeletal and soft tissue components of the orofacial complex. But currently we do have the ability to efficiently move teeth and correct malocclusions within the limitations of the skeletal and soft tissue boundaries imposed on us by individual patients. Research ,development and ingenuity of people in the field of orthodontics have undoubtedly provided orthodontists with efficient tooth moving appliances and techniques,but continuing progress is based on stretching the boundaries ,disturbing the comfort zone and creating new challenges. Lingual orthodontics has definetly added a new dimension into orthodontics, its now on us to move out of our comfort zone and take up the challenges of this technique for the progress of orthodontics and satisfaction of our patients. www.indiandentalacademy.com
- 122. REFERENCES 1. Scuzzo G and Takemoto K-Invisible Orthodontics current concepts and solutions in lingual orthodontics .Quintessenz 1st edition 2. Romano R-Lingual orthodontics .BC DECKER 1st edition 3. Mzrahi E – Lingual orthodontics .Sem in Ortho 151-214;12;3,2006 4. Echarri P- Revisiting the history of lingual orthodontics. Sem in Ortho 153-159;12;3.2006 Abstracts-: 1. Alexander C M,Gorman J C- Lingual Orthodontics-A Status report JCO1982 Apr 255-262. 2. Kurz C,Swartz M- Lingual Orthodontics; A Status report Part-2 Research and development ,JCO-1982 Nov 735-740. 3. Scholz R P,Swartz M-Lingual Orthodontics;A Status report Part-3 Indirect bonding laboratory and clinical procedures JCO 1982 Dec 812-820. 4. Gorman J C,Hilgers J J-Lingual Orthodontics; A Status Report Part- 4 Diagnosis and Treatment planning –JCO 1983 Jan 26-35 5. Alexander R.G,Gorman J.C;Lingual Orthodontics-A Status Report Part-5 Lingual Mechanotherapy-JCO 1983 Feb 99-115 www.indiandentalacademy.com
- 123. 6. Alexander C.M,Alexander R.G-Lingual orthodontics; A Status Report Part-6 Patient and practice management-JCO 1983 Apr 240-246. 7. Smith J.R –Lingual orthodontics;A Status Report –Part 7 Case report-Extraction ;JCO 1983 Jul 464-473. 8. Smith J.R,Gorman J.C,Kurz C-Keys to success in lingual therapy-Part 1;JCO 1986 Apr 252-261. 9. Smith J.R,Gorman J.C,Kurz C-Keys to success in lingual therapy-Part 2;JCO 1986 May 330-340. 10. Creekmore T.Lingual orthodontics-Its renaissance;AJO DO 1989 120-137. 11. Kyung H M,Park H S,Sung J H;The mushroom bracket positioner for lingual orthodontics;JCO 2002 Jun 320-328 12. Kyung H M,Park H S,Sung J H;The plain wire mushroom bracket positioner for lingual orthodontics;JCO 2004 July 388-395. www.indiandentalacademy.com