Highly Available Active-Active NFS server on GlusterFS Storage system
This presentation gives an overview on how Highly Available Active-Active NFS server is achieved on GlusterFS storage system and how one can configure it.
06/08/15
NFS-Ganesha + GlusterFS
●A user-mode file server.
● Supports NFS v3, 4.0, 4.1, pNFS and 9P from the Plan9 operating system.
● Provides a FUSE-compatible File System Abstraction Layer(FSAL) to plug into any storage
mechanism.
● Integrated with GlusterFS using 'libgfapi' library available via 'glusterfs-api*' packages.
● Dynamically exports/unexport GlusterFS volumes/sub-directories using D-Bus mechanism.
4.
06/08/15
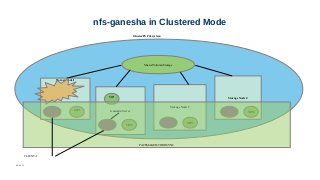
High availability ofNFS-Ganesha servers
● Achieved using Pacemaker/Corosync.
● HA-script:
● Input:
– servers to be added to the cluster along with Virtual IPs assigned
– via the 'ganesha-ha.conf' file
● Sets up and tears down the entire cluster.
● New resource-agent scripts added to
● monitor NFS service on each node.
● Case - if NFS service down on any of the nodes
– Entire cluster is put into grace via D-bus signal
– Virtual IP fails over to a different node (within the cluster).
● Integrated with new Gluster CLI introduced to configure NFS-Ganesha.
06/08/15
Pre-requisites
1. Populate /etc/hosts(or ensure DNS) on all machines.
2. Disable and stop NetworkManager service, enable and start network service on all machines
3. Create a gluster shared volume 'gluster_shared_storage' and mount it on
'/var/run/gluster/shared_storage' on all the cluster nodes using glusterfs native mount.
4. Touch /etc/ganesha/ganesha.conf (empty file)
5.. `yum -y install pacemaker cman pcs ccs resource-agents corosync` on all machines
6. set cluster auth password on all machines
- `echo redhat | passwd --stdin hacluster`
- pcs cluster auth on all the nodes
7. Enable IPv6 on all the cluster nodes.
8. Enable and start pcsd on all machines
- `chkconfig --add pcsd; chkconfig pcsd on; service pcsd start`
9. Populate /etc/ganesha/ganesha-ha.conf on all the cluster nodes.
7.
06/08/15
Sample ganesha-ha.conf
Sample ganesha-ha.conffile:
# Name of the HA cluster created.
HA_NAME="ganesha-ha-360"
# The server from which you intend to mount
# the shared volume.
HA_VOL_SERVER="server1"
# The subset of nodes of the Gluster Trusted Pool
# that forms the ganesha HA cluster. IP/Hostname
# is specified.
HA_CLUSTER_NODES="server1,server2,..."
# Virtual IPs of each of the nodes specified above.
VIP_server1="10.x.x.x"
VIP_server2="10.x.x.x"
8.
06/08/15
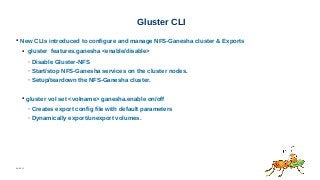
Gluster CLI
● NewCLIs introduced to configure and manage NFS-Ganesha cluster & Exports
● gluster features.ganesha <enable/disable>
– Disable Gluster-NFS
– Start/stop NFS-Ganesha services on the cluster nodes.
– Setup/teardown the NFS-Ganesha cluster.
● gluster vol set <volname> ganesha.enable on/off
– Creates export config file with default parameters
– Dynamically export/unexport volumes.
9.
06/08/15
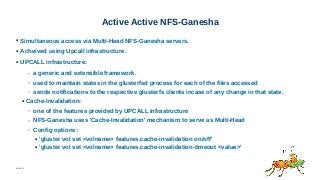
Active Active NFS-Ganesha
●Simultaneous access via Multi-Head NFS-Ganesha servers.
● Acheived using Upcall infrastructure.
● UPCALL infrastructure:
– a generic and extensible framework.
– used to maintain states in the glusterfsd process for each of the files accessed
– sends notifications to the respective glusterfs clients incase of any change in that state.
● Cache-Invalidation:
– one of the features provided by UPCALL infrastructure
– NFS-Ganesha uses 'Cache-Invalidation' mechanism to serve as Multi-Head
– Config options:
● 'gluster vol set <volname> features.cache-invalidation on/off'
● 'gluster vol set <volname> features.cache-invalidation-timeout <value>'
#11 A client can determine that server failure (and thus loss of locking state) has occurred, when it receives one of two errors. The NFS4ERR_STALE_STATEID error indicates a stateid invalidated by a reboot or restart. The NFS4ERR_STALE_CLIENTID error indicates a clientid invalidated by reboot or restart. When either of these are
received, the client must establish a new clientid (See the section &quot;Client ID&quot;) and re-establish the locking state as discussed below. The period of special handling of locking and READs and WRITEs, equal in duration to the lease period, is referred to as the &quot;grace period&quot;. During the grace period, clients recover locks and the associated state by reclaim-type locking requests (i.e., LOCK requests with reclaim set to true and OPEN operations with a claim type of CLAIM_PREVIOUS). During the grace period, the server must reject READ and WRITE operations and non-reclaim locking requests (i.e., other LOCK and OPEN operations) with an error of NFS4ERR_GRACE.


![[오픈소스컨설팅]RHEL7/CentOS7 Pacemaker기반-HA시스템구성-v1.0](https://cdn.slidesharecdn.com/ss_thumbnails/rhel-centos7-pacemaker-based-ha-admin-guidev1-151215000535-thumbnail.jpg?width=640&height=640&fit=bounds)


