SlideShare a Scribd company logo
1 of 40
Download to read offline
THE                 JAMAICAN


The JAMAICAN is Fibeifab's newest entry in the                              aged rusted-out, leaky bodies it is designed to
field o f ultra-modern automotive body design. The                          replace. Comfortable and weathertight, the JA-
JAMAICAN is designed to capture i n fiberglass                              M A I C A N is rust and corrosion proof making it a
the very latest trends in sports a n d GT Styling -
                                                                            practical as well as a beautiful conversion.
smoother I ~ n e s ;
                   uncluttered, graceful contours; all
combined with the look of power.                                            N o t only does the design of the JAMAICAN in-
                                                                            corporate the ultimate i n styling a n d utmost in
The J A M A I C A N 1 s ~ r i t a b l efor use o n a number of
                     s
                                                                   comfort it also gives considerable a t t e n t ~ o n to
readily available sports c3r chassis. The use o f
t h e exist,ng ,netal            f l o o r panels o f t h e        d r ~ v e rs<ifety - all the JAPVIAICAN window open-
various chassis, coupled w ~ t hthe bull[-in paneling              lngs are designed to accept readily available
of the JAMAICAFI b o d y , provides easy ~ n s t ~ i l l a t ~ o n crulomotlve s ~ f e t y glass, ~ n c l u d i n g roll u p side
on the PVIGA, A u s t ~ n He.iley J. A u s t ~ n Ht:L~l~,y Cj               w ~ n d o w s , p r o i ~ l s l o n for ~ r i t e g r a l roll b a r ' ,   rein-
T r t l ~ l n p hT R - 3 TI?-4 ,incl /LV
                                                                            fr?r(:r>ll ~ ~ ~ ~ ; c l ~ ; ~i p~ :l In~~ n q
                                                                                                         l t t        i

The JAPVIAICAN CiT c o u p e j t y l l n ~ j~ ; r , ~ f t c tInl t~t,l?r-
                                                              ~


FI B E R FA B                                               2 3 6 5 LAFAYETTE
                                                            sA,-ra     =LA-1,   c n L , F .ssoso           r
Here are your Jamaican M o u n t i n g I n s t r u c t i o n s .                     They
include a l l the drawings,                     parts lists, etc.               you w i l l
require to complete                   your car.           However,           before you
peruse the plans l e t ' s consider the tools you'll need
and a few sources of c h a s s i s .

A l l of our f a c t o r y cars,             l i k e the ones shown i n these
instructions,            are b u i l t u s i n g no more t h a n the ordinary
home workshop inventory of tools.                                 W e recommend,as
a minimum "Jamaican Workshop",                                the following:
       1. 1 / 4 " e l e c t r i c d r i l l
            2.      1 / 8 " , 1 / 4 " , 3 / 8 " ( w i t h 1/4"shank) d r i l l b i t s
            3.      One s e t o f w o o d w o r k i n g h o l e s a w s
            4.      I<eyhole saw or e l e c t r i c saber saw
            5.      M e d i u m b l a d e standard a n d phillips s c r e w d r i v e r
            6.      3 / 8 " , 1/2",9/16t1 s o c k e t s , wrenches,etc.
            7.      Straight edge
            8.      Steel tape
            9.      Assorted rasps

W i t h regards to the procurement of a chassis                                 --   if
you're not already driving i t                       --
i.41~ h   a  ~ f o!u n d t h e a u t o w r e c k i n g
                ~                                             yards t o be a good
source of chassis--locally we have a directory called
a P A R T S LOCATOR which l i s t s the various years and
m a k e s a v a i l a b l e t h r o ~ r g h o u to u r t e r r i t o r y .   You should
check to see i f an                equivalent guide                 is available          in
your locale.
Another source i s your insurance agent                 --    ask him to
riotify you i f he processes any               "total wreck"        claims
involving the chassis          - type you're after.               Finally,
check the c l a s s i f i e d ads i n your      local papers u n d e r
the   "   auto parts"     headings     --   many times        a    usable
chassis is l i s t e d by an owner before he              sells it t o
a dismantler.

Now on t o the d e t a i l s . .   .... .. .


Note: These instructions represent the principal corr~position the
                                                                of
total Jamaican Mounting Instructions Package. Some ver detailed
                                                          X
material is withheld and w i l l be sent with your body. In i s manner
we can always introduce up-to-m inute changes into the instructions-
---changes which occur inevitably as a result of our continuing pro-
gram of product refinement and improvement.


             T H E COST OF THESE INSTRUCTIONS
             W I L L B E REFLlNDED ON RECEIPT OF
                        YOUR F I R S T ORDER.             1
1.    CHASSIS                                               Austin Healey, MGA1TR3,TR4
        Required:
          Frame and suspension (incl. hubs)
          Engine (unless considering engine swap)
          Transmission, propellor shaft, rear axle
          Steering assembl y, brake system
          Pedal Assembly, (clutch, brake, throttl e)
          Some inner panelling (see figure 2 )
          Gas tank, Trans. & shaft tunnel covers
          Floor boards (MGA), radiator
        Desirable:
          Original wiring
          Heater
          Instruments
          Wheels and tires

2..   J A M A I C A N DOOR H A R D W A R E
                        -
          Door Hinges two sets of hinges are required       Ford CODB 6 4 2 2 8 0 0 A rt. tp.
                                                            Ford CODB 6 4 2 2 7 0 1 A If. tp.
         Windows   -   left and right door windows          VW143 8 4 5 201A& 202A
                                                            (glass) 1 9 6 0 - 6 3 Karmann Ghia
         Regulator mechanisms                               (also 6 0 - 6 3 Karmann Ghia)
                                                            551B. 552B. 571A.565A
                                                            ~ ~ 1 4 1 8 53 0 7 ~ & 5 0 2 ~
                                                                                  1
         Weather stripping   - one windlace k i t           Standard w/upholstery k i t or i s
                                                            available from Fiberfab
           Window opening weather stripping                 VW 1 4 3 8 4 5 2 1 1 A & 2 1 2
           Matherstripping chrome trim                      VW 1 4 3 853 3 3 7 A & 3 3 8 A
           Outside and inside wiper rubber                  Somaca B - 6 0 5 (4ea.l
                                                            ( 6 1 - 6 3 GM cars)
           Outside wiper chrome trim                        VW 1 4 3 853 5 1 6 A (2ea.l
                         -
         Door Latches Option 1 (for handleless key
           only operation):   DOOR L A T C H E S            Ford   C45Z- 6321813-C
                                                            Ford   C45Z- 6321812-C
            Door lock cylinder                              Ford   C50Z-6221984-A1
            Striker Studs                                   Ford   C20B-6220008
                                                            Ford   C20B-6220009
                         -
         Door Latches Option 2 (~j$.,hgd!es!-
           Use standard hardware: Latches, Kandles,         Karmann Ghia
           and striker studs.

3.    WINDSHIELD
        Safetv Glass windshield (included                   1 9 6 3 - 6 6 Corvette Stingray
          w ~ t hne ueiuxe KIL;
                r
        Rubber Molding                                      Chev.   3844049
        Chrome Molding and retainor c l i p s               Chev.   3841251    (lea.
                                                            Chev.   3841255    (lea.)
                                                            Chev.   3859044    (2ea.l
                                                            Chev.   3859045    (2ea.l
                                                            Chev.   3843939    (20ea.l

4.    REAR WllVDOW
        {';
        a
        :        Glass Windshield (included
                 the Deluxe Kit)
         Rubber Molding
                                                        I   Porsche
                                                            Porsche
                                                            Porsche
                                                                      901 545 10120
                                                                      9 1 2 Rear Window
                                                                      901 545 911 20
                                                            Porsche   9 0 1 5 4 5 912 20
                                                            Porsche   9 1 2 Rear Window
         Chrome Molding                                     Porsche   644 5 4 1 9 2 1 0 6
                                                            Porsche   9 1 2 Rear Window
5.   HOOD
       H e a d I i g h t s : high b e a d l o w beam combination
           units (identified by 3-prong connector) with
           mounting brackets and chrome bulb retaining
           ring, such as the sealed beam units standard
           on Austin-Healey MGA and TR.
       G r i I l : Any g r i l l o our choice f i t t i n g an
                                  C
                                   5
           opening measuring " x 4 4 " overal I. Suggested
           g r i l l include egg-crate (Camaro), horizontal bar,
           and expanded metal (available at most hardware
           stores)
       P a r k / t u r n i n d i c a t o r l i g h t s : select
           dual-element 1 2 v bulb units compatible with
           your g r i l l selection. The lights standard on
           your chassis w i l l probably suffice.
       Hood Latch:
           Option 1 Side Mount
                         :                                           Triumph Spitfire
           Option 2: Center Mount                                    Austin-Healey or MGA


6.   OTHER BODY HARDWARE
       T a i l l i g h t s : A n y f l a t p a n e l mountedtail
           light units of not more than 7" high or 8"
           wide may be utilized.
       L i c e n s e p l a t e l i g h t / b r a c k e t : Combin-   Austin-Healey, MGA,or TR
           ation holder and light available at most a u t o
           supply stores.
       Gas tank f i l l e r cap:                 Standard Austin-
           Healey, MGA or TR cap or chrome flip-top
           cap available from Fiberfab.


7.   INSTRUMENTS
       I f the stock gauges are not functioning or are
       not avail able, Fiberfab can supply replacements
       out of the extensive Stewart-Warner line. The
       following items may be ordered from your local
       Stewart-Warner dealer or directly from us..           ...     STEWART-WARNER NO.

            Fuel level gauge                                         301-AW
            Fuel level sender                                        385-C
            Instal lation k i t                                      366-LP

            Water temperature gauge
            Temperature sender


            O i l pressure gauge
            Pressure sender

            Ammeter

          Speedometer (16 0 M PHI
        Other Optional Instruments
            O i l temperature gauge                                  311-CF
            Temperature sender                                       See Water Temperature

            Tachometer
            Tachometer sender
I        548 Baldwln Street
                                                                                                                            Brldgevllle. Pennsylvania 15017
                                                                                                                            Phone 472 221-6200

                                                        JAMAICAN SERIES PRICE L I S T


  JAMAICAN      S E R I E S B A S I C BODY K I T S :                                                                           EFFECTIVE 7/1/76

  A       A     I           B A S I C BODY K I T S F O R T R 3 , T R 4 , T . R b A , T R 6 , T R Z S O ,    MGA,
                            A U S T I N HEALEY 3 0 0 0 .
  JAMAICAN      II          B A S I C BODY K I T F O R VW OR K A R M A N N G H I A .
  JAMAICAN      !I-V8       F R A M E * A N 0 B A S l C BODY K I T FOR FRONT MOUNTED v 8 .

              * T H E J A M A I C A N I I - V 8 FRAME K I T I S A S U P E R S O P H I S T I C A T E D I N D E P E N D E N T SUSPEN-
                 S I O N A N D POWER T R A I N .
                T H E J A M A I C A N l l - V 8 F R A M E I S A L A D D E R F R A M E C O N S T R U C T E D O F 5" X 2 " X . I 2 0
                 STEEL T U B I N G , H E L I A R C WELDED TOGETHER I N A S T A B I L I Z I N G J I G .                     A SPECIAL
                 F L O O R P A N I N T H E J A M A I C A N 1 1 - V 8 BODY L O C K S T H E B O D Y I N P L A C E ON T H E F R A M E .
                T H E F R A H E I S E N G I N E E R E D T O A C C E P T A S M A L L B L O C K C H E V Y V 8 FORWARD MOUNTED.
                 C O U P L E D TO A C O M P A T I B L E S T A N D A R D OR A U T O M A T I C T R A N S M I S S I O N .     THE FRONT
                S U S P E N S I O N I S C O R V A I R ( ' 6 6 OR N E W E R ) ,      T H E T H I R D MEMBER I S C O R V E T T E ( ' 6 3
                OR N E W E R ) ,        A N 0 T H E R E A R S U S P E N S I O N I S C O R V A I R ( ' 6 6 OR N E W E R ) .   CORVAIR
                R E C I R C U L A T I N G B A L L T Y P E OR P I N T O R A C K h P I N I O N T Y P E S T E E R I N G MAY BE U S E D .
                T H E NEWEST J A M A I C A N l l - V 8 K I T U T I L I Z E S T H E CAHARO FRONT SUBFRAME A 9 D T H E
                C H E V E L L E REAR A X L E ASSEMBLY.

 J A M A I C A N S E R I E S B A S I C BODY K l T S    INCLUDE:

  1.            M A I N BODY W I T H I N N E R P A N E L S .
 2.             FORWARD N O S E S E C T I O N ( O N E - P I E C E T I L T C O N F I G U R A T I O N )       FOR J A M A I C A N I K I T S ONLY.
                FORWARD N O S E S E C T I O N A N D S E P A R A T E H O O D F O R J A M A I C A N I I A N 0 l l - V 8 K l T S O N L Y .
 3.             E N G I N E ACCESS/TRUNK L I D FOR J A M A I C A N I I AND l l - V 8 K I T S ONLY.
 4.             ONE P A I R DOORS.
 5.             ONE P A I R F I B E R G L A S S GT SEAT SHELLS (NOT U P H O L S T E R E D ) .
                E A S Y R I D E R S E A T S H E L L S W l T H H E A D R E S T A R E O P T I O N A L AND $ 3 0 . 0 0 A D D I T I O N A L .
 6.             ONE D A S H P I E C E .
 7.             F R A M E K I T FOR J A M A I C A N l l - V 8 K I T O N L Y .
. 8.            ONE F I B E R G L A S S T R A N S M I S S I O N C O N S O L E - C O V E R F O R J A M A I C A N 1 1 - V 8 K I T O N L Y .
 9.             ASSEMBLY MANUAL.              (MAY BE ORDERED I N ADVANCE FOR $10.00.)                                  SPECIFY CHASSIS.


 JAMAICAN SERIES OPTIONS:

 VDO C O C K P I T G A U G E S   1 2 VOLT ONLY:                              SPEEDOMETER
                                                                             TACHOMETER
                                                                             AMMETER
                                                                             F U E L GAUGE
                                                                             O I L T E M P E R A T U R E GAUGE
                                                                             O I L TEMPERATURE SENDER
 VDO C O C K P I T   GAUGES FOR J A M A I C A N        ll-V8    ONLY:        SPEEDOMETER
                                                                             TACHOMETER
                                                                             AMMETER
                                                                             F U E L GAUGE
                                                                             O I L P R E S S U R E GAUGE
                                                                             O I L PRESSURE SENDER
                                                                             W A T E R T E M P E R A T U R E GAUGE
                                                                             WATER T E M P E R A T U R E SENDER
 I N T E R I O R UPHOLSTERY, B L A C K ONLY.
 cr    SEAT COVERS, BLACK ONLY, PAIR.
 EASY R I D E R S E A T COVERS, B L A C K ONLY,              PAIR.

 T H E J A M A I C A N S E R I E S B O D Y K l T S A R E NOW O F F E R E O I N P R E - A S S E M B L E D F O R M .
 T H E BODY I S T O T A L L Y A S S E M B L E D .      J U S T MOUNT TO Y O U R C H A S S I S .
 c o n P u l E FRon PRICE LIST ITEMS DESIRED.
 ADO L A B O R C H A R G E O F $ 1 2 0 0 . 0 0 F O R J A M A I C A N I A N 0 l l K I T S , $ 1 5 0 0 . 0 0 F O R J A M A I C A N    11-V8     KIT.
J A M A l CAN   SERIES    DELUXE     PAK       (OPTIONAL    ITEMS) :

WINDSHIELD CLASS                                                     CORVETTE ' 6 3 - ' 6 7                        1 REP.     $ 98.00    EA.
WINDSHIELD REVEAL MOLDING                                            CORVETTE ' 6 4 - ' 6 7                        1 REP.       35.94    EA.
WINDSHIELD POLY TAPE                                                                                               1 REP.        9.00    EA.
WINDSHIELD REVEAL C L I P S                                                                                        1 SET         2.00    EA.
REAR GLASS CLEAR                                                     PORSCHE 9 1 1 - 9 1 2                         I REP.      146.25    €A.
REAR C L A S Z U A A ~ C ~                                                                                         1 REQ.       35.63    En.
REAR GLASS REVEAL MOLDING                                                                                          1 REQ.       47.50    EA.
S I D E CLASS                                                        KARMANN G H l A HARDTOP ' 6 1 - ' 7 4         2 REQ.       44.00    EA.
S I D E GLASS C A R R I E R CHANNEL                                  KARMANN G H l A HARDTOP l 6 1 - ' 7 4         2 REQ.        5.00    EA.
S I D E GLASS C A R R I E R GASKET                                   KARMANN G H l A HARDTOP ' 6 1 - ' 7 4         2 REQ.        2.00    EA.
S I D E GLASS REGULATOR                                              KARMANN G H l A HARDTOP ' 6 1 - ' 7 4        2 REQ.        28.00    EA.
S I D E CLASS WINDOW G U I D E TRACK                                 KARMANN G H l A HARDTOP ' 6 1 - ' 7 4         2 REQ.       29.10    EA.
S I D E GLASS HOLDING EXTRUSION                                                                                   2 REQ.         7.40    EA.
S I D E GLASS MOLDING EXTRUSION WEATHERSTRIP                                                                      2 REQ.         9.40    EA.
S I D E GLASS WEATHERSTRIP INNER                                                                                  2 REP.         5.25    EA.
S I D E GLASS WEATHERSTRIP OUTER                                                                                  2 REQ.         6.25    EA.
DOOR H I N G E S L E F T                                             MUSTANG ' 6 5 - ' 6 7       OR P I N T O     1 SET         19.95    EA.
DOOR H I N G E S R I G H T                                           M U S T A N G ' 6 5 - ' 6 7 OR P I N T O     1 SET         19.95    EA.
OUTSIDE BAT HANDLE, LATCH & CABLE ACTUATOR                                                                        2 REQ.        21.56    €A.
WINOLACE
H E A D L lG U T
                -   DOORWAY S U R R O U N D                                                                       2 REQ.
                                                                                                                  2 REQ.
                                                                                                                                15.00
                                                                                                                                24.30
                                                                                                                                         EA.
                                                                                                                                         EA.
FRONT TURN S I G N A L                                                                                            2 REP.         5.67    EA.
T A I L LIGHT                                                                                                     2 R E Q .     23.20   EA.
I N D I C A T O R DASH L I G H T                                                                                  3 REP.         2.67    EA.
CHROME GAS CAP C O V E R                                                                                          I REP.        11.01    EA.
0 1 M M E R SUI T C H                                                                                             1 REQ.         2.74    EA.
ST BAT HANDLE SWITCH                                                                                              2 REP.         3.97    EA.
I G N I T I O N SWITCH WITH KEYS                                                                                  1 REP.         8.00    EA.
HEADLIGHT BAT HANDLE SWITCH                                                                                       I REQ.         3-97    EA.
I N S I D E REAR V I E W H I R R O R                                                                              1 REQ.        10.58    EA.
WALNUT S T E E R I N G WHEEL                                                                                      1 REP.        39.95    EA.
WIRING HARNESS                                                                                                    1 REQ.        45.00    EA.
DEFOGGER        -
FENDER MOUNT MIRROR
                    DEFROSTER
                                -       BLACK PRIHED
                                                                                                                  1 REQ.
                                                                                                                  2 REP.
                                                                                                                                39.50
                                                                                                                                 9.02
                                                                                                                                         EA.
                                                                                                                                         EA.
DOOR L A T C H H A N D L E I N S I D E , E U R O P E A N S T Y L E                                                2 REQ.         6.65    EA.
DOOR W I N D O W H A N D L E I N S I D E , E U R O P E A N S T Y L E                                              2 REQ.         7.35    EA.
W I N D S H I E L O W I P E R A S S E M B L Y . COHPLETE W I T H ARMS 6 B L A D E S                               I REQ.       89.95     EA.


JAMAICAN        SERIES    ACCESSORIES:

O I L PRESSURE GAUGE 7 0 d
O I L PRESSURE GAUGE SENDER
FUEL TANK FLOAT U N l T
QUARTZ CLOCK
FOUR-WAY F L A S H E R S
L I C E N S E P L A T E BRACKET AND L I G H T
CONSOLE
ROADRUNNER S T E E R I N G UHEEL           -     EUROPEAN S T Y L I N G   FOAM
F O R M U L A GT S T E E R I N G U H E E L -     LEATHER COVERED
SEAT ADJUSTERS, 5" T R A V E L , P A l R
QUICKSHIFT K I T
CUSTOM SI1I F T E R ' 6 8 - ' 7 4 V U
CUSTOM S H I F T E R ' 5 6 - ! 6 7     VU
PEDAL AND ACCELERATOR COVER K I T
O I L COOLER AND F I L T E R U N l T
H I GH P E R F O R M A N C E A I R C L E A N E R
F E N D E R MOUNT M I R R O R   -    CHROME
HEADLIGHT COVERS, P A I R
GT S T Y L E FRONT RUMPER
GT S T Y L E H E A R OIJMPER
HEADER/DUAL M l l r F L E R COMBINAT I Otl
DECALS, BLACK LETTERING, P A l R
M E D A L L I O N , HOUtdU P E W T E R


CURB UE1611T:         JAMAlC;lN      1 ,   16006,    JAMAICAN       ll,    1475#,   JAMAICAN   I I - v ~ ,2 1 0 0 6
L
     KIT #I   - STANDARD            JAMAICAN KIT INCLUDES:
    1 ) JAMAICAN body                                                   7) Wide, fully flanged doorsills
    2) Front hood hinges (prelaminated into body)                       8) Rear window surround flange
    3) Complete inner panels (to mount body)                            9) Windshield surround flange
    4) Headlight indents                                               10) Metal reinforcing inside windshield area
    5) Dashboard                                                       11) Side and front air scoops
    6) Recessed license plate holder                                   12) Mounting instruction booklet


    KIT #2    - DELUXE JAMAICAN KIT, includes everything in KIT #1,                 PLUS:


I
    1 ) Safety glass windshield
    2) Door-inner panels for roll-up mechanism
                                                                  3) Rear safety glass window
                                                                  4) Choice of GT, Classic or Lotus-type fiberglass
                                                                     seat shells

       Complete mounting and chassrs prepsratron instructions are included with each body order.
                                                                                                                      1
       Should you wish a copy prior to purchasing your body, the mounting booklet is available for
       $5.00 refundable with order.


                                                         JAMAICAN PRICE LIST
    JAMAICAN      Kit .?I, St,jndclrd                                                                      $795.00
    JAMAICAN      Klt s?:,     Deluxe                                                                       895.00
    JAMAICAN      Deluxe Upholstery Kit ( B l k )                                                           195 00
    JAtvlAICAbl   P l e x ~ q l ~ ~ s s r l l ~ f l h Covtlrs
                                  Hea                 t                                                      30.00


    The following accessories included with the Deluxe K i t are also available separately:
T A B L E OF CONTENTS


      CONSTRUCTION M A T E R I A L S        --   T o o l s and S u p p l i e s


      W H A T TO L O O K FOR W H E N ACQUIRING A W R E C K E D
      V E H I C L E : MG, T R , A U S T I N H E A L E Y


      PREPARING THE CHASSIS            --   What goes? What stays?


      IVIOUIVTING T H E J A M A I C A N B O D Y


      I N S T A L L I N G THE WINDOWS AND WINDSHIELD


      WIRING AND INSTRUMENTS


      UPHOLSTERY       --   Interior   Finish


      SANDING,     PRIMING AND PAINTING              --   Exterior Finish


      V-8   POWER O P T I O N


lo.   JAMAICAN/VOLKSWAGEN
INTRODUCTION


          T h e f o l l o w i n g p a g e s c o n t a i n i n s t r u c t i o n s f o r a s s e m b l i n g t h e 1968 JAMAICAN.
These instructions are intended to cover every phase of preparation,                                                     assembly
and f i n i s h i n g    required to bring             your car       -   b u i l d i n g project to a successful                con-
clusion.

           T o meet the demands o f the many p e o p l e who prefer tlie d r i v i n g " f e e l " and
e x t e r n a l a p p e a r a n c e o f a f r o n t - e n g i n e d s p o r t s c a r , F i b e r f a b c r e a t e d t h e JAMAICAN.

         D u r i n g t h p d e v ~ l o p m e n to f t h e J A M A I C A N d e + i g n ,    it   e..4   r c l l i::d     t l i ~ :zzrtain
u n i b o d y c a r s s u c h a s t l i e Austin-Healey S p r i t e a n d M G B w e r e n o t s u i t a b l e v e h i c l e s
f o r a "body swap".             I n other words, removal o f tlie o r i g i n a l metal body removed
t o o much s t r u c t u r a l r i g i d i t y .   Nevertheless, e l i m i n a t i o n of the unibody cars s t i l l
l e f t t h r e e v e r y p o p u l a r f r o n t - e n g i n e d s p o r t s c a r s t o be c o n s i d e r e d      ------------
A U S T I N - H E A L E Y , MGA, and T R I U M P H .

         W h e n y o u o r d e r y o u r JAMAICAN k i t ,            you can s p e c i f y the c h a s s i s on w h i c h
you plan to mount it,                s o t h a t w h e n y o u r JAMAICAN b o d y i s p r o d u c e d ,                the proper
inner                 for mounting are laminated i n t o the body--thus                                the body f i t s         pre-
c i s e l y on j u s t the type of car you are converting.
1.     CONSTRUCTION M A T E R I A L S

        The typical inventory of tools found in most home garages or basements w i l l probably more than
suffice to complete your JAMAICAN. In reality, very - tools are absolutely essential to the conver-
                                                             few
s ion.
        The following breakdown of tools i s based on Fiberfab factory ex erience.. Items that are con-
                                                                    of               f:
sidered essential are listed. Another l i s t is also ~ r o v i d e d items whic are q u ~ t e
                                                                                             helpful and serve
to make certain construction tasks significant1 y easier.
HAND TOOLS
     Essential
      -5/16",     3/8", 7 / 1 6 " , 1/2", 9 / 1 6 " , 5 / 8 " sockets   -- 3 / 8 "    Drive
      -31.6'. L r ~ v e
                      Rachet Handle
      -Standard    screw-driver    --medium blade
      ---Phillips screw-driver -- medium blade
      Straight-edge


                       --
      -3/8"
      -3/811
                    Drive
                                   6
                               3" and 6 extensions
                      7/16", 1/2", / 1 6 " combination (open-end and box-end wrenches)
                              --
           " ~ o p l 'rivet gun    home workshop variety
     -Steel         rule (72")
     +ire-terminal            crimping tool
     -
     -Hacksaw
     -
           Knife
           Assorted rasps, files, drills and taps
      -Set       of wood-working hole-saws
POWER TOOLS
    Essential
   -Electric     drill   --
                          1 / 4 " capacity
   Helpful
        Electric drill  --1 / 2 " capacity
       Sabre saw
        Rotary sander/grinder
        Hydraulic floor-jack and jack stands
CONSTRUCTION MATERIALS
   Essential
       Assorted .machine bolts and nuts; 1/4",5/16" and 3/8"; with washers and locking washers
       Assorted sheet metal screws
       Sandpaper
       Silicone seal (common types are Rubber Sealant by the Macklenburg-Duncan Company of
                      Oklahoma City, Dow-Corning DC 7 5 0 , and General Electric)
       But I tape (windshield installation kit)     --      typical is Somaca#9103*
       2 0 8 ' - 3 0 0 ' # Z 6 AWG wire; 1 0 0 ' - 1 5 0 ' # 1 0 AWG wire (if chassis re-wiring required)
       Primer, paint, etc.
       Car seam sealer, 1 tube -- typical is 3W # 1 9 1 5 - 5 2 0 9
   Helpful
       Epoxy adhesive k i t ( high-grade epoxy, *body              filler type)
       Epoxy putty/filler
       Crimp-on wire terminals
       Assorted "pop" rivets
*   Somaca-Western, 8 5 2 Aldo Ave., Santa Clara, Calif. SOMMER AND M A C A , 5 5 0 1 W.Ogden Ave.,
           Chicago, Illinois
*   3 M is the trademark of Minnesota Mining and Manufacturing
2 . WHAT TO LOOK FOR WHEN ACQUIRING A W R E C K E D V E H I C L E

      Many persons purchasing a J A M A I C A N body w i s l i to replace the travelworli or weatllered "skin" of tlre
 vellicle they already own and are currently driving. Other builders plan to acquire a wrecked Austin Healey,
 M G A or TR from a salvage yard and refurbisli t h i s "outcast" w i t h a new J A M A I C A N body and perhaps some
 new nlechanical parts. In either instance, t h i s brief section should be of interest to a l l prospective builders.

      I n most areas o f the Uriited States, a t l e a s t three approaches to obtaining a suitable, salvageable
 sports car are available. The f i r s t approach i s to contact the local dealer i r ~        tfie vehicle of interest. He
 may have been asked to b i d on insurance work and w i l l kriow tlie a v a i l a b i l i t y arid locatiolr of wrecked vehicles.
 Tlie second approacli is to c a l l several automobile irisurallce conlpanies arid ask about ariy recent wrecks
 they have declared to be "totals"      --marly tirnes i f the car i s earlier than 1 9 6 0 atid the body damage i s mod-
 erate to extensive, the car w i l l be "totalled" even thougll under i t s rumpled s k i n i s a m e m i c a 1 "jewel".

      Tlie third and most obvious aooroach i s t o c a l l the local salvaqe/wrecking yards -- ~ s y c i a l l y  those ad-
 vertising a foreign car section. Some areas ot the U.5.; tor example, the San F r a r ~ c i s c oBay Area wliere
 Fiberfab i s located; have publications appearirig weekly or monthly w l ~ i c l il i s t a l l wrecked vehicles and
 their location. The publicatiori we use is:

                                             THE PARTS LOCATOR
                                             1 6 9 6 Wastiirigton Avenue
                                             San Leandro, California
 lrrfortnation concerning similar publications ill other l o c a l i t i e s may be forthcornirig from tlie above address,
 upon request.

      When a seemingly suitable wreck i s f i n a l l y located, look i t over c l o s e l y i n person, not via photographs.
Don't l e t a mangled body dismay you or a clean-looking body fool you. Remember, you are interested primarily
i n the frame, drive-line, suspension a l l d engine     --broken doors, ripped seats, sliattered glass, etc., are
o f not consequence.

      Items to be checked are:
      1 CONDITION OF ENGINE
       .                                 --
                                         valve cover not crrrslred, carburetors intact, exhaust manifold not
           torn loose, pan secure and not leakilrg, radiator free of punctures, etc.            --
                                                                                          try to get some kind of
           guarantee that the engine i s i n rurining condition.
      2. CONDITION O F SUSPENSION               -- a l l axles rotate,   steering linkage i s not bent or broken, A-frames
           (front suspension) unbent, etc.
      3. CONDITION O F D R I V E - L I N E     --
                                             w i t t i one rear wheel blocked from rotating, make sure the other
           rear wheel turns reasonable freely when the gearbox i s i n neutral and does riot turn a t a l l when any
           gear i s selected (assuming, of course, that an engine i s i n place i n the veliicle).
     4. CONDITION OF T H E F R A M E           --   using a steel tape, measure the squareness of the frame; ie.,
           check fore and a f t dimension between the wheel centers on both sides (the "wlleelbase")           are --
           they i d e n t i c a l ? Look under the car and assure yourself that none of tlie frame members are crushed
           or bent.

      I n addition, try to get as many pieces of a u x i l i a r y equipment as possible a t the time you buy the "outcast"
---items such as windshield wiper motors, instruments, etc., w i l l probably be cheaper i n a "package deal"
than i f you return later to purchase them separately.

     A s an a i d to acquiring a usable wreck and estimating i t s worth, some v i t a l s t a t i s t i c s are presented below:

AUSTIN-HEALEY
     The A u s t i n Motor Company of Birmirrgliarn, England started building the Austin-Healey 1 0 0 sports car
i n 1952. The Austin-Healey 1 0 0 used the 2.6 liter, four-cylinder A u s t i n A 9 0 e ~ ~ g i l l e .
                                                                                                      Subsequent ver-
sions were the l O O M and 1 0 0 s ; both aimed a t competition events. The 1 0 0 s errgirie developed 132 BH P
and had disc brakes.

           Next i n the A u s t i n - M a l e y evolution was the 1 0 0 - 6 usirig a BMC, 2 . 6 liter, s i x cylirider erigine. Some
of the 1 0 0 - 6 models were produced w i t h a s i x - p o r t l i e a d to obtain higher performarlce than the standard 1 0 0 - 6
eligine output of 1 0 2 BHP. 111 1959, a 3 l i t e r s i x cylinder engine was irltroduced i n tlre Austili-Healey 3 0 0 0 .
T l i e 3 l i t e r engine was available for a brief period ( 1 9 6 1 - 1 9 6 2 ) i n a 3-carburetor version wliich proved quite
d i f f i c u l t to keep i n tune. Tlie Austin-Healey 3 0 0 0 had d i s c brakes (front) arid wire wheel options. Tlle
wheelbase i s 9 2 inches.
-
 MG
      As early as 1 9 3 6 , the MG Company (now located at Abingdon, England), produced a vehicle suitable
 for conversionwith a JAMAICAN body      --the MG, TA. This car featured a 1.3 liter, 5 0 BHP four cylinder
 englne. I n April, 1 9 3 9 the TA was replaced by a new model with minor refinemerlts, the MG fB. The
 total T A and T B production, before it was discontinued as a result of WWII, was only 3 4 0 0 cars.
    Shortly after the war, the T B was revived in a new form as the MG TC which was soon followed by the
TD. Both were equipped with 5 7 . 5 BHP engines. In 1 9 5 4 the 63 BHP TF 1 5 0 0 was introduced but
was short-lived because i n 1 9 5 5 production was commenced on the MGA which offered a 78 BHP en ine.
The MGA series offered several interesting options
cam engine in place of the standard pushrod engine.
                                                        --
                                                       disc brakes (front), wire wheels and a twin over ead    R
       I n 1 9 6 2 , the MGB arrived on the scene but as previously mentioned, its unibod constructipn pre-
cludes its use as a vehicle for the JAMAICA^. A l l of the cars listed above, except t l e MGB will accept
                                     c they all have frames separable jrorll tile bodym~l; .i,,:t h q ;.I hall? 9a"
Lilr ..iAMkiCA:i body i n a s ~ ~ l uasl ~
wheelbases.
     Market response for the JAMAICAN has revealed, however, that 9 9 % of the bu ers using the body on
MGs were using a MGA. Therefore, the JAMAICAN is inner-paneled to f i t the M G series exactly although
                                                                                    ~
the body can be used with the MG TA, TB, TC, TDor TF.
TRIUMPH
      In 1 9 5 2 when Standard took over the Triumph Company to form the standard-Triumph Motor Company,
the Standard Vanguard engine was modified to 2 liters developing 100 BHP and fitted to a Triumph
Mayflower chassis to create the T R 2 sports car. Since 1 9 5 2 the TR2 has evolved through the TR3 to
the T R 4 and currently the T R 4 A with independent rear suspension. A I ~
                                                                          these cars ha* been fitted with
front wheel disc brakes and all have an 88" wheelbase.
       'The inner-paneling for the JAMAICAN-for-Triumph has been designed to f i t all TR1s with two basic
models --one for T R 3 and T R 2 and one for TR4, TR4A, TR4A-IRS, and TR 2 5 0 . Ttlerefore, when a
JAMAICAN-for-Triumph i s ordered the model must be stated.
3. PREPARING THE CHASSIS

    The first step in the building of your new JAMAICAN is to prepare the chassis for the JAMAICAN body.
The following tasks to be completed are common for all vehicle types.
    1 Remove the battery.
     .
    2.   Drain the gas tank.
    3. Remove gas tank filler hose and cap assembly, and tape shut filler neck with masking tape.
    4.    Remove seats and a l l upholstery.
    5.    Remove windshield and wiper arms.
    6.    Remove doors.
    7.    Remove spare tire.
    8. Remove hood-cover engine with tarpaulin or equivalent.
    9. Remove deck lid.
    1 0 . Discorlnect all wirinq to lights srld fue! t ~ v ' r .a d pr~tecbille!ytape thc :.di;.;.ends.
    1 . Remove headlights and parwturn lights.
      1
    1 2 . Remove license I ight-bracket.
    13. Remove windshield wiper motor and mechanism.
    1 4 . Remove bumpers.
    1 5 . Remove fenders (most bolts are located inside wheel wells).
    1 6 . Drain engine and radiator of water.
    1 7 . Remove radiator.
    1 8 . Remove instruments and panel controls and protectively tape the wire-ends.

    For the next steps, turn to the section describing your particular chassis.

AUSTIN-HEALEY
    1 Un-bolt relay, fuse block, volt regulator, etc., from firewall and place them down out of the way.
      .
    2. Remove gas tank.
    3. Remove front bumper brackets and horns.
    4.Cut off outer skin at fendu line.
    5.Referring to Figure 2A* :
      a. Remove rear cross braces (between fender inner panels).
      b. Remove rear fender inner panels (down to chassis).
      c. Remove cowl brace (stamped sheetmetal).
      d. Remove lower door s i l l s and front hinge posts (see detail for cuttirlg side panels).
      e. Cut 2" off top of firewall.
      f. Remove body mount brackets and cross brace from front wheel wells.
      g. Trim 4 " off of outside of wheel wells, parallel with center seams.
   6. Remove mounting brackets from radiator and replace 2 " higher on radiator.
   7. While holding radiator in place on chassis mark section of frame cross member that interferes with
      lower hose outlet. Cut this section out o f cross member.
   8. Bolt radiator i n its new position.
   9. Trim off all protrusions on inside (cockpit side) of firewall above heater duct.


         Un-bolt relay, fuse block, volt regulator, etc., from firewall and lace them down out of the way.
         Remove heater assembly including defrosters. (The blower side oPthe heater box w i l l have to be
         dropped 1 - 1 / 4 inches. This i s easily done by dis-assembling the box, cutting a wedge out of
         the side panels, bending new tabs and re-assembl ing the box.)
         Remove outer skin at fender line.
         Remove cowl support bracket.
         Referring to Figure 2Bk :
         a. Cut front wheel well panels just ahead of radiator mounting flanges.
         b. Un-bolt front bumper support brackets.
         c. Remove nose section.
         d. Remove door sills, and rocker panels.
         e. Cut side panels (with hinge posts) straight dowri 2 " back from upper firewall (vertical surface
             where relay, fuse block etc., were attached).
         f. Remove rear fender inner panel cross brace.
         g. Remove rear fender inner panels down to inner floor surfaces.
         h. Cut upper firewall straight across from fender panel-to-fender-panel, and trim off all pro-
             trusions from inside of remaining panel.
         i. Fabricate radiator mounting flange extensions so that radiator can be mounted down 2 " and
             forward enough to clear lower hose.

 *HEREINAFTER AN ASTERISK FOLLOWING A FIGURE NUMBER REFERS TO THE BLUEPRINTS.
1. Re~liovegas tank.
     2.   Remove outer skin.
     3. Remove a l l hardware from upper firewall.
     4. Referring to Figures 2Ctand 2 D :     *
          a. Remove upper firewall above horizontal surface.
          b. Remove entire rear fender inner panels and trunk floor.
          c. Remove rocker panels and side panels (with door hinge posts).
          d. Removefront fender inner panels 2 " ahead of radiator mounts.
     5.   Move mounting brackets on radiator up 2 " and re-mount.


        The followirig again refers to a l l veliicles, We recomrllend a t this point, t l ~ a tlle chassis be cleaned
                                                                                               t
o f f (steam, gunk etc.) arid painted will1 a rust preventive pairit.

     I f you are planning an engine "swap" the installation of the new engine should be done before mount-
ing the body. Seesection 9 for V-8 engine installation details.
4.          MOUNTING THE JAMAICAN BODY

          We recommend that, prior to mounting the JAMAICAN body on the chassis, a few preparatory steps be
  completed on the body while access to a l l areas is s t i l l possible. First, with the body upside down, trim the
  wheel opening flanges back to about 3/4" and sand smooth. Trirn each rocker panel to an equal dimension
  from the door s i l l and sand smooth. Trim the tail section return as per Figure 4, and sand smooth. Then,
  with the body right side up again, cut the windshield and rear window openings to 3/4" from s i l l , cut out the
  door opening, leaving a 1/2" flange above the fender line (window opening, Figure 3E*) and at least 4 "
  flange below the fender I ine (Figure 3 P ) . The lower flange w i l l be trirnmedlater after the body is mounted to
  the chassis.
           We suggest that Uie t a i l section be wired prior to mounting the body while the inside of that area is
  readily accessible. See Section 6 for wiring details. Be sure that the inner panels are correctly seated on
  the mounting surfaces of Uie chassis. Do not fasten down the body at this time, but proceed to the next step
  ---- mounting the doors.


                                                                                                   e c t i o n Inverted


                      c u t Out and
                        Remove                       Y
                                                     f-
                                                        y                    -   ---     %
                                                                                         '
                                                                                                           'IGURE 4


MOLlNTlNG THE DOORS

                    Before the doors can be mounted, the following steps must be taken:

                    1. Trim the door edges back to the scribe l i n e on the outside skin.
                   2. Cut the window slot in the top surface as per Figure 5.
                   3. Attach the door window trim as illustrated i n Figure 3H*.
With these steps completed the doors may now be located i n the body and temporaril y held i n place with masking
tape. Particular attention should be given to the f i t down the rear edge of the door and the area under the wind-
shield post. Any mis-alignment along the bottom edge of the door may be corrected when bolting the bod rocker
panel (area beneath the door) to the chassis. Now locate the hinges as i n Fibure 3Bk and mark the bolt K o ~ e
locations on both the body and the doors. Remove the doors and d r i l l out the holes, using a d r i l l b i t from 1/8"
to 1/4" larger than the mounting bolts. The extra large holes w i l l allow adjustment for a perfect fit. I t i s
advisable to use a backing plate inside the doors for added strength when bolting the hinges to the doors. A
plate 1/8" thick and the same shape as the surface of the hinge that bolts to the outside surface of the door
should suffice. We have found that a nut-plate for the body-half of the hinges makes installation and adjustment
much easier. These plates again may be fabricated of 1/8" steel plate (although 3/16" allows for more threads)
approximately the shape of the hinge surface. D r i l l the bolt holes (undersize) and thread for the mounting bolts.
If access to the back of the hinge-mounting surface i n the body is not available, cut a 3 " to 4" hole between the
upper and lower hinges so that the nut plates may be inserted and secured. The doors may now be installed, with
'1," ' - ; * , y ( : : ; ! o ~ ~ < ~ ? t . , ~ . l ~l:> : . l  c c l   I"       ct79y
The door latch r n e c l ~ a n i s ~ rillustrated ill F i g u r e 3 P , should be mounted riext. Since such a w i d e
                                               ~,
variety of latclics are available, each w itli i t s own s p e c i f i c i n s t a l l a t i o n rnetliods, all attetr~ptw i l l not be ~r~acle
here to describe the latcli instal la ti or^.
       After tlie door i r ~ s t a l l a t i o n
                                               has been completed, the r n a i ~ ~ section may be bolted to the chassis
                                                                               body
(remember to a l i g n t l ~ e
                             rocker panels wit11 the doors when attaching these sections).


MOUNTING THE HOOD

         Before placing the hood i n p o s i t i o n on the chassis, t r i m the rear edge (at c o w l and doors) of the hood
back t o the scribe l i n e and trim the wheel opening flanges as per the rear wheel openings. Place the hood
on the cowl and block the front up until body crease l i n e s up along the rear fenders, doors and front fenders.
Mark the rocker panel overlap and trim for minimurn gap. Wit11 the hood located i n correct p o s i t i o n make
cardboard templates of tlie hinge brackets. These brackets should be bolted or welded to the main chassis
rails. See F i g u r e 6 for a typical i r ~ s t a l l a t i o n . B e sure to use a t l e a s t 1-1/2" steel angle or 3 / 1 6 ' ' steel
strap for bracket material for strength.
S H I N WITH W A S H E R S T O R A I S E /,/
            OR LOWER ( p a r t " 0 " )


A U X I L I A R Y HOLES D R I L L E D FOR
fORWARD AND AFT ADJUSTflENT


                            CONSTRUCTION AND ASSEMBLY
                                FRONT HOOD H I N G E
                                     F O R JAMAICAN
5.    INSTALLING THE WINDSHIELD, REAR WINDOW AND DOOR WINDOWS

        'The JAMAICAN body i s designed s b e c i f i c a ~ ~ use the Chevrolet Stingray windshield and surround-
                                                          to ~
ing chrome trim. The windshield i s supplied as part of the D E L U X E kit. The chrome trim i s available from
your local Chevrolet dealer (see P A R T S L l S T for appropriate part numbers) i f you wish to use i t on your
JAMAICAN.
           The windshield i s installed using the installation k i t and silicone rubber sealant listed in Section 1,
under Construction Materials. If chrome trim i s to be used, twenty trim-retaining clips should be secured in
place around Uie edge ot Uie window opening before tlie glass is installed. Small, flat-head wood screws
w i l l suffice to hold the retainers securely. The material in the installation k i t       --    "butyl tape" (which has
the appearance of a 3 / 8 " diameter rope formed of a tar-like substance)           --    i s now pressed into place along
the l i p of the windshield opening. Then, the glass i s l a i d i n place in the opening over the tape and pressure
i s applied to compress the tape to about 5 0 % of its original thickness. Now, the silicone rubber sealant
is squeezed in the gap around the glass        ---                                  ---
                                                          even on the retaining c l i p s   and the chrome trim i s immedi-
qtely installed by p r ~ s s i n ?i t into tho c l i p s and sealant. Remove the excess sealant as rn*?n y " s * l e
                                                                                                               -*
before i t commences to set. DO NOT DISTURB THE G L A S S FOR A T L E A S T EIGHT HOURS AFTER
INSTALLATION.

         The rear window opening i s designed expressly to accept the Porsclie 9 1 2 rear window. The DELUXE
K I T i n c l x e m a r window glass. The chrome trim i s available from your local VW-Porsche dealer ( see
PARTS L l S T for numbers). The rear window i s installed in the same manner as the windshield. However, i f
chrome trim is to be used, the glass should be placed l i g h t l y on the installation material while the sealant i s
squeezed in the gap and on top edge of the glass. The clirome trim should be placed immediately around the
glass and the entire assembly pressed into the installation material. Again, remove the excess sealant.
         The JAMAICAN door window openings are designed to accept VW Karmann Ghia ( 1 9 6 0 - 1 9 6 3 ) door
windows. The door inner panels are designed to accomodate the above mentiorled windows and to support the
roll-up mechanism     ---
                        s l i g h t l y modified VW Karmann Ghia (see P A R T S L l S T for part numbers) for    ---
raising and lowering the side windows with a standard crank.

        Figure 7 shows the guide-track and roll-up mechanism (for the l e f t door). The bottom 1" of the guide-
track must be cut off to f i t i n the JAMAICAN door and the two positioning p i l l a r s should be re-ta ped to 5 / 1 6 -
1 8 to accept the 5 / 1 6 - 1 8 x 2 - 1 / 2 " f l a t head machine screws required to fasten the track to e door inner
                                                                                                          !
                                                                                                          t
panel. D r i l l and counter sink the holes i n the door inner panel as illustrated i n Figure 3 A * for the guide-track
screws. lnsert the 5/16" f l a t head screws in the holes and run lock washers and nuts up the screws on the
inside of the panel until they are near the panel. lnsert the guide-track through tlie long slot i n the panel and
screw the flathead screws about 1 / 4 " i n the positioning pillars.
        Re-tap the four tapped holes i n the roll-up meclianism,(Figure 7 ) to 1 / 4 - 2 0 .              lnsert the mechanism
through the large slot in the inner panel, insert the roller on the end of the arm into the cross-track on the
guide track and bolt to the d e p r e s s i o s i n the inner panel with 1 / 4 - 2 0 x 3 / 4 I f hex head bolts.
          Next, f i t the rubber grommet i n the glass holder, f i t the two bolts (be sure to use the original VW
bolts) i n the inner holes. lnsert the assembly through the s l o t i n the top of the door and secure to the guide-
t r a c k The closed window may now be adjusted to f i t the window opening by closing the door, cranking up
the window and adjusting the guide-track ositioning screws on the inner panel. When i n tlie correct position
tighten the nuts on these screws against tRe inner panel and adjust the l i m i t adjustment (see Figure 7 ) so that
the glass cannot be raised above this position.
6. WIRING AND INSTRUMENTS
         This section of the instructions provides tlie ground-rules for completing the basic wiring of your
 JAMAICAN. In many instances, especially if tlie chassis was not acquired as a wrecked vehicle, the
 wiring harness should be intact arid usable; some lengthening or shortening of particular wires may be neces-
 sary but, in general, the Austin Healey, MG or TR factory-installed wiring harnesses are adequate for tlie
 JAMAICAN.
         In the cases where the original harness has been partially or totally destroyed or a radically different
 (from the original vehicle) electrical instrument/component layout (e.g., as a result of an "engine-swap")
 is desired, the following wiring guide sliould be helpful.
         A basic wiring harness sliould provide for:
         1. Starting
         2. Ignition
         3. Basic Instrumentation   -- te~nperature, o i l pressure (guayes or warning liglits), fuel level, and
            battery/generator corid i t ion.
         4. Interior and exterior lighting
         5. Battery-charging and ground circuits
         6. Accessory power and control     --
                                             windshield wipers, horn, heater fan, etc.
        A t this stage in construction, most items to be wired have been installed; e.g., the starter, the
starter solenoid, ignition coil, o i l pressure arid water temperature senders, battery charging indicator
(voltage regulator) and fuel level sender unit are a l l available for wiring. Lights, however, are yet to be
installed.

T A I L LIGHTS
        AS was mentioned i n Section 4 , tlie rear body section should be wired before mounting with plugs
for ease o f installation. The two common wiring techniques covering a l l chassis applications are illus-
trated in Figures 8a,b,c.     If your chassis had a single tail l i g h t bulb per side, an eight-contact Lucas
relay may be found under the hoodand F i g u r e 8 b should be used. For a dual tail l i g h t bulb installation
(no relay), use Figure 8c. We recommend Lhat the original turn signal/brake light configuration be retained
to simplify the wiring task. In either case, locate and secure the light sockets to the body and wire as per
the applicable diagram. D r i l l holes through the inner panels and connect the male end of 4-prong plug or
plugs near the center of the rear body panel (on the inside). Be careful to note the function of eachwire
                                                                          -
being attached to a plug-pin inasmuch as these functions must carry through to tlie plugs wired on the
chassis.
 HEADLIGHTS AND PARKING LIGHTS

          Headlight brackets should be fabricated as shown i n Figure 3W and secured to the headlight bucket
backing plate. Cut a 7 - 1 / 8 " diameter hole in the center of the headlight-tunnel and bolt the assembly i n
place. P a r u t u r n lights can be installed on sheet-metal brackets located i n the g r i l l e opening. Remember,
when mounting the lights - - o r for Lhat matter, any electrical component    ---  i n fiberglass, unlike steel bodies,
that a S E P A R A T E GROUND WIRE M U S T B E INCORPORATED IN T H E WIRING HARNESS i n order to com-
plete a l l circuits back to the battery "ground" terminal.

INSTRUMENT PANEL WIRING

        Your JAMAICAN body is delivered to you w i t h a fiberglass dashboard already laminated i n place.
                                                                              --
The dash i s designed to u t i l i z e a centralized instrument/control cluster this cluster i s the hub of the
wiring harness and should be carefully planned. The basic instrument/control requirements a r x a t i s f i e d
by the following indicators, sw~tches, etc.:
        Controls   --
         1.   Key-operated ignition switch
         2.   Headlight/parking light switch
         3.   Headlight dimmer switch
         4.   Accessory control switches, as required.
        Indicators   --
         1.   Fuel level gauge
         2.   Water temperature gauge or l i g h t
         3.   Oil pressure gauge or l i g l i t
         4.   Ammeter or charge/discharye warning light
         5.   Headlight high-beam "on" indicating light
         6.   Speedometer (non-electrical).
CHASSIS WIRING
         The wiring harness i s divided in two major pieces   -- hub-to-front   and hub-to-rear.    The hub-to-
 -wires are routed from the hub (instrumenVcontrol of the steering column. Firewall arid then t h
 front
 grornmetted hole in the firewall above and to the right
                                                         cluster) torward the
                                                                           to
                                                                              Engine instrumentation,
                                                                                                                  i
 ignition and starter solenoid leads end at a terminal block mounted centrally at the top of the engine side
 of the firewall. Lighting leads continue forward along the frame rail and terminate in female connectors
 which mate with the male connector serving to terminate the in-the-hood wiring. Connection is made at
 a point on the frame ahead of the front wheel center1 ine.
 NOTE: Provide sufficient wire for the male corinector to reach the female connector even with the hood
          fully open.
         The hub-to rear harness i s routed from the hub forward to the firewall, along the firewall to the
 righthand wheel-well, down the firewall to the floor, around the well, under the door-jamb to the rear
 wheel-well, over the well to the rear of the body.

 T H t iiib-TC-;;.EAR   tiARNESS CONTAINS:
         1. Hub to brake lights   --
                                one #10 wire i n the harness to the RH light, then across Ule rear to the
             LH light. (DON'T FORGET TO GROUND THE LIGHTS TO THE CHASSIS!)
                                  .. -
         2. Hub to tail lights -- one #10 wire routed the same as the brake lights.
         3. Fuel gauge to fuel-level sender -- one #16 wire to the tank sender terminal.
         4. If the battery is rear-mounted, the ammeter-to-battery connection is made in the following
              manner. Connect the battery "hot-side" to the starter solenoid via 12-volt battery cable
              run adjacent to a fore-and-aft frame member. Connect the ammeter to the same solenoid
              terminal via #10 wire run i n the hub-to-front harness.

THE HUB-TO-FRONT HARNESS CONTAINS:
       1. The hub to brake light switch and return -- two 810 wires to the firewall terminal strip (from
          the terminal, two #10 wires go to the brake light switch mounted on the brake master cylinder
            or in the forward brake lines depending on the vehicle.] These wires carry battery "hot-side"
            to the pressure switch and back to the hub for distribution to the rear.
       2.   Temperature and pressure indicators t o appropriate engine mounted senders         --
                                                                                            two #16 wires
            to the terminal block --  from the terminal block two #16 wires to the senders.
       3.   Ammeter to voltage regulator --   one #10 wire to the terminal block
            block to the "armature" terminal on the regulator.
                                                                                     --
                                                                                     one #10 wire from the

       4.   Headlight switch to parking lights  -- one #10 wire from the hub to the six-pin female con-
            nector.
       5.   Headlight switch/dimmer switch (dash mounted) to low beams          --
                                                                               one #10 wire routed as parking
            light wire.
       6. Headlight switch/dimmer switch (dash mounted) to high beams --same as low beam.
       7. lgnition switch to starter solenoid   --
                                                 one #10 wire to the terminal block       --
                                                                                       one #10 wire from
          the block down the firewall to the solenoid.
       8. lgnition switch to starter solenoid   --
                                                 one #10 wire to the terminal block       --
                                                                                       one #16 wire from
          the block to the coil l'BAT.ll,"SW.",   etc. terminal.
       9. If the battery is front-mounted, i.e., under the hood, an ammeter-to-battery connection i s re-
          quired in the hub-to-front harness. Use #10 wire to the terminal block and #lo wire from the
          block to the battery "hot-side" (U. S. cars use the     "+"
                                                                   battery terminal as hot and1'-" terminal
          for ground, British cars with LUCAS ignition and electrical system use the reverse, i.e.,
          "-" is hot.)

        'The items of inslrumentation mentioned above may be ordered from your local Stewart-Warner dealer
or directly from Fiberfab. See the parts l i s t for the recommended set Stewart-Warner gauges and senders.
Some " u ~ ~ l ~ a r ~ i e s sconr~ectionsare required i n fie engine compartment. They iricludc:
                                      ed"

       1. Ignition coil "DIST", etc. terminal to the distributor     --    use # l b wire.
       2 . Generator/alternator Field to the voltage regulator    -- use # 1 6 wire.
       3. Generator/alternator armature to the voltage regulator      -- use # 1 0 wire.
       4. Battery "hot-side" to the starter solenoid -- use 1 2 - v o l t battery-cable.
       5. Battery "ground-side" to grou~id (some point on tile frame close to the battery) -- use 1 2 - v o l t
            battery-cable.


        The preceding material should serve as a guide to the basic w i r i r ~ g your JAMAICAN.
                                                                                 of               Ad-
ditional items such as horns, direction indicators, tachometers, etc., can be added at your discretion.
In general, all additional wiring can be simply added into the hub-tc-front or hub-to-rear harness with-
out incurring any special routing problems.
ROLL-UP WINDOW MECHANISM PARTS
lde~ltificatioll Voll(swayeti Part Nunibers
               by


                                  L E F T DOOR      RIGHT DOOR
REGULATOR                       1 4 1 8 3 7 501B    1 4 1 837 502B
TRACK ASSEMBLY                  1 4 1 8 3 7 5516    1 4 1 837 552B
GLASS HOLDER                    1 4 1 837 5 T l k   14;   237 571,?1
WINDOW GLASS GRCMR;lET          1 4 1 837 5 6 5 ~   1 4 1 837 5 6 5 ~


                                    FIGURE 7


  Tap to 5/16-18
7. UPHOLSTERY -- INTERIOR FINISHING
       The upholstering of your JAMAICAN is purely a matter of personal taste. You can be as simple or
as elaborate as you desire -- austere for the road machine, buff or "posh" for the grarid touring enthusiast.
        A t the factory, we use, of course, the JAMAICAN upholstery k i t (available at extra cost). The
standard upholstery k i t corrsists, i n part, of automotive-grade carpet cut to f i t tlte floor, firewall and head-
liner surfaces and bound with plastic, sewn binding to prevent ravelling. The carpeting is affixed with 3 M
(Copyright, Minnesota Mining and Mar~ufacturing)Trim Adhesive dispensed from a spray can.
       Wood blocks should also be glued into the windshield pillars to provide attachment points for the
upholstered pillar panels -- again easily constructed of vinyl over cardboard and foam rubber.
         I f you have access to a co~nmercialsewirig machine you can make your own carpeting, rugs, etc.
Use heavy paper to make a pattern of Uie interior of the car. Transfer this pattern to the carpet (making
sure i t is not upsidedown) and cut. Sew on the binding. Spray the surfaces to be covered with trim ad-
hesive. Install the upholstery. Use the same "paper pattern" technique to develop the door panels, wind-
shield pillar panel, etc. , shapes.
        In the area behind the seats (under the rear window) plywood paneling can be inserted between the
rear wheel-wells and over the gas tank and spare tire compartment. Cut a pattern from a piece of corrugated
cardboard and transfer this to 1/4" plywood     --
                                                use marine plywood and varnish well before installing.
        The plywood interior surface can be painted to match the upholstery or covered w i t h carpet l i k e the
floor and headliner. Chrome skid strips can be tacked over the carpet, running fore and aft at a 4 " to 5 "
spacing --  these strips allow luggage to be easily placed behind the seats without scuffing the carpet.
        Upholstered door panels, available as part of the standard upholstery k i t are attached to the door
inner panels with plated phillips head sheet metal screws w i t h finishing washers.
        As a finishing touch, a courtesy light can be installed overhead on the vehicle centerline just for-
ward of the rear window. Wiring is routed up a windshield post and under the headlirier material. The
operating switches are mounted facing up through the door jamb at the very front of the jamb, out of the
way of entering and exiting feet.
        The stock Austin Heale , M W , or Triumph heating system can be utilized w i t h the JAMAICAN
body. New ducts must be cut tlrough the top of the dash to allow defroster air to reach the windshield.


* See chassis preparation for minor modification to MGA heater box.
8. EXTERIOR F I N I S H
         Tlle ~lrostirnporta~~t
                             item i n t l ~ e
                                            arca of exterior finis11 i s , of course, tlre 11ai11ti11cl.            Fil,crglass is
111ost compatible with acrylic lacquers. Lacqucrs, also, are the easicst and 111osttro~rble-frce ill t l ~ e i r
app[ ication. They call eve11 be appl icd ill a s l iglltl y dusty crrvironlnent         --     the dtrst a ~ r dspraying imper-
fections can be rubbed-out st~bseqirer~tly.     Just f o l l o w tlte paint i r ~ s t r ~ t c t i o r ~ s don't try sprayirly on
                                                                                                    atid
cold and/or damp days.
         About body surface preparation -- most fiberglass bodies have s l i g l i t inlperfections such as p i n
lloles or mold~narks. Often they w i l l pick up a fcw scratclles during shipment. I t is virtually i m p o s s ~ b l e
to avoid this. Body putty and s a ~ l d paper should take care of any body f i n i s h problems you might have.
       We are proud of the finished sllrlace of our bodies. We m e special care and materials around the
edges of the body surface to prevent cllills. One of our own A Z T E C S , w i t h over 5 0 , 0 0 0 miles on it,
does not have one body crack irl it. I t s t i l l has i t s original paint job, too!
        Your JAMAICAN body w i l l have a color when you receive it. I n most instances, t h i s color w i l l
be black. This is -the finished color. T h i s i s a special gelcoat your body has been given to achieve
                  riot
a better surface.
         Before you paint your J A M A I C A N the entire body should be l i q l l t l y sanded w i t h k 4 0 0 sandpaper.
Tile body i s sanded in order to "scuff up" the surface wllich i s too s X X G hold paint.              Rerrrember to go
liglltly! Then the body should be washed off and wiped witlr Prepsol or some other p a i ~ l preparation l i q u i d
                                                                                                          t
to eli~nitlateany o i l or dirt. The body i s now ready for primer and paint.

Other Items of Exterior F i n i s h Are:

WINDSHIELD WIPERS            --
                          The A u s t i n Healey, M G and TR witldshield wiper actuator systems are almost
<dent~cal,one to another. They consist of a 1 2 - v o l t motor driving a crank which p u l l s and puslles a cable
inside a tube. The wiper pivots are mounted on the tube and engage the back and forth rnotion of the cable.
Installation in the J A M A I C A N i s simply a matter of nlounting tlre 'pivots i n two holes d r i l l e d through the
cowl as shown i n Figure 3F*. Ttre niotor i s brought to a convenient mounting location by gently bending
the cable-bearing tube u n t i l the motor contacts the desired mounting surface.

WEATHERSTRIPPING             --   The only place the J A M A I C A N may require weatherstripping is around the hood
and doors. We suggest, for the hood, using a t h i n strip (3/4"                  wide) of adhesive-backed foam rubber.
Typical stripping material is found, for example, i n the Sears catalog bearing # 2 8 A 7 2 2 6 . Apply the
stripping after painting. The door weather s t r i p (Figure 3Gf')i s a combination windlace and weatherstrip,
a v a i l a b l e r a standard item w i t h the ~ ~ p h o l s t e r y and i s installed by simply slipping over the prepared
                                                                  kit,
fiberglass flanges.
9 . V-8 POWER OPTION
         Soon after World War II, [lie sports car busitless besari to flourisli w i t h Llie iritrodoctiori of Ule MG-
 TC -- and soon after i t s iritroductiori certain owriers irievitably wanted more "go". Some enthusiasts welit
 tile supercliarger/super-t~r~iirig route largely will1 disastrous results -- tlie ~ i o t a b l e       exception was the mag-
 nificent (arid very experisive) " o l d 83", arid M G - T C f i t t e d w i t h all I N T E R M E C C A N I C A blower, iritercooler
 and special body.
           Otlier builders resorted to tlie " e ~ i g i ~ iswap". The M G e r ~ g i n e
                                                            e                             was replaced by [lie ver~erable
 ,Cord V - 8 / 6 0 Substituting engirles     --                                                           power were applied --
                                               if suitable c o ~ ~ s t r a i ~ i t s ~ i g i ~ i~ e a ~ i d
                                                                              OII e          sz
 proved far more satisfactory fliari to "liop-UO" the stock engine.
          Today tlie V - 3 / 6 0 IGISlorlg been superceded by tlie Clievrolet 233 ctl.            Iri.   V - 8 arid more recent1 y
 by tile Ford 2 8 9 cu. in. V - 8 "Fairlane e~igirie".
        Any of the veliicles suitable for use w i t l i a J A M A I C A N body are also suitable for either of these
V-gls. Tlie Austin Healey 3 0 0 0 series cllassis i s probably tlie best to use i f etigirie outputs exceedirig
 7 5 DUD a- beirlg c n n q i t l ~ r e d . We ~*/ould
                                                    recomrriend, in an;! ca:c, that tlie liorsepower r ~ o exceed 2 5 0
                                                                                                           t
~ H unless the entire frame, drive-line and suspension are reworked to safely contain the tiiylier power.
      P
          The best time durirlg the J A M A I C A N coristruction to p e r f o r ~the engine swap is, obviously, before
                                                                                  ~i
tile body i s mounted. I n tlle course of preparirig the cliassis, rernove the original engine, tlie engine mounts
atid [lie transmission and i l s mounts. (Note: Tlie stock transmission car1 be retained for low power             under   --
150 B H P    --installations a ~ i dif a suitable engine-to-gearbox adapter is available).
        Tlie "riew" V - 8 arid gearbox (we used a Warrier T - 1 0 box and a Ford 289 for our Healey-JAMAICAN-
Ford, and a Buick Aluniinum V - 8 for our MGA-JAMAICAN-Buick*) are lowered into tlie engine compartment
and blocked i n position. New engine and gearbox mounts are now fabricated, f i t t e d to Uie eriyine-gearbox
inplace, and welded to tlie frame.
       Once tlie engine and gearbox are permanently installed, the drive-sliaft car1 be shortened by cutting
and welding (make certain i t i s straight after welding) arid Llie HURST-shifter can be iristalled.
       A high capacity radiator, sucli as tlie Harrison aluminurri radiator for Corvette, sliould be installed.
A surge tank should be mounted w i t h tlie f i l l e r opening above the level of the cylinder heads.
                                                   sliould be required -- Lhe ignition systern remairis 1 2 - v o l t .
       No significant modification i n w i r i ~ i g
Only the o i l pressure and water ternperati~resending units may be different.
       Several notes i n closing        --
                                    a good reference for H U R S T parts, special engine/gear box mounts,
Instruments, etc., i s the "Honest Charley" catalog available from:

                                   HONESTCHARLEYSPEEDSHOP
                                   Honest Street a t North H i w a y II
                                   Chattanooga, Tennessee 3 7 4 2 1

          When acquiring a wrecked veliicle for a JAMAICAN arid ari engirie swap i s contemplated avoid
cars w i t h wire wlieels  --
                           choose tlie d i s c wlieels for s t r e n g t h n d durability.
                                                                                                                        -
        P L E A S E F E E L F R E E TO C O N S U L T U S ! Wlien you are buildirig your J A M A I C A N , i f you en-
counter some problems outside the scope of these illstructions or are having trouble obtaining any of the
materials you need, do not hesitate to contact us. We w i l l be pleased to a s s i s t you i n any way we can.


" For details concerning tlie V - 8       iristatlatiori, coriiact otrr factory.
1 0 . THE JAMAICAN-VOLI(SWAGEN


         Tl~eJAMAICAN-VOLKSWAGEN c o ~ ~ v c r s i io ~ s t r t ~ c l i oarcs set apart fro111 I ) a l a ~ ~ c e 1l1e ~ i ~ a l c r i a l
                                                                     ~i i               ~i                        Ll~c        of
ill tllis 111a11t1al
                 because of the largc I I U I I I ~ J C ~of IIII~CI~IC p r o c c d ~ ~ r ci s ~ v o l v c d COIIIJ)ICL~II~ rear-cngi~icd
                                                                                            ~           ill             lliis
variation. Sections 1, 2 a~icl4 t l i r o ~ ~ g l i arc a p p l i c a l ~ l e your VW-based project. S e c t i o ~3, I~owevcr,
                                                     3                        to                                              i
is supercedetl by t l ~ e o l l o w i ~ ~ g ~ a t c r i a l .
                        f                ~~


REMOVING THE VOLI<SWAGEN BODY


      Before you start to cl~ll)olttllc body, rerliove the front and rear seats, discorir~ectand relllove tlie battery
slid drain tlie gas tank.Next, relllove t l ~ c e f t front tire/wl~eel ill order to urlbolt tlie steering shaft by rerni,vi~iy
                                               l
two bolts fro111 steering shaft u ~ ~ i v c r s joint. Now d i s c o ~ ~ ~the c t wirc.
               tile                             al                           ~ c Iiorn

      Now discon~iectthe I I I ~ I ~ L lI~ o~ e
                                     c ~ k cable or tlie wire from tlie electrically operated clioke.                 Discon~iecttlic
wires (to tlie coil a ~ voltaye regt~lator)
                        ~ d                   and ~ L i e l L l u i u ,caLI? fro;,, ~ I I C~ : ; i ~ i c .
                                                                                          ~

         Remove tlie choke froni t l ~ e
                                       dasliboarrl (110 dasliboard c o ~ i t r o lexists for tlie electrically/tl~er~nostatically
operated c l ~ o k e ) ~ i d
                     a pull tlie cable tlirougli to remove it. Discon~iectt l ~ e        gas l i ~ ~ e s the gas tank and remove
                                                                                                     to
tile tank by llnbolting (see Figure 9 ) a ~ l~ f di ~ i g t up and out. Don't forget tlie reserve fuel switch-over valve
                                                i t      i
in t l ~ e
         cockpit.

        You are now ready to unbolt t l ~ ebody. F i r s t , relnove tlie bolts located alorig the outside edges of the
llliderside of the floorpall (see Figure 9 ) . Next, relnove the several bolts r e l ~ ~ a i n i ati g front underside of
                                                                                                 ~ tlie
tile floorpan    --
                  just inside tlie front wheel-wells.

       Remove tlie four bolts exposed w l ~ e l the rear seat was taken out. F i n a l l y , remove the rear tires/wlieels
                                                i
arid unbolt the body bolts ill tlie wlieel-wells. SAVE THESE B O L T S !

      The body s l ~ o u l dnow be free to be lifted off via block and tackle, cl~ain-hoist, or yourself and "several
strong and willing helpers." CAUTION : Tlie Volkswager~llody i s extreniely Iieavy! I t is because of this
weight loss, incidently, that you rnay expect better-tliarl-Volkswagen pertortr~arice111 your completed
JAMAICAN-VW.

      Care should be exercised when l i f t i n g off tlie Volkswagen body in order to preserve the body-to-floorpan
rubber seal. I t can be used to "weatherstrip" your new JAMAICAN body.

      I t is advisable to save a l l tlie undamaged parts such as tlie steering colutnn and wlieel, gas tank,                   in-
struments, etc., inasmuch as these items can be used to complete your JAMAICAN.


INSTALLING THE F R A M E R A I L S


       The frame rails are installed next. Remove the dust covers ( 4 bolts each) from over tlie elids of the
rear torsion bars (covers on early chassis f i t around the end of Llie torsi011 bar leavirig i t exposed, while
covers on late chassis completely cover tlie end of the bar).

          Modify the dust cover as shown i n Figure 10 and replace t h e n on the floorpan with the upper two bolts
(don't forget to put the rubber "dougllnuts" back under the covers.) Bolt the end-plate of tlie frame r a i l s to
the floorpan over the dust covers using the bottom two dust cover retaining,bolts                  --     leave the bolts loose.
L i f t the front end of tlie frame r a i l and secure i t under tlie lower, front tors1011 housing (tube) using the
                                                                                              bar
U-bolts provided with the frame rails. Position tlie U-bolts about 1 inches either side of tlie floorpan
                                                                                3
centerline  --    tigliteri a l l bolts. Secure tlie edge of the floorpan to tlie r a i l s by d r i l l i ~ i g
                                                                                                               tlirough tlie 'pan
Into the 'rails and f a s t e r ~ i ~with large sheet-metal screws.
                                      ig
FIGURE 1 0


REPOSITIONING THE COCKPIT CONTROLS

       With the floorpan supported by the frame rails, the central tunnel of the floorpan can be cut and "rear-
ranged" in order to relocate the pedals and gearshift. Referring to Figure 9    -- three   full   sections are
cut from the tunnel and replaced as shown. The cutting can be accomplished using a sabre-saw or an oxy-
acetylene cutter. Cuts should be made along the side of tlie tunnel as close to the floor as possible     --
                                                                                                           cuts
up the sides should be perpendicular to the floor. Care should be taken to cut only the tunnel, not the tubes
and cables running within the tunnel.

       Figure 1 shows the reconfigured VW 'pan ready for the JAMAICAN body. For the pedals to operate
                1
i n their "new" position the clutch and accelerator cables must be shortened by cutting-off 1 4 1/2 inches and
reswaging the end fittings to the cut ends. The tubing surrounding the accelerator cable i s puslled back inside
the tunnel and .cut-off flush a t the point it exists the rear of the tunnel. The pedal pivot support tab is re-bolted
to the pan through a new hole drilled i n the 'pan after the pivot is securely i n its new position.

       Repositioning the steering column and wheel is accomplished by lowering (reducing the angle between the
'pan and the column) and lengthening the steering column/shaft. The required lowering i s quite simple. The
VW steering box i s only clamped on the upper front torsion bar housing. I t can be rotated on the housing just
by loosening the clamps. With the clamps loosened, the steering box should be rotated such that the steering
linkage just clears the "hump" i n the center of the floorpan when the wheels are turned from lock-to-lock.
(Lowering the steering box alters the toe-in adjustment of the steering geometry. Proper toe-in i s reestab-
lished by adjusting the tie-rods until the fronts of the front tires are about 1/8" closer together than the backs
-- refer to Figure 12. Make sure the adjustment i s divided equally between the tie-rods).


                                                   FIGURE 1 2
A simple metllod of lengtlienirig the stecring shaft the required 1 4 inches is to insert the extension,
sliown i n Figure 13, between the steeril~gbox and tlie steering shaFt. Tlie order of assernbly o f stecring
components i n a stock VW is: steering box, flexible rubber disc, "TI'-flange, stecring shaft. Tlie revised
order of assembly For the JAMAICAN/VW is: steering box, flexible rubber disc, 14'' extension, Flexible
rubber disc, "TIL-flange, steering shaft.

                         .


                                       +I - -               3'
                                                       FIGURE 13


MOUNTING THE REAR HANGERS

      The final step i n preparing tlie floorpan i s to mount the rear hangers For the t a i l section of the GT-12
body. Figure 1 4 shows both hangers i n place on the mounts formerly used to secure the Volkswagen body.
When the Fiberglass tail section i s installed, shims (washers) may have to be placed under the front, rear
or both hanger-mounting feet (see Figure 1 4 ) to precisely align the t a i l section with the main body section.


     I                                            FIGURE 1 4
Fiberfab brochure - Jamaican kit car

More Related Content

Similar to Fiberfab brochure - Jamaican kit car

PRODUCT CATALOG RAPPID VALVES
PRODUCT CATALOG RAPPID VALVESPRODUCT CATALOG RAPPID VALVES
PRODUCT CATALOG RAPPID VALVESGaurav Dalal
 
1986 Falcon 100 (N46MK sn 206) Detailed Specs
1986 Falcon 100 (N46MK sn 206) Detailed Specs1986 Falcon 100 (N46MK sn 206) Detailed Specs
1986 Falcon 100 (N46MK sn 206) Detailed Specskevrossignon
 
Tabela lubrificantes-diesel
Tabela lubrificantes-dieselTabela lubrificantes-diesel
Tabela lubrificantes-dieselJorge Costa
 
CASE W24 Wheel Loader Service Repair Manual.pdf
CASE W24 Wheel Loader Service Repair Manual.pdfCASE W24 Wheel Loader Service Repair Manual.pdf
CASE W24 Wheel Loader Service Repair Manual.pdffujskekdmd3e
 
Case w24 wheel loader service repair manual
Case w24 wheel loader service repair manualCase w24 wheel loader service repair manual
Case w24 wheel loader service repair manualfjkskmmdmme
 
Case w24 wheel loader service repair manual
Case w24 wheel loader service repair manualCase w24 wheel loader service repair manual
Case w24 wheel loader service repair manualfjsjekdmmeme
 
Catalogo completo alta(1)
Catalogo completo alta(1)Catalogo completo alta(1)
Catalogo completo alta(1)Euclides Junior
 
Case w24 wheel loader service repair manual
Case w24 wheel loader service repair manualCase w24 wheel loader service repair manual
Case w24 wheel loader service repair manualfujsjefkskem
 
Case w24 wheel loader service repair manual
Case w24 wheel loader service repair manualCase w24 wheel loader service repair manual
Case w24 wheel loader service repair manualfikskefjsekfsem
 
Engine oil comparisson
Engine oil comparissonEngine oil comparisson
Engine oil comparissonc_kokiks_2
 
Produse noi MEFIN
Produse noi MEFINProduse noi MEFIN
Produse noi MEFINEGAGENEL
 
Dearborn Protocol Adapter 5 for Trucks,Trailers,Buses and Light Commercial Ve...
Dearborn Protocol Adapter 5 for Trucks,Trailers,Buses and Light Commercial Ve...Dearborn Protocol Adapter 5 for Trucks,Trailers,Buses and Light Commercial Ve...
Dearborn Protocol Adapter 5 for Trucks,Trailers,Buses and Light Commercial Ve...Jack Chen
 
Great plains parts manual center pivot hitch cph-12, cph-15, chp-20
Great plains parts manual center pivot hitch cph-12, cph-15, chp-20Great plains parts manual center pivot hitch cph-12, cph-15, chp-20
Great plains parts manual center pivot hitch cph-12, cph-15, chp-20PartCatalogs Net
 
2013 hino 155 series truck service repair manual
2013 hino 155 series truck service repair manual2013 hino 155 series truck service repair manual
2013 hino 155 series truck service repair manualfujsekfkksemm
 
2013 hino 195h series truck service repair manual
2013 hino 195h series truck service repair manual2013 hino 195h series truck service repair manual
2013 hino 195h series truck service repair manualfujsefkskemm
 
2013 hino 195 series truck service repair manual
2013 hino 195 series truck service repair manual2013 hino 195 series truck service repair manual
2013 hino 195 series truck service repair manualfhsjejfksemm
 
2013 hino 155h series truck service repair manual
2013 hino 155h series truck service repair manual2013 hino 155h series truck service repair manual
2013 hino 155h series truck service repair manualfhsjejfksemm
 
2003 Polaris 800 RMK CC SNOWMOBILE Service Repair Manual
2003 Polaris 800 RMK CC SNOWMOBILE Service Repair Manual2003 Polaris 800 RMK CC SNOWMOBILE Service Repair Manual
2003 Polaris 800 RMK CC SNOWMOBILE Service Repair Manualhjskemdmmm
 

Similar to Fiberfab brochure - Jamaican kit car (20)

PRODUCT CATALOG RAPPID VALVES
PRODUCT CATALOG RAPPID VALVESPRODUCT CATALOG RAPPID VALVES
PRODUCT CATALOG RAPPID VALVES
 
1986 Falcon 100 (N46MK sn 206) Detailed Specs
1986 Falcon 100 (N46MK sn 206) Detailed Specs1986 Falcon 100 (N46MK sn 206) Detailed Specs
1986 Falcon 100 (N46MK sn 206) Detailed Specs
 
GRseditspg1-22
GRseditspg1-22GRseditspg1-22
GRseditspg1-22
 
Tabela lubrificantes-diesel
Tabela lubrificantes-dieselTabela lubrificantes-diesel
Tabela lubrificantes-diesel
 
CASE W24 Wheel Loader Service Repair Manual.pdf
CASE W24 Wheel Loader Service Repair Manual.pdfCASE W24 Wheel Loader Service Repair Manual.pdf
CASE W24 Wheel Loader Service Repair Manual.pdf
 
Case w24 wheel loader service repair manual
Case w24 wheel loader service repair manualCase w24 wheel loader service repair manual
Case w24 wheel loader service repair manual
 
Case w24 wheel loader service repair manual
Case w24 wheel loader service repair manualCase w24 wheel loader service repair manual
Case w24 wheel loader service repair manual
 
Catalogo completo alta(1)
Catalogo completo alta(1)Catalogo completo alta(1)
Catalogo completo alta(1)
 
Case w24 wheel loader service repair manual
Case w24 wheel loader service repair manualCase w24 wheel loader service repair manual
Case w24 wheel loader service repair manual
 
Case w24 wheel loader service repair manual
Case w24 wheel loader service repair manualCase w24 wheel loader service repair manual
Case w24 wheel loader service repair manual
 
Anc
AncAnc
Anc
 
Engine oil comparisson
Engine oil comparissonEngine oil comparisson
Engine oil comparisson
 
Produse noi MEFIN
Produse noi MEFINProduse noi MEFIN
Produse noi MEFIN
 
Dearborn Protocol Adapter 5 for Trucks,Trailers,Buses and Light Commercial Ve...
Dearborn Protocol Adapter 5 for Trucks,Trailers,Buses and Light Commercial Ve...Dearborn Protocol Adapter 5 for Trucks,Trailers,Buses and Light Commercial Ve...
Dearborn Protocol Adapter 5 for Trucks,Trailers,Buses and Light Commercial Ve...
 
Great plains parts manual center pivot hitch cph-12, cph-15, chp-20
Great plains parts manual center pivot hitch cph-12, cph-15, chp-20Great plains parts manual center pivot hitch cph-12, cph-15, chp-20
Great plains parts manual center pivot hitch cph-12, cph-15, chp-20
 
2013 hino 155 series truck service repair manual
2013 hino 155 series truck service repair manual2013 hino 155 series truck service repair manual
2013 hino 155 series truck service repair manual
 
2013 hino 195h series truck service repair manual
2013 hino 195h series truck service repair manual2013 hino 195h series truck service repair manual
2013 hino 195h series truck service repair manual
 
2013 hino 195 series truck service repair manual
2013 hino 195 series truck service repair manual2013 hino 195 series truck service repair manual
2013 hino 195 series truck service repair manual
 
2013 hino 155h series truck service repair manual
2013 hino 155h series truck service repair manual2013 hino 155h series truck service repair manual
2013 hino 155h series truck service repair manual
 
2003 Polaris 800 RMK CC SNOWMOBILE Service Repair Manual
2003 Polaris 800 RMK CC SNOWMOBILE Service Repair Manual2003 Polaris 800 RMK CC SNOWMOBILE Service Repair Manual
2003 Polaris 800 RMK CC SNOWMOBILE Service Repair Manual
 

More from tr-freunde

Triumph roadster
Triumph roadsterTriumph roadster
Triumph roadstertr-freunde
 
Triumph TR3 - rattle and roll - british classics 6-2013
Triumph TR3 - rattle and roll - british classics 6-2013Triumph TR3 - rattle and roll - british classics 6-2013
Triumph TR3 - rattle and roll - british classics 6-2013tr-freunde
 
Triumph TR4 TR4A clutch workshop manual
Triumph TR4 TR4A clutch workshop manualTriumph TR4 TR4A clutch workshop manual
Triumph TR4 TR4A clutch workshop manualtr-freunde
 
Standard triumph service information 1954
Standard triumph service information 1954Standard triumph service information 1954
Standard triumph service information 1954tr-freunde
 
Triumph service bulletins 1963
Triumph service bulletins 1963Triumph service bulletins 1963
Triumph service bulletins 1963tr-freunde
 
Triumph service bulletin 1964
Triumph service bulletin 1964Triumph service bulletin 1964
Triumph service bulletin 1964tr-freunde
 
Triumph service bulletin 1965
Triumph service bulletin 1965Triumph service bulletin 1965
Triumph service bulletin 1965tr-freunde
 
Erster Elektro Triumph TR6
Erster Elektro Triumph TR6Erster Elektro Triumph TR6
Erster Elektro Triumph TR6tr-freunde
 
TR-Freunde fotokalender 2013 hochformat
TR-Freunde fotokalender 2013 hochformatTR-Freunde fotokalender 2013 hochformat
TR-Freunde fotokalender 2013 hochformattr-freunde
 
TR Freunde fotokalender 2013 querformat
TR Freunde fotokalender 2013 querformatTR Freunde fotokalender 2013 querformat
TR Freunde fotokalender 2013 querformattr-freunde
 
TR Freunde Fotokalender 2013 hochformat 2
TR Freunde Fotokalender 2013 hochformat 2TR Freunde Fotokalender 2013 hochformat 2
TR Freunde Fotokalender 2013 hochformat 2tr-freunde
 
TR-Freunde fotokalender 2013 hochformat
TR-Freunde fotokalender 2013 hochformatTR-Freunde fotokalender 2013 hochformat
TR-Freunde fotokalender 2013 hochformattr-freunde
 

More from tr-freunde (12)

Triumph roadster
Triumph roadsterTriumph roadster
Triumph roadster
 
Triumph TR3 - rattle and roll - british classics 6-2013
Triumph TR3 - rattle and roll - british classics 6-2013Triumph TR3 - rattle and roll - british classics 6-2013
Triumph TR3 - rattle and roll - british classics 6-2013
 
Triumph TR4 TR4A clutch workshop manual
Triumph TR4 TR4A clutch workshop manualTriumph TR4 TR4A clutch workshop manual
Triumph TR4 TR4A clutch workshop manual
 
Standard triumph service information 1954
Standard triumph service information 1954Standard triumph service information 1954
Standard triumph service information 1954
 
Triumph service bulletins 1963
Triumph service bulletins 1963Triumph service bulletins 1963
Triumph service bulletins 1963
 
Triumph service bulletin 1964
Triumph service bulletin 1964Triumph service bulletin 1964
Triumph service bulletin 1964
 
Triumph service bulletin 1965
Triumph service bulletin 1965Triumph service bulletin 1965
Triumph service bulletin 1965
 
Erster Elektro Triumph TR6
Erster Elektro Triumph TR6Erster Elektro Triumph TR6
Erster Elektro Triumph TR6
 
TR-Freunde fotokalender 2013 hochformat
TR-Freunde fotokalender 2013 hochformatTR-Freunde fotokalender 2013 hochformat
TR-Freunde fotokalender 2013 hochformat
 
TR Freunde fotokalender 2013 querformat
TR Freunde fotokalender 2013 querformatTR Freunde fotokalender 2013 querformat
TR Freunde fotokalender 2013 querformat
 
TR Freunde Fotokalender 2013 hochformat 2
TR Freunde Fotokalender 2013 hochformat 2TR Freunde Fotokalender 2013 hochformat 2
TR Freunde Fotokalender 2013 hochformat 2
 
TR-Freunde fotokalender 2013 hochformat
TR-Freunde fotokalender 2013 hochformatTR-Freunde fotokalender 2013 hochformat
TR-Freunde fotokalender 2013 hochformat
 

Recently uploaded

➥🔝 7737669865 🔝▻ Asansol Call-girls in Women Seeking Men 🔝Asansol🔝 Escorts...
➥🔝 7737669865 🔝▻ Asansol Call-girls in Women Seeking Men  🔝Asansol🔝   Escorts...➥🔝 7737669865 🔝▻ Asansol Call-girls in Women Seeking Men  🔝Asansol🔝   Escorts...
➥🔝 7737669865 🔝▻ Asansol Call-girls in Women Seeking Men 🔝Asansol🔝 Escorts...amitlee9823
 
8377087607, Door Step Call Girls In Majnu Ka Tilla (Delhi) 24/7 Available
8377087607, Door Step Call Girls In Majnu Ka Tilla (Delhi) 24/7 Available8377087607, Door Step Call Girls In Majnu Ka Tilla (Delhi) 24/7 Available
8377087607, Door Step Call Girls In Majnu Ka Tilla (Delhi) 24/7 Availabledollysharma2066
 
➥🔝 7737669865 🔝▻ Bhiwandi Call-girls in Women Seeking Men 🔝Bhiwandi🔝 Escor...
➥🔝 7737669865 🔝▻ Bhiwandi Call-girls in Women Seeking Men  🔝Bhiwandi🔝   Escor...➥🔝 7737669865 🔝▻ Bhiwandi Call-girls in Women Seeking Men  🔝Bhiwandi🔝   Escor...
➥🔝 7737669865 🔝▻ Bhiwandi Call-girls in Women Seeking Men 🔝Bhiwandi🔝 Escor...amitlee9823
 
Connaught Place, Delhi Call girls :8448380779 Model Escorts | 100% verified
Connaught Place, Delhi Call girls :8448380779 Model Escorts | 100% verifiedConnaught Place, Delhi Call girls :8448380779 Model Escorts | 100% verified
Connaught Place, Delhi Call girls :8448380779 Model Escorts | 100% verifiedDelhi Call girls
 
Vip Mumbai Call Girls Navi Mumbai Call On 9920725232 With Body to body massag...
Vip Mumbai Call Girls Navi Mumbai Call On 9920725232 With Body to body massag...Vip Mumbai Call Girls Navi Mumbai Call On 9920725232 With Body to body massag...
Vip Mumbai Call Girls Navi Mumbai Call On 9920725232 With Body to body massag...amitlee9823
 
Majestic Call Girls: 🍓 7737669865 🍓 High Profile Model Escorts | Bangalore Es...
Majestic Call Girls: 🍓 7737669865 🍓 High Profile Model Escorts | Bangalore Es...Majestic Call Girls: 🍓 7737669865 🍓 High Profile Model Escorts | Bangalore Es...
Majestic Call Girls: 🍓 7737669865 🍓 High Profile Model Escorts | Bangalore Es...amitlee9823
 
Top Rated Call Girls South Mumbai : 9920725232 We offer Beautiful and sexy Ca...
Top Rated Call Girls South Mumbai : 9920725232 We offer Beautiful and sexy Ca...Top Rated Call Girls South Mumbai : 9920725232 We offer Beautiful and sexy Ca...
Top Rated Call Girls South Mumbai : 9920725232 We offer Beautiful and sexy Ca...amitlee9823
 
Call Girls in Malviya Nagar Delhi 💯 Call Us 🔝9205541914 🔝( Delhi) Escorts Ser...
Call Girls in Malviya Nagar Delhi 💯 Call Us 🔝9205541914 🔝( Delhi) Escorts Ser...Call Girls in Malviya Nagar Delhi 💯 Call Us 🔝9205541914 🔝( Delhi) Escorts Ser...
Call Girls in Malviya Nagar Delhi 💯 Call Us 🔝9205541914 🔝( Delhi) Escorts Ser...Delhi Call girls
 
Top Rated Call Girls Mumbai Central : 9920725232 We offer Beautiful and sexy ...
Top Rated Call Girls Mumbai Central : 9920725232 We offer Beautiful and sexy ...Top Rated Call Girls Mumbai Central : 9920725232 We offer Beautiful and sexy ...
Top Rated Call Girls Mumbai Central : 9920725232 We offer Beautiful and sexy ...amitlee9823
 
Top Rated Call Girls Navi Mumbai : 9920725232 We offer Beautiful and sexy Cal...
Top Rated Call Girls Navi Mumbai : 9920725232 We offer Beautiful and sexy Cal...Top Rated Call Girls Navi Mumbai : 9920725232 We offer Beautiful and sexy Cal...
Top Rated Call Girls Navi Mumbai : 9920725232 We offer Beautiful and sexy Cal...amitlee9823
 
+97470301568>>buy vape oil,thc oil weed,hash and cannabis oil in qatar doha}}
+97470301568>>buy vape oil,thc oil weed,hash and cannabis oil in qatar doha}}+97470301568>>buy vape oil,thc oil weed,hash and cannabis oil in qatar doha}}
+97470301568>>buy vape oil,thc oil weed,hash and cannabis oil in qatar doha}}Health
 
Escorts Service Rajajinagar ☎ 7737669865☎ Book Your One night Stand (Bangalore)
Escorts Service Rajajinagar ☎ 7737669865☎ Book Your One night Stand (Bangalore)Escorts Service Rajajinagar ☎ 7737669865☎ Book Your One night Stand (Bangalore)
Escorts Service Rajajinagar ☎ 7737669865☎ Book Your One night Stand (Bangalore)amitlee9823
 
➥🔝 7737669865 🔝▻ Moradabad Call-girls in Women Seeking Men 🔝Moradabad🔝 Esc...
➥🔝 7737669865 🔝▻ Moradabad Call-girls in Women Seeking Men  🔝Moradabad🔝   Esc...➥🔝 7737669865 🔝▻ Moradabad Call-girls in Women Seeking Men  🔝Moradabad🔝   Esc...
➥🔝 7737669865 🔝▻ Moradabad Call-girls in Women Seeking Men 🔝Moradabad🔝 Esc...amitlee9823
 
Vip Mumbai Call Girls Mira Road Call On 9920725232 With Body to body massage ...
Vip Mumbai Call Girls Mira Road Call On 9920725232 With Body to body massage ...Vip Mumbai Call Girls Mira Road Call On 9920725232 With Body to body massage ...
Vip Mumbai Call Girls Mira Road Call On 9920725232 With Body to body massage ...amitlee9823
 
一比一原版(PU学位证书)普渡大学毕业证学历认证加急办理
一比一原版(PU学位证书)普渡大学毕业证学历认证加急办理一比一原版(PU学位证书)普渡大学毕业证学历认证加急办理
一比一原版(PU学位证书)普渡大学毕业证学历认证加急办理ezgenuh
 
Bangalore Call Girls: 🍓 7737669865 🍓 High Profile Model Escorts | Bangalore E...
Bangalore Call Girls: 🍓 7737669865 🍓 High Profile Model Escorts | Bangalore E...Bangalore Call Girls: 🍓 7737669865 🍓 High Profile Model Escorts | Bangalore E...
Bangalore Call Girls: 🍓 7737669865 🍓 High Profile Model Escorts | Bangalore E...amitlee9823
 
ELECTRICITÉ TMT 55.pdf electrick diagram manitout
ELECTRICITÉ TMT 55.pdf electrick diagram manitoutELECTRICITÉ TMT 55.pdf electrick diagram manitout
ELECTRICITÉ TMT 55.pdf electrick diagram manitoutssjews46
 
Dubai Call Girls R0yalty O525547819 Call Girls Dubai
Dubai Call Girls R0yalty O525547819 Call Girls DubaiDubai Call Girls R0yalty O525547819 Call Girls Dubai
Dubai Call Girls R0yalty O525547819 Call Girls Dubaikojalkojal131
 

Recently uploaded (20)

➥🔝 7737669865 🔝▻ Asansol Call-girls in Women Seeking Men 🔝Asansol🔝 Escorts...
➥🔝 7737669865 🔝▻ Asansol Call-girls in Women Seeking Men  🔝Asansol🔝   Escorts...➥🔝 7737669865 🔝▻ Asansol Call-girls in Women Seeking Men  🔝Asansol🔝   Escorts...
➥🔝 7737669865 🔝▻ Asansol Call-girls in Women Seeking Men 🔝Asansol🔝 Escorts...
 
8377087607, Door Step Call Girls In Majnu Ka Tilla (Delhi) 24/7 Available
8377087607, Door Step Call Girls In Majnu Ka Tilla (Delhi) 24/7 Available8377087607, Door Step Call Girls In Majnu Ka Tilla (Delhi) 24/7 Available
8377087607, Door Step Call Girls In Majnu Ka Tilla (Delhi) 24/7 Available
 
➥🔝 7737669865 🔝▻ Bhiwandi Call-girls in Women Seeking Men 🔝Bhiwandi🔝 Escor...
➥🔝 7737669865 🔝▻ Bhiwandi Call-girls in Women Seeking Men  🔝Bhiwandi🔝   Escor...➥🔝 7737669865 🔝▻ Bhiwandi Call-girls in Women Seeking Men  🔝Bhiwandi🔝   Escor...
➥🔝 7737669865 🔝▻ Bhiwandi Call-girls in Women Seeking Men 🔝Bhiwandi🔝 Escor...
 
Connaught Place, Delhi Call girls :8448380779 Model Escorts | 100% verified
Connaught Place, Delhi Call girls :8448380779 Model Escorts | 100% verifiedConnaught Place, Delhi Call girls :8448380779 Model Escorts | 100% verified
Connaught Place, Delhi Call girls :8448380779 Model Escorts | 100% verified
 
Vip Mumbai Call Girls Navi Mumbai Call On 9920725232 With Body to body massag...
Vip Mumbai Call Girls Navi Mumbai Call On 9920725232 With Body to body massag...Vip Mumbai Call Girls Navi Mumbai Call On 9920725232 With Body to body massag...
Vip Mumbai Call Girls Navi Mumbai Call On 9920725232 With Body to body massag...
 
Majestic Call Girls: 🍓 7737669865 🍓 High Profile Model Escorts | Bangalore Es...
Majestic Call Girls: 🍓 7737669865 🍓 High Profile Model Escorts | Bangalore Es...Majestic Call Girls: 🍓 7737669865 🍓 High Profile Model Escorts | Bangalore Es...
Majestic Call Girls: 🍓 7737669865 🍓 High Profile Model Escorts | Bangalore Es...
 
Top Rated Call Girls South Mumbai : 9920725232 We offer Beautiful and sexy Ca...
Top Rated Call Girls South Mumbai : 9920725232 We offer Beautiful and sexy Ca...Top Rated Call Girls South Mumbai : 9920725232 We offer Beautiful and sexy Ca...
Top Rated Call Girls South Mumbai : 9920725232 We offer Beautiful and sexy Ca...
 
Call Girls in Malviya Nagar Delhi 💯 Call Us 🔝9205541914 🔝( Delhi) Escorts Ser...
Call Girls in Malviya Nagar Delhi 💯 Call Us 🔝9205541914 🔝( Delhi) Escorts Ser...Call Girls in Malviya Nagar Delhi 💯 Call Us 🔝9205541914 🔝( Delhi) Escorts Ser...
Call Girls in Malviya Nagar Delhi 💯 Call Us 🔝9205541914 🔝( Delhi) Escorts Ser...
 
Top Rated Call Girls Mumbai Central : 9920725232 We offer Beautiful and sexy ...
Top Rated Call Girls Mumbai Central : 9920725232 We offer Beautiful and sexy ...Top Rated Call Girls Mumbai Central : 9920725232 We offer Beautiful and sexy ...
Top Rated Call Girls Mumbai Central : 9920725232 We offer Beautiful and sexy ...
 
Top Rated Call Girls Navi Mumbai : 9920725232 We offer Beautiful and sexy Cal...
Top Rated Call Girls Navi Mumbai : 9920725232 We offer Beautiful and sexy Cal...Top Rated Call Girls Navi Mumbai : 9920725232 We offer Beautiful and sexy Cal...
Top Rated Call Girls Navi Mumbai : 9920725232 We offer Beautiful and sexy Cal...
 
+97470301568>>buy vape oil,thc oil weed,hash and cannabis oil in qatar doha}}
+97470301568>>buy vape oil,thc oil weed,hash and cannabis oil in qatar doha}}+97470301568>>buy vape oil,thc oil weed,hash and cannabis oil in qatar doha}}
+97470301568>>buy vape oil,thc oil weed,hash and cannabis oil in qatar doha}}
 
Escorts Service Rajajinagar ☎ 7737669865☎ Book Your One night Stand (Bangalore)
Escorts Service Rajajinagar ☎ 7737669865☎ Book Your One night Stand (Bangalore)Escorts Service Rajajinagar ☎ 7737669865☎ Book Your One night Stand (Bangalore)
Escorts Service Rajajinagar ☎ 7737669865☎ Book Your One night Stand (Bangalore)
 
➥🔝 7737669865 🔝▻ Moradabad Call-girls in Women Seeking Men 🔝Moradabad🔝 Esc...
➥🔝 7737669865 🔝▻ Moradabad Call-girls in Women Seeking Men  🔝Moradabad🔝   Esc...➥🔝 7737669865 🔝▻ Moradabad Call-girls in Women Seeking Men  🔝Moradabad🔝   Esc...
➥🔝 7737669865 🔝▻ Moradabad Call-girls in Women Seeking Men 🔝Moradabad🔝 Esc...
 
(INDIRA) Call Girl Nashik Call Now 8617697112 Nashik Escorts 24x7
(INDIRA) Call Girl Nashik Call Now 8617697112 Nashik Escorts 24x7(INDIRA) Call Girl Nashik Call Now 8617697112 Nashik Escorts 24x7
(INDIRA) Call Girl Nashik Call Now 8617697112 Nashik Escorts 24x7
 
Vip Mumbai Call Girls Mira Road Call On 9920725232 With Body to body massage ...
Vip Mumbai Call Girls Mira Road Call On 9920725232 With Body to body massage ...Vip Mumbai Call Girls Mira Road Call On 9920725232 With Body to body massage ...
Vip Mumbai Call Girls Mira Road Call On 9920725232 With Body to body massage ...
 
Stay Cool and Compliant: Know Your Window Tint Laws Before You Tint
Stay Cool and Compliant: Know Your Window Tint Laws Before You TintStay Cool and Compliant: Know Your Window Tint Laws Before You Tint
Stay Cool and Compliant: Know Your Window Tint Laws Before You Tint
 
一比一原版(PU学位证书)普渡大学毕业证学历认证加急办理
一比一原版(PU学位证书)普渡大学毕业证学历认证加急办理一比一原版(PU学位证书)普渡大学毕业证学历认证加急办理
一比一原版(PU学位证书)普渡大学毕业证学历认证加急办理
 
Bangalore Call Girls: 🍓 7737669865 🍓 High Profile Model Escorts | Bangalore E...
Bangalore Call Girls: 🍓 7737669865 🍓 High Profile Model Escorts | Bangalore E...Bangalore Call Girls: 🍓 7737669865 🍓 High Profile Model Escorts | Bangalore E...
Bangalore Call Girls: 🍓 7737669865 🍓 High Profile Model Escorts | Bangalore E...
 
ELECTRICITÉ TMT 55.pdf electrick diagram manitout
ELECTRICITÉ TMT 55.pdf electrick diagram manitoutELECTRICITÉ TMT 55.pdf electrick diagram manitout
ELECTRICITÉ TMT 55.pdf electrick diagram manitout
 
Dubai Call Girls R0yalty O525547819 Call Girls Dubai
Dubai Call Girls R0yalty O525547819 Call Girls DubaiDubai Call Girls R0yalty O525547819 Call Girls Dubai
Dubai Call Girls R0yalty O525547819 Call Girls Dubai
 

Fiberfab brochure - Jamaican kit car

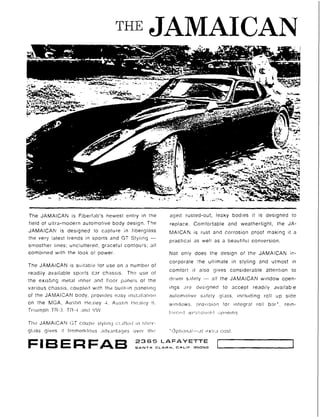
  • 1. THE JAMAICAN The JAMAICAN is Fibeifab's newest entry in the aged rusted-out, leaky bodies it is designed to field o f ultra-modern automotive body design. The replace. Comfortable and weathertight, the JA- JAMAICAN is designed to capture i n fiberglass M A I C A N is rust and corrosion proof making it a the very latest trends in sports a n d GT Styling - practical as well as a beautiful conversion. smoother I ~ n e s ; uncluttered, graceful contours; all combined with the look of power. N o t only does the design of the JAMAICAN in- corporate the ultimate i n styling a n d utmost in The J A M A I C A N 1 s ~ r i t a b l efor use o n a number of s comfort it also gives considerable a t t e n t ~ o n to readily available sports c3r chassis. The use o f t h e exist,ng ,netal f l o o r panels o f t h e d r ~ v e rs<ifety - all the JAPVIAICAN window open- various chassis, coupled w ~ t hthe bull[-in paneling lngs are designed to accept readily available of the JAMAICAFI b o d y , provides easy ~ n s t ~ i l l a t ~ o n crulomotlve s ~ f e t y glass, ~ n c l u d i n g roll u p side on the PVIGA, A u s t ~ n He.iley J. A u s t ~ n Ht:L~l~,y Cj w ~ n d o w s , p r o i ~ l s l o n for ~ r i t e g r a l roll b a r ' , rein- T r t l ~ l n p hT R - 3 TI?-4 ,incl /LV fr?r(:r>ll ~ ~ ~ ~ ; c l ~ ; ~i p~ :l In~~ n q l t t i The JAPVIAICAN CiT c o u p e j t y l l n ~ j~ ; r , ~ f t c tInl t~t,l?r- ~ FI B E R FA B 2 3 6 5 LAFAYETTE sA,-ra =LA-1, c n L , F .ssoso r
  • 2. Here are your Jamaican M o u n t i n g I n s t r u c t i o n s . They include a l l the drawings, parts lists, etc. you w i l l require to complete your car. However, before you peruse the plans l e t ' s consider the tools you'll need and a few sources of c h a s s i s . A l l of our f a c t o r y cars, l i k e the ones shown i n these instructions, are b u i l t u s i n g no more t h a n the ordinary home workshop inventory of tools. W e recommend,as a minimum "Jamaican Workshop", the following: 1. 1 / 4 " e l e c t r i c d r i l l 2. 1 / 8 " , 1 / 4 " , 3 / 8 " ( w i t h 1/4"shank) d r i l l b i t s 3. One s e t o f w o o d w o r k i n g h o l e s a w s 4. I<eyhole saw or e l e c t r i c saber saw 5. M e d i u m b l a d e standard a n d phillips s c r e w d r i v e r 6. 3 / 8 " , 1/2",9/16t1 s o c k e t s , wrenches,etc. 7. Straight edge 8. Steel tape 9. Assorted rasps W i t h regards to the procurement of a chassis -- if you're not already driving i t -- i.41~ h a ~ f o!u n d t h e a u t o w r e c k i n g ~ yards t o be a good source of chassis--locally we have a directory called a P A R T S LOCATOR which l i s t s the various years and m a k e s a v a i l a b l e t h r o ~ r g h o u to u r t e r r i t o r y . You should check to see i f an equivalent guide is available in your locale.
  • 3. Another source i s your insurance agent -- ask him to riotify you i f he processes any "total wreck" claims involving the chassis - type you're after. Finally, check the c l a s s i f i e d ads i n your local papers u n d e r the " auto parts" headings -- many times a usable chassis is l i s t e d by an owner before he sells it t o a dismantler. Now on t o the d e t a i l s . . .... .. . Note: These instructions represent the principal corr~position the of total Jamaican Mounting Instructions Package. Some ver detailed X material is withheld and w i l l be sent with your body. In i s manner we can always introduce up-to-m inute changes into the instructions- ---changes which occur inevitably as a result of our continuing pro- gram of product refinement and improvement. T H E COST OF THESE INSTRUCTIONS W I L L B E REFLlNDED ON RECEIPT OF YOUR F I R S T ORDER. 1
  • 4. 1. CHASSIS Austin Healey, MGA1TR3,TR4 Required: Frame and suspension (incl. hubs) Engine (unless considering engine swap) Transmission, propellor shaft, rear axle Steering assembl y, brake system Pedal Assembly, (clutch, brake, throttl e) Some inner panelling (see figure 2 ) Gas tank, Trans. & shaft tunnel covers Floor boards (MGA), radiator Desirable: Original wiring Heater Instruments Wheels and tires 2.. J A M A I C A N DOOR H A R D W A R E - Door Hinges two sets of hinges are required Ford CODB 6 4 2 2 8 0 0 A rt. tp. Ford CODB 6 4 2 2 7 0 1 A If. tp. Windows - left and right door windows VW143 8 4 5 201A& 202A (glass) 1 9 6 0 - 6 3 Karmann Ghia Regulator mechanisms (also 6 0 - 6 3 Karmann Ghia) 551B. 552B. 571A.565A ~ ~ 1 4 1 8 53 0 7 ~ & 5 0 2 ~ 1 Weather stripping - one windlace k i t Standard w/upholstery k i t or i s available from Fiberfab Window opening weather stripping VW 1 4 3 8 4 5 2 1 1 A & 2 1 2 Matherstripping chrome trim VW 1 4 3 853 3 3 7 A & 3 3 8 A Outside and inside wiper rubber Somaca B - 6 0 5 (4ea.l ( 6 1 - 6 3 GM cars) Outside wiper chrome trim VW 1 4 3 853 5 1 6 A (2ea.l - Door Latches Option 1 (for handleless key only operation): DOOR L A T C H E S Ford C45Z- 6321813-C Ford C45Z- 6321812-C Door lock cylinder Ford C50Z-6221984-A1 Striker Studs Ford C20B-6220008 Ford C20B-6220009 - Door Latches Option 2 (~j$.,hgd!es!- Use standard hardware: Latches, Kandles, Karmann Ghia and striker studs. 3. WINDSHIELD Safetv Glass windshield (included 1 9 6 3 - 6 6 Corvette Stingray w ~ t hne ueiuxe KIL; r Rubber Molding Chev. 3844049 Chrome Molding and retainor c l i p s Chev. 3841251 (lea. Chev. 3841255 (lea.) Chev. 3859044 (2ea.l Chev. 3859045 (2ea.l Chev. 3843939 (20ea.l 4. REAR WllVDOW {'; a : Glass Windshield (included the Deluxe Kit) Rubber Molding I Porsche Porsche Porsche 901 545 10120 9 1 2 Rear Window 901 545 911 20 Porsche 9 0 1 5 4 5 912 20 Porsche 9 1 2 Rear Window Chrome Molding Porsche 644 5 4 1 9 2 1 0 6 Porsche 9 1 2 Rear Window
  • 5. 5. HOOD H e a d I i g h t s : high b e a d l o w beam combination units (identified by 3-prong connector) with mounting brackets and chrome bulb retaining ring, such as the sealed beam units standard on Austin-Healey MGA and TR. G r i I l : Any g r i l l o our choice f i t t i n g an C 5 opening measuring " x 4 4 " overal I. Suggested g r i l l include egg-crate (Camaro), horizontal bar, and expanded metal (available at most hardware stores) P a r k / t u r n i n d i c a t o r l i g h t s : select dual-element 1 2 v bulb units compatible with your g r i l l selection. The lights standard on your chassis w i l l probably suffice. Hood Latch: Option 1 Side Mount : Triumph Spitfire Option 2: Center Mount Austin-Healey or MGA 6. OTHER BODY HARDWARE T a i l l i g h t s : A n y f l a t p a n e l mountedtail light units of not more than 7" high or 8" wide may be utilized. L i c e n s e p l a t e l i g h t / b r a c k e t : Combin- Austin-Healey, MGA,or TR ation holder and light available at most a u t o supply stores. Gas tank f i l l e r cap: Standard Austin- Healey, MGA or TR cap or chrome flip-top cap available from Fiberfab. 7. INSTRUMENTS I f the stock gauges are not functioning or are not avail able, Fiberfab can supply replacements out of the extensive Stewart-Warner line. The following items may be ordered from your local Stewart-Warner dealer or directly from us.. ... STEWART-WARNER NO. Fuel level gauge 301-AW Fuel level sender 385-C Instal lation k i t 366-LP Water temperature gauge Temperature sender O i l pressure gauge Pressure sender Ammeter Speedometer (16 0 M PHI Other Optional Instruments O i l temperature gauge 311-CF Temperature sender See Water Temperature Tachometer Tachometer sender
  • 6. I 548 Baldwln Street Brldgevllle. Pennsylvania 15017 Phone 472 221-6200 JAMAICAN SERIES PRICE L I S T JAMAICAN S E R I E S B A S I C BODY K I T S : EFFECTIVE 7/1/76 A A I B A S I C BODY K I T S F O R T R 3 , T R 4 , T . R b A , T R 6 , T R Z S O , MGA, A U S T I N HEALEY 3 0 0 0 . JAMAICAN II B A S I C BODY K I T F O R VW OR K A R M A N N G H I A . JAMAICAN !I-V8 F R A M E * A N 0 B A S l C BODY K I T FOR FRONT MOUNTED v 8 . * T H E J A M A I C A N I I - V 8 FRAME K I T I S A S U P E R S O P H I S T I C A T E D I N D E P E N D E N T SUSPEN- S I O N A N D POWER T R A I N . T H E J A M A I C A N l l - V 8 F R A M E I S A L A D D E R F R A M E C O N S T R U C T E D O F 5" X 2 " X . I 2 0 STEEL T U B I N G , H E L I A R C WELDED TOGETHER I N A S T A B I L I Z I N G J I G . A SPECIAL F L O O R P A N I N T H E J A M A I C A N 1 1 - V 8 BODY L O C K S T H E B O D Y I N P L A C E ON T H E F R A M E . T H E F R A H E I S E N G I N E E R E D T O A C C E P T A S M A L L B L O C K C H E V Y V 8 FORWARD MOUNTED. C O U P L E D TO A C O M P A T I B L E S T A N D A R D OR A U T O M A T I C T R A N S M I S S I O N . THE FRONT S U S P E N S I O N I S C O R V A I R ( ' 6 6 OR N E W E R ) , T H E T H I R D MEMBER I S C O R V E T T E ( ' 6 3 OR N E W E R ) , A N 0 T H E R E A R S U S P E N S I O N I S C O R V A I R ( ' 6 6 OR N E W E R ) . CORVAIR R E C I R C U L A T I N G B A L L T Y P E OR P I N T O R A C K h P I N I O N T Y P E S T E E R I N G MAY BE U S E D . T H E NEWEST J A M A I C A N l l - V 8 K I T U T I L I Z E S T H E CAHARO FRONT SUBFRAME A 9 D T H E C H E V E L L E REAR A X L E ASSEMBLY. J A M A I C A N S E R I E S B A S I C BODY K l T S INCLUDE: 1. M A I N BODY W I T H I N N E R P A N E L S . 2. FORWARD N O S E S E C T I O N ( O N E - P I E C E T I L T C O N F I G U R A T I O N ) FOR J A M A I C A N I K I T S ONLY. FORWARD N O S E S E C T I O N A N D S E P A R A T E H O O D F O R J A M A I C A N I I A N 0 l l - V 8 K l T S O N L Y . 3. E N G I N E ACCESS/TRUNK L I D FOR J A M A I C A N I I AND l l - V 8 K I T S ONLY. 4. ONE P A I R DOORS. 5. ONE P A I R F I B E R G L A S S GT SEAT SHELLS (NOT U P H O L S T E R E D ) . E A S Y R I D E R S E A T S H E L L S W l T H H E A D R E S T A R E O P T I O N A L AND $ 3 0 . 0 0 A D D I T I O N A L . 6. ONE D A S H P I E C E . 7. F R A M E K I T FOR J A M A I C A N l l - V 8 K I T O N L Y . . 8. ONE F I B E R G L A S S T R A N S M I S S I O N C O N S O L E - C O V E R F O R J A M A I C A N 1 1 - V 8 K I T O N L Y . 9. ASSEMBLY MANUAL. (MAY BE ORDERED I N ADVANCE FOR $10.00.) SPECIFY CHASSIS. JAMAICAN SERIES OPTIONS: VDO C O C K P I T G A U G E S 1 2 VOLT ONLY: SPEEDOMETER TACHOMETER AMMETER F U E L GAUGE O I L T E M P E R A T U R E GAUGE O I L TEMPERATURE SENDER VDO C O C K P I T GAUGES FOR J A M A I C A N ll-V8 ONLY: SPEEDOMETER TACHOMETER AMMETER F U E L GAUGE O I L P R E S S U R E GAUGE O I L PRESSURE SENDER W A T E R T E M P E R A T U R E GAUGE WATER T E M P E R A T U R E SENDER I N T E R I O R UPHOLSTERY, B L A C K ONLY. cr SEAT COVERS, BLACK ONLY, PAIR. EASY R I D E R S E A T COVERS, B L A C K ONLY, PAIR. T H E J A M A I C A N S E R I E S B O D Y K l T S A R E NOW O F F E R E O I N P R E - A S S E M B L E D F O R M . T H E BODY I S T O T A L L Y A S S E M B L E D . J U S T MOUNT TO Y O U R C H A S S I S . c o n P u l E FRon PRICE LIST ITEMS DESIRED. ADO L A B O R C H A R G E O F $ 1 2 0 0 . 0 0 F O R J A M A I C A N I A N 0 l l K I T S , $ 1 5 0 0 . 0 0 F O R J A M A I C A N 11-V8 KIT.
  • 7. J A M A l CAN SERIES DELUXE PAK (OPTIONAL ITEMS) : WINDSHIELD CLASS CORVETTE ' 6 3 - ' 6 7 1 REP. $ 98.00 EA. WINDSHIELD REVEAL MOLDING CORVETTE ' 6 4 - ' 6 7 1 REP. 35.94 EA. WINDSHIELD POLY TAPE 1 REP. 9.00 EA. WINDSHIELD REVEAL C L I P S 1 SET 2.00 EA. REAR GLASS CLEAR PORSCHE 9 1 1 - 9 1 2 I REP. 146.25 €A. REAR C L A S Z U A A ~ C ~ 1 REQ. 35.63 En. REAR GLASS REVEAL MOLDING 1 REQ. 47.50 EA. S I D E CLASS KARMANN G H l A HARDTOP ' 6 1 - ' 7 4 2 REQ. 44.00 EA. S I D E GLASS C A R R I E R CHANNEL KARMANN G H l A HARDTOP l 6 1 - ' 7 4 2 REQ. 5.00 EA. S I D E GLASS C A R R I E R GASKET KARMANN G H l A HARDTOP ' 6 1 - ' 7 4 2 REQ. 2.00 EA. S I D E GLASS REGULATOR KARMANN G H l A HARDTOP ' 6 1 - ' 7 4 2 REQ. 28.00 EA. S I D E CLASS WINDOW G U I D E TRACK KARMANN G H l A HARDTOP ' 6 1 - ' 7 4 2 REQ. 29.10 EA. S I D E GLASS HOLDING EXTRUSION 2 REQ. 7.40 EA. S I D E GLASS MOLDING EXTRUSION WEATHERSTRIP 2 REQ. 9.40 EA. S I D E GLASS WEATHERSTRIP INNER 2 REP. 5.25 EA. S I D E GLASS WEATHERSTRIP OUTER 2 REQ. 6.25 EA. DOOR H I N G E S L E F T MUSTANG ' 6 5 - ' 6 7 OR P I N T O 1 SET 19.95 EA. DOOR H I N G E S R I G H T M U S T A N G ' 6 5 - ' 6 7 OR P I N T O 1 SET 19.95 EA. OUTSIDE BAT HANDLE, LATCH & CABLE ACTUATOR 2 REQ. 21.56 €A. WINOLACE H E A D L lG U T - DOORWAY S U R R O U N D 2 REQ. 2 REQ. 15.00 24.30 EA. EA. FRONT TURN S I G N A L 2 REP. 5.67 EA. T A I L LIGHT 2 R E Q . 23.20 EA. I N D I C A T O R DASH L I G H T 3 REP. 2.67 EA. CHROME GAS CAP C O V E R I REP. 11.01 EA. 0 1 M M E R SUI T C H 1 REQ. 2.74 EA. ST BAT HANDLE SWITCH 2 REP. 3.97 EA. I G N I T I O N SWITCH WITH KEYS 1 REP. 8.00 EA. HEADLIGHT BAT HANDLE SWITCH I REQ. 3-97 EA. I N S I D E REAR V I E W H I R R O R 1 REQ. 10.58 EA. WALNUT S T E E R I N G WHEEL 1 REP. 39.95 EA. WIRING HARNESS 1 REQ. 45.00 EA. DEFOGGER - FENDER MOUNT MIRROR DEFROSTER - BLACK PRIHED 1 REQ. 2 REP. 39.50 9.02 EA. EA. DOOR L A T C H H A N D L E I N S I D E , E U R O P E A N S T Y L E 2 REQ. 6.65 EA. DOOR W I N D O W H A N D L E I N S I D E , E U R O P E A N S T Y L E 2 REQ. 7.35 EA. W I N D S H I E L O W I P E R A S S E M B L Y . COHPLETE W I T H ARMS 6 B L A D E S I REQ. 89.95 EA. JAMAICAN SERIES ACCESSORIES: O I L PRESSURE GAUGE 7 0 d O I L PRESSURE GAUGE SENDER FUEL TANK FLOAT U N l T QUARTZ CLOCK FOUR-WAY F L A S H E R S L I C E N S E P L A T E BRACKET AND L I G H T CONSOLE ROADRUNNER S T E E R I N G UHEEL - EUROPEAN S T Y L I N G FOAM F O R M U L A GT S T E E R I N G U H E E L - LEATHER COVERED SEAT ADJUSTERS, 5" T R A V E L , P A l R QUICKSHIFT K I T CUSTOM SI1I F T E R ' 6 8 - ' 7 4 V U CUSTOM S H I F T E R ' 5 6 - ! 6 7 VU PEDAL AND ACCELERATOR COVER K I T O I L COOLER AND F I L T E R U N l T H I GH P E R F O R M A N C E A I R C L E A N E R F E N D E R MOUNT M I R R O R - CHROME HEADLIGHT COVERS, P A I R GT S T Y L E FRONT RUMPER GT S T Y L E H E A R OIJMPER HEADER/DUAL M l l r F L E R COMBINAT I Otl DECALS, BLACK LETTERING, P A l R M E D A L L I O N , HOUtdU P E W T E R CURB UE1611T: JAMAlC;lN 1 , 16006, JAMAICAN ll, 1475#, JAMAICAN I I - v ~ ,2 1 0 0 6
  • 8. L KIT #I - STANDARD JAMAICAN KIT INCLUDES: 1 ) JAMAICAN body 7) Wide, fully flanged doorsills 2) Front hood hinges (prelaminated into body) 8) Rear window surround flange 3) Complete inner panels (to mount body) 9) Windshield surround flange 4) Headlight indents 10) Metal reinforcing inside windshield area 5) Dashboard 11) Side and front air scoops 6) Recessed license plate holder 12) Mounting instruction booklet KIT #2 - DELUXE JAMAICAN KIT, includes everything in KIT #1, PLUS: I 1 ) Safety glass windshield 2) Door-inner panels for roll-up mechanism 3) Rear safety glass window 4) Choice of GT, Classic or Lotus-type fiberglass seat shells Complete mounting and chassrs prepsratron instructions are included with each body order. 1 Should you wish a copy prior to purchasing your body, the mounting booklet is available for $5.00 refundable with order. JAMAICAN PRICE LIST JAMAICAN Kit .?I, St,jndclrd $795.00 JAMAICAN Klt s?:, Deluxe 895.00 JAMAICAN Deluxe Upholstery Kit ( B l k ) 195 00 JAtvlAICAbl P l e x ~ q l ~ ~ s s r l l ~ f l h Covtlrs Hea t 30.00 The following accessories included with the Deluxe K i t are also available separately:
  • 9. T A B L E OF CONTENTS CONSTRUCTION M A T E R I A L S -- T o o l s and S u p p l i e s W H A T TO L O O K FOR W H E N ACQUIRING A W R E C K E D V E H I C L E : MG, T R , A U S T I N H E A L E Y PREPARING THE CHASSIS -- What goes? What stays? IVIOUIVTING T H E J A M A I C A N B O D Y I N S T A L L I N G THE WINDOWS AND WINDSHIELD WIRING AND INSTRUMENTS UPHOLSTERY -- Interior Finish SANDING, PRIMING AND PAINTING -- Exterior Finish V-8 POWER O P T I O N lo. JAMAICAN/VOLKSWAGEN
  • 10. INTRODUCTION T h e f o l l o w i n g p a g e s c o n t a i n i n s t r u c t i o n s f o r a s s e m b l i n g t h e 1968 JAMAICAN. These instructions are intended to cover every phase of preparation, assembly and f i n i s h i n g required to bring your car - b u i l d i n g project to a successful con- clusion. T o meet the demands o f the many p e o p l e who prefer tlie d r i v i n g " f e e l " and e x t e r n a l a p p e a r a n c e o f a f r o n t - e n g i n e d s p o r t s c a r , F i b e r f a b c r e a t e d t h e JAMAICAN. D u r i n g t h p d e v ~ l o p m e n to f t h e J A M A I C A N d e + i g n , it e..4 r c l l i::d t l i ~ :zzrtain u n i b o d y c a r s s u c h a s t l i e Austin-Healey S p r i t e a n d M G B w e r e n o t s u i t a b l e v e h i c l e s f o r a "body swap". I n other words, removal o f tlie o r i g i n a l metal body removed t o o much s t r u c t u r a l r i g i d i t y . Nevertheless, e l i m i n a t i o n of the unibody cars s t i l l l e f t t h r e e v e r y p o p u l a r f r o n t - e n g i n e d s p o r t s c a r s t o be c o n s i d e r e d ------------ A U S T I N - H E A L E Y , MGA, and T R I U M P H . W h e n y o u o r d e r y o u r JAMAICAN k i t , you can s p e c i f y the c h a s s i s on w h i c h you plan to mount it, s o t h a t w h e n y o u r JAMAICAN b o d y i s p r o d u c e d , the proper inner for mounting are laminated i n t o the body--thus the body f i t s pre- c i s e l y on j u s t the type of car you are converting.
  • 11. 1. CONSTRUCTION M A T E R I A L S The typical inventory of tools found in most home garages or basements w i l l probably more than suffice to complete your JAMAICAN. In reality, very - tools are absolutely essential to the conver- few s ion. The following breakdown of tools i s based on Fiberfab factory ex erience.. Items that are con- of f: sidered essential are listed. Another l i s t is also ~ r o v i d e d items whic are q u ~ t e helpful and serve to make certain construction tasks significant1 y easier. HAND TOOLS Essential -5/16", 3/8", 7 / 1 6 " , 1/2", 9 / 1 6 " , 5 / 8 " sockets -- 3 / 8 " Drive -31.6'. L r ~ v e Rachet Handle -Standard screw-driver --medium blade ---Phillips screw-driver -- medium blade Straight-edge -- -3/8" -3/811 Drive 6 3" and 6 extensions 7/16", 1/2", / 1 6 " combination (open-end and box-end wrenches) -- " ~ o p l 'rivet gun home workshop variety -Steel rule (72") +ire-terminal crimping tool - -Hacksaw - Knife Assorted rasps, files, drills and taps -Set of wood-working hole-saws POWER TOOLS Essential -Electric drill -- 1 / 4 " capacity Helpful Electric drill --1 / 2 " capacity Sabre saw Rotary sander/grinder Hydraulic floor-jack and jack stands CONSTRUCTION MATERIALS Essential Assorted .machine bolts and nuts; 1/4",5/16" and 3/8"; with washers and locking washers Assorted sheet metal screws Sandpaper Silicone seal (common types are Rubber Sealant by the Macklenburg-Duncan Company of Oklahoma City, Dow-Corning DC 7 5 0 , and General Electric) But I tape (windshield installation kit) -- typical is Somaca#9103* 2 0 8 ' - 3 0 0 ' # Z 6 AWG wire; 1 0 0 ' - 1 5 0 ' # 1 0 AWG wire (if chassis re-wiring required) Primer, paint, etc. Car seam sealer, 1 tube -- typical is 3W # 1 9 1 5 - 5 2 0 9 Helpful Epoxy adhesive k i t ( high-grade epoxy, *body filler type) Epoxy putty/filler Crimp-on wire terminals Assorted "pop" rivets * Somaca-Western, 8 5 2 Aldo Ave., Santa Clara, Calif. SOMMER AND M A C A , 5 5 0 1 W.Ogden Ave., Chicago, Illinois * 3 M is the trademark of Minnesota Mining and Manufacturing
  • 12. 2 . WHAT TO LOOK FOR WHEN ACQUIRING A W R E C K E D V E H I C L E Many persons purchasing a J A M A I C A N body w i s l i to replace the travelworli or weatllered "skin" of tlre vellicle they already own and are currently driving. Other builders plan to acquire a wrecked Austin Healey, M G A or TR from a salvage yard and refurbisli t h i s "outcast" w i t h a new J A M A I C A N body and perhaps some new nlechanical parts. In either instance, t h i s brief section should be of interest to a l l prospective builders. I n most areas o f the Uriited States, a t l e a s t three approaches to obtaining a suitable, salvageable sports car are available. The f i r s t approach i s to contact the local dealer i r ~ tfie vehicle of interest. He may have been asked to b i d on insurance work and w i l l kriow tlie a v a i l a b i l i t y arid locatiolr of wrecked vehicles. Tlie second approacli is to c a l l several automobile irisurallce conlpanies arid ask about ariy recent wrecks they have declared to be "totals" --marly tirnes i f the car i s earlier than 1 9 6 0 atid the body damage i s mod- erate to extensive, the car w i l l be "totalled" even thougll under i t s rumpled s k i n i s a m e m i c a 1 "jewel". Tlie third and most obvious aooroach i s t o c a l l the local salvaqe/wrecking yards -- ~ s y c i a l l y those ad- vertising a foreign car section. Some areas ot the U.5.; tor example, the San F r a r ~ c i s c oBay Area wliere Fiberfab i s located; have publications appearirig weekly or monthly w l ~ i c l il i s t a l l wrecked vehicles and their location. The publicatiori we use is: THE PARTS LOCATOR 1 6 9 6 Wastiirigton Avenue San Leandro, California lrrfortnation concerning similar publications ill other l o c a l i t i e s may be forthcornirig from tlie above address, upon request. When a seemingly suitable wreck i s f i n a l l y located, look i t over c l o s e l y i n person, not via photographs. Don't l e t a mangled body dismay you or a clean-looking body fool you. Remember, you are interested primarily i n the frame, drive-line, suspension a l l d engine --broken doors, ripped seats, sliattered glass, etc., are o f not consequence. Items to be checked are: 1 CONDITION OF ENGINE . -- valve cover not crrrslred, carburetors intact, exhaust manifold not torn loose, pan secure and not leakilrg, radiator free of punctures, etc. -- try to get some kind of guarantee that the engine i s i n rurining condition. 2. CONDITION O F SUSPENSION -- a l l axles rotate, steering linkage i s not bent or broken, A-frames (front suspension) unbent, etc. 3. CONDITION O F D R I V E - L I N E -- w i t t i one rear wheel blocked from rotating, make sure the other rear wheel turns reasonable freely when the gearbox i s i n neutral and does riot turn a t a l l when any gear i s selected (assuming, of course, that an engine i s i n place i n the veliicle). 4. CONDITION OF T H E F R A M E -- using a steel tape, measure the squareness of the frame; ie., check fore and a f t dimension between the wheel centers on both sides (the "wlleelbase") are -- they i d e n t i c a l ? Look under the car and assure yourself that none of tlie frame members are crushed or bent. I n addition, try to get as many pieces of a u x i l i a r y equipment as possible a t the time you buy the "outcast" ---items such as windshield wiper motors, instruments, etc., w i l l probably be cheaper i n a "package deal" than i f you return later to purchase them separately. A s an a i d to acquiring a usable wreck and estimating i t s worth, some v i t a l s t a t i s t i c s are presented below: AUSTIN-HEALEY The A u s t i n Motor Company of Birmirrgliarn, England started building the Austin-Healey 1 0 0 sports car i n 1952. The Austin-Healey 1 0 0 used the 2.6 liter, four-cylinder A u s t i n A 9 0 e ~ ~ g i l l e . Subsequent ver- sions were the l O O M and 1 0 0 s ; both aimed a t competition events. The 1 0 0 s errgirie developed 132 BH P and had disc brakes. Next i n the A u s t i n - M a l e y evolution was the 1 0 0 - 6 usirig a BMC, 2 . 6 liter, s i x cylirider erigine. Some of the 1 0 0 - 6 models were produced w i t h a s i x - p o r t l i e a d to obtain higher performarlce than the standard 1 0 0 - 6 eligine output of 1 0 2 BHP. 111 1959, a 3 l i t e r s i x cylinder engine was irltroduced i n tlre Austili-Healey 3 0 0 0 . T l i e 3 l i t e r engine was available for a brief period ( 1 9 6 1 - 1 9 6 2 ) i n a 3-carburetor version wliich proved quite d i f f i c u l t to keep i n tune. Tlie Austin-Healey 3 0 0 0 had d i s c brakes (front) arid wire wheel options. Tlle wheelbase i s 9 2 inches.
  • 13. - MG As early as 1 9 3 6 , the MG Company (now located at Abingdon, England), produced a vehicle suitable for conversionwith a JAMAICAN body --the MG, TA. This car featured a 1.3 liter, 5 0 BHP four cylinder englne. I n April, 1 9 3 9 the TA was replaced by a new model with minor refinemerlts, the MG fB. The total T A and T B production, before it was discontinued as a result of WWII, was only 3 4 0 0 cars. Shortly after the war, the T B was revived in a new form as the MG TC which was soon followed by the TD. Both were equipped with 5 7 . 5 BHP engines. In 1 9 5 4 the 63 BHP TF 1 5 0 0 was introduced but was short-lived because i n 1 9 5 5 production was commenced on the MGA which offered a 78 BHP en ine. The MGA series offered several interesting options cam engine in place of the standard pushrod engine. -- disc brakes (front), wire wheels and a twin over ead R I n 1 9 6 2 , the MGB arrived on the scene but as previously mentioned, its unibod constructipn pre- cludes its use as a vehicle for the JAMAICA^. A l l of the cars listed above, except t l e MGB will accept c they all have frames separable jrorll tile bodym~l; .i,,:t h q ;.I hall? 9a" Lilr ..iAMkiCA:i body i n a s ~ ~ l uasl ~ wheelbases. Market response for the JAMAICAN has revealed, however, that 9 9 % of the bu ers using the body on MGs were using a MGA. Therefore, the JAMAICAN is inner-paneled to f i t the M G series exactly although ~ the body can be used with the MG TA, TB, TC, TDor TF. TRIUMPH In 1 9 5 2 when Standard took over the Triumph Company to form the standard-Triumph Motor Company, the Standard Vanguard engine was modified to 2 liters developing 100 BHP and fitted to a Triumph Mayflower chassis to create the T R 2 sports car. Since 1 9 5 2 the TR2 has evolved through the TR3 to the T R 4 and currently the T R 4 A with independent rear suspension. A I ~ these cars ha* been fitted with front wheel disc brakes and all have an 88" wheelbase. 'The inner-paneling for the JAMAICAN-for-Triumph has been designed to f i t all TR1s with two basic models --one for T R 3 and T R 2 and one for TR4, TR4A, TR4A-IRS, and TR 2 5 0 . Ttlerefore, when a JAMAICAN-for-Triumph i s ordered the model must be stated.
  • 14. 3. PREPARING THE CHASSIS The first step in the building of your new JAMAICAN is to prepare the chassis for the JAMAICAN body. The following tasks to be completed are common for all vehicle types. 1 Remove the battery. . 2. Drain the gas tank. 3. Remove gas tank filler hose and cap assembly, and tape shut filler neck with masking tape. 4. Remove seats and a l l upholstery. 5. Remove windshield and wiper arms. 6. Remove doors. 7. Remove spare tire. 8. Remove hood-cover engine with tarpaulin or equivalent. 9. Remove deck lid. 1 0 . Discorlnect all wirinq to lights srld fue! t ~ v ' r .a d pr~tecbille!ytape thc :.di;.;.ends. 1 . Remove headlights and parwturn lights. 1 1 2 . Remove license I ight-bracket. 13. Remove windshield wiper motor and mechanism. 1 4 . Remove bumpers. 1 5 . Remove fenders (most bolts are located inside wheel wells). 1 6 . Drain engine and radiator of water. 1 7 . Remove radiator. 1 8 . Remove instruments and panel controls and protectively tape the wire-ends. For the next steps, turn to the section describing your particular chassis. AUSTIN-HEALEY 1 Un-bolt relay, fuse block, volt regulator, etc., from firewall and place them down out of the way. . 2. Remove gas tank. 3. Remove front bumper brackets and horns. 4.Cut off outer skin at fendu line. 5.Referring to Figure 2A* : a. Remove rear cross braces (between fender inner panels). b. Remove rear fender inner panels (down to chassis). c. Remove cowl brace (stamped sheetmetal). d. Remove lower door s i l l s and front hinge posts (see detail for cuttirlg side panels). e. Cut 2" off top of firewall. f. Remove body mount brackets and cross brace from front wheel wells. g. Trim 4 " off of outside of wheel wells, parallel with center seams. 6. Remove mounting brackets from radiator and replace 2 " higher on radiator. 7. While holding radiator in place on chassis mark section of frame cross member that interferes with lower hose outlet. Cut this section out o f cross member. 8. Bolt radiator i n its new position. 9. Trim off all protrusions on inside (cockpit side) of firewall above heater duct. Un-bolt relay, fuse block, volt regulator, etc., from firewall and lace them down out of the way. Remove heater assembly including defrosters. (The blower side oPthe heater box w i l l have to be dropped 1 - 1 / 4 inches. This i s easily done by dis-assembling the box, cutting a wedge out of the side panels, bending new tabs and re-assembl ing the box.) Remove outer skin at fender line. Remove cowl support bracket. Referring to Figure 2Bk : a. Cut front wheel well panels just ahead of radiator mounting flanges. b. Un-bolt front bumper support brackets. c. Remove nose section. d. Remove door sills, and rocker panels. e. Cut side panels (with hinge posts) straight dowri 2 " back from upper firewall (vertical surface where relay, fuse block etc., were attached). f. Remove rear fender inner panel cross brace. g. Remove rear fender inner panels down to inner floor surfaces. h. Cut upper firewall straight across from fender panel-to-fender-panel, and trim off all pro- trusions from inside of remaining panel. i. Fabricate radiator mounting flange extensions so that radiator can be mounted down 2 " and forward enough to clear lower hose. *HEREINAFTER AN ASTERISK FOLLOWING A FIGURE NUMBER REFERS TO THE BLUEPRINTS.
  • 15. 1. Re~liovegas tank. 2. Remove outer skin. 3. Remove a l l hardware from upper firewall. 4. Referring to Figures 2Ctand 2 D : * a. Remove upper firewall above horizontal surface. b. Remove entire rear fender inner panels and trunk floor. c. Remove rocker panels and side panels (with door hinge posts). d. Removefront fender inner panels 2 " ahead of radiator mounts. 5. Move mounting brackets on radiator up 2 " and re-mount. The followirig again refers to a l l veliicles, We recomrllend a t this point, t l ~ a tlle chassis be cleaned t o f f (steam, gunk etc.) arid painted will1 a rust preventive pairit. I f you are planning an engine "swap" the installation of the new engine should be done before mount- ing the body. Seesection 9 for V-8 engine installation details.
  • 16. 4. MOUNTING THE JAMAICAN BODY We recommend that, prior to mounting the JAMAICAN body on the chassis, a few preparatory steps be completed on the body while access to a l l areas is s t i l l possible. First, with the body upside down, trim the wheel opening flanges back to about 3/4" and sand smooth. Trirn each rocker panel to an equal dimension from the door s i l l and sand smooth. Trim the tail section return as per Figure 4, and sand smooth. Then, with the body right side up again, cut the windshield and rear window openings to 3/4" from s i l l , cut out the door opening, leaving a 1/2" flange above the fender line (window opening, Figure 3E*) and at least 4 " flange below the fender I ine (Figure 3 P ) . The lower flange w i l l be trirnmedlater after the body is mounted to the chassis. We suggest that Uie t a i l section be wired prior to mounting the body while the inside of that area is readily accessible. See Section 6 for wiring details. Be sure that the inner panels are correctly seated on the mounting surfaces of Uie chassis. Do not fasten down the body at this time, but proceed to the next step ---- mounting the doors. e c t i o n Inverted c u t Out and Remove Y f- y - --- % ' 'IGURE 4 MOLlNTlNG THE DOORS Before the doors can be mounted, the following steps must be taken: 1. Trim the door edges back to the scribe l i n e on the outside skin. 2. Cut the window slot in the top surface as per Figure 5. 3. Attach the door window trim as illustrated i n Figure 3H*. With these steps completed the doors may now be located i n the body and temporaril y held i n place with masking tape. Particular attention should be given to the f i t down the rear edge of the door and the area under the wind- shield post. Any mis-alignment along the bottom edge of the door may be corrected when bolting the bod rocker panel (area beneath the door) to the chassis. Now locate the hinges as i n Fibure 3Bk and mark the bolt K o ~ e locations on both the body and the doors. Remove the doors and d r i l l out the holes, using a d r i l l b i t from 1/8" to 1/4" larger than the mounting bolts. The extra large holes w i l l allow adjustment for a perfect fit. I t i s advisable to use a backing plate inside the doors for added strength when bolting the hinges to the doors. A plate 1/8" thick and the same shape as the surface of the hinge that bolts to the outside surface of the door should suffice. We have found that a nut-plate for the body-half of the hinges makes installation and adjustment much easier. These plates again may be fabricated of 1/8" steel plate (although 3/16" allows for more threads) approximately the shape of the hinge surface. D r i l l the bolt holes (undersize) and thread for the mounting bolts. If access to the back of the hinge-mounting surface i n the body is not available, cut a 3 " to 4" hole between the upper and lower hinges so that the nut plates may be inserted and secured. The doors may now be installed, with '1," ' - ; * , y ( : : ; ! o ~ ~ < ~ ? t . , ~ . l ~l:> : . l c c l I" ct79y
  • 17. The door latch r n e c l ~ a n i s ~ rillustrated ill F i g u r e 3 P , should be mounted riext. Since such a w i d e ~, variety of latclics are available, each w itli i t s own s p e c i f i c i n s t a l l a t i o n rnetliods, all attetr~ptw i l l not be ~r~acle here to describe the latcli instal la ti or^. After tlie door i r ~ s t a l l a t i o n has been completed, the r n a i ~ ~ section may be bolted to the chassis body (remember to a l i g n t l ~ e rocker panels wit11 the doors when attaching these sections). MOUNTING THE HOOD Before placing the hood i n p o s i t i o n on the chassis, t r i m the rear edge (at c o w l and doors) of the hood back t o the scribe l i n e and trim the wheel opening flanges as per the rear wheel openings. Place the hood on the cowl and block the front up until body crease l i n e s up along the rear fenders, doors and front fenders. Mark the rocker panel overlap and trim for minimurn gap. Wit11 the hood located i n correct p o s i t i o n make cardboard templates of tlie hinge brackets. These brackets should be bolted or welded to the main chassis rails. See F i g u r e 6 for a typical i r ~ s t a l l a t i o n . B e sure to use a t l e a s t 1-1/2" steel angle or 3 / 1 6 ' ' steel strap for bracket material for strength.
  • 18. S H I N WITH W A S H E R S T O R A I S E /,/ OR LOWER ( p a r t " 0 " ) A U X I L I A R Y HOLES D R I L L E D FOR fORWARD AND AFT ADJUSTflENT CONSTRUCTION AND ASSEMBLY FRONT HOOD H I N G E F O R JAMAICAN
  • 19. 5. INSTALLING THE WINDSHIELD, REAR WINDOW AND DOOR WINDOWS 'The JAMAICAN body i s designed s b e c i f i c a ~ ~ use the Chevrolet Stingray windshield and surround- to ~ ing chrome trim. The windshield i s supplied as part of the D E L U X E kit. The chrome trim i s available from your local Chevrolet dealer (see P A R T S L l S T for appropriate part numbers) i f you wish to use i t on your JAMAICAN. The windshield i s installed using the installation k i t and silicone rubber sealant listed in Section 1, under Construction Materials. If chrome trim i s to be used, twenty trim-retaining clips should be secured in place around Uie edge ot Uie window opening before tlie glass is installed. Small, flat-head wood screws w i l l suffice to hold the retainers securely. The material in the installation k i t -- "butyl tape" (which has the appearance of a 3 / 8 " diameter rope formed of a tar-like substance) -- i s now pressed into place along the l i p of the windshield opening. Then, the glass i s l a i d i n place in the opening over the tape and pressure i s applied to compress the tape to about 5 0 % of its original thickness. Now, the silicone rubber sealant is squeezed in the gap around the glass --- --- even on the retaining c l i p s and the chrome trim i s immedi- qtely installed by p r ~ s s i n ?i t into tho c l i p s and sealant. Remove the excess sealant as rn*?n y " s * l e -* before i t commences to set. DO NOT DISTURB THE G L A S S FOR A T L E A S T EIGHT HOURS AFTER INSTALLATION. The rear window opening i s designed expressly to accept the Porsclie 9 1 2 rear window. The DELUXE K I T i n c l x e m a r window glass. The chrome trim i s available from your local VW-Porsche dealer ( see PARTS L l S T for numbers). The rear window i s installed in the same manner as the windshield. However, i f chrome trim is to be used, the glass should be placed l i g h t l y on the installation material while the sealant i s squeezed in the gap and on top edge of the glass. The clirome trim should be placed immediately around the glass and the entire assembly pressed into the installation material. Again, remove the excess sealant. The JAMAICAN door window openings are designed to accept VW Karmann Ghia ( 1 9 6 0 - 1 9 6 3 ) door windows. The door inner panels are designed to accomodate the above mentiorled windows and to support the roll-up mechanism --- s l i g h t l y modified VW Karmann Ghia (see P A R T S L l S T for part numbers) for --- raising and lowering the side windows with a standard crank. Figure 7 shows the guide-track and roll-up mechanism (for the l e f t door). The bottom 1" of the guide- track must be cut off to f i t i n the JAMAICAN door and the two positioning p i l l a r s should be re-ta ped to 5 / 1 6 - 1 8 to accept the 5 / 1 6 - 1 8 x 2 - 1 / 2 " f l a t head machine screws required to fasten the track to e door inner ! t panel. D r i l l and counter sink the holes i n the door inner panel as illustrated i n Figure 3 A * for the guide-track screws. lnsert the 5/16" f l a t head screws in the holes and run lock washers and nuts up the screws on the inside of the panel until they are near the panel. lnsert the guide-track through tlie long slot i n the panel and screw the flathead screws about 1 / 4 " i n the positioning pillars. Re-tap the four tapped holes i n the roll-up meclianism,(Figure 7 ) to 1 / 4 - 2 0 . lnsert the mechanism through the large slot in the inner panel, insert the roller on the end of the arm into the cross-track on the guide track and bolt to the d e p r e s s i o s i n the inner panel with 1 / 4 - 2 0 x 3 / 4 I f hex head bolts. Next, f i t the rubber grommet i n the glass holder, f i t the two bolts (be sure to use the original VW bolts) i n the inner holes. lnsert the assembly through the s l o t i n the top of the door and secure to the guide- t r a c k The closed window may now be adjusted to f i t the window opening by closing the door, cranking up the window and adjusting the guide-track ositioning screws on the inner panel. When i n tlie correct position tighten the nuts on these screws against tRe inner panel and adjust the l i m i t adjustment (see Figure 7 ) so that the glass cannot be raised above this position.
  • 20. 6. WIRING AND INSTRUMENTS This section of the instructions provides tlie ground-rules for completing the basic wiring of your JAMAICAN. In many instances, especially if tlie chassis was not acquired as a wrecked vehicle, the wiring harness should be intact arid usable; some lengthening or shortening of particular wires may be neces- sary but, in general, the Austin Healey, MG or TR factory-installed wiring harnesses are adequate for tlie JAMAICAN. In the cases where the original harness has been partially or totally destroyed or a radically different (from the original vehicle) electrical instrument/component layout (e.g., as a result of an "engine-swap") is desired, the following wiring guide sliould be helpful. A basic wiring harness sliould provide for: 1. Starting 2. Ignition 3. Basic Instrumentation -- te~nperature, o i l pressure (guayes or warning liglits), fuel level, and battery/generator corid i t ion. 4. Interior and exterior lighting 5. Battery-charging and ground circuits 6. Accessory power and control -- windshield wipers, horn, heater fan, etc. A t this stage in construction, most items to be wired have been installed; e.g., the starter, the starter solenoid, ignition coil, o i l pressure arid water temperature senders, battery charging indicator (voltage regulator) and fuel level sender unit are a l l available for wiring. Lights, however, are yet to be installed. T A I L LIGHTS AS was mentioned i n Section 4 , tlie rear body section should be wired before mounting with plugs for ease o f installation. The two common wiring techniques covering a l l chassis applications are illus- trated in Figures 8a,b,c. If your chassis had a single tail l i g h t bulb per side, an eight-contact Lucas relay may be found under the hoodand F i g u r e 8 b should be used. For a dual tail l i g h t bulb installation (no relay), use Figure 8c. We recommend Lhat the original turn signal/brake light configuration be retained to simplify the wiring task. In either case, locate and secure the light sockets to the body and wire as per the applicable diagram. D r i l l holes through the inner panels and connect the male end of 4-prong plug or plugs near the center of the rear body panel (on the inside). Be careful to note the function of eachwire - being attached to a plug-pin inasmuch as these functions must carry through to tlie plugs wired on the chassis. HEADLIGHTS AND PARKING LIGHTS Headlight brackets should be fabricated as shown i n Figure 3W and secured to the headlight bucket backing plate. Cut a 7 - 1 / 8 " diameter hole in the center of the headlight-tunnel and bolt the assembly i n place. P a r u t u r n lights can be installed on sheet-metal brackets located i n the g r i l l e opening. Remember, when mounting the lights - - o r for Lhat matter, any electrical component --- i n fiberglass, unlike steel bodies, that a S E P A R A T E GROUND WIRE M U S T B E INCORPORATED IN T H E WIRING HARNESS i n order to com- plete a l l circuits back to the battery "ground" terminal. INSTRUMENT PANEL WIRING Your JAMAICAN body is delivered to you w i t h a fiberglass dashboard already laminated i n place. -- The dash i s designed to u t i l i z e a centralized instrument/control cluster this cluster i s the hub of the wiring harness and should be carefully planned. The basic instrument/control requirements a r x a t i s f i e d by the following indicators, sw~tches, etc.: Controls -- 1. Key-operated ignition switch 2. Headlight/parking light switch 3. Headlight dimmer switch 4. Accessory control switches, as required. Indicators -- 1. Fuel level gauge 2. Water temperature gauge or l i g h t 3. Oil pressure gauge or l i g l i t 4. Ammeter or charge/discharye warning light 5. Headlight high-beam "on" indicating light 6. Speedometer (non-electrical).
  • 21.
  • 22. CHASSIS WIRING The wiring harness i s divided in two major pieces -- hub-to-front and hub-to-rear. The hub-to- -wires are routed from the hub (instrumenVcontrol of the steering column. Firewall arid then t h front grornmetted hole in the firewall above and to the right cluster) torward the to Engine instrumentation, i ignition and starter solenoid leads end at a terminal block mounted centrally at the top of the engine side of the firewall. Lighting leads continue forward along the frame rail and terminate in female connectors which mate with the male connector serving to terminate the in-the-hood wiring. Connection is made at a point on the frame ahead of the front wheel center1 ine. NOTE: Provide sufficient wire for the male corinector to reach the female connector even with the hood fully open. The hub-to rear harness i s routed from the hub forward to the firewall, along the firewall to the righthand wheel-well, down the firewall to the floor, around the well, under the door-jamb to the rear wheel-well, over the well to the rear of the body. T H t iiib-TC-;;.EAR tiARNESS CONTAINS: 1. Hub to brake lights -- one #10 wire i n the harness to the RH light, then across Ule rear to the LH light. (DON'T FORGET TO GROUND THE LIGHTS TO THE CHASSIS!) .. - 2. Hub to tail lights -- one #10 wire routed the same as the brake lights. 3. Fuel gauge to fuel-level sender -- one #16 wire to the tank sender terminal. 4. If the battery is rear-mounted, the ammeter-to-battery connection is made in the following manner. Connect the battery "hot-side" to the starter solenoid via 12-volt battery cable run adjacent to a fore-and-aft frame member. Connect the ammeter to the same solenoid terminal via #10 wire run i n the hub-to-front harness. THE HUB-TO-FRONT HARNESS CONTAINS: 1. The hub to brake light switch and return -- two 810 wires to the firewall terminal strip (from the terminal, two #10 wires go to the brake light switch mounted on the brake master cylinder or in the forward brake lines depending on the vehicle.] These wires carry battery "hot-side" to the pressure switch and back to the hub for distribution to the rear. 2. Temperature and pressure indicators t o appropriate engine mounted senders -- two #16 wires to the terminal block -- from the terminal block two #16 wires to the senders. 3. Ammeter to voltage regulator -- one #10 wire to the terminal block block to the "armature" terminal on the regulator. -- one #10 wire from the 4. Headlight switch to parking lights -- one #10 wire from the hub to the six-pin female con- nector. 5. Headlight switch/dimmer switch (dash mounted) to low beams -- one #10 wire routed as parking light wire. 6. Headlight switch/dimmer switch (dash mounted) to high beams --same as low beam. 7. lgnition switch to starter solenoid -- one #10 wire to the terminal block -- one #10 wire from the block down the firewall to the solenoid. 8. lgnition switch to starter solenoid -- one #10 wire to the terminal block -- one #16 wire from the block to the coil l'BAT.ll,"SW.", etc. terminal. 9. If the battery is front-mounted, i.e., under the hood, an ammeter-to-battery connection i s re- quired in the hub-to-front harness. Use #10 wire to the terminal block and #lo wire from the block to the battery "hot-side" (U. S. cars use the "+" battery terminal as hot and1'-" terminal for ground, British cars with LUCAS ignition and electrical system use the reverse, i.e., "-" is hot.) 'The items of inslrumentation mentioned above may be ordered from your local Stewart-Warner dealer or directly from Fiberfab. See the parts l i s t for the recommended set Stewart-Warner gauges and senders.
  • 23. Some " u ~ ~ l ~ a r ~ i e s sconr~ectionsare required i n fie engine compartment. They iricludc: ed" 1. Ignition coil "DIST", etc. terminal to the distributor -- use # l b wire. 2 . Generator/alternator Field to the voltage regulator -- use # 1 6 wire. 3. Generator/alternator armature to the voltage regulator -- use # 1 0 wire. 4. Battery "hot-side" to the starter solenoid -- use 1 2 - v o l t battery-cable. 5. Battery "ground-side" to grou~id (some point on tile frame close to the battery) -- use 1 2 - v o l t battery-cable. The preceding material should serve as a guide to the basic w i r i r ~ g your JAMAICAN. of Ad- ditional items such as horns, direction indicators, tachometers, etc., can be added at your discretion. In general, all additional wiring can be simply added into the hub-tc-front or hub-to-rear harness with- out incurring any special routing problems.
  • 24. ROLL-UP WINDOW MECHANISM PARTS lde~ltificatioll Voll(swayeti Part Nunibers by L E F T DOOR RIGHT DOOR REGULATOR 1 4 1 8 3 7 501B 1 4 1 837 502B TRACK ASSEMBLY 1 4 1 8 3 7 5516 1 4 1 837 552B GLASS HOLDER 1 4 1 837 5 T l k 14; 237 571,?1 WINDOW GLASS GRCMR;lET 1 4 1 837 5 6 5 ~ 1 4 1 837 5 6 5 ~ FIGURE 7 Tap to 5/16-18
  • 25. 7. UPHOLSTERY -- INTERIOR FINISHING The upholstering of your JAMAICAN is purely a matter of personal taste. You can be as simple or as elaborate as you desire -- austere for the road machine, buff or "posh" for the grarid touring enthusiast. A t the factory, we use, of course, the JAMAICAN upholstery k i t (available at extra cost). The standard upholstery k i t corrsists, i n part, of automotive-grade carpet cut to f i t tlte floor, firewall and head- liner surfaces and bound with plastic, sewn binding to prevent ravelling. The carpeting is affixed with 3 M (Copyright, Minnesota Mining and Mar~ufacturing)Trim Adhesive dispensed from a spray can. Wood blocks should also be glued into the windshield pillars to provide attachment points for the upholstered pillar panels -- again easily constructed of vinyl over cardboard and foam rubber. I f you have access to a co~nmercialsewirig machine you can make your own carpeting, rugs, etc. Use heavy paper to make a pattern of Uie interior of the car. Transfer this pattern to the carpet (making sure i t is not upsidedown) and cut. Sew on the binding. Spray the surfaces to be covered with trim ad- hesive. Install the upholstery. Use the same "paper pattern" technique to develop the door panels, wind- shield pillar panel, etc. , shapes. In the area behind the seats (under the rear window) plywood paneling can be inserted between the rear wheel-wells and over the gas tank and spare tire compartment. Cut a pattern from a piece of corrugated cardboard and transfer this to 1/4" plywood -- use marine plywood and varnish well before installing. The plywood interior surface can be painted to match the upholstery or covered w i t h carpet l i k e the floor and headliner. Chrome skid strips can be tacked over the carpet, running fore and aft at a 4 " to 5 " spacing -- these strips allow luggage to be easily placed behind the seats without scuffing the carpet. Upholstered door panels, available as part of the standard upholstery k i t are attached to the door inner panels with plated phillips head sheet metal screws w i t h finishing washers. As a finishing touch, a courtesy light can be installed overhead on the vehicle centerline just for- ward of the rear window. Wiring is routed up a windshield post and under the headlirier material. The operating switches are mounted facing up through the door jamb at the very front of the jamb, out of the way of entering and exiting feet. The stock Austin Heale , M W , or Triumph heating system can be utilized w i t h the JAMAICAN body. New ducts must be cut tlrough the top of the dash to allow defroster air to reach the windshield. * See chassis preparation for minor modification to MGA heater box.
  • 26. 8. EXTERIOR F I N I S H Tlle ~lrostirnporta~~t item i n t l ~ e arca of exterior finis11 i s , of course, tlre 11ai11ti11cl. Fil,crglass is 111ost compatible with acrylic lacquers. Lacqucrs, also, are the easicst and 111osttro~rble-frce ill t l ~ e i r app[ ication. They call eve11 be appl icd ill a s l iglltl y dusty crrvironlnent -- the dtrst a ~ r dspraying imper- fections can be rubbed-out st~bseqirer~tly. Just f o l l o w tlte paint i r ~ s t r ~ t c t i o r ~ s don't try sprayirly on atid cold and/or damp days. About body surface preparation -- most fiberglass bodies have s l i g l i t inlperfections such as p i n lloles or mold~narks. Often they w i l l pick up a fcw scratclles during shipment. I t is virtually i m p o s s ~ b l e to avoid this. Body putty and s a ~ l d paper should take care of any body f i n i s h problems you might have. We are proud of the finished sllrlace of our bodies. We m e special care and materials around the edges of the body surface to prevent cllills. One of our own A Z T E C S , w i t h over 5 0 , 0 0 0 miles on it, does not have one body crack irl it. I t s t i l l has i t s original paint job, too! Your JAMAICAN body w i l l have a color when you receive it. I n most instances, t h i s color w i l l be black. This is -the finished color. T h i s i s a special gelcoat your body has been given to achieve riot a better surface. Before you paint your J A M A I C A N the entire body should be l i q l l t l y sanded w i t h k 4 0 0 sandpaper. Tile body i s sanded in order to "scuff up" the surface wllich i s too s X X G hold paint. Rerrrember to go liglltly! Then the body should be washed off and wiped witlr Prepsol or some other p a i ~ l preparation l i q u i d t to eli~nitlateany o i l or dirt. The body i s now ready for primer and paint. Other Items of Exterior F i n i s h Are: WINDSHIELD WIPERS -- The A u s t i n Healey, M G and TR witldshield wiper actuator systems are almost <dent~cal,one to another. They consist of a 1 2 - v o l t motor driving a crank which p u l l s and puslles a cable inside a tube. The wiper pivots are mounted on the tube and engage the back and forth rnotion of the cable. Installation in the J A M A I C A N i s simply a matter of nlounting tlre 'pivots i n two holes d r i l l e d through the cowl as shown i n Figure 3F*. Ttre niotor i s brought to a convenient mounting location by gently bending the cable-bearing tube u n t i l the motor contacts the desired mounting surface. WEATHERSTRIPPING -- The only place the J A M A I C A N may require weatherstripping is around the hood and doors. We suggest, for the hood, using a t h i n strip (3/4" wide) of adhesive-backed foam rubber. Typical stripping material is found, for example, i n the Sears catalog bearing # 2 8 A 7 2 2 6 . Apply the stripping after painting. The door weather s t r i p (Figure 3Gf')i s a combination windlace and weatherstrip, a v a i l a b l e r a standard item w i t h the ~ ~ p h o l s t e r y and i s installed by simply slipping over the prepared kit, fiberglass flanges.
  • 27. 9 . V-8 POWER OPTION Soon after World War II, [lie sports car busitless besari to flourisli w i t h Llie iritrodoctiori of Ule MG- TC -- and soon after i t s iritroductiori certain owriers irievitably wanted more "go". Some enthusiasts welit tile supercliarger/super-t~r~iirig route largely will1 disastrous results -- tlie ~ i o t a b l e exception was the mag- nificent (arid very experisive) " o l d 83", arid M G - T C f i t t e d w i t h all I N T E R M E C C A N I C A blower, iritercooler and special body. Otlier builders resorted to tlie " e ~ i g i ~ iswap". The M G e r ~ g i n e e was replaced by [lie ver~erable ,Cord V - 8 / 6 0 Substituting engirles -- power were applied -- if suitable c o ~ ~ s t r a i ~ i t s ~ i g i ~ i~ e a ~ i d OII e sz proved far more satisfactory fliari to "liop-UO" the stock engine. Today tlie V - 3 / 6 0 IGISlorlg been superceded by tlie Clievrolet 233 ctl. Iri. V - 8 arid more recent1 y by tile Ford 2 8 9 cu. in. V - 8 "Fairlane e~igirie". Any of the veliicles suitable for use w i t l i a J A M A I C A N body are also suitable for either of these V-gls. Tlie Austin Healey 3 0 0 0 series cllassis i s probably tlie best to use i f etigirie outputs exceedirig 7 5 DUD a- beirlg c n n q i t l ~ r e d . We ~*/ould recomrriend, in an;! ca:c, that tlie liorsepower r ~ o exceed 2 5 0 t ~ H unless the entire frame, drive-line and suspension are reworked to safely contain the tiiylier power. P The best time durirlg the J A M A I C A N coristruction to p e r f o r ~the engine swap is, obviously, before ~i tile body i s mounted. I n tlle course of preparirig the cliassis, rernove the original engine, tlie engine mounts atid [lie transmission and i l s mounts. (Note: Tlie stock transmission car1 be retained for low power under -- 150 B H P --installations a ~ i dif a suitable engine-to-gearbox adapter is available). Tlie "riew" V - 8 arid gearbox (we used a Warrier T - 1 0 box and a Ford 289 for our Healey-JAMAICAN- Ford, and a Buick Aluniinum V - 8 for our MGA-JAMAICAN-Buick*) are lowered into tlie engine compartment and blocked i n position. New engine and gearbox mounts are now fabricated, f i t t e d to Uie eriyine-gearbox inplace, and welded to tlie frame. Once tlie engine and gearbox are permanently installed, the drive-sliaft car1 be shortened by cutting and welding (make certain i t i s straight after welding) arid Llie HURST-shifter can be iristalled. A high capacity radiator, sucli as tlie Harrison aluminurri radiator for Corvette, sliould be installed. A surge tank should be mounted w i t h tlie f i l l e r opening above the level of the cylinder heads. sliould be required -- Lhe ignition systern remairis 1 2 - v o l t . No significant modification i n w i r i ~ i g Only the o i l pressure and water ternperati~resending units may be different. Several notes i n closing -- a good reference for H U R S T parts, special engine/gear box mounts, Instruments, etc., i s the "Honest Charley" catalog available from: HONESTCHARLEYSPEEDSHOP Honest Street a t North H i w a y II Chattanooga, Tennessee 3 7 4 2 1 When acquiring a wrecked veliicle for a JAMAICAN arid ari engirie swap i s contemplated avoid cars w i t h wire wlieels -- choose tlie d i s c wlieels for s t r e n g t h n d durability. - P L E A S E F E E L F R E E TO C O N S U L T U S ! Wlien you are buildirig your J A M A I C A N , i f you en- counter some problems outside the scope of these illstructions or are having trouble obtaining any of the materials you need, do not hesitate to contact us. We w i l l be pleased to a s s i s t you i n any way we can. " For details concerning tlie V - 8 iristatlatiori, coriiact otrr factory.
  • 28. 1 0 . THE JAMAICAN-VOLI(SWAGEN Tl~eJAMAICAN-VOLKSWAGEN c o ~ ~ v c r s i io ~ s t r t ~ c l i oarcs set apart fro111 I ) a l a ~ ~ c e 1l1e ~ i ~ a l c r i a l ~i i ~i Ll~c of ill tllis 111a11t1al because of the largc I I U I I I ~ J C ~of IIII~CI~IC p r o c c d ~ ~ r ci s ~ v o l v c d COIIIJ)ICL~II~ rear-cngi~icd ~ ill lliis variation. Sections 1, 2 a~icl4 t l i r o ~ ~ g l i arc a p p l i c a l ~ l e your VW-based project. S e c t i o ~3, I~owevcr, 3 to i is supercedetl by t l ~ e o l l o w i ~ ~ g ~ a t c r i a l . f ~~ REMOVING THE VOLI<SWAGEN BODY Before you start to cl~ll)olttllc body, rerliove the front and rear seats, discorir~ectand relllove tlie battery slid drain tlie gas tank.Next, relllove t l ~ c e f t front tire/wl~eel ill order to urlbolt tlie steering shaft by rerni,vi~iy l two bolts fro111 steering shaft u ~ ~ i v c r s joint. Now d i s c o ~ ~ ~the c t wirc. tile al ~ c Iiorn Now discon~iectthe I I I ~ I ~ L lI~ o~ e c ~ k cable or tlie wire from tlie electrically operated clioke. Discon~iecttlic wires (to tlie coil a ~ voltaye regt~lator) ~ d and ~ L i e l L l u i u ,caLI? fro;,, ~ I I C~ : ; i ~ i c . ~ Remove tlie choke froni t l ~ e dasliboarrl (110 dasliboard c o ~ i t r o lexists for tlie electrically/tl~er~nostatically operated c l ~ o k e ) ~ i d a pull tlie cable tlirougli to remove it. Discon~iectt l ~ e gas l i ~ ~ e s the gas tank and remove to tile tank by llnbolting (see Figure 9 ) a ~ l~ f di ~ i g t up and out. Don't forget tlie reserve fuel switch-over valve i t i in t l ~ e cockpit. You are now ready to unbolt t l ~ ebody. F i r s t , relnove tlie bolts located alorig the outside edges of the llliderside of the floorpall (see Figure 9 ) . Next, relnove the several bolts r e l ~ ~ a i n i ati g front underside of ~ tlie tile floorpan -- just inside tlie front wheel-wells. Remove tlie four bolts exposed w l ~ e l the rear seat was taken out. F i n a l l y , remove the rear tires/wlieels i arid unbolt the body bolts ill tlie wlieel-wells. SAVE THESE B O L T S ! The body s l ~ o u l dnow be free to be lifted off via block and tackle, cl~ain-hoist, or yourself and "several strong and willing helpers." CAUTION : Tlie Volkswager~llody i s extreniely Iieavy! I t is because of this weight loss, incidently, that you rnay expect better-tliarl-Volkswagen pertortr~arice111 your completed JAMAICAN-VW. Care should be exercised when l i f t i n g off tlie Volkswagen body in order to preserve the body-to-floorpan rubber seal. I t can be used to "weatherstrip" your new JAMAICAN body. I t is advisable to save a l l tlie undamaged parts such as tlie steering colutnn and wlieel, gas tank, in- struments, etc., inasmuch as these items can be used to complete your JAMAICAN. INSTALLING THE F R A M E R A I L S The frame rails are installed next. Remove the dust covers ( 4 bolts each) from over tlie elids of the rear torsion bars (covers on early chassis f i t around the end of Llie torsi011 bar leavirig i t exposed, while covers on late chassis completely cover tlie end of the bar). Modify the dust cover as shown i n Figure 10 and replace t h e n on the floorpan with the upper two bolts (don't forget to put the rubber "dougllnuts" back under the covers.) Bolt the end-plate of tlie frame r a i l s to the floorpan over the dust covers using the bottom two dust cover retaining,bolts -- leave the bolts loose. L i f t the front end of tlie frame r a i l and secure i t under tlie lower, front tors1011 housing (tube) using the bar U-bolts provided with the frame rails. Position tlie U-bolts about 1 inches either side of tlie floorpan 3 centerline -- tigliteri a l l bolts. Secure tlie edge of the floorpan to tlie r a i l s by d r i l l i ~ i g tlirough tlie 'pan Into the 'rails and f a s t e r ~ i ~with large sheet-metal screws. ig
  • 29.
  • 30. FIGURE 1 0 REPOSITIONING THE COCKPIT CONTROLS With the floorpan supported by the frame rails, the central tunnel of the floorpan can be cut and "rear- ranged" in order to relocate the pedals and gearshift. Referring to Figure 9 -- three full sections are cut from the tunnel and replaced as shown. The cutting can be accomplished using a sabre-saw or an oxy- acetylene cutter. Cuts should be made along the side of tlie tunnel as close to the floor as possible -- cuts up the sides should be perpendicular to the floor. Care should be taken to cut only the tunnel, not the tubes and cables running within the tunnel. Figure 1 shows the reconfigured VW 'pan ready for the JAMAICAN body. For the pedals to operate 1 i n their "new" position the clutch and accelerator cables must be shortened by cutting-off 1 4 1/2 inches and reswaging the end fittings to the cut ends. The tubing surrounding the accelerator cable i s puslled back inside the tunnel and .cut-off flush a t the point it exists the rear of the tunnel. The pedal pivot support tab is re-bolted to the pan through a new hole drilled i n the 'pan after the pivot is securely i n its new position. Repositioning the steering column and wheel is accomplished by lowering (reducing the angle between the 'pan and the column) and lengthening the steering column/shaft. The required lowering i s quite simple. The VW steering box i s only clamped on the upper front torsion bar housing. I t can be rotated on the housing just by loosening the clamps. With the clamps loosened, the steering box should be rotated such that the steering linkage just clears the "hump" i n the center of the floorpan when the wheels are turned from lock-to-lock. (Lowering the steering box alters the toe-in adjustment of the steering geometry. Proper toe-in i s reestab- lished by adjusting the tie-rods until the fronts of the front tires are about 1/8" closer together than the backs -- refer to Figure 12. Make sure the adjustment i s divided equally between the tie-rods). FIGURE 1 2
  • 31.
  • 32. A simple metllod of lengtlienirig the stecring shaft the required 1 4 inches is to insert the extension, sliown i n Figure 13, between the steeril~gbox and tlie steering shaFt. Tlie order of assernbly o f stecring components i n a stock VW is: steering box, flexible rubber disc, "TI'-flange, stecring shaft. Tlie revised order of assembly For the JAMAICAN/VW is: steering box, flexible rubber disc, 14'' extension, Flexible rubber disc, "TIL-flange, steering shaft. . +I - - 3' FIGURE 13 MOUNTING THE REAR HANGERS The final step i n preparing tlie floorpan i s to mount the rear hangers For the t a i l section of the GT-12 body. Figure 1 4 shows both hangers i n place on the mounts formerly used to secure the Volkswagen body. When the Fiberglass tail section i s installed, shims (washers) may have to be placed under the front, rear or both hanger-mounting feet (see Figure 1 4 ) to precisely align the t a i l section with the main body section. I FIGURE 1 4